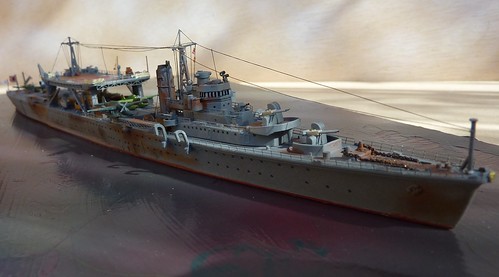
_GOTOBOTTOM
General Ship Modeling: Painting & Color Schemes
Topics on painting and paint schemes are grouped here
Rattle Tin Vs Paint Brush
bigal07
Visit this Community
England - East Anglia, United Kingdom
Joined: January 07, 2009
KitMaker: 887 posts
Model Shipwrights: 575 posts
Posted: Saturday, March 26, 2011 - 03:39 AM UTC
Some time ago although he'll probably not be greatly concerned about this little thread, Ray D. Bean asked about the possible use of a rattle tin against that of a paint brush, I have one of those airbrushes and no matter what I do, or who's advice I follow, I simply can't get the darn thing to work, which then lead me to the rattle tin, a disposable tin of spray paint.
This is a double wammy for me because I'm not that good at part per part building or painting, so you'll have to bare with me throughout the varied stages of this paint and spray job.
I did say second wammy, as a VERY LARGE seaplane tender that I've wanted to build again has now finally surfaced, the IJN Chitose in the real world this must have been a giant, the beginning of our little project will oddly enough begin with part building this model, and I'll try and show you how a rattle tin can be used -
Coming up to 3 years now, and this model I am sure we can improve slightly, using the same method painting, we'll see how we get on.
Chiyoda ''2'' 006
This is the Aoshima 1-700 kit, and measures a good 11 inches, and for this scale, this a HUGE model considering its a tender and not a battleship.
bigal07
Visit this Community
England - East Anglia, United Kingdom
Joined: January 07, 2009
KitMaker: 887 posts
Model Shipwrights: 575 posts
Posted: Saturday, March 26, 2011 - 09:25 PM UTC
rattle can 002
Above we're going to cover everything that isn't nailed to the floorboards, this is all one colour from the rattle tin.
Below is our tin of paint, this offers a nice dark but quite lively grey into the subject, as you can see, its not the end of the world.
rattle can 004
rattle can 005
Same thing - this time rather then the same old red, we'll use crimson, and again we're plastering basically everything that doesn't move.
bigal07
Visit this Community
England - East Anglia, United Kingdom
Joined: January 07, 2009
KitMaker: 887 posts
Model Shipwrights: 575 posts
Posted: Saturday, March 26, 2011 - 11:14 PM UTC
rattle can 006
Okay one of two things has happened, the rattle tin has acted as an undercoat and 2, shown up some smaller pieces that will be removed.
Using quite a large brush, not being to fussy we're paint on the first coat of browns that will hopefully show up as the wooden deck. Later this tender was stripped down and converted into a light aircraft carrier.
rattle can 008
Covering what appears to be decking, now we'll wait until dry before applying a slightly different shade of brow, this will dry and then we'll have some fun with applying a black wash, the reels will go, plastic chain, and the huge void under the cradle will be filled with rubbish, this will simply act as a filler and nothing else.
Depending on the drying time, this is not bad for a days model work, with some luck I'll show you how we're going to paint this giant of a ship.
bigal07
Visit this Community
England - East Anglia, United Kingdom
Joined: January 07, 2009
KitMaker: 887 posts
Model Shipwrights: 575 posts
Posted: Sunday, March 27, 2011 - 02:42 AM UTC
rattle can 013
Simply remove the plastic chain and any reel, we'll be adding varied boxes and general rubbish to make up for empty space and so on.
Also I almost forgot to a add, we're part building, assemble the different stages and spray the whole lot one colour as described.
rattle can 014
The overhanging cradle has yet to be painted, at this stage bits and bobs are being added.
The top section marked for heavy lumps of wood, boxes and anything that will offer protection from attacking aircraft.
rattle can 016
At this stage we're not bothered about colour or getting something just right, this is wacking a load of junk in, sitting back and thinking if it will work or not, with fingers crossed tomorrow, decal and final prep for underneath the cradle with some danggly bits due to the very nature of this section, heavy lifting equipment would have been in effect used on a dayily basies, both boat and aircraft engines would have been removed/repaired, moved from one part of this open air work shop to the other, and the only this is happening, is by the use of overhead cranes.
Sammuel
Visit this Community
California, United States
Joined: September 02, 2008
KitMaker: 200 posts
Model Shipwrights: 95 posts
Posted: Sunday, March 27, 2011 - 04:19 AM UTC
Big Al;

Great build log and look to seeing more of it. I plan on picking up this kit and adding it th my collection of IJN ships.
I'm with you about the airbrush and on such small scale. I still don't have the skill set to make it happen. On all my 1/700 ships I use a rattel can and brush painting. I tend to go with Kure Grey or IJN Grey, depends on the ship yard she came out off at the time.

I have seen some very outstanding models painted the way you are showing us. Keep up the great work and I hope to beat you as far as the size of your IJN feet. How many do you have in your collection now?

Respectfully
Sam
bigal07
Visit this Community
England - East Anglia, United Kingdom
Joined: January 07, 2009
KitMaker: 887 posts
Model Shipwrights: 575 posts
Posted: Sunday, March 27, 2011 - 06:37 AM UTC
Hello Sam, thank you for those words of encouragement, I have built around 40 ship models, and at a quick count I now have about 20, those early one's seem to disappear or I sell on ebay, the IJN has a fantastic range of surface craft, never quite sure why so many, perhaps a case of the producers being from Japan lol might have something to do with it.
Coating everything in one colour is the easy way forward, especially for myself as this is how I build, a bit later on today I'll start the high lighting, picking out the small pieces, then using shades, rust and black wash finish the deck and fill out the void beneath the cradle. Then onto my old nemesis the 1-700 aircraft which I have every intention of doing the easy way.
bigal07
Visit this Community
England - East Anglia, United Kingdom
Joined: January 07, 2009
KitMaker: 887 posts
Model Shipwrights: 575 posts
Posted: Sunday, March 27, 2011 - 09:17 AM UTC
rattle can 021
This is applying a decal, a tried and tested method using gloss varnish, this will hold the outer edges of the decal making it almost invisible. Of course we don't want a shiny finish.
Note the dust particles within the varnish, this is from a dirty brush that I have intentional used.
rattle can 022
The meat-ball decal now applied looking all nice and shiny, which we'll make good in out next photo.
Using a 000 brush we're simply picking up the small details such as the recoil of the double AA's and so on, pick a colour you're comfortable with, I use off white and gun metal. Also the stack/smoker bridge, all the same colour and all treated the same.
rattle can 023
The dacal allowed to completely dry is now covered with a ''matt'' varnish this will hide the outer skin of the decal and sink into the surounding colour, gone is that shine that we got shot of.
Its been a busy building day, but already you can clearly see how fast you can reach this stage by using a rattle tin of spray paint, high light with varied paint brush sizes.
Tomorrow fingers crossed, we'll have a look at those twin mast and try and fix that huge cradle in its place. The problem that's now been open is the actual length of this ship, while a lot can be made to go on, nevertheless this is a rather long flat ship standing 2 inches at the mast, with a battleship there's the tall structures, huge jutting guns and tall mast giving the eye an nice even glance, however with something like the Chitose, this is a long ship that's very difficult to keep the eye busy. We'll try and address this problem in the closing stages of this paint and build project.
bigal07
Visit this Community
England - East Anglia, United Kingdom
Joined: January 07, 2009
KitMaker: 887 posts
Model Shipwrights: 575 posts
Posted: Sunday, March 27, 2011 - 09:43 PM UTC
DAY 2 -
Note the PE reels have now gone in, also picking up varied pieces using a 000 brush to highlight, the decking finished using 2 colour browns and black wash, the rail that aircraft would be transfered on is normally nothing more then a basic mould line, in this case, these are nicely raised and we'll take full advantage of this by using a shade to highlight the rail.
rat 037
The small boats normally empty and simply sitting there looking all lost, I've decided to fill these out with some boxes, cut from 2 sizes of plastic and painted the same way as the deck.
There's nothing really wrong with the forward mast, however, I just want those yards a little longer and finer, out comes the brass wire and super glue, I use PVA to secure the two pieces then drop ZAP CA onto the same spot.
Note the supporting upright is missing, this will go on once this mast has been secured into place.
rat 043
The smoker is finished as much as its going to be, that's been glued in its place, the double AA's have been touched up and finished also along with the bridge, notice the mould line on the trumpet, this obviously will also go in due course time.
A bit later on we're be fixing the big pieces into place and I'll show you what I use for shade, weathering and paint.
For those waiting to see how I tackle the photoetch, this will take place towards the end of the build along with the rigging that I'll show you using what I reguard as the best method (not that I'm any good at it lol) I can just show you how. Remember this whole model is painted using a rattle tin and simply going over using highlight paint and weathering.
Not bad for 2 days and still that whole 2nd day to go WOW !
bigal07
Visit this Community
England - East Anglia, United Kingdom
Joined: January 07, 2009
KitMaker: 887 posts
Model Shipwrights: 575 posts
Posted: Monday, March 28, 2011 - 01:35 AM UTC
Day 2 con -
No one is honestly going to see underneath this overhanging cradle but I also feel by filling it with rubbish will also give the eye something to hunt down.
rat 041
With weathering complete its now time to add the structure.
Light rust weathering with a dash of black wash is plenty.
rat 046
once the other pieces are added, once again we'll lightly weather those which should look slightly different, some people weather together, if I can, weather underneath, then over the top which I believe gives it a nice little shade.
The side pipe mould line removed and a small hole drilled out, this will make a little difference to the overall effect.
rat 2 001
The plastic capapult that come with the kit are a standard, and to be honest look okay to a certain degree, however as with the original model I built some time ago, we're going with the PE, so 1 down 3 to go.
rat 2 006
bigal07
Visit this Community
England - East Anglia, United Kingdom
Joined: January 07, 2009
KitMaker: 887 posts
Model Shipwrights: 575 posts
Posted: Monday, March 28, 2011 - 03:04 AM UTC
Painting -
A subtle way is by using the counter colour paint in the tin, the same number 27 and believe me, you'll find this is a slightly different shade to that of the rattle tin, which is great, what we're doing is using quite a large brush 3/0 to gently pick up a drop of paint and very quickly whip down the side of the hull, in the following photo's you might just make out these tiger stripes.
rat 4 001
rat 4 003
With very little to do with the exception of allowing glue and paint to dry, this day is more or less done.
rat 5 001
The tools of the traid as they say, the paint pen is silver, and this is a very deep looking silver which actually reflects a good amount of light, the tried and tested PVA is wood glue and also great for applying PE and rigging as we'll see a little later on, the black wash is NOT cheap but used wisely can last a very long time, its great for aging a subject or getting that knackered worn look, the rust streaks is a very light rust pigment, this is fine used in a background with a darker orange rust used over the top of this one, the brushes varied sizes for their jobs, I spend an aweful lot of money on 000 brushes, apparently the ever-lasting company don't make these, at almost £3.00 each I take these down to the metal.
rat 5 002
The large brush is generally used for applying weathering or wash, the middle size for streaking, highlighting, and touching up large sections, the 000 size is for picking up small pieces and covering with a choice of coloured paint, the paint stripper has a nasty habbit of eatting the brush and I have to use this to clean the darn thing, with the warhammer paint (gun metal) this will wash off in water very much like the Tamiya paints.
What a pain - just found out I've run out of reels, Doh !
I've checked and double checked and none, these are now on order, while I am forced to wait, tomorrow we'll have another look at junk, PE rail and aircraft that I am not looking forward to.
Roll on tomorrow !
blaster76
Visit this Community
Texas, United States
Joined: September 15, 2002
KitMaker: 8,985 posts
Model Shipwrights: 3,509 posts
Posted: Monday, March 28, 2011 - 06:40 AM UTC
Interesting concept using spray cans. I thnk about 99,9 percent of my use is dull cote. Though i do use a couple of different colors on large areas. but 700 scale....whewooooo you must be a master with one 'cause i would just get way too much and hide details.
Sammuel
Visit this Community
California, United States
Joined: September 02, 2008
KitMaker: 200 posts
Model Shipwrights: 95 posts
Posted: Monday, March 28, 2011 - 07:49 AM UTC
I shake my can real well and also put it in a pan of warm water. After doing this and when I spray, the paint comes out in a nice fine even mist. Just my two cents.

Sam
bigal07
Visit this Community
England - East Anglia, United Kingdom
Joined: January 07, 2009
KitMaker: 887 posts
Model Shipwrights: 575 posts
Posted: Monday, March 28, 2011 - 08:31 AM UTC
Hello there, while I have a great sense of humour, I am not writing and taking all these photographs for my health. Please take the trouble and read at lease some of what I have wrote.
Using a rattle tin and then using a 000 brush to highlight the smaller pieces, which actually means you get the best of both worlds. This is now 2 days into the build and almost 80% finished with very little loss to fine detail as I wrote about, in fact the weathering will probably hide many of the small pieces, then there's the tiger stripes, remember those ?
Please read before offering a comment. Thank you.
bigal07
Visit this Community
England - East Anglia, United Kingdom
Joined: January 07, 2009
KitMaker: 887 posts
Model Shipwrights: 575 posts
Posted: Monday, March 28, 2011 - 09:43 PM UTC
DAY 3
0.700, just found out what the ''O'' stands for - OH my God its early - anyway the one or two following photos should show those pesky tiger stripes by using the counter part paint, also the 4 catapults, and dreaded aircraft that I hate to build, there should be a bit of a mix of aircraft, remember this is a tender and as yet, not a carrier.
rat 6 004
Using a fast downward movement, simply stripe down top to bottom, this is a very faint method to use, but at last captured in this following photo.
rat 6 008
I like placing these stripes on at the beginning of weatehring, even with very little weathering, these little wear/wash marks simply brake up an otherwise large hull of solid grey.
This was last night, and even I have to wait for things to completely dry, I'm waiting for those reels, and today is a junk day, fillers that we'll be dropping and placing on the deck.
Here's a little treat ------------------
Chitose%20midships,%20%20closeup
The huge cradle overhanging the deck, probably used as work shop, repair systems, either way, the original design of this ship felt it darn well important to have this lump of metal.
This showing the meat ball, also varied aircraft.
Chitose%20midships,%20%20Mat%201942
The seaplane tender IJN Chitose at sea, on our model we've still to add the rigging, rail and aft lifting cranes.
Chitose1
bigal07
Visit this Community
England - East Anglia, United Kingdom
Joined: January 07, 2009
KitMaker: 887 posts
Model Shipwrights: 575 posts
Posted: Tuesday, March 29, 2011 - 02:29 AM UTC
Junk - on the subject of junk, the Japinese for whatever reason would often have huge chunks of wood laying about, some almost tree size, maybe used for holding up aircraft wings, deflecting buletts, I'm not honestly sure, however we can quite easily make this up by using different shapes/thicknesses of plastic, a whole length is used, and by applying a little rough sandpaper, I quickly wipe each piece through roughing up the surface.
rat 7 001
rat 7 004
painting brown, light and dark trying to give this some texture.
rat 7 010
cutting in varied lengths, the ends obviously being touched up with the same colour paint.
Not for the faint hearted, this is how I set my aft crane, I could load something under the crane, but find this best.
rat 7 008
rat 7 011
rat 7 014
Above is our overview of the stuff scattered about, of course there is method in our madness (so I believe lol) using wings, silver foil, ladders and the aircraft themselves, the space fillers appear to be doing rather a good job.
Last photo for today, this view showing us although we're only 3 days into our paint and build, we've already come a long way, this is mostly due to using the rattle tin, spray everything one colour and then pick up and highlight all the small pieces as shown on this build log.
I have shown you the weathering I use, how I paint and what size brushes used, with black wash and using the counter part paint (matt 27) how quickly we can build, but its not about fast or quick building, this is about how I build, everyone is different and everyone I dare say has their own method, this is me and my method.
I'm back at work tomorrow, afternoon shift 1500 to 2200 and I hate it, a long 7 days ahead laced with pre-booked over-time as well.
We replaced the mast, used the original aft mast but used thinner brass wire for the support of the mast, replaced both flag polls with wire, hand painted these as I want some of the brass to come through, it would have been much easer to simply spray the whole thing, but then no brass showing through unless I scrape some paint off.
We replaced all 4 catapults, 3 cranes and even installed sliding cranes beneath the cradle, we saw how the meat ball decal was applied, reels and anchor chain replaced, checked everything for the dreaded mould lines, and I dare say there will still be some somewhere.
Not a bad 3 days if I must say so myself.
Tomorrow with luck a little rigging, for this you'll need the following -
A few drops of this stuff.
rat 8 001
A few lengths of this wonderful line.
rat 8 003
One of these ------------------------
spider
A good piece of waste plastic, you'll have to check this frist by setting it on fire then blowing it out.
rat 8 002
Okay so maybe not the JB trained spider. But, youre need thin super glue, not thick, but thin ------------------ this is what I use.
rat 8 005
And finally one of these.
Horseshoe
Just kidding.
There's a little bit of rigging we'll try tomorrow, normally rigging is a last job as obviously you don't want to knock this, or find that its encrouching on the PE, like I said, with some luck, we'll give this a go tomorrow.
bigal07
Visit this Community
England - East Anglia, United Kingdom
Joined: January 07, 2009
KitMaker: 887 posts
Model Shipwrights: 575 posts
Posted: Tuesday, March 29, 2011 - 09:22 PM UTC
DAY 4
Showing you how to suck eggs ?
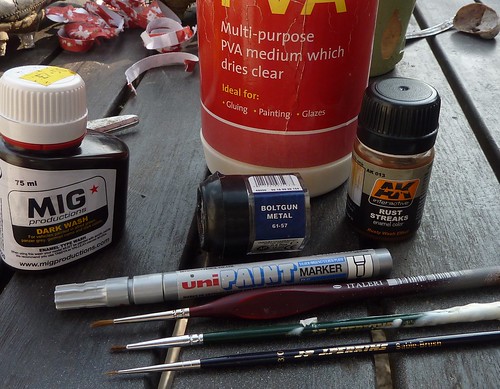
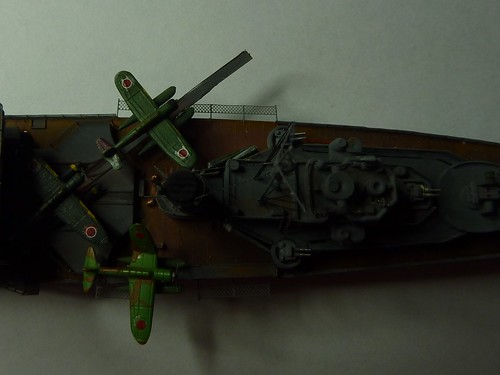
This is going to be quite a photo shoot, so bare with me while I load everything, and remember everything is on my Flickr site.
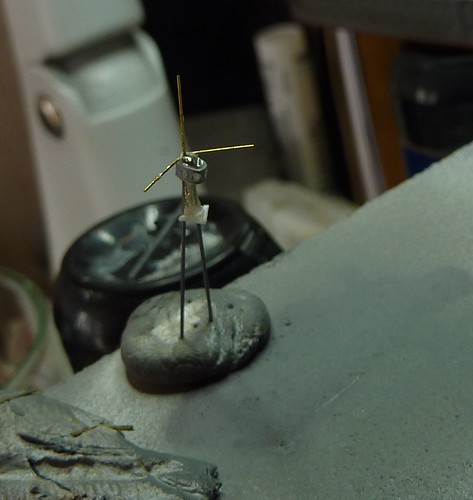
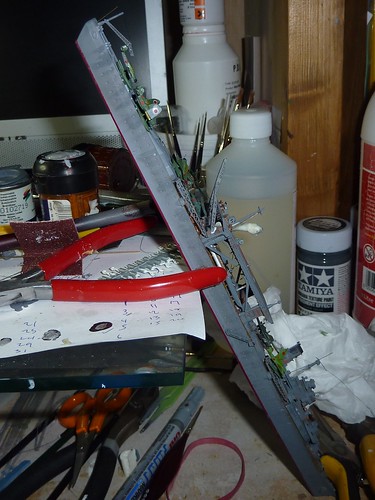
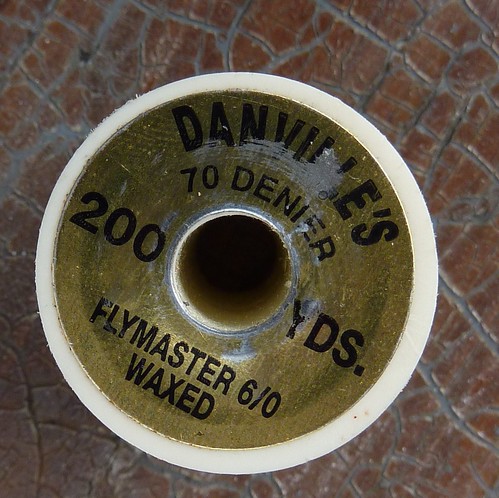
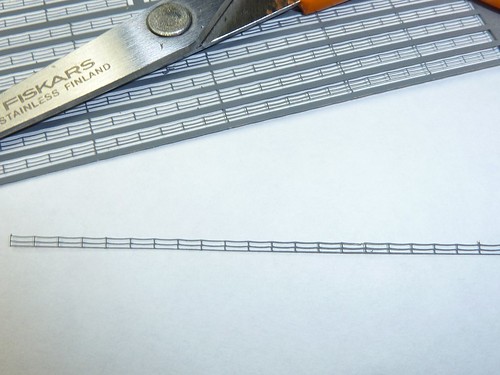
Rigging (at lease a small part anyway).
rat 9 001
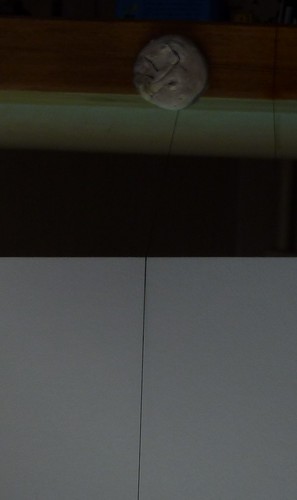
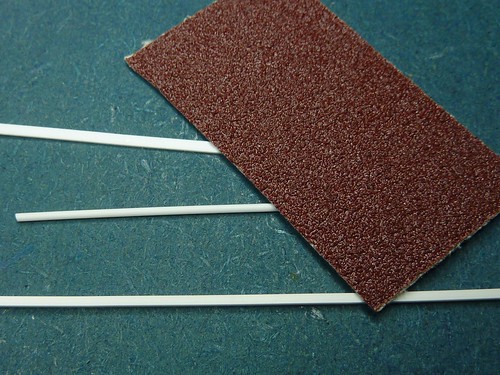
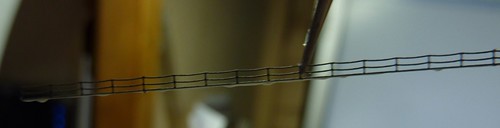
Above and secured between two pieces of tac is the fly fishing line we're be using at this stage, the white paper is merely there to show you the line.
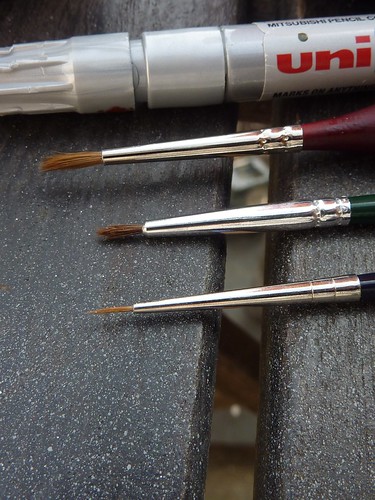
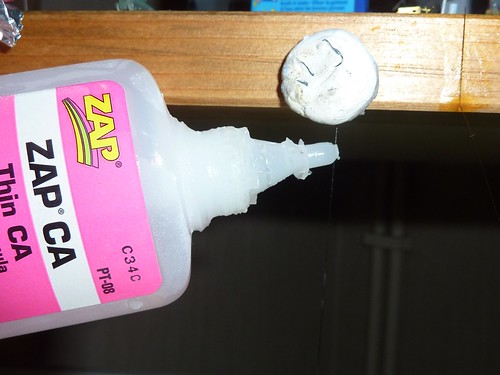
allowing the super glue (thin) to drizzle down the line, then using the wooden part of a brush, simply go up and down the line for a few seconds, this will remove any unwanted bumps left by either the line (dust) or glue.
.
rat 9 003
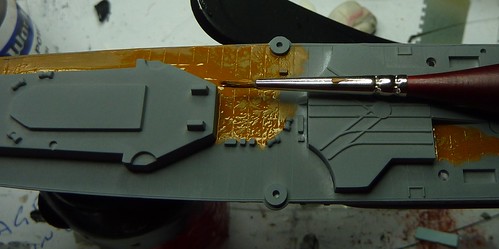
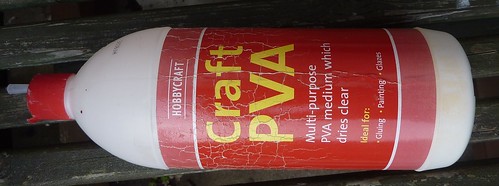
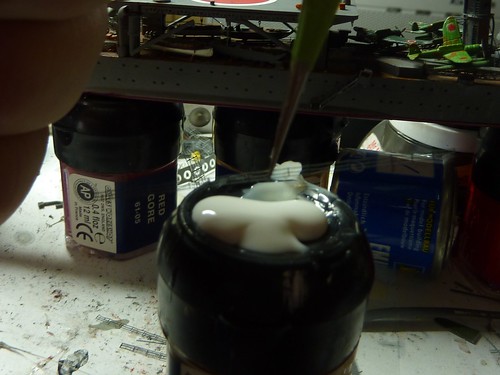
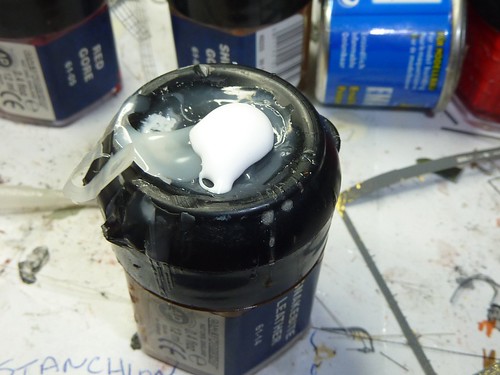
Squeeze out some PVA, this is way to much, then again its cheap, I've had my bottle of 1 litre coming up to 2 years, and apart from fixing cabinets and lumps of wood, its darn good stuff for scale model building as you'll see.
rat 9 005
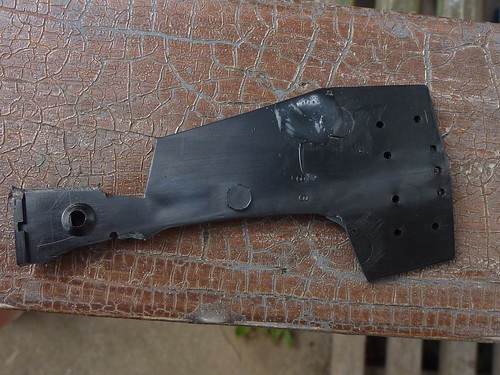
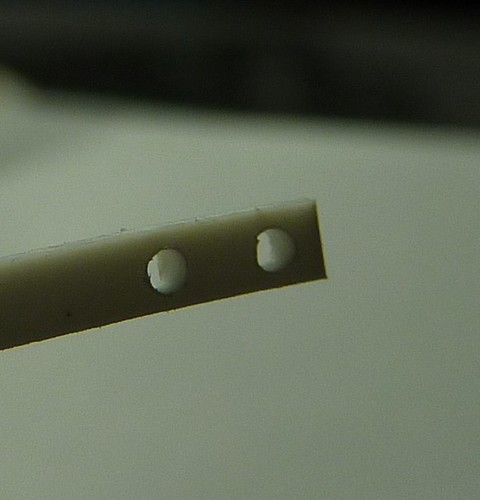
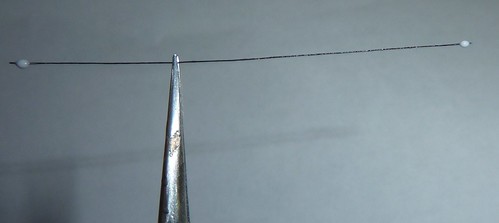
This is what we're after, a small length of stiff line that's not to encrusted with glue, note the 2 ends holding the PVA, this is no good, simply wipe off between your fingers and carefully dip the very ends into the glue, we're aiming for the very ends ''only'' and a small amount, try and use some spare to get the hang of this.
rat 9 006
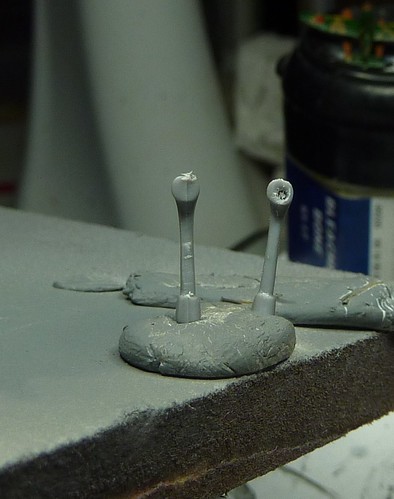
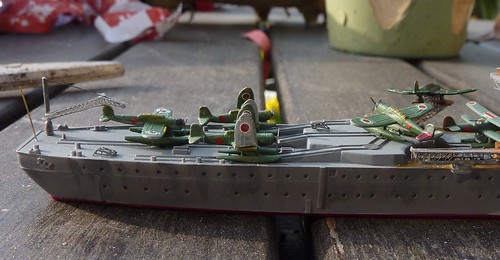
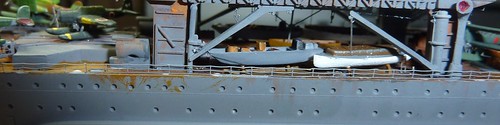
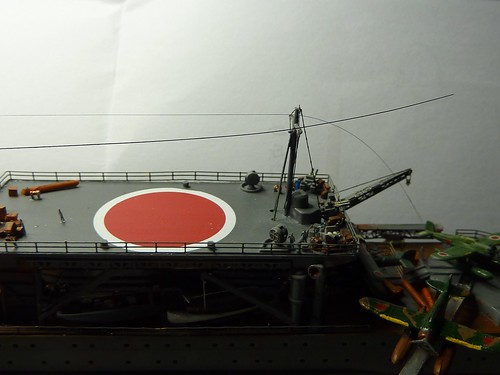
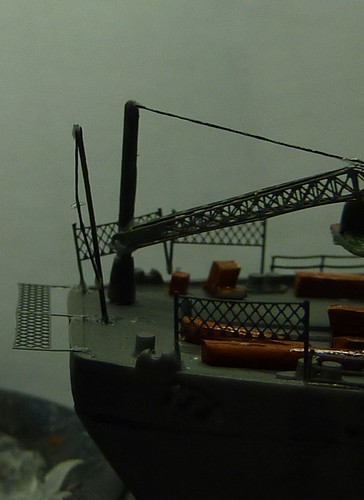
Okay so far - now we're cutting to length, we guess what the length could be, then offer it up to the piece we're be attaching this to, once we happy, we then attach the top first UNDER the yards not on them or on top of them, the next photo maybe not the best in the world, its raining outside at the moment so everything is either under my light or the flash of the camera, note the ends are still wet shown white, when this PVA glue goes off, it will be transparent.
rat 8 001
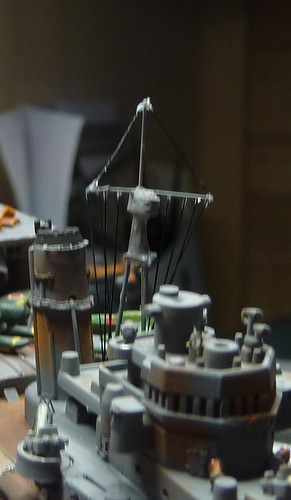
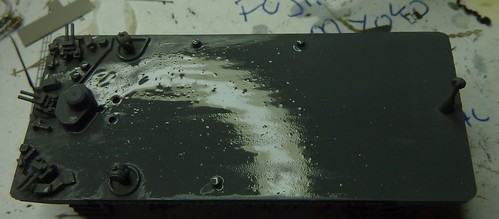
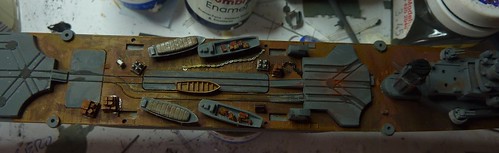
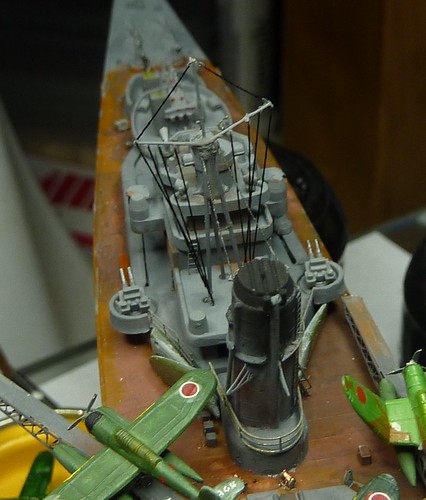
Aft mast treated just the same.
rat 8 005
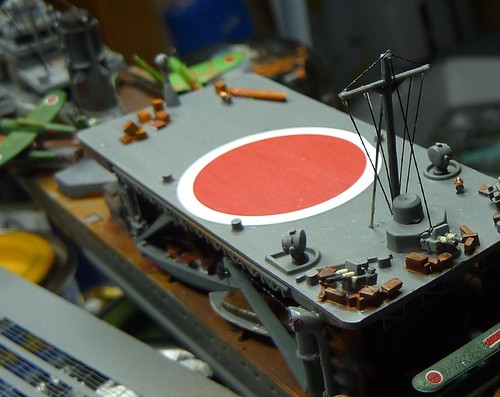
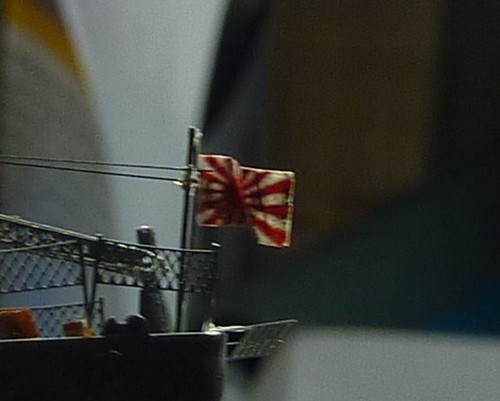
Mast line now dry, note the little blobs at the ends, not a problem as we're be dealing with this a little later on.
rat 8 006
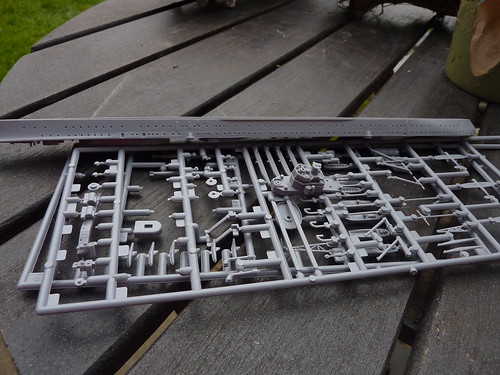
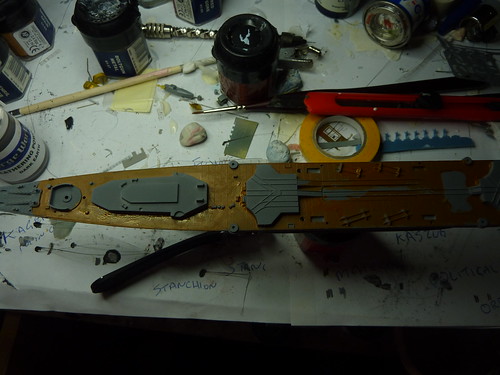
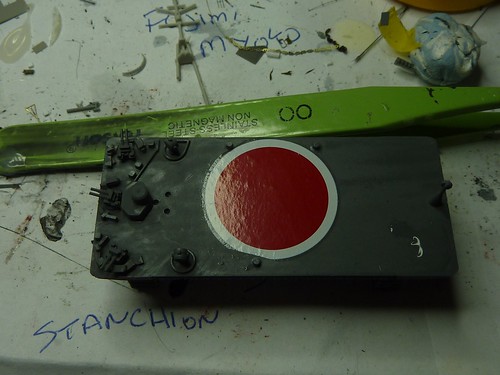
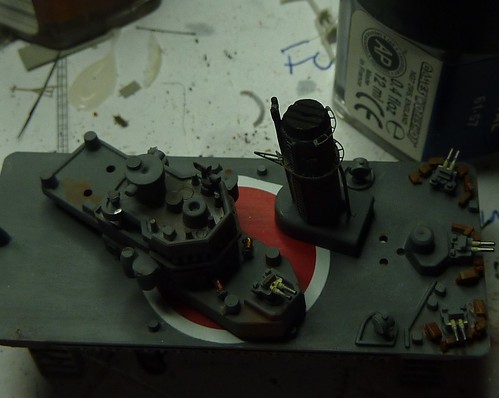
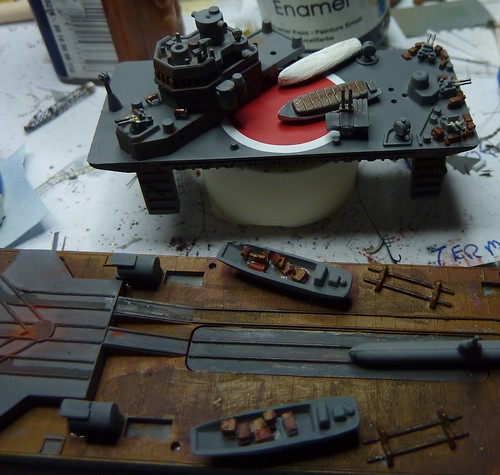
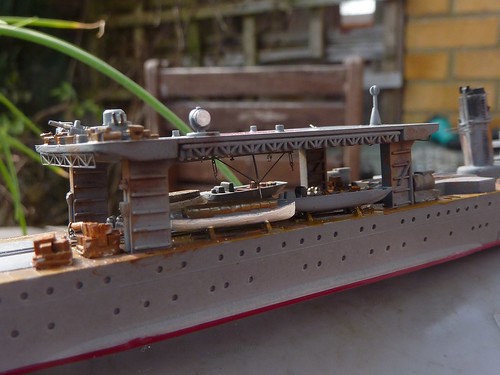
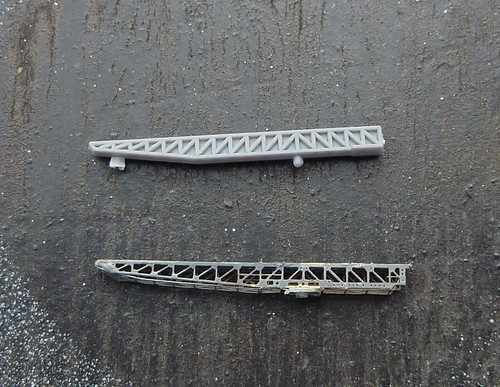
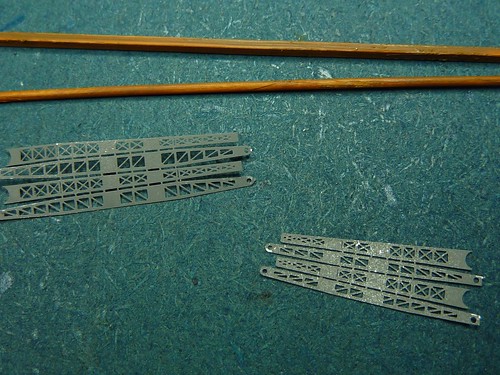
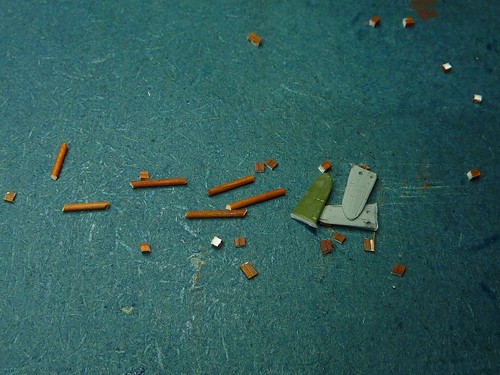
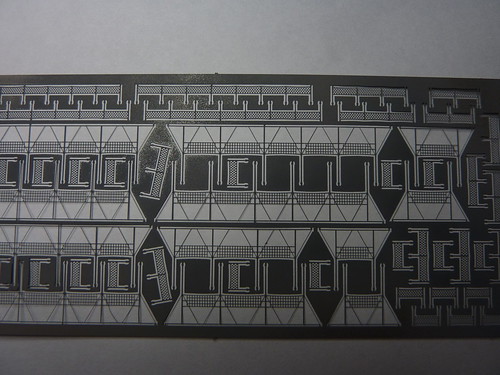
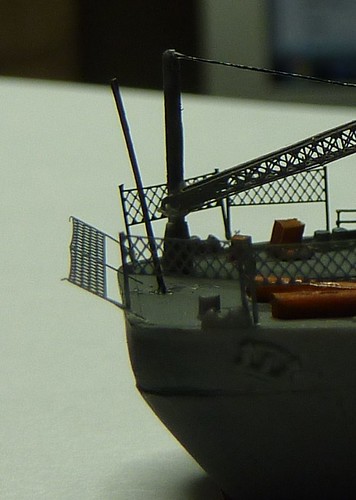
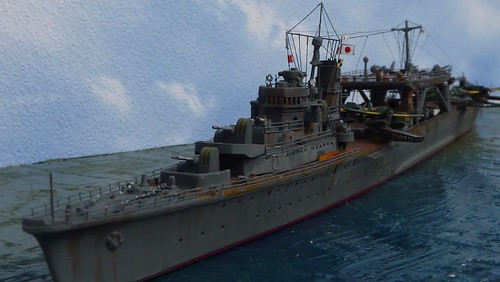
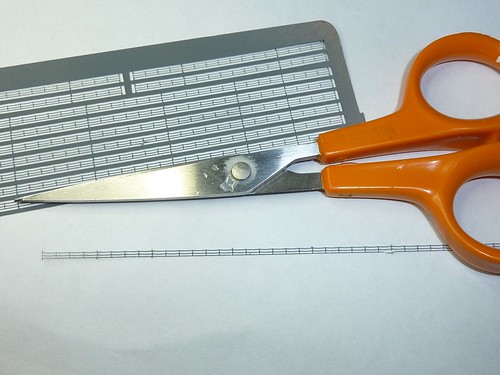
This is all we're doing for the rigging, for the time being that is. We now turn our attention to the rail, using two types 2/3 bar the first drope type will fit on the very edge of our ship, the 2nd type for the upper parts of the ship.
Also above, note the square rail gone in, below is our drope or steel rope rail that if you look is no good, look again and you'll see small pieces sticking up and below where this has been cut simply remove this with a good, and I do say a good pair of cutters.
rat 9 009
rat 9 010
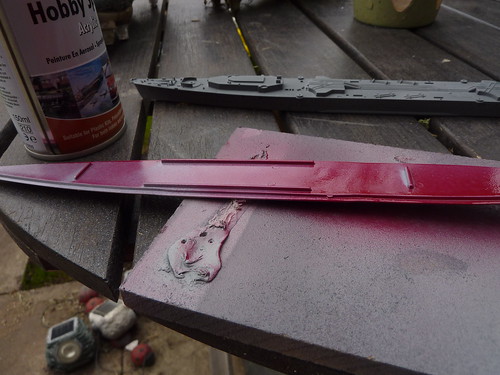
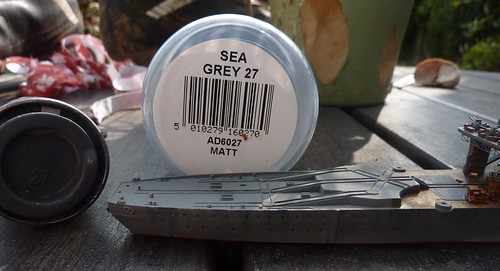
And yes I did forget to add - out comes the rattle tin again, and spray the whole thing front and back, I never apply naked brass rail to a model then attempt to paint it, why ? Because of 2 things 1. The paint from a pot will need thinning down as this is way to thick, the rail will hold the paint and push this into the corners and you'll end up with a rail looking like slabs of concrete. 2. you'll never be able to use a spray gun or rattle tin, its simply to much mucking about using either one.
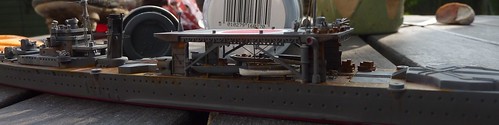
Using a stiff piece of card, normally the same card that comes with the rail, I place a small amount of sticky tape at the very edge allowing the sheet of rail to flap backward and forward as if on a hinge, simply flap one way, spray using the same colour, or slightly lighter, wait until dry, flap the other way and repeat the job. Other people do things different, remember this is how I do my painting.
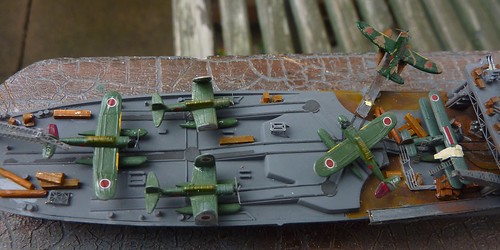
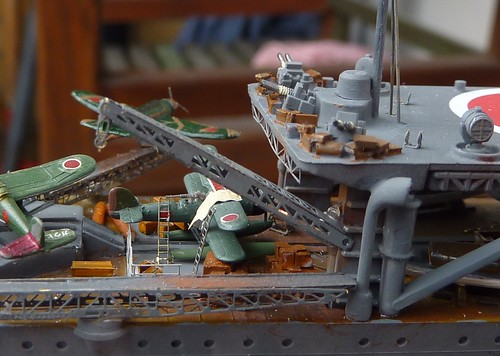
Not a lot of time today, so I'll try and get some of that rail down, once that's all finished we can turn our attention to the rest of the rigging, but I can't promise as time is running out, so days will be slightly stretched.
Tomorrow fingers crossed, the lower rail and secondary rail in place, I'll show you how ''NOT'' to stick your fingers together and the lengths we're be using.
bigal07
Visit this Community
England - East Anglia, United Kingdom
Joined: January 07, 2009
KitMaker: 887 posts
Model Shipwrights: 575 posts
Posted: Wednesday, March 30, 2011 - 02:13 AM UTC
Why do tomorrow what you can do today lol.
I have about 20 minutes left before I have to go to work.
PVA in use again, this time applying PE rail.
rat 10 003
Don't overload the bottom of the rail with PVA, this amount is more then enough, once this has gone off, you'll it stuck very well indeed.
rat 10 004
This is now applied directly to our ship. Note the white blobs of glue, don't worry about these as later once dry, you won't see them.
rat 10 001
The same method will be used to stick down all rail and even the aircraft.
While quite happy with the rail, I am not completely convinced these would have been throughout the ship. So, this is where I cock-up and use my common sense and apply what I believe would be a safty issue during WW2 and this is how I would address this.
rat 10 011
While this stuff is visible, its also quite hard to see, I feel little more happy thinking if anyone was to fall off a catapult, there would be something to stop them falling into the drink. This is my idea, and probably completely wrong.
rat 10 012
As back as you can go, with aircraft and a crane, lumps of wood scattered about, what's stopping you from falling over the side ? I honestly believe the rail, although in places there simply is no rail, wouldn't stop you.
rat 10 014
bigal07
Visit this Community
England - East Anglia, United Kingdom
Joined: January 07, 2009
KitMaker: 887 posts
Model Shipwrights: 575 posts
Posted: Wednesday, March 30, 2011 - 10:44 PM UTC
Day 5
Rigging -
Take the piece of plastic shown earler and cut or brake into smaller pieces with a nice narrow end, we're set this alight, once on fire, blow it out gently stab it into a sheet of paper (how can you gently stab anything oh well) and slowly pull the piece of plastic away, you're feeling for a slight tightness as you pull, at this stage stop, brake off, and repeat until you have enough lengths of stretched plastic.
rat 11 002
Remember ordinary glue will melt plastic, PVA will not, so with this in mind, I firstly anchor one end directly to the mast using a small blob of PVA and allow this to go off, once this has happened, we then add another blob of PVA to the other mast and very carefully pull it across, we're not concerned about the belly that this method will produce at this stage.
While this is drying, we're turn our attention to the flag poll, in my view, the flag is not stuck on the poll, but on a small length of line.
Below is our decal flag, remove and bend in half giving us our flag, now we apply a little varnish, allow to dry and simply bend the flag until we're happy with the shape.
rat 11 008
Almost there, we have the flag in our nice shape, this is now fixed, remember the black wash, its now time to use a little, just lick a brush over bits of the surface of the flag as we don't want this looking to new.
rat 11 010
Our flag poll, all we're doing is applying a small length of line, this will be fishing line because we don't want this snapping.
rat 11 001
Below is our finished subject and looking rather grubby, some dirt and nothing like the brand new flag that we actually know this to be.
rat 11 011
Back to rigging - with all due respect, I honestly believe that drop down wire from the rigging isn't simply stuck on the deck as shown on many a model, so we're take this a little further, a small piece of plastic and drill a hole in it.
rat 11 004
This we're cut and be placing 3 lines from the overhead rigging, with this, it should look like the downward wire/cable is actually going somewhere, into a junction box, secure whatever attachment type thing, I feel it will look better then simply glued to the deck.
We have 3 lines going directly into our termal box thingy, the other end, carefully apply a small blob of PVA at each connection.
rat 11 005
A little dark, raining outside again, I'll try and post a better photo a bit later on.
bigal07
Visit this Community
England - East Anglia, United Kingdom
Joined: January 07, 2009
KitMaker: 887 posts
Model Shipwrights: 575 posts
Posted: Thursday, March 31, 2011 - 12:26 AM UTC
What does 5 days of paint and build look like ? Not bad actually although we still have one or two missing parts, hardly a flogging offence.
IJN Chitose 045
What about if we encompass this within our little diorama ? Would it look better or simply make the eye go wandering off ?
IJN Chitose 009
IJN Chitose 018
This is where we're going to stop, apart from waitng for a crane and reels, this is more or less finished, the last photo showing a good shot of that meat ball, this would probably look better in black and white, maybe when I send the whole lot to the gallery, it will be something to consider.
IJN Chitose 024
The diorama is something I explained some time ago on another thread, this is built in something I call ''Simple Mode'' and now is the time to post your comments if you wish to do so.
5 days from rattle tin to rigging a model of how ''I'' build not how to build and paint, but nevertheless I hope you've picked up one or two ideas, realised that using a rattle tin isn't the end of the world, and even how we can mix and match the type of rigging used, the flags, rail, aircraft, rigging all glued down with PVA and nothing else, this won't stick your fingers together but will once allowed to go off, will stick very well indeed all the above.
Well over to you now -
bigal07
Visit this Community
England - East Anglia, United Kingdom
Joined: January 07, 2009
KitMaker: 887 posts
Model Shipwrights: 575 posts
Posted: Friday, April 01, 2011 - 10:29 AM UTC
Decal up-date.
When applying our meat ball decal we used a dirty brush which left behind quite a lot of dust particles within the gloss, there is a huge stretch of area of flat smooth surface, you could weather this, but it would still be flat, you could sprinkle some scatter over the finished decal, but then you'll have to think how this will be stuck down, the varnish will take care of it, no sheer flat surface, have a look at the photo below.
The reel being rather small poses a problem as to what we're going to use for the drum, the larger reel isn't a problem because we'll simply use round styrene for the job, there's not an aweful lot of styrene small enough for these sized reels, and even if we had that size, of course, we've still got to transfer that to the reel. A small amount of PVA is used, the reel is firstly stuck into its postion allowed to dry, a small blob of PVA is placed between the reel cheek ends until they meet, wipe across and you'll see the conection between the cheek ends and the tops of those ens meet with the white glue, once completely dried, paint copper, brass, steel.
IJN Chitose 002
Oh and also a better photo showing our juntion box with those 3 overhead cables going in, looks much better then simply being glued to the surface.
 _GOTOTOP