

We've started on my Elco. The hull/deck are glued together, the charthouse and instrument panel are glued together, and the holes are drilled out in the deck. Did any of you do that on yours?
He's just going to work on it while I'm there with him, ... that's fine with me, the 191 in 1944/45 was not exactly a stock early Elco 80-footer, ... HA HA. But, I've got to tell ya, I'm impressed as Hell about this kit. When Stan glued the deck on - I heard it click into place, as well as the instrument panel into the charthouse piece. All of those things had nice tight fits!
I'm now thinking that I'll do an article on this project. But, I'm kind of confused over one thing from the instructions ... it says to cut-off/remove two sets of hinges for two hatches, one on the foredeck and the one on the aft-deck (near the 20mm - on the stock early Elco) ... but I have a photo of the 191, with the foredeck's hatch opened, and the hatch is opened as if the hinges were attached where Merit tells modelers to cut/remove them.
We'll be using the Mark XIIIs and their roll-off racks which Merit gave me. We'll use the 40mm that Merit gave me. We'll use the late-war engine-room hatch that Merit gave me. We'll use the rest/stop for the radar mast. I bought a 1:48 SO-Type radar from a vendor from Shapeways (3-D printing), but he didn't do the rest/stop for it. He has the Mark XIIIs and roll-off racks in 1:48 but for $76 and change - I AIN'T GONNA PAY THAT MUCH for those! We'll use two of the 20mm guns (on tripods) that Merit gave me. I've gotten the mufflers done in 3-D printing and some depth charges and a .30-cal on a tall tripod and I'm waiting on a 1:48 3-D printed 37mm M4 on a tripod.
A friend from Australia is creating a 48-star cloth flag and I've asked him about (if he would) creating a decal sheet for the PT-191. Her numbers (in 1944/45) were a green color with grey shading and she had a distinctive kill scoreboard ...
I'll keep you abreast on the build.
Tim


Go to modelshipwrights.com for the current dynamic site!
Ships by Class/Type: Military Small Craft
For topics on PT boats, landing craft, Vietnam riverine, etc.
For topics on PT boats, landing craft, Vietnam riverine, etc.
Hosted by Jim Starkweather
Merit 1:48 Elco Early-80-footer PT Build

TGarthConnelly

Joined: August 03, 2008
KitMaker: 875 posts
Model Shipwrights: 872 posts

Posted: Thursday, May 19, 2016 - 01:51 AM UTC

TRM5150
Joined: January 03, 2010
KitMaker: 2,159 posts
Model Shipwrights: 1,400 posts

Posted: Thursday, May 19, 2016 - 05:43 AM UTC
Sounds fantastic Tim! Looking forward to seeing some of the progress!! Bring on those pictures! 

Robbd01

#323
Joined: February 13, 2013
KitMaker: 791 posts
Model Shipwrights: 59 posts

Posted: Thursday, May 19, 2016 - 06:39 AM UTC
I certainly will be watching. I have that kit in the stash and was waiting for a build post. So post them pics and build notes. I do have a question, anywhere I can pick up a 1/48 US 37mm gun in case I want to do the 109?
Cheers


Cheers

TGarthConnelly
Joined: August 03, 2008
KitMaker: 875 posts
Model Shipwrights: 872 posts
Posted: Thursday, May 19, 2016 - 08:10 PM UTC
I will start taking photos next week, ...
To answer your question ... and this is something I NEVER knew about, but Bandai has/had a 1:48 37mm M3. It's on SCALEMATES:
Boxart US 37mm Anti Tank Gun 8291 Bandai
Facts
Brand: Bandai
Product name: US 37mm Anti Tank Gun
Product number: 8291
Scale: 1:48
Type: Full kit
Includes: Plastic sprues
To answer your question ... and this is something I NEVER knew about, but Bandai has/had a 1:48 37mm M3. It's on SCALEMATES:
Boxart US 37mm Anti Tank Gun 8291 Bandai
Facts
Brand: Bandai
Product name: US 37mm Anti Tank Gun
Product number: 8291
Scale: 1:48
Type: Full kit
Includes: Plastic sprues
Quoted Text
I certainly will be watching. I have that kit in the stash and was waiting for a build post. So post them pics and build notes. I do have a question, anywhere I can pick up a 1/48 US 37mm gun in case I want to do the 109?
Cheers
Robbd01
#323
Joined: February 13, 2013
KitMaker: 791 posts
Model Shipwrights: 59 posts
Posted: Friday, May 20, 2016 - 05:45 PM UTC
Quoted Text
I will start taking photos next week, ...
To answer your question ... and this is something I NEVER knew about, but Bandai has/had a 1:48 37mm M3. It's on SCALEMATES:
Boxart US 37mm Anti Tank Gun 8291 Bandai
Facts
Brand: Bandai
Product name: US 37mm Anti Tank Gun
Product number: 8291
Scale: 1:48
Type: Full kit
Includes: Plastic spruesQuoted TextI certainly will be watching. I have that kit in the stash and was waiting for a build post. So post them pics and build notes. I do have a question, anywhere I can pick up a 1/48 US 37mm gun in case I want to do the 109?
Cheers
Ya, I was aware of the Bandai but was hoping for another option.
Cheers
TGarthConnelly
Joined: August 03, 2008
KitMaker: 875 posts
Model Shipwrights: 872 posts
Posted: Friday, May 20, 2016 - 06:38 PM UTC
Hmmm. What if you contact one of the vendors on www.shapeways.com and ask them if they'd do a 37mm M3 field piece without tires ... That could be another option ....
Quoted Text
Quoted TextI will start taking photos next week, ...
To answer your question ... and this is something I NEVER knew about, but Bandai has/had a 1:48 37mm M3. It's on SCALEMATES:
Boxart US 37mm Anti Tank Gun 8291 Bandai
Facts
Brand: Bandai
Product name: US 37mm Anti Tank Gun
Product number: 8291
Scale: 1:48
Type: Full kit
Includes: Plastic spruesQuoted TextI certainly will be watching. I have that kit in the stash and was waiting for a build post. So post them pics and build notes. I do have a question, anywhere I can pick up a 1/48 US 37mm gun in case I want to do the 109?
Cheers
Ya, I was aware of the Bandai but was hoping for another option.
Cheers

Biggles2

Joined: January 01, 2004
KitMaker: 7,600 posts
Model Shipwrights: 833 posts

Posted: Friday, May 20, 2016 - 08:35 PM UTC
Would resin .50's such as these: http://www.track48.com/shop/product.php?productid=512&cat=0&page=2 be OK replacements for the kit weapons, or would there be a lot of modification involved? 
TGarthConnelly
Joined: August 03, 2008
KitMaker: 875 posts
Model Shipwrights: 872 posts
Posted: Friday, May 20, 2016 - 08:45 PM UTC
The kit's 50s are great. Mini-kits in themselves. But, Robbie was asking about the 37mm M3 ................
Quoted Text
Would resin .50's such as these: http://www.track48.com/shop/product.php?productid=512&cat=0&page=2 be OK replacements for the kit weapons, or would there be a lot of modification involved?
TGarthConnelly
Joined: August 03, 2008
KitMaker: 875 posts
Model Shipwrights: 872 posts
Posted: Thursday, May 26, 2016 - 01:49 AM UTC
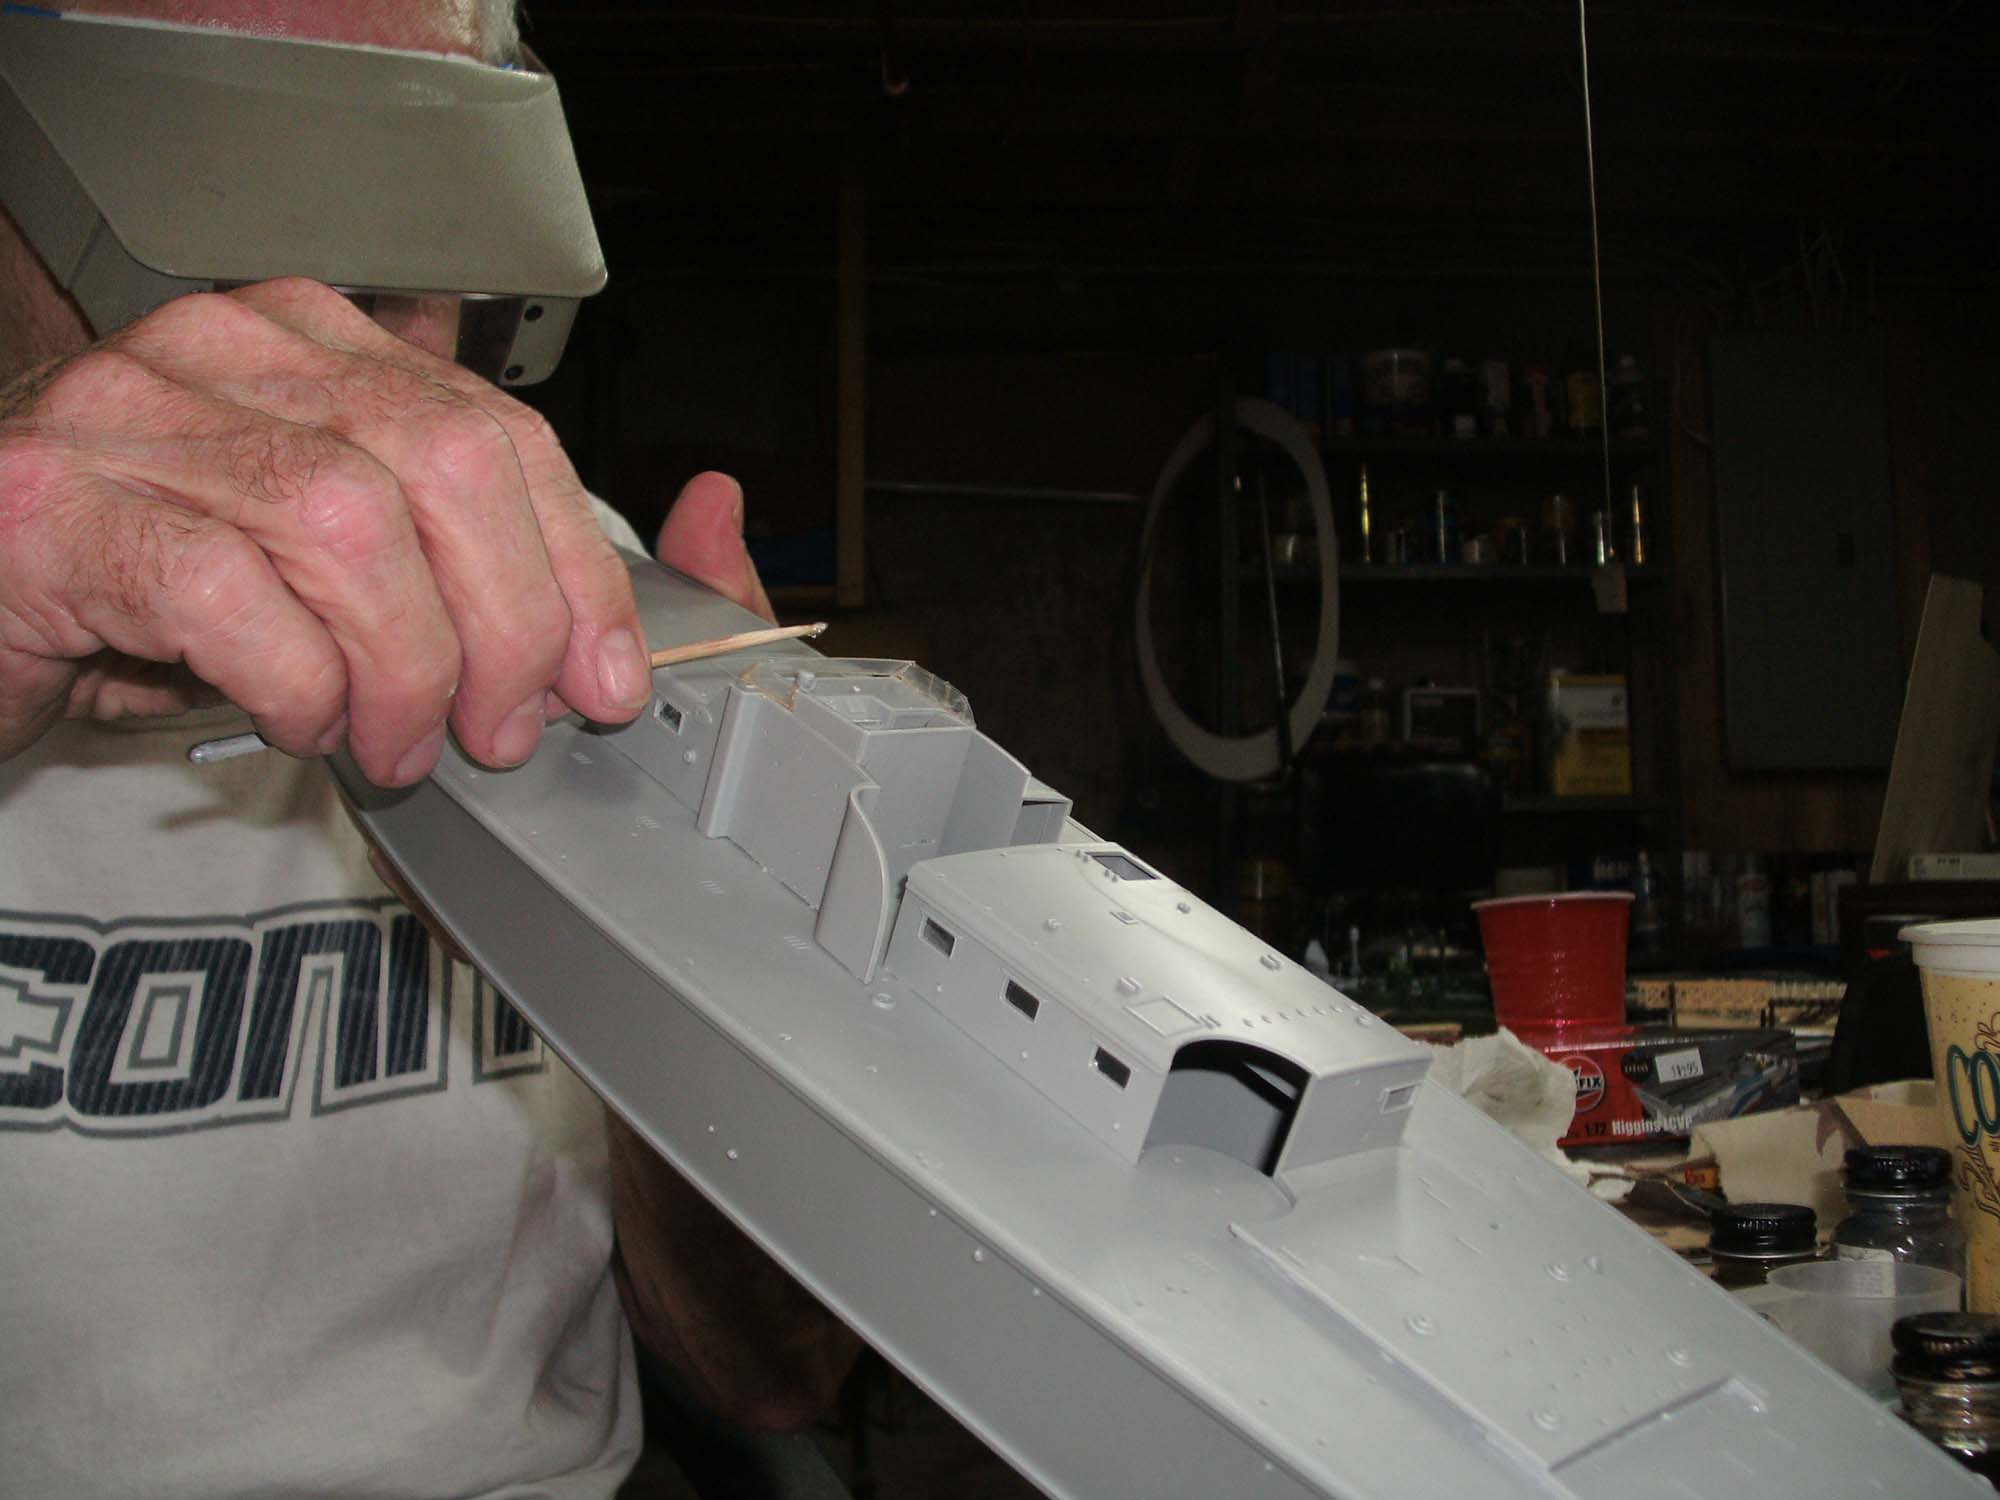
Just got back from Stan's, ... photos to follow as soon as my brother puts the chip from the camera into my PC. It is coming along nicely. Got the cockpit/charthouse on and glued. I had him put the armored bulkhead in (I realize the 191 PROBABLY did not have hers in 1944/45, but I've always liked the look of the 80-footers with it - just looks incomplete without it) ... Stan forgot to put the clear plastic ports in the charthouse before he glued it onto the deck ... he had a heck of a hard time getting them in - but he did ... A couple of them are dirty with glue-spots but that's OK because those ports will get painted over.
The fit of the parts is really, really, really good and tight. The best I've ever seen in any kit ...that impressed me ... what blew me away today was that the throttle quadrant was/is a mini-kit in itself. The throttles are separate pieces which are inserted into holes in the quadrant! Another thing which blew me away was that the clear plastic ports have a "coating" over them which needs to be peeled off before they are inserted ......... I've never seen something like that before. He put the ports in the Day Cabin and glued it onto the deck ...
Finally, we glued the deck piece which goes over the engine-room.
I am really impressed with the Merit kit ...
TGarthConnelly
Joined: August 03, 2008
KitMaker: 875 posts
Model Shipwrights: 872 posts
Posted: Thursday, May 26, 2016 - 03:38 AM UTC
Quoted Text
Just got back from Stan's, ... photos to follow as soon as my brother puts the chip from the camera into my PC. It is coming along nicely. Got the cockpit/charthouse on and glued. I had him put the armored bulkhead in (I realize the 191 PROBABLY did not have hers in 1944/45, but I've always liked the look of the 80-footers with it - just looks incomplete without it) ... Stan forgot to put the clear plastic ports in the charthouse before he glued it onto the deck ... he had a heck of a hard time getting them in - but he did ... A couple of them are dirty with glue-spots but that's OK because those ports will get painted over.
The fit of the parts is really, really, really good and tight. The best I've ever seen in any kit ...that impressed me ... what blew me away today was that the throttle quadrant was/is a mini-kit in itself. The throttles are separate pieces which are inserted into holes in the quadrant! Another thing which blew me away was that the clear plastic ports have a "coating" over them which needs to be peeled off before they are inserted ......... I've never seen something like that before. He put the ports in the Day Cabin and glued it onto the deck ...
Finally, we glued the deck piece which goes over the engine-room.
I am really impressed with the Merit kit ...
TGarthConnelly
Joined: August 03, 2008
KitMaker: 875 posts
Model Shipwrights: 872 posts
Posted: Thursday, May 26, 2016 - 07:34 PM UTC
I do have to point one mistake in the instructions in Step 10. But, to preface it, Stan determined it would be safer to build and attach items like the cockpit/charthouse structure and the Day Cabin, rather than making the turrets and machine guns. He was fearful that those items might have been broken or have pieces go missing. Frankly, I agree/agreed with him. Besides, it seems to be more logical to put the cockpit/charthouse and Day Cabin structures on to the deck/hull earlier in the building process. In Step 10, the page(s) with the instructions on how to build the cockpit/charthouse structure, one of the pieces to be glued on top of the instrument panel is labeled F-12, it should be labeled E-12.
Quoted Text
Quoted TextJust got back from Stan's, ... photos to follow as soon as my brother puts the chip from the camera into my PC. It is coming along nicely. Got the cockpit/charthouse on and glued. I had him put the armored bulkhead in (I realize the 191 PROBABLY did not have hers in 1944/45, but I've always liked the look of the 80-footers with it - just looks incomplete without it) ... Stan forgot to put the clear plastic ports in the charthouse before he glued it onto the deck ... he had a heck of a hard time getting them in - but he did ... A couple of them are dirty with glue-spots but that's OK because those ports will get painted over.
The fit of the parts is really, really, really good and tight. The best I've ever seen in any kit ...that impressed me ... what blew me away today was that the throttle quadrant was/is a mini-kit in itself. The throttles are separate pieces which are inserted into holes in the quadrant! Another thing which blew me away was that the clear plastic ports have a "coating" over them which needs to be peeled off before they are inserted ......... I've never seen something like that before. He put the ports in the Day Cabin and glued it onto the deck ...
Finally, we glued the deck piece which goes over the engine-room.
I am really impressed with the Merit kit ...

Fordboy

Joined: July 13, 2004
KitMaker: 2,169 posts
Model Shipwrights: 1,597 posts

Posted: Sunday, May 29, 2016 - 06:24 AM UTC
Ahoy Tim
Great updates indeed.
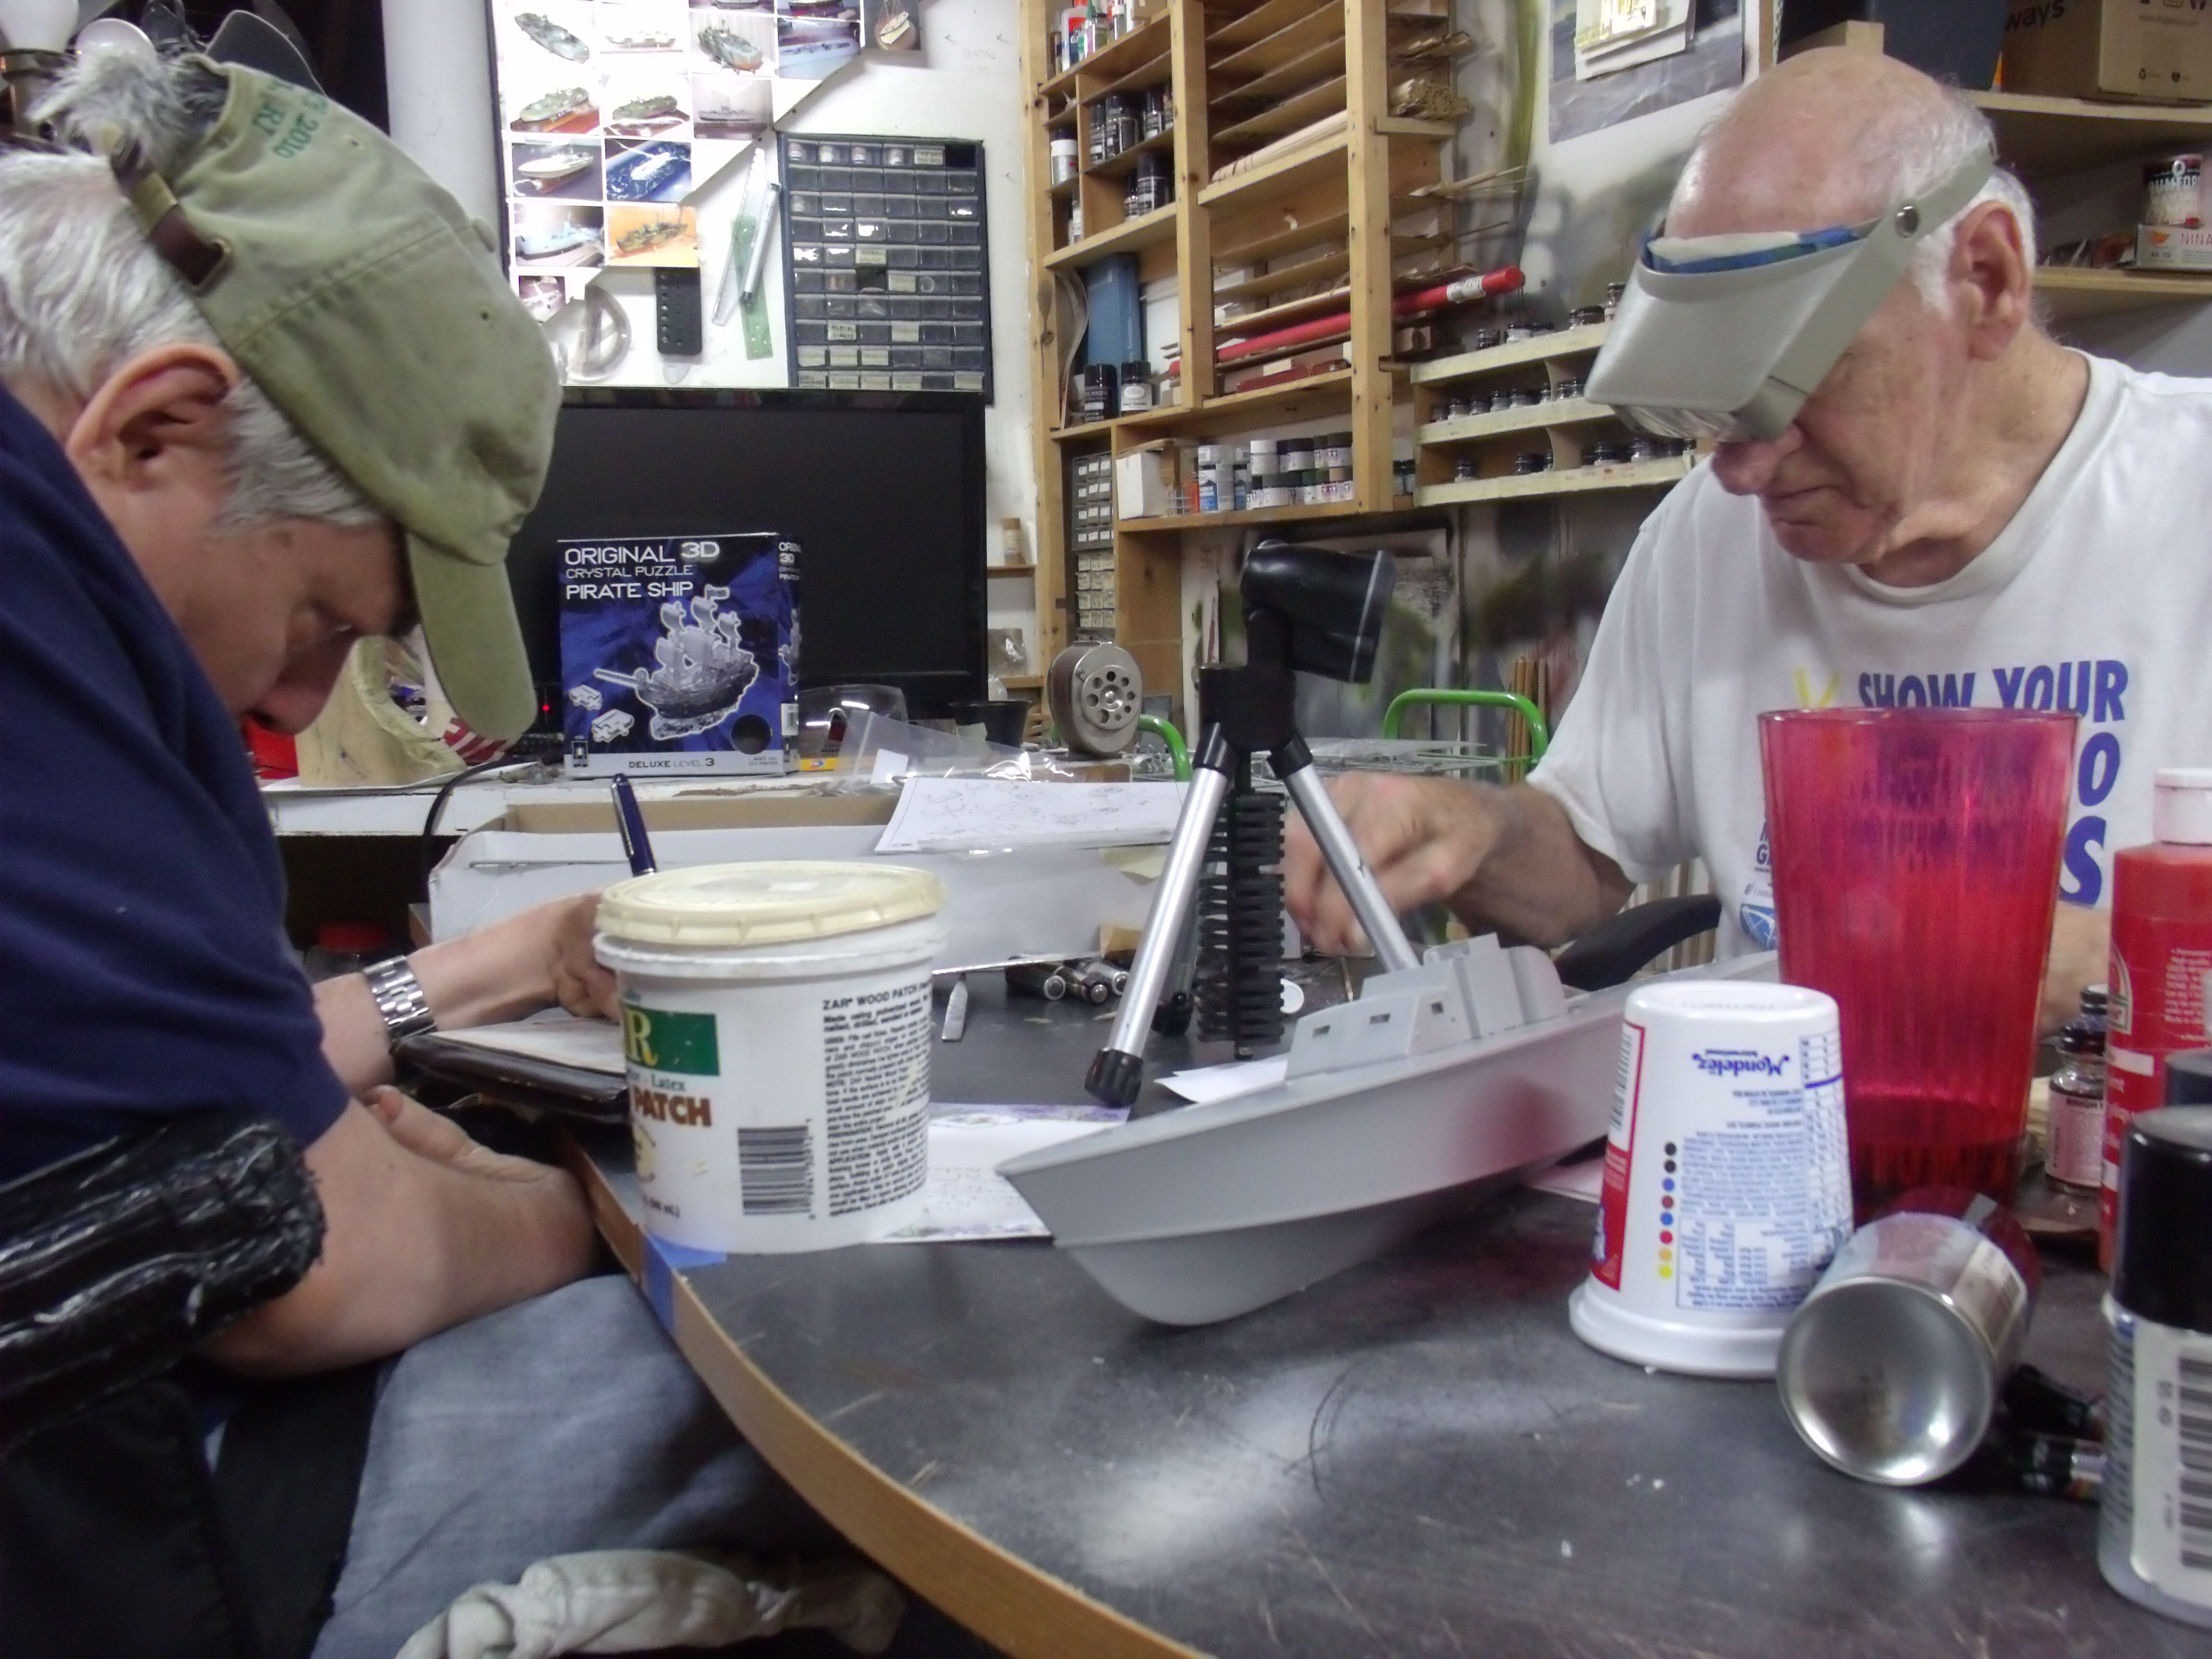
Love the pictures.
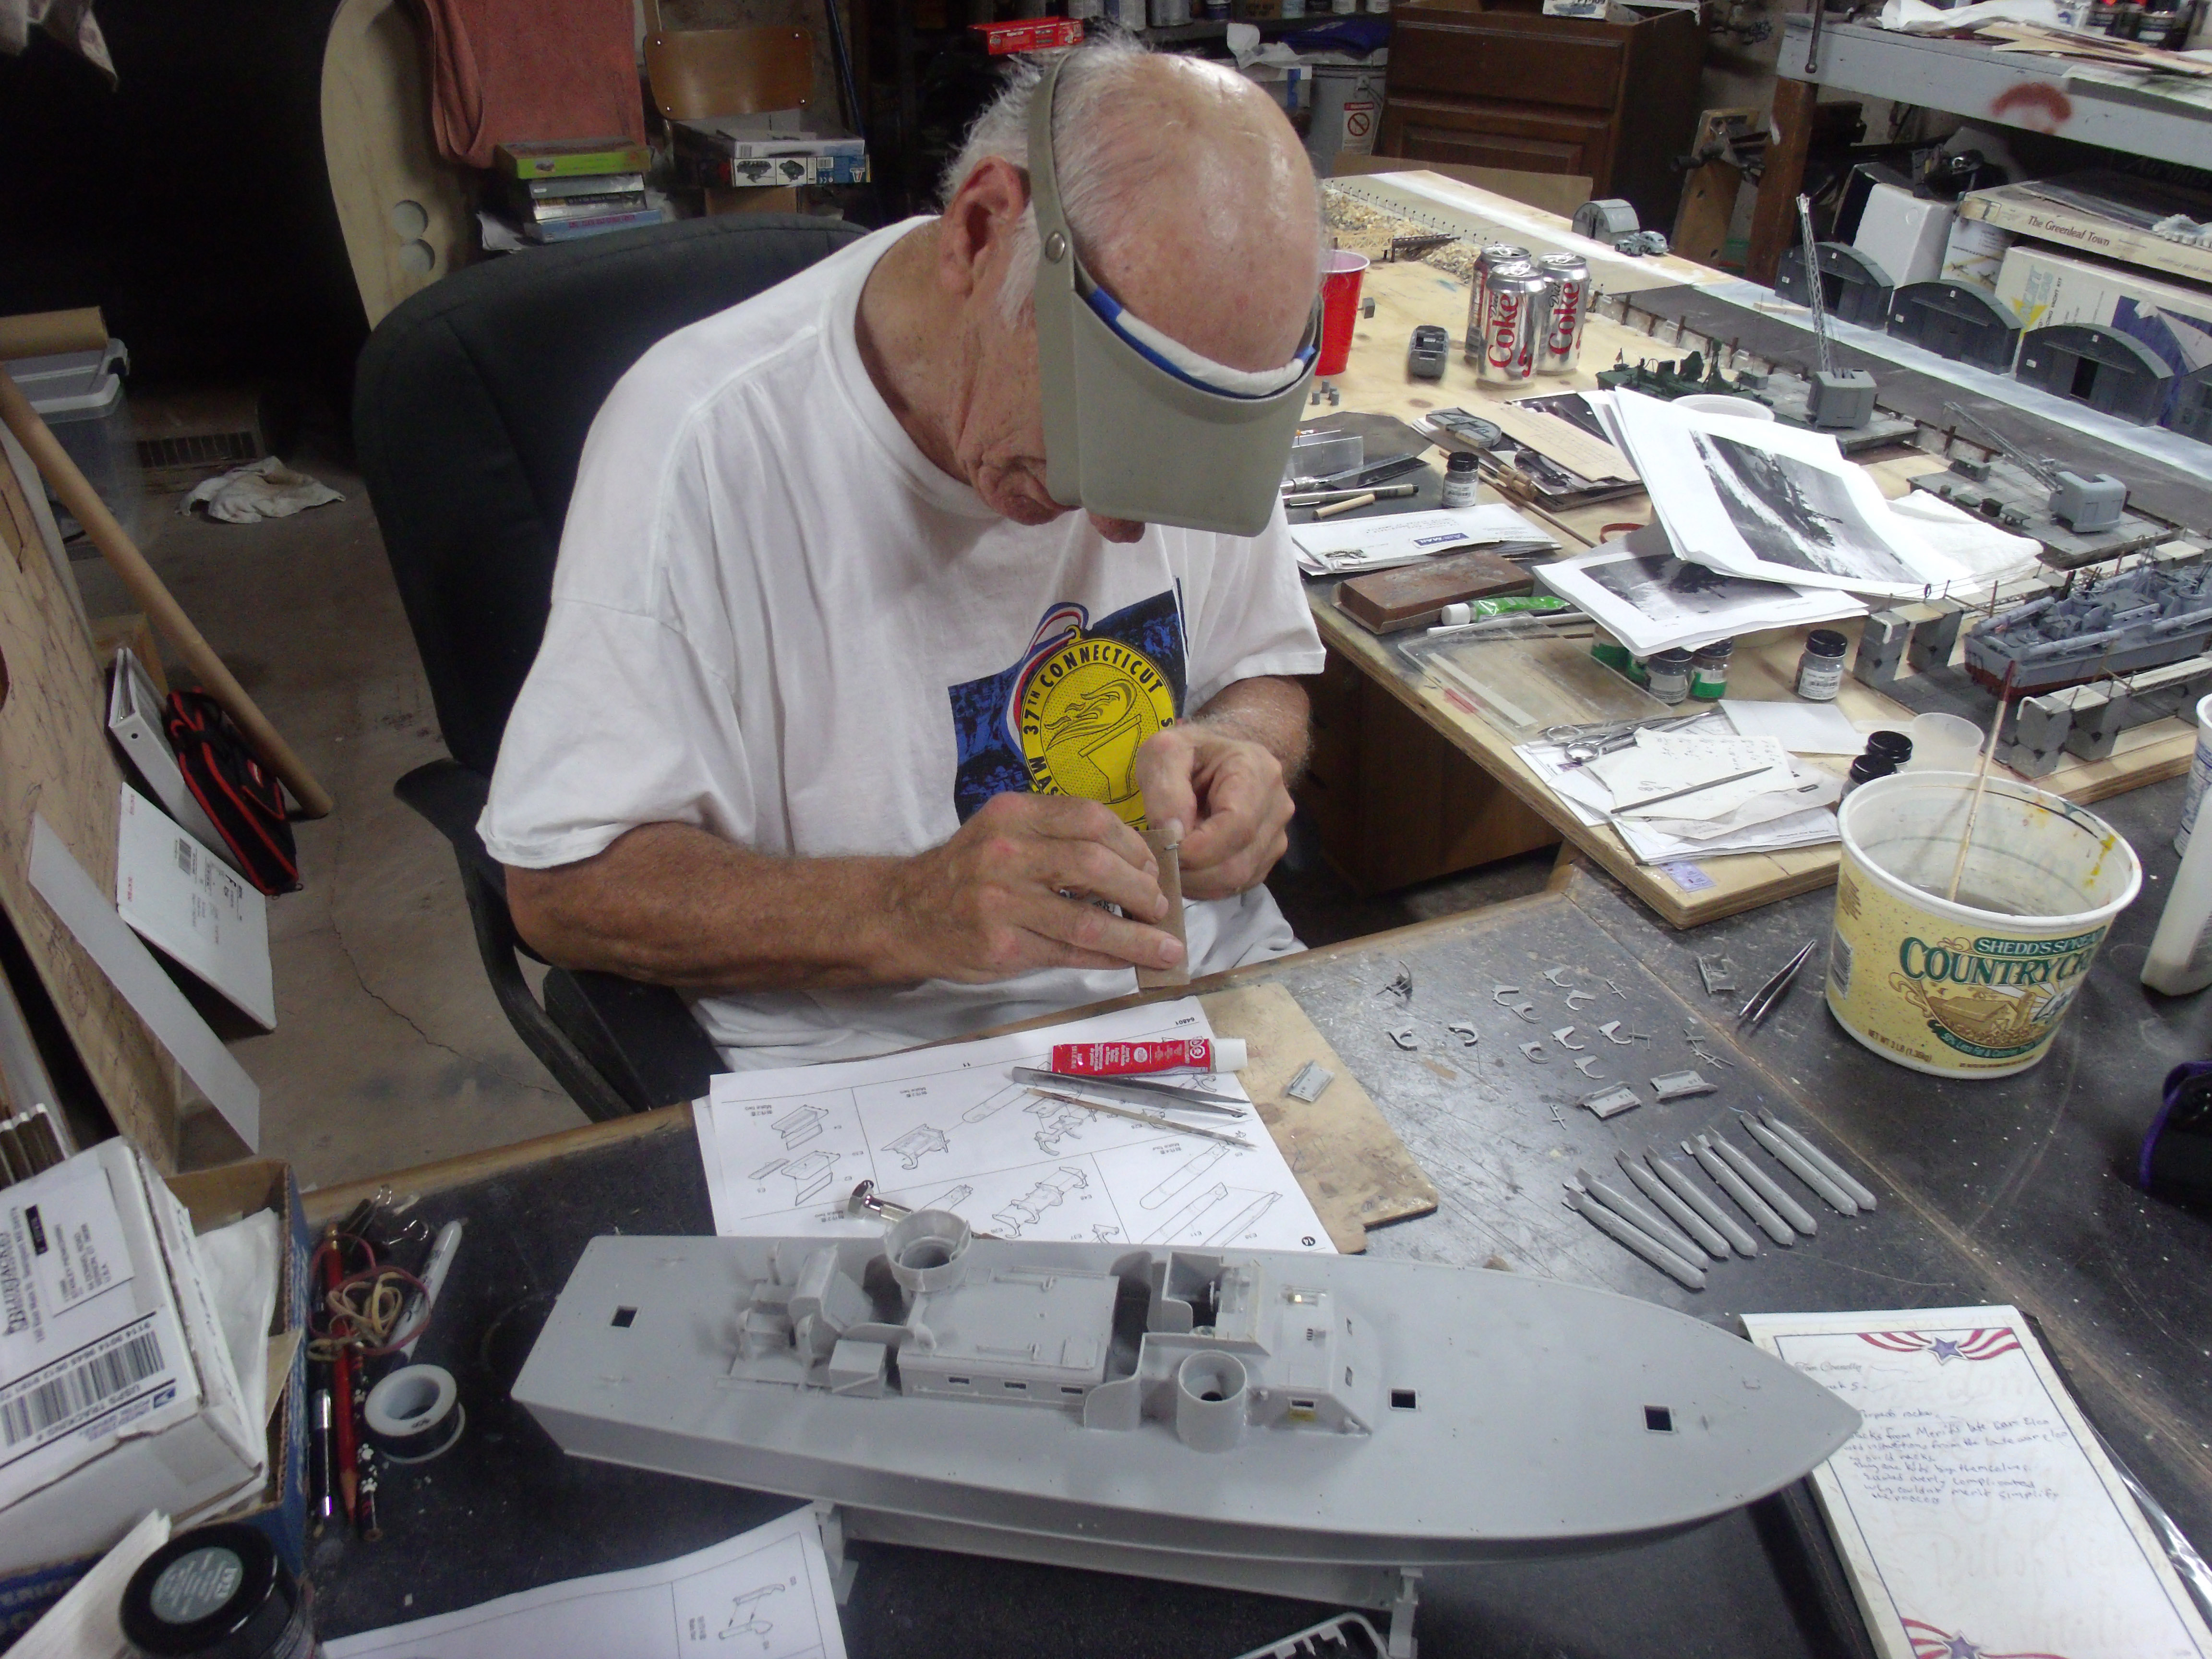
In the last picture is that your good self on the LHS with Stan
I like his hobby space set up as well.
Looks like a very professional space indeed.
Cheers
Sean
Great updates indeed.
Love the pictures.
In the last picture is that your good self on the LHS with Stan
I like his hobby space set up as well.
Looks like a very professional space indeed.
Cheers
Sean
TRM5150
Joined: January 03, 2010
KitMaker: 2,159 posts
Model Shipwrights: 1,400 posts
Posted: Sunday, May 29, 2016 - 06:28 AM UTC
Thanks for the update Tim! Looks and sounds like things are progressing nicely! Keep it going! 

warmonger
Joined: November 08, 2006
KitMaker: 217 posts
Model Shipwrights: 13 posts

Posted: Sunday, May 29, 2016 - 09:12 AM UTC
These are one of the kits I'm really interested in getting right now, but there is so little on the Internet on them. Also, I have found nothing in the way of aftermarket. Does anyone know of any figures for them?
TGarthConnelly
Joined: August 03, 2008
KitMaker: 875 posts
Model Shipwrights: 872 posts
Posted: Sunday, May 29, 2016 - 08:43 PM UTC
Sean,
Yes, sir, that's me. He was working on the model and I was taking notes as to what to post here and on other sites. I'm also doing an article on the build, ... hence - why I'm taking photos. I am a little disappointed though, during that afternoon, I snapped about 4 or 5 photos, 3 or 4 after that one of Stan putting the armored bulkhead in and they didn't come out! But that one of the two of us taken by my brother did. Strange.
Tim
Quoted Text
Ahoy Tim
Great updates indeed.
Love the pictures.
In the last picture is that your good self on the LHS with Stan
I like his hobby space set up as well.
Looks like a very professional space indeed.
Cheers
Sean
TGarthConnelly
Joined: August 03, 2008
KitMaker: 875 posts
Model Shipwrights: 872 posts
Posted: Sunday, May 29, 2016 - 08:46 PM UTC
Hi Troy,
Go to www.shapeways.com and look there. There tons of stuff for PTs and MTBs, including figures in various scales.
Tim
Go to www.shapeways.com and look there. There tons of stuff for PTs and MTBs, including figures in various scales.
Tim
Quoted Text
These are one of the kits I'm really interested in getting right now, but there is so little on the Internet on them. Also, I have found nothing in the way of aftermarket. Does anyone know of any figures for them?
TGarthConnelly
Joined: August 03, 2008
KitMaker: 875 posts
Model Shipwrights: 872 posts
Posted: Thursday, June 02, 2016 - 02:17 AM UTC
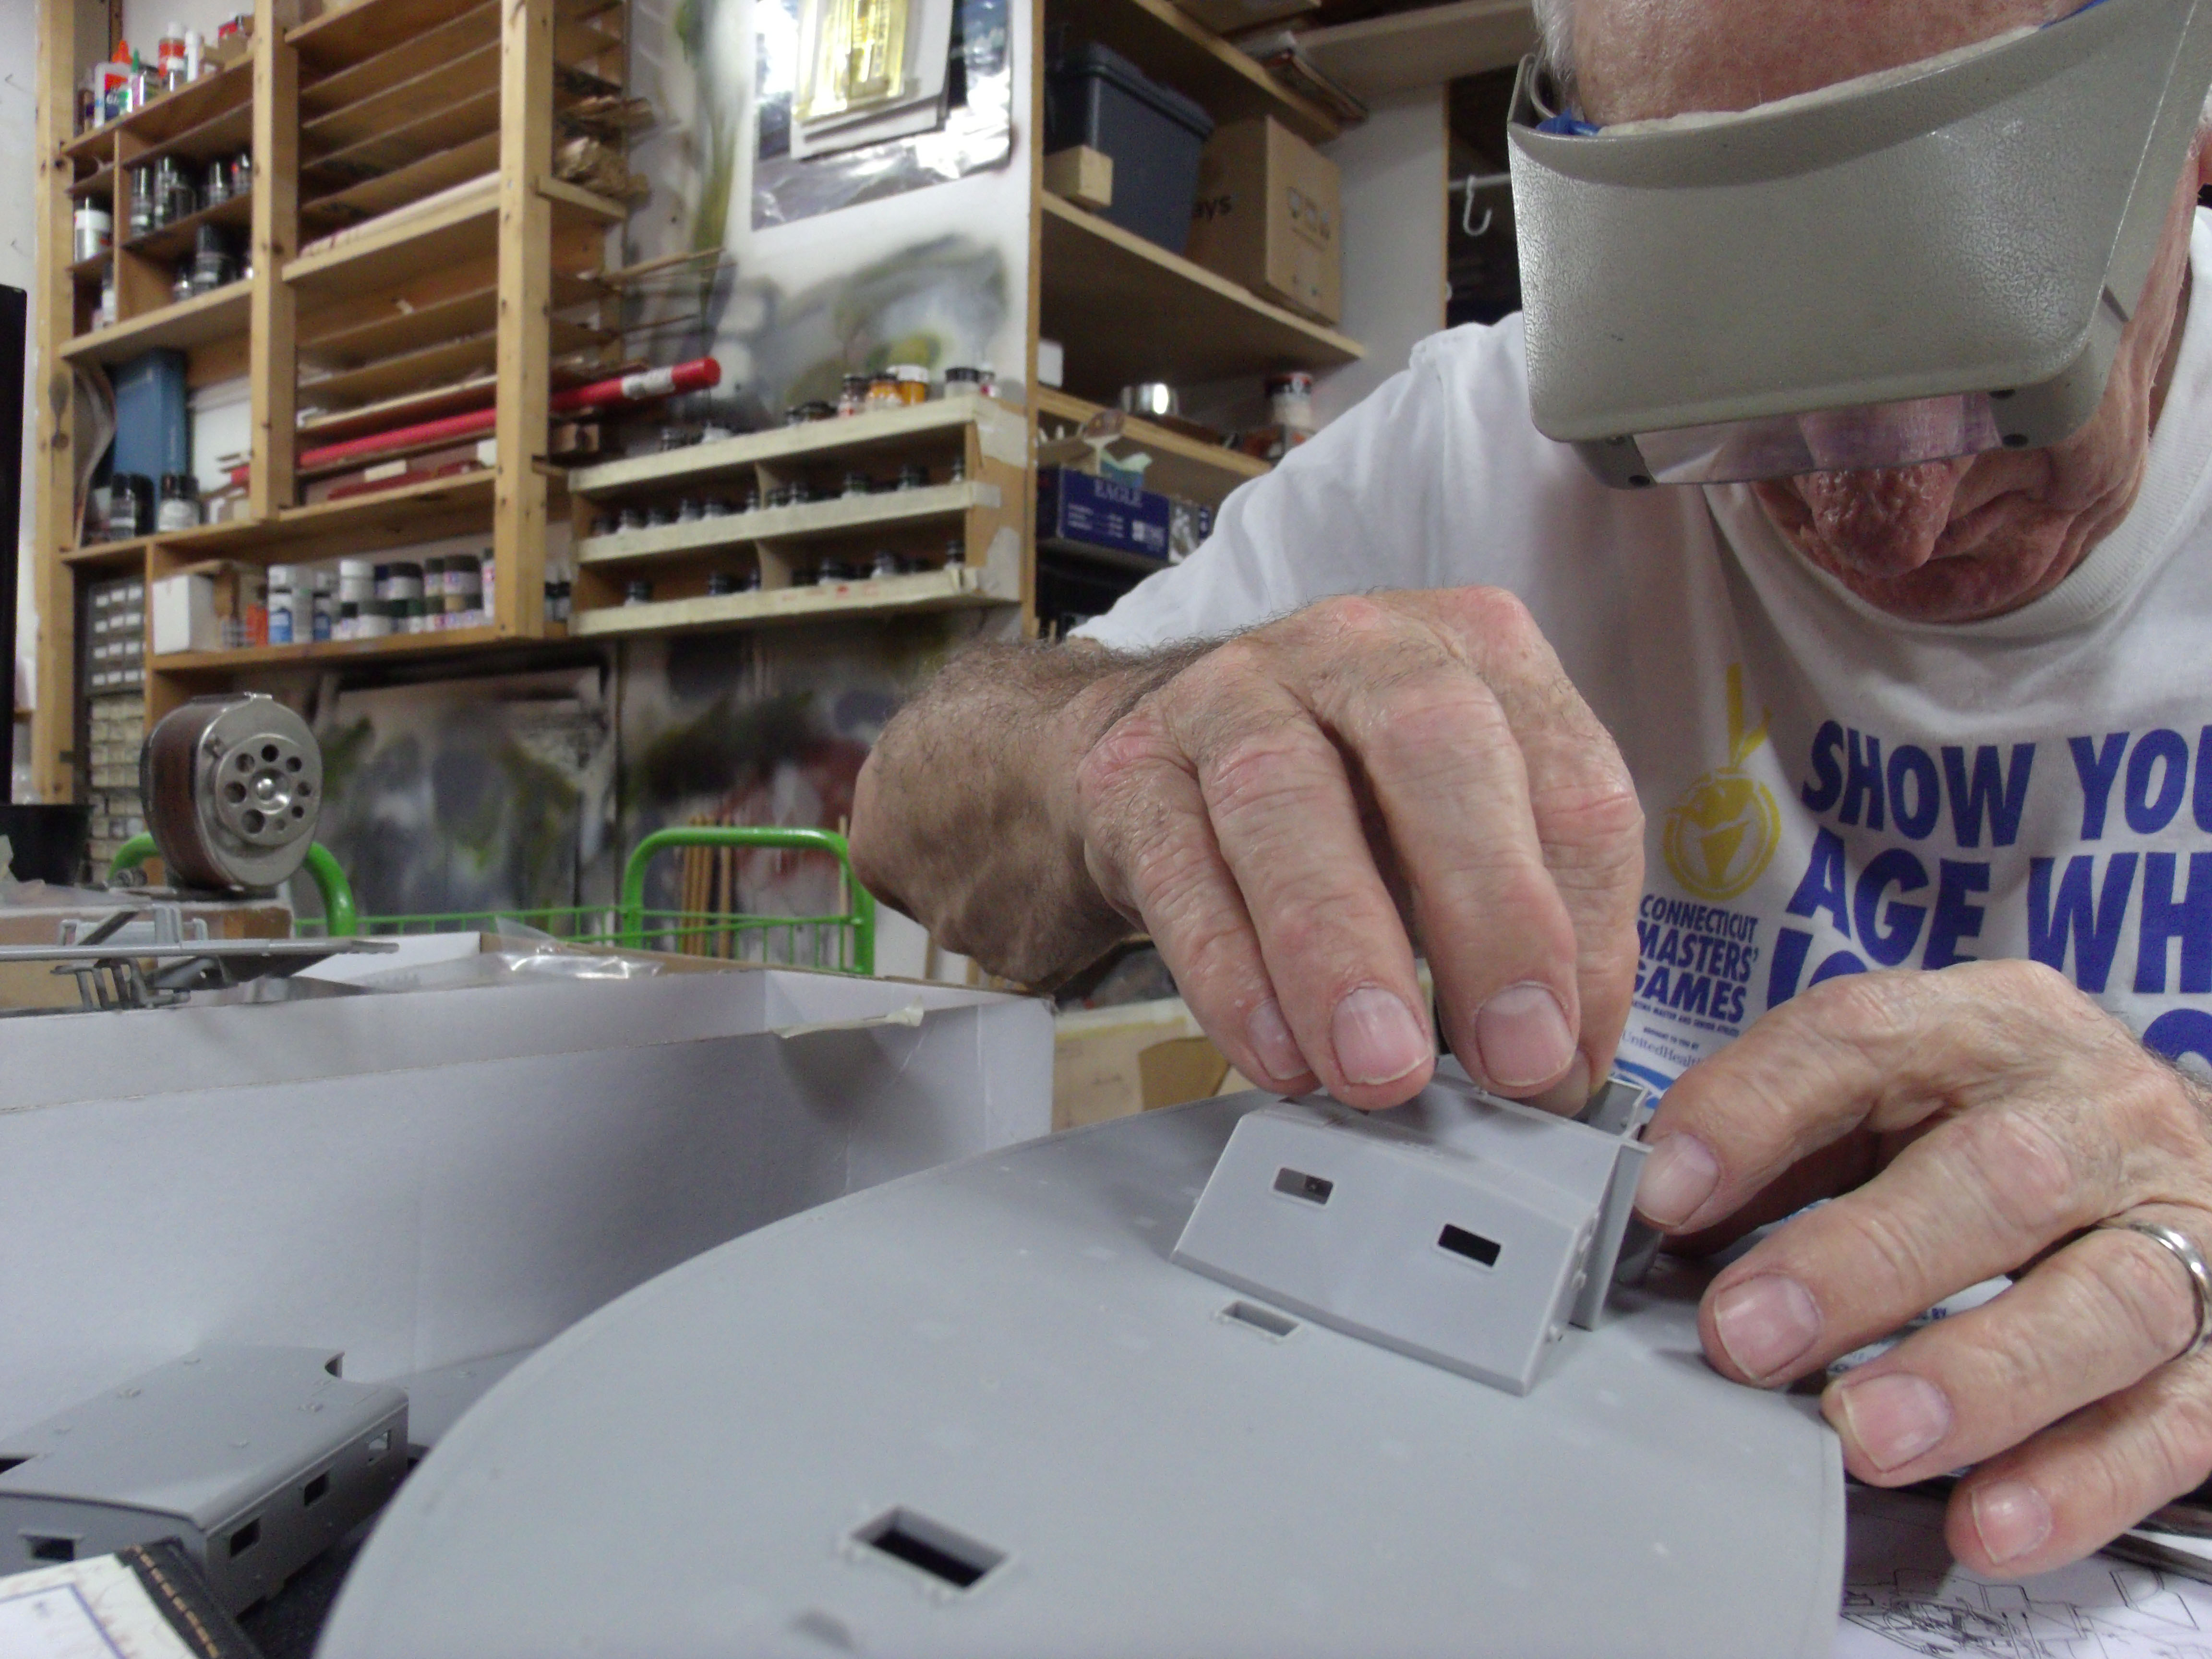
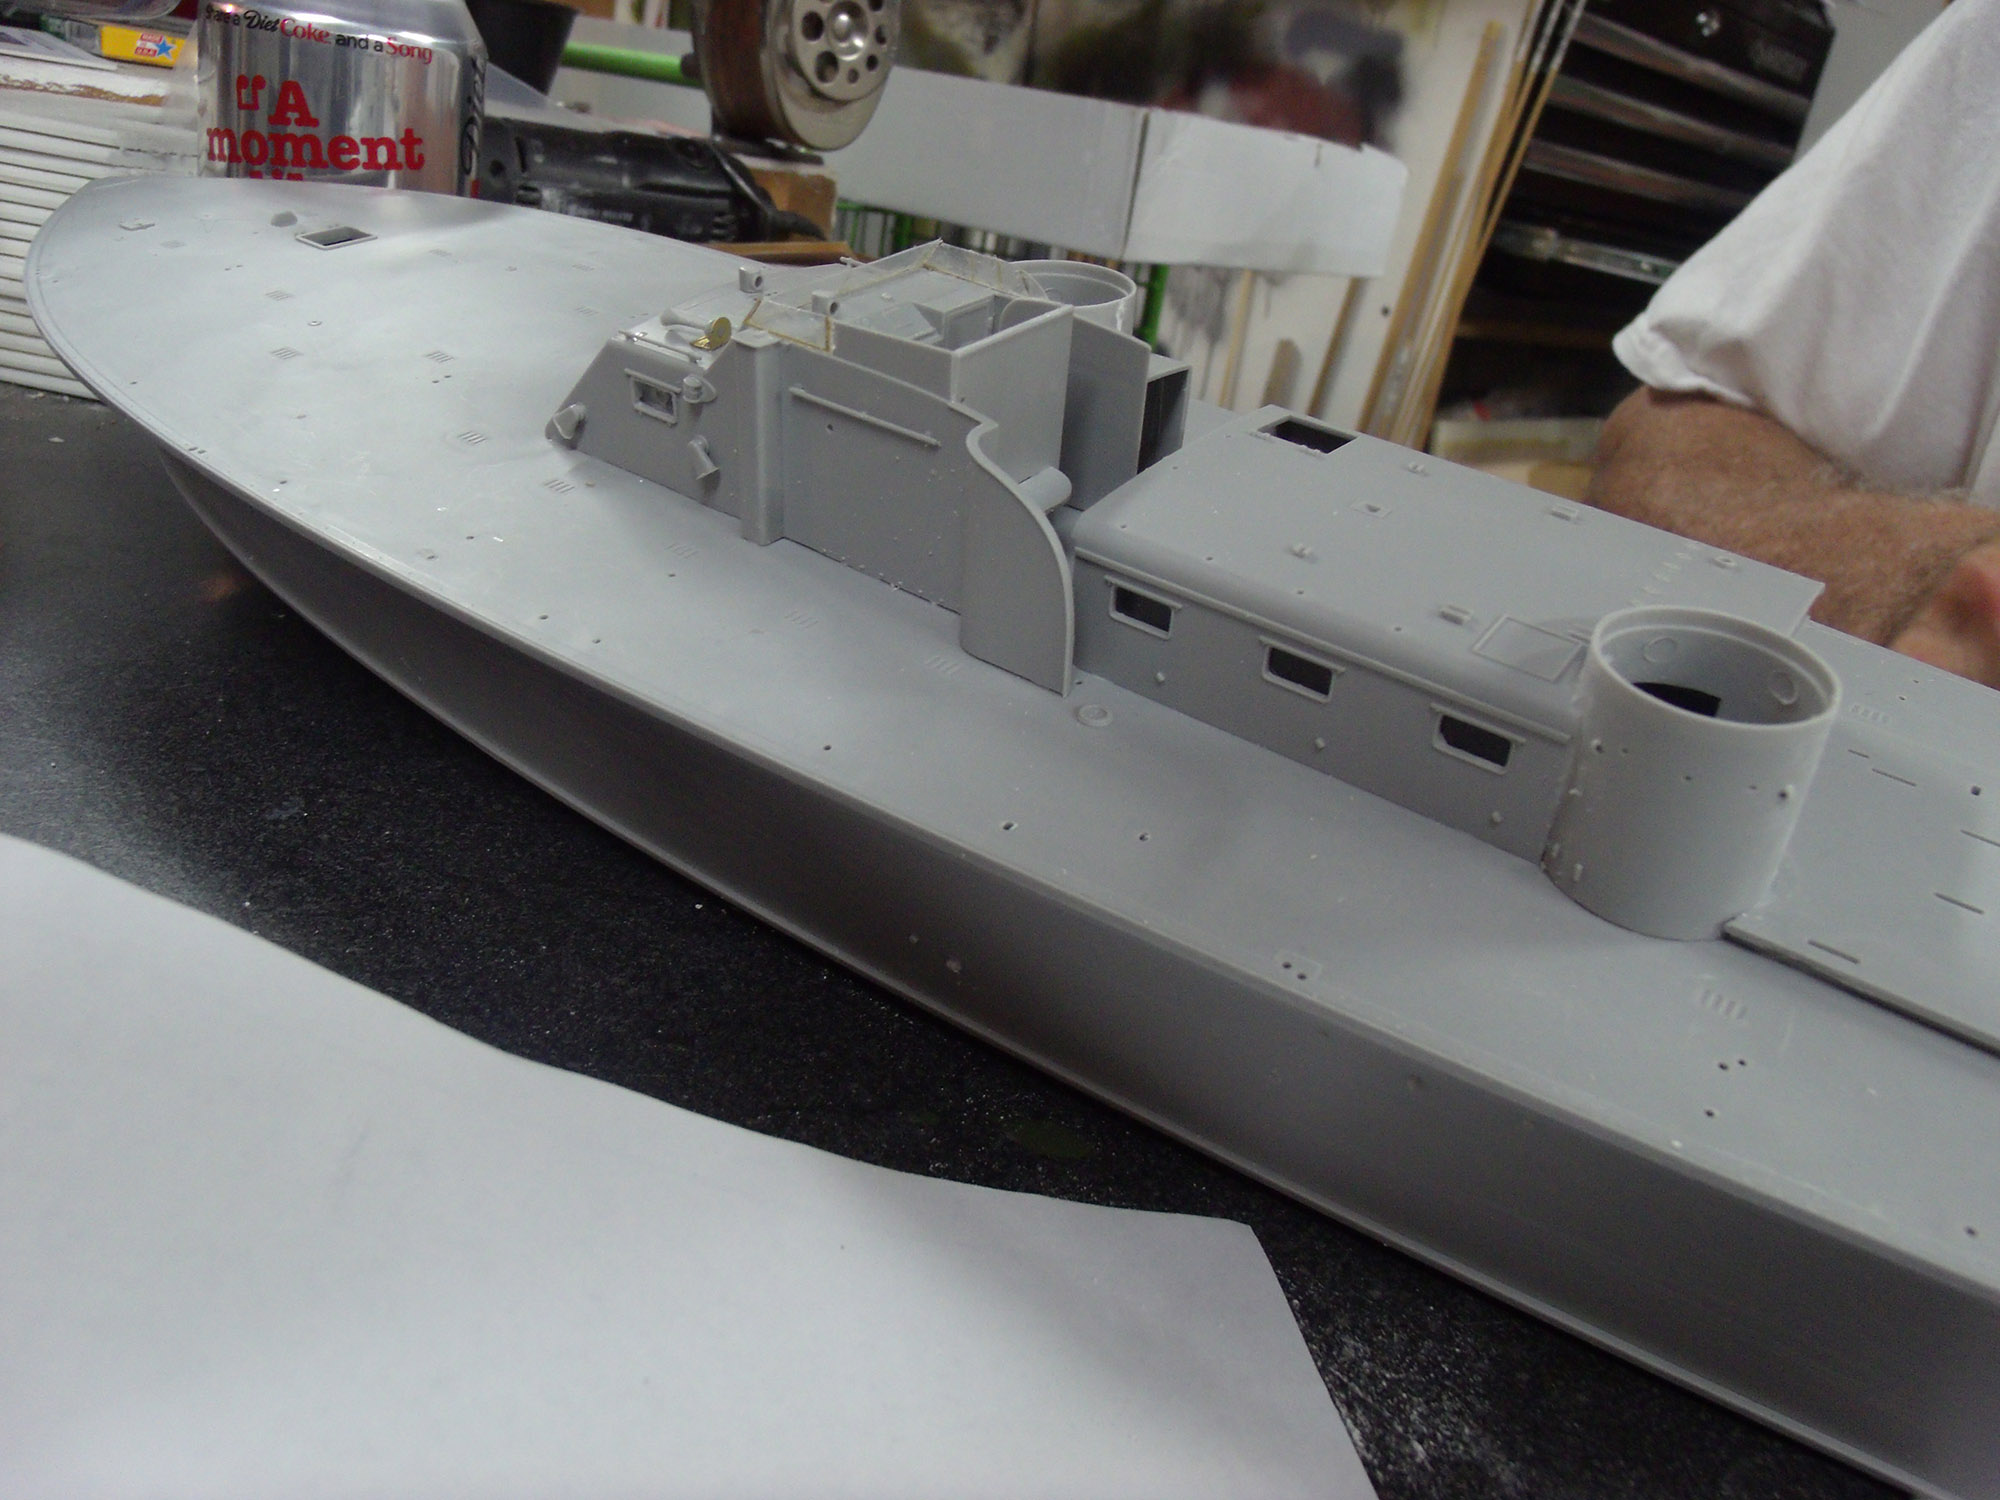
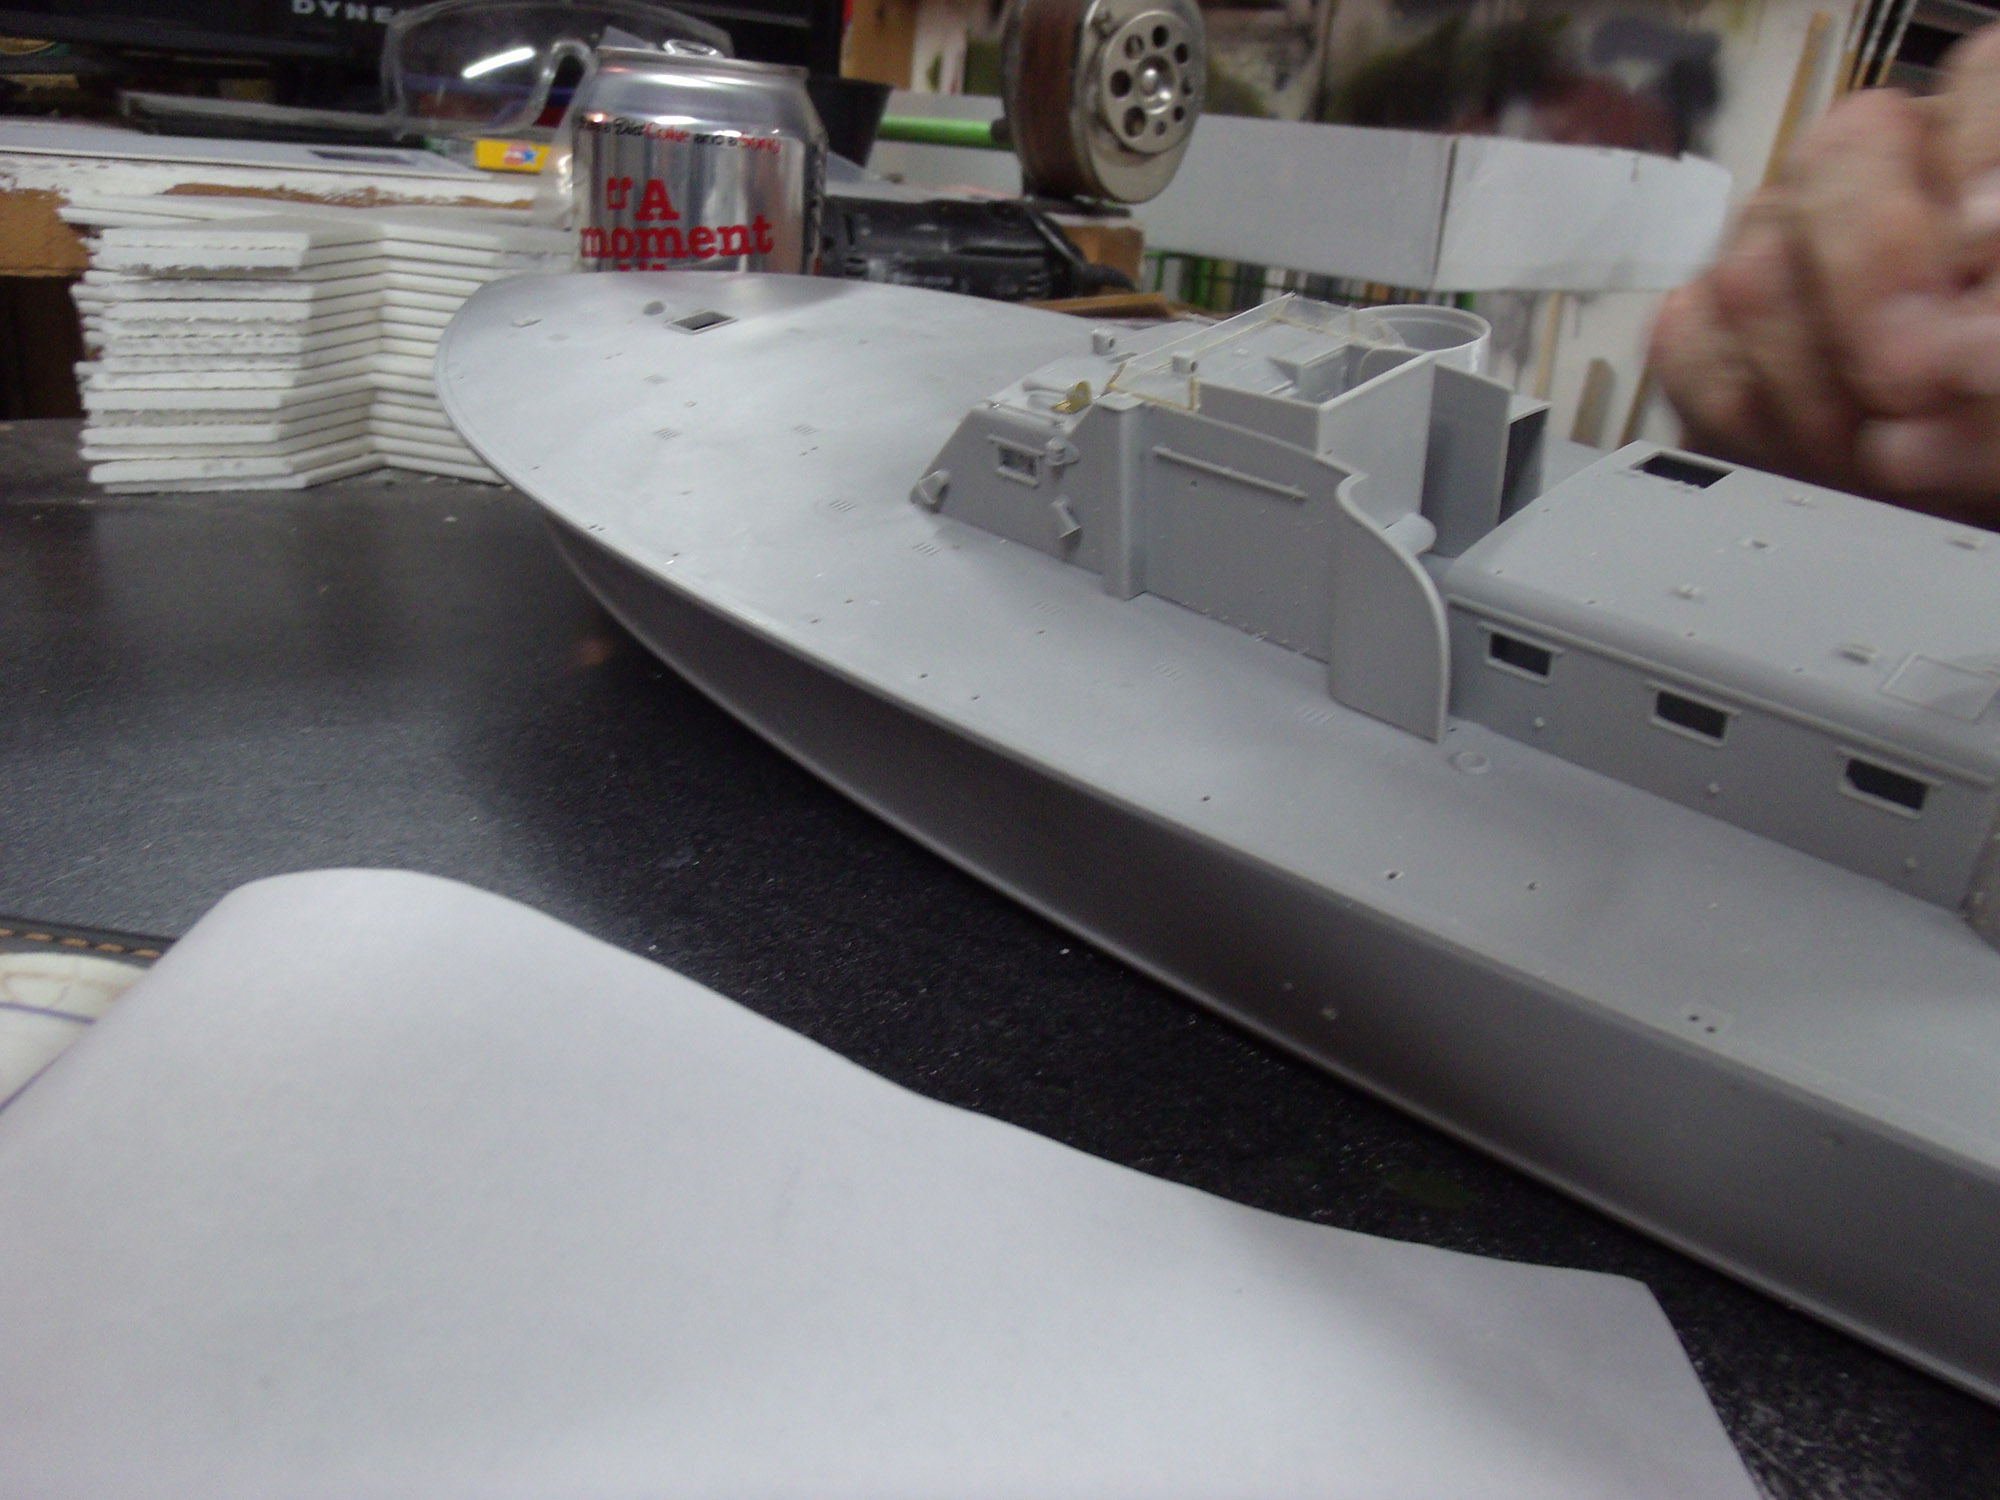
Today - Stan did work on the charthouse/cockpit - he installed the windshield and the hand rails and the two running lights and the compass which was located on the roof of the charthouse. The hand rails, lights and compass were all very small pieces. It became clear to me that one would need to take great care with these pieces due to their small size. If not - the carpet monster would be well fed! One thing that I noticed while watching Stan using the instructions relating to the cockpit/charthouse structure, ... they call for parts from different trees ... wouldn't it be easier, more logical and efficient to have all those pieces on one tree and not on different ones?
Here are the photos from today:
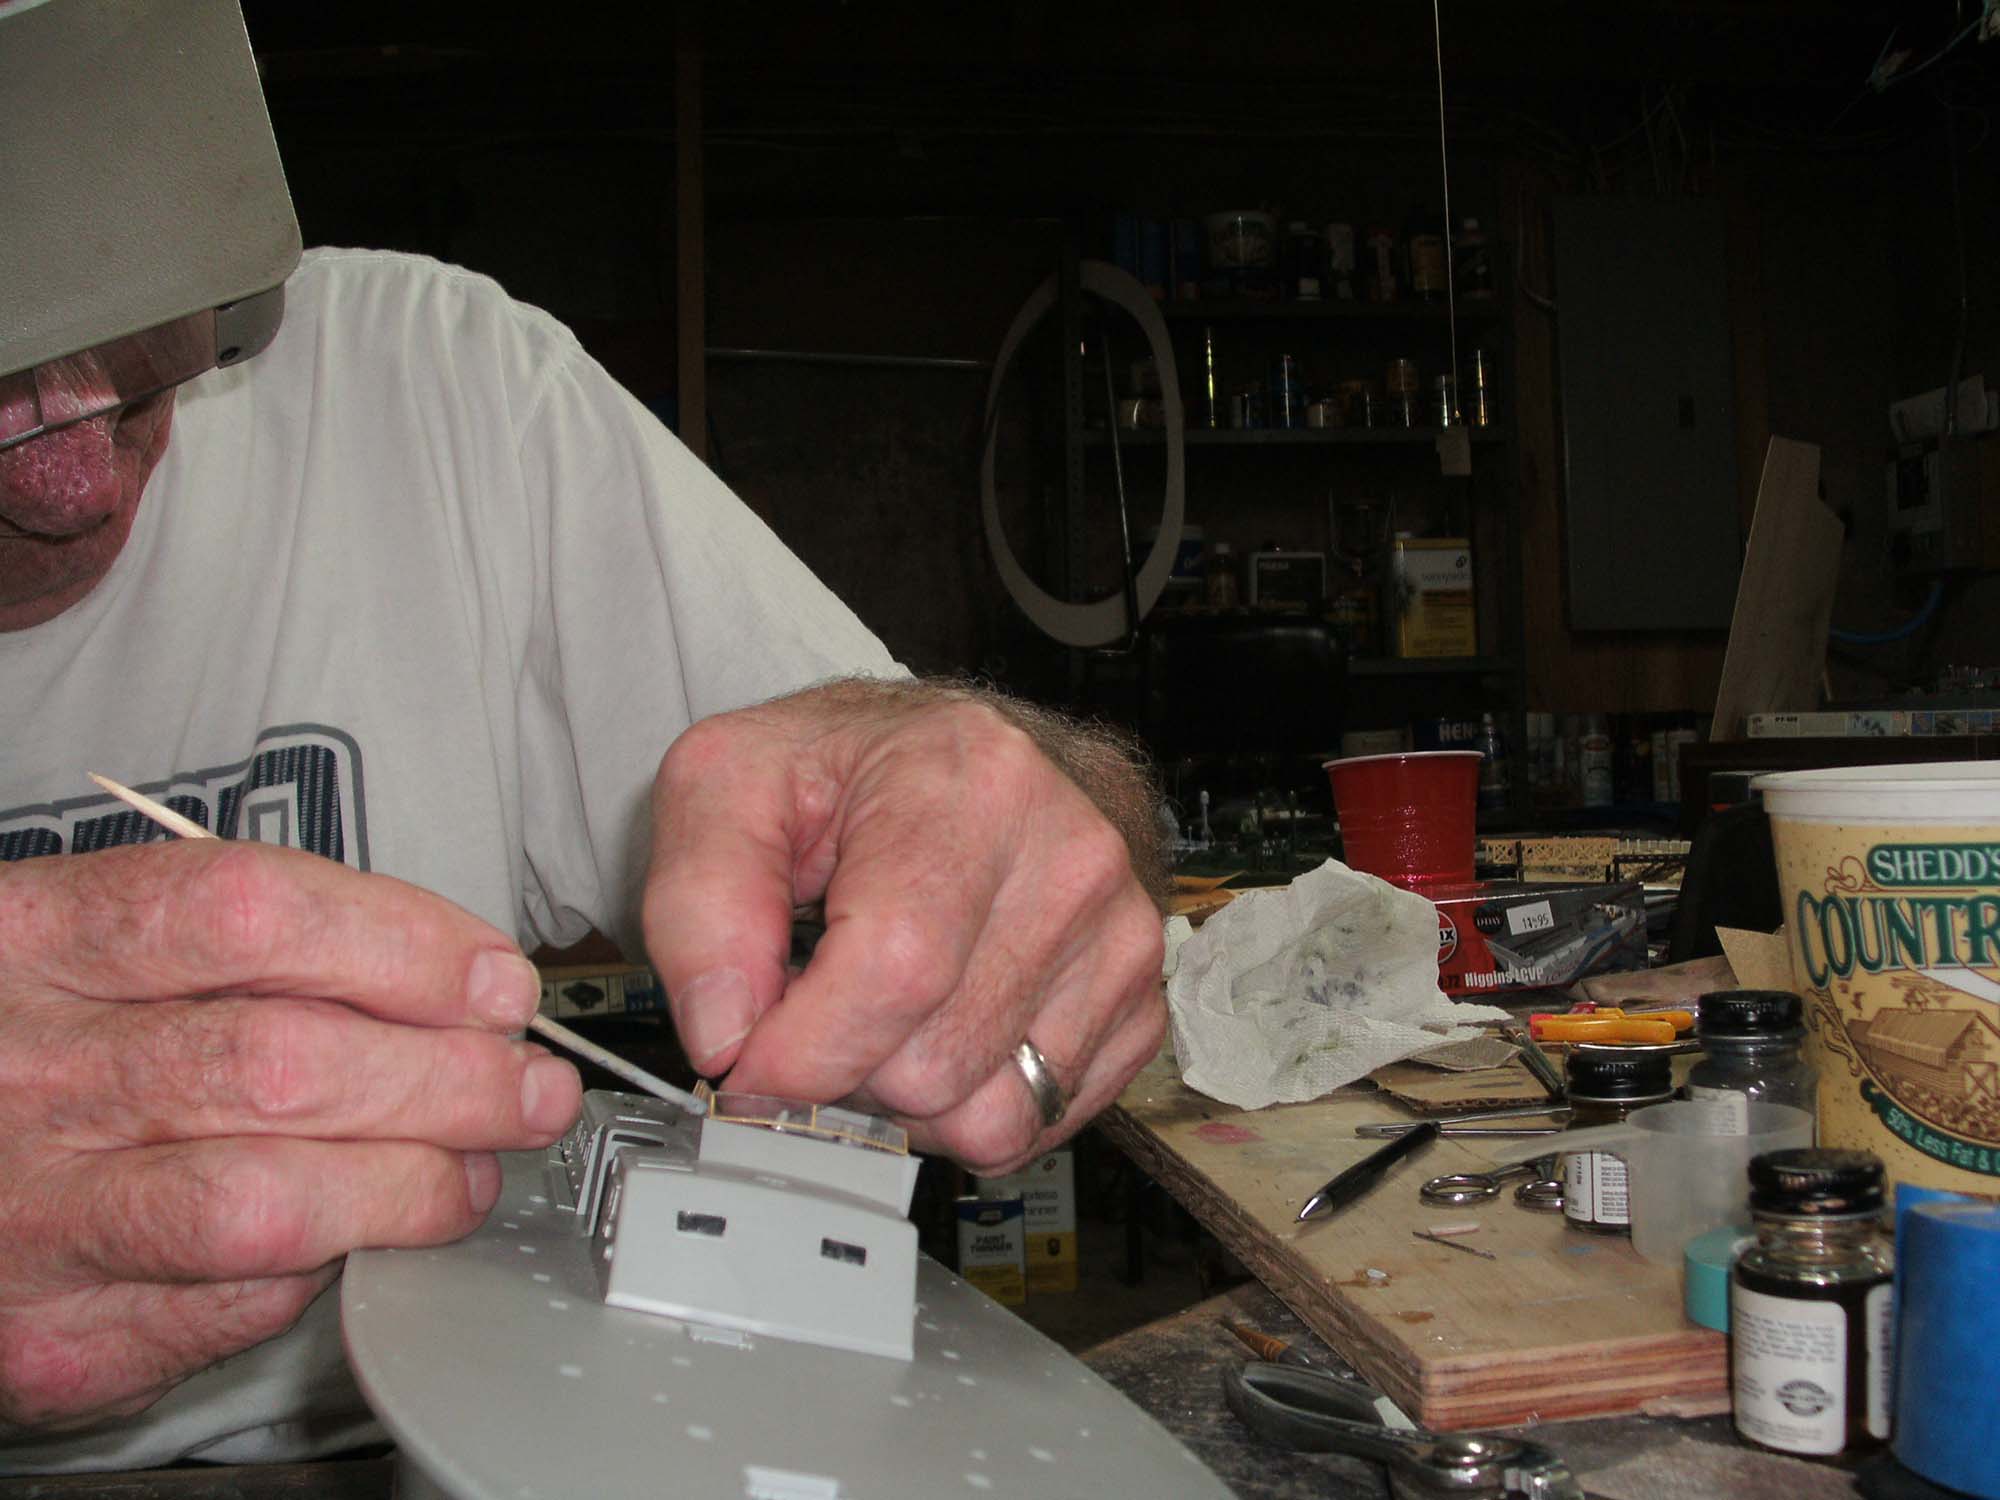
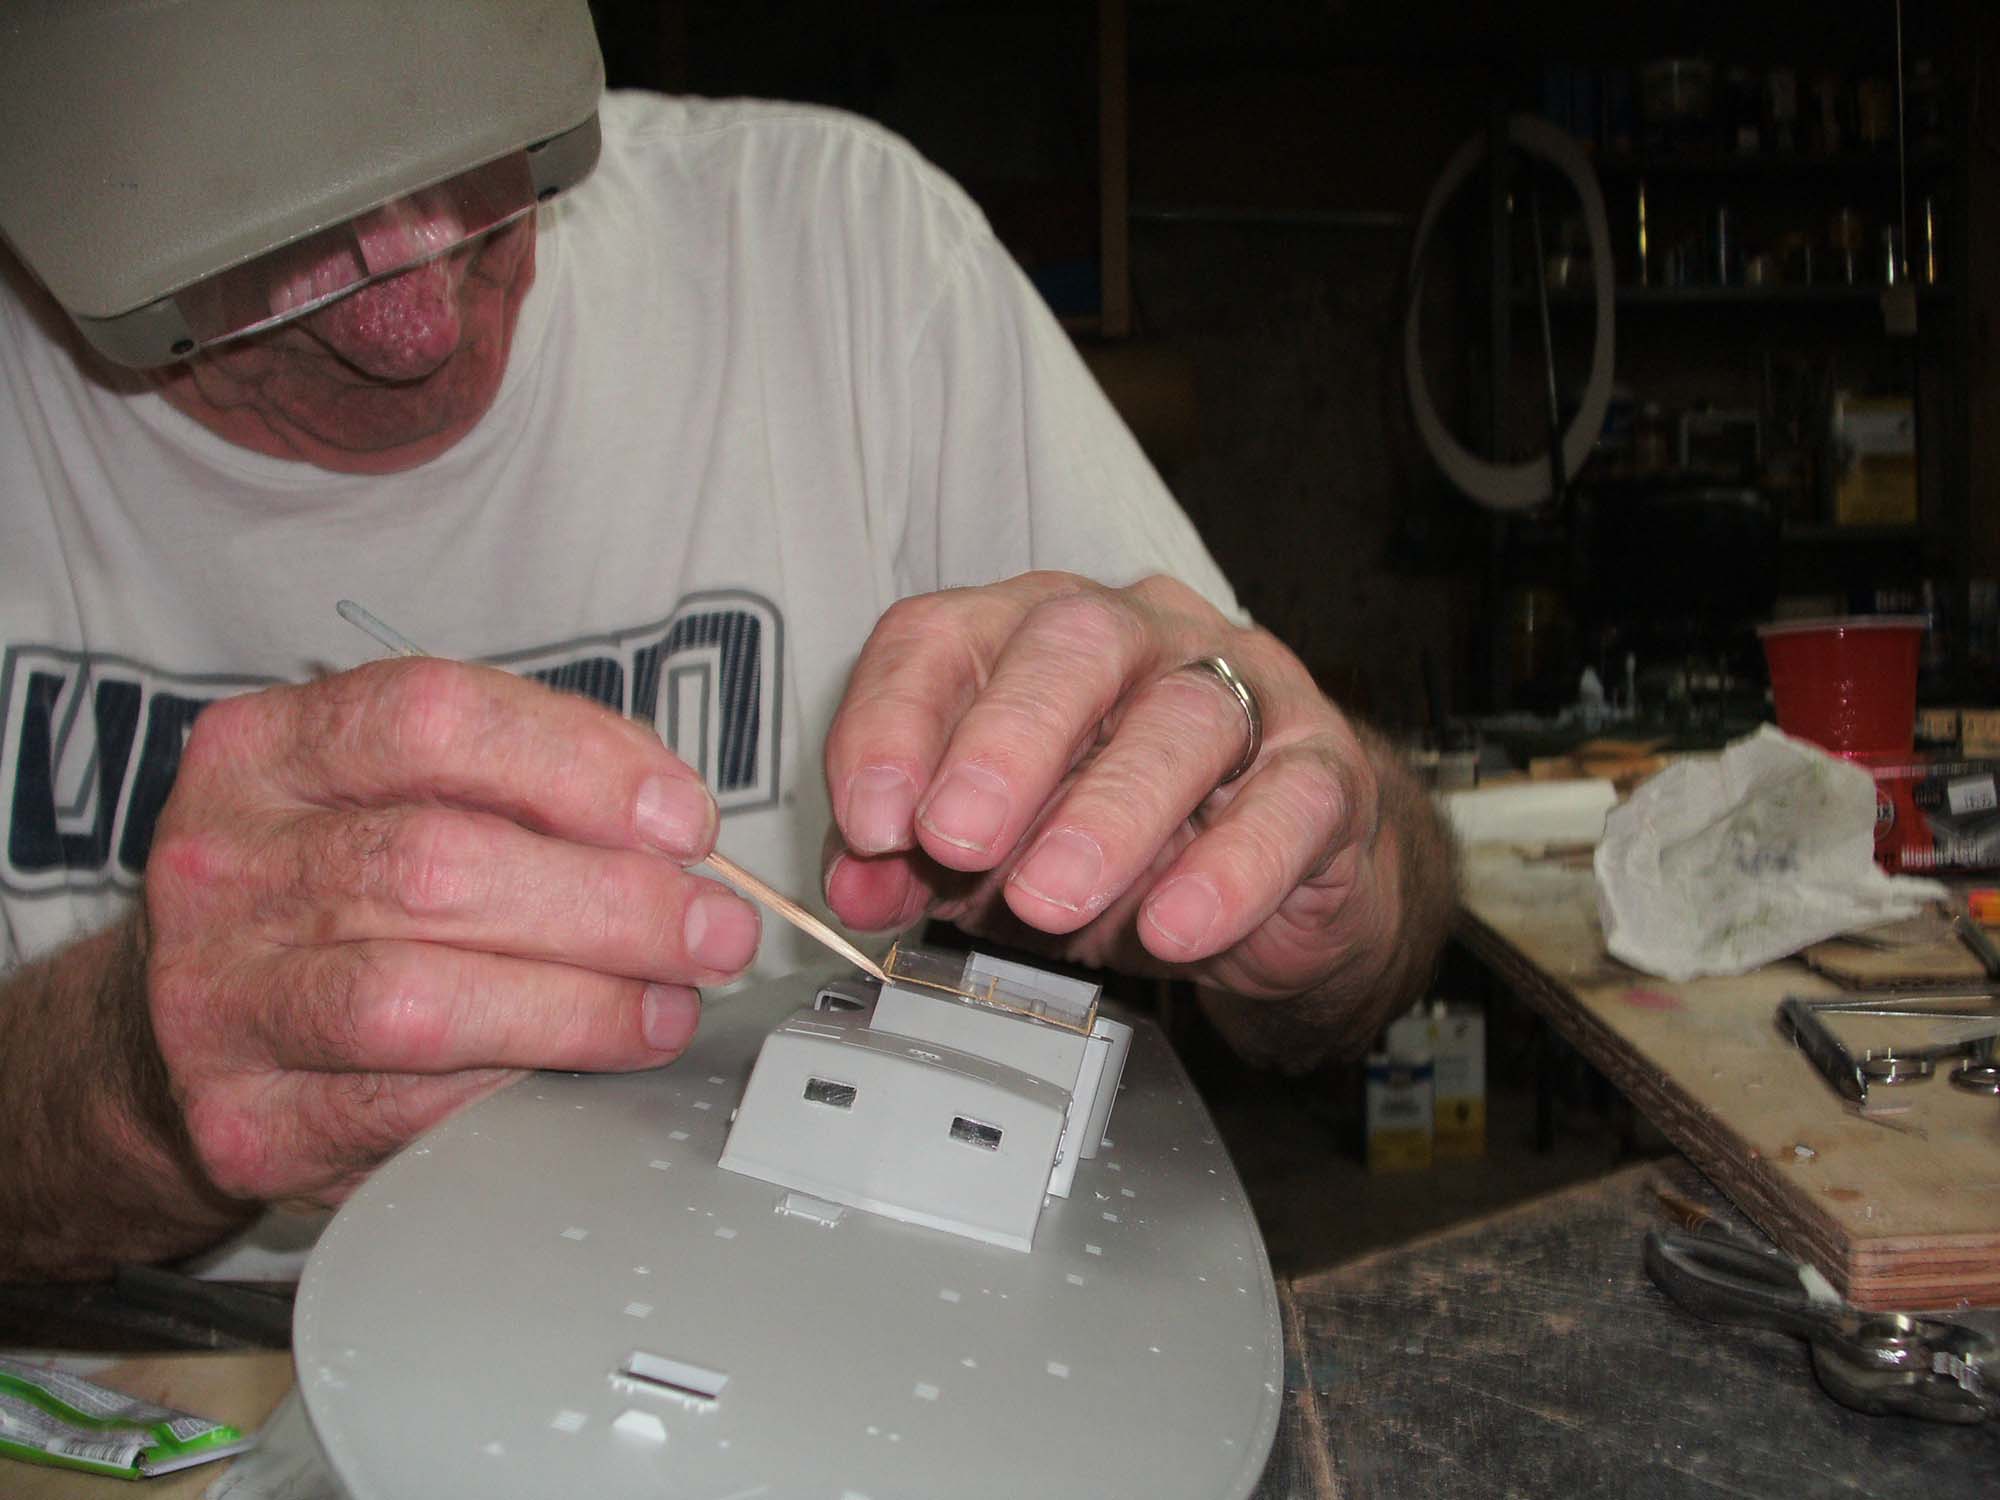

Tim
Here are the photos from today:
Tim
TRM5150
Joined: January 03, 2010
KitMaker: 2,159 posts
Model Shipwrights: 1,400 posts
Posted: Saturday, June 04, 2016 - 05:58 AM UTC
Stan is making some decent progress there on this one Tim! Ahh, the age-ole fight between man, photo etch and the dreaded abyssal plain!!  Keep up the good fellas!
Keep up the good fellas! Biggles2
Joined: January 01, 2004
KitMaker: 7,600 posts
Model Shipwrights: 833 posts
Posted: Tuesday, June 07, 2016 - 09:19 PM UTC
Hi. Would this be any help? http://www.shapeways.com/product/XCSDMN58Y/browning-m4-pt-1-48?optionId=59857904
TGarthConnelly
Joined: August 03, 2008
KitMaker: 875 posts
Model Shipwrights: 872 posts
Posted: Saturday, June 11, 2016 - 08:13 PM UTC
Biggles,
I have one one of those. In fact, I am the one who asked Hawkins to do it.
Tim
I have one one of those. In fact, I am the one who asked Hawkins to do it.
Tim
Quoted Text
Hi. Would this be any help? http://www.shapeways.com/product/XCSDMN58Y/browning-m4-pt-1-48?optionId=59857904
TGarthConnelly
Joined: August 03, 2008
KitMaker: 875 posts
Model Shipwrights: 872 posts
Posted: Thursday, June 16, 2016 - 02:25 AM UTC
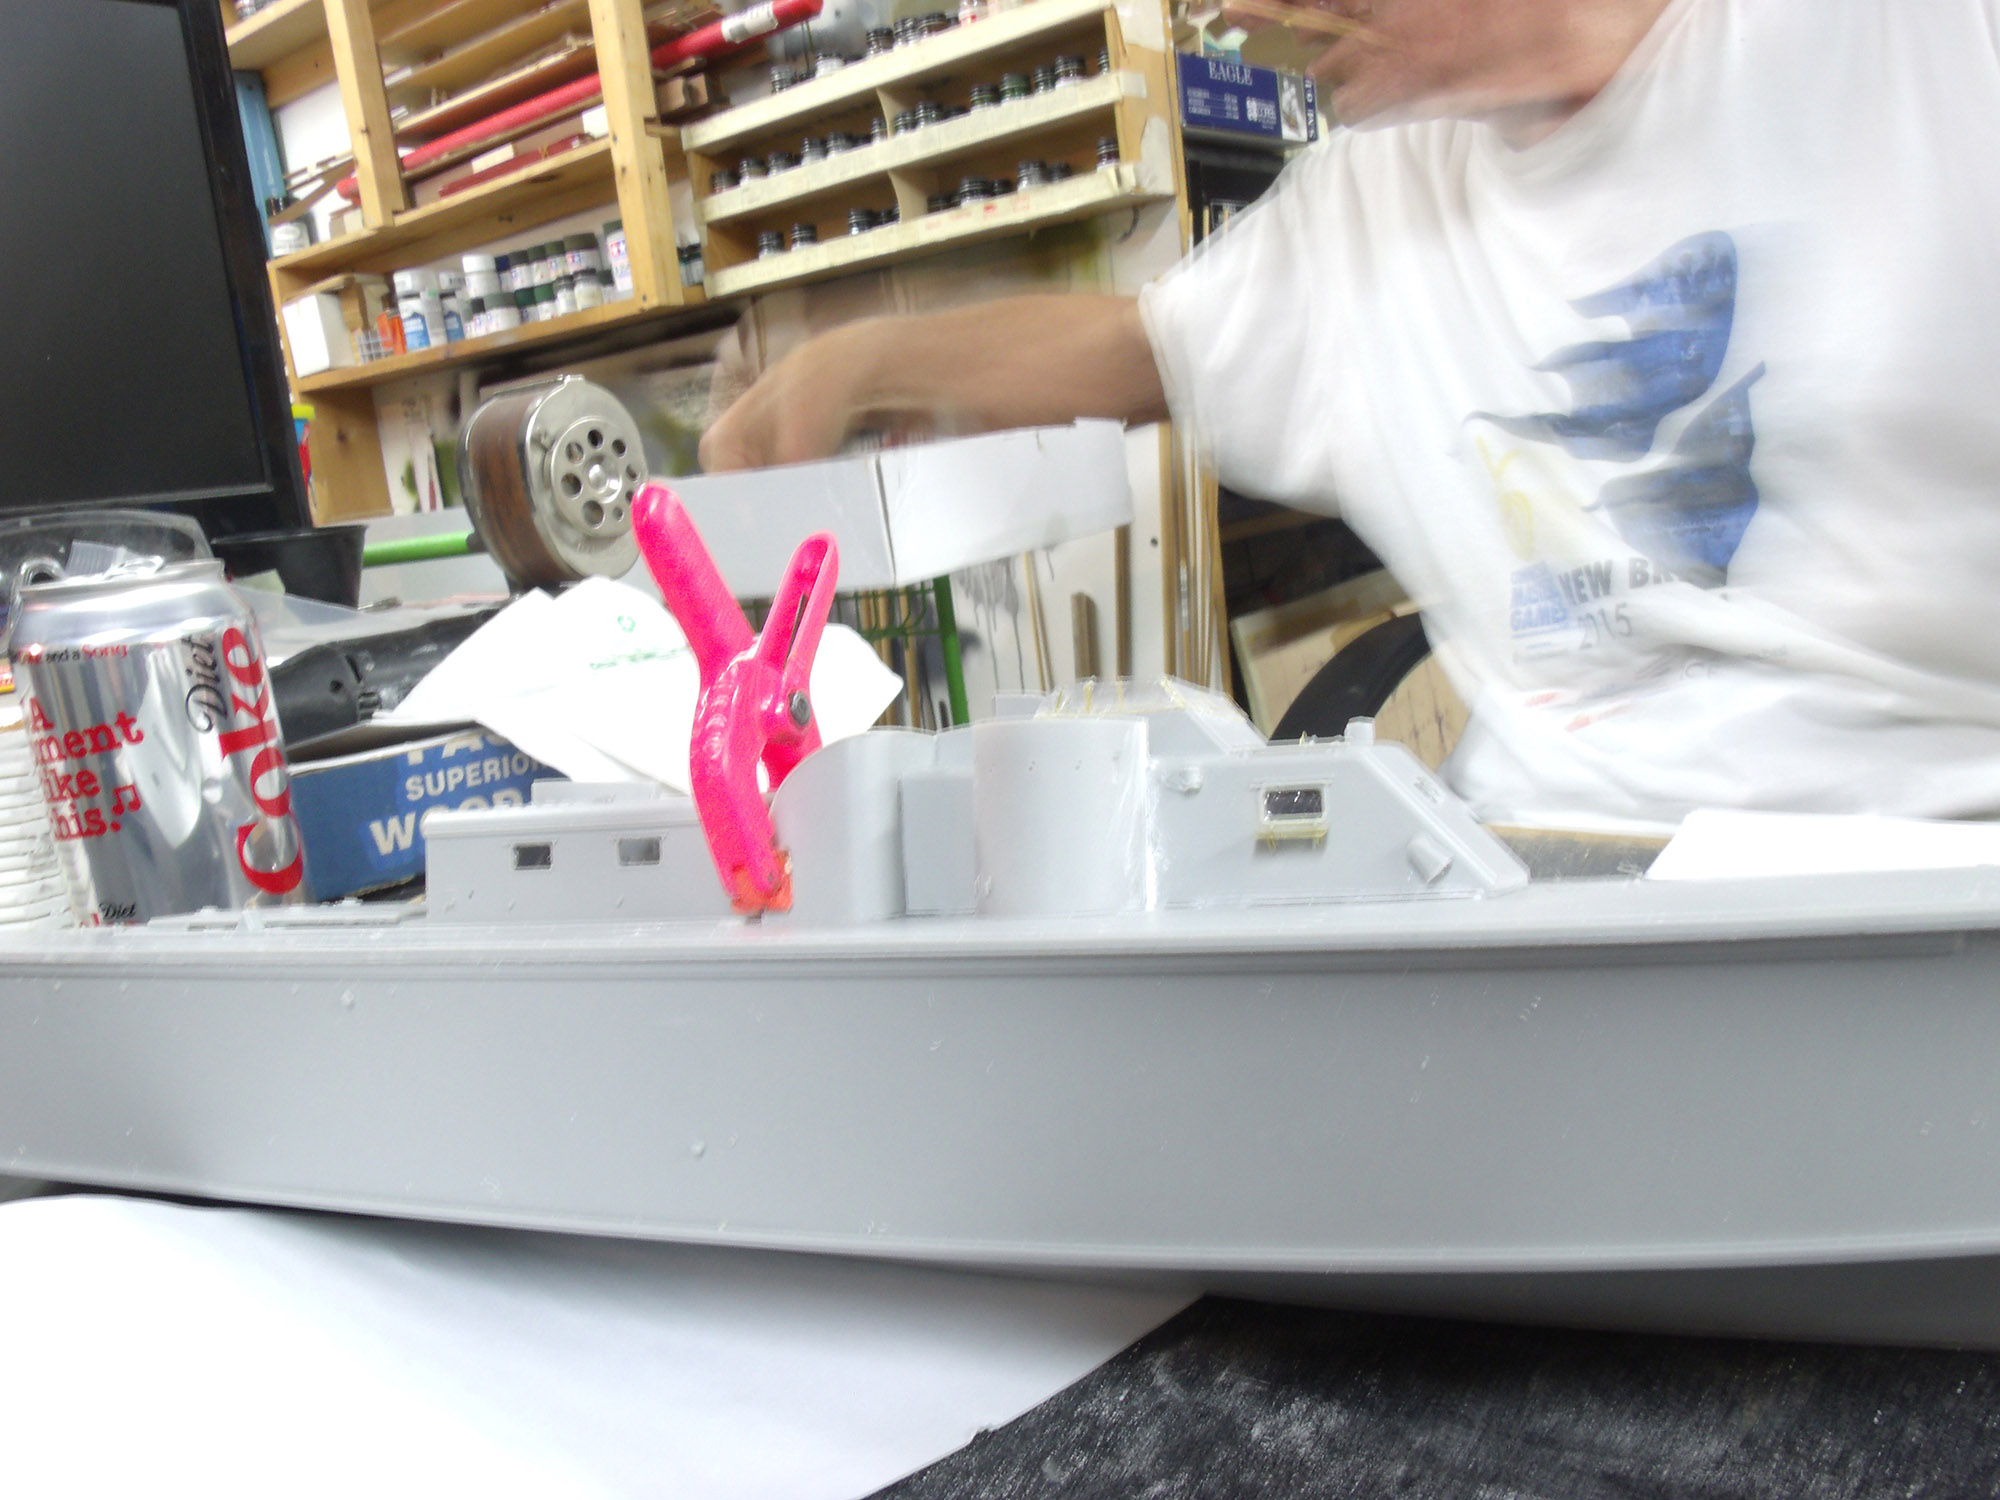
Week four started with Stan making the two tubs for the two turrets. These pieces required just needed a minimum of filler in their seams, but I think that was Stans wanting the model to be perfect than there being an actual need for filler. That said, where the forward turret butts up against the charthouse/cockpit structure does need some filler because of gapping. The 191 had its life-ring, which Merit positions on the port-side bulkhead of the cockpit, on the back of the Day Room structure. Stan repositioned it on the model as well.
He also put on the step and its bracing, which went under the starboard side bulkhead of the charthouse, which is made out of Photo-Etched brass, which amazed me. Stan finished this weeks session by putting the horn, and its Photo-Etched brass holder, the handrails which are located on the roof of the Day Room as well as the handrail which is located on the port-side bulkhead of the cockpit and one of the spray-shields which are attached to the Day Room structure.
Here are four photos from today:
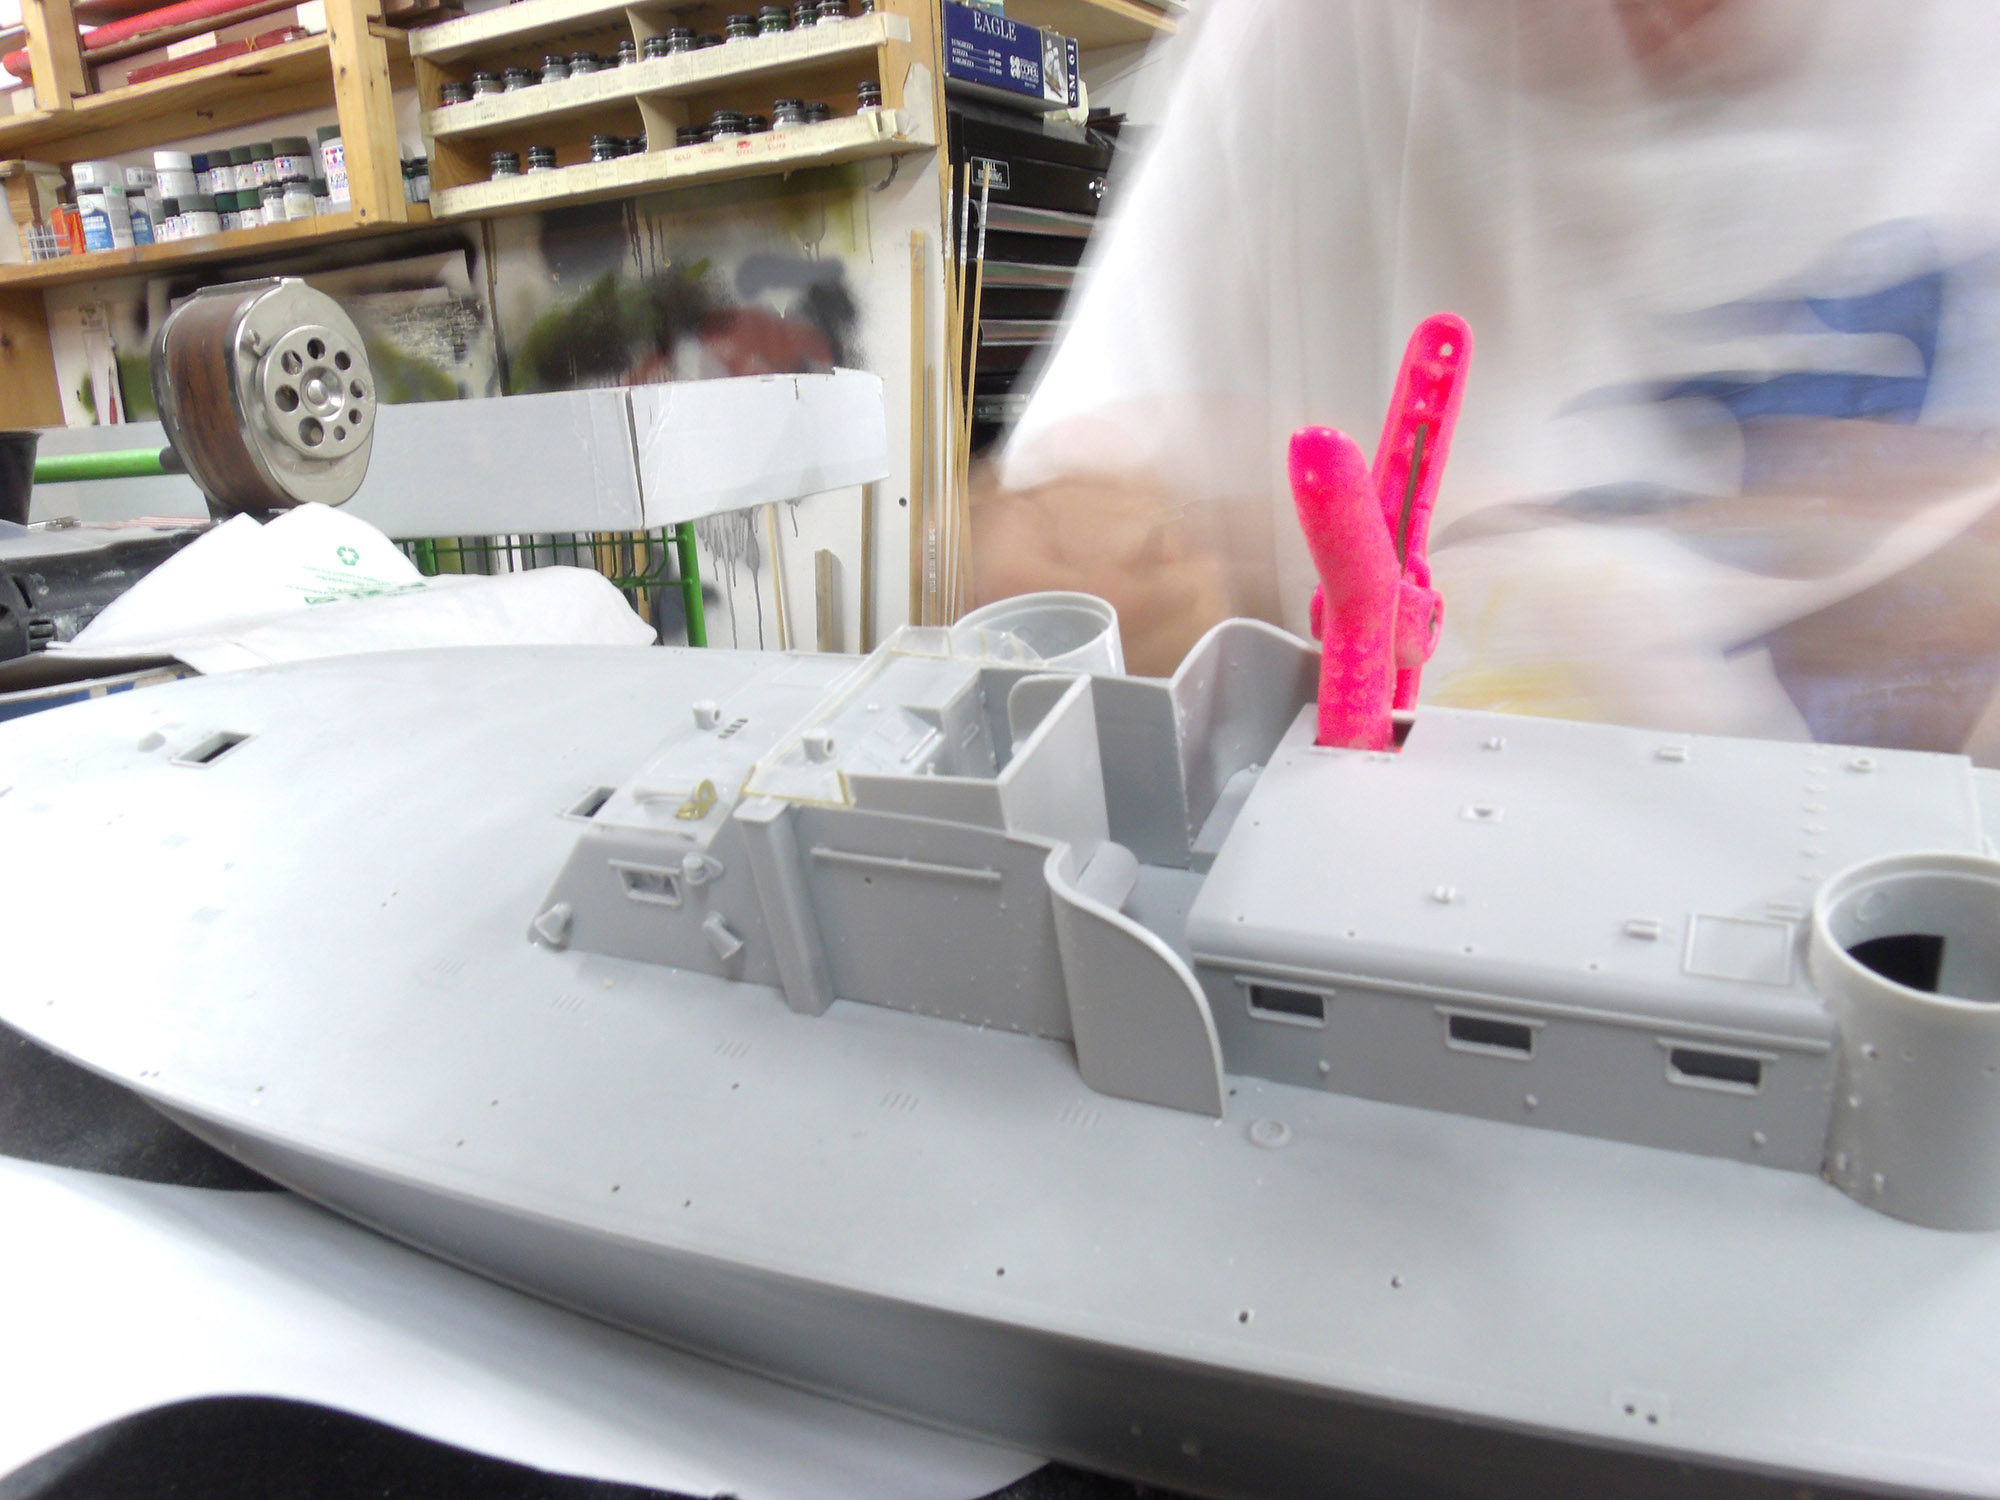
Tim
He also put on the step and its bracing, which went under the starboard side bulkhead of the charthouse, which is made out of Photo-Etched brass, which amazed me. Stan finished this weeks session by putting the horn, and its Photo-Etched brass holder, the handrails which are located on the roof of the Day Room as well as the handrail which is located on the port-side bulkhead of the cockpit and one of the spray-shields which are attached to the Day Room structure.
Here are four photos from today:
Tim
TGarthConnelly
Joined: August 03, 2008
KitMaker: 875 posts
Model Shipwrights: 872 posts
Posted: Friday, June 17, 2016 - 01:44 AM UTC
There is something which I would like to add here regarding the forward twin .50-caliber machine gun turret. In the couple of photos that I had seen of the 191, I noticed that the starboard forward turret did not have the depression-rails which one normally sees on that turret. I asked her former skipper about it. He told me, in a letter, that it was done to allow that gunner to be allowed to fire at targets on the boats port-side, directly over the heads over the guys heads in the cockpit. Mr. Clarke commented that he trusted the gunner and was never worried about being hit.
TGarthConnelly
Joined: August 03, 2008
KitMaker: 875 posts
Model Shipwrights: 872 posts
Posted: Thursday, June 23, 2016 - 01:01 AM UTC
Went over to Stan's. No pics though, the camera's batteries were/are dead ...
He put a vent on the day room roof, the cranks for the tubes (un-needed - but looks better with them, put on the boat hook, the two mooring cleats on the aft deck, the two ready-service lockers aft of the day room, the heater box (un-needed, but looks better with it) and put on the late-war engine-room hatch. Good headway. I'll be away from 6/28 to 7/8, so - nothing will be done until mid-July, ...
He put a vent on the day room roof, the cranks for the tubes (un-needed - but looks better with them, put on the boat hook, the two mooring cleats on the aft deck, the two ready-service lockers aft of the day room, the heater box (un-needed, but looks better with it) and put on the late-war engine-room hatch. Good headway. I'll be away from 6/28 to 7/8, so - nothing will be done until mid-July, ...
TRM5150
Joined: January 03, 2010
KitMaker: 2,159 posts
Model Shipwrights: 1,400 posts
Posted: Thursday, June 23, 2016 - 03:58 AM UTC
Any progress is good progress Tim! Looking good judging from the last set of pics! Looking forward to seeing the next round when you get back...enjoy the time off!
TGarthConnelly
Joined: August 03, 2008
KitMaker: 875 posts
Model Shipwrights: 872 posts
Posted: Thursday, July 14, 2016 - 04:27 AM UTC
We are in Week 5 of the build.
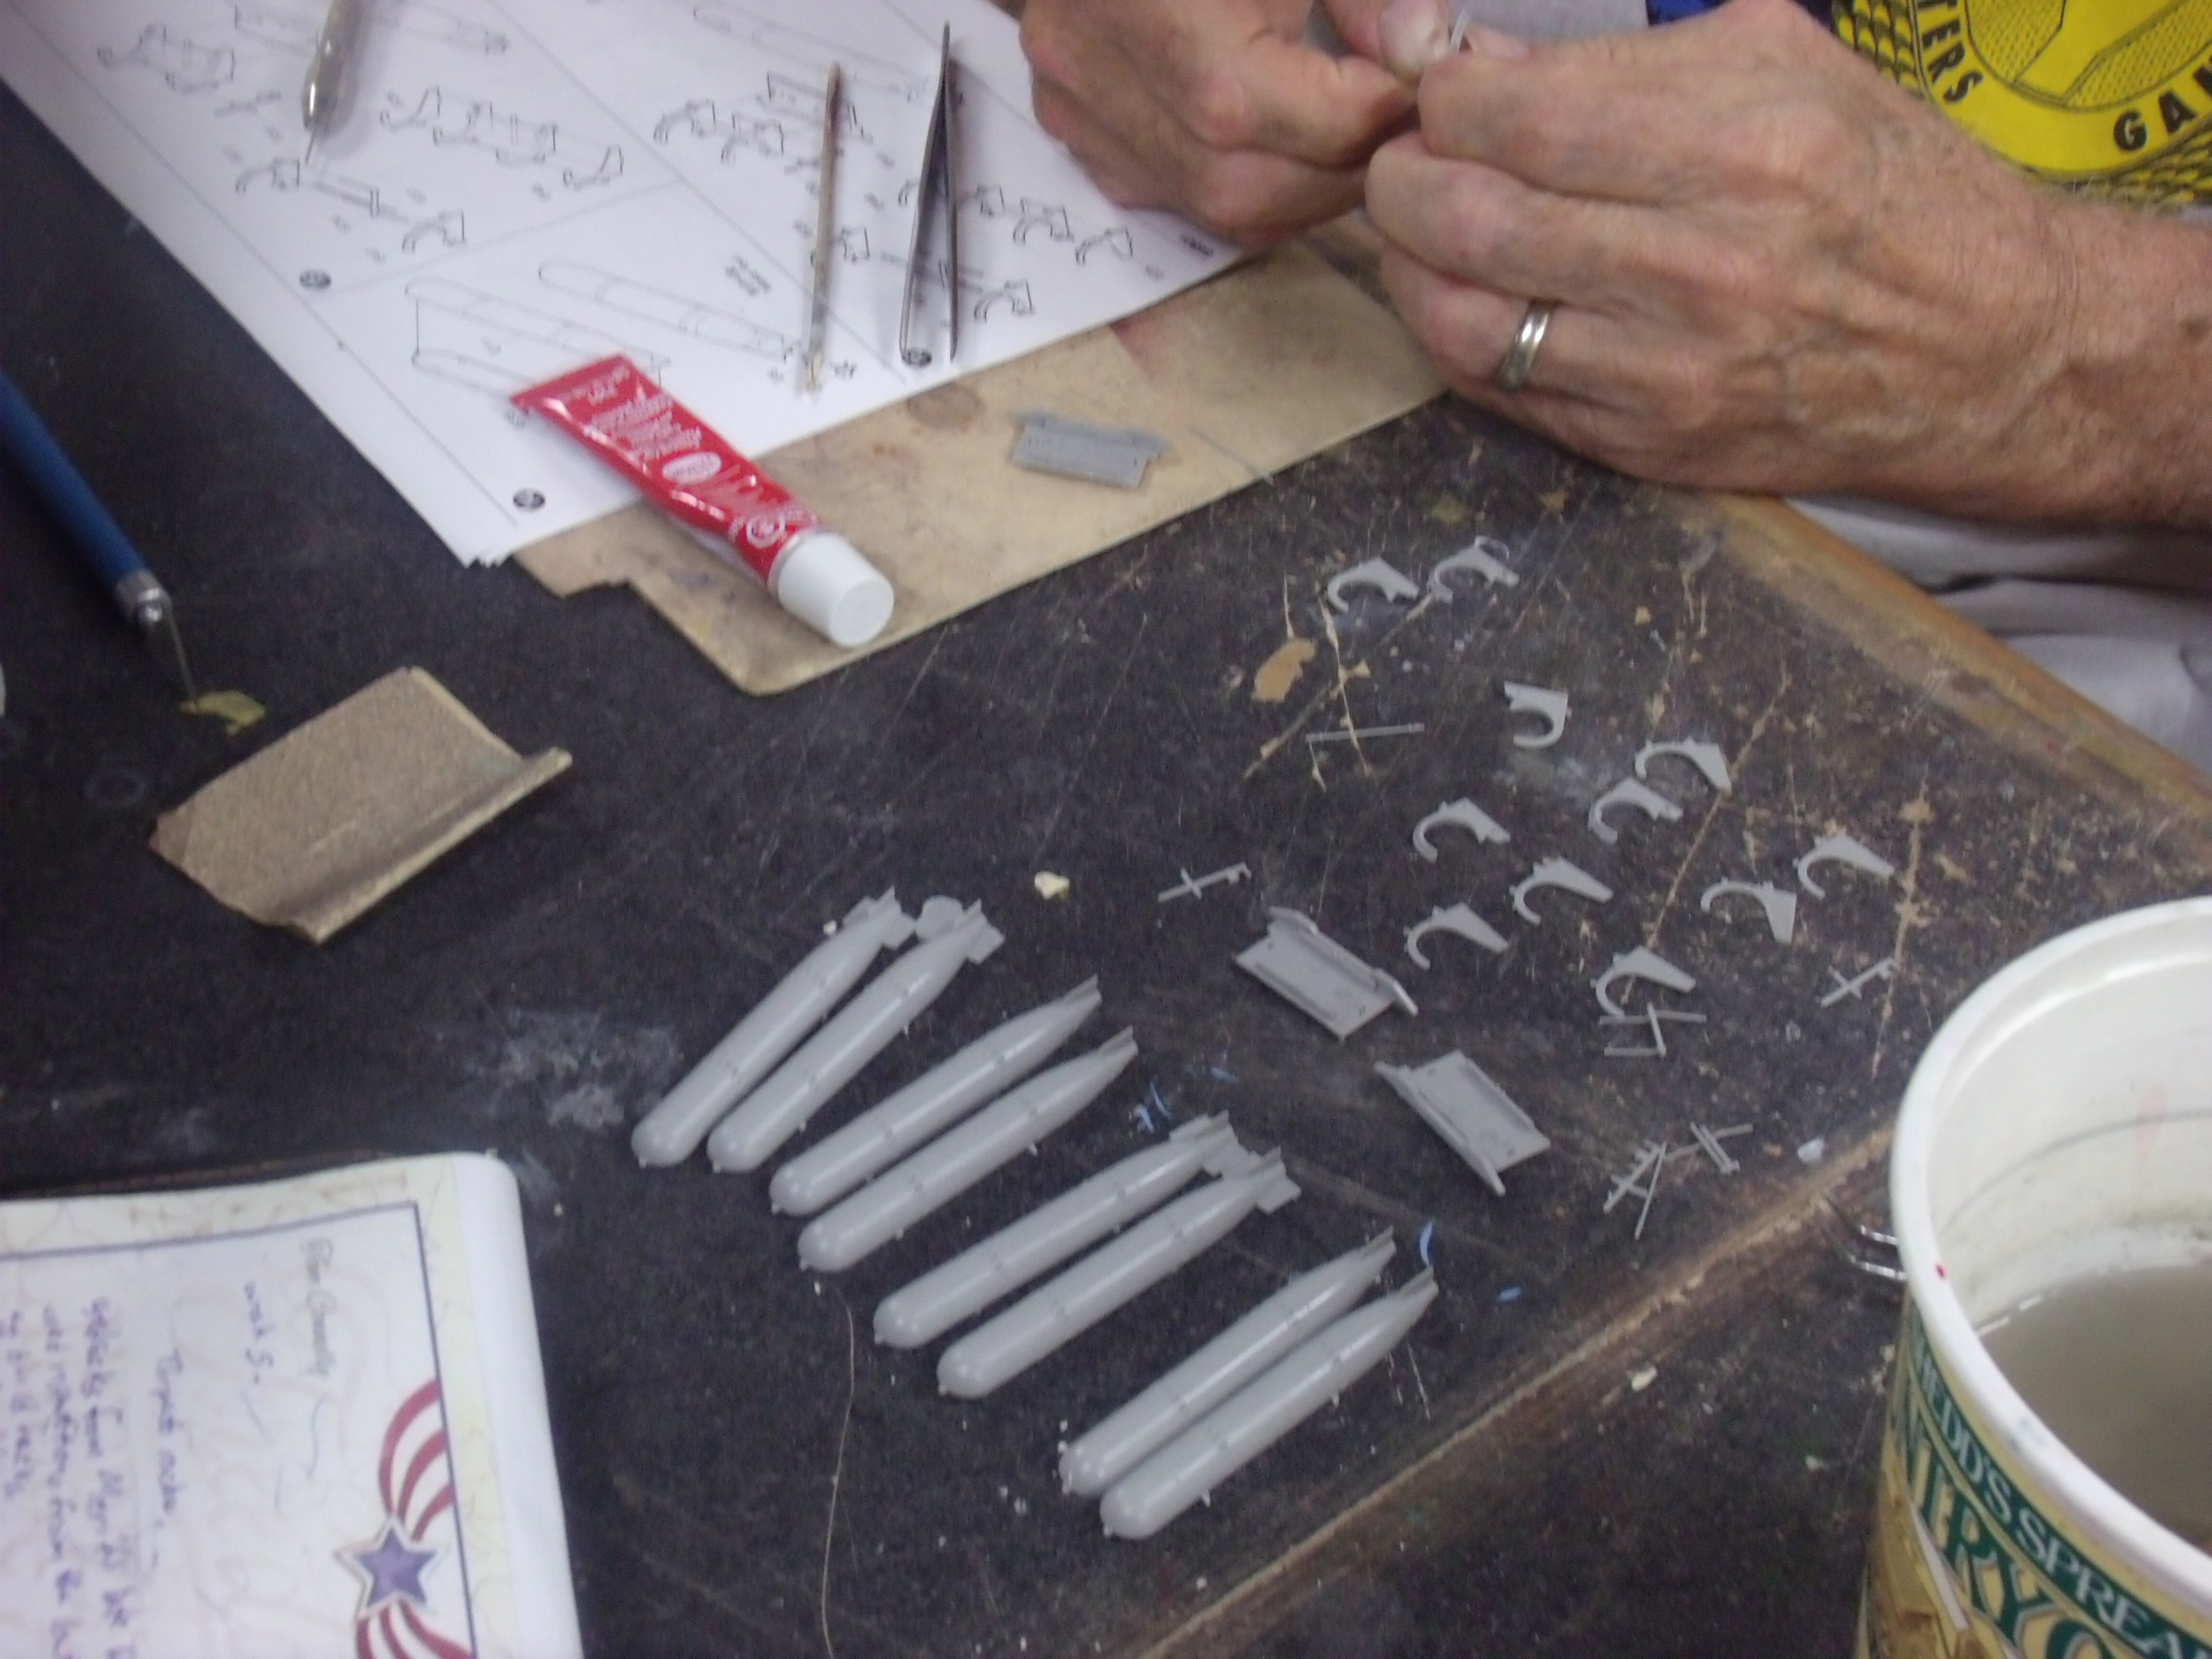
We (Stan) worked on the roll-off racks for the Mark XIII torpedoes. Merit sent me what I would need for them from their Late-war Elco kit.
I've got to say that, even though these racks are kits/mini-kits in themselves, from what I watched Stan do while making them, but it seemed that they were a little overly complicated (too many pieces)... I think the side "legs" of them could have been molded in one piece and not the multi-parts which Merit had/has.
Here are a copy of photos:
 |

WEB HOSTING BY


Copyright ©2021 Model Shipwrights and Kitmaker Network, a subsidiary of Silver Star Enterprises
All Rights Reserved. Please read our Conditions of Use and Privacy Policy.
All Rights Reserved. Please read our Conditions of Use and Privacy Policy.