Ships by Class/Type: Battleships
Topics from the Dreadnaught era to modern day.
Hosted by Steve Joyce
HMS Hood 1941 - Trumpeter 1/350 + Lion Roar
Cosimodo
#335
Visit this Community
Auckland, New Zealand
Joined: September 03, 2013
KitMaker: 1,808 posts
Model Shipwrights: 871 posts
Posted: Sunday, May 07, 2017 - 01:51 PM UTC
Hi Jan,
It's been a while since I caught up with your progress. Firstly, very nice work on the flag lockers, a really neat solution. The gaps, as Russ said, a Trumpeter necessity to make you feel like you're truly modelling though I am sure at times we would all rather do with out the filling and sanding.
The deck looks great and I think it always a milestone when it starts to go on.

cheers
Michael
RussellE
#306
Visit this Community
Victoria, Australia
Joined: June 27, 2010
KitMaker: 3,959 posts
Model Shipwrights: 2,777 posts
Posted: Sunday, May 07, 2017 - 03:23 PM UTC
Superb work Jan, on what is a beast of a kit! (& not the good, X-men kind of Beast, either )

Michael's hit the nail on the head: you've reached a major milestone in laying down the wood deck

After this kit, you'll need a nice Tamiya, or new tool Airfix wing thing to recover

Russ
RedDuster
Visit this Community
England - South East, United Kingdom
Joined: March 01, 2010
KitMaker: 7,078 posts
Model Shipwrights: 6,649 posts
Posted: Monday, May 08, 2017 - 09:08 PM UTC
Great work Jan,

She is looking good with the deck down.

Cheers

Si
JJ1973
#345
Visit this Community
Niedersachsen, Germany
Joined: August 22, 2011
KitMaker: 1,835 posts
Model Shipwrights: 1,832 posts
Posted: Tuesday, May 09, 2017 - 09:22 AM UTC
Thank you very much, Micheal, Russ and Si!!

Yes indeed I am very happy with the work on the wooden decl started, that somehow marks the point of no return to all the work on the hull and brass additions. So the touch up and repair is declared finished for good or for bad...and she's really looking so much nicer sitting on the shipyard with the forecastle wood deck down now! I hope I'll get some good progress over the coming weekend!

Thanks for looking and commenting!!

Cheers


Jan
JJ1973
#345
Visit this Community
Niedersachsen, Germany
Joined: August 22, 2011
KitMaker: 1,835 posts
Model Shipwrights: 1,832 posts
Posted: Monday, May 15, 2017 - 09:38 AM UTC
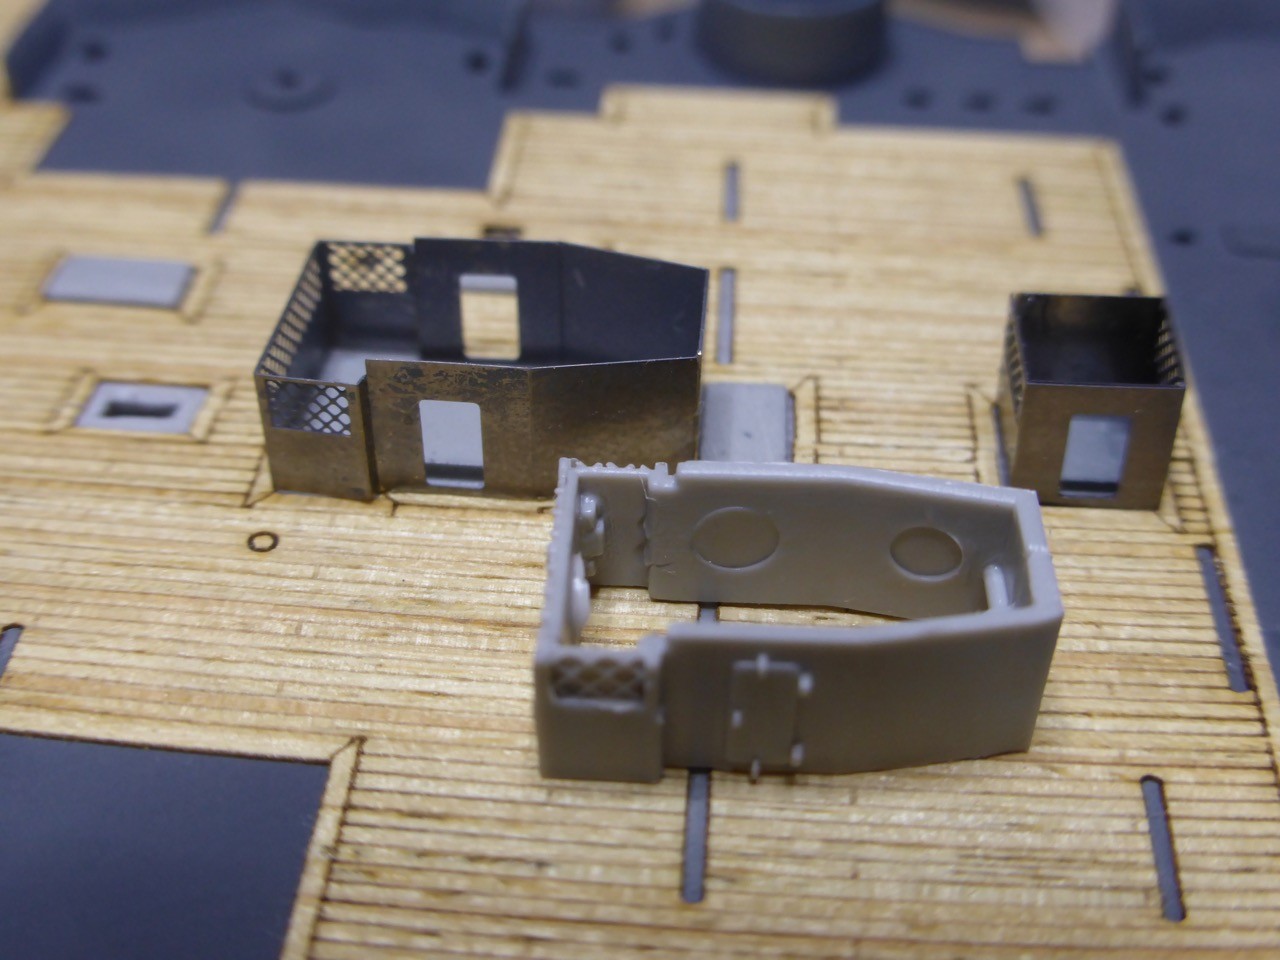
And here's some more progress - I had to start with some of the shelter deck structures to make sure that the wooden deck would come down in the right place.

I built the Trumpi originals first, but most will be replaced by Eduard etch later on, started with them as well. The plastic parts are only to fit the wooden deck - well, the after structure will not be replaced, of course, but there are more corrections needed, and etch to be added. But that's for later.


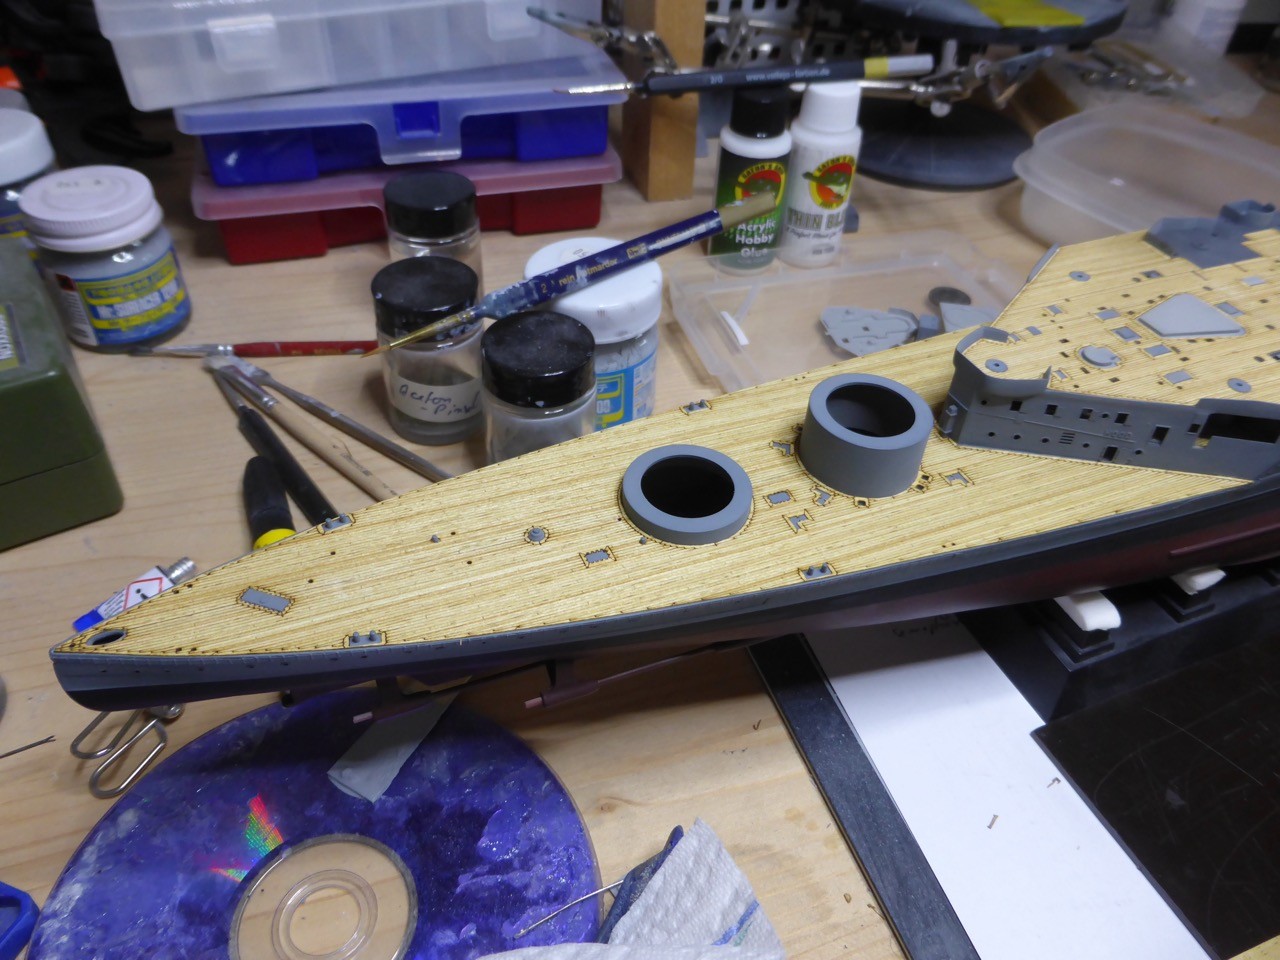
In order to properly place the deck, I decided to deliberately cut it in smaller sections, along some lines that I hope will be hidden afterwards. That allows me to control the process of laying down the deck, instead of being driven and end up with a slightly off-placed deck. That worked out pretty well and I think I will to it like this with future wooden decks the same way...


Shelter deck was laid down in four parts. Here's the result and some close ups of the cutting lines, I think that's ok.


After deck same procedure...


Cut in halves. There was a significant gap between the barbets that needed filling, but I think proved me right - the fit around the barbets is pretty tight and on the forecastle I had to do some major re-working and cutting. Filling the gap as here was way easier and I think it looks all right.


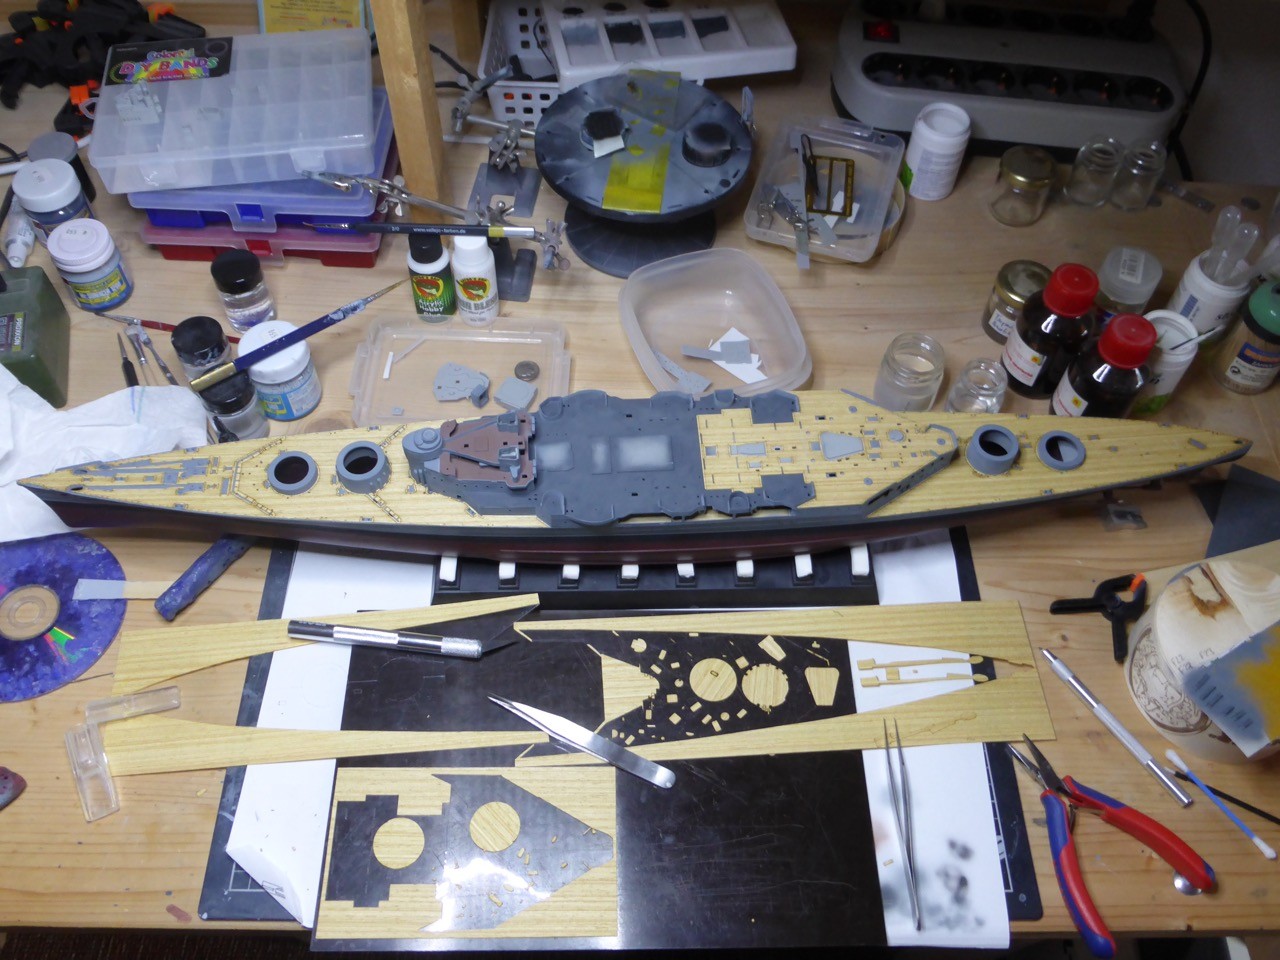
Full view and my 'battlefield' around...


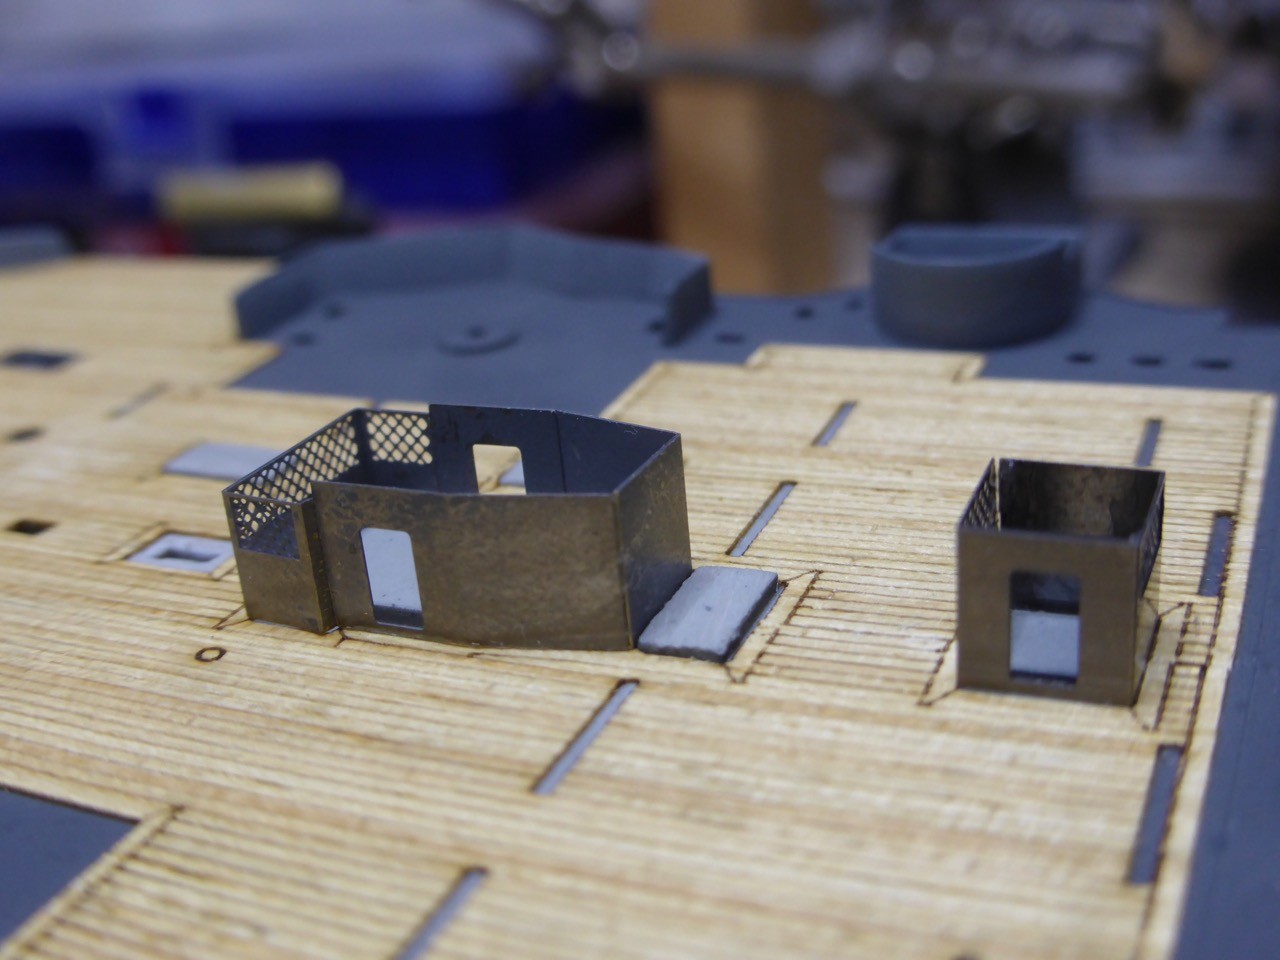
The Eduard structures compared to the kit's ones, and first inclined ladders installed:


So much for now, I should have another update in a week from now.

As always, thanks for looking in and commenting!!

Cheers,
Jan
mgrummitt
Visit this Community
California, United States
Joined: January 07, 2014
KitMaker: 133 posts
Model Shipwrights: 105 posts
Posted: Monday, May 15, 2017 - 07:51 PM UTC
Great job Jan! Love to see it coming together!

Cheers!
rolltide31
#377
Visit this Community
Texas, United States
Joined: June 27, 2010
KitMaker: 1,481 posts
Model Shipwrights: 1,332 posts
Posted: Monday, May 15, 2017 - 11:36 PM UTC
Jan,

Amazing work. I like the method for the wooden deck, I may need to steal that idea when I begin to tackle the IJN Fuso again.

Those Eduard parts are a great improvement over the kit parts...amazing what a little PE will do to the beauty of the build.

Great work my friend.

Looking forward to seeing some more.

Dave
RedDuster
Visit this Community
England - South East, United Kingdom
Joined: March 01, 2010
KitMaker: 7,078 posts
Model Shipwrights: 6,649 posts
Posted: Tuesday, May 16, 2017 - 01:08 AM UTC
Great stuff Jan,

Like the idea of cutting the deck into sections, worked very well. I have found it can be fun fitting sections over moulded on barbettes and the suchlike.

The etched vent boxes look very neat indeed.

Keep up the good work mate.

Cheers

Si
RussellE
#306
Visit this Community
Victoria, Australia
Joined: June 27, 2010
KitMaker: 3,959 posts
Model Shipwrights: 2,777 posts
Posted: Tuesday, May 16, 2017 - 08:39 AM UTC
Coming along very nicely Jan!

A neat solution with the timber decking, cutting it into smaller more manageable sections. I too struggle with wood decks around the barbettes.

Another major milestone reached-well done mate
JJ1973
#345
Visit this Community
Niedersachsen, Germany
Joined: August 22, 2011
KitMaker: 1,835 posts
Model Shipwrights: 1,832 posts
Posted: Tuesday, May 16, 2017 - 09:14 AM UTC
Mike, Dave, Si and Russ - thank you so much for your kind comments and continued support!! That really helps keeping up the motivation on this marathon build.

But it's really good to have some really visible progress. I am pretty happy with the wooden deck! And I should get some more done over the coming weekend!

Thanks again and cheers,
Jan
StephenLarsen
#474
Visit this Community
North Carolina, United States
Joined: June 13, 2015
KitMaker: 67 posts
Model Shipwrights: 41 posts
Posted: Wednesday, May 17, 2017 - 05:07 PM UTC
Really good work! I am enjoying your posts very much.
TimReynaga
Staff MemberAssociate Editor
MODEL SHIPWRIGHTS
Visit this Community
California, United States
Joined: May 03, 2006
KitMaker: 2,500 posts
Model Shipwrights: 1,830 posts
Posted: Wednesday, May 17, 2017 - 05:28 PM UTC
Great work on that deck, Jan - it takes guts to cut up those beautiful, expensive wood deck parts! Your approach of cutting the deck into more manageable sections for installation makes a lot of sense. And the results are stunning! I too am enjoying your posts and pictures very much.
JJ1973
#345
Visit this Community
Niedersachsen, Germany
Joined: August 22, 2011
KitMaker: 1,835 posts
Model Shipwrights: 1,832 posts
Posted: Saturday, May 20, 2017 - 10:41 PM UTC
Hi Tim and Stephen,

thank you so much for your kind words!! That's most appreciated, I am really happy that you like the build!!

Cheers,
Jan
JJ1973
#345
Visit this Community
Niedersachsen, Germany
Joined: August 22, 2011
KitMaker: 1,835 posts
Model Shipwrights: 1,832 posts
Posted: Saturday, May 20, 2017 - 10:49 PM UTC
And some more progress - last week it was working the ship, no it's back to small stuff...

Structures for the shelter deck - probably some surfacer needed, I will give them a coat of paint and then I'll see...


North star winches - will need some alteration to the wooden deck once in place, they are different sizes than the original ones...


Work on the main breakwaters started. Whatever that stuff on the outside might be - Pontos has it in their 1/200 as well (downloaded their instructions, can be helpful for my build, too) - wow, that's some small and fiddly work with the Eduard PE set...


Doesn't look all that bad, I hope it still looks good under a coat of paint.

All in all, I am more and more using the Eduard vice the Lion Roar stuff...the Eduard is a pretty smart set!

That's it for now, and I have to take another break, so next update in early June...

Cheers and thanks for looking in!!

Jan
RedDuster
Visit this Community
England - South East, United Kingdom
Joined: March 01, 2010
KitMaker: 7,078 posts
Model Shipwrights: 6,649 posts
Posted: Sunday, May 21, 2017 - 01:30 AM UTC
Very nice work Jan,

Great etch work, the etched grills will really add depth.

Keep up the great work mate.

Cheers

Si
RussellE
#306
Visit this Community
Victoria, Australia
Joined: June 27, 2010
KitMaker: 3,959 posts
Model Shipwrights: 2,777 posts
Posted: Sunday, May 21, 2017 - 03:11 AM UTC
Great work Jan!

looks like you'll be in for more filling/sanding on some of the structures for the shelter deck, but not too much!

Those winches look great!
JJ1973
#345
Visit this Community
Niedersachsen, Germany
Joined: August 22, 2011
KitMaker: 1,835 posts
Model Shipwrights: 1,832 posts
Posted: Monday, June 05, 2017 - 09:38 AM UTC
Thank you so much, Russ and Si!

Yes, some surfacer and sanding was required, but not too much.
Some more small stuff done, need to start installing it.

This stuff is 'eating up' time - I had a feeling that I did not all that bad over the weekend, but looking at the final output - well - hmmm...

Okay, here are just a bunch of pictures of my ongoing small stuff battle...


And the Shapeways Boats, some paint next, hopefully in a week or so...


Thanks for looking in, more in about a week!!

Cheers,
Jan
RussellE
#306
Visit this Community
Victoria, Australia
Joined: June 27, 2010
KitMaker: 3,959 posts
Model Shipwrights: 2,777 posts
Posted: Monday, June 05, 2017 - 02:52 PM UTC
Great progress here Jan!

A real production line you've got going on there!

the pumps look great!

I have to say, I'm very interested to see how the boats come up under some paint.
mgrummitt
Visit this Community
California, United States
Joined: January 07, 2014
KitMaker: 133 posts
Model Shipwrights: 105 posts
Posted: Monday, June 05, 2017 - 08:16 PM UTC
The Hood is looking great Jan!

Can't wait to see more updates!

Cheers!
RedDuster
Visit this Community
England - South East, United Kingdom
Joined: March 01, 2010
KitMaker: 7,078 posts
Model Shipwrights: 6,649 posts
Posted: Monday, June 05, 2017 - 11:21 PM UTC
Great stuff Jan,

All the small stuff is important, it what is what adds the depth.

Loving the shapeways boats, they will look superb with paint on.

Keep u[p the great work.

Cheers

Si
JJ1973
#345
Visit this Community
Niedersachsen, Germany
Joined: August 22, 2011
KitMaker: 1,835 posts
Model Shipwrights: 1,832 posts
Posted: Tuesday, June 06, 2017 - 09:30 AM UTC
Hi Si, Mike and Russ,

thank you very much for your kind comments and following patiently along my glacier speed build!!

With over a year into the build right now - well, I'll have to double-check, but I'm almost positive the real HMS Hood had progressed farther at that point...

Small stuff is really taking up time, and there's so much more to come. But essentially the small stuff makes the impression in the end.

Thanks again and cheers,
Jan
rolltide31
#377
Visit this Community
Texas, United States
Joined: June 27, 2010
KitMaker: 1,481 posts
Model Shipwrights: 1,332 posts
Posted: Tuesday, June 06, 2017 - 09:32 PM UTC
Jan,

Amazing progress. As Russell mentioned, the assembly line is looking quite efficient. Completely understand the issue (time consuming) with all the fiddly parts. But as you said, the small parts leave the big impressions.

Looking forward to seeing them come together.

Dave
JJ1973
#345
Visit this Community
Niedersachsen, Germany
Joined: August 22, 2011
KitMaker: 1,835 posts
Model Shipwrights: 1,832 posts
Posted: Friday, June 16, 2017 - 02:13 AM UTC
Hi Dave,

thank you very much!!

So, a few days late - last weekend no bench time, but got something done 'in between' - I hope to have a substantial update by Sunday or Monday...

Painting the boats - grey and 'wood'-brown


blue (what blue?- the only source I could find, HMS Hood association, mentioned blue/navy blue, but I can't find anything closer, so I choose a flat blue from Tamyia. So all these pictures of course show work in progress, masking and further painting to follow...


While this is curing to sustain masking tape, I installed some hatches and winches on the ship:


Right - my glorious production line did not take into account that some of the hatches are on the darker colored shelter deck...but that should be an easy fix...

Cheers for now,

Jan
RedDuster
Visit this Community
England - South East, United Kingdom
Joined: March 01, 2010
KitMaker: 7,078 posts
Model Shipwrights: 6,649 posts
Posted: Friday, June 16, 2017 - 01:10 PM UTC
Nice work Jan

The boats are coming to life with paint on. The North star winches look excellent down, as does all the deck detail.

looking forward to your weekend update.

Cheers

Si
JJ1973
#345
Visit this Community
Niedersachsen, Germany
Joined: August 22, 2011
KitMaker: 1,835 posts
Model Shipwrights: 1,832 posts
Posted: Saturday, June 17, 2017 - 11:19 PM UTC
Thank you very much, Si!

Well, boats.

I did have a plan, however, that collapsed when I found out that masking is not good with those 3D-printed boats. Possibly the slightly uneven surface makes the tape stick to the protruding parts...anyway, here's what changed my plan for the weekend (plan was - mask a stripe around the boats, use the angled areas/shadows to spray on white and let it cure).


Well, not going to happen - instead, break out some new 2/0, 5/0, and 10/0 hairy sticks and doing some painting.


Actually, I'm not really good at that, somehow I have no steady hand when it comes to free painting. The pronounced shapes of the printed boats helped, but still it became an endeavour that kept me busy the entire weekend-benchtime.

Work in progress...


So I abandoned the plan to paint the lower hull of the motor boats white - I read they where, but sources differ. Now it doesn't matter, hulls will be one color only...

Here are the motor boats. Very fine detail. Yes, you can see they were printed, but only on the pictures, to the naked eye, this is almost invisible...


And the open boats.
Grey/brown/blue is sprayed on and corrected with a brush, withe is entirely brushed on on the boats above.


So here's my little fleet. In the end, I am quite happy with the result, even though it's not perfect.


For now,

Cheers,
Jan