S-100 gun tub lid question
Netherlands
Joined: December 09, 2008
KitMaker: 336 posts
Model Shipwrights: 333 posts
Posted: Friday, September 28, 2018 - 05:37 AM UTC
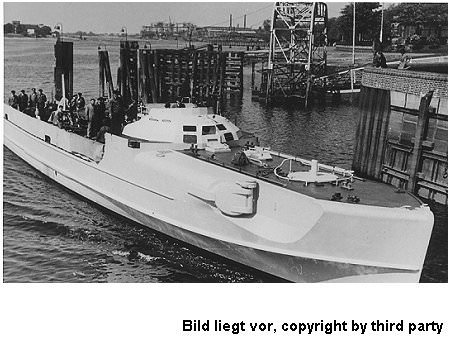
I'm currently working on an rc conversion of the 1/35 Italeri S-100. In choppy water it's advisable to close the bow gun tub to stop water from entering the hull. Thing is that the Italeri tub cover/lid is far too big and I'm not sure about the offset position of the vertical protrusion either. As I see it, the lid should fit inside the various spare Flak 38 magazine holders surrounding the tub. This means the diameter of the Italeri lid is about 7mm too big. Unfortunately,it's difficult to judge from pics whether or not the protrusion on the lid is offset or dead centre, I do get the impression though it's not offset at all. I know that the Lürssen drawings show an offset protrusion on the tub lid.
I went through most of the lengthy S-100 thread, perhaps I missed something ? Thanks in advance.
Arjan
New York, United States
Joined: January 21, 2008
KitMaker: 2,531 posts
Model Shipwrights: 1,244 posts
Posted: Friday, September 28, 2018 - 02:25 PM UTC
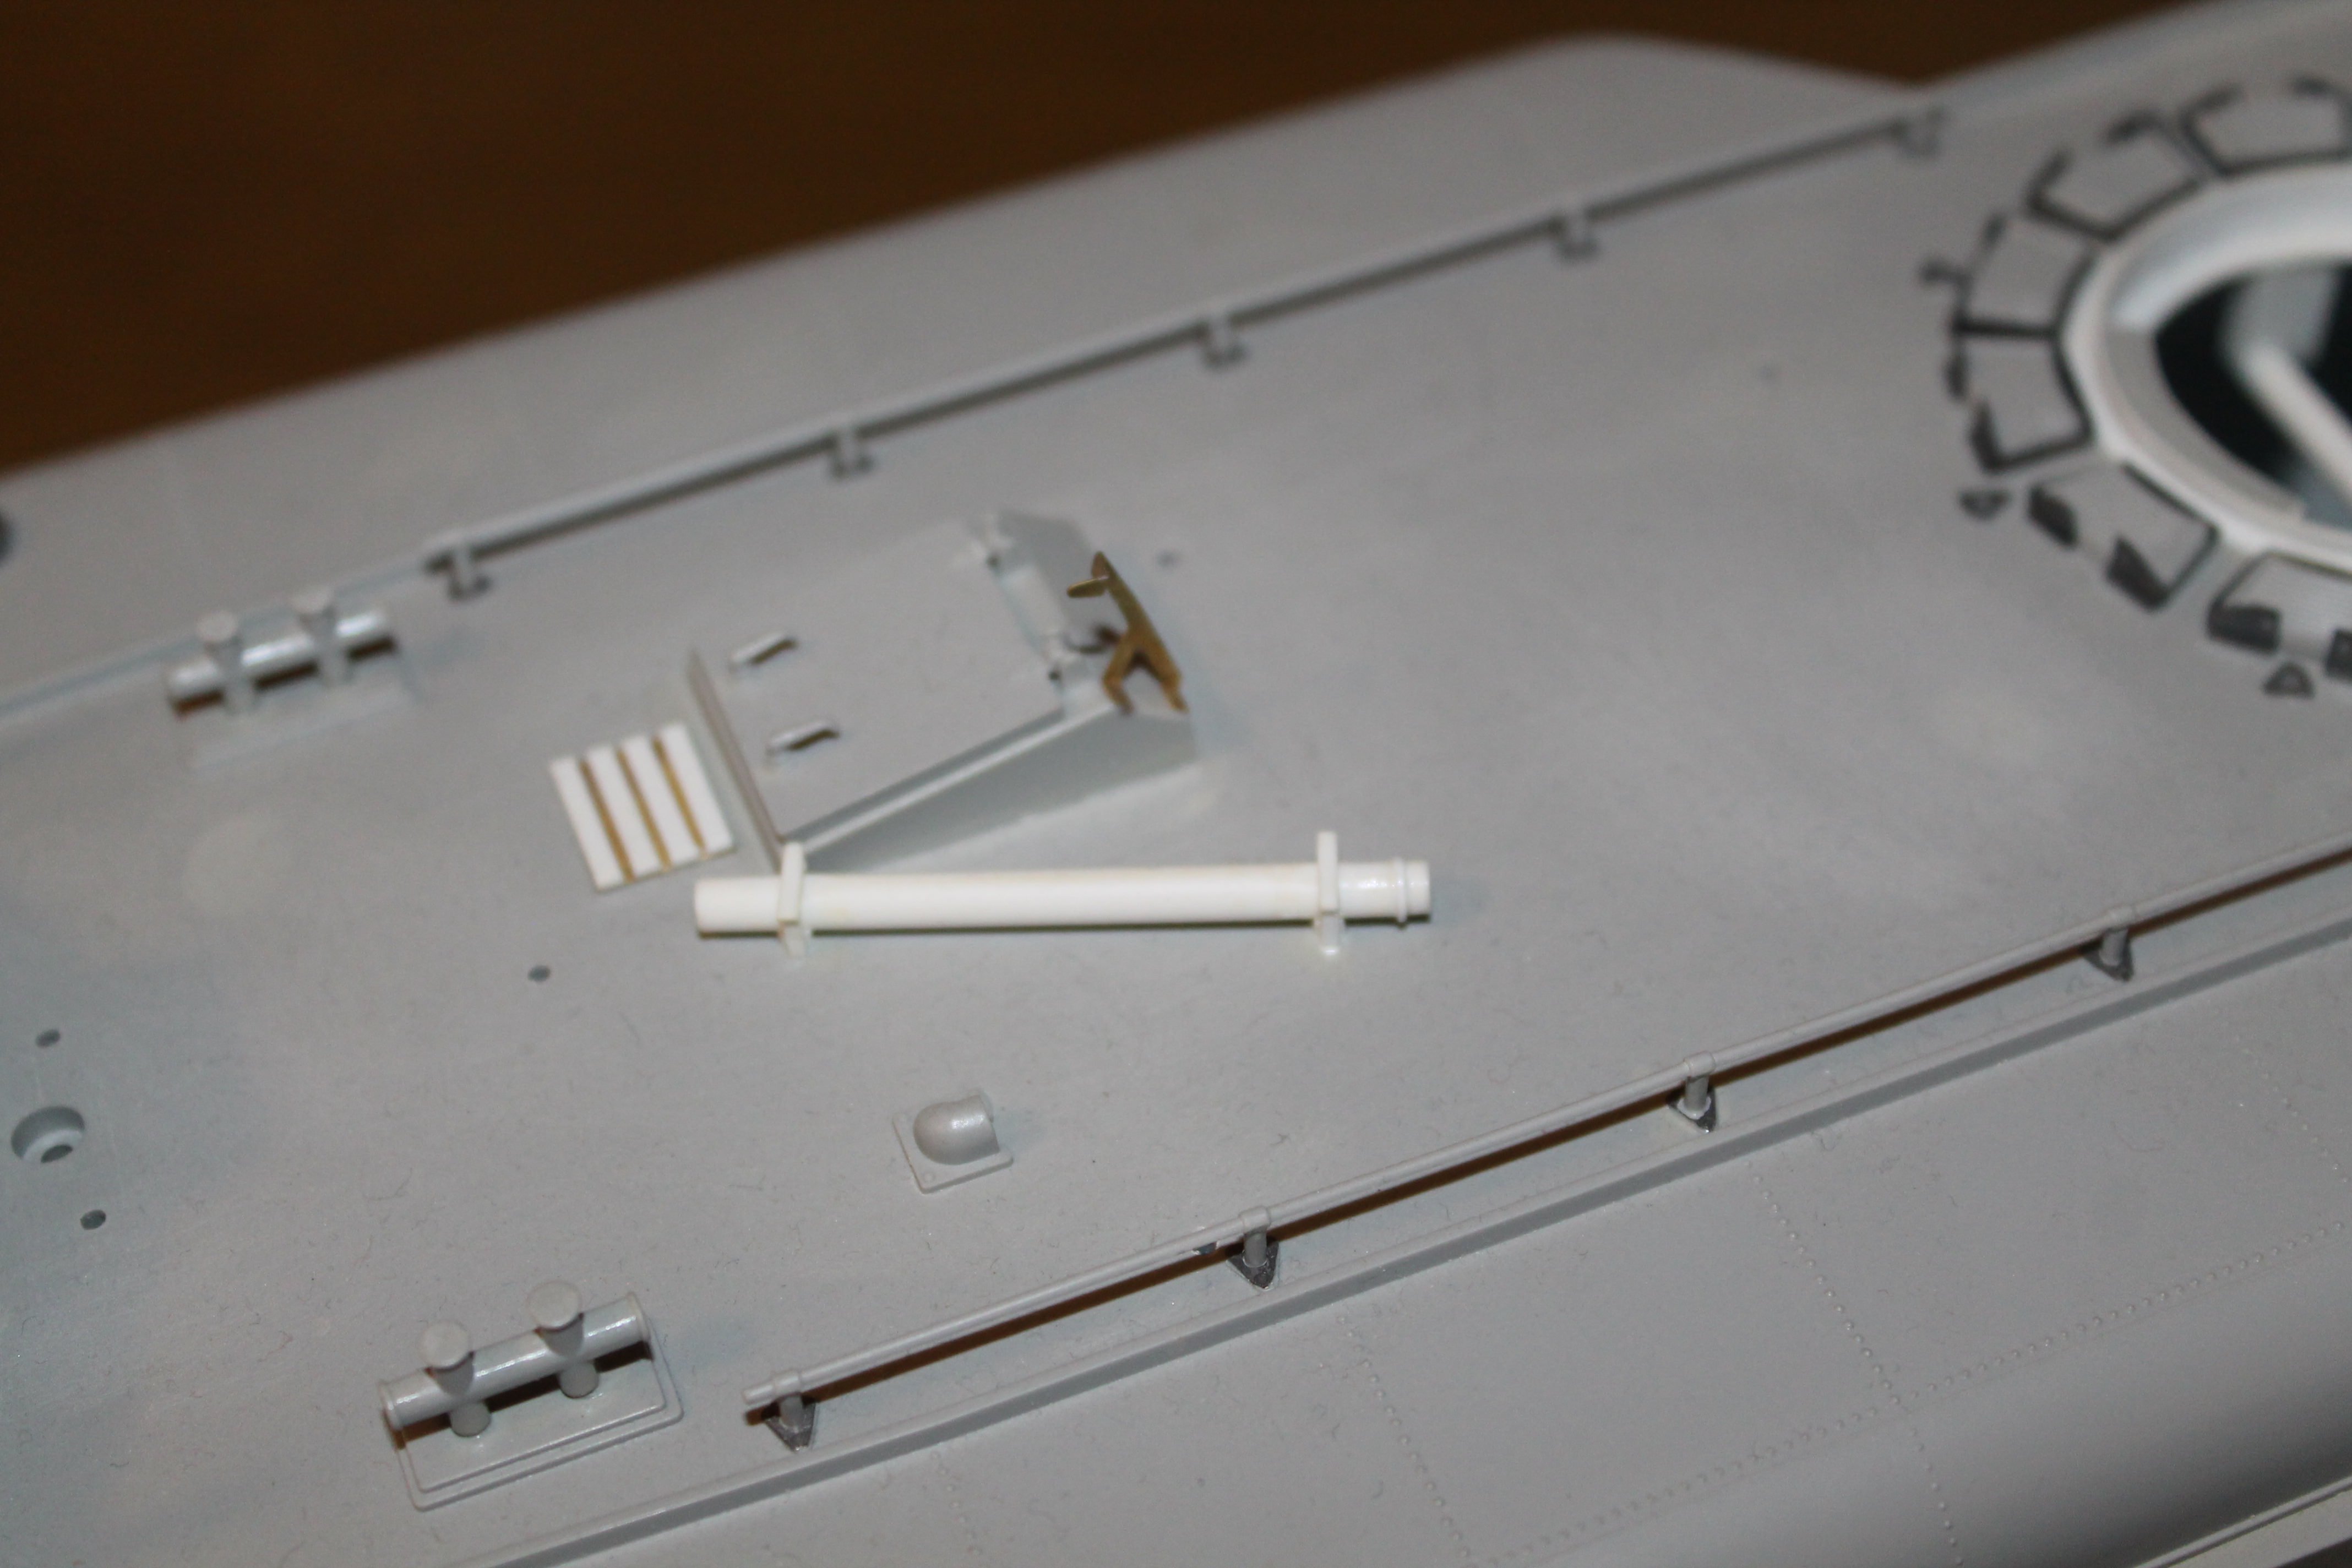
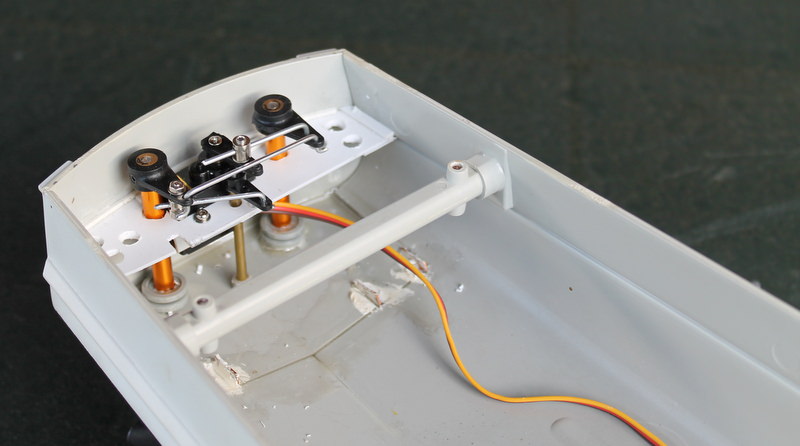
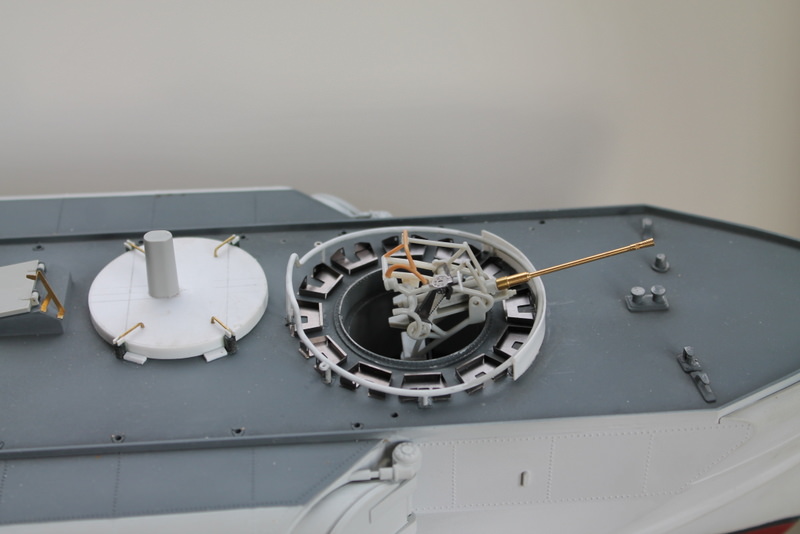
The Italeri gun tub is too small in diameter. A fellow named Bob Palmacci used to offer some drawings for correcting this issue, along with a few others. I used them to enlarge the tub on mine when I started working on it. Maybe they got the size of the cover right though. This would account for it appearing to be too big. As I understand it, the gun mount folded back into the tub, with the barrel removed, when stowed. So the protrusion on the cover would be in line with the gun.
The bar the mount pivots on can be seen in the photos. In the next photo you can see the barrel stowage tube.
Hope this helps.

Al
Netherlands
Joined: December 09, 2008
KitMaker: 336 posts
Model Shipwrights: 333 posts
Posted: Friday, September 28, 2018 - 06:29 PM UTC
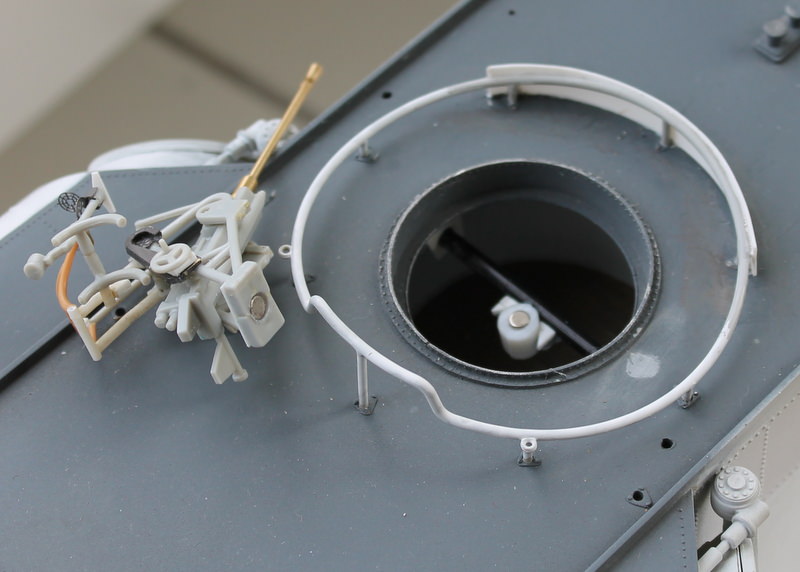
Thanks Al ! I also enlarged the tub opening and I fixed the gun with two neodymium magnets so I can remove the gun easily. My plan is to make a new lid and also fit it with magnets so it can be used in inclement conditions.

Regards,
Arjan
New York, United States
Joined: January 21, 2008
KitMaker: 2,531 posts
Model Shipwrights: 1,244 posts
Posted: Friday, September 28, 2018 - 11:39 PM UTC
Looks really great, Arjan. Have to get back to working on mine one of these days.
Al
Netherlands
Joined: December 09, 2008
KitMaker: 336 posts
Model Shipwrights: 333 posts
Posted: Saturday, September 29, 2018 - 12:30 AM UTC
The problem with projects of this nature is that they take far too long to complete (after all we are rivet counters

). I started with my S-100 kit 10 years ago and after a year or so I was utterly fed up with it. Nowadays I prefer to convert plastic boat kits to working rc models and I lowered my building standards somewhat (I'm no longer aiming for 100% accuracy).
The Italeri S-Boot makes a good rc boat and it's even feasible to convert one after having built it as a static model as I did (of course not the best approach). One of the problems I have is that the colour of the paint I used 10 years ago is difficult to match so I will have to repaint most of it.
Regards,
Arjan
Netherlands
Joined: December 09, 2008
KitMaker: 336 posts
Model Shipwrights: 333 posts
Posted: Saturday, September 29, 2018 - 03:11 AM UTC
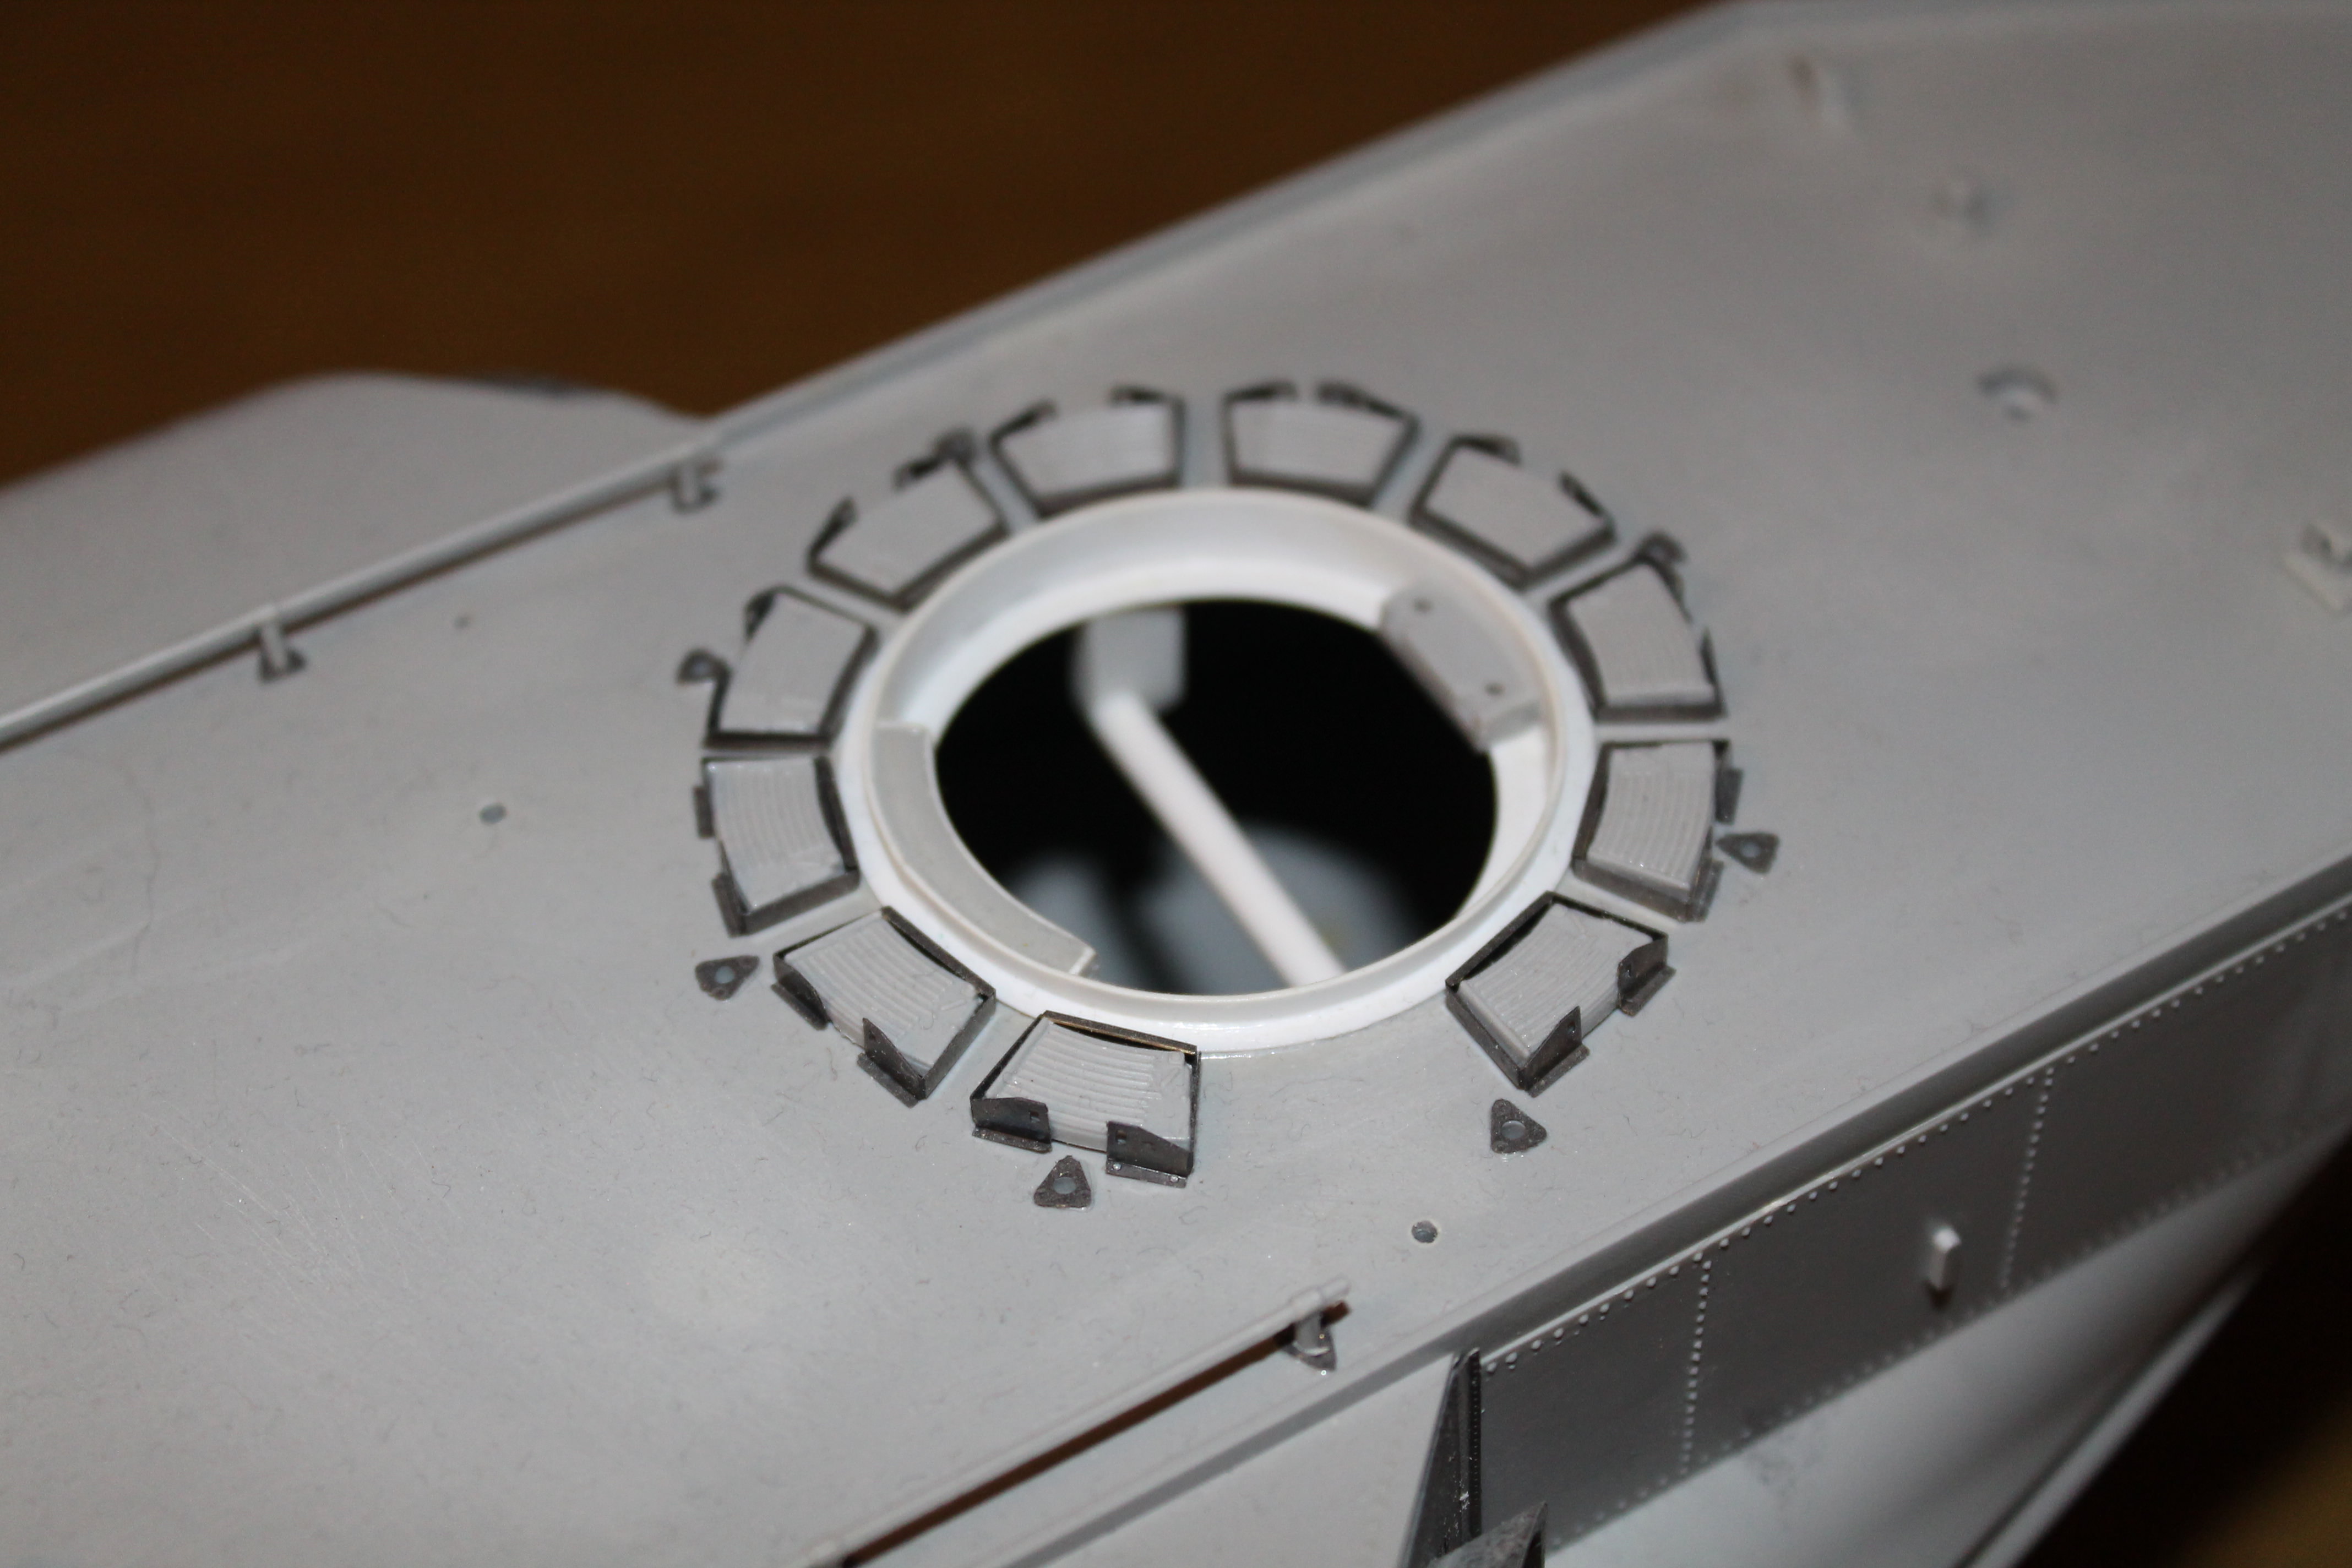
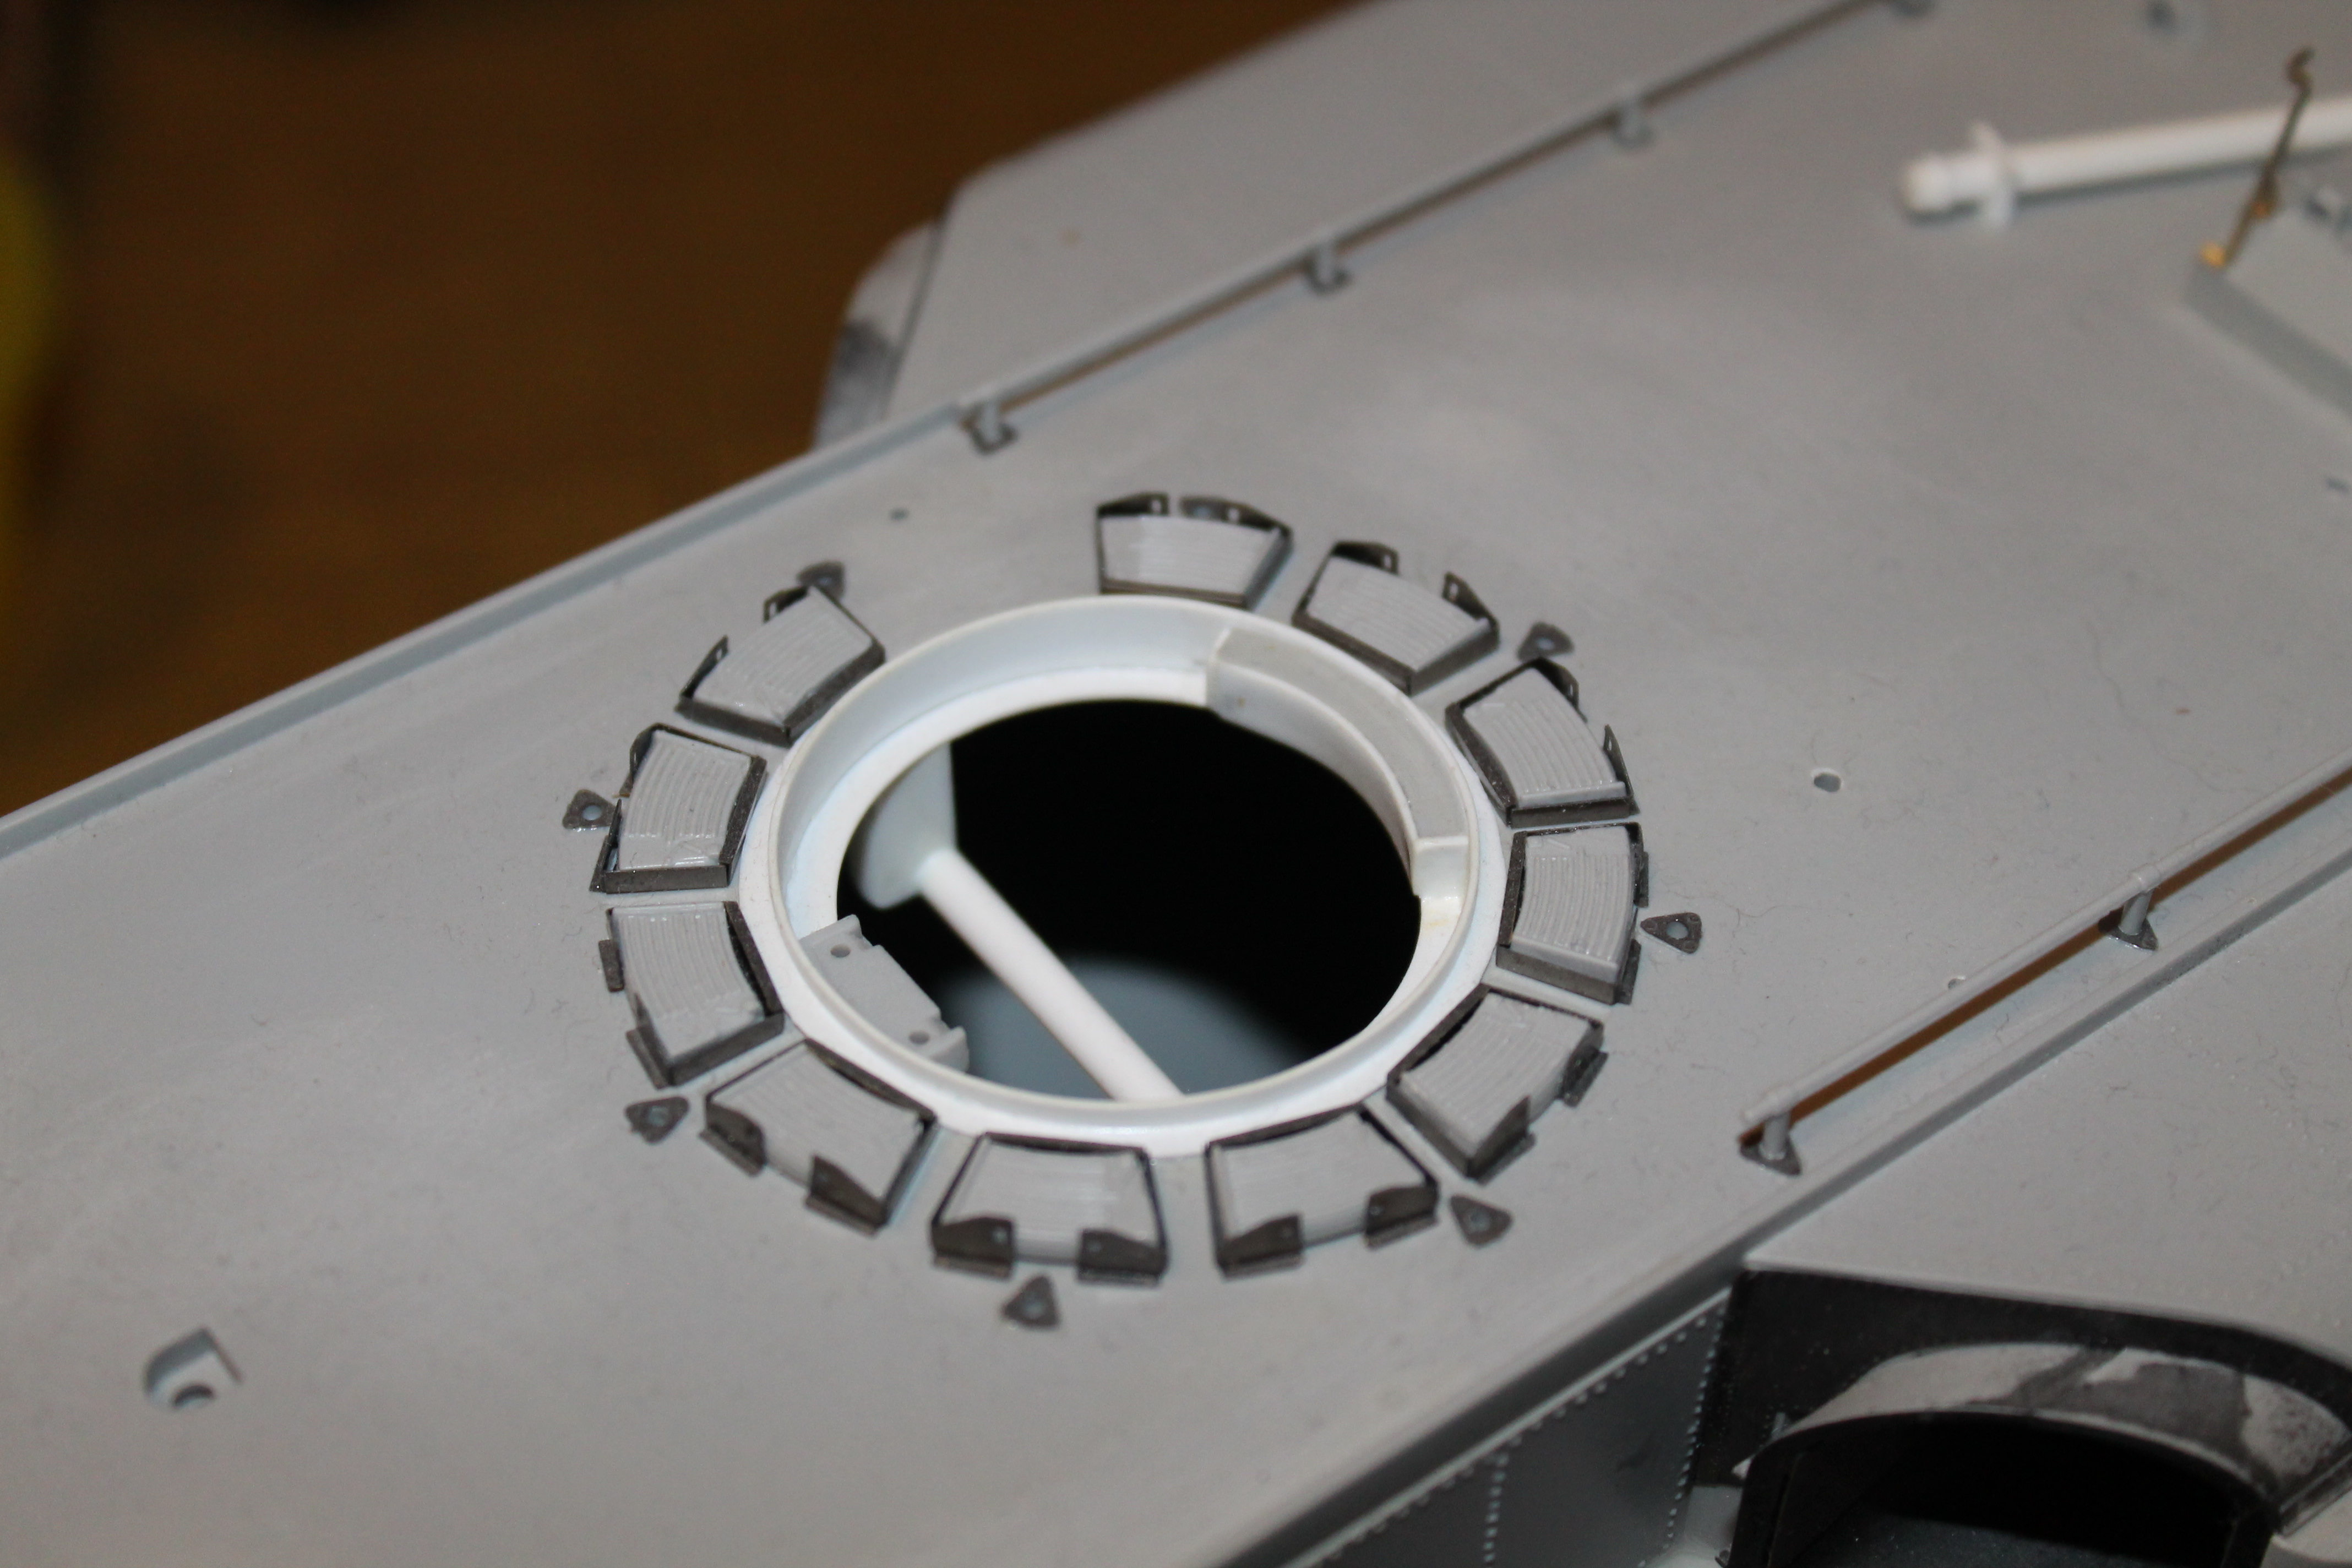
In the mean time I have made a smaller lid with a protrusion less offset than the originaL Italeri part :
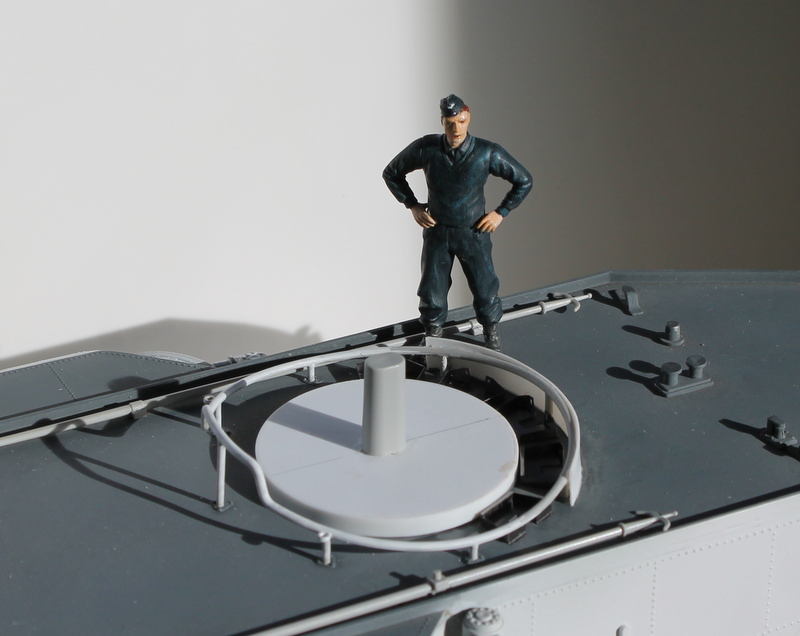
This pic shows the size difference between the new and original lid :
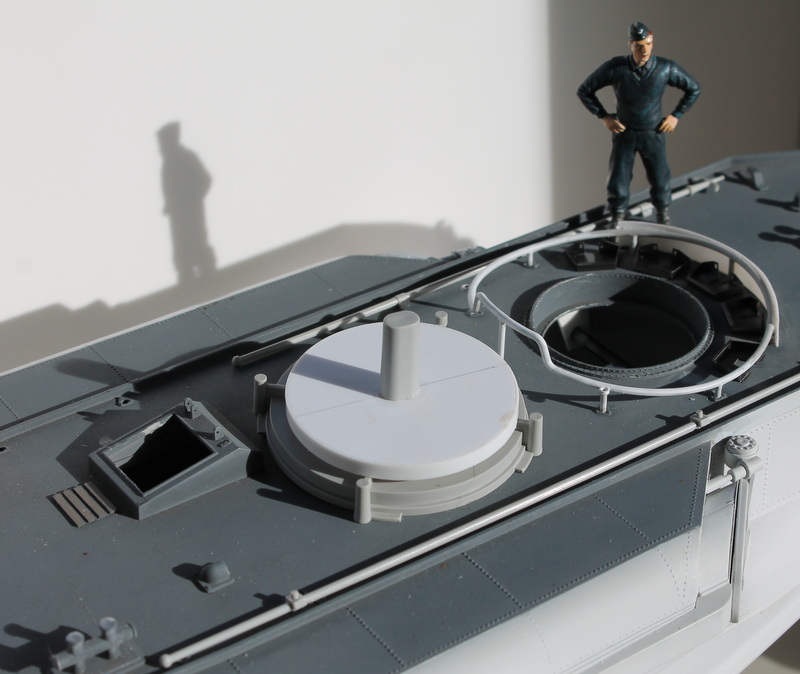
edit: having studied some other pics I decided to give the protrusion on the tub lid a more offset position after all ....
It's not clear to me how the lid was actually fastened over the tub (what kind of fittings ?) Perhaps someone can help ?
Arjan
Netherlands
Joined: December 09, 2008
KitMaker: 336 posts
Model Shipwrights: 333 posts
Posted: Monday, October 01, 2018 - 04:10 AM UTC
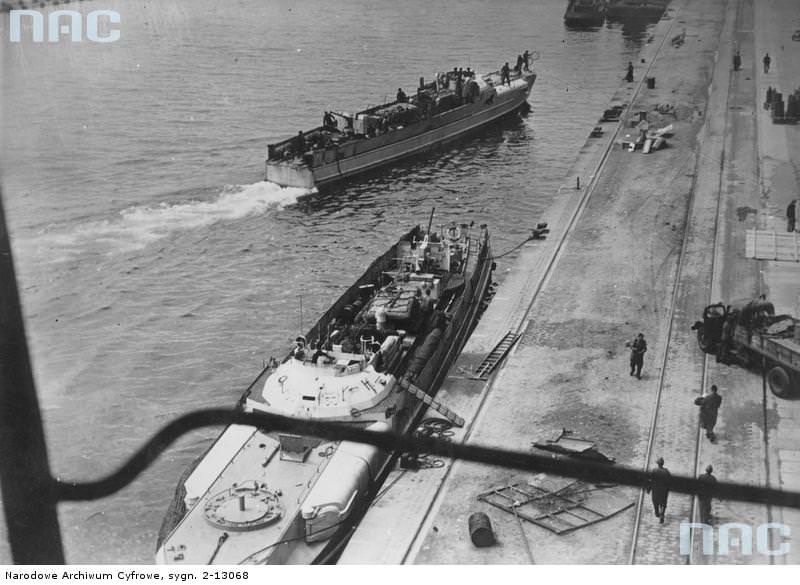
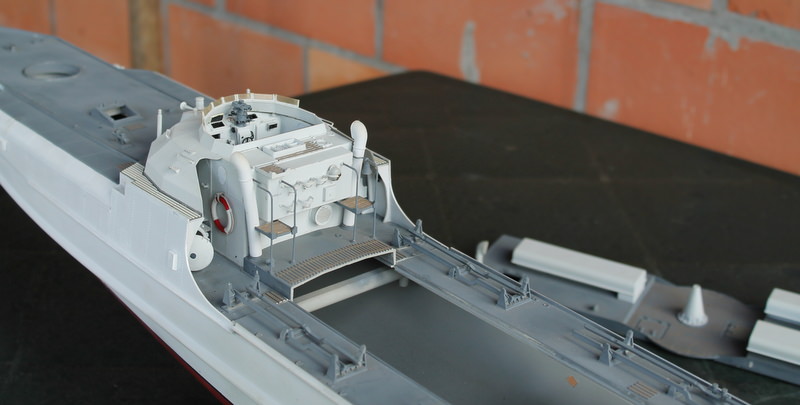
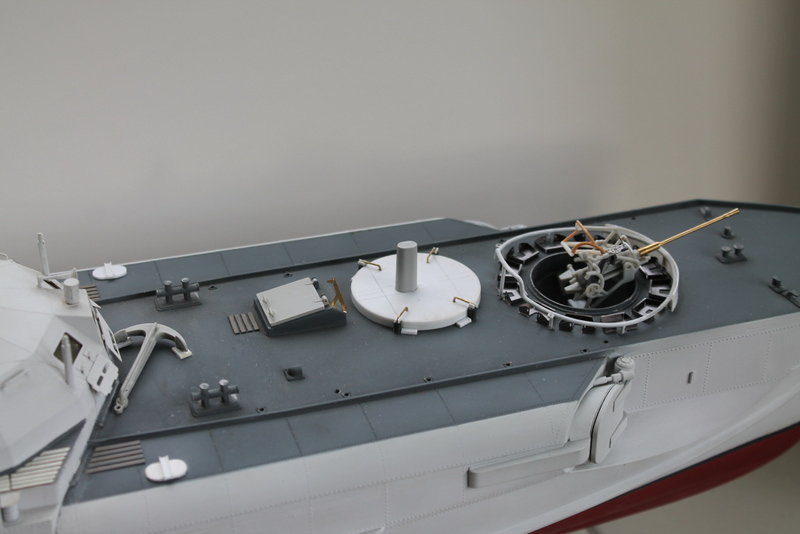
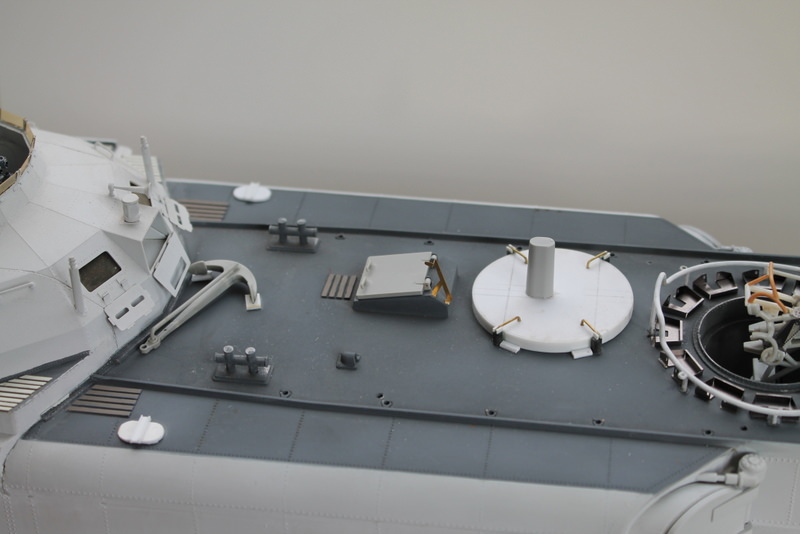
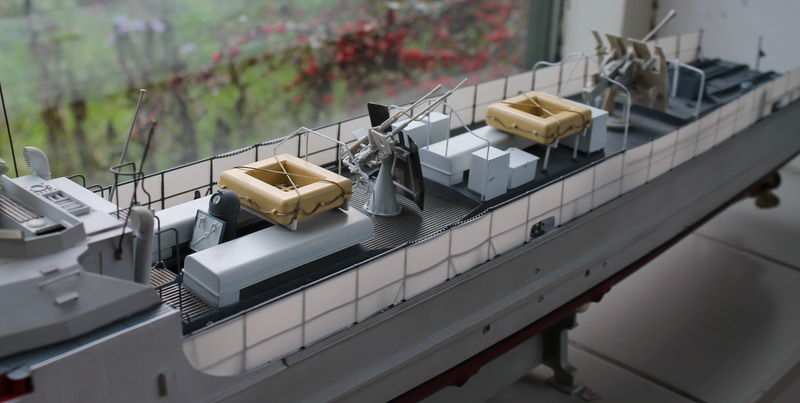
I have just finished the tub lid, I simply glued it to the deck and decided not to use it to cover the "Brunnen". I closed the dooropening in the tub so the tub should be watertight if any water enters during a run. I think I counted 12 magazine holders in the pic of the S-boats at the quay I posted so that's the number I added. The alternative position of the anchor I adopted can be seen in two pics (the two Felixstowe boats had the anchor on the starboard side of the wheelhouse).
Arjan
Netherlands
Joined: December 09, 2008
KitMaker: 336 posts
Model Shipwrights: 333 posts
Posted: Sunday, October 28, 2018 - 11:58 PM UTC
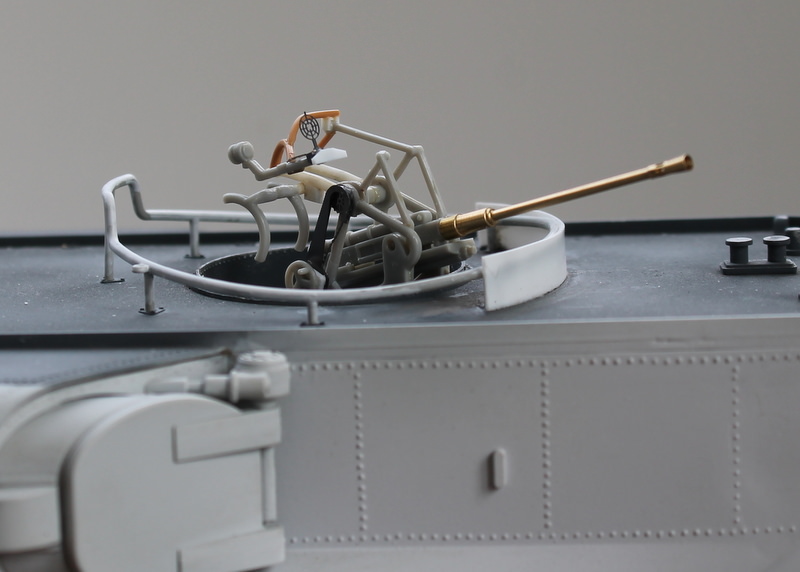
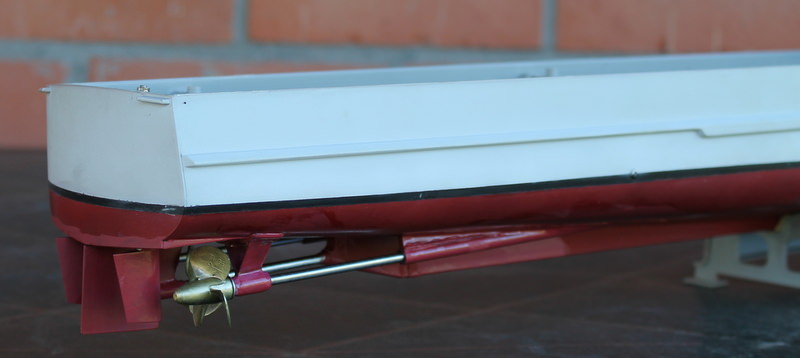
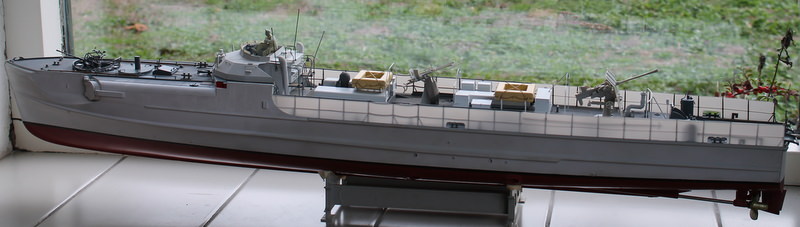
In the mean time I have nearly finished the build. I still have to paint some details and figures and add pe parts to the guns. Ten days ago the boat made its maiden voyage and I'm pleased with the results. Since this is a static modelling board I will spare you the details of the setup and hardware I used.
I glued on 0.3 mm dodgers to add some much needed strength to the plastic stanchions. I still have to paint these and drill hundreds of holes ... I also replaced some vulnerable parts with metal wire (strikers etc.)
Arjan

#453
Texas, United States
Joined: August 28, 2016
KitMaker: 1,925 posts
Model Shipwrights: 1,298 posts
Posted: Monday, October 29, 2018 - 12:25 AM UTC
Arjan,
Your S-100 is looking awesome.
Mark

Berlin, Germany
Joined: May 28, 2010
KitMaker: 193 posts
Model Shipwrights: 186 posts
Posted: Monday, October 29, 2018 - 03:23 AM UTC
Hello Arjan, welcome to the Grey Fleet. you boat looks already great and your adjustment cant be more on the spot. For reference here is my S100 you have probably seen already:
https://www.youtube.com/watch?v=ZsjBgv2a5p0but maybe want to get some more details for the S-boat, here I can recommend a good shop at shapeways having all relevant details, like telephone boxes. torpedo pistols, smoke cans, Naxo etc available:
https://www.shapeways.com/shops/iron-models?section=Schnellboot+parts+across+all+Schnellboot+types+in&s=0one more correction I I may, the persenning was nitted to some stand of the rail and was open near the front torpedo rack where the chain is set on the rail to carry through larger things.
kind regards
Christian
PT Boat Command European Theater
Netherlands
Joined: December 09, 2008
KitMaker: 336 posts
Model Shipwrights: 333 posts
Posted: Monday, October 29, 2018 - 03:40 AM UTC
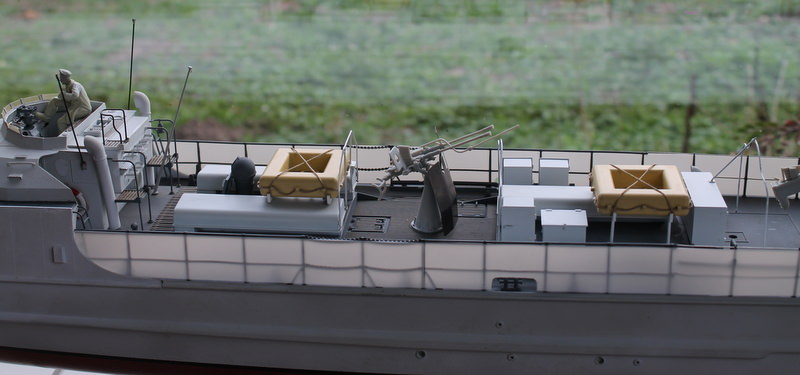
Hi Christian, not really clear from the pics I posted but the dodgers on each side of my boat consist of three seperate pieces (just like period pics show).
Regards,
Arjan
Berlin, Germany
Joined: May 28, 2010
KitMaker: 193 posts
Model Shipwrights: 186 posts
Posted: Tuesday, November 06, 2018 - 09:38 AM UTC
Hello Arjan,
sorry for the delay. I was mor referrining to the way the persenning was connected to the rail and how the entrance was designed in the persenning by connecting the persenning vertikally to the railpost as you can see on thsi picture.

However, I searched through my whole collection of books and pictures and have to admit that my interpretation looks maybe nice, but is not based on any evidence. To thsi end your persenning is more accurate even though I always have the feling something is missing. Anyway just my 25 cent of (wrong) thought on this without evidence.
keep up the building
kind regards
Christian
PT Boat Command European Theater
Netherlands
Joined: December 09, 2008
KitMaker: 336 posts
Model Shipwrights: 333 posts
Posted: Tuesday, November 06, 2018 - 10:42 PM UTC
Hi Christian, I think the dodgers were attached to the rail with leather or canvas straps that may have had some type of press-fasteners. It's hard to find clear reference pics of these straps but I'm pretty sure no rope was used or carabiners.

I like the video of your S-Boot, have you used brushed or brushless motors ?
Regards,
Arjan
Berlin, Germany
Joined: May 28, 2010
KitMaker: 193 posts
Model Shipwrights: 186 posts
Posted: Wednesday, November 07, 2018 - 05:08 AM UTC
I agree with your assessment on the dodgers. My representation - regardless how nice it might look - is not based on facts instead fiction.
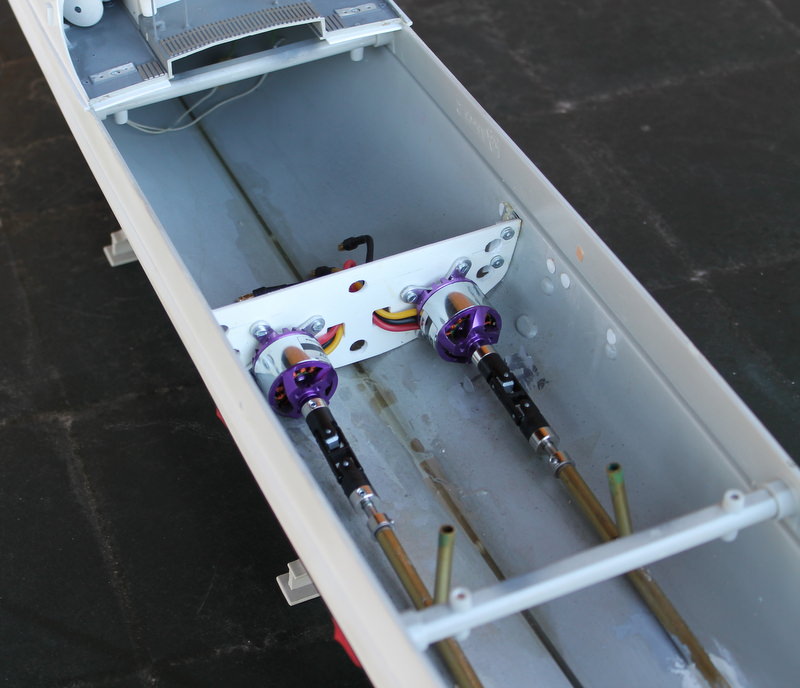
I have used Brushless engines from HobbyKing and now actually designe my own engine racks to ensure that the engine is sitting directly aligned to the prop shaft and I can use direct coupling by this way.
That is very need development and design piece and I can certainly share the link to my brushless engines (besides the two old robbe Roxxy engines on the picture)
https://hobbyking.com/de_de/brushless-motor-d2826-2000kv-turnigy.html?___store=de_deand a picture of engine racks being designe and printed through Shapeways.

This ensures the minimized noise when the engines are running
kind regards
Christian
PT Boat Command European Theater
Netherlands
Joined: December 09, 2008
KitMaker: 336 posts
Model Shipwrights: 333 posts
Posted: Sunday, March 24, 2019 - 08:30 PM UTC
Some pics of the first outing of the rc boating season. The guns and figures are still not finished yet nor have I applied my 8.Schnellboot Flottille decals. Hope to post some better pics soon.

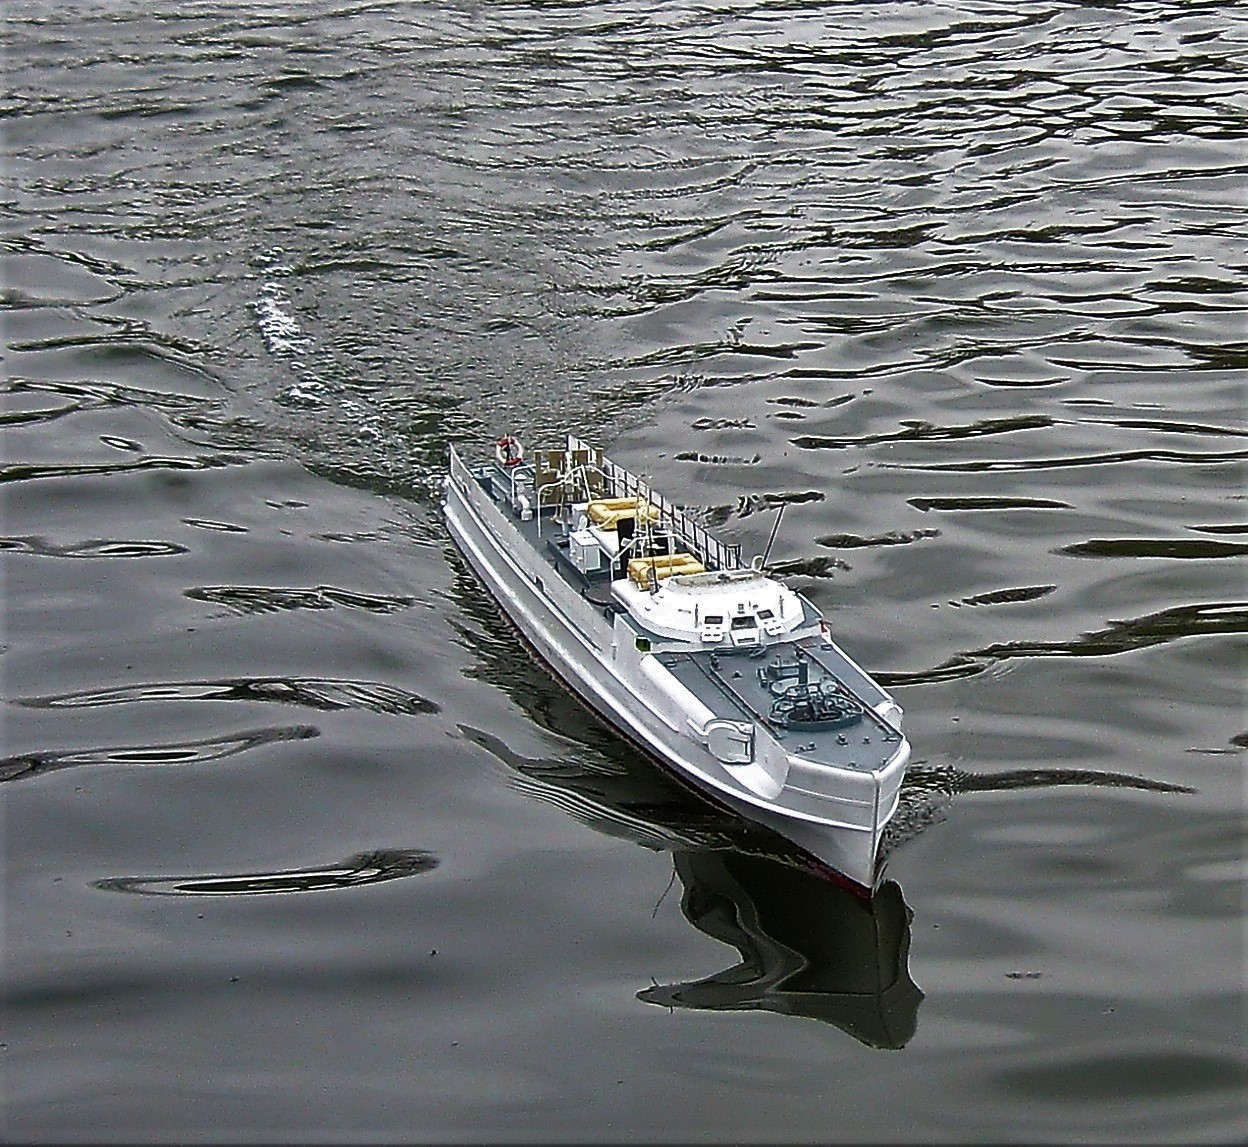
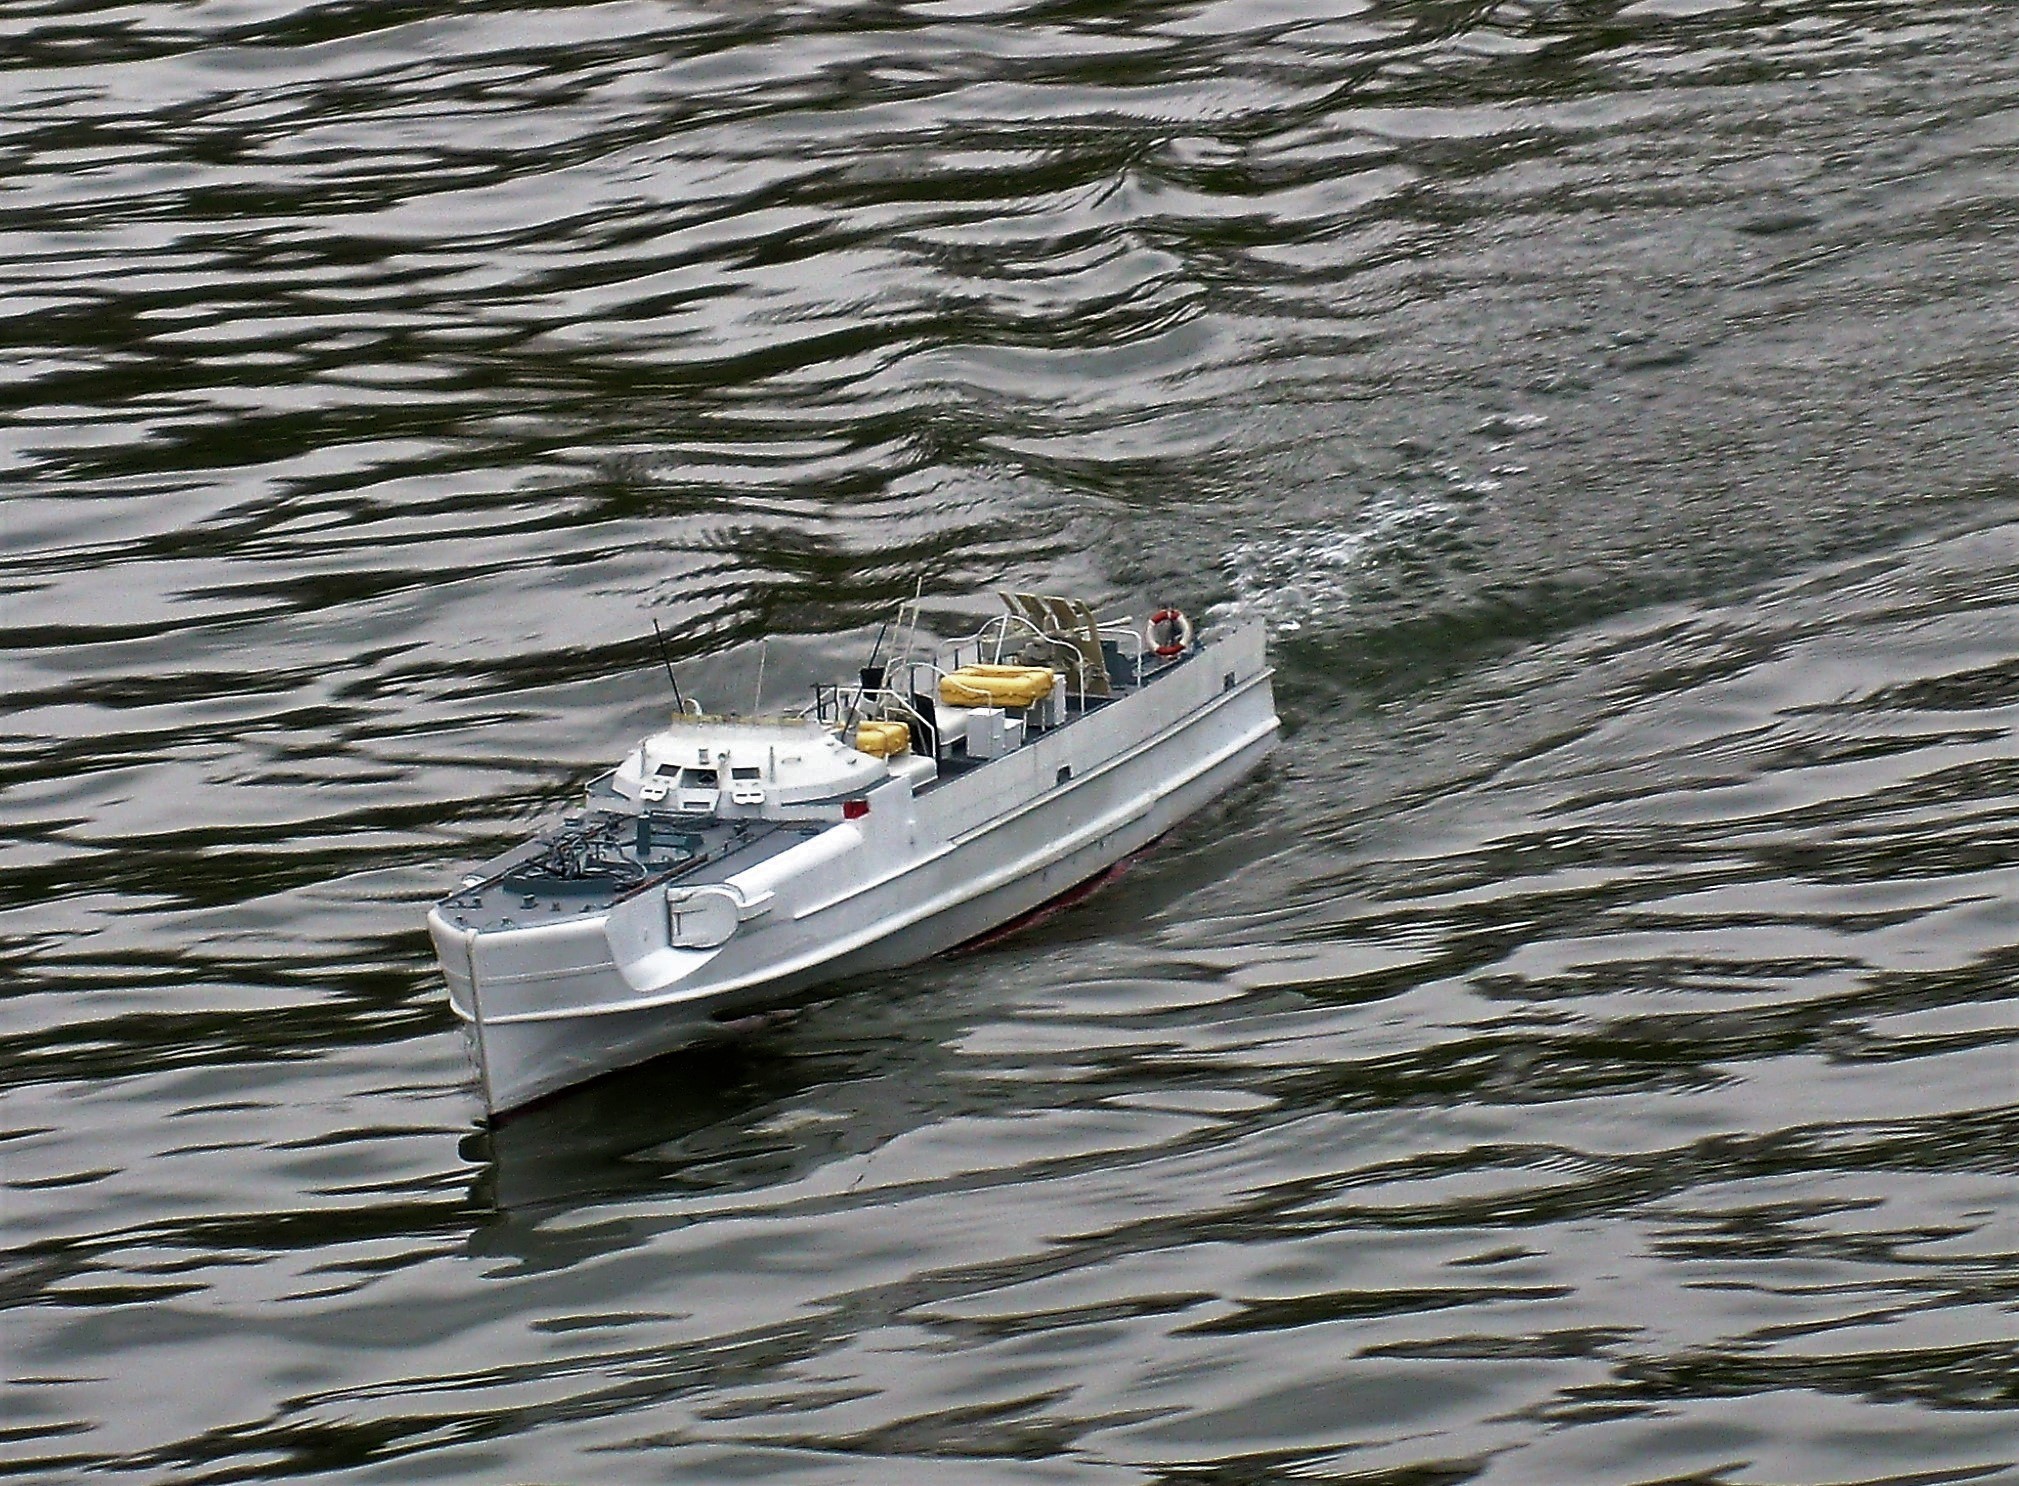
Arjan
TimReynaga
 Associate Editor
California, United States
Joined: May 03, 2006
KitMaker: 2,500 posts
Model Shipwrights: 1,830 posts
Posted: Monday, March 25, 2019 - 12:38 AM UTC
Arjan,
Even incomplete, your Schnellboote looks fantastic cutting through the water!

#453
Texas, United States
Joined: August 28, 2016
KitMaker: 1,925 posts
Model Shipwrights: 1,298 posts
Posted: Monday, March 25, 2019 - 01:43 AM UTC
Quoted Text
Arjan,
Even incomplete, your Schnellboote looks fantastic cutting through the water!
Ditto!
Netherlands
Joined: December 09, 2008
KitMaker: 336 posts
Model Shipwrights: 333 posts
Posted: Monday, March 25, 2019 - 05:56 AM UTC
Thanks for the kind words gentlemen. I've started on some 1/35 Azimut resin S-Boot sailors but they require quite a bit of work. Fortunately, the added weight of a crew isn't an issue for the 1/35 Schnellboot. For my PT boat and Vosper I drilled out the torsos of the figures to save weight. The additional advantage of this is that these figures also stay afloat when they fall overboard
.
Regards,
Arjan
New York, United States
Joined: December 01, 2007
KitMaker: 1,575 posts
Model Shipwrights: 7 posts
Posted: Sunday, July 28, 2019 - 05:20 AM UTC
Quoted Text
A fellow named Bob Palmacci used to offer some drawings for correcting this issue, along with a few others.
Robert Palmacci still offers the drawings at
Schnellboot! http://hitemlowandhard.blogspot.com
New York, United States
Joined: December 01, 2007
KitMaker: 1,575 posts
Model Shipwrights: 7 posts
Posted: Sunday, July 28, 2019 - 05:37 AM UTC
For anyone interested in converting their S-38/S-100 to RC, you need to check out Puffin's
S-100 Bouwverslag album. Lots of useful info in the pics.
http://hitemlowandhard.blogspot.com