_GOTOBOTTOM
Ships by Class/Type: Battleships
Topics from the Dreadnaught era to modern day.
Hosted by Steve Joyce
Schulschiff Schleswig-Holstein 1939 1:350
Black_sheep
Visit this Community
Bayern, Germany
Joined: December 11, 2009
KitMaker: 823 posts
Model Shipwrights: 551 posts
Posted: Saturday, June 13, 2020 - 09:47 PM UTC
I always asked myself why the war started because of the dispute around the free city of Danzig and why Hitler invaded Poland? Well, after the armistice of WWI Danzig was getting separated from the former german empire and installed as a free city by the league of nations and set under the protection of the young polish nation. During the difficult years in the twenties and thirties tensions rised between the overwhelmingly german inhabitants and the polish minority, which was baked up and supported by the polish government. Poland was allowed to build an ammunition dump at the Westerplatte which was secretly heavily fortified by them. Hitler asked for a single corridor for a highway or train line to Danzig and its vital free port for an easier and more economical supplement of the german inhabitants there and the enclave of eastern Prussia from there. Poland was conjured mainly by England but also France not to make any further deal with the German Reich and got reassured that England and France will enter into war with Germany if Germany will start hostilities against Poland. Poland therefore relied on these assurances and surely also completely underestimated Germany´s real military abilities and so steadily refused further talkings about Danzig and gave more pressure and violence agains the german population within the polish state, Shootings between Polish and German custom officials and soldiers happened more frequently. In the last week before the outbreak of war polish coastal AA-batteries even tried to shoot down civil Lufthansa passenger aircrafts over the Baltic Sea a couple of times which were on the way from Berlin to Königsberg in eastern Prussia. The population on the german side sees with increasing horror the influx of refugees, the shootings and the attacks on german farmers across the border. It expects that one will soon put an end tho this business. Poland already made an partial Mobilisation of its armed forces in march 1939. On 31. August, the day before the war´s start, Poles in Krakow murdered the still acting German consul there. The German-Polish border in August 1939 even without war stands in flames.

The former fleet flagship of the Reichsmarine Schleswig-Holstein, at this time a cadet´s ship, was at an announced and allowed ceremonial visit at Danzig Harbor. But in September the 1th at 4.47 o´clock she silently veered to Westerplatte and started to fire point blank with all of her guns at the polish ammunition depot. This action got into history as the beginning of the second world war in Europe – in far east Japan, Russia and China already struggled with each other openly already since 1937.

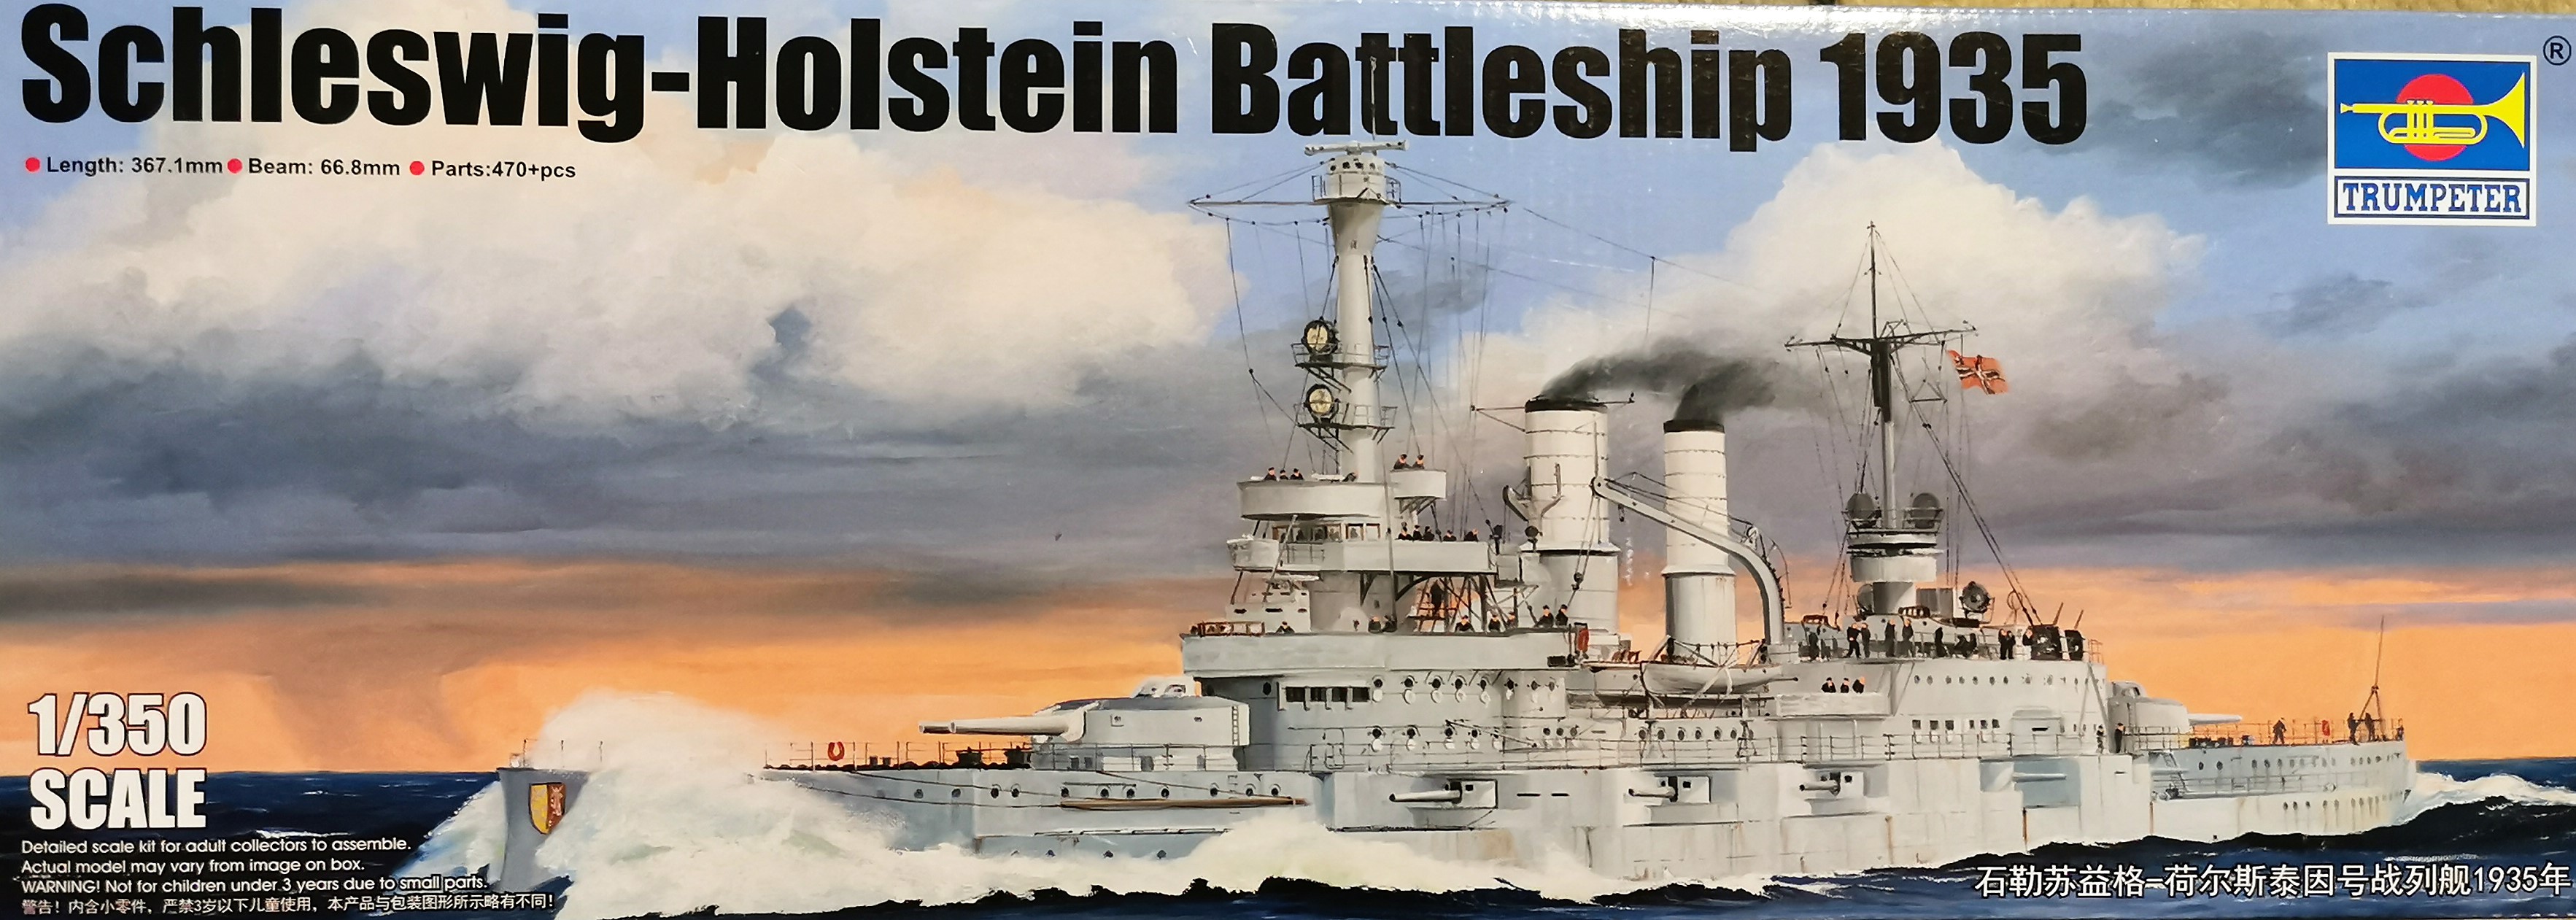
When TRUMPETER released this ship I was immediately sure I need to build this historical ship one day. When I got the kit I quickly discovered that TRUMPETER regrettably made quite some errors, ommissions and simplifications. There is some work to get the ship as accurate as possible for this point in time. I will speak about the details during my build.

I would be glad if I would have some of you aboard for this project as it will be much more fun than to steam just alone ahead.

Lets see what we have prepared for this build:

First TRUMPETERs kit: There are 13 frets with an overseeable number of parts, one decal sheet, a blackened chain and 6 photoetched sheets.

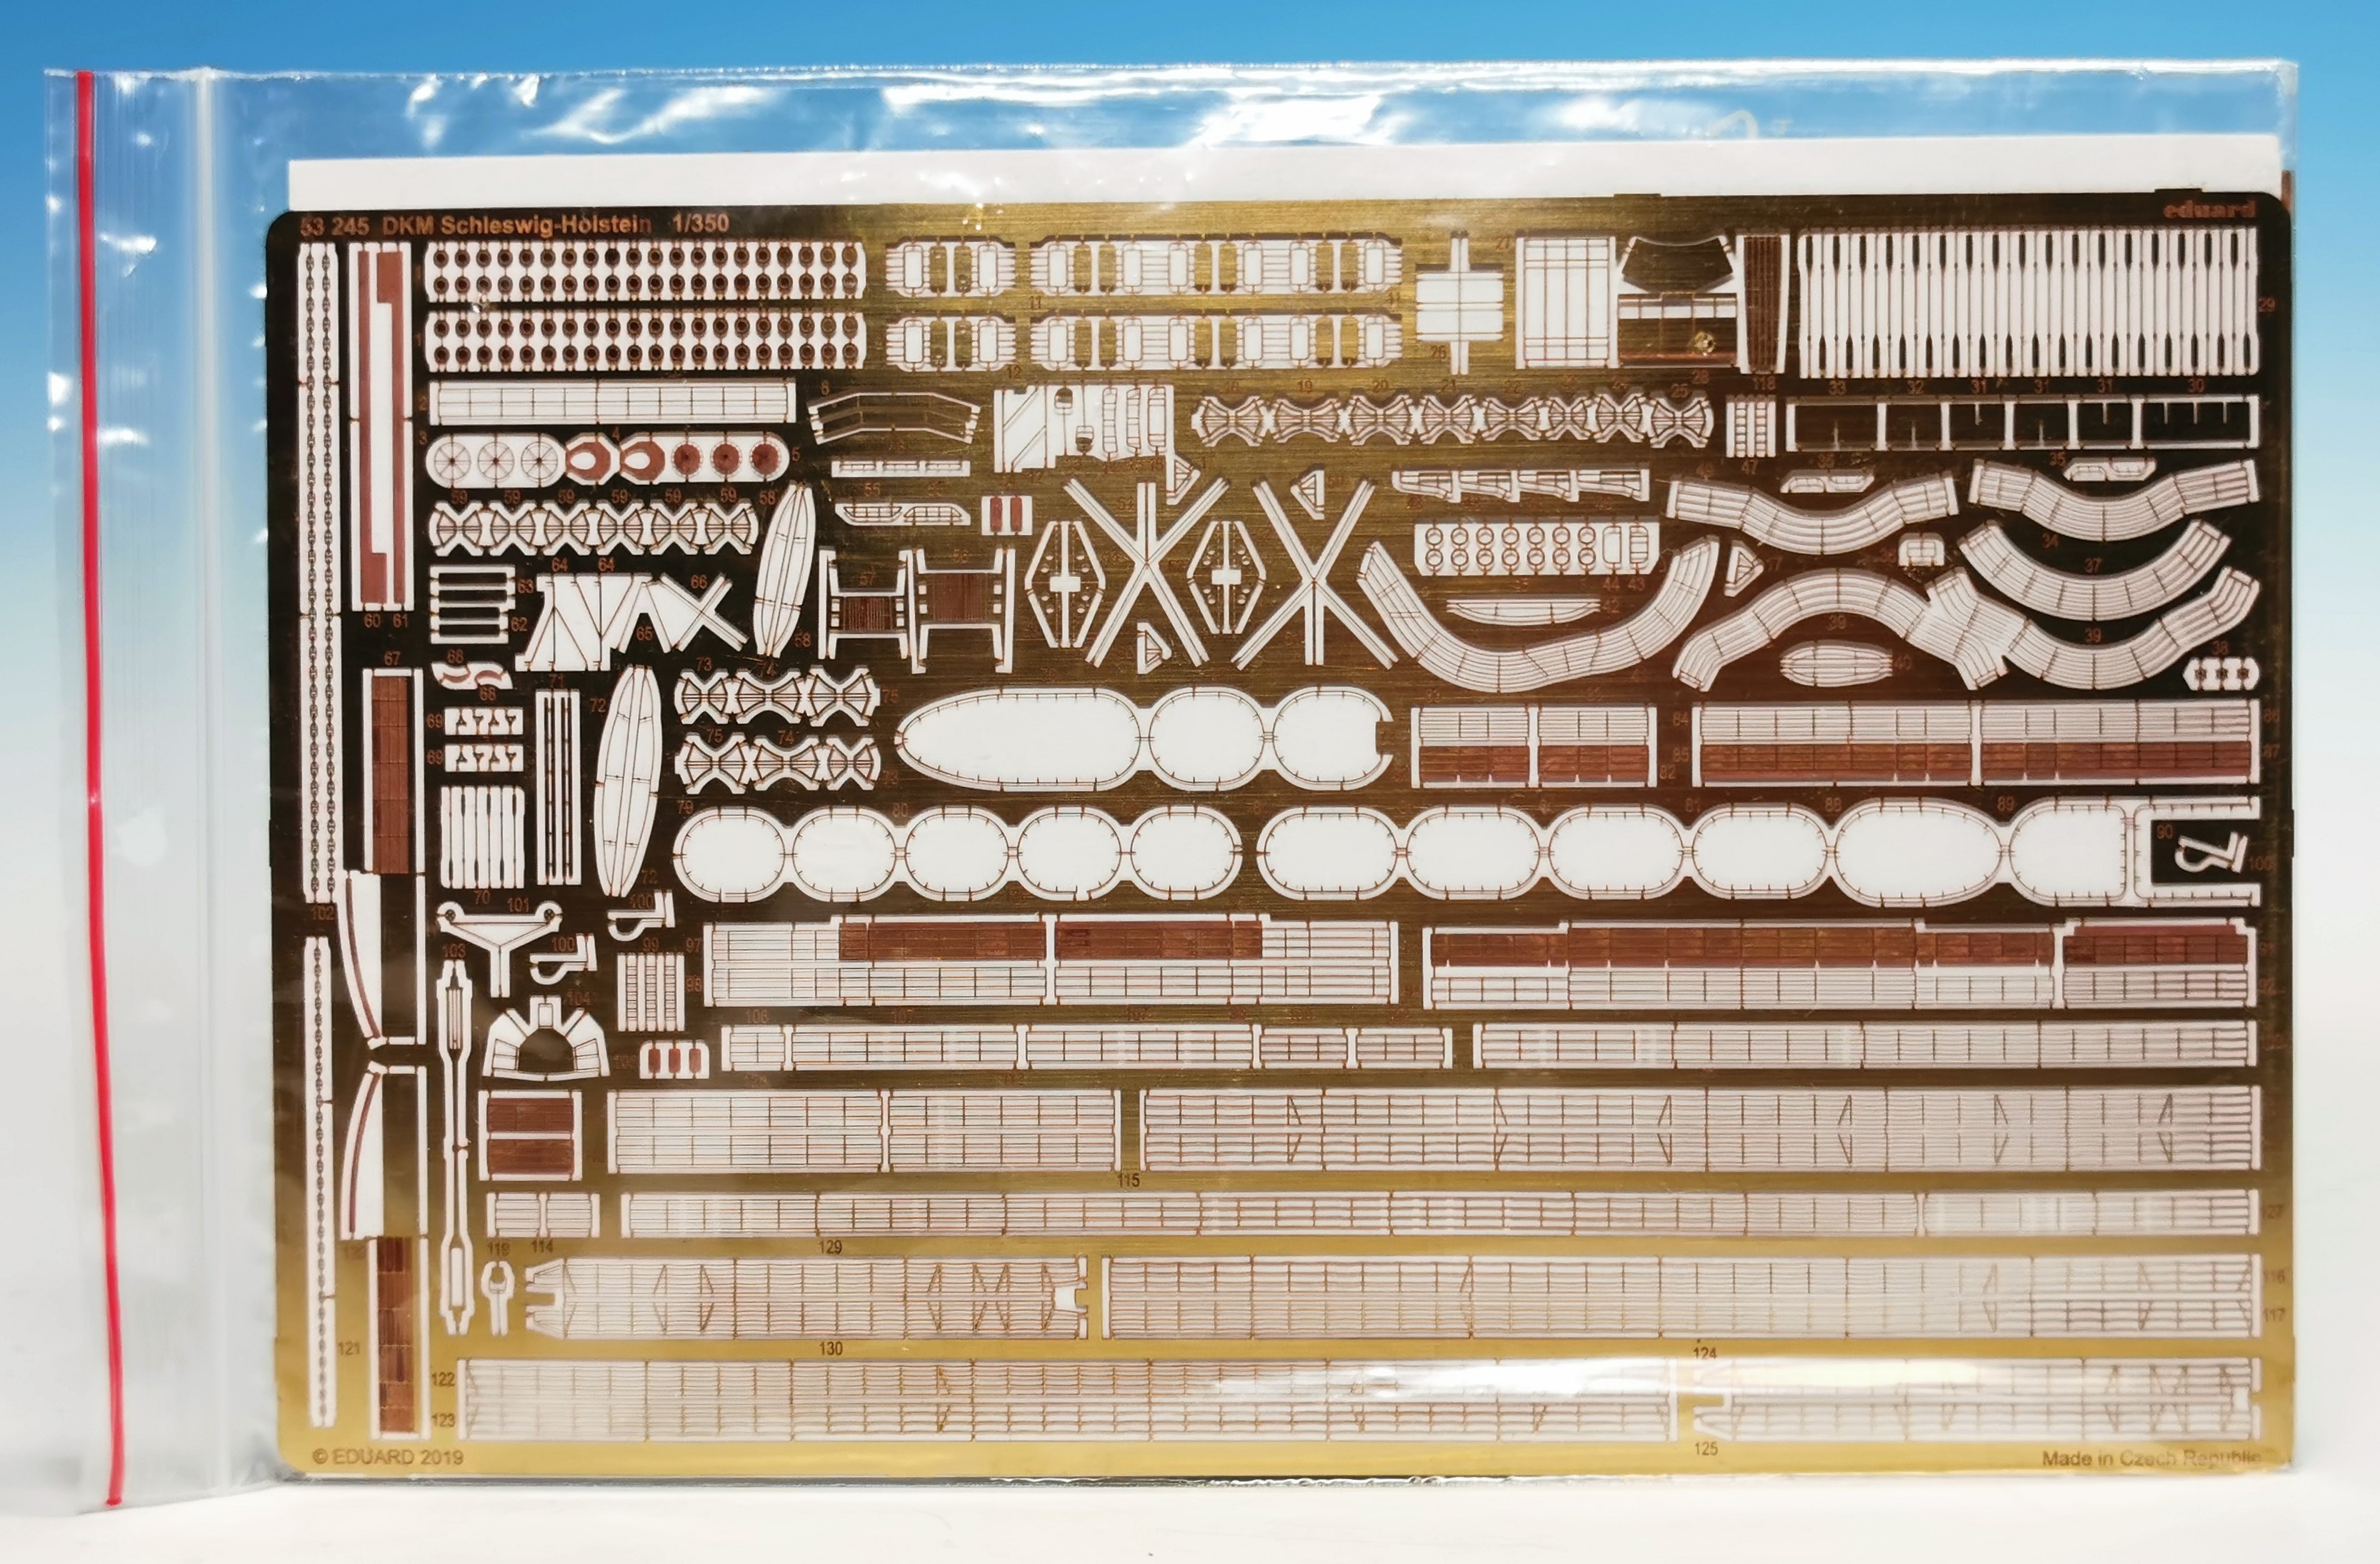
EDUARD´s etched set for it – it will improve many details already

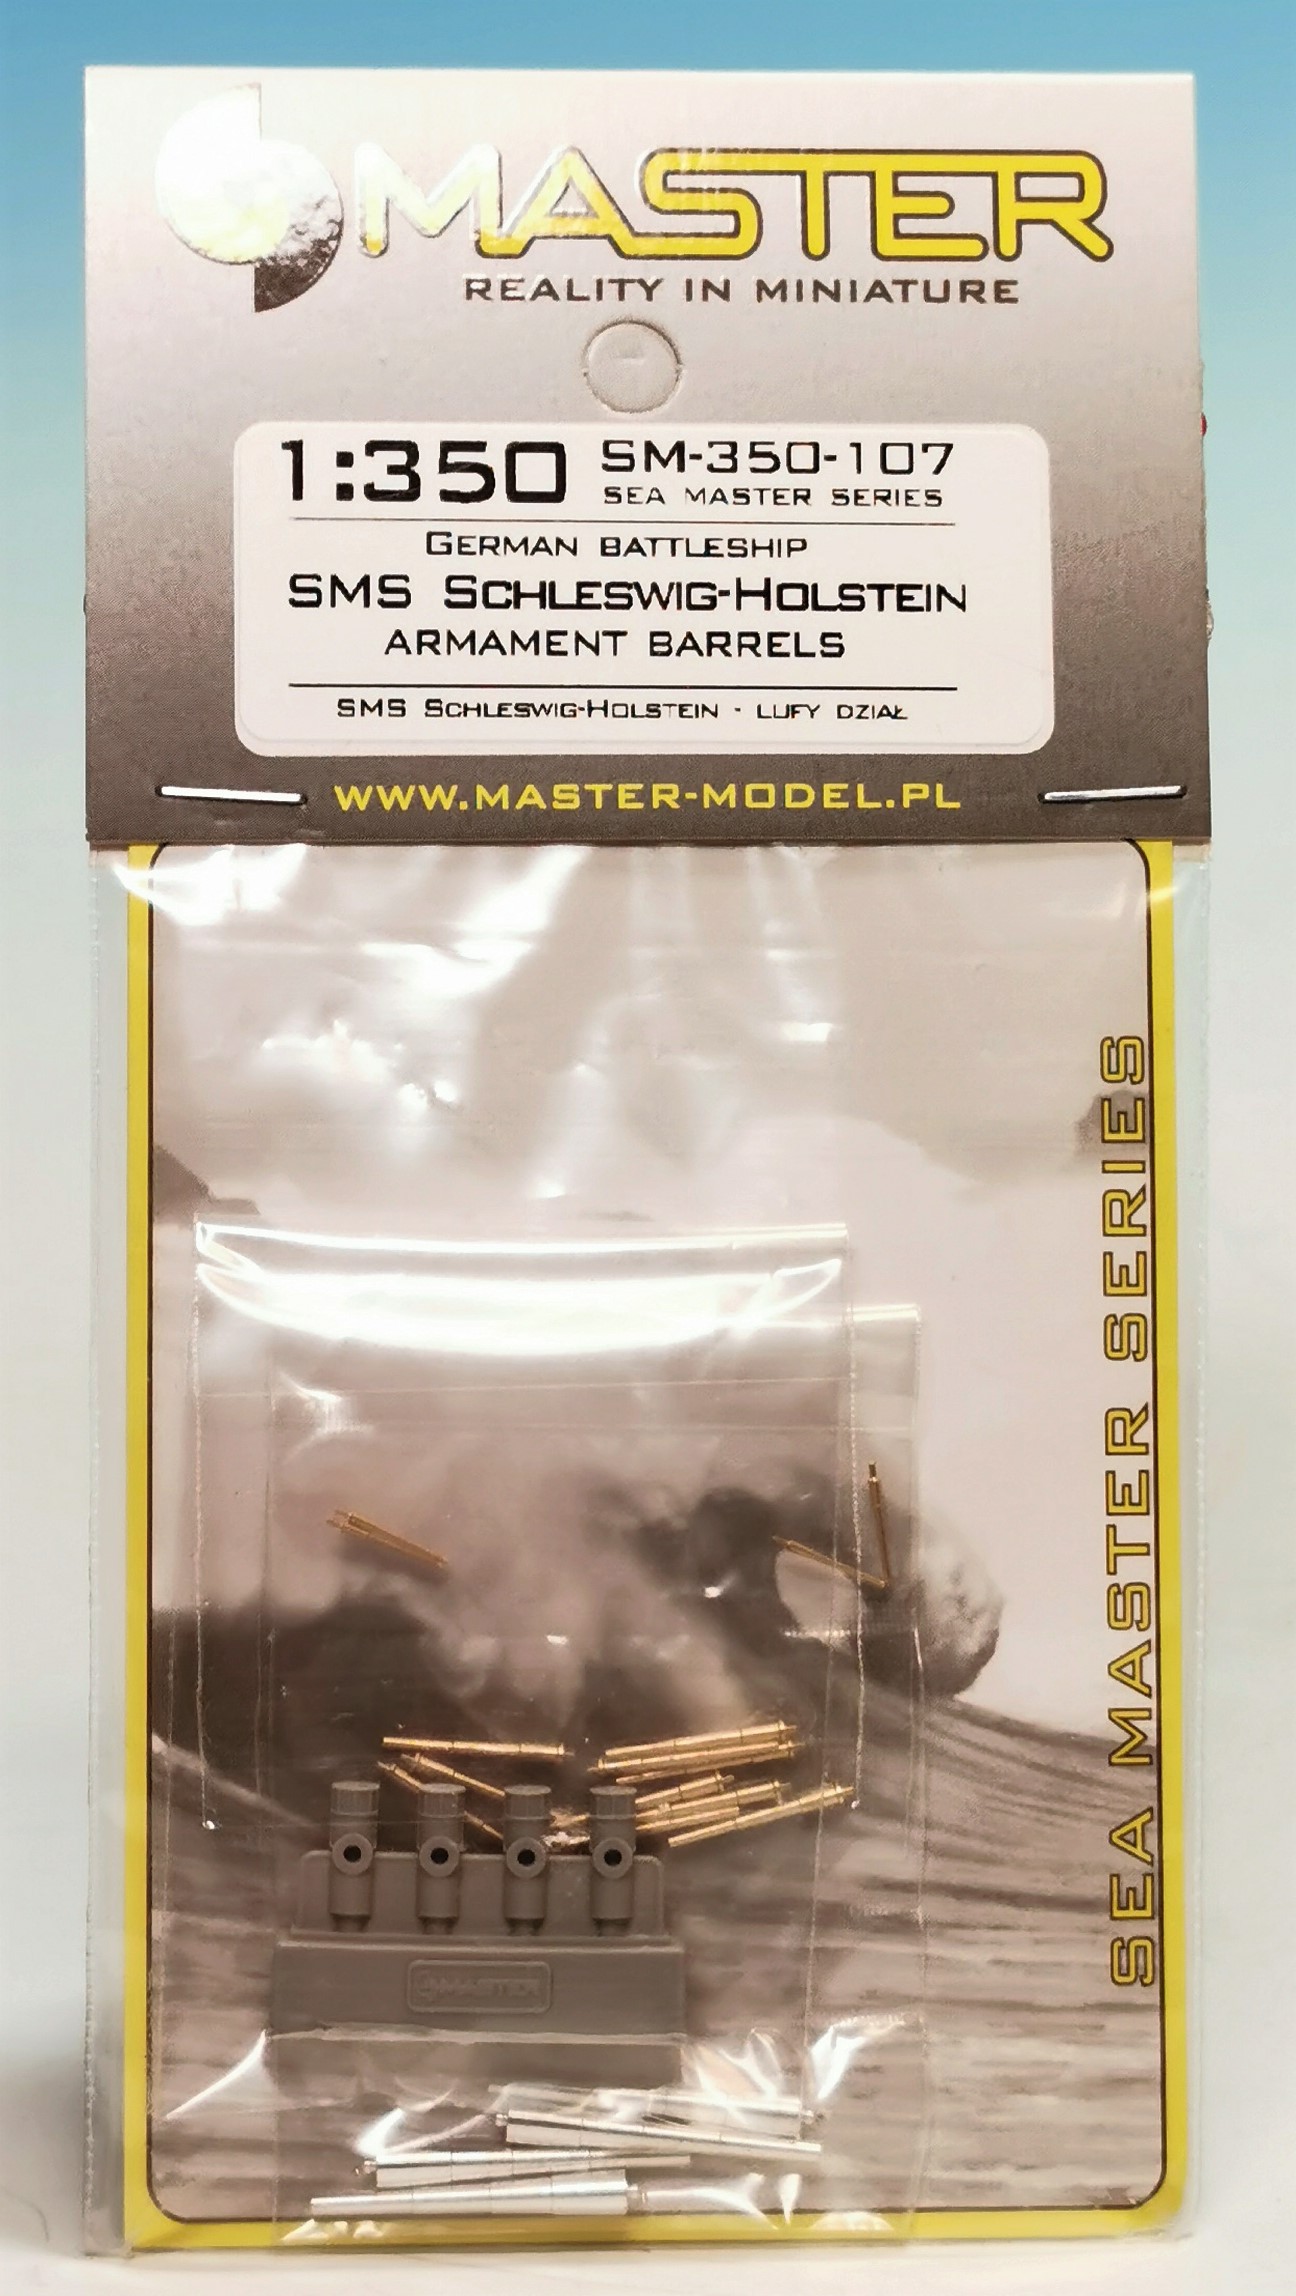
MASTER`s turned barrels; they have correcter diameter for the secondary guns

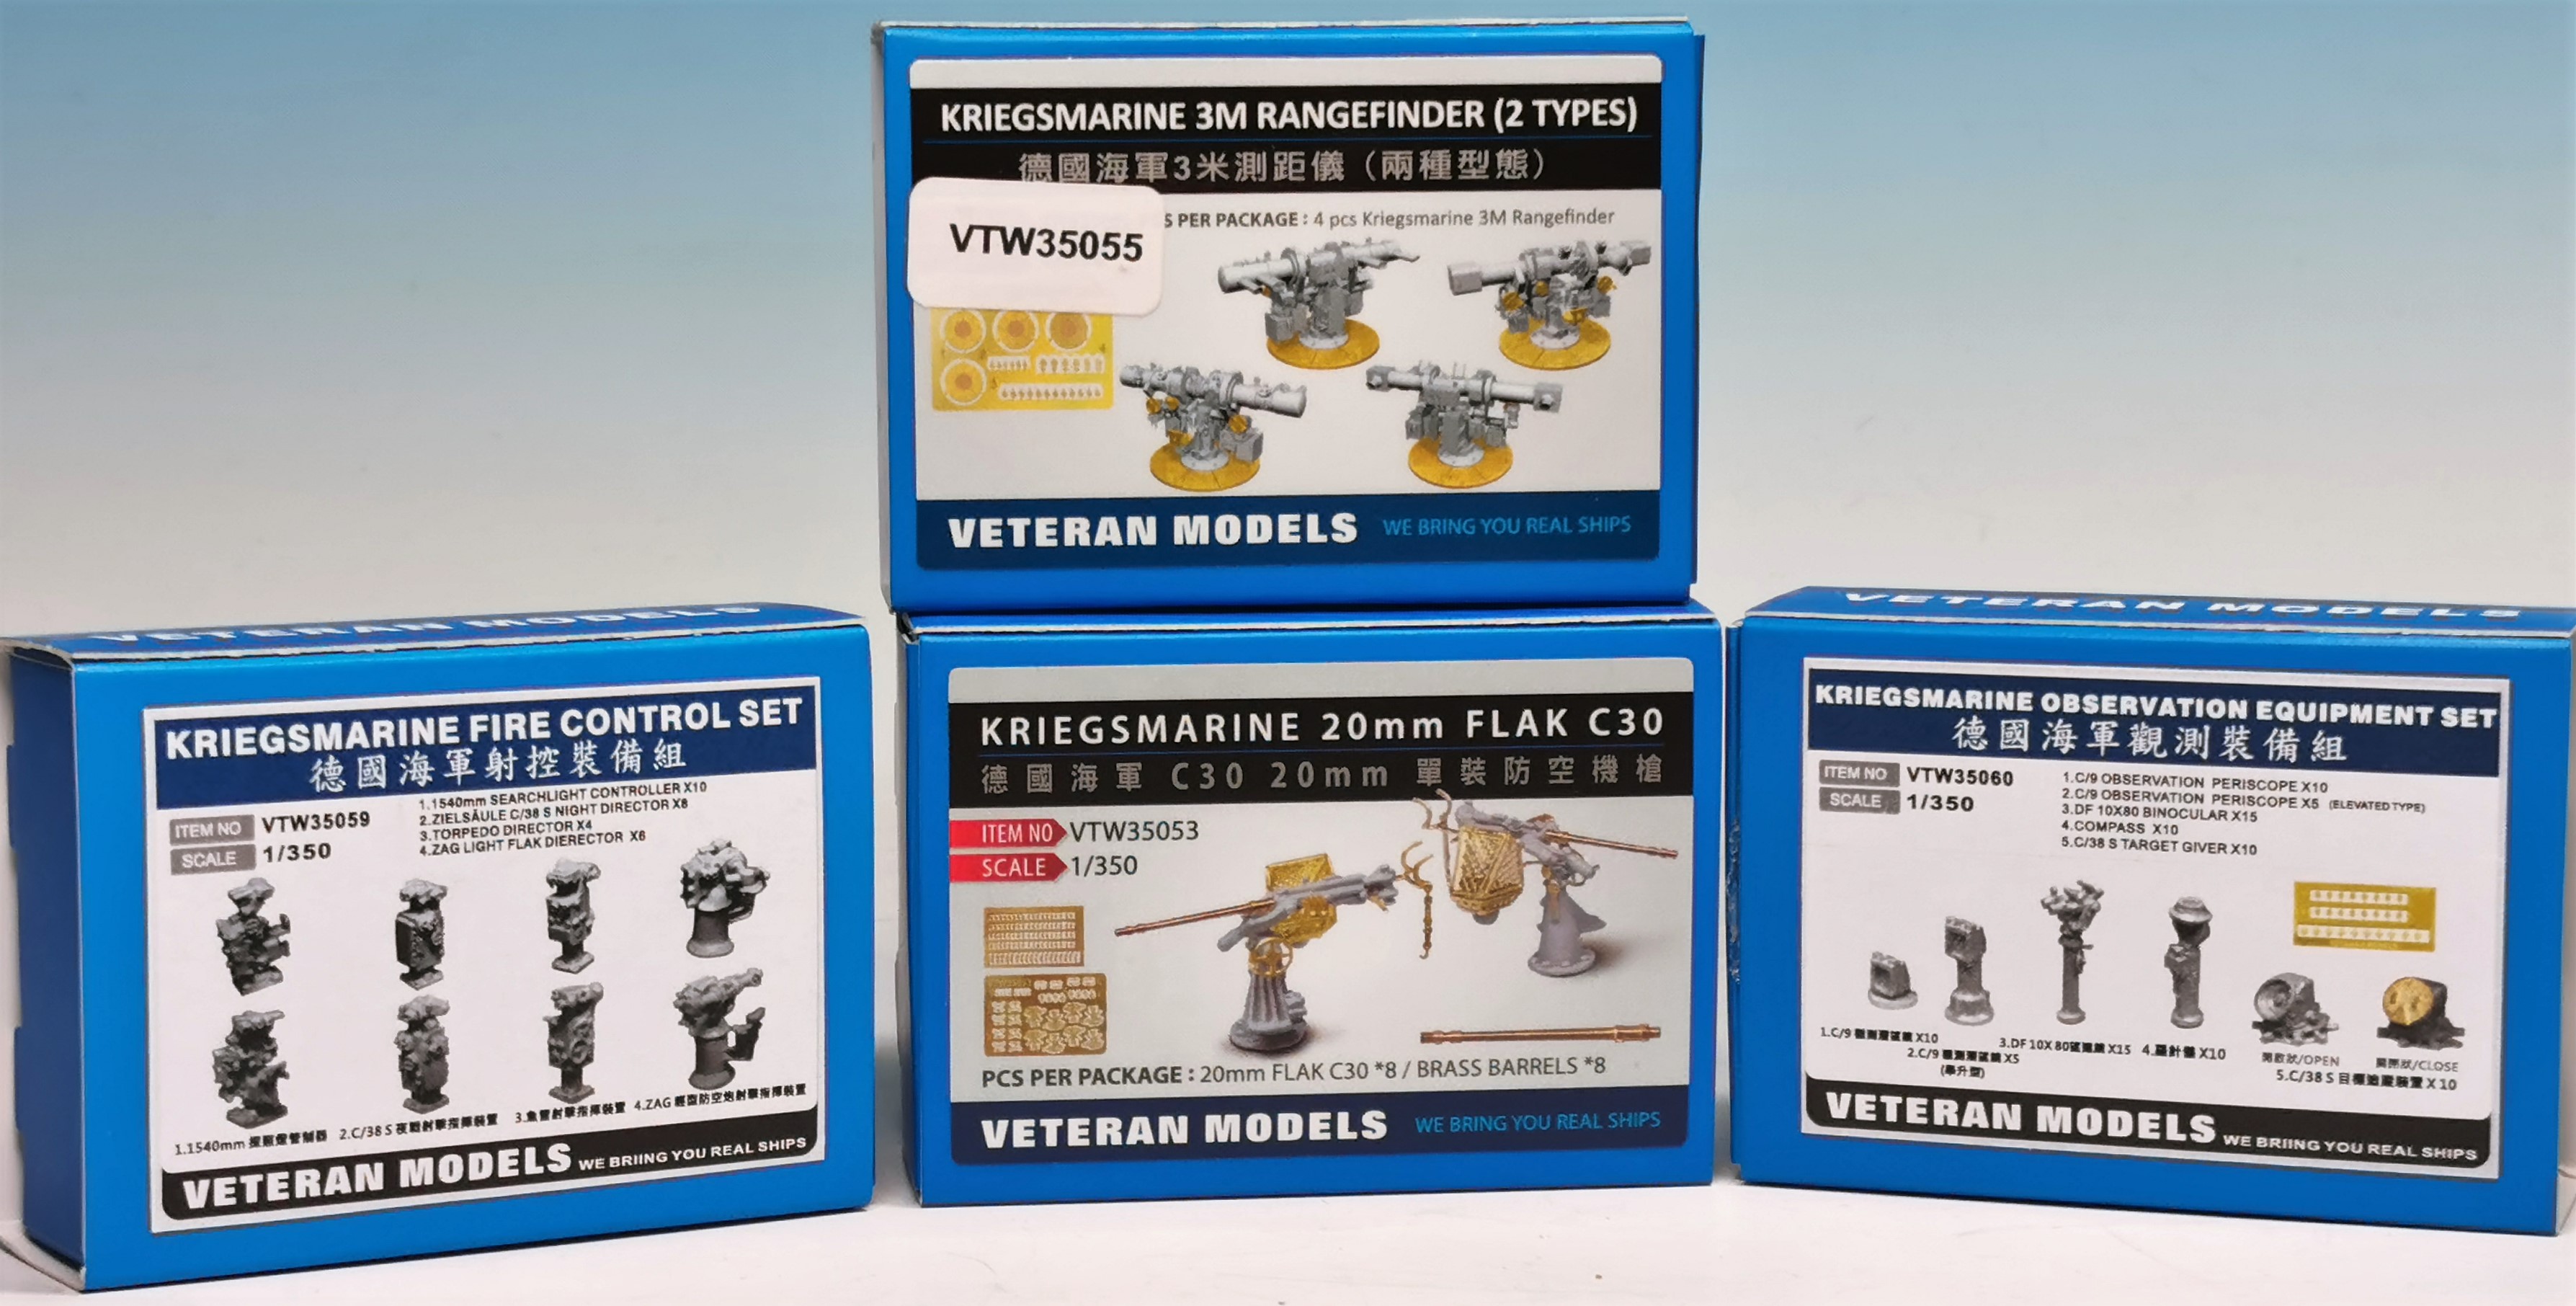
Some VETERAN MODEL sets – maybe the most important add ons

A wooden veneer deck from SHIPYARD WORKS


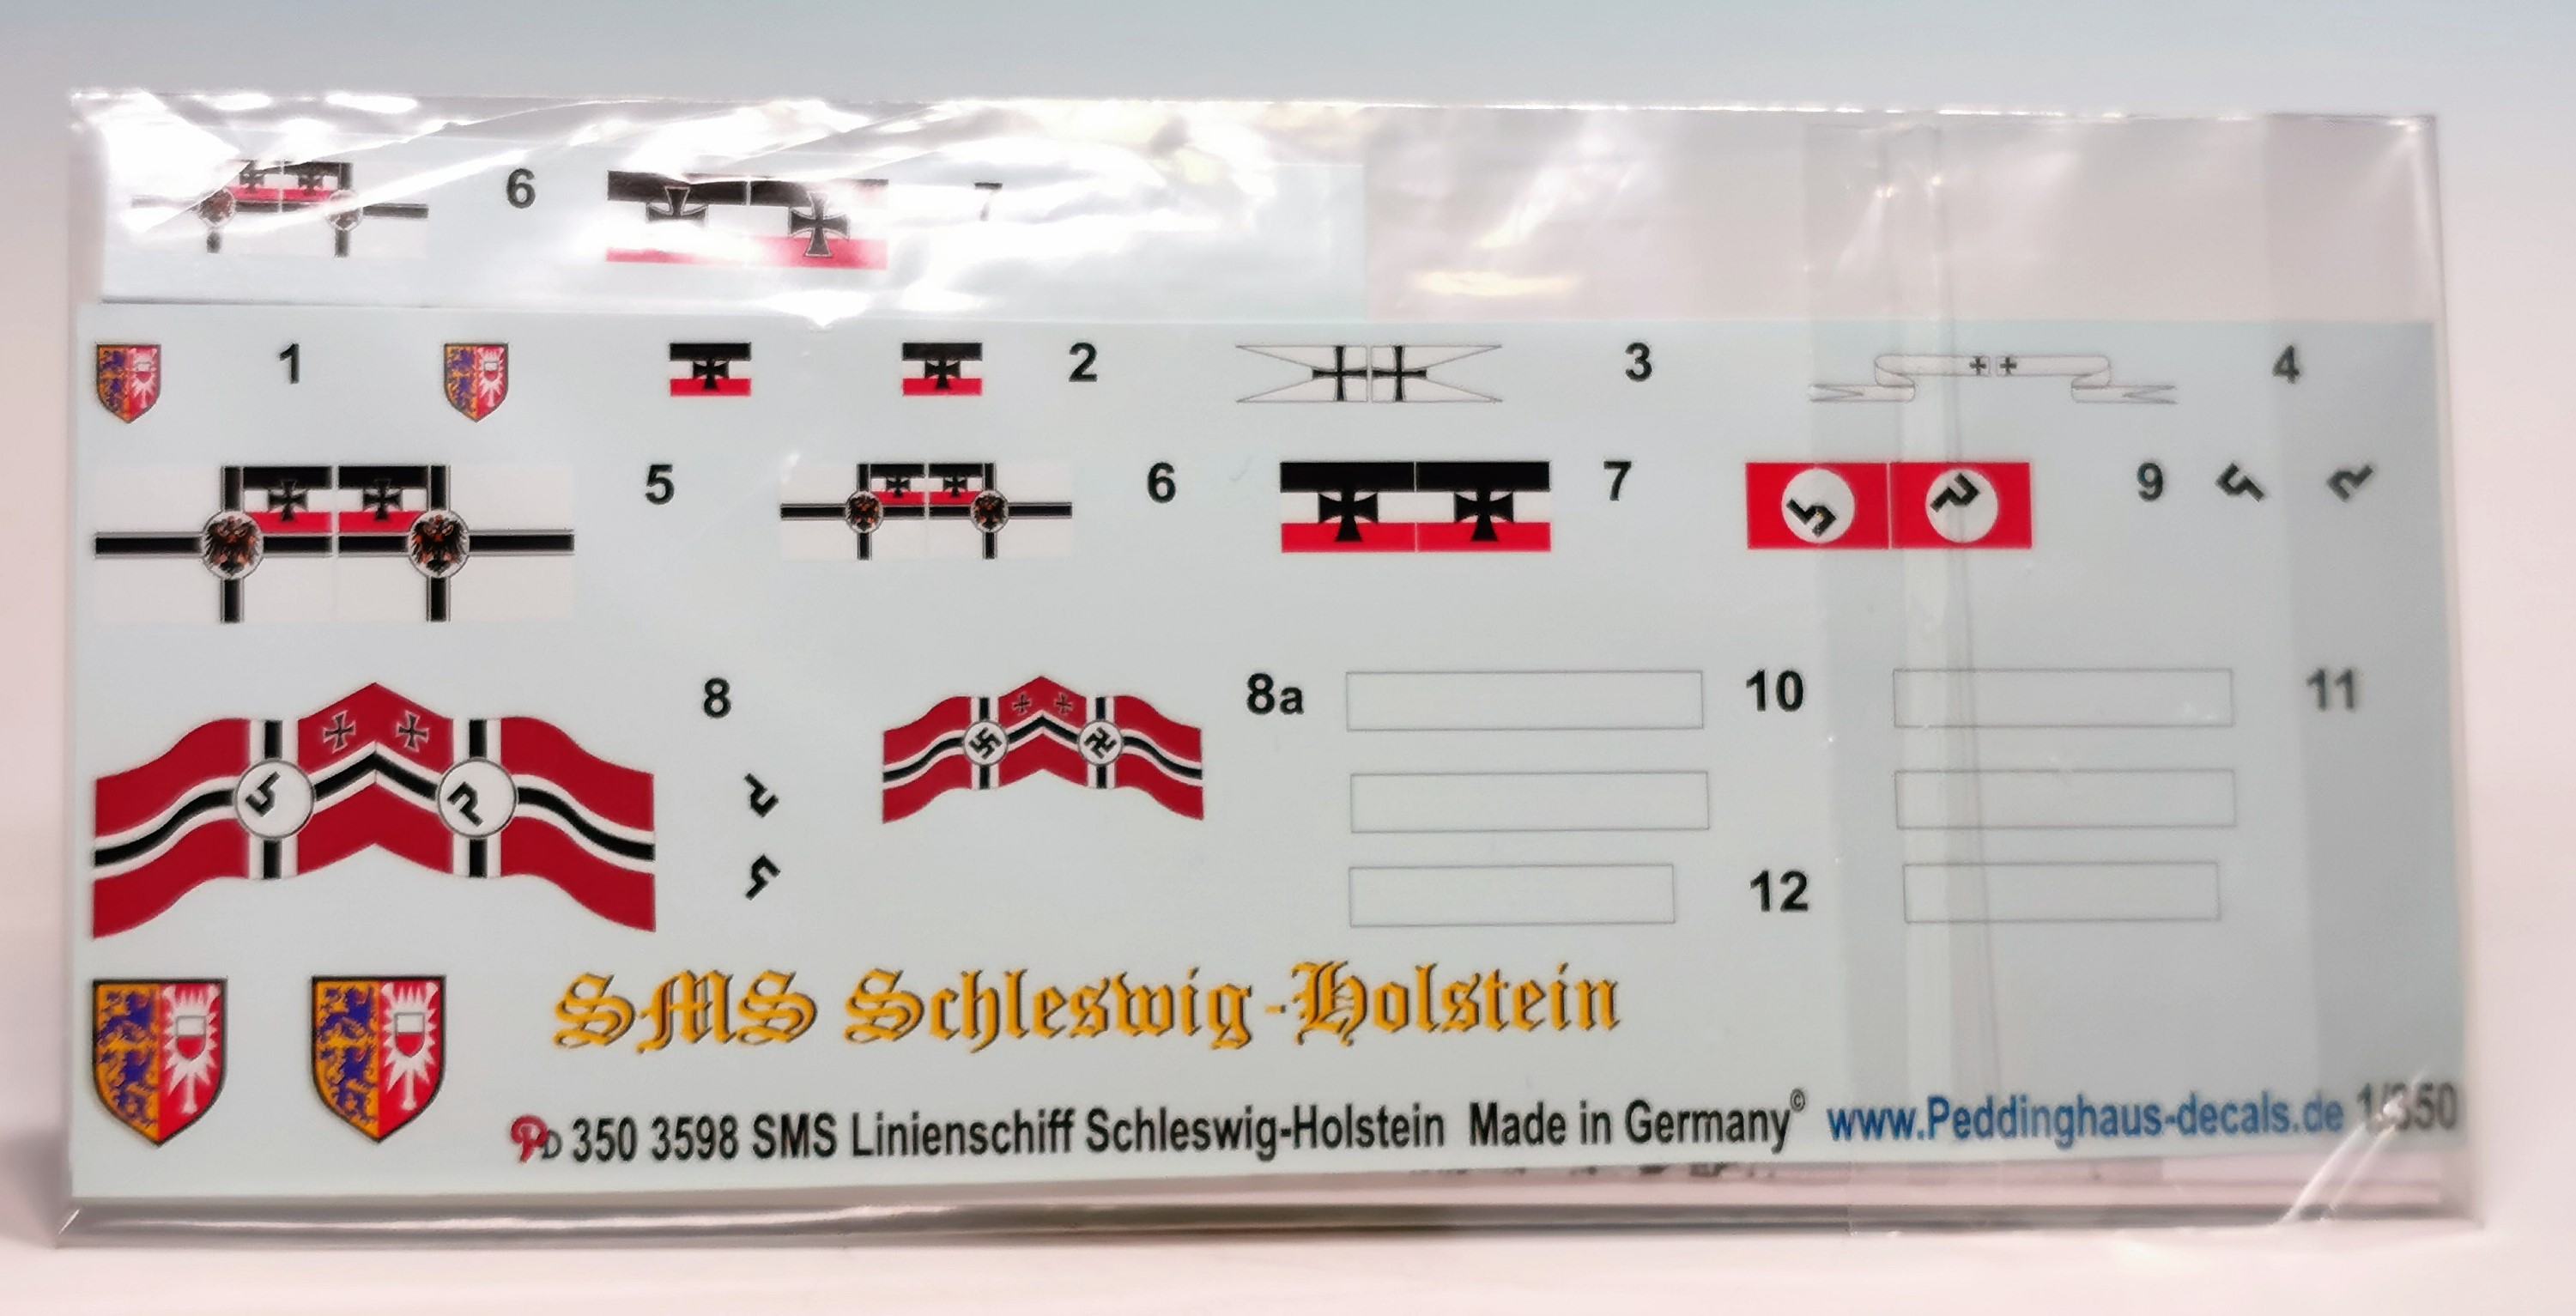
Decals from PEDDINGHAUS

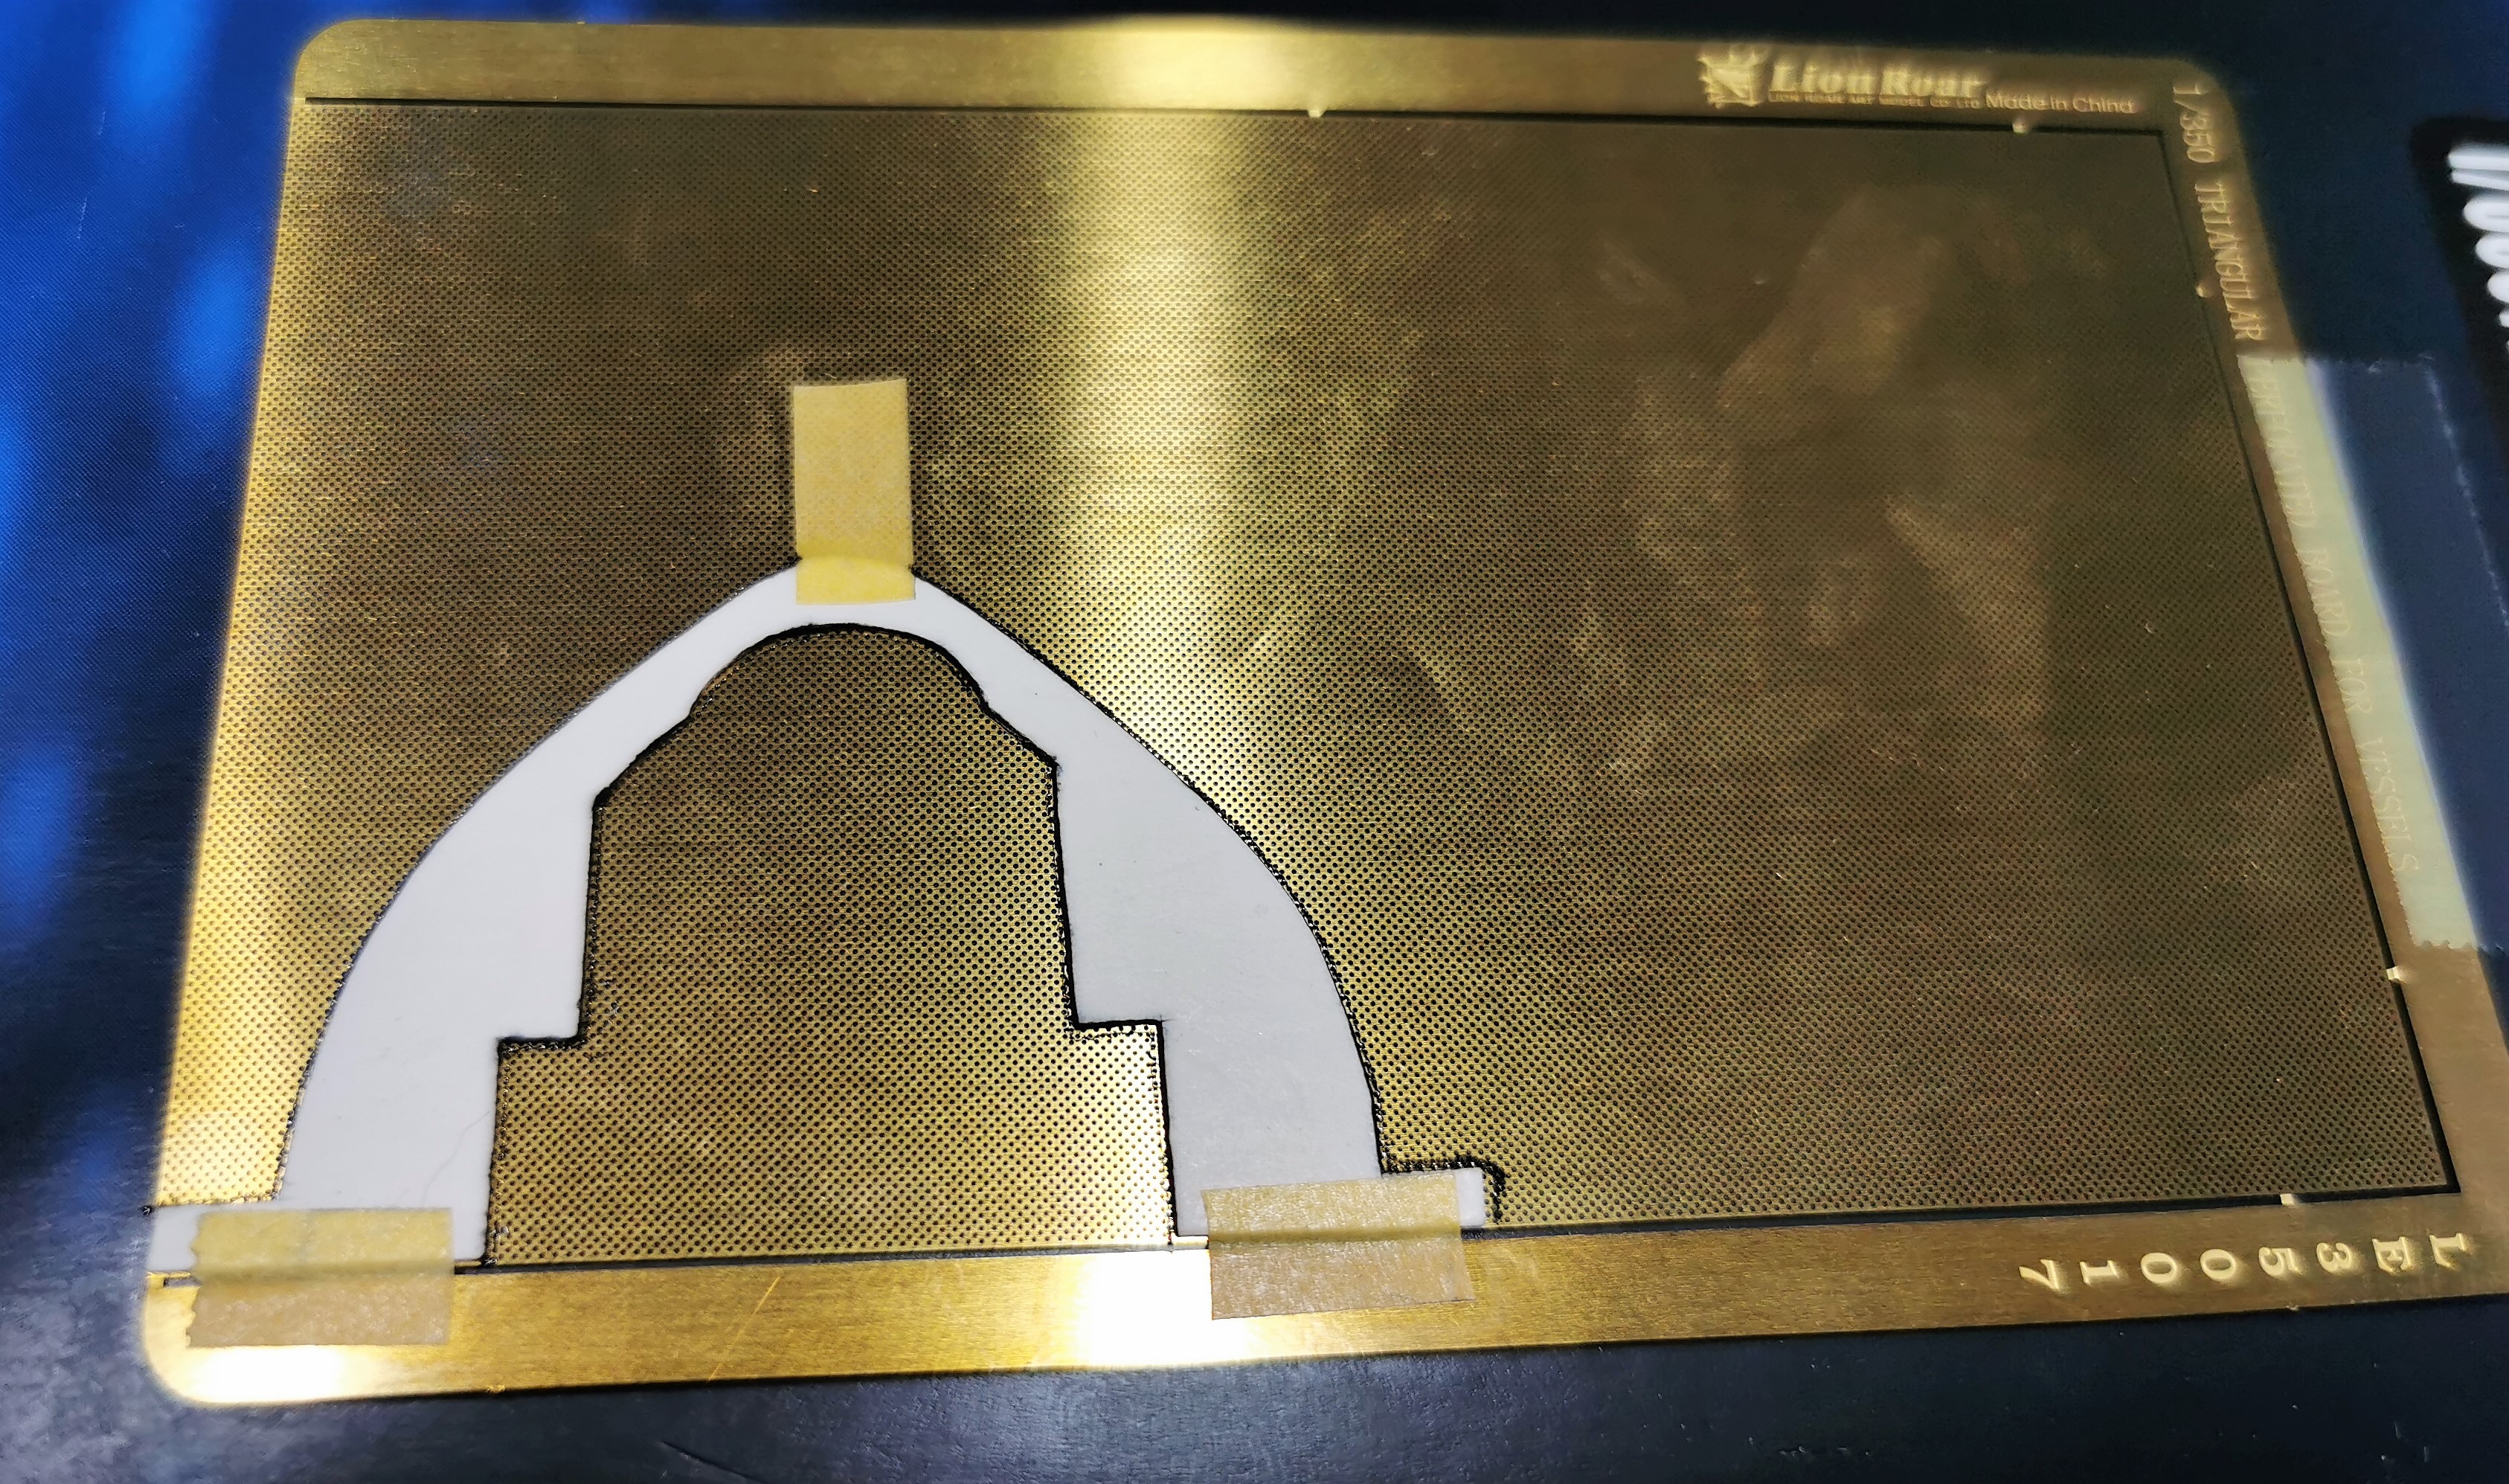
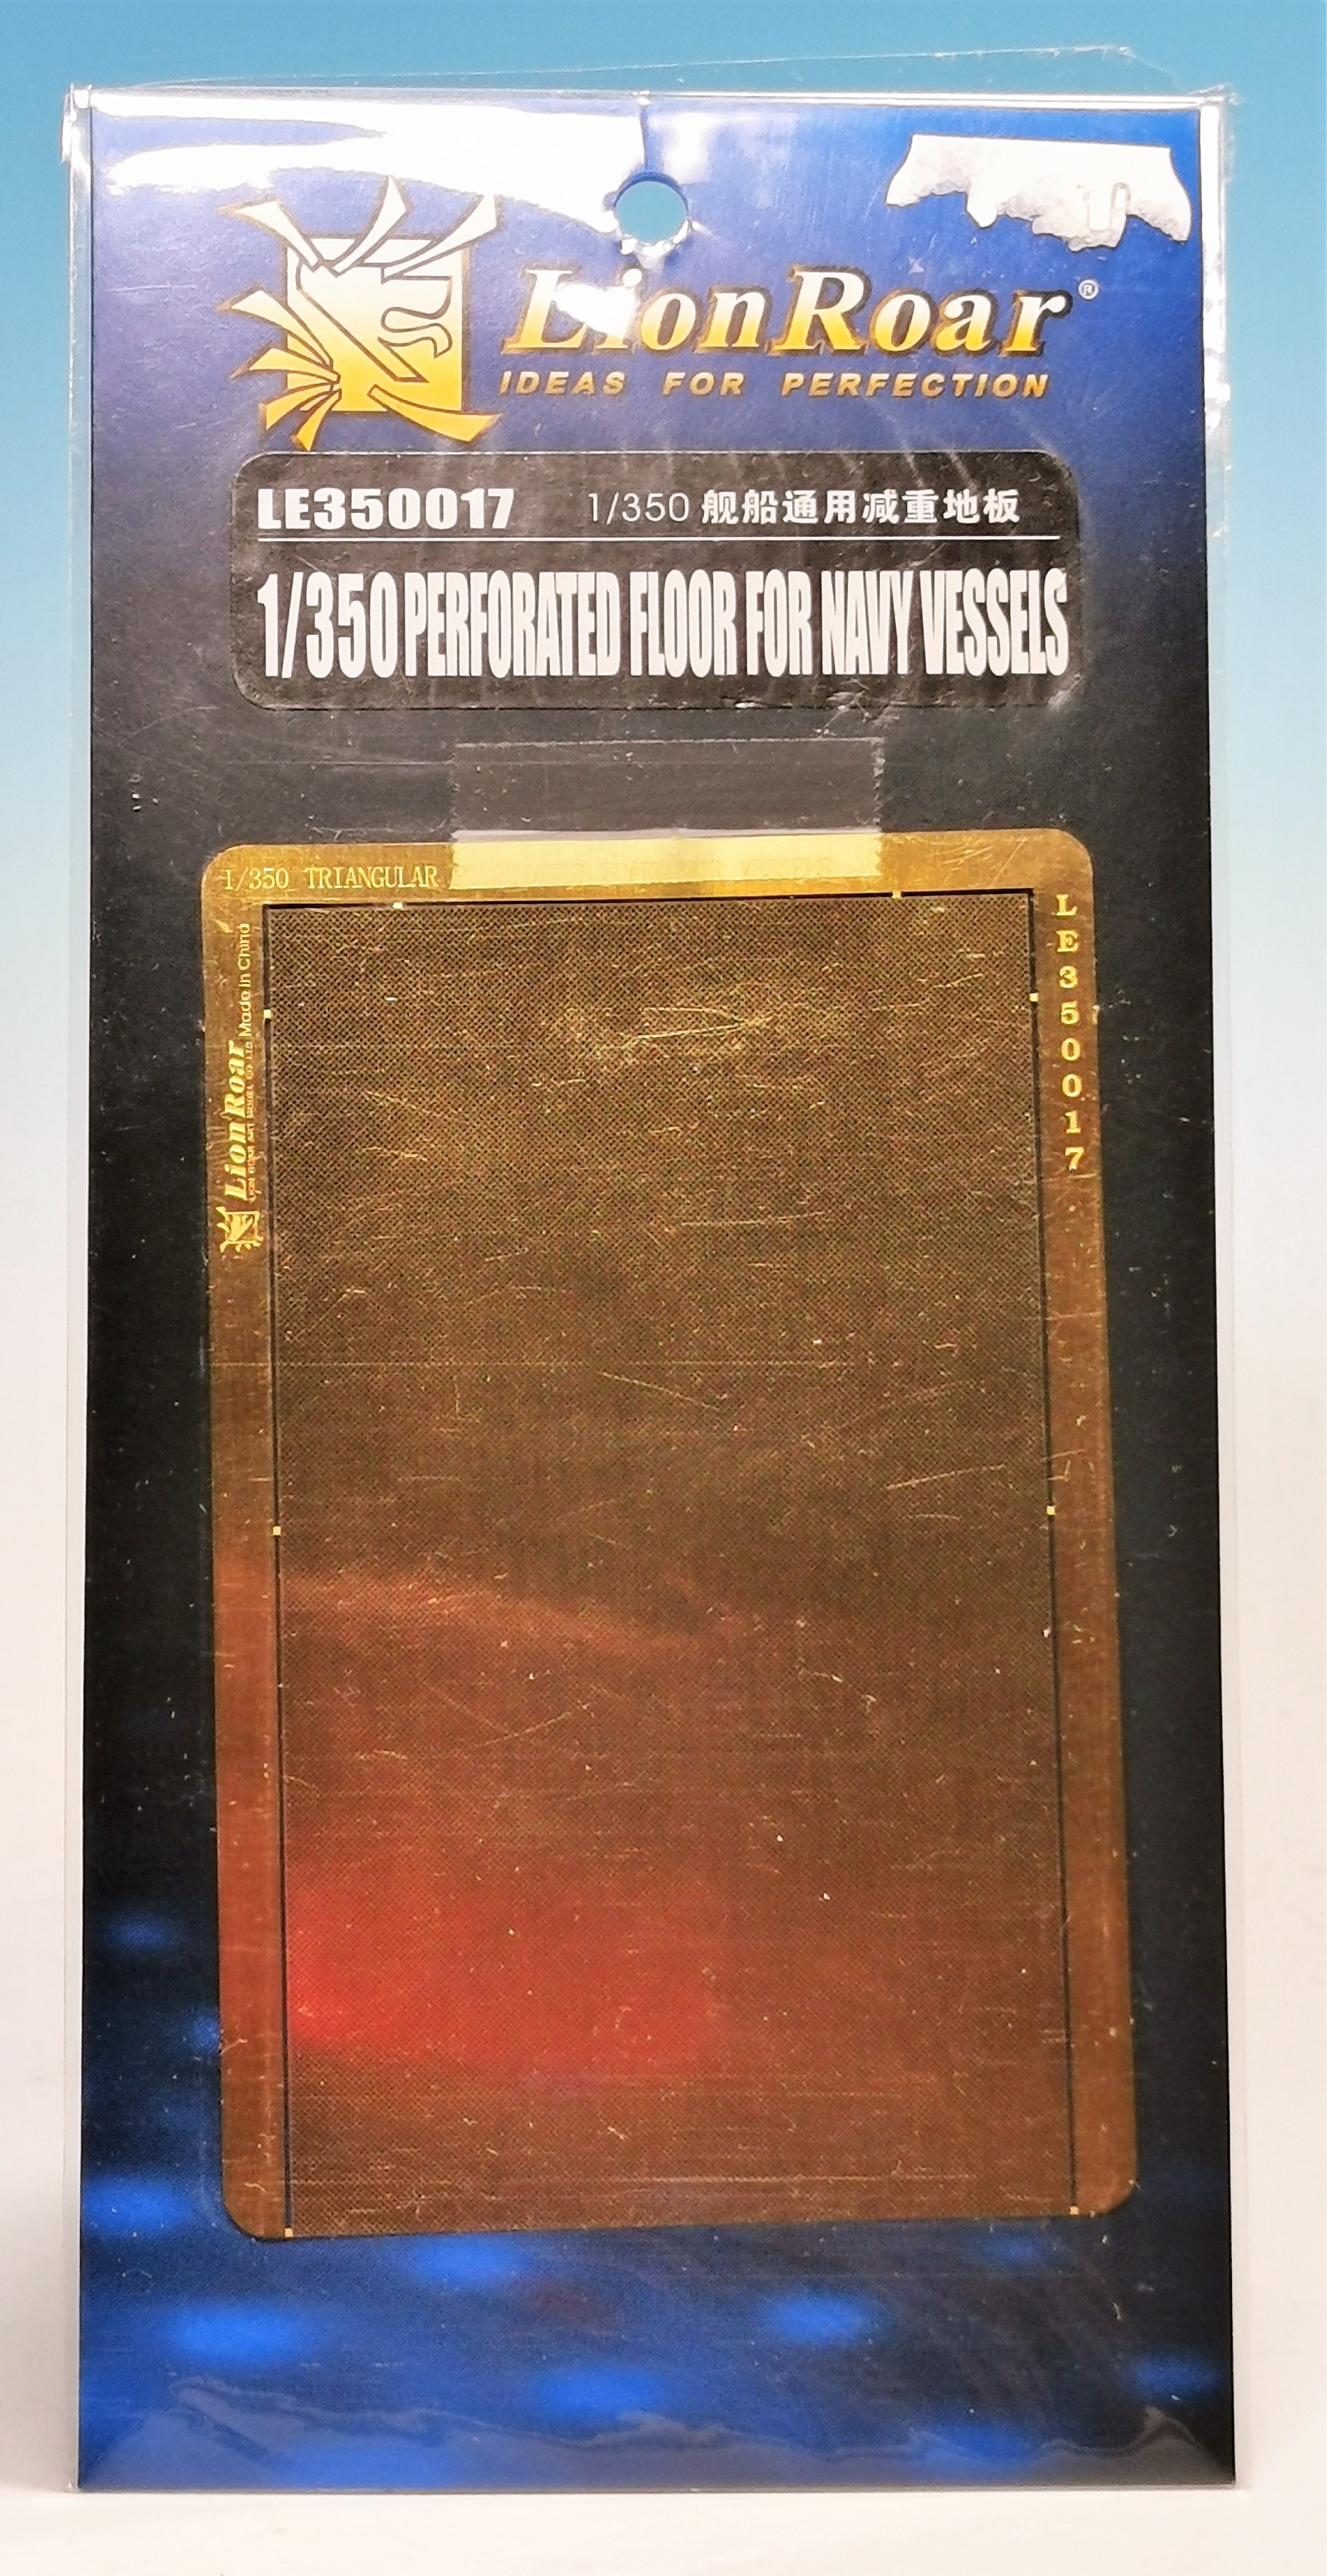
and finally an etched perforated floor from Lion Roar; the ship does have quite some perforated floors at the bridge area but TRUMPETER and EDUARD ommitted them both. I will try if I can make it with this one:


Ok that’s it, full speed ahead
TimReynaga
Staff MemberAssociate Editor
MODEL SHIPWRIGHTS
Visit this Community
California, United States
Joined: May 03, 2006
KitMaker: 2,500 posts
Model Shipwrights: 1,830 posts
Posted: Sunday, June 14, 2020 - 06:15 AM UTC
Hey Thomas,

I too was excited to note this unusual choice by Trumpeter when it came out. Glad to see you are taking on this interesting subject - I'm taking a front row seat to watch Schleswig-Holstein come alive!
GazzaS
#424
Visit this Community
Queensland, Australia
Joined: April 23, 2015
KitMaker: 4,648 posts
Model Shipwrights: 249 posts
Posted: Sunday, June 14, 2020 - 08:17 AM UTC
HI Thomas!
Great to see you taking on the old pre-dreadnought. Going to have to follow.

Gaz
RussellE
#306
Visit this Community
Victoria, Australia
Joined: June 27, 2010
KitMaker: 3,959 posts
Model Shipwrights: 2,777 posts
Posted: Sunday, June 14, 2020 - 09:27 AM UTC
Hi Thomas!

What a great topic and a fascinating introduction!

Following along with interest
RedDuster
Visit this Community
England - South East, United Kingdom
Joined: March 01, 2010
KitMaker: 7,078 posts
Model Shipwrights: 6,649 posts
Posted: Monday, June 15, 2020 - 05:00 AM UTC
Hi Thomas,

Great subject, will be following along for the ride, and inspiration when I get round to tackling the one in my stash.

Cheers

Si
McRunty
#491
Visit this Community
Missouri, United States
Joined: April 06, 2016
KitMaker: 602 posts
Model Shipwrights: 349 posts
Posted: Monday, June 15, 2020 - 05:48 AM UTC
Was very tempted to buy this kit when it came out but held off until some proper buildups went up online so will follow with a great deal of interest.
d6mst0
#453
Visit this Community
Texas, United States
Joined: August 28, 2016
KitMaker: 1,925 posts
Model Shipwrights: 1,298 posts
Posted: Tuesday, June 16, 2020 - 12:08 AM UTC
This will be a most interesting build. Looking forward to see how it goes together as I have the same kit and accessories.

I wondered why Trumpeter didn't release it in its 1939 configuration? Firing one of the first shots of WWII, being its only claim to frame and being only one of the battleships Germany was able to keep after WWI.

Mark
Black_sheep
Visit this Community
Bayern, Germany
Joined: December 11, 2009
KitMaker: 823 posts
Model Shipwrights: 551 posts
Posted: Saturday, June 27, 2020 - 04:03 AM UTC
Ahoy all and very welcome aboard altogether. I am glad there are quite some people interested in this topic

Sorry for the delay with postings but the very first steps already were time consuming - but look I will show you what I did until now:

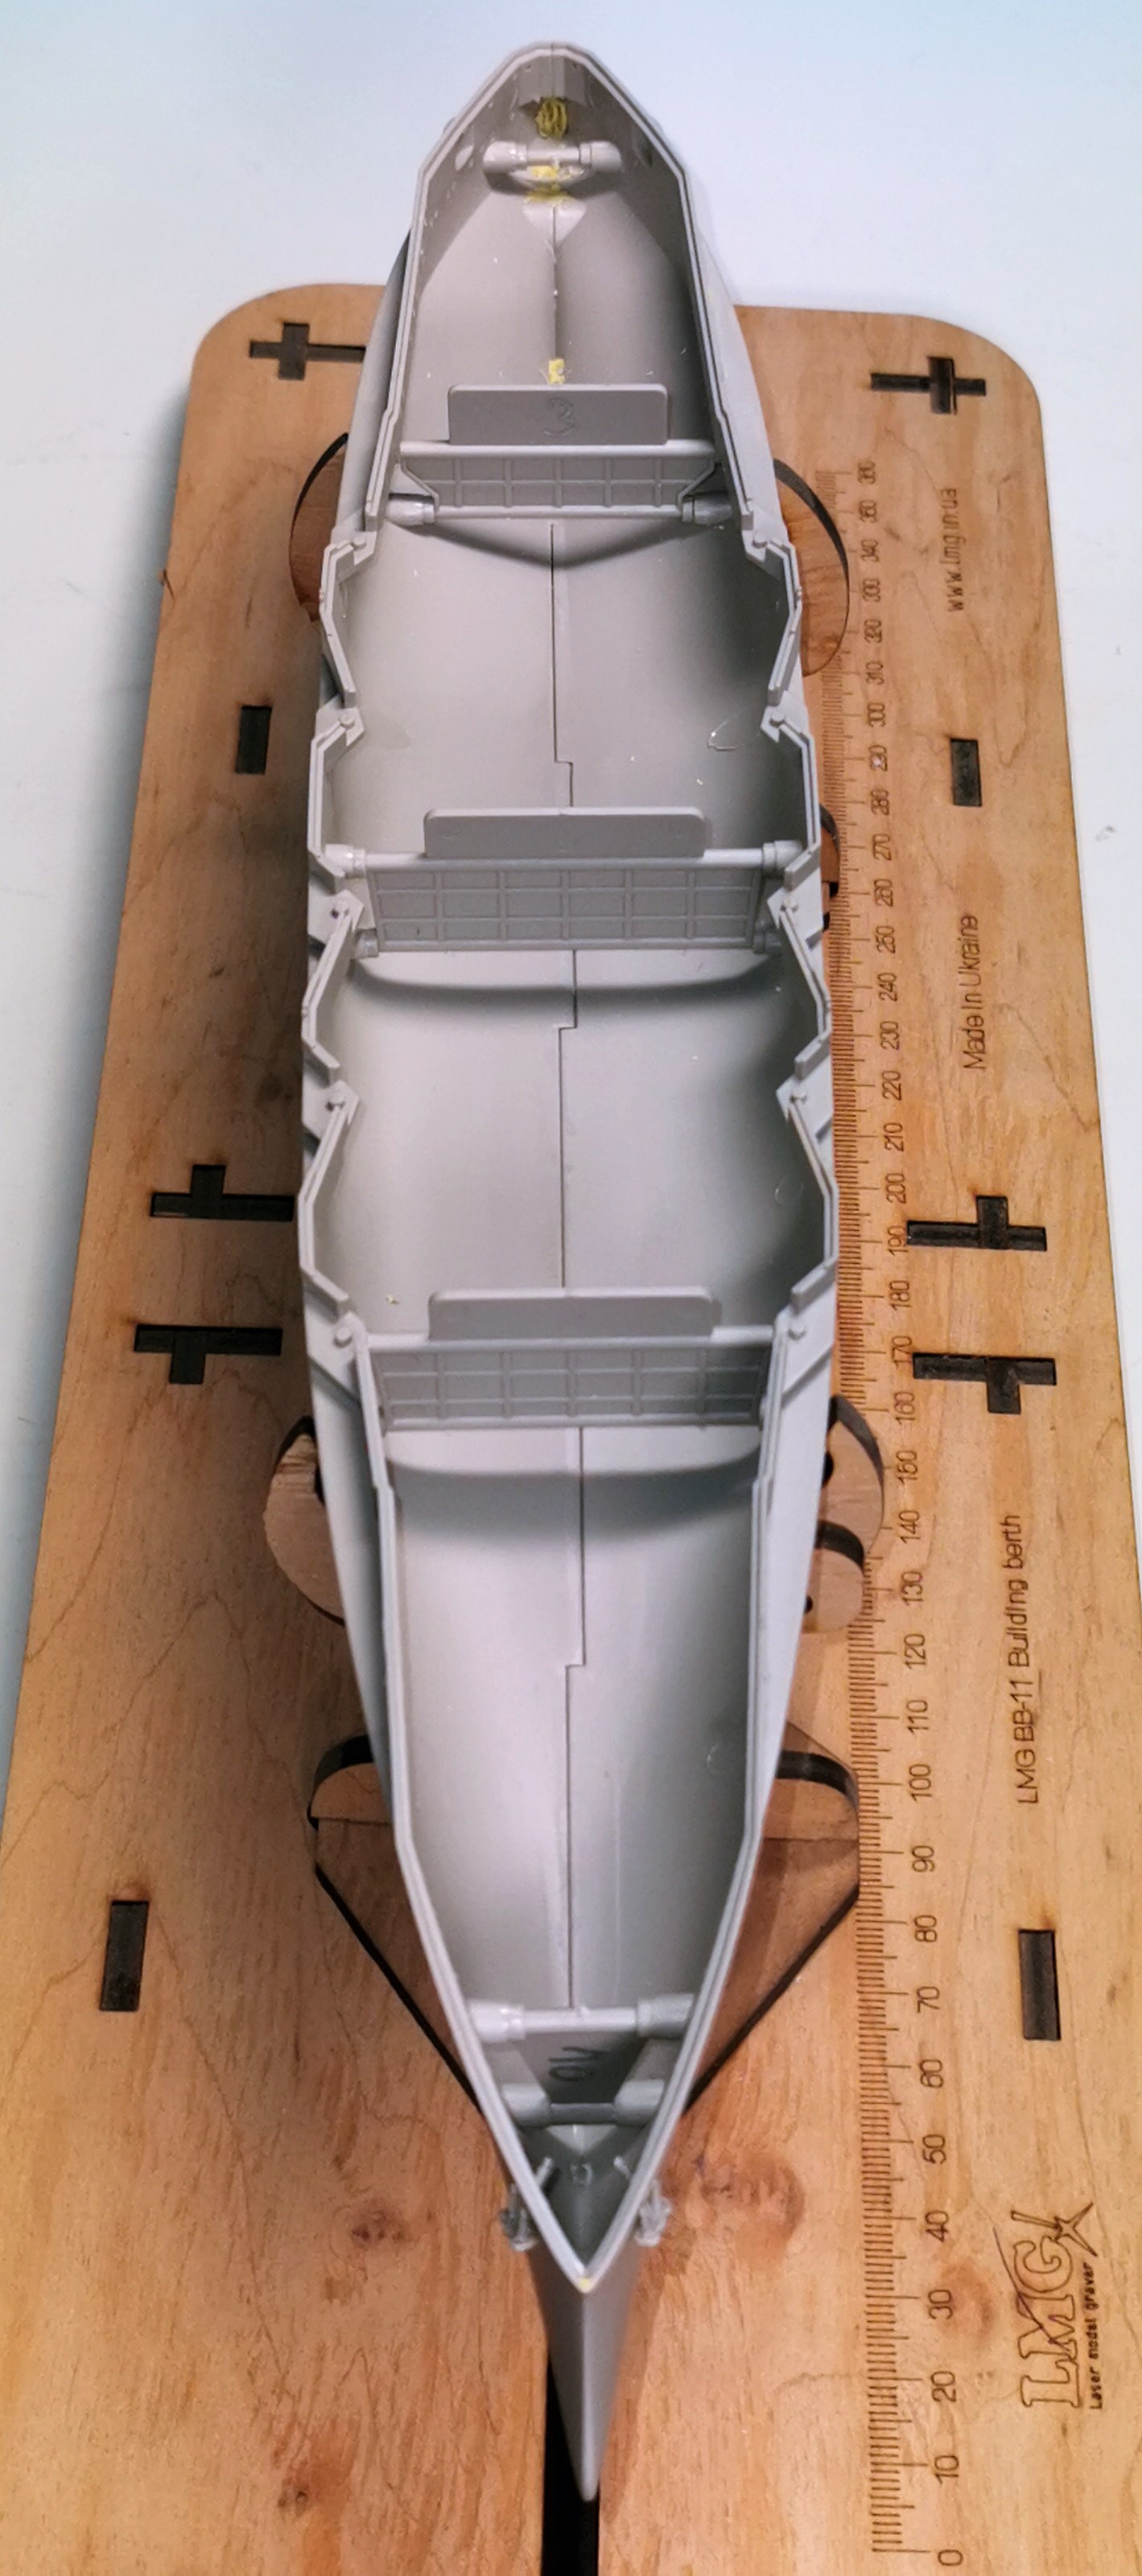
First I glued together the hull. It is a nice detail that TRUMPETER did here like Hasegawa and Fujimi and let you glue some strenghtening profiles inside. This way the whole hull is quasi torsion-free


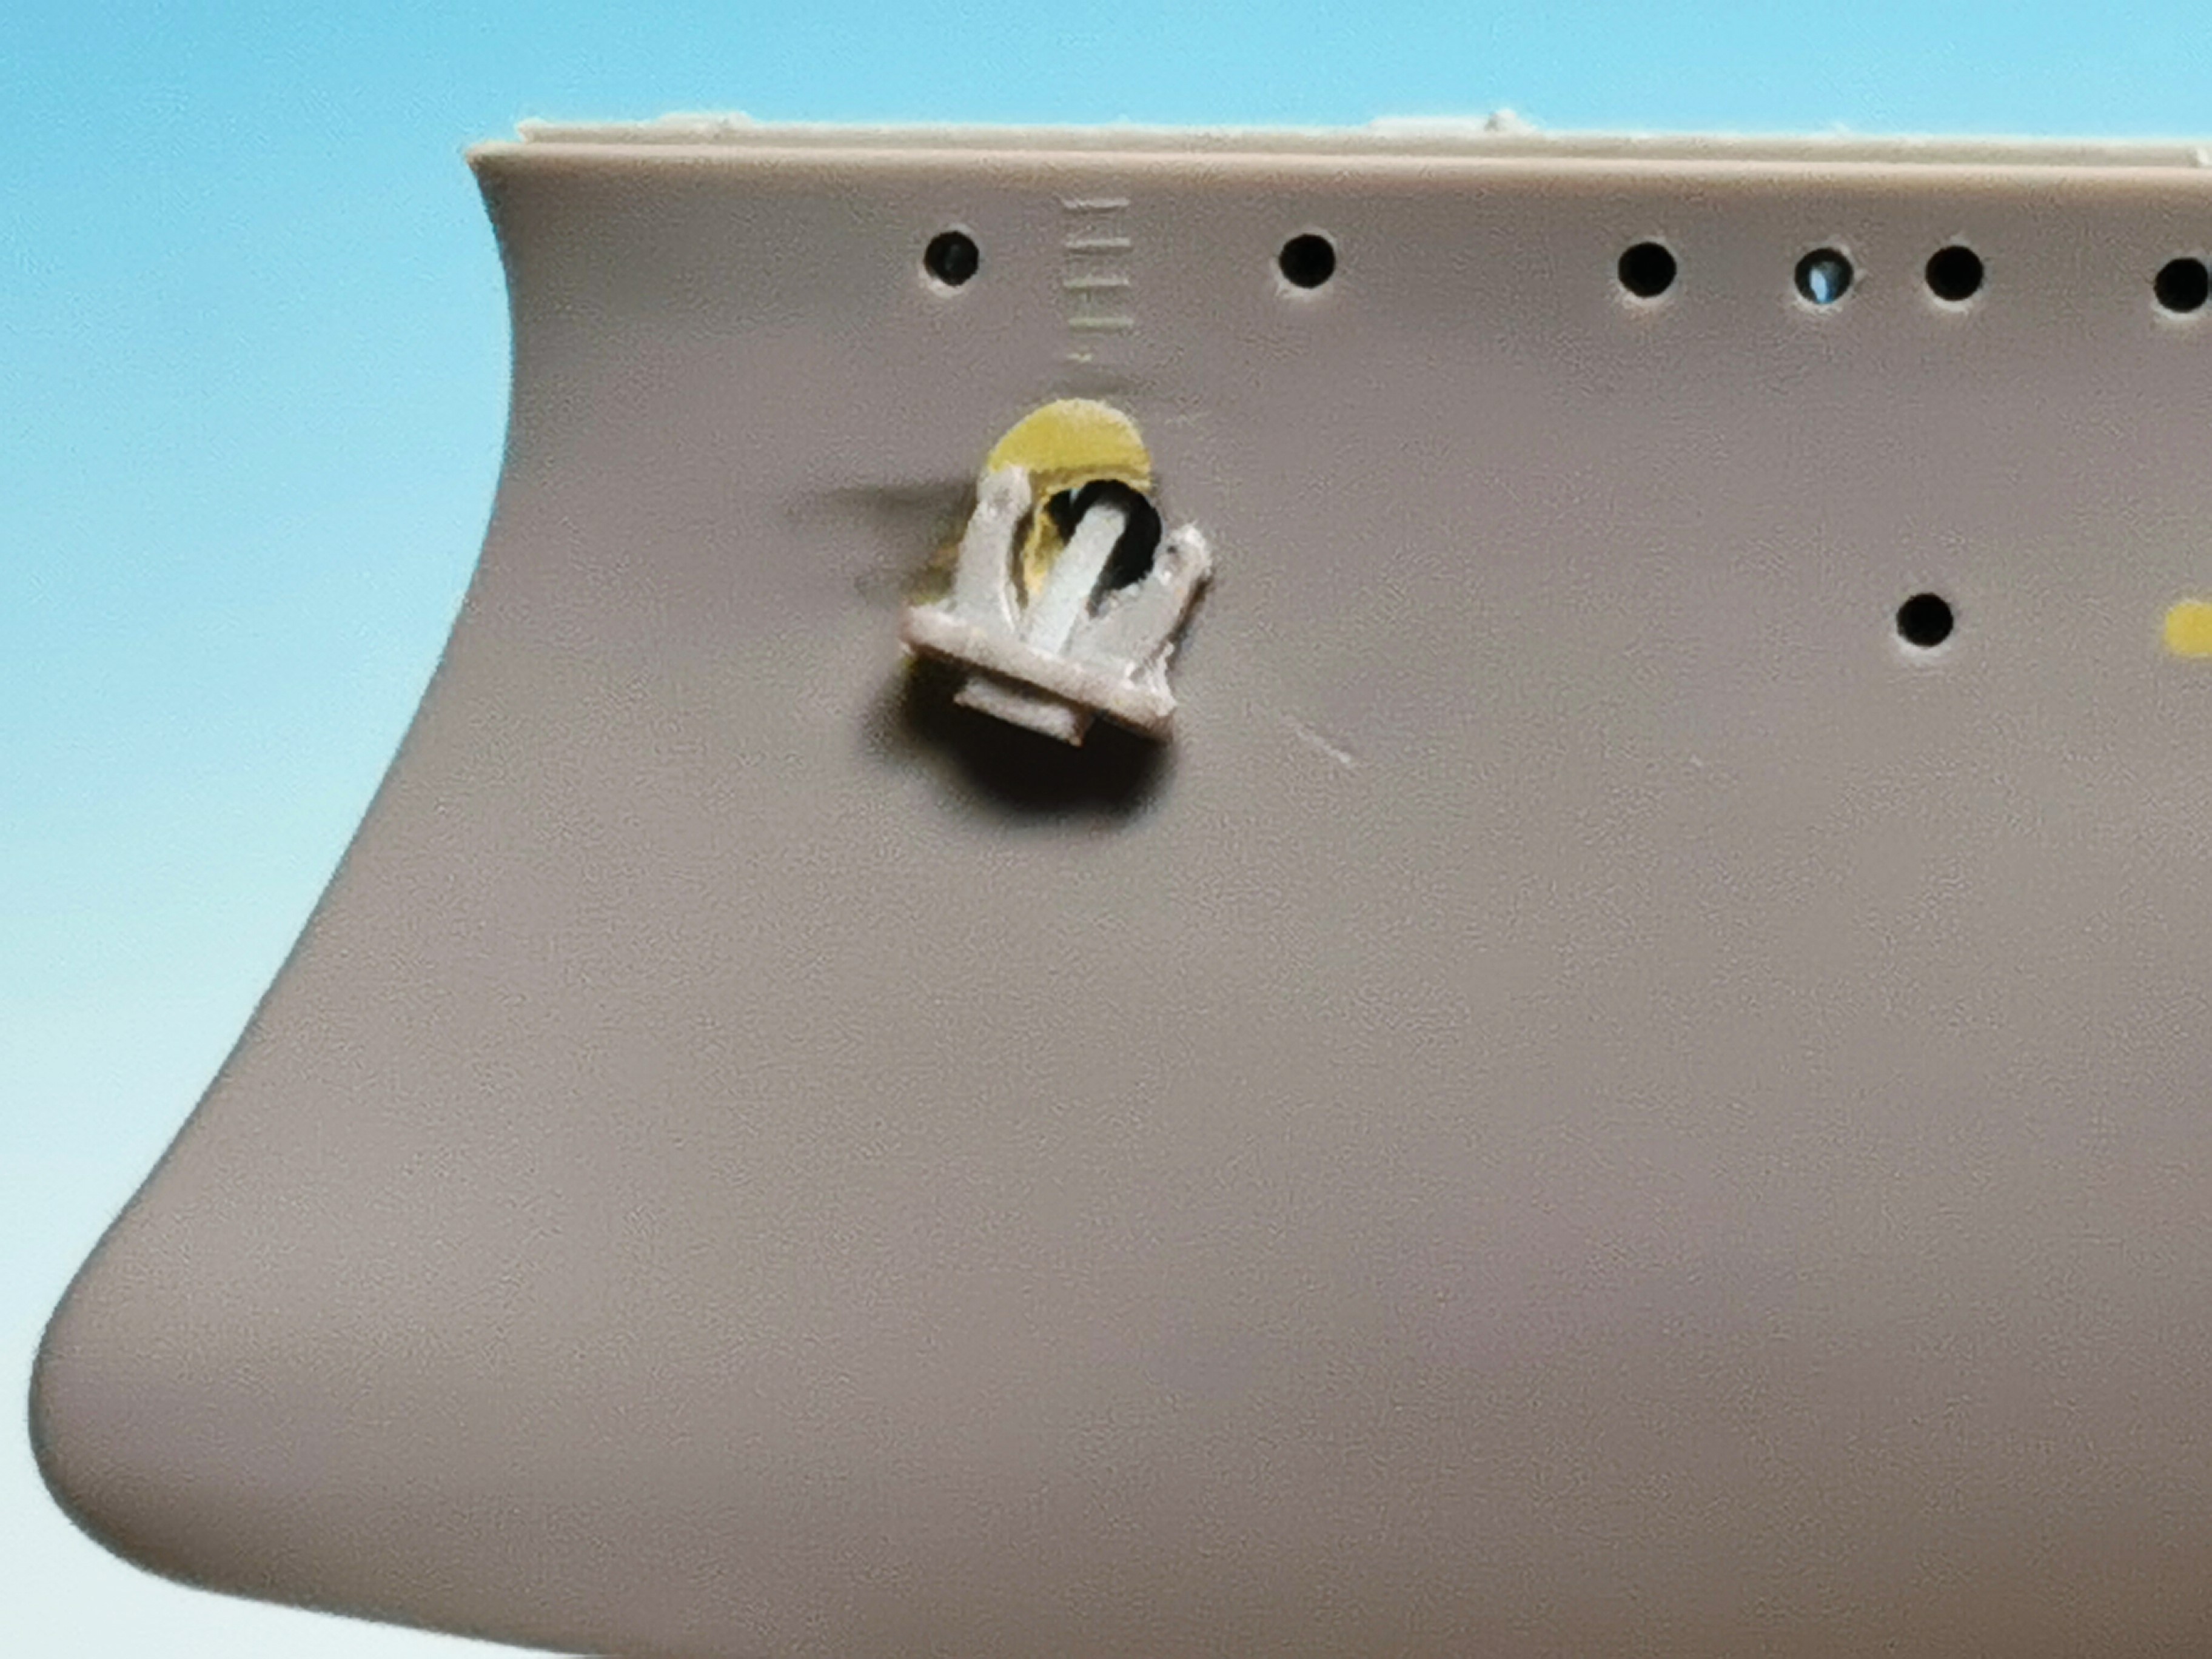
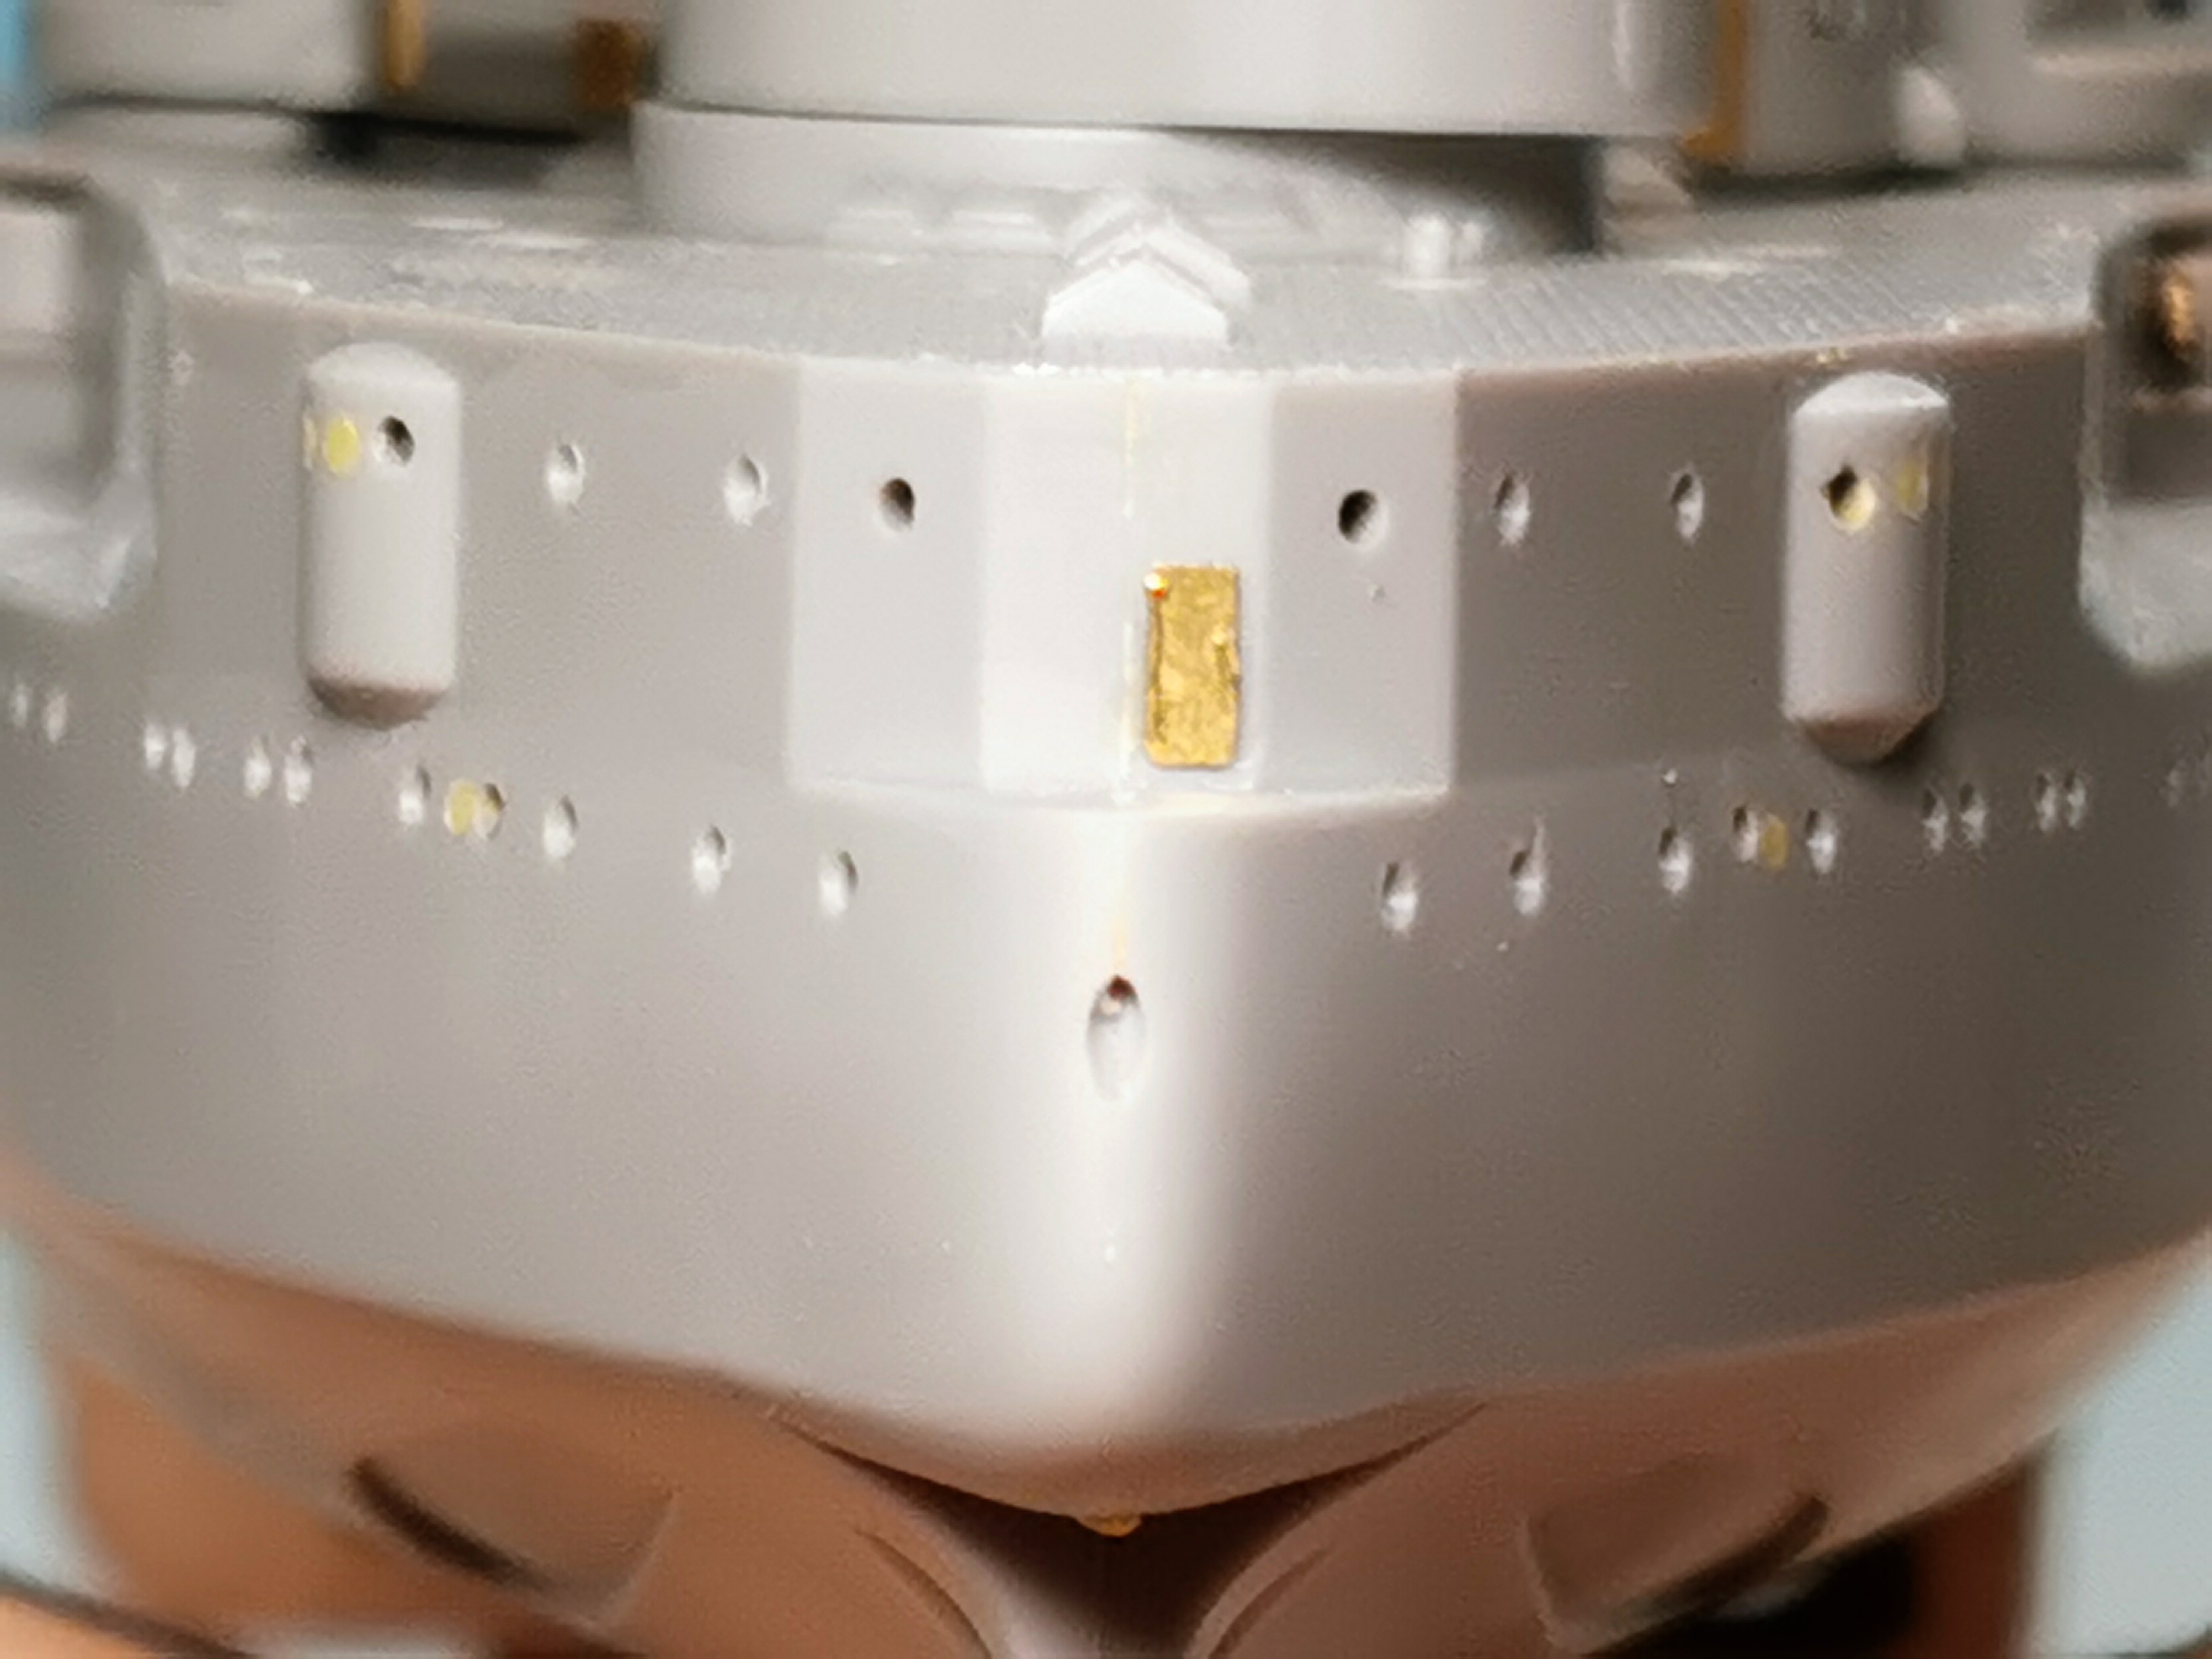
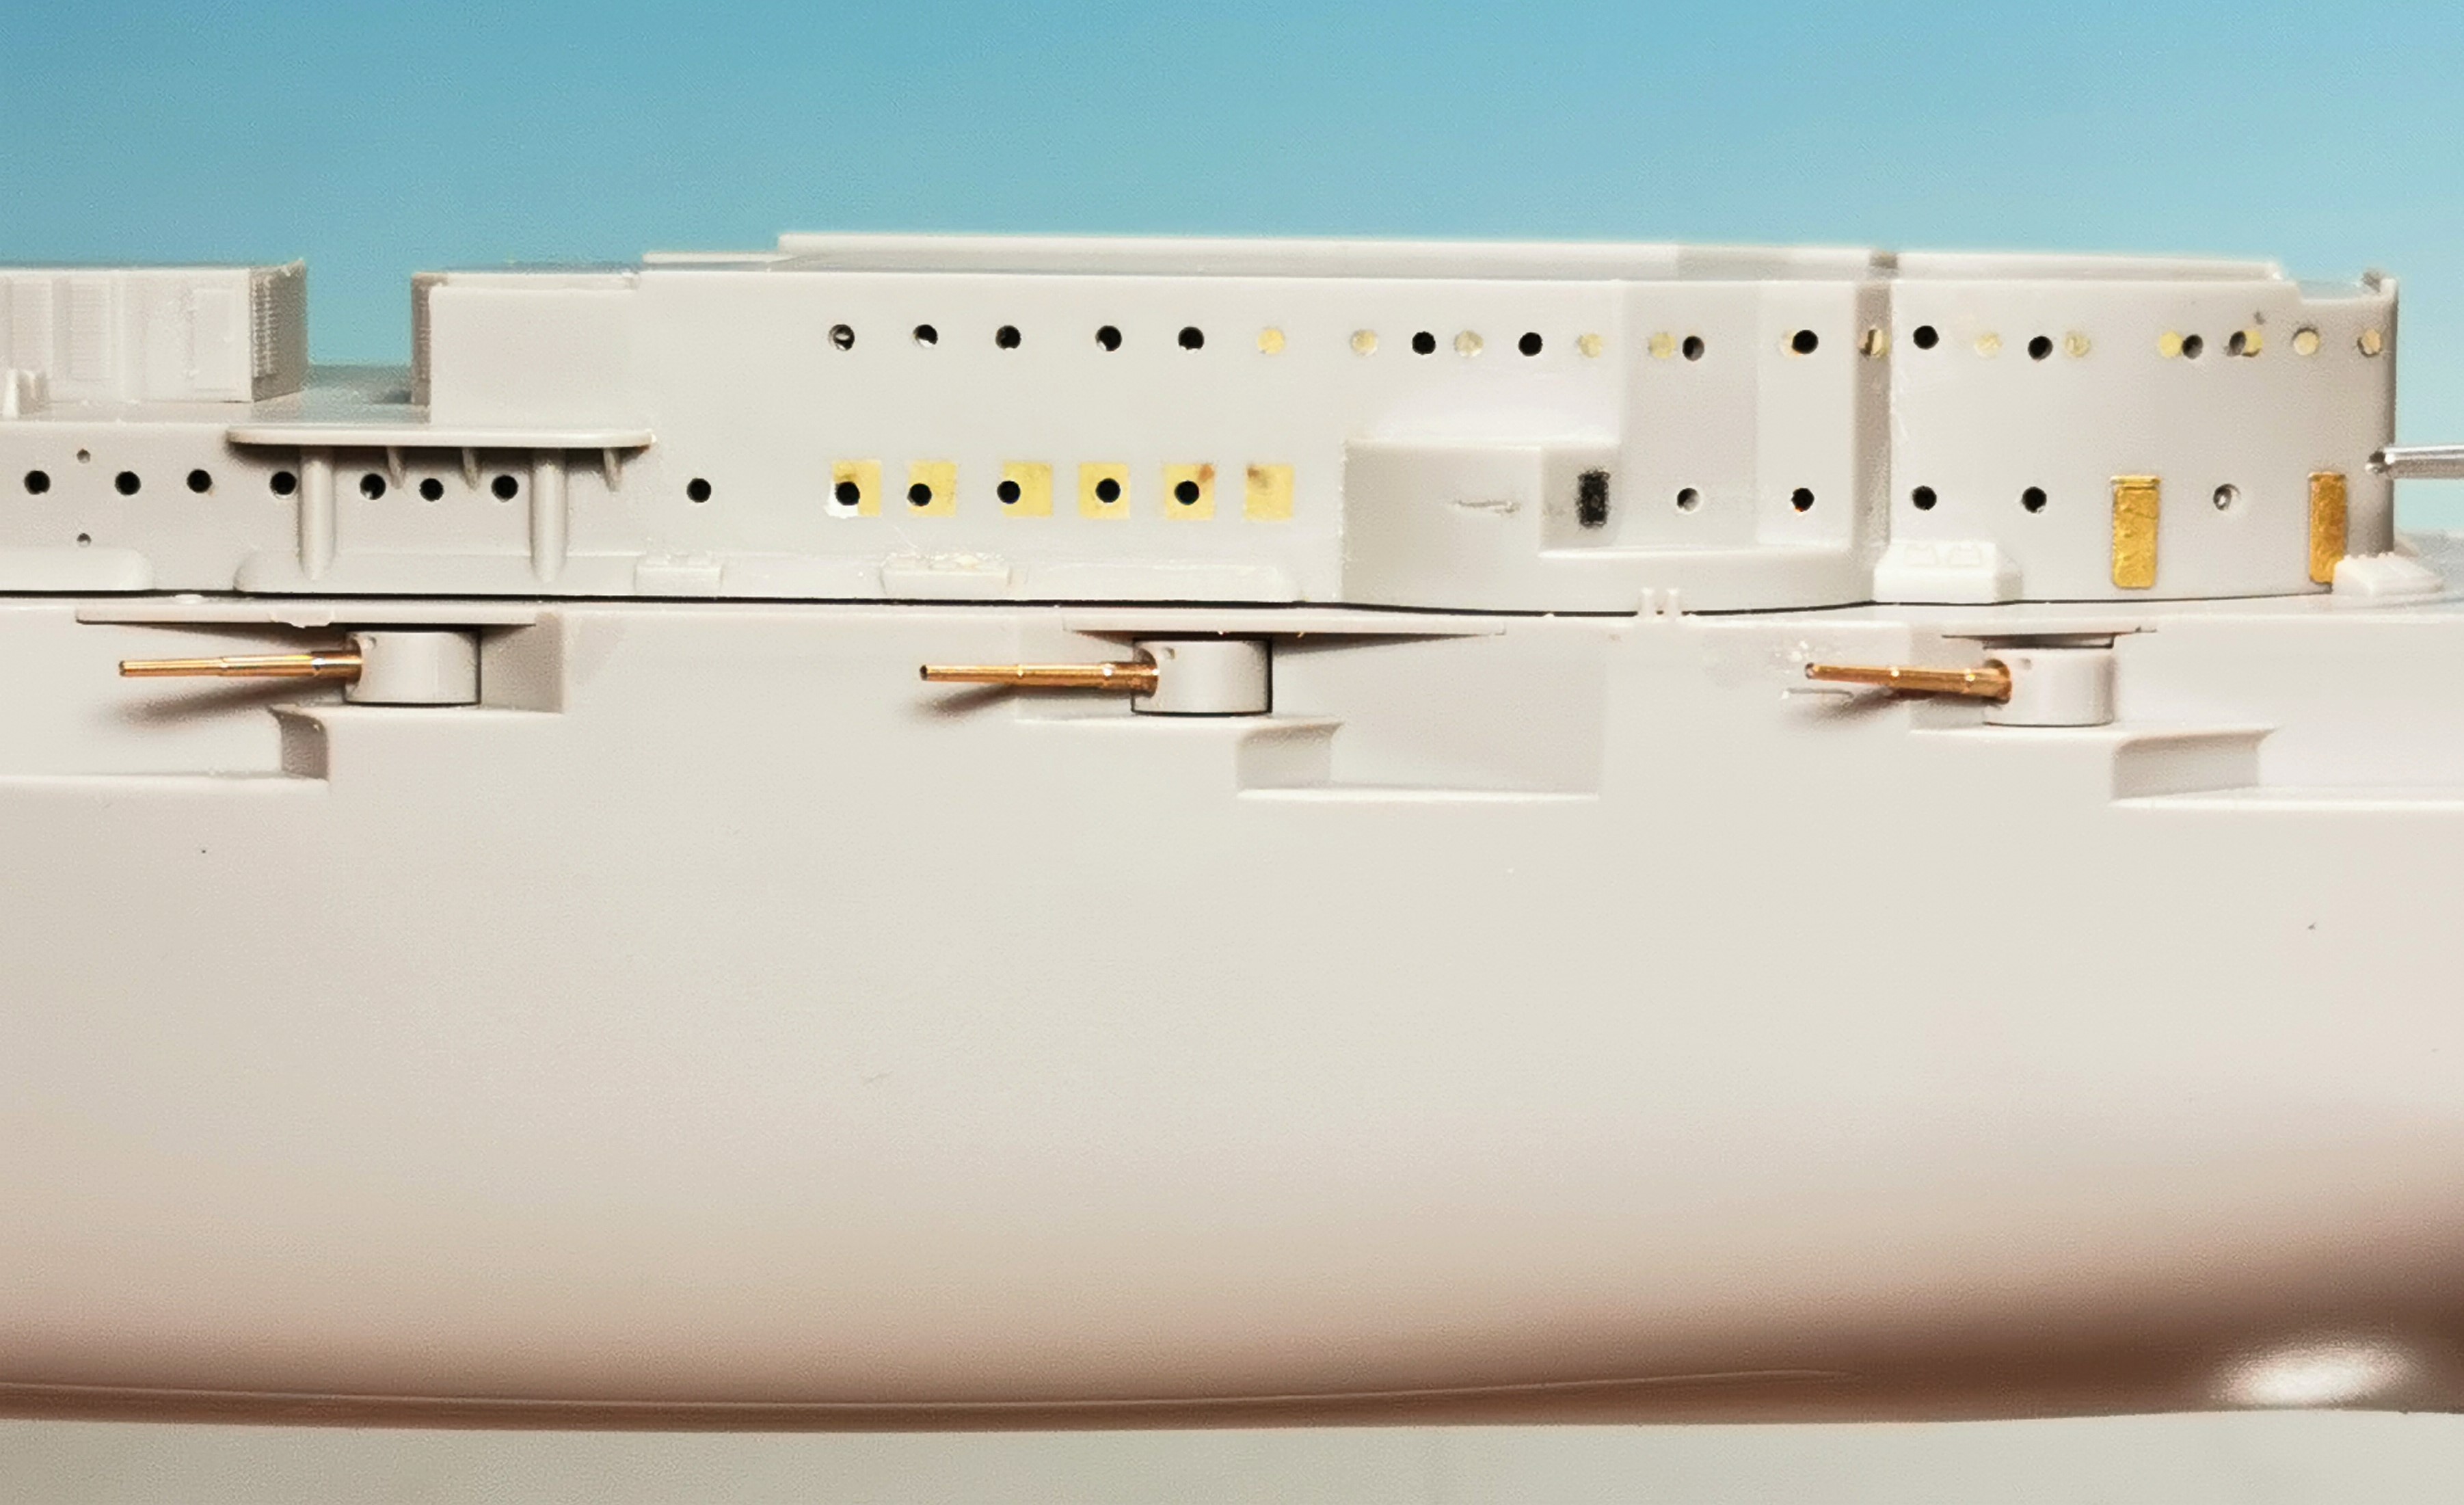
Then I discovered first that the outside anchor hawse wholes are shown too far up. I closed them with Putty and redrilled them more lower around the same height as the lower portholes.


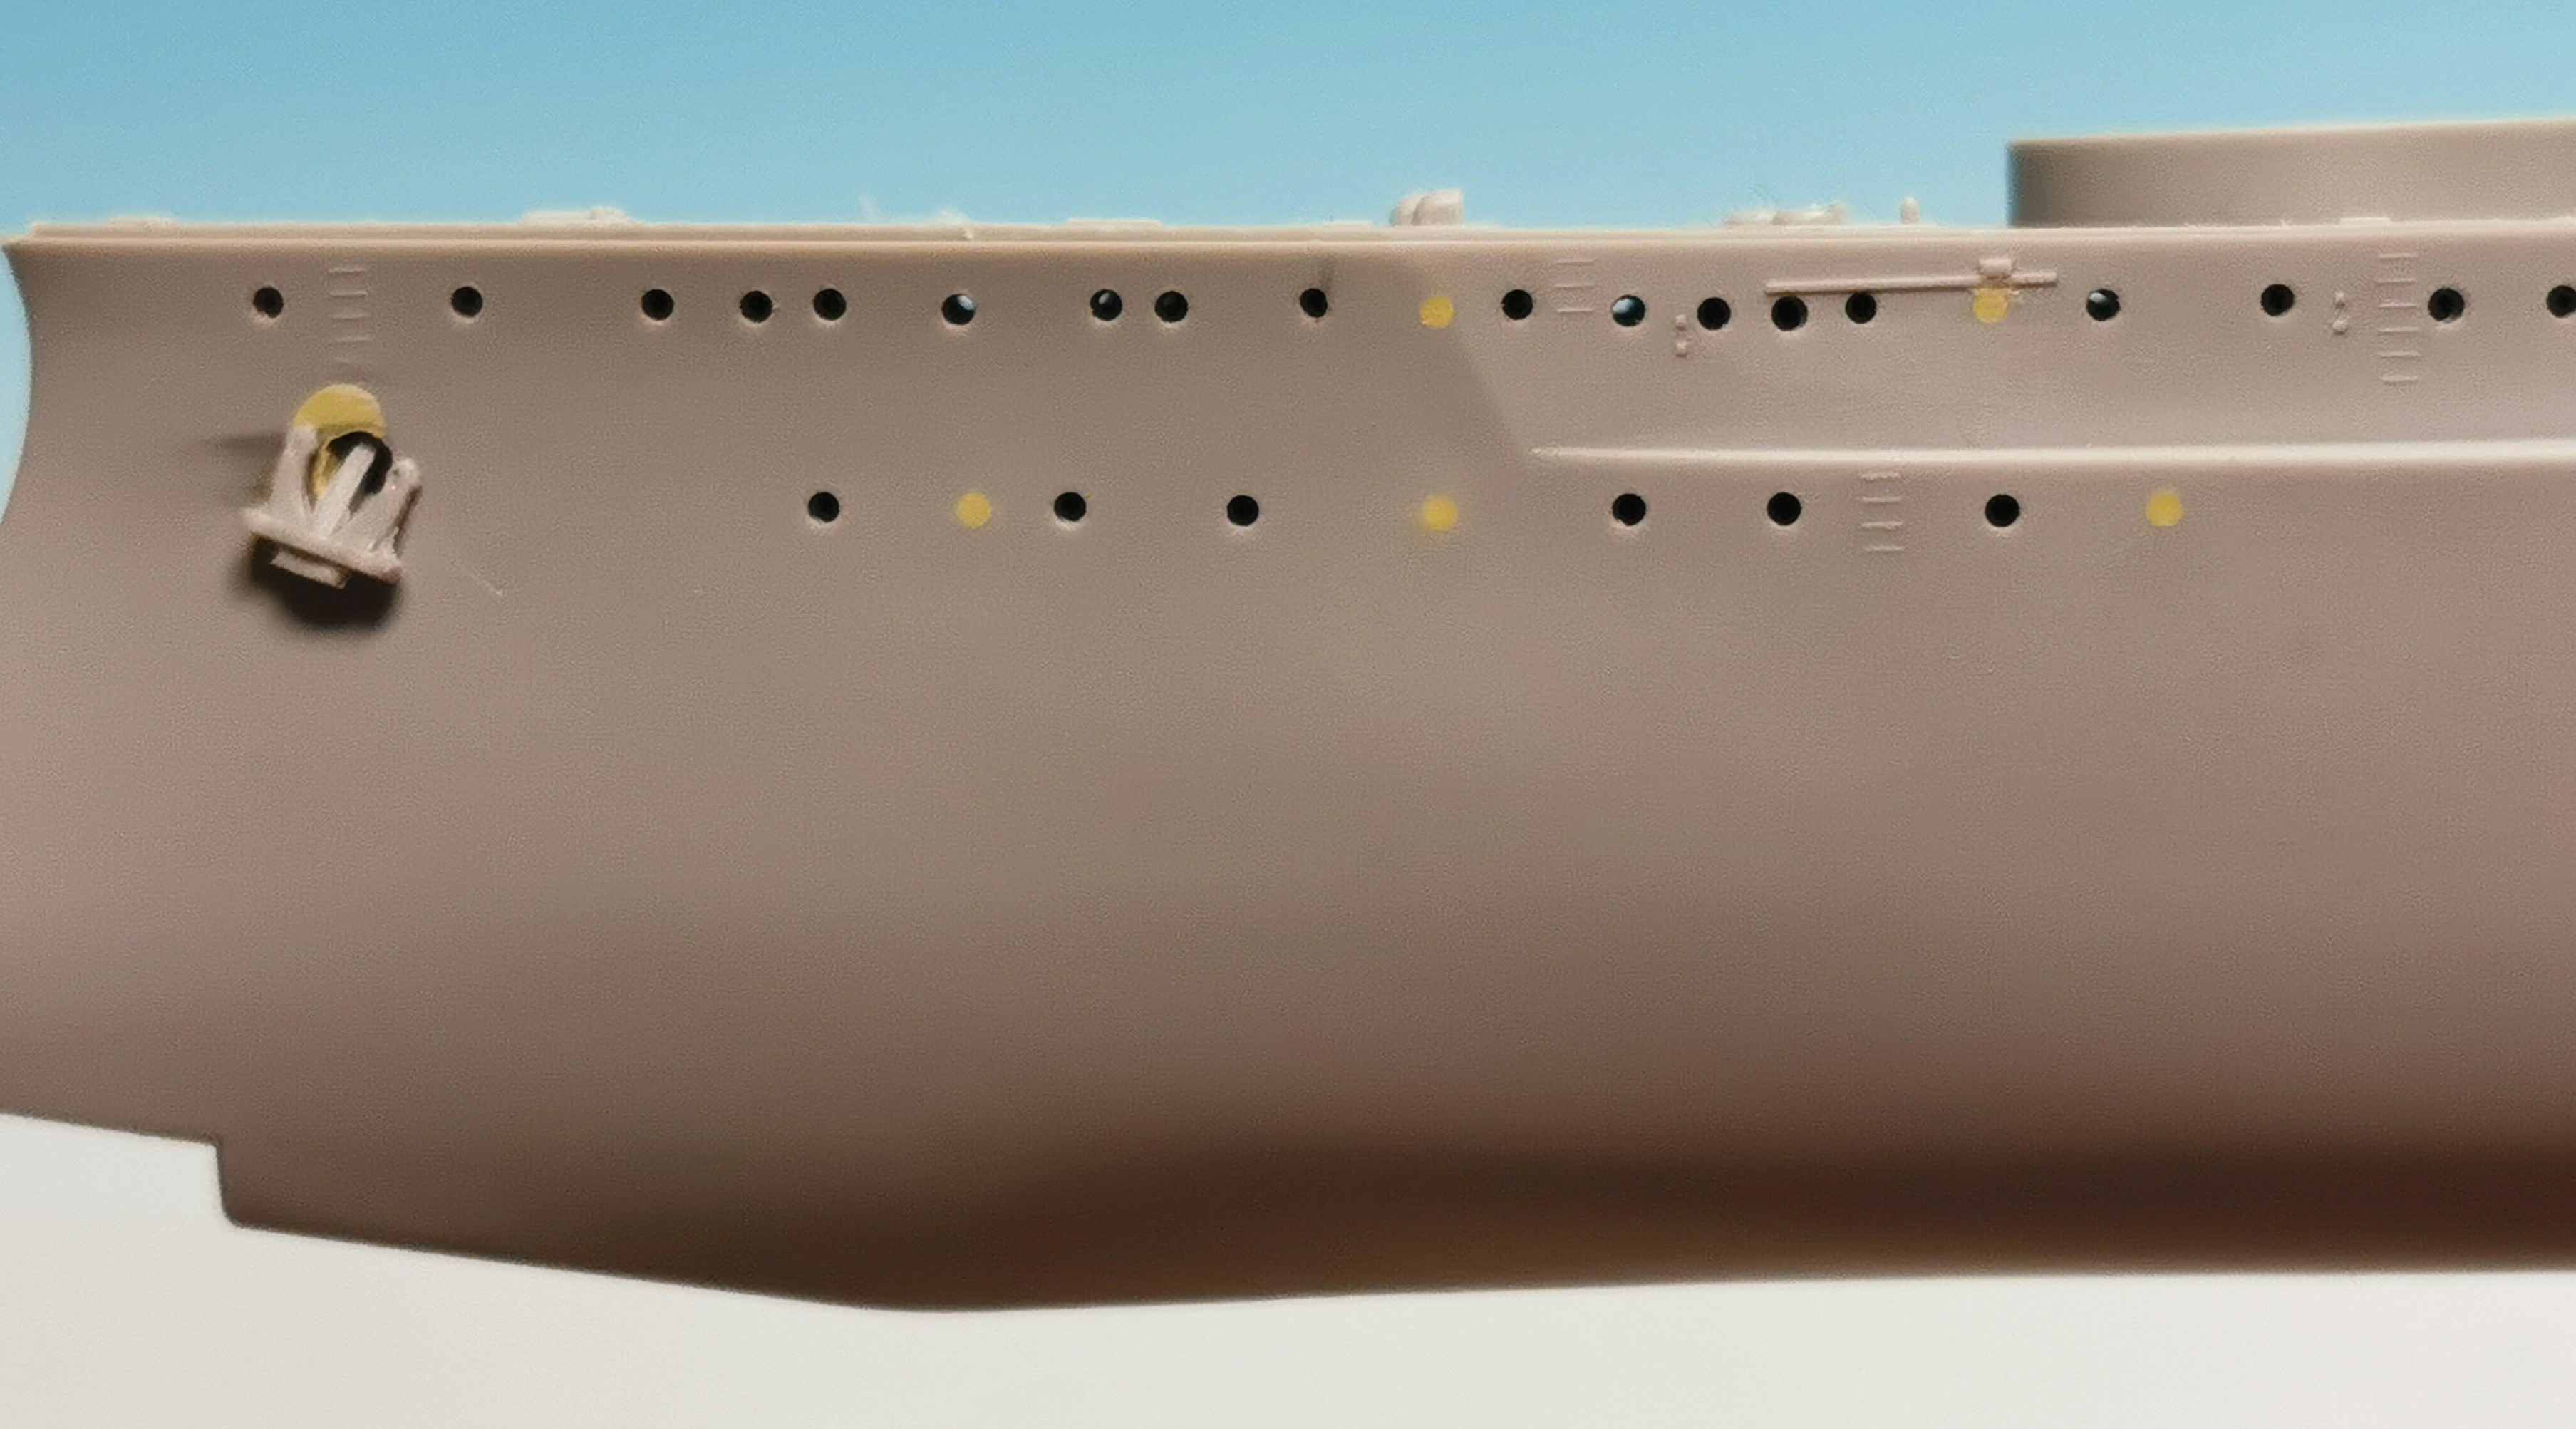
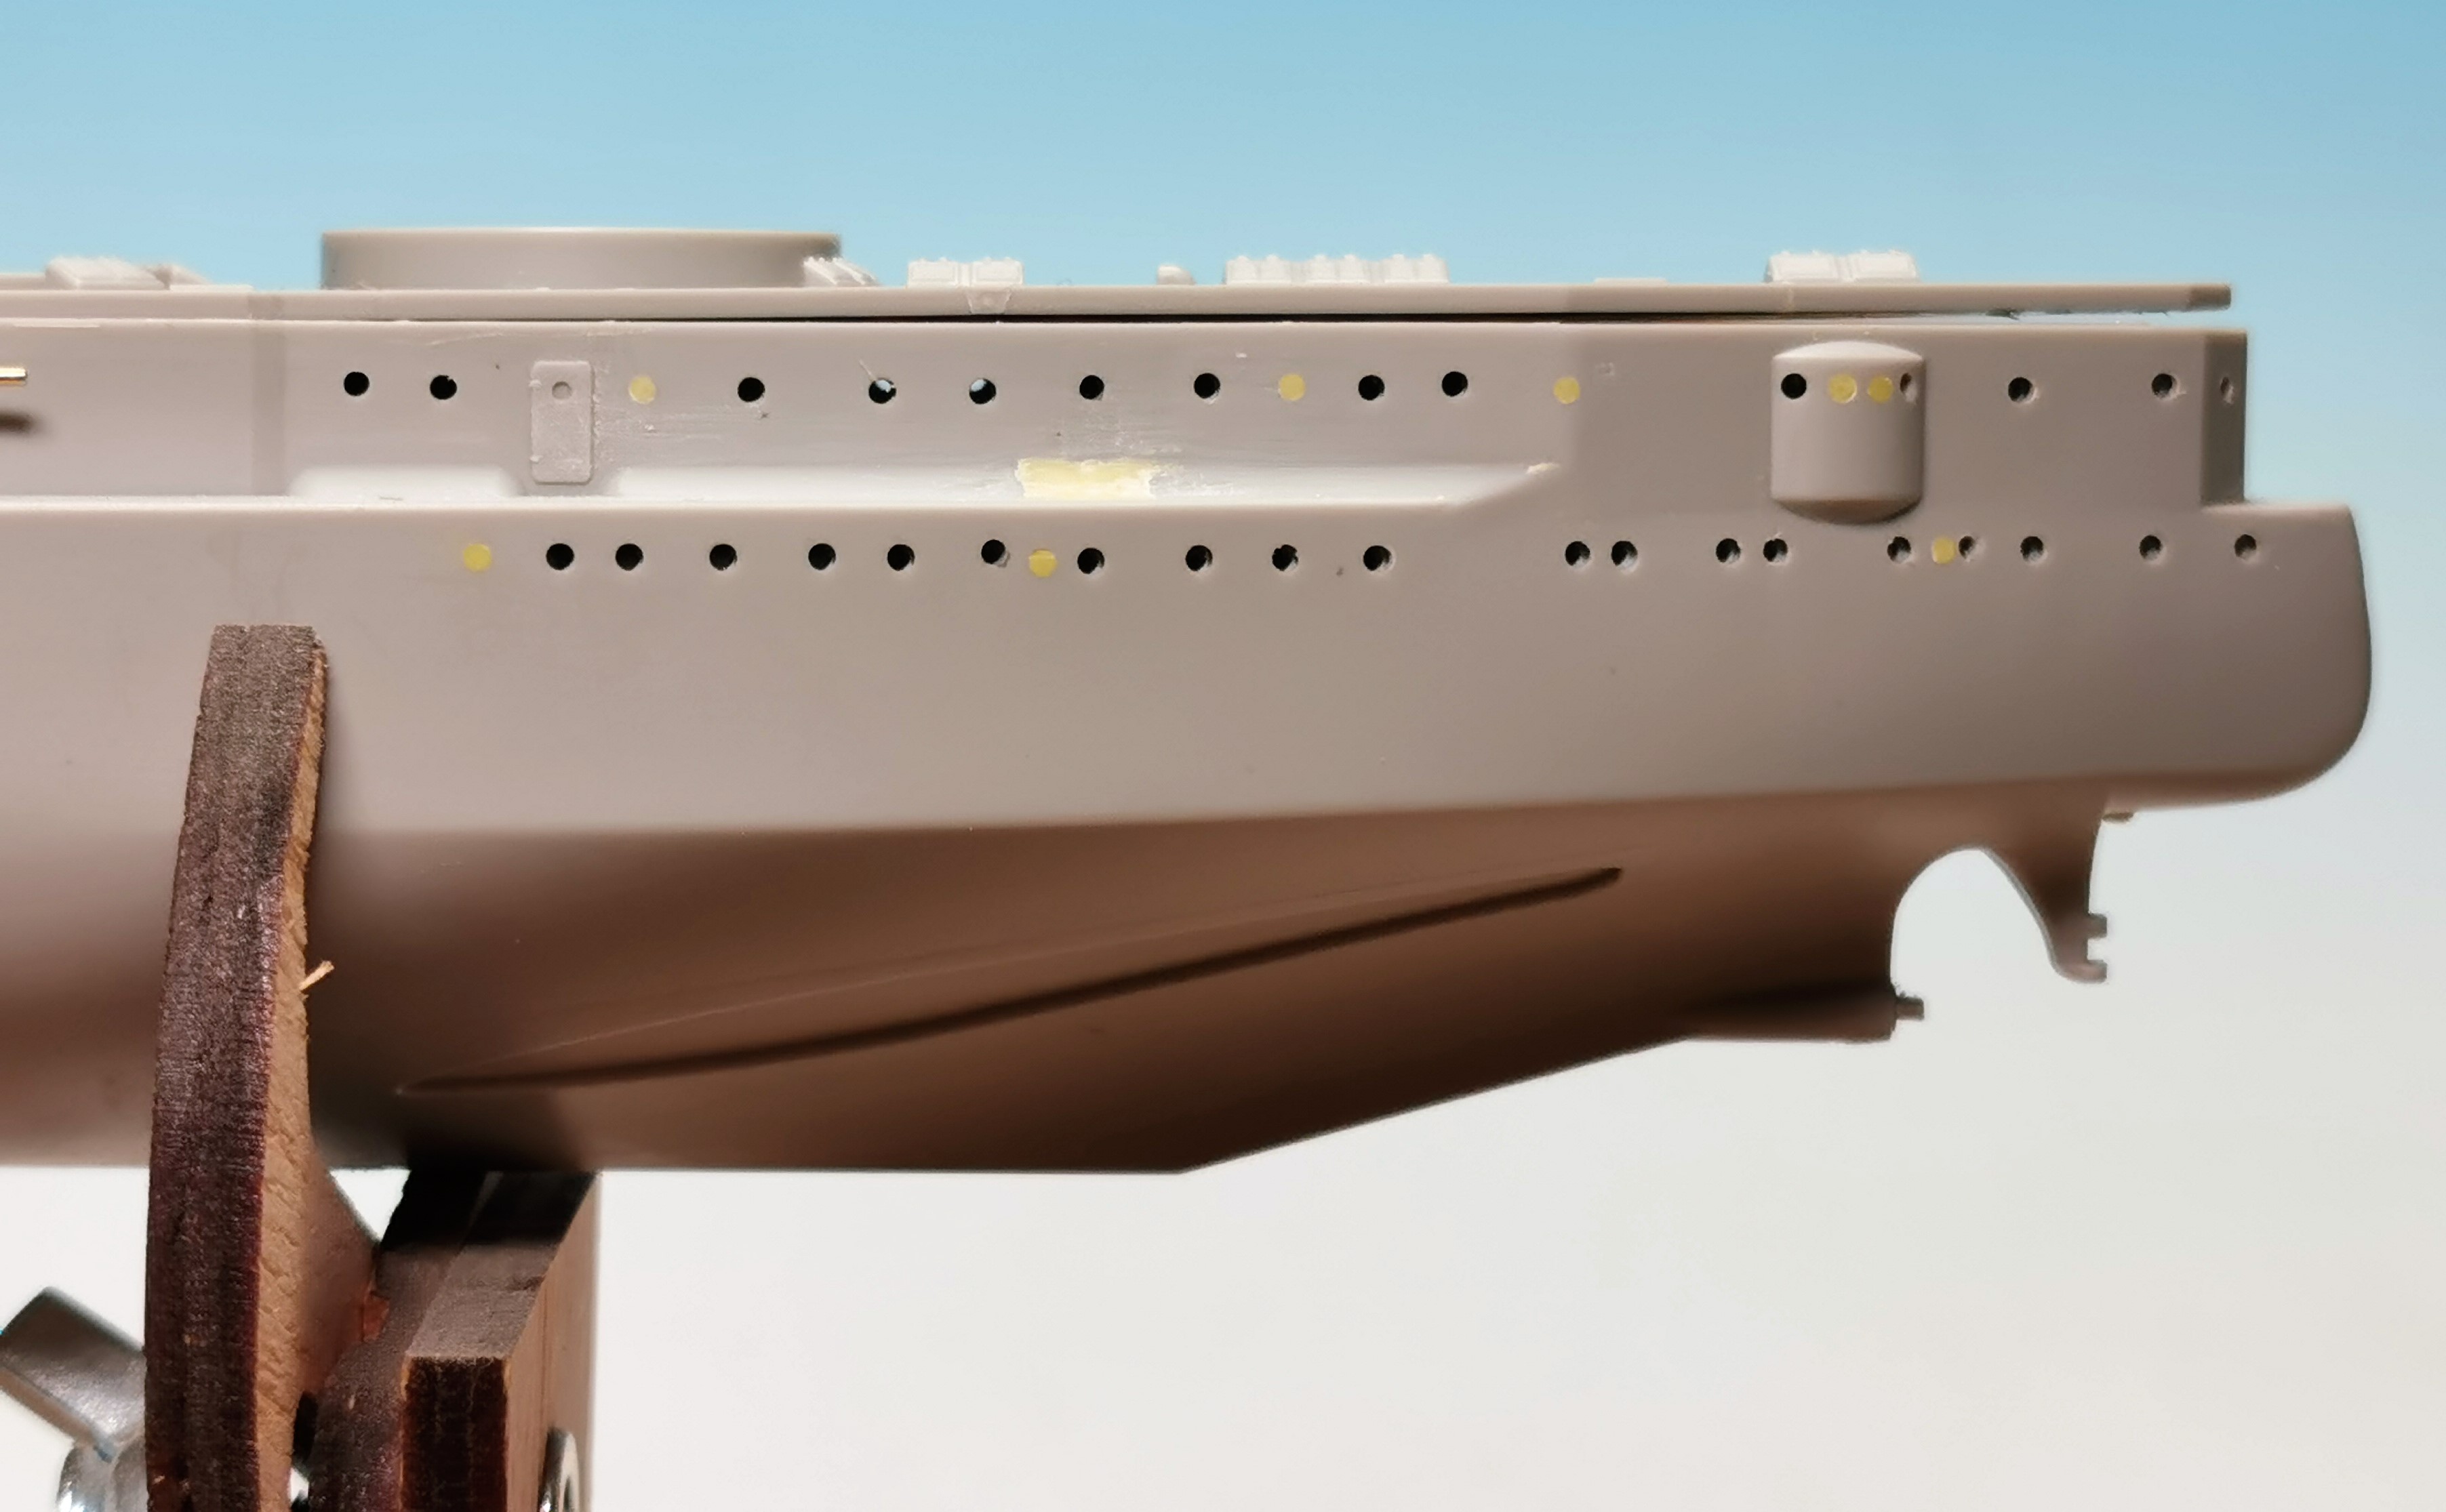
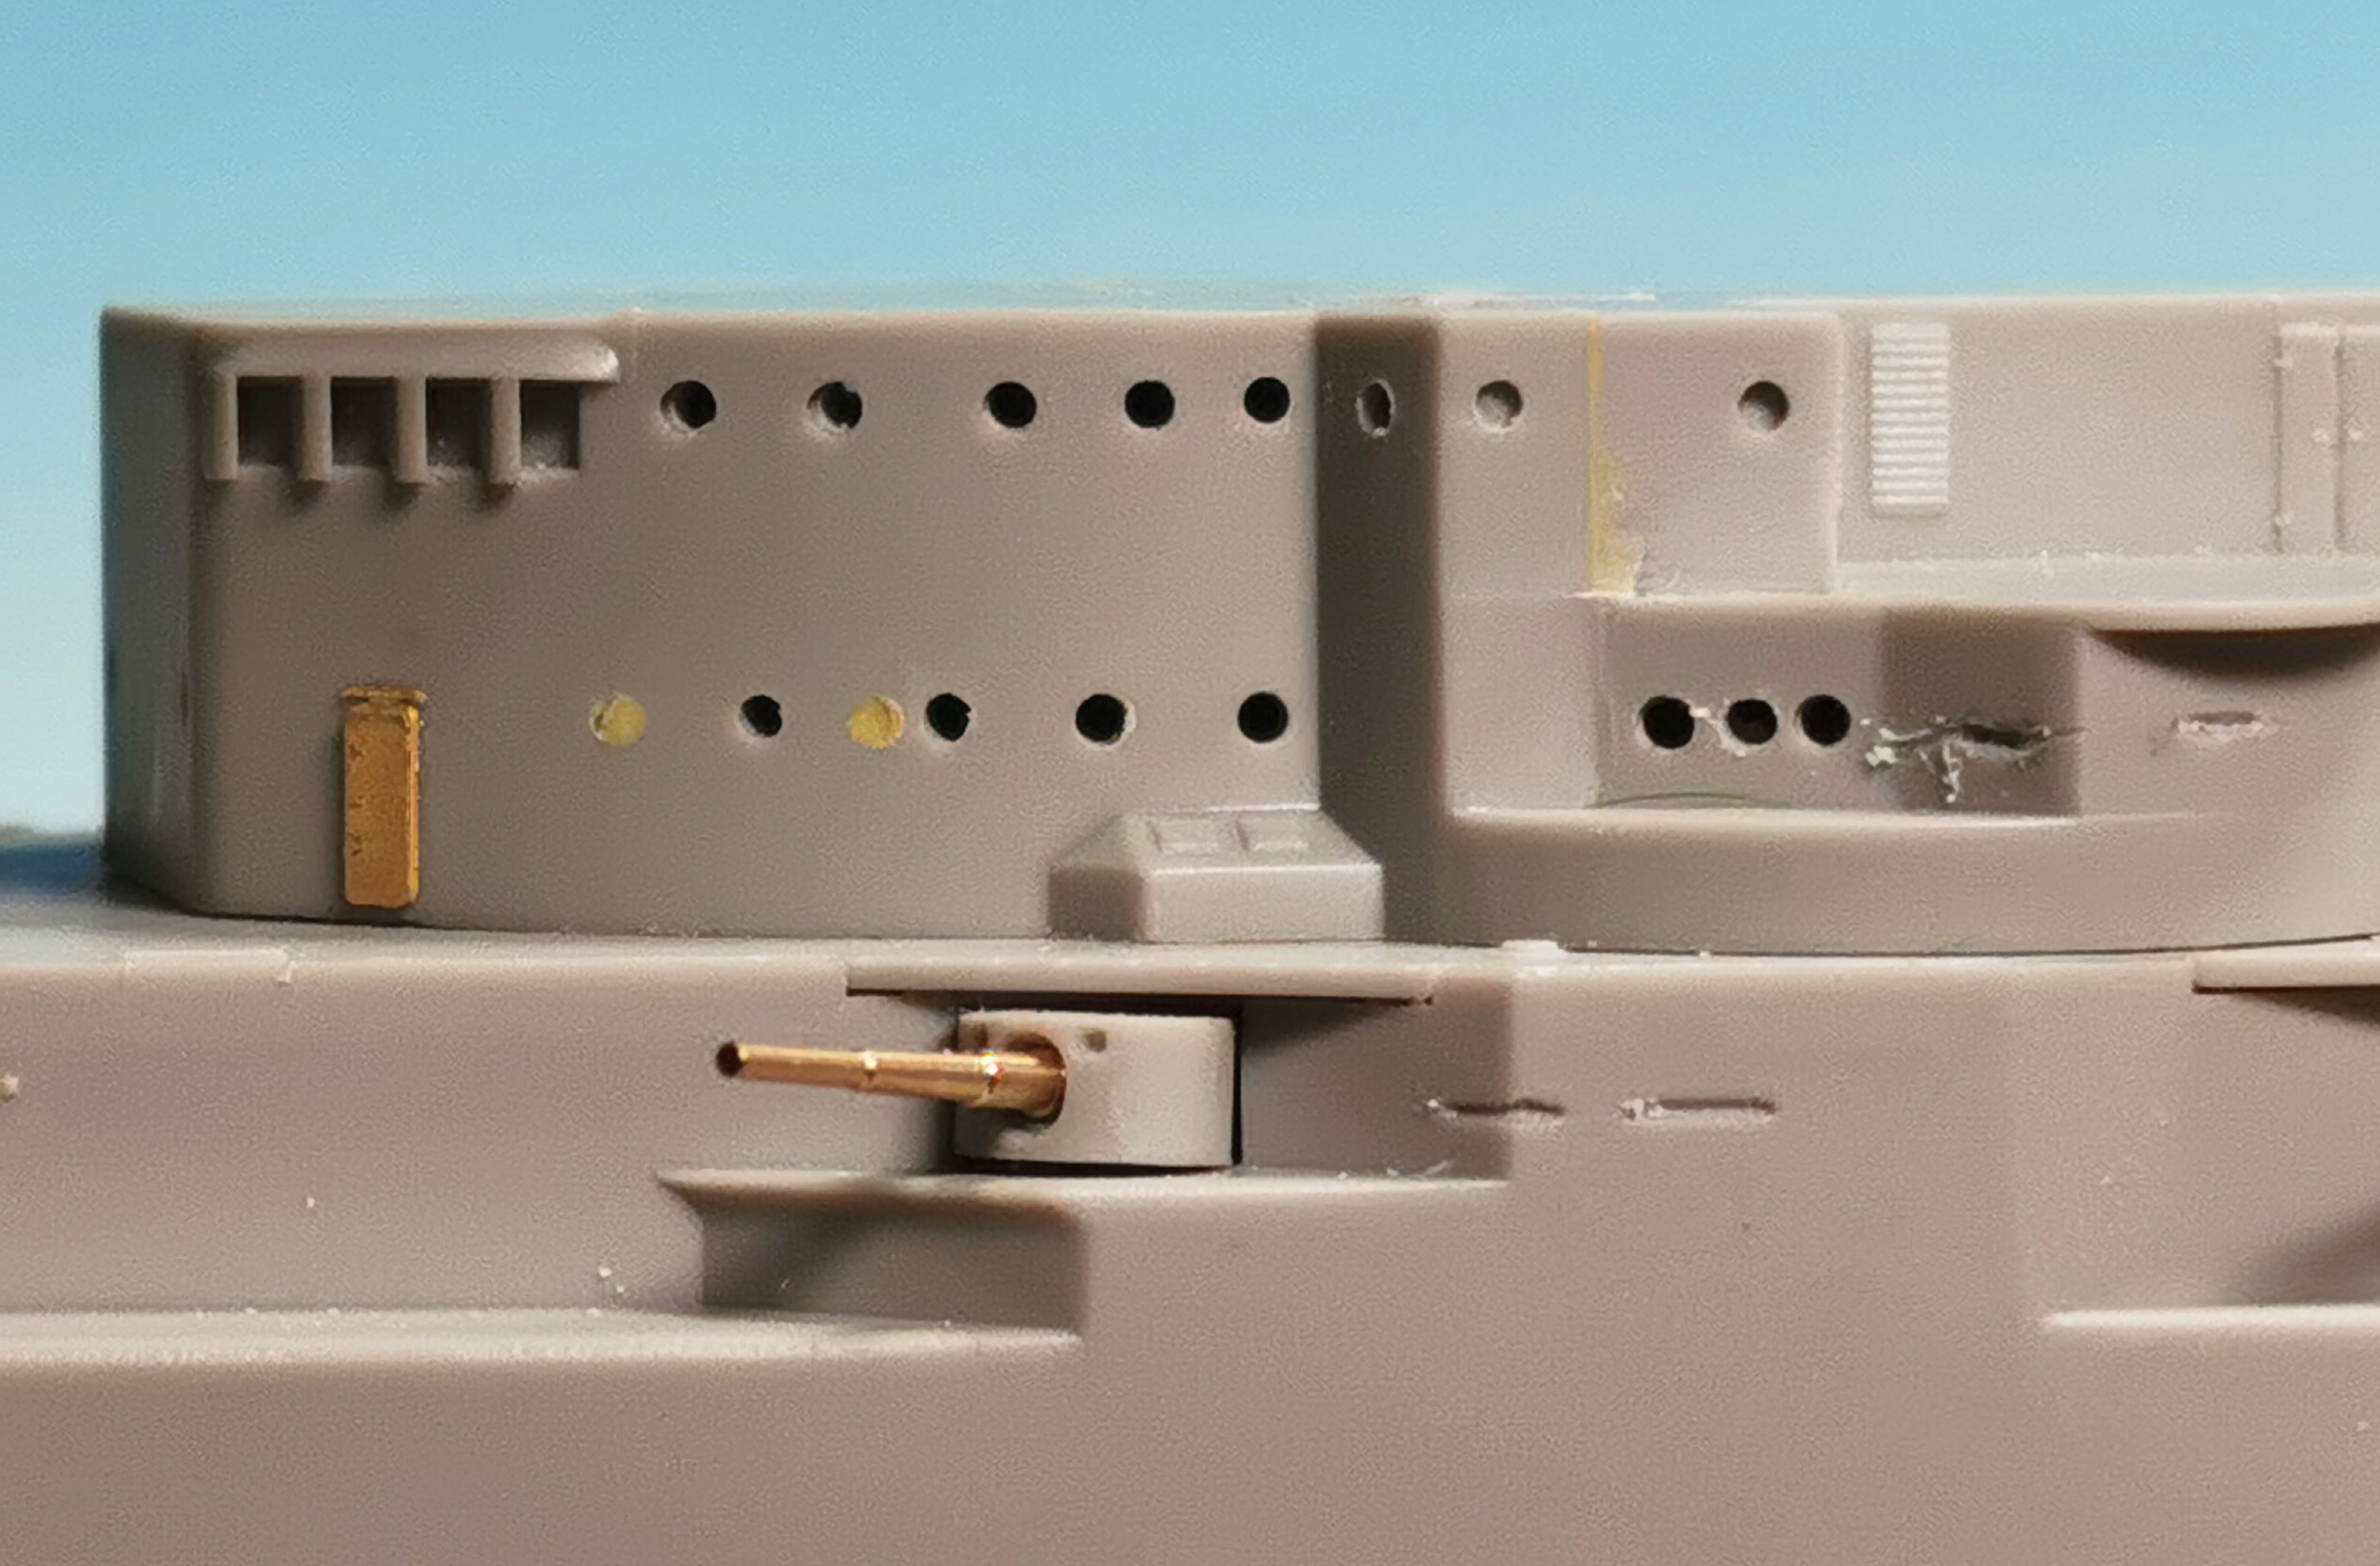
Next it was obvious that many portholes were wrongly positioned, some are too much and some are simply ommitted. I started to close the superfluous portholes and drilled the missing ones at the correct locations. Here are the pictures of the real one and the ship plan very necessary


At the aft tween deck there were two doors but in September 1939 there was just one door. I removed the superfluous door and changed some details and portholes again.


At the stern deck there was a door and both portholes missing.


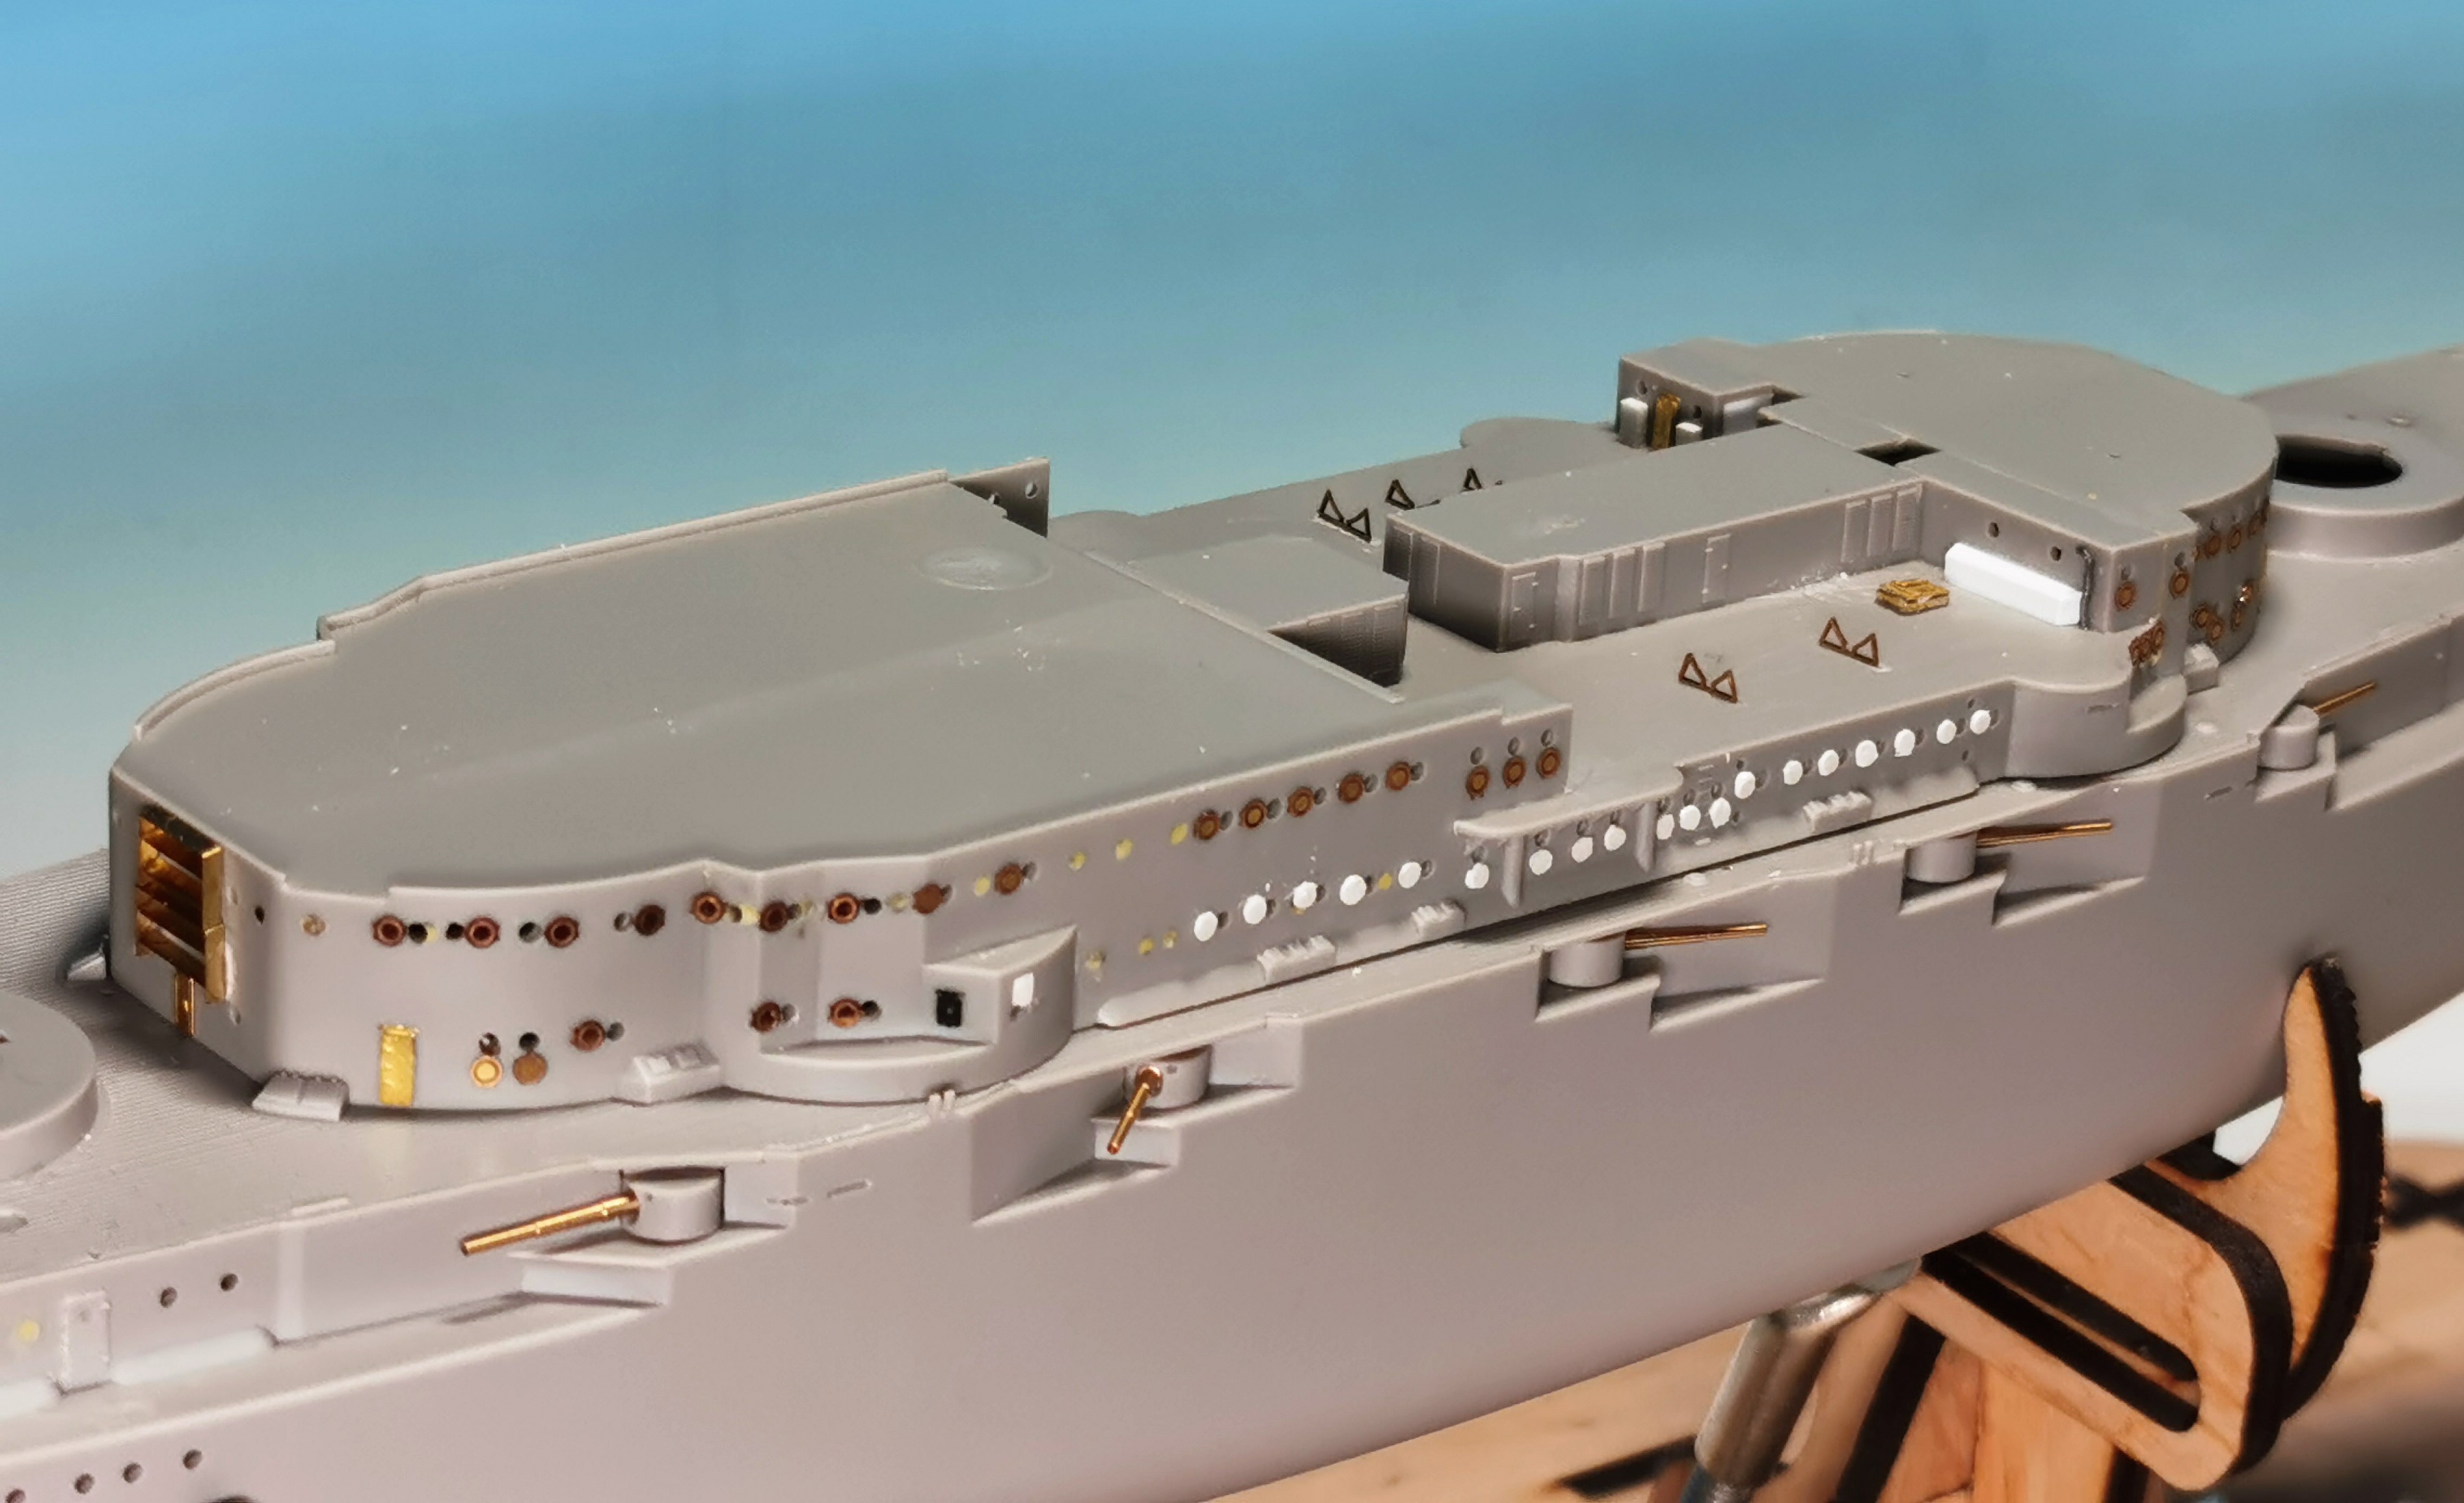
At the superstructure there were quite a few changes necessary. Missing doors added, the square "windows-like" openings were not there in September 1939 and were treated with Putty and redrilled as Portholes. Again here many superfluous portholes filled and some missing one drilled.


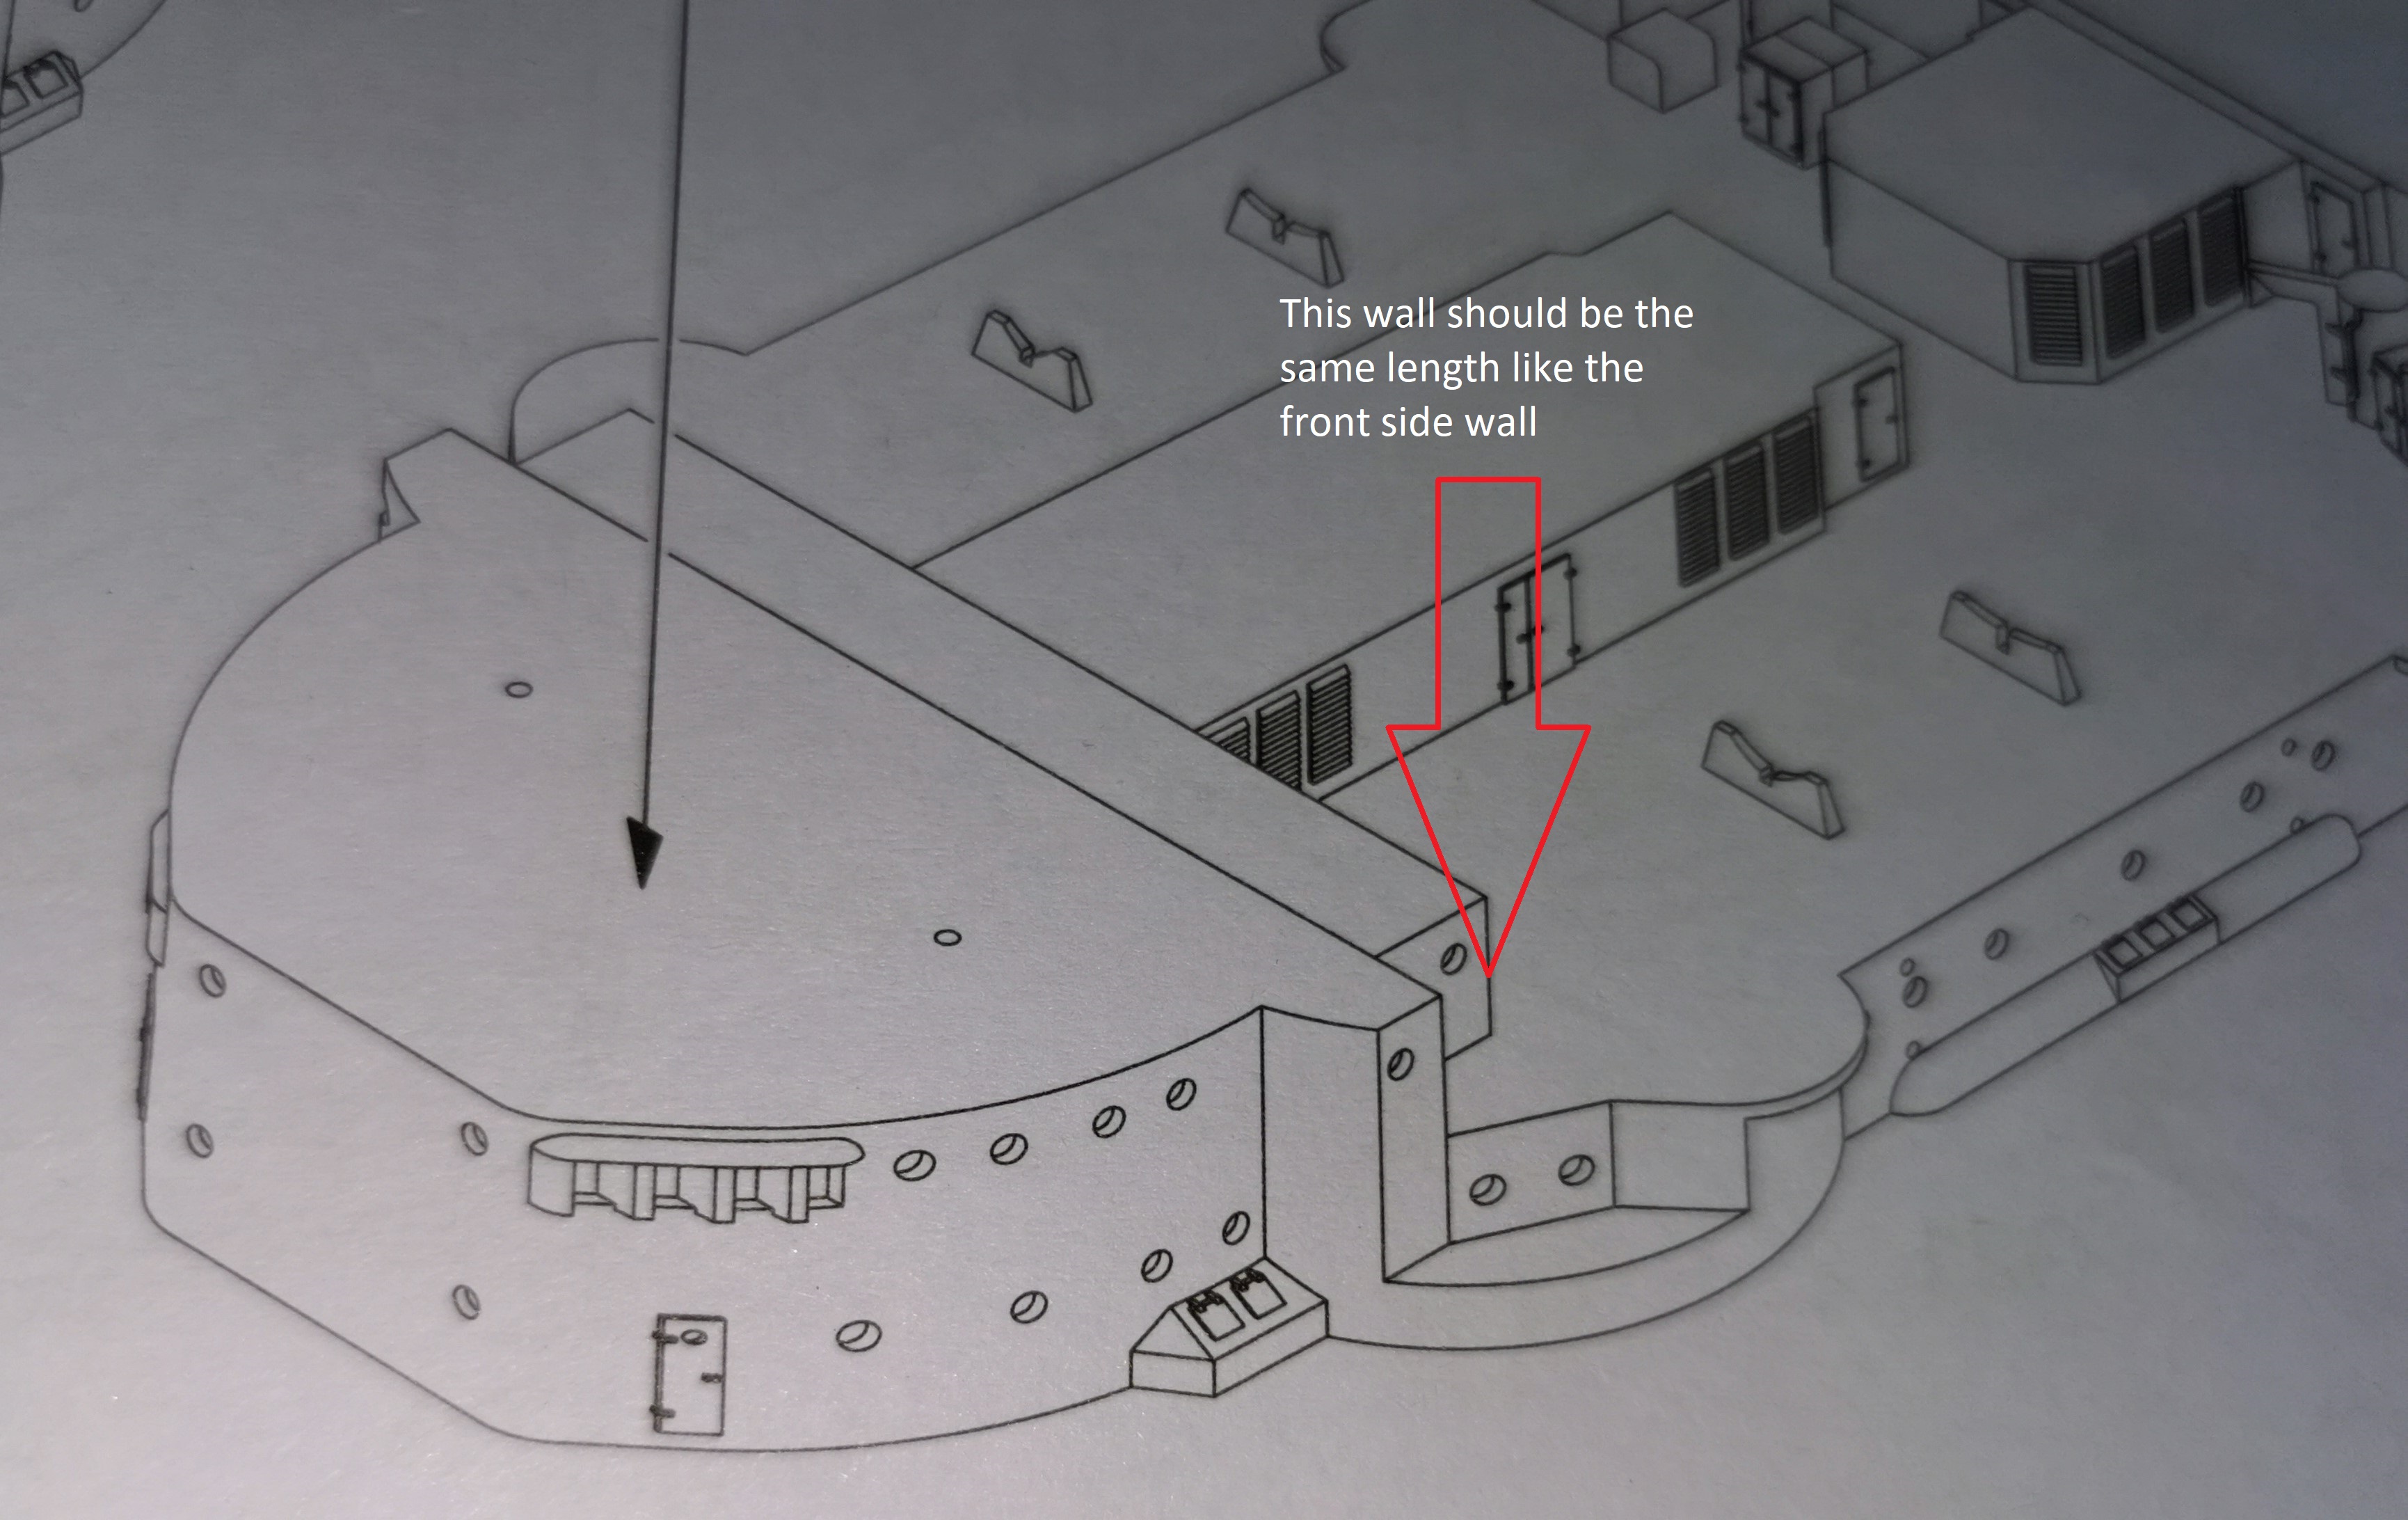
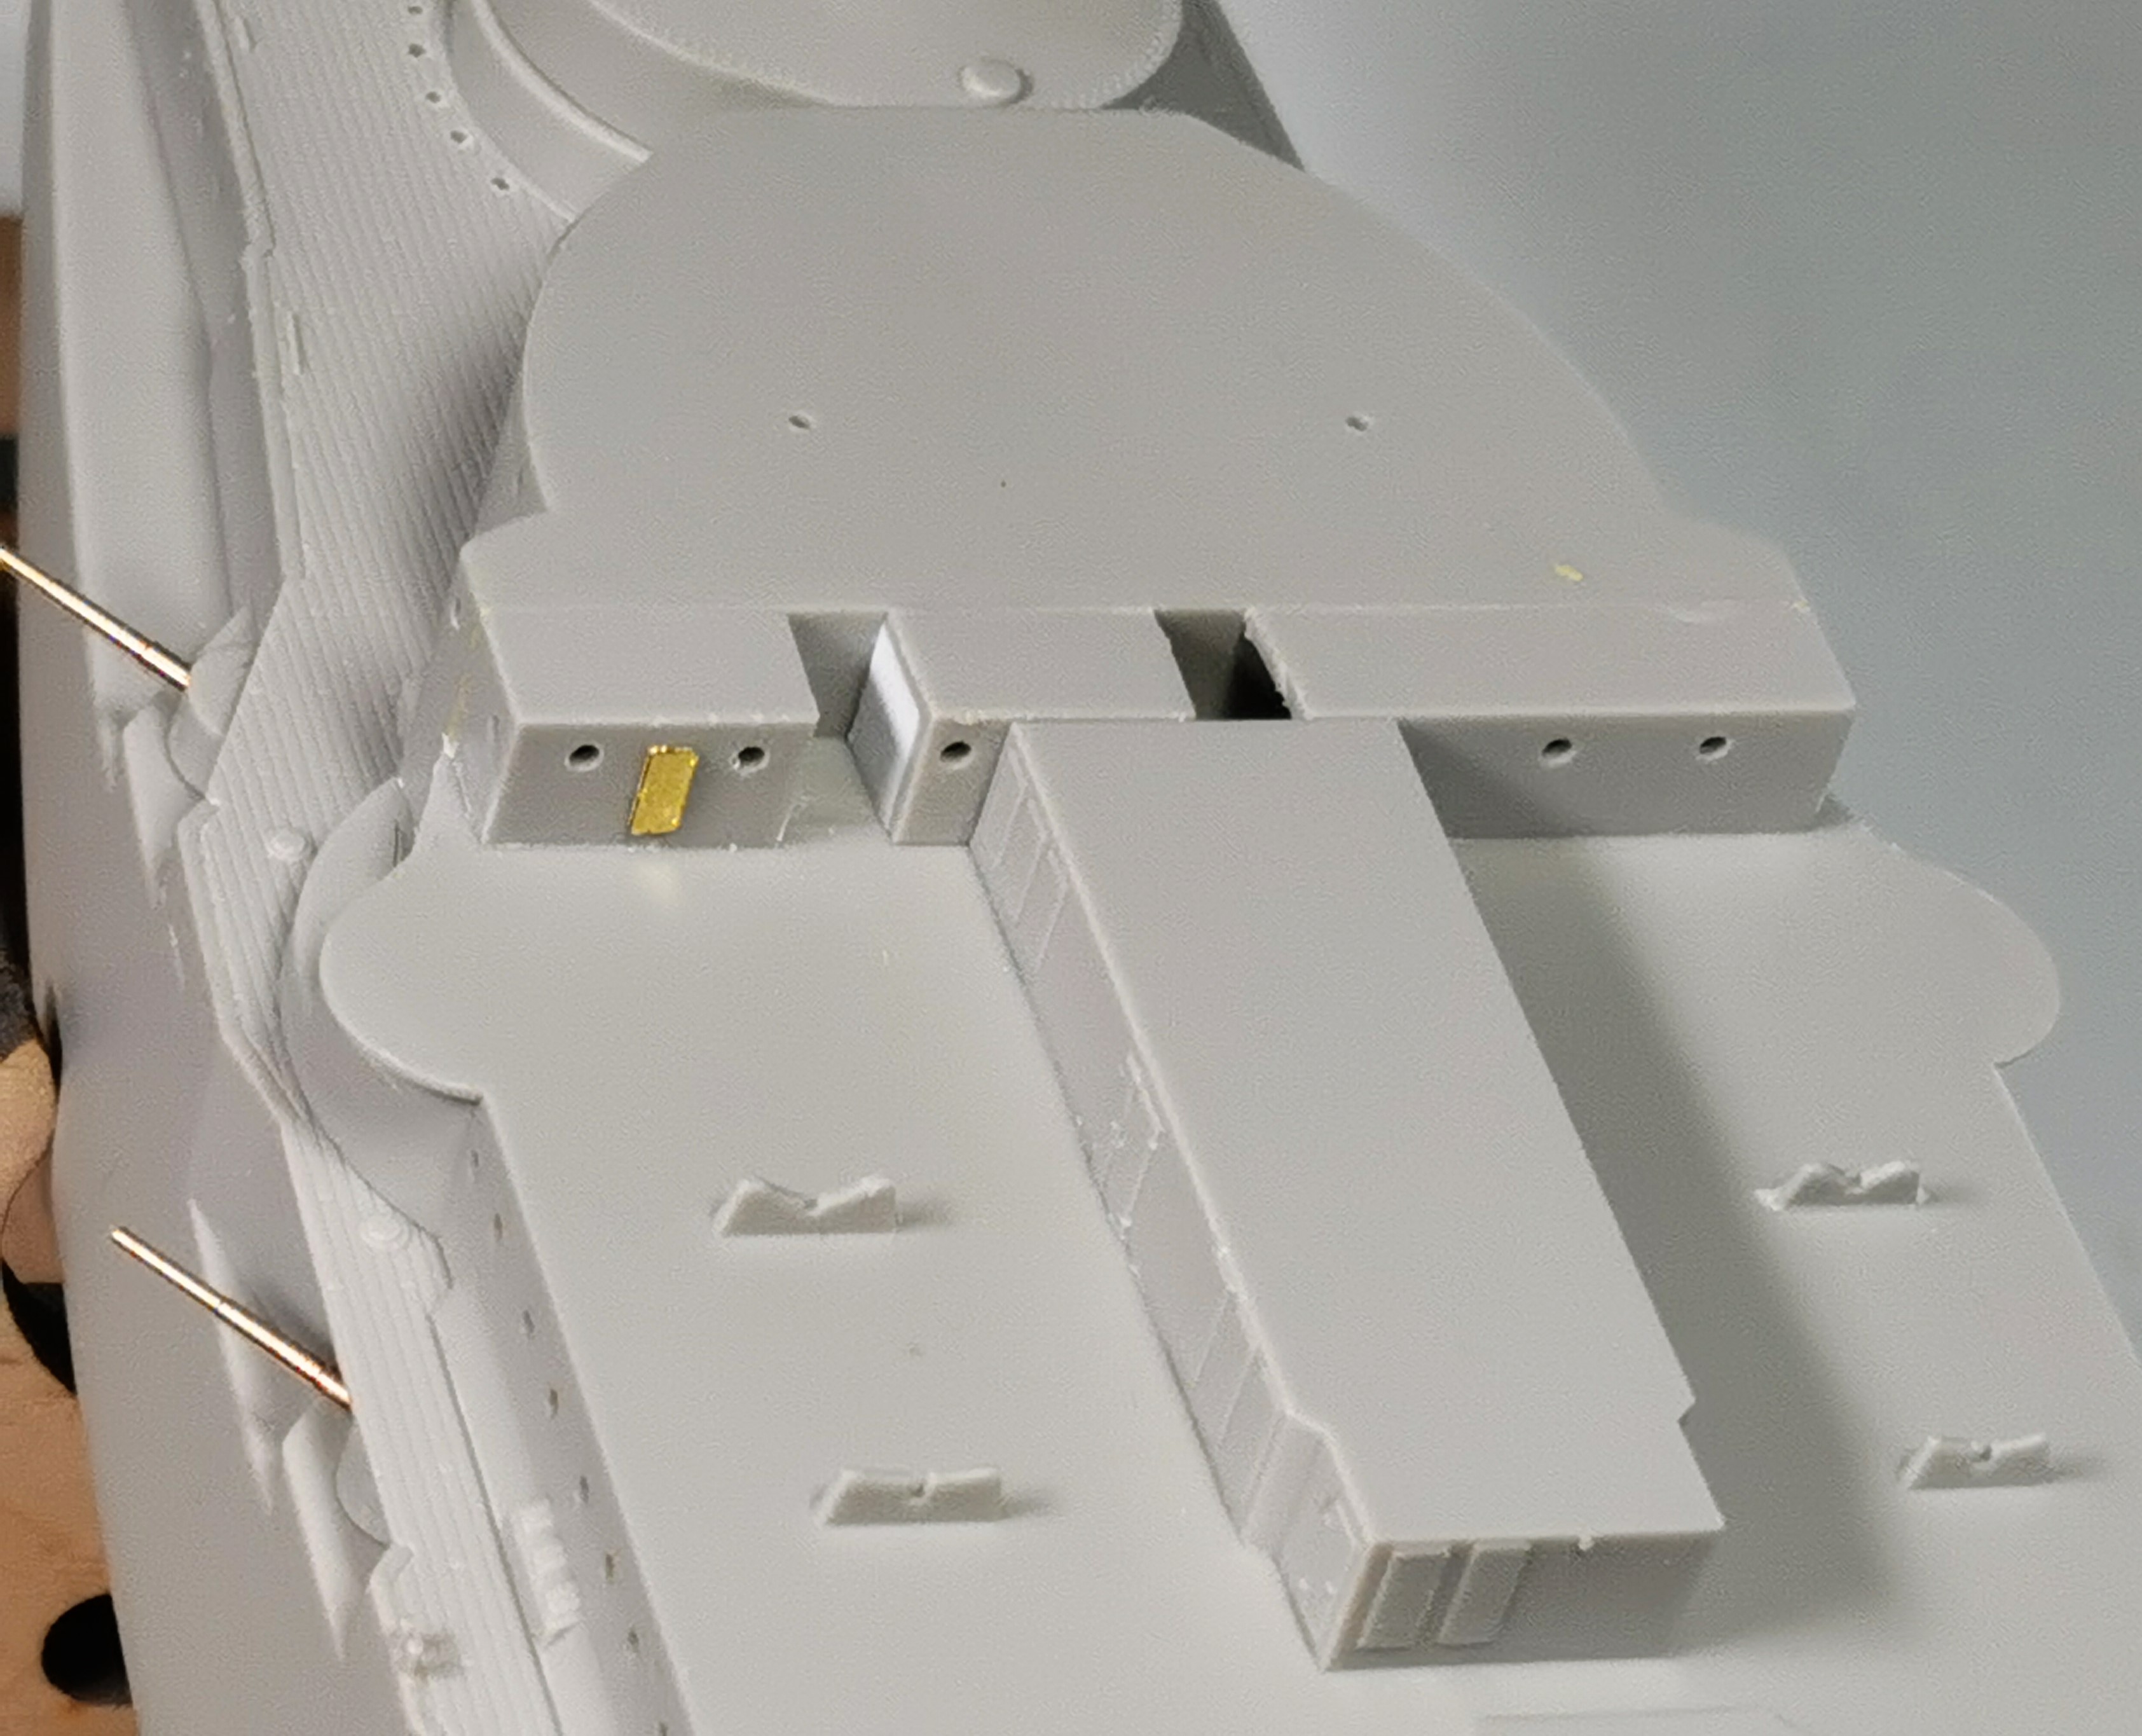
Maybe its too much nitpicking but I decided to do it as correctly as possible, no matter how much blood and sweat necessary (really captain? ). TRUMPETER compartment part G42 is shown set back from the front compartment; look the instructions picture for a better understanding


But this is also wrong, it is slightly bulged but I decided to show it evenly


And there is an indentation left for a stairway up to the first upper deck which is completely missing. I sawed apart Part G42 and created the indentation with evergreen sidewalls. A stairway will be surely found later from the sparesbox. There are also some boxes in front of these walls which I am about to create now out of evergreen sheets


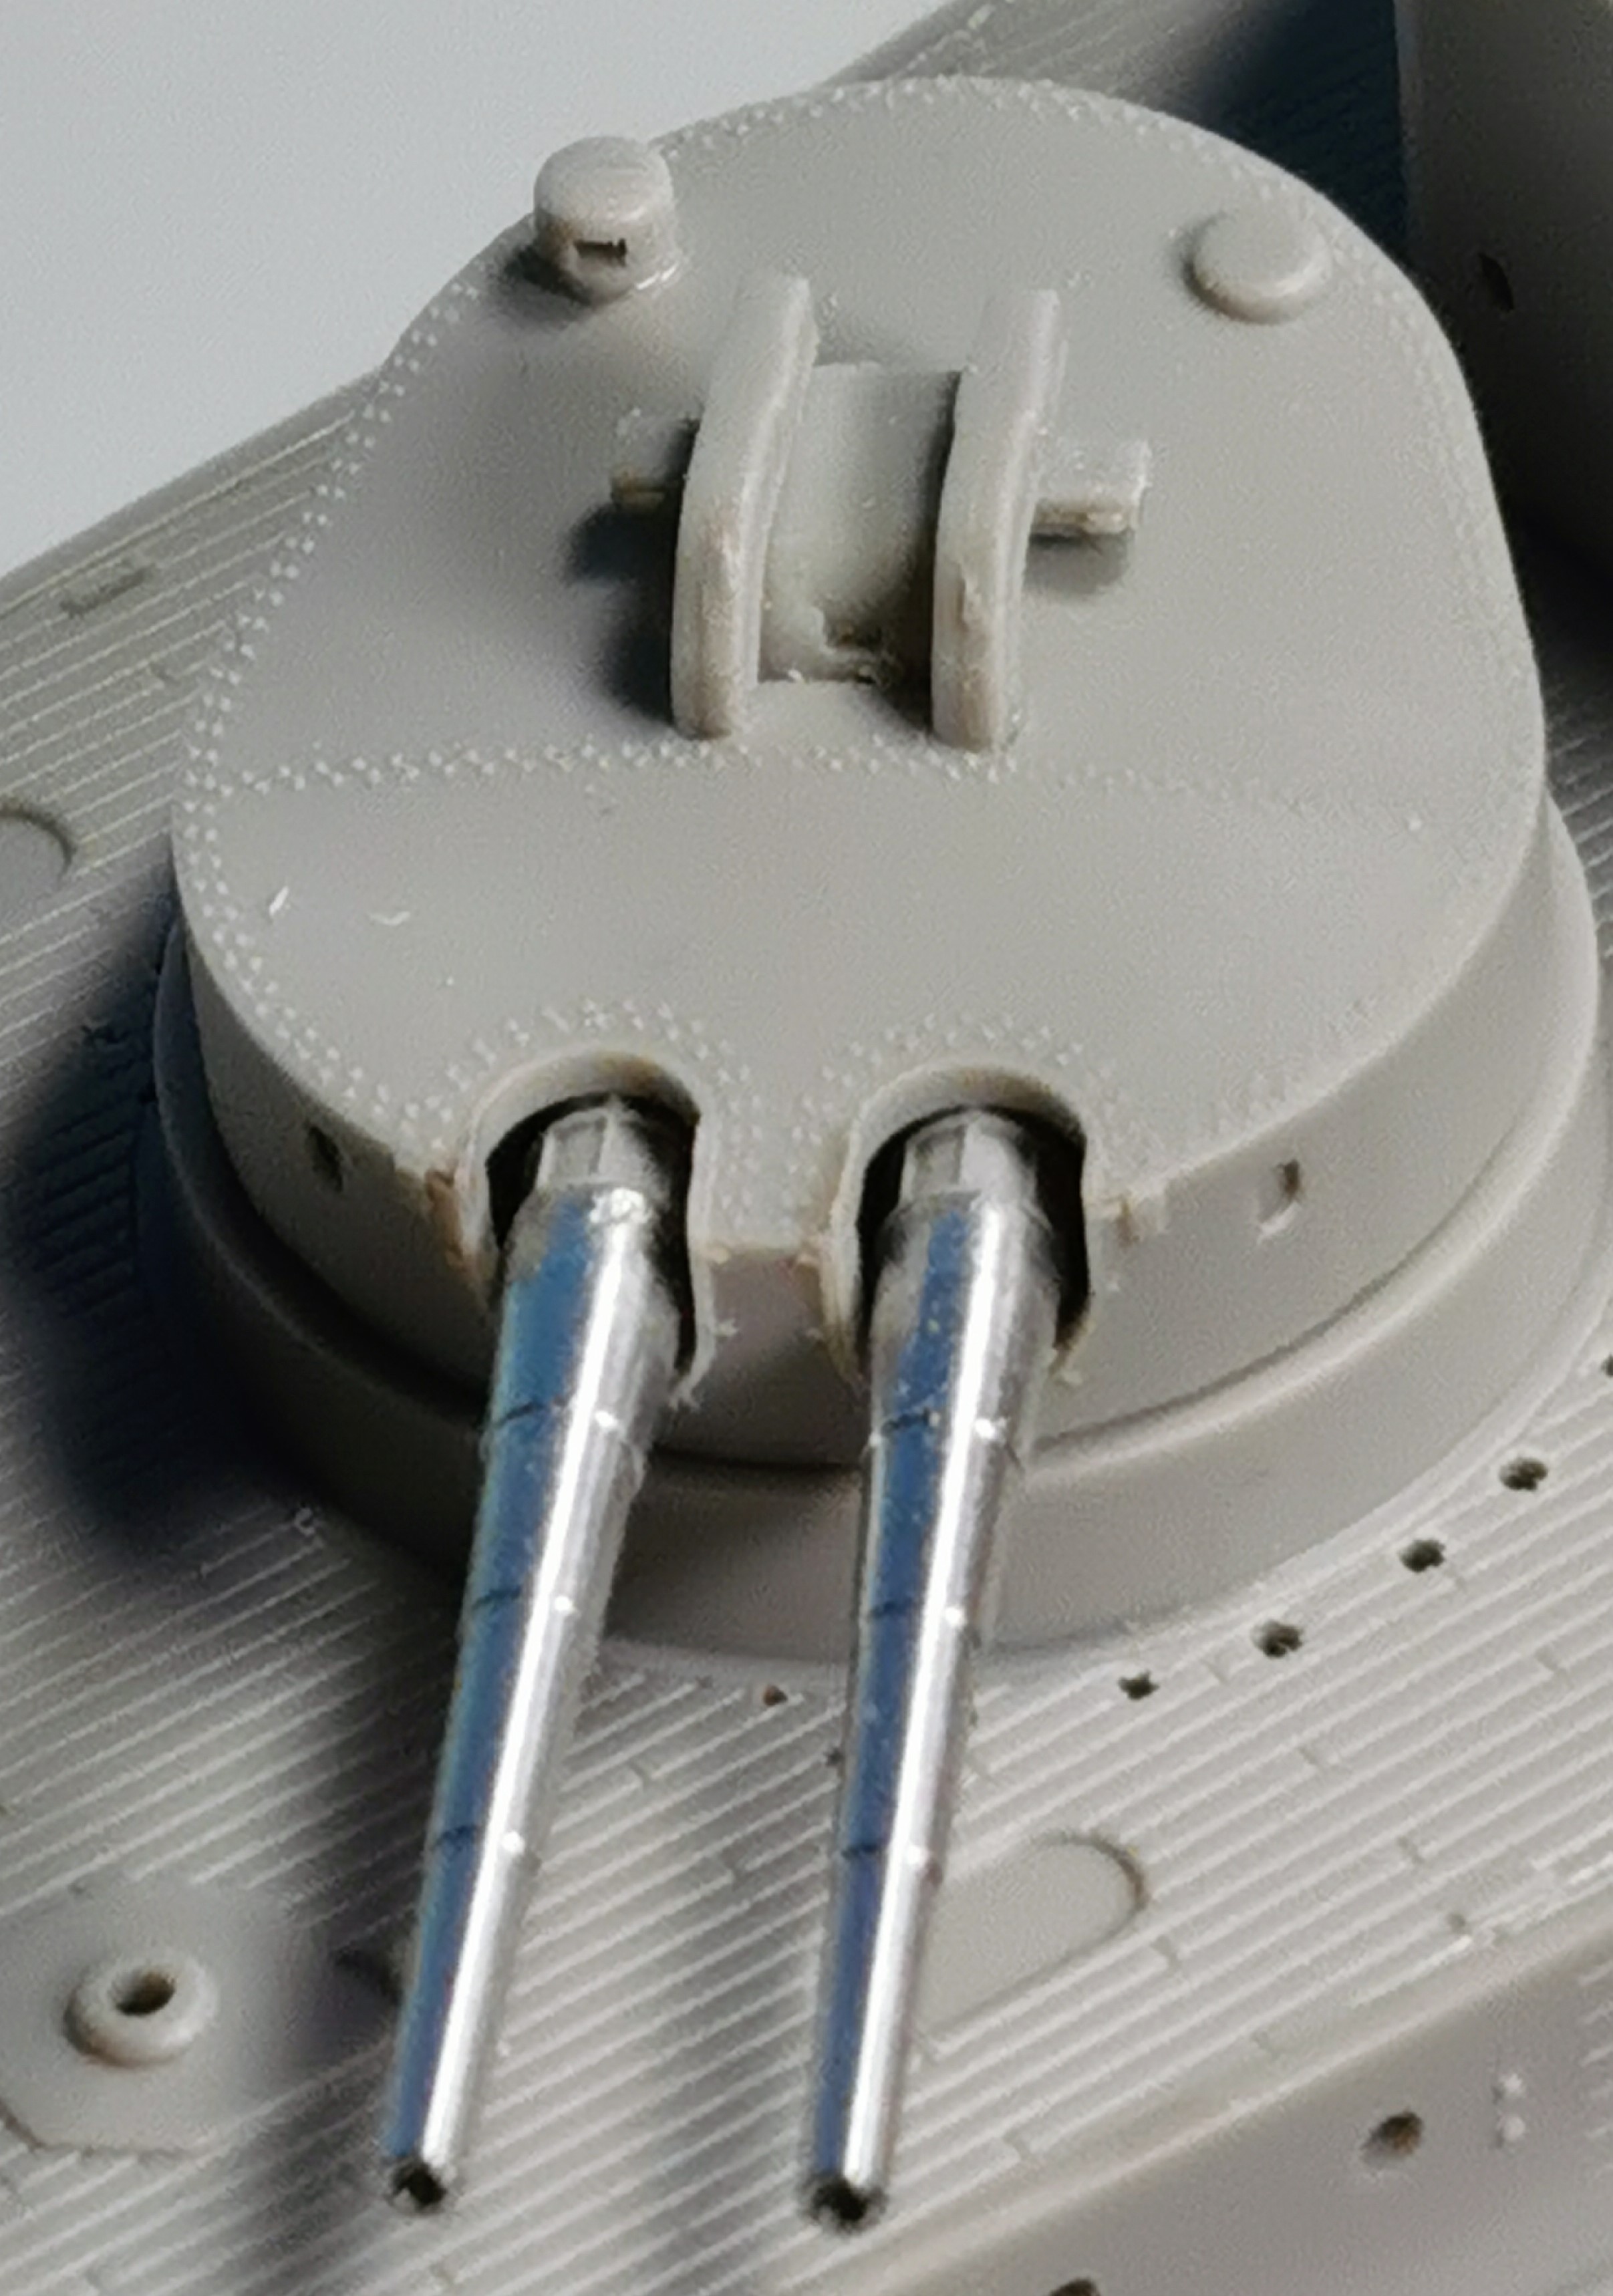
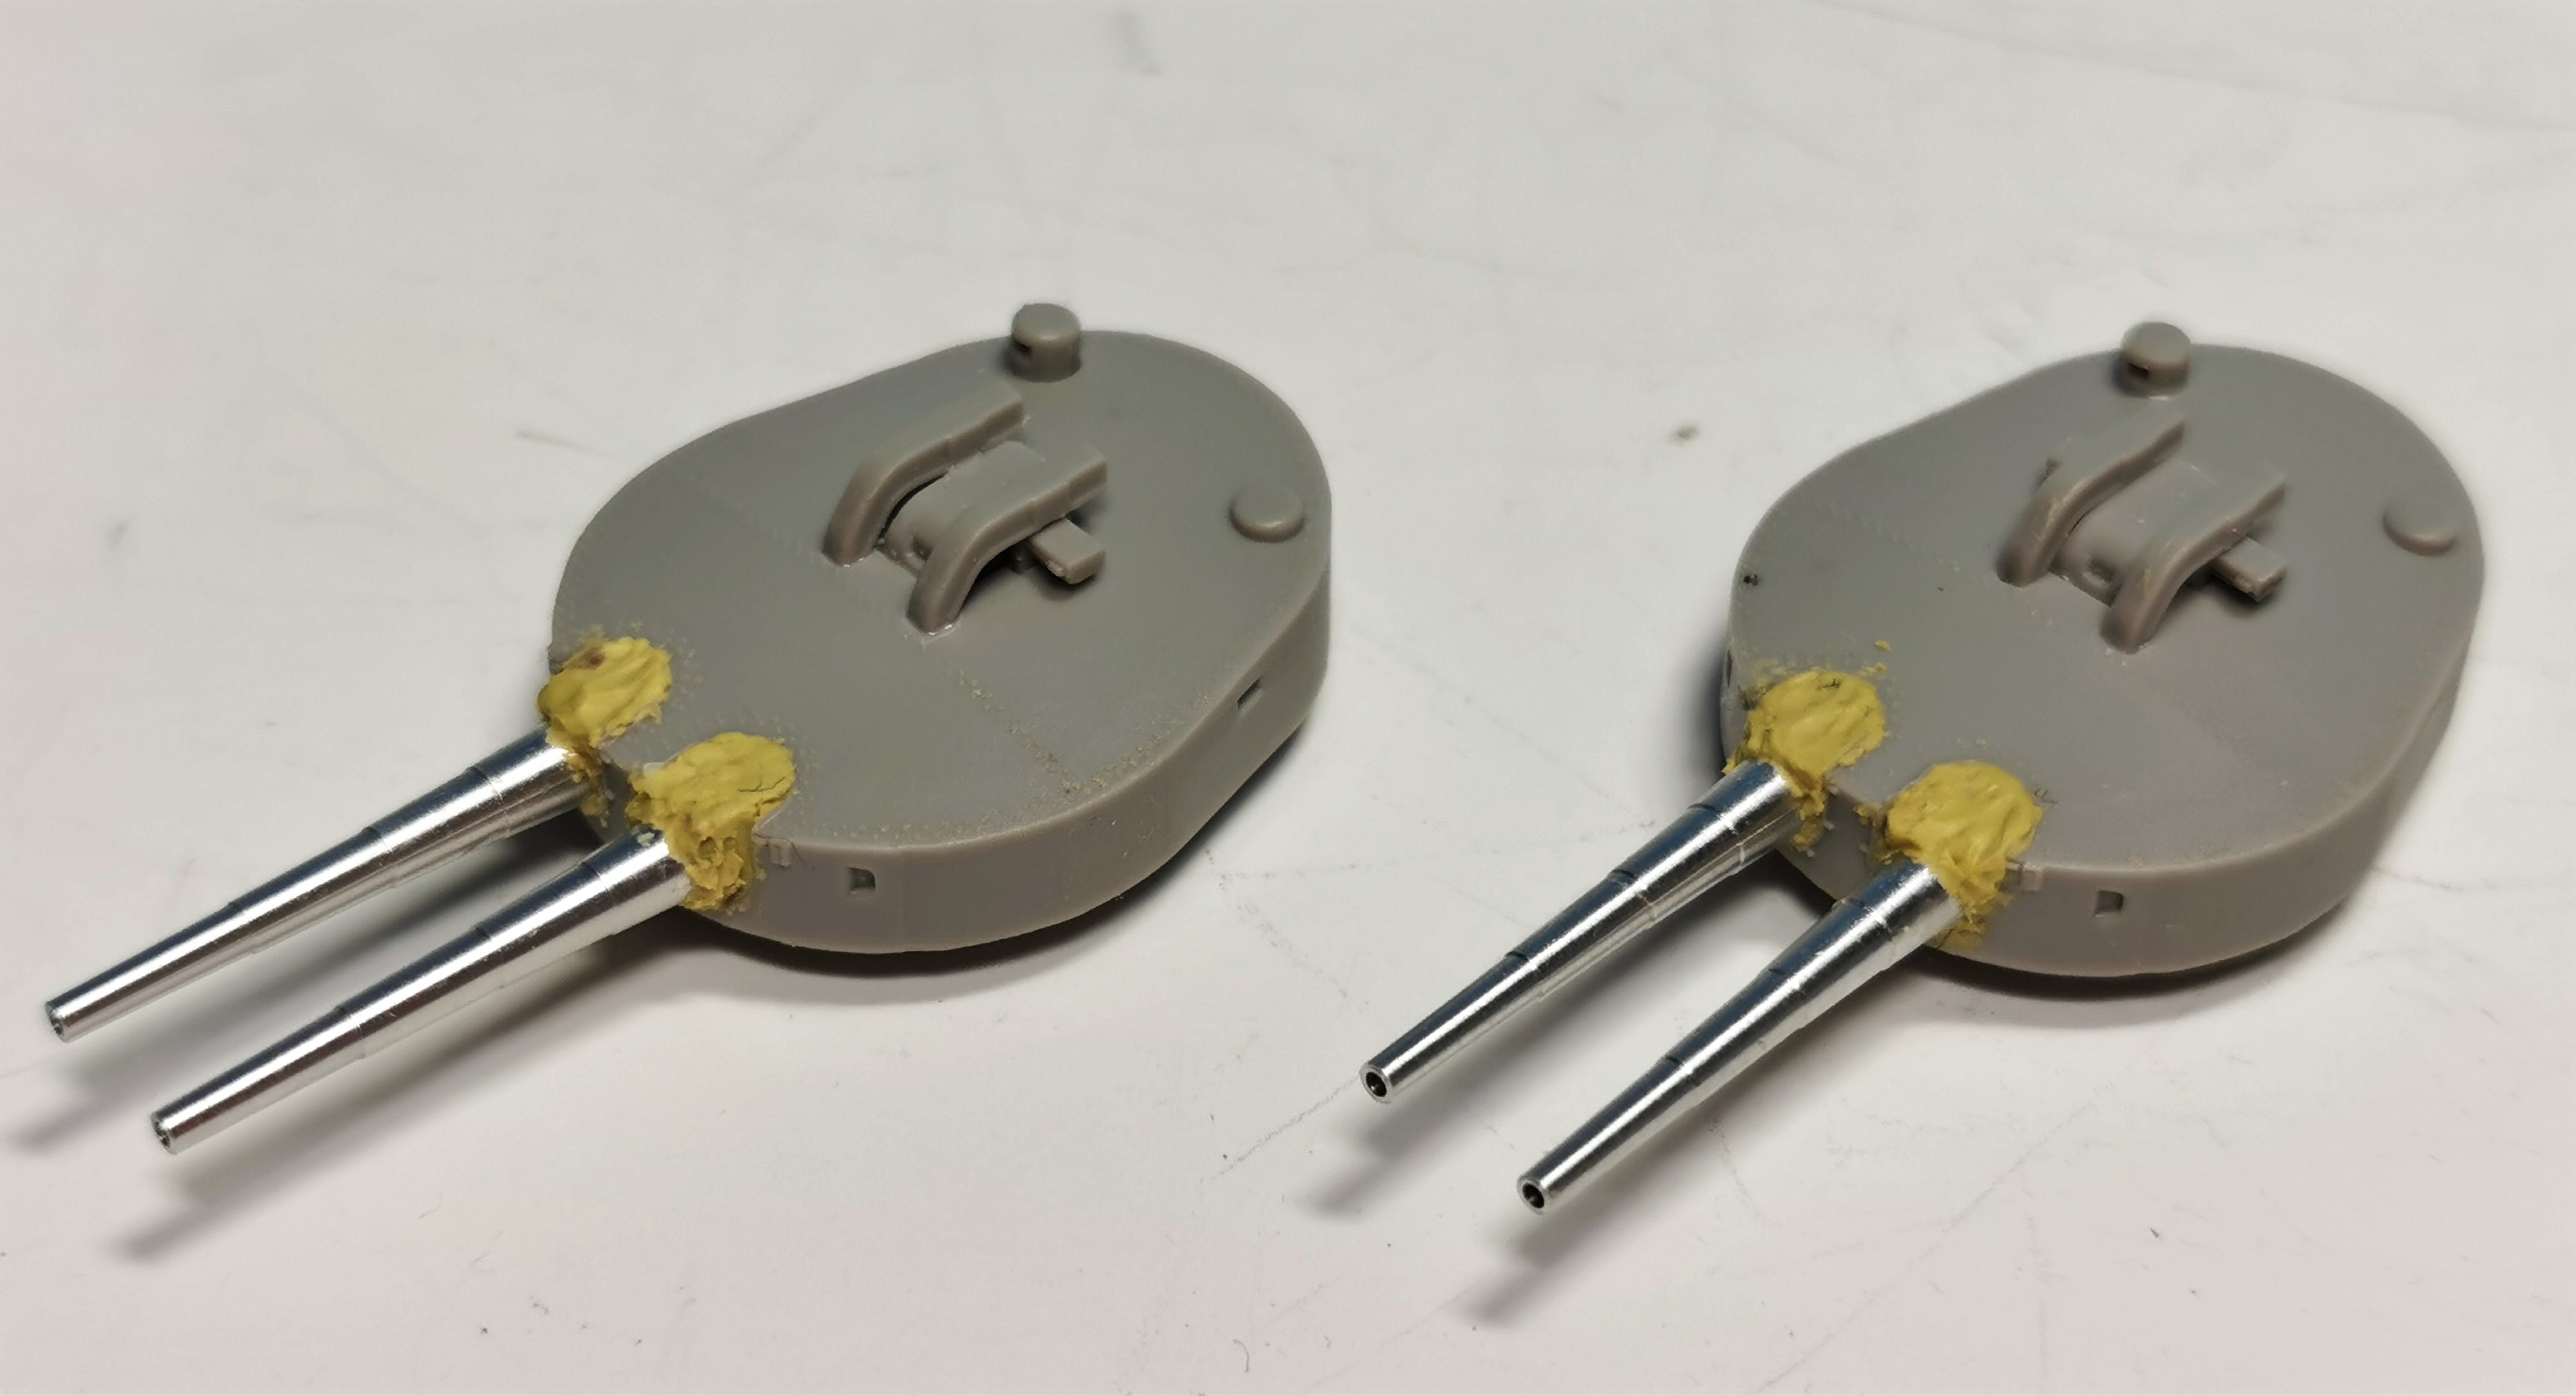
I also finished already the two mainguns and all ten secondary guns. The kit´s guns benefit greatly from the turned barrels from MASTERS. Especially the secondary guns are now better in scale for a 150 mm gun. I did read in another forum that TRUMPETER provided barrel parts for the 170 mm guns but these ones were replaced before WWII with the newer 150 mm guns. There are just the blastbags for the main guns to be done carefully with putty as, again, pictures showed the Schleswig-Holstein at the Westerplatte clearly with blastbags attached.


Thats it with my efforts so far, I do hope you like it what I did. Off at the harbour for a beer now
d6mst0
#453
Visit this Community
Texas, United States
Joined: August 28, 2016
KitMaker: 1,925 posts
Model Shipwrights: 1,298 posts
Posted: Saturday, June 27, 2020 - 08:40 AM UTC
Thomas,

Nice work with all of the modifications. Ship building always seem to be a lot of effort at the start with very little to show of it, but always pays off at the end.

Mark
GazzaS
#424
Visit this Community
Queensland, Australia
Joined: April 23, 2015
KitMaker: 4,648 posts
Model Shipwrights: 249 posts
Posted: Sunday, June 28, 2020 - 09:06 PM UTC
HI Thomas!

Love all of the corrections you are making!

Gaz
RussellE
#306
Visit this Community
Victoria, Australia
Joined: June 27, 2010
KitMaker: 3,959 posts
Model Shipwrights: 2,777 posts
Posted: Monday, June 29, 2020 - 12:21 AM UTC
Very impressive work so far Thomas
TimReynaga
Staff MemberAssociate Editor
MODEL SHIPWRIGHTS
Visit this Community
California, United States
Joined: May 03, 2006
KitMaker: 2,500 posts
Model Shipwrights: 1,830 posts
Posted: Monday, June 29, 2020 - 02:49 AM UTC
Beautiful work as usual, Thomas. I appreciate how you take the trouble to correct poorly positioned hawse holes, portholes and other small discrepancies that a non-expert (myself included) would never be aware of on the final build!
Black_sheep
Visit this Community
Bayern, Germany
Joined: December 11, 2009
KitMaker: 823 posts
Model Shipwrights: 551 posts
Posted: Sunday, July 05, 2020 - 04:32 AM UTC
Thank you all for your replies, I do my best to get the real ship out of this kit

At this weekend I glued on all the opened porthole hatches out of EDUARD´s set. As I drilled out some more holes according to the real ship there were missing quite a lot etched porthole hatches. I had the choice to buy another EDUARD set just for these ones or make my own out of thin evergreen sheet with my trustable stamping tool (dont know its name yet...). I changed some chocks for the lifeboats with etched ones and made the new etched vents at the aft superstructure:
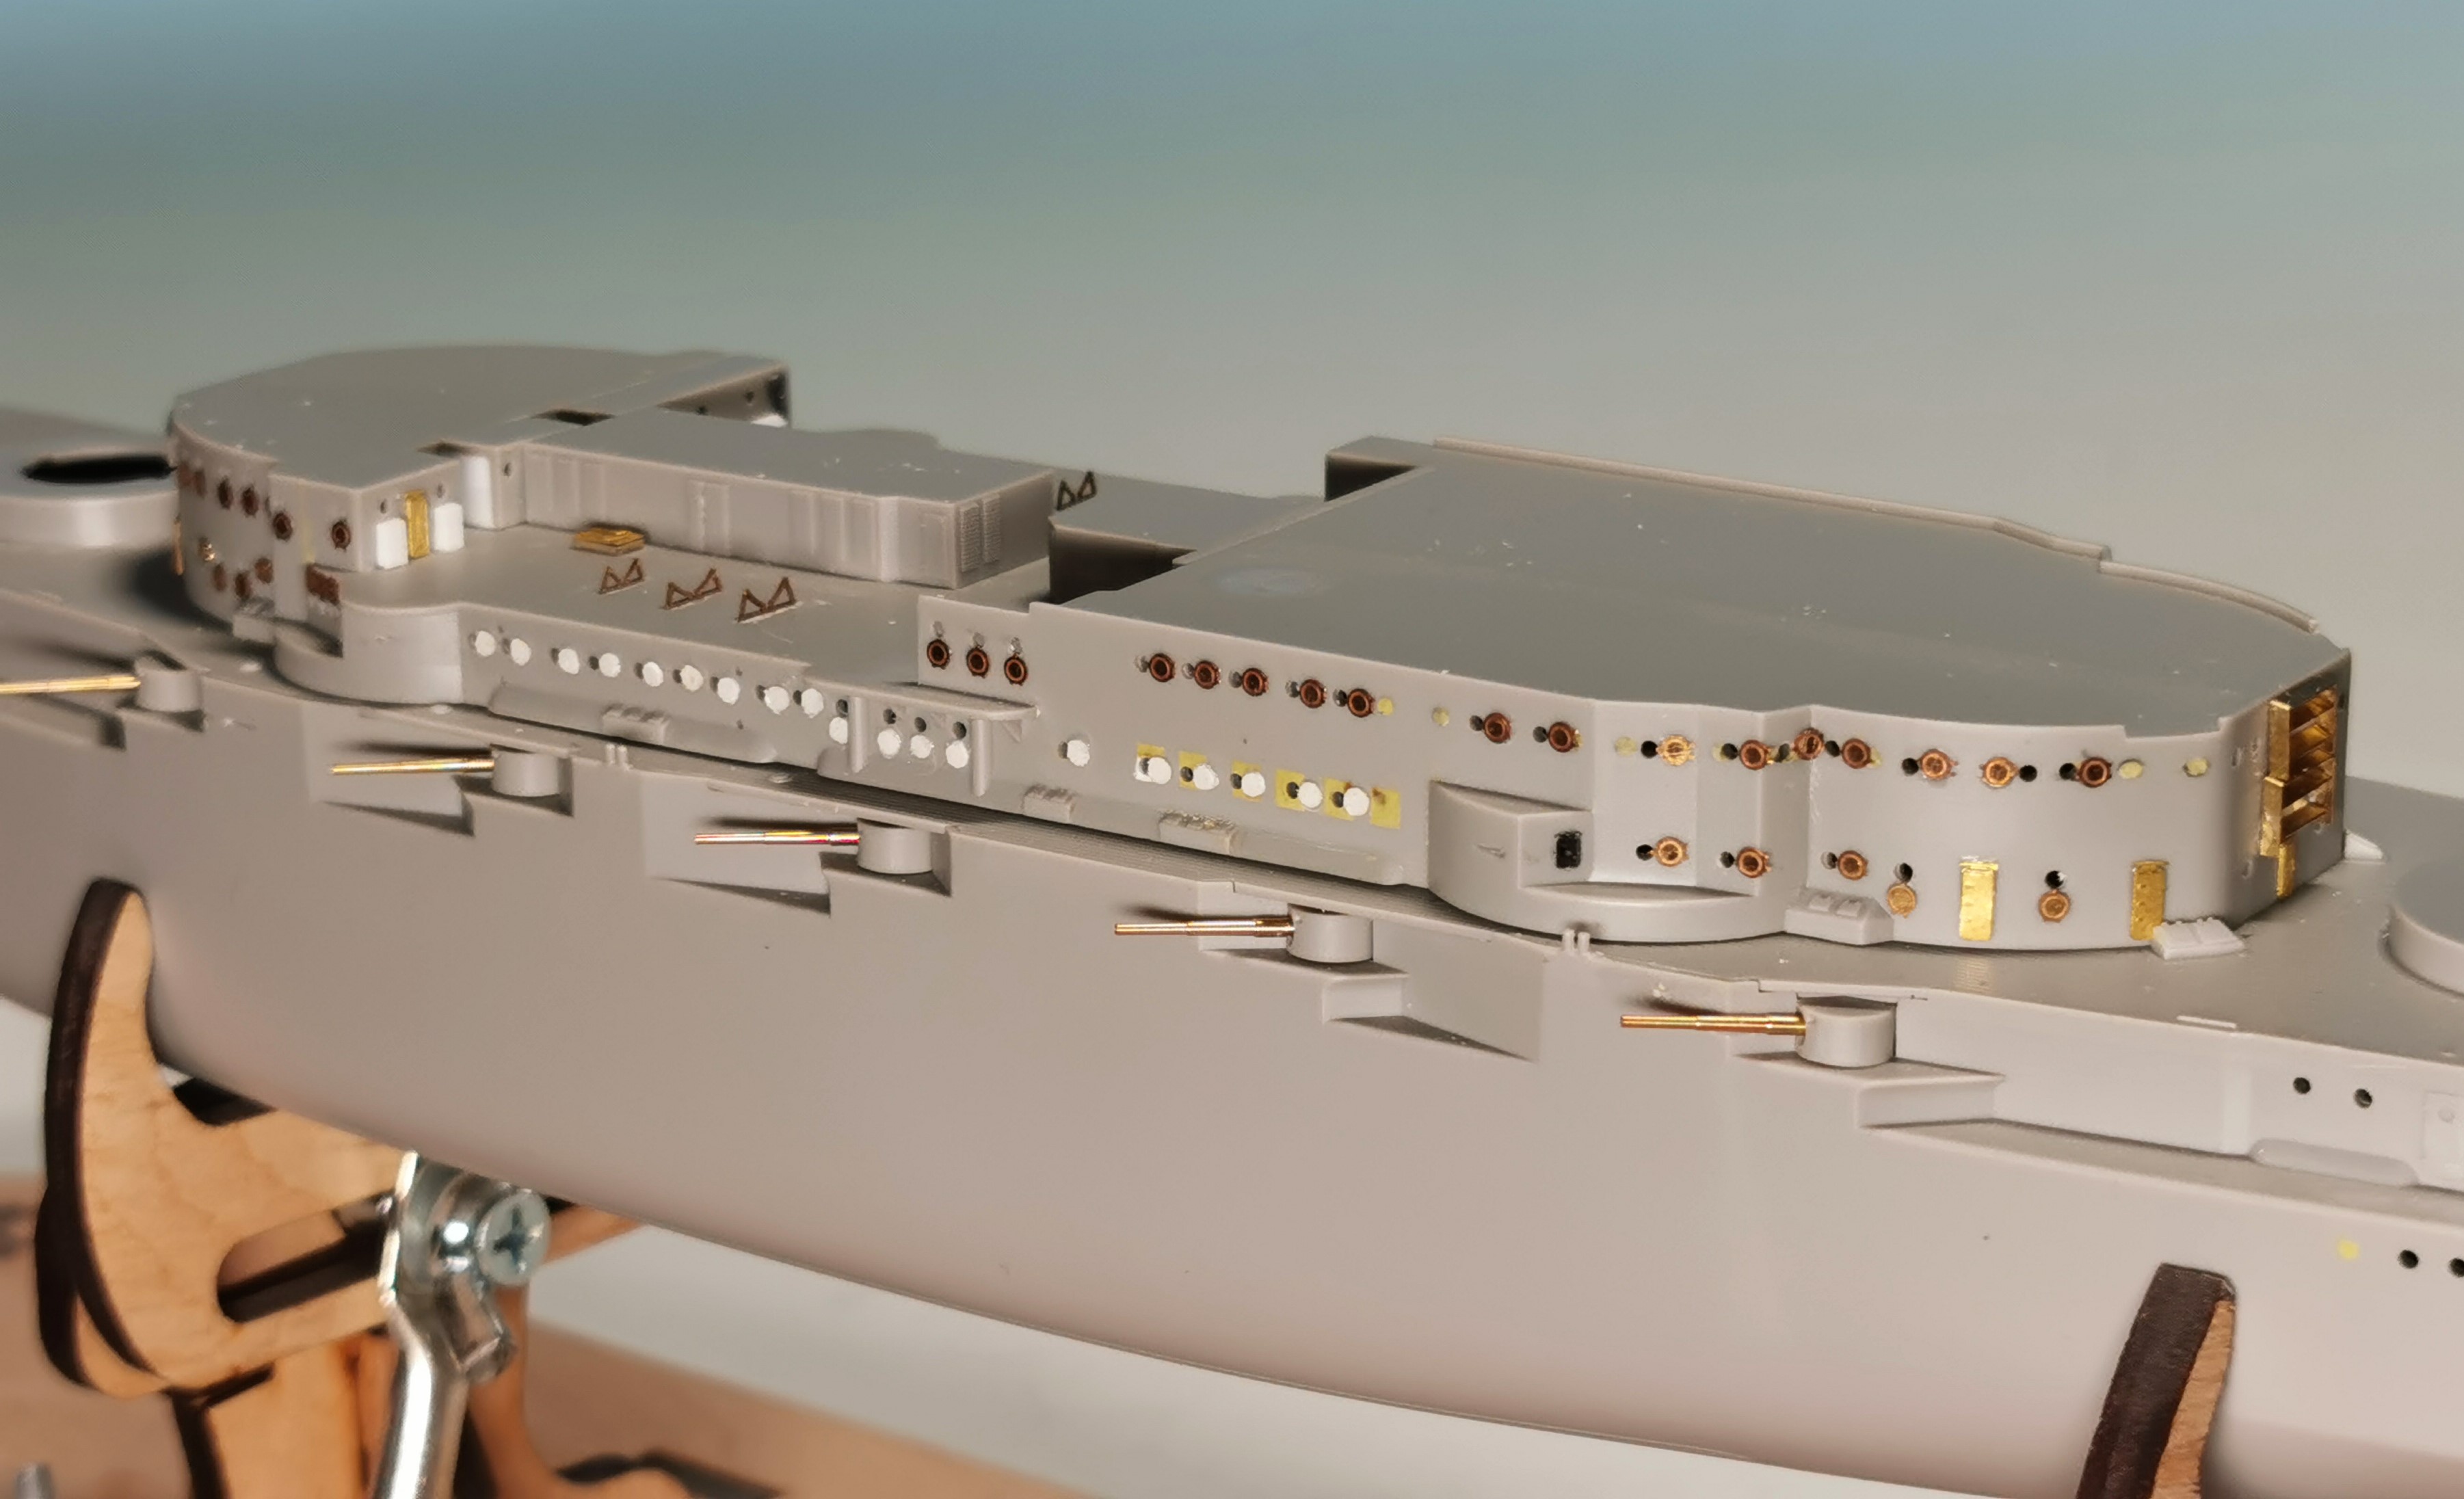
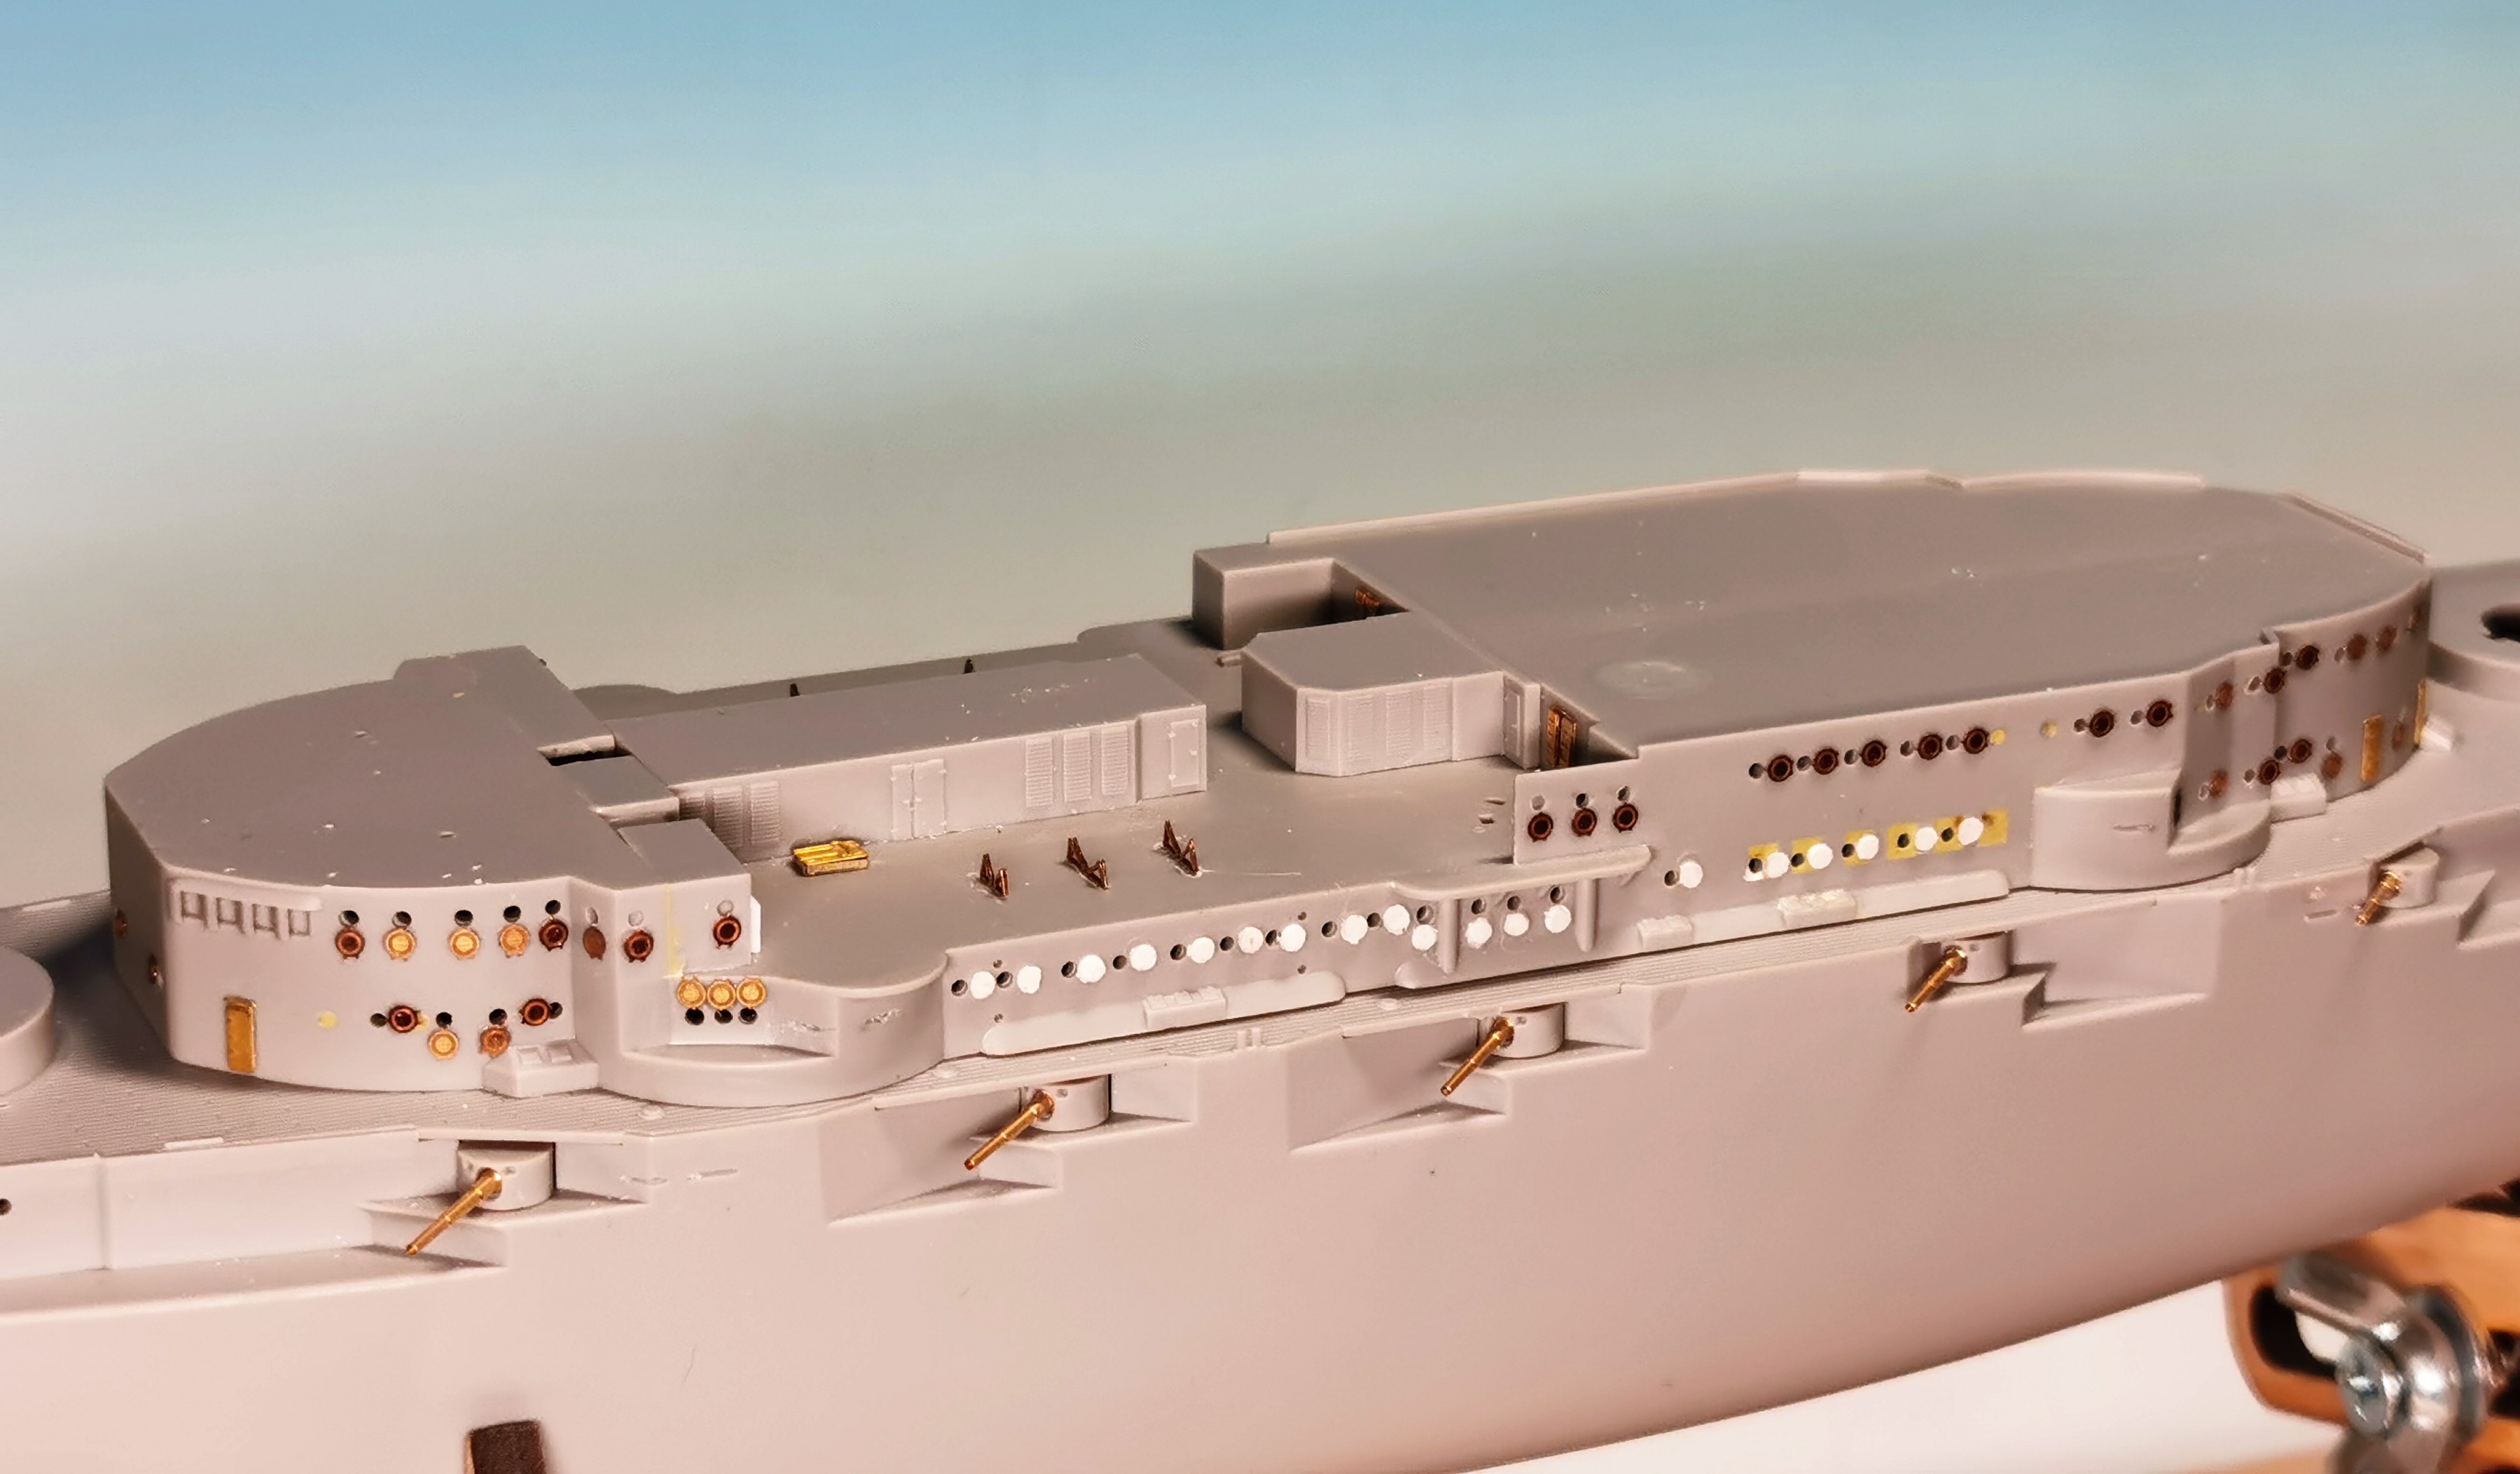


The last work today were the selfmade blastbags of the main gun turrets. Never made before but it was easy; I am curious how it will look after painting


Thats it for this weekend; heading to the bunk now
d6mst0
#453
Visit this Community
Texas, United States
Joined: August 28, 2016
KitMaker: 1,925 posts
Model Shipwrights: 1,298 posts
Posted: Sunday, July 05, 2020 - 06:35 AM UTC
Thomas,

Nice work on those portholes covers. They really add to the looks of the superstructure and standout with a little weathering.

Mark
Black_sheep
Visit this Community
Bayern, Germany
Joined: December 11, 2009
KitMaker: 823 posts
Model Shipwrights: 551 posts
Posted: Sunday, July 05, 2020 - 06:41 AM UTC

Quoted Text

Thomas,

Nice work on those portholes covers. They really add to the looks of the superstructure and standout with a little weathering.

Mark


Hey Mark, it was quite some work already in the very beginning of this build but I also think it will pay off later after painting.

Cheers
RussellE
#306
Visit this Community
Victoria, Australia
Joined: June 27, 2010
KitMaker: 3,959 posts
Model Shipwrights: 2,777 posts
Posted: Sunday, July 05, 2020 - 09:53 PM UTC
Excellent work on the portholes, Thomas

She's going to look great under some paint
GazzaS
#424
Visit this Community
Queensland, Australia
Joined: April 23, 2015
KitMaker: 4,648 posts
Model Shipwrights: 249 posts
Posted: Monday, July 06, 2020 - 04:16 PM UTC
Looking nice, Thomas!
Black_sheep
Visit this Community
Bayern, Germany
Joined: December 11, 2009
KitMaker: 823 posts
Model Shipwrights: 551 posts
Posted: Tuesday, July 07, 2020 - 05:08 AM UTC
@Russell and Gazza: Thank you very much friends. I am also curious how it will look unter paint. I have to think carefully now how to continue with which segments now
RedDuster
Visit this Community
England - South East, United Kingdom
Joined: March 01, 2010
KitMaker: 7,078 posts
Model Shipwrights: 6,649 posts
Posted: Friday, July 10, 2020 - 09:05 PM UTC
Great start Thomas,

Very interesting to see all the corrections, making notes for when I get round to this one.

Cheers

Si
Black_sheep
Visit this Community
Bayern, Germany
Joined: December 11, 2009
KitMaker: 823 posts
Model Shipwrights: 551 posts
Posted: Sunday, July 26, 2020 - 08:13 AM UTC
Story continues - sorry for the delay but after continueing to the next step in manual I was already trapped in another problems to solve:

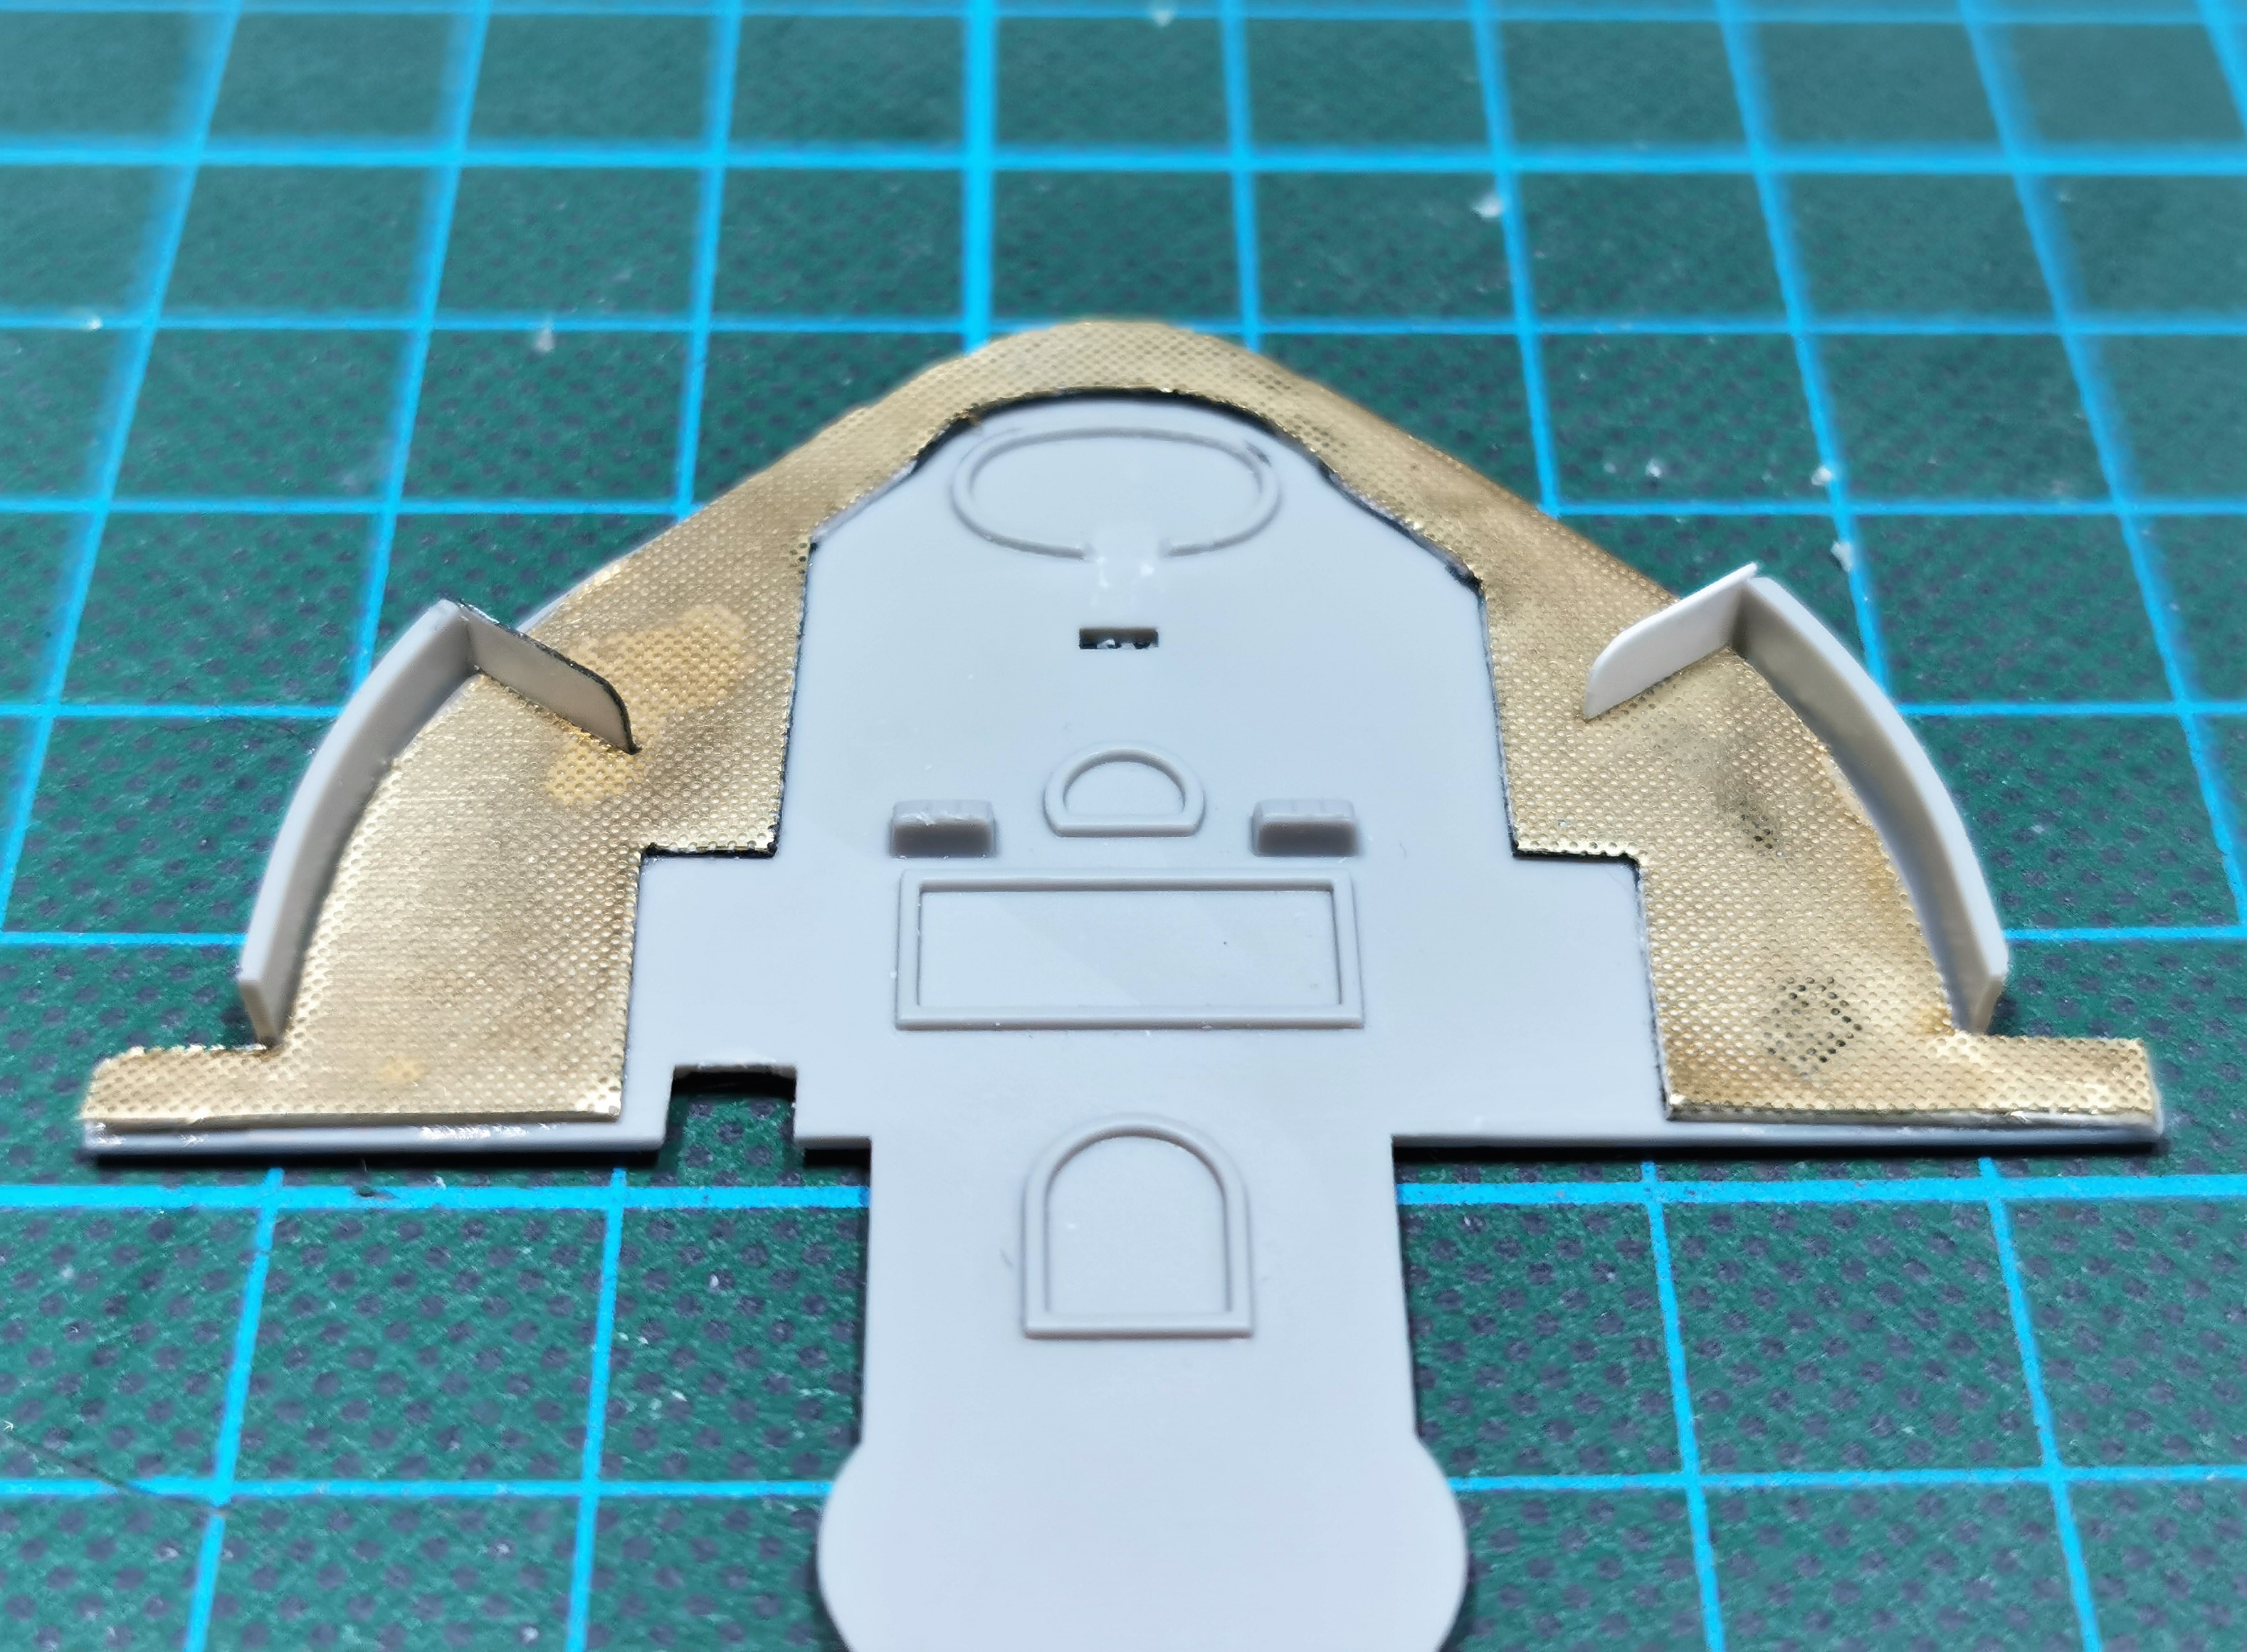
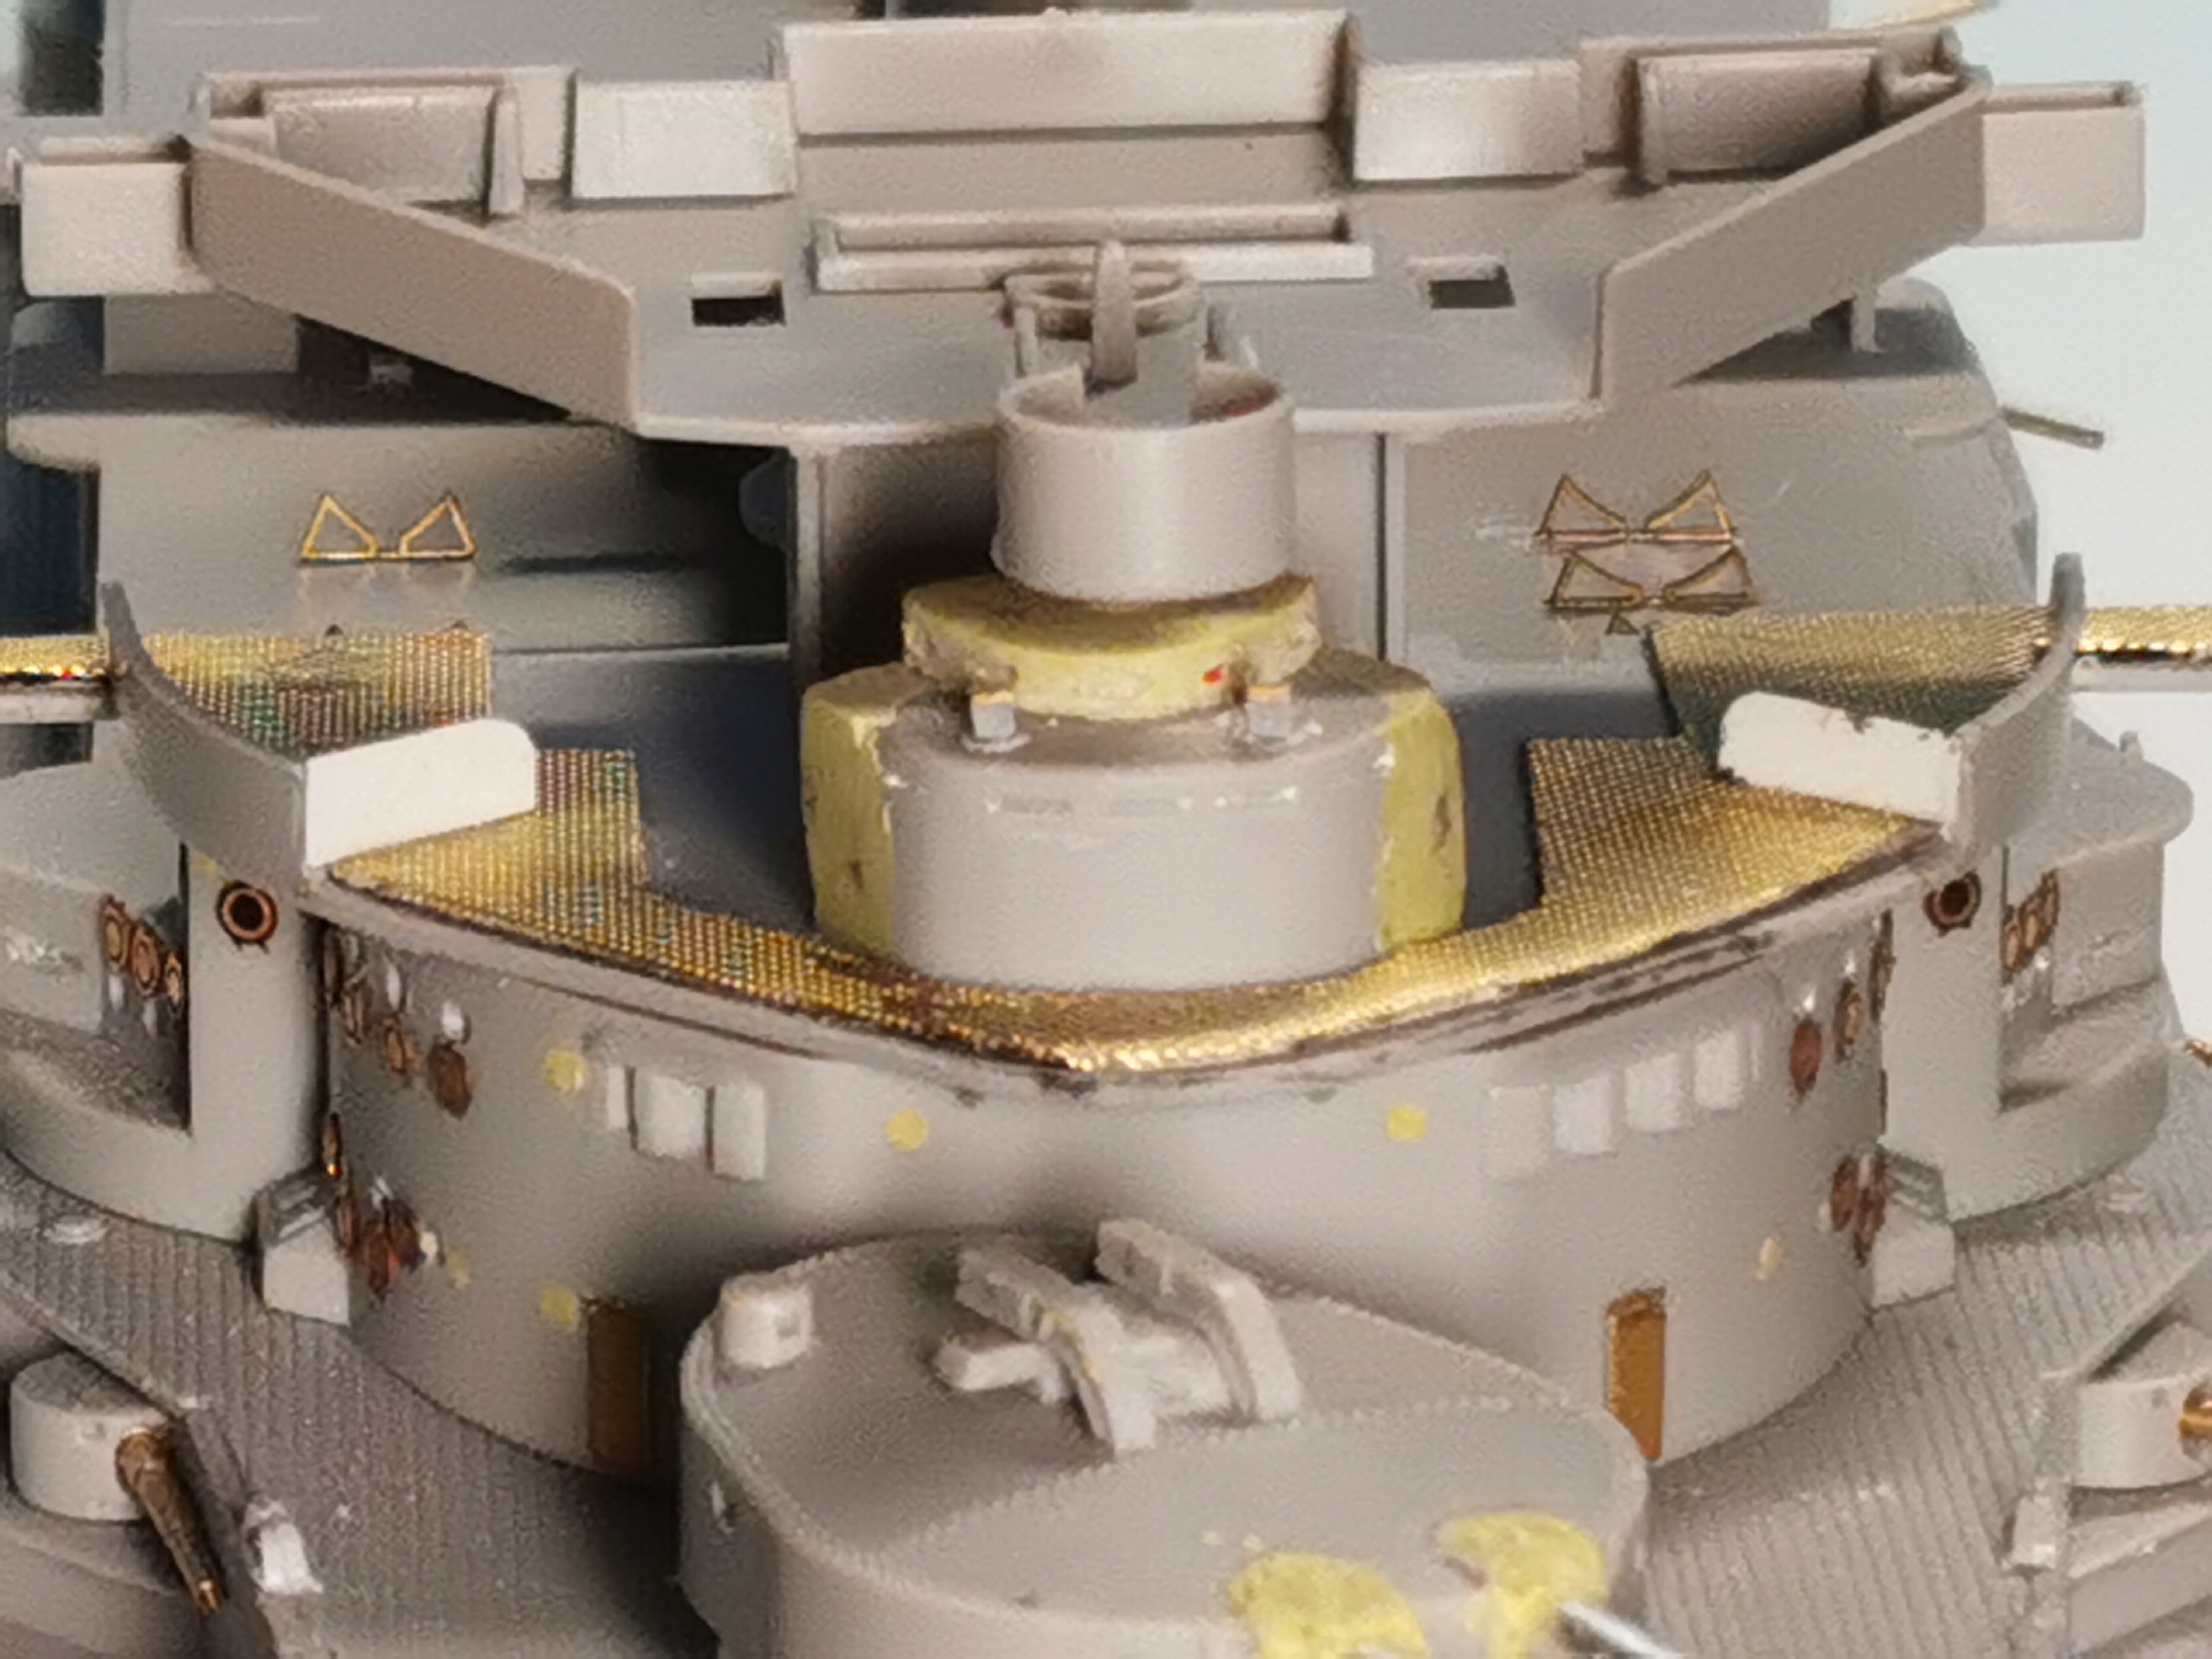
The lower bridge of the Schleswig Holstein have wooden grates installed. These are completely missed in TRUMPETER´s kit and sadly also ommitted in EDUARD´s etched set, too. Therefore I´ve bought me LION ROAR´s perforated floor set for this task. First I had to do a pattern out of paper. The shape was later transfered to a thin evergreen sheet to resemble that the gratings are a bit higher as the normal ship´s floor. When the plastic form was finished I superglued it with the perforated etched floor:


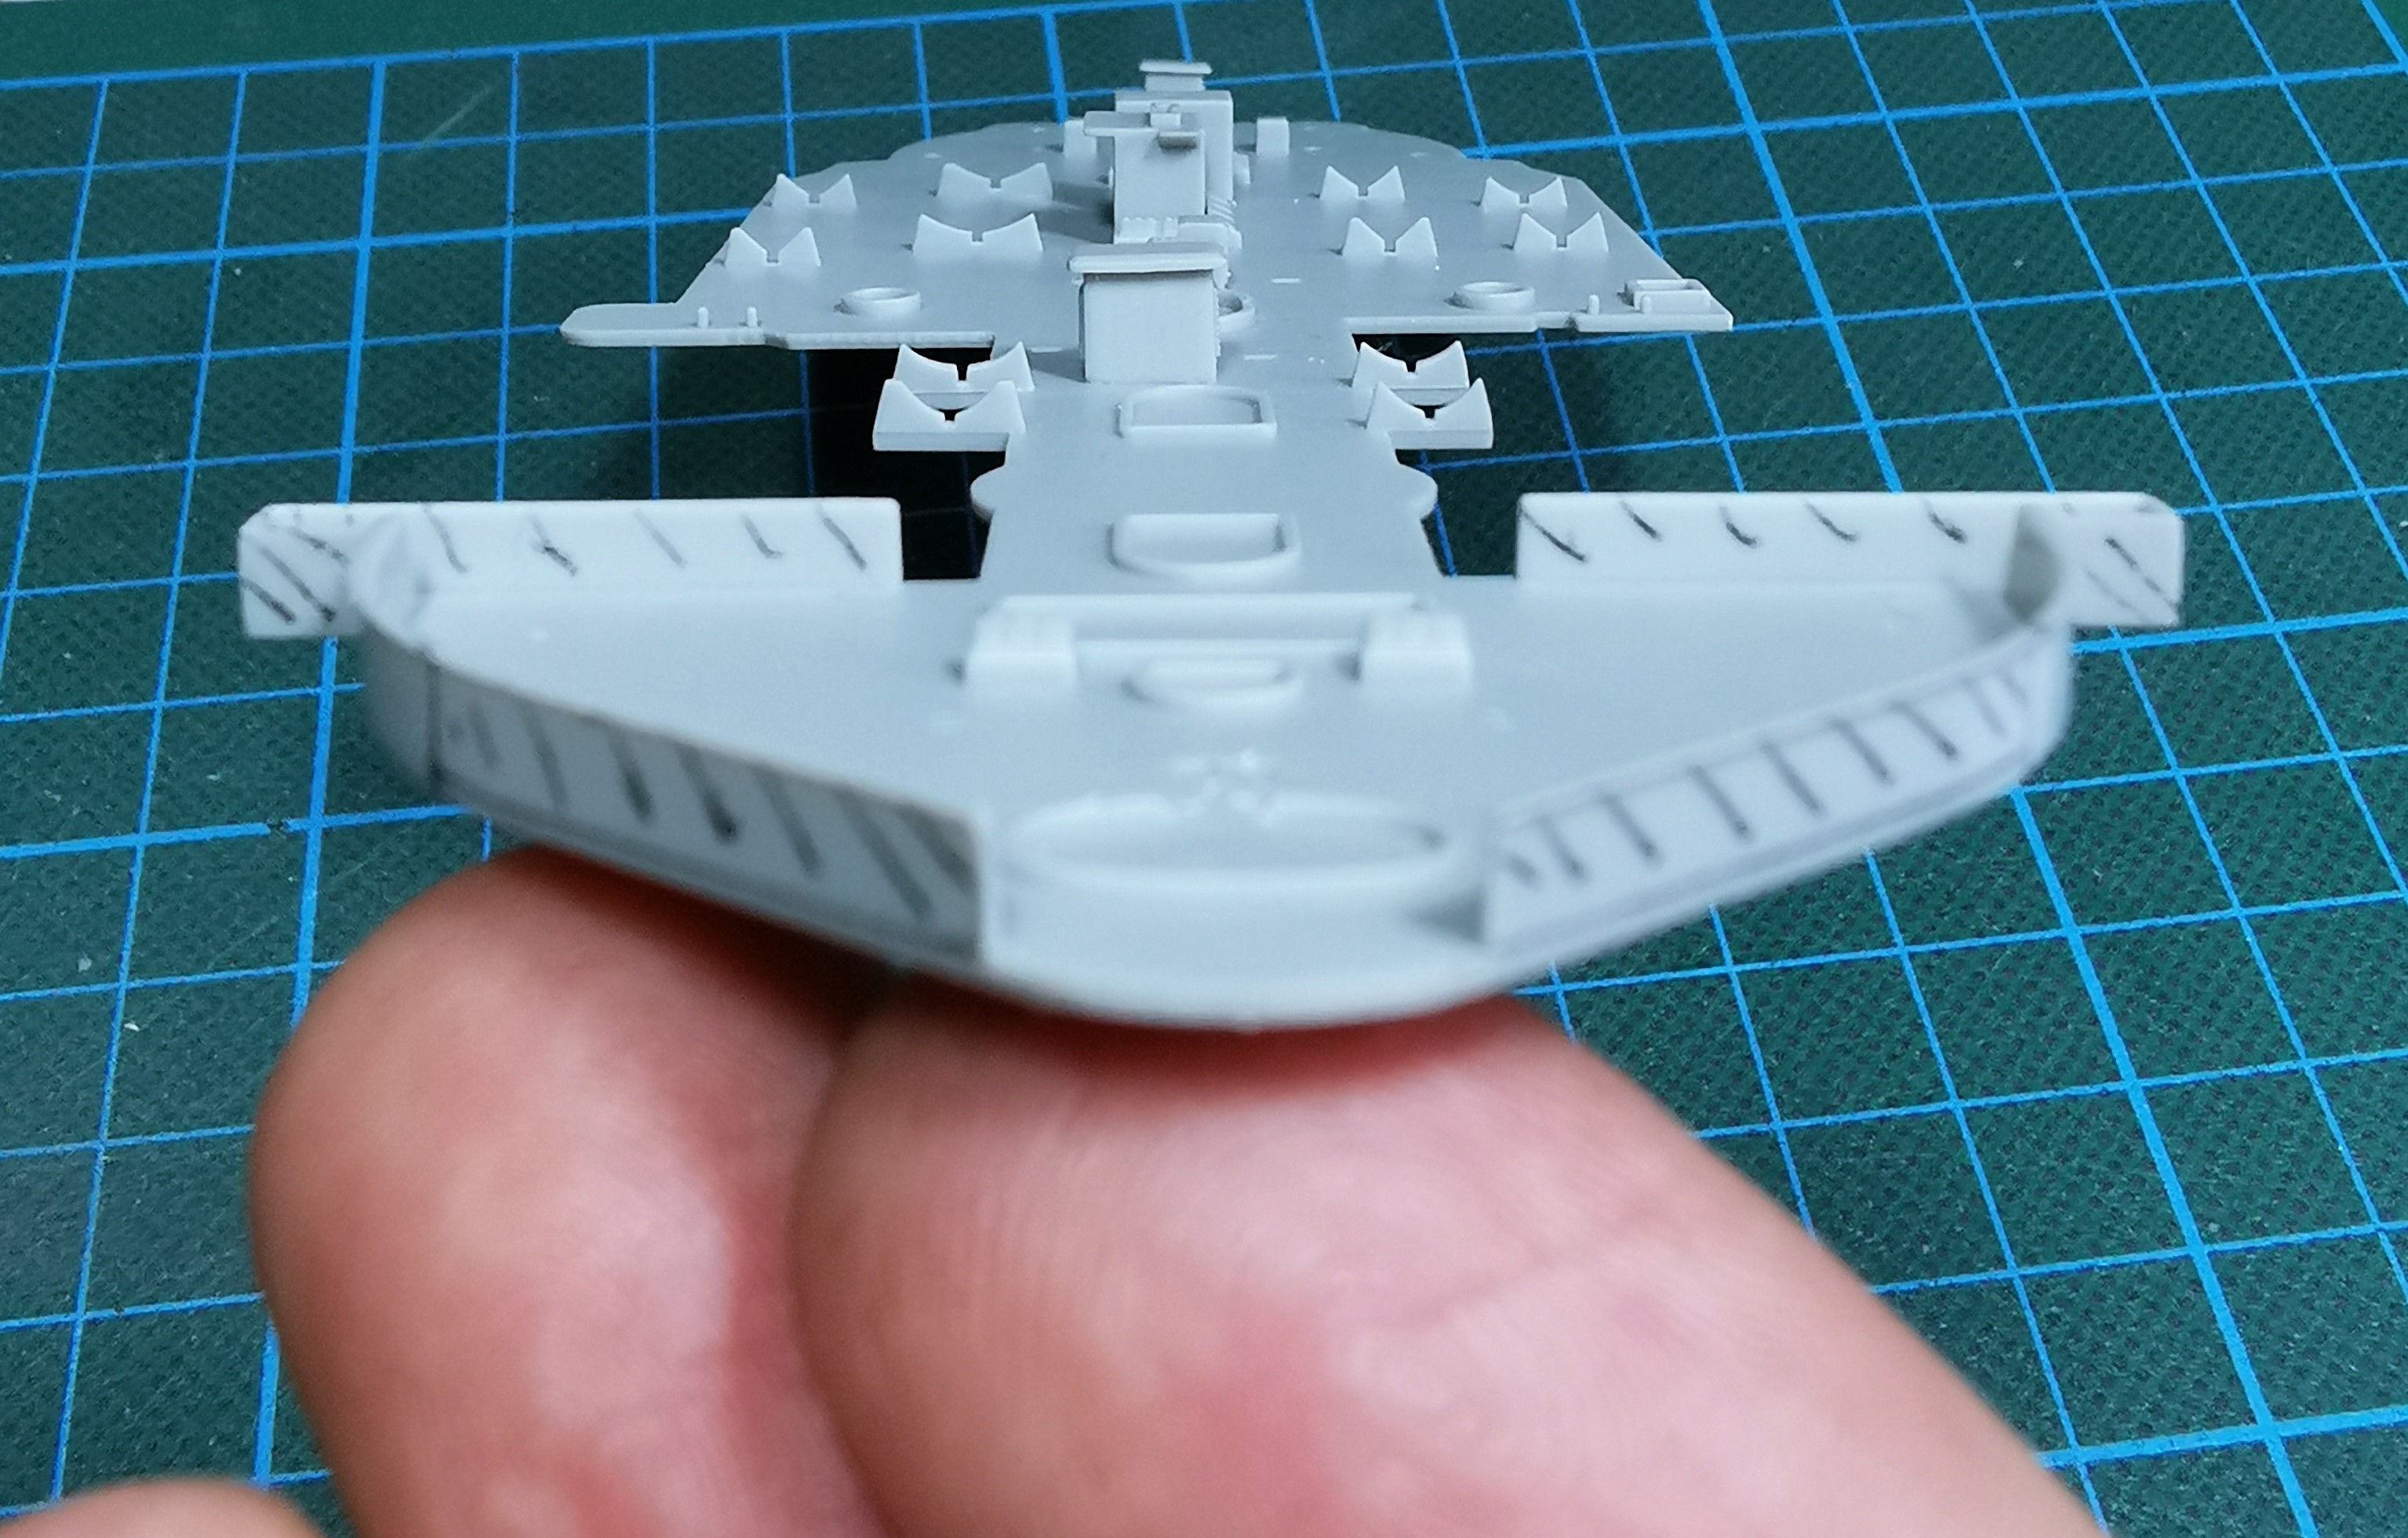
Then it was time for surgery at the plastic deck which I intended to correct. All the black striped areas needed to leave as in reality there was railing with canvas and no fixed walls in these areas:


I was pleased with the results and added two splashwalls with Evergreen sheet


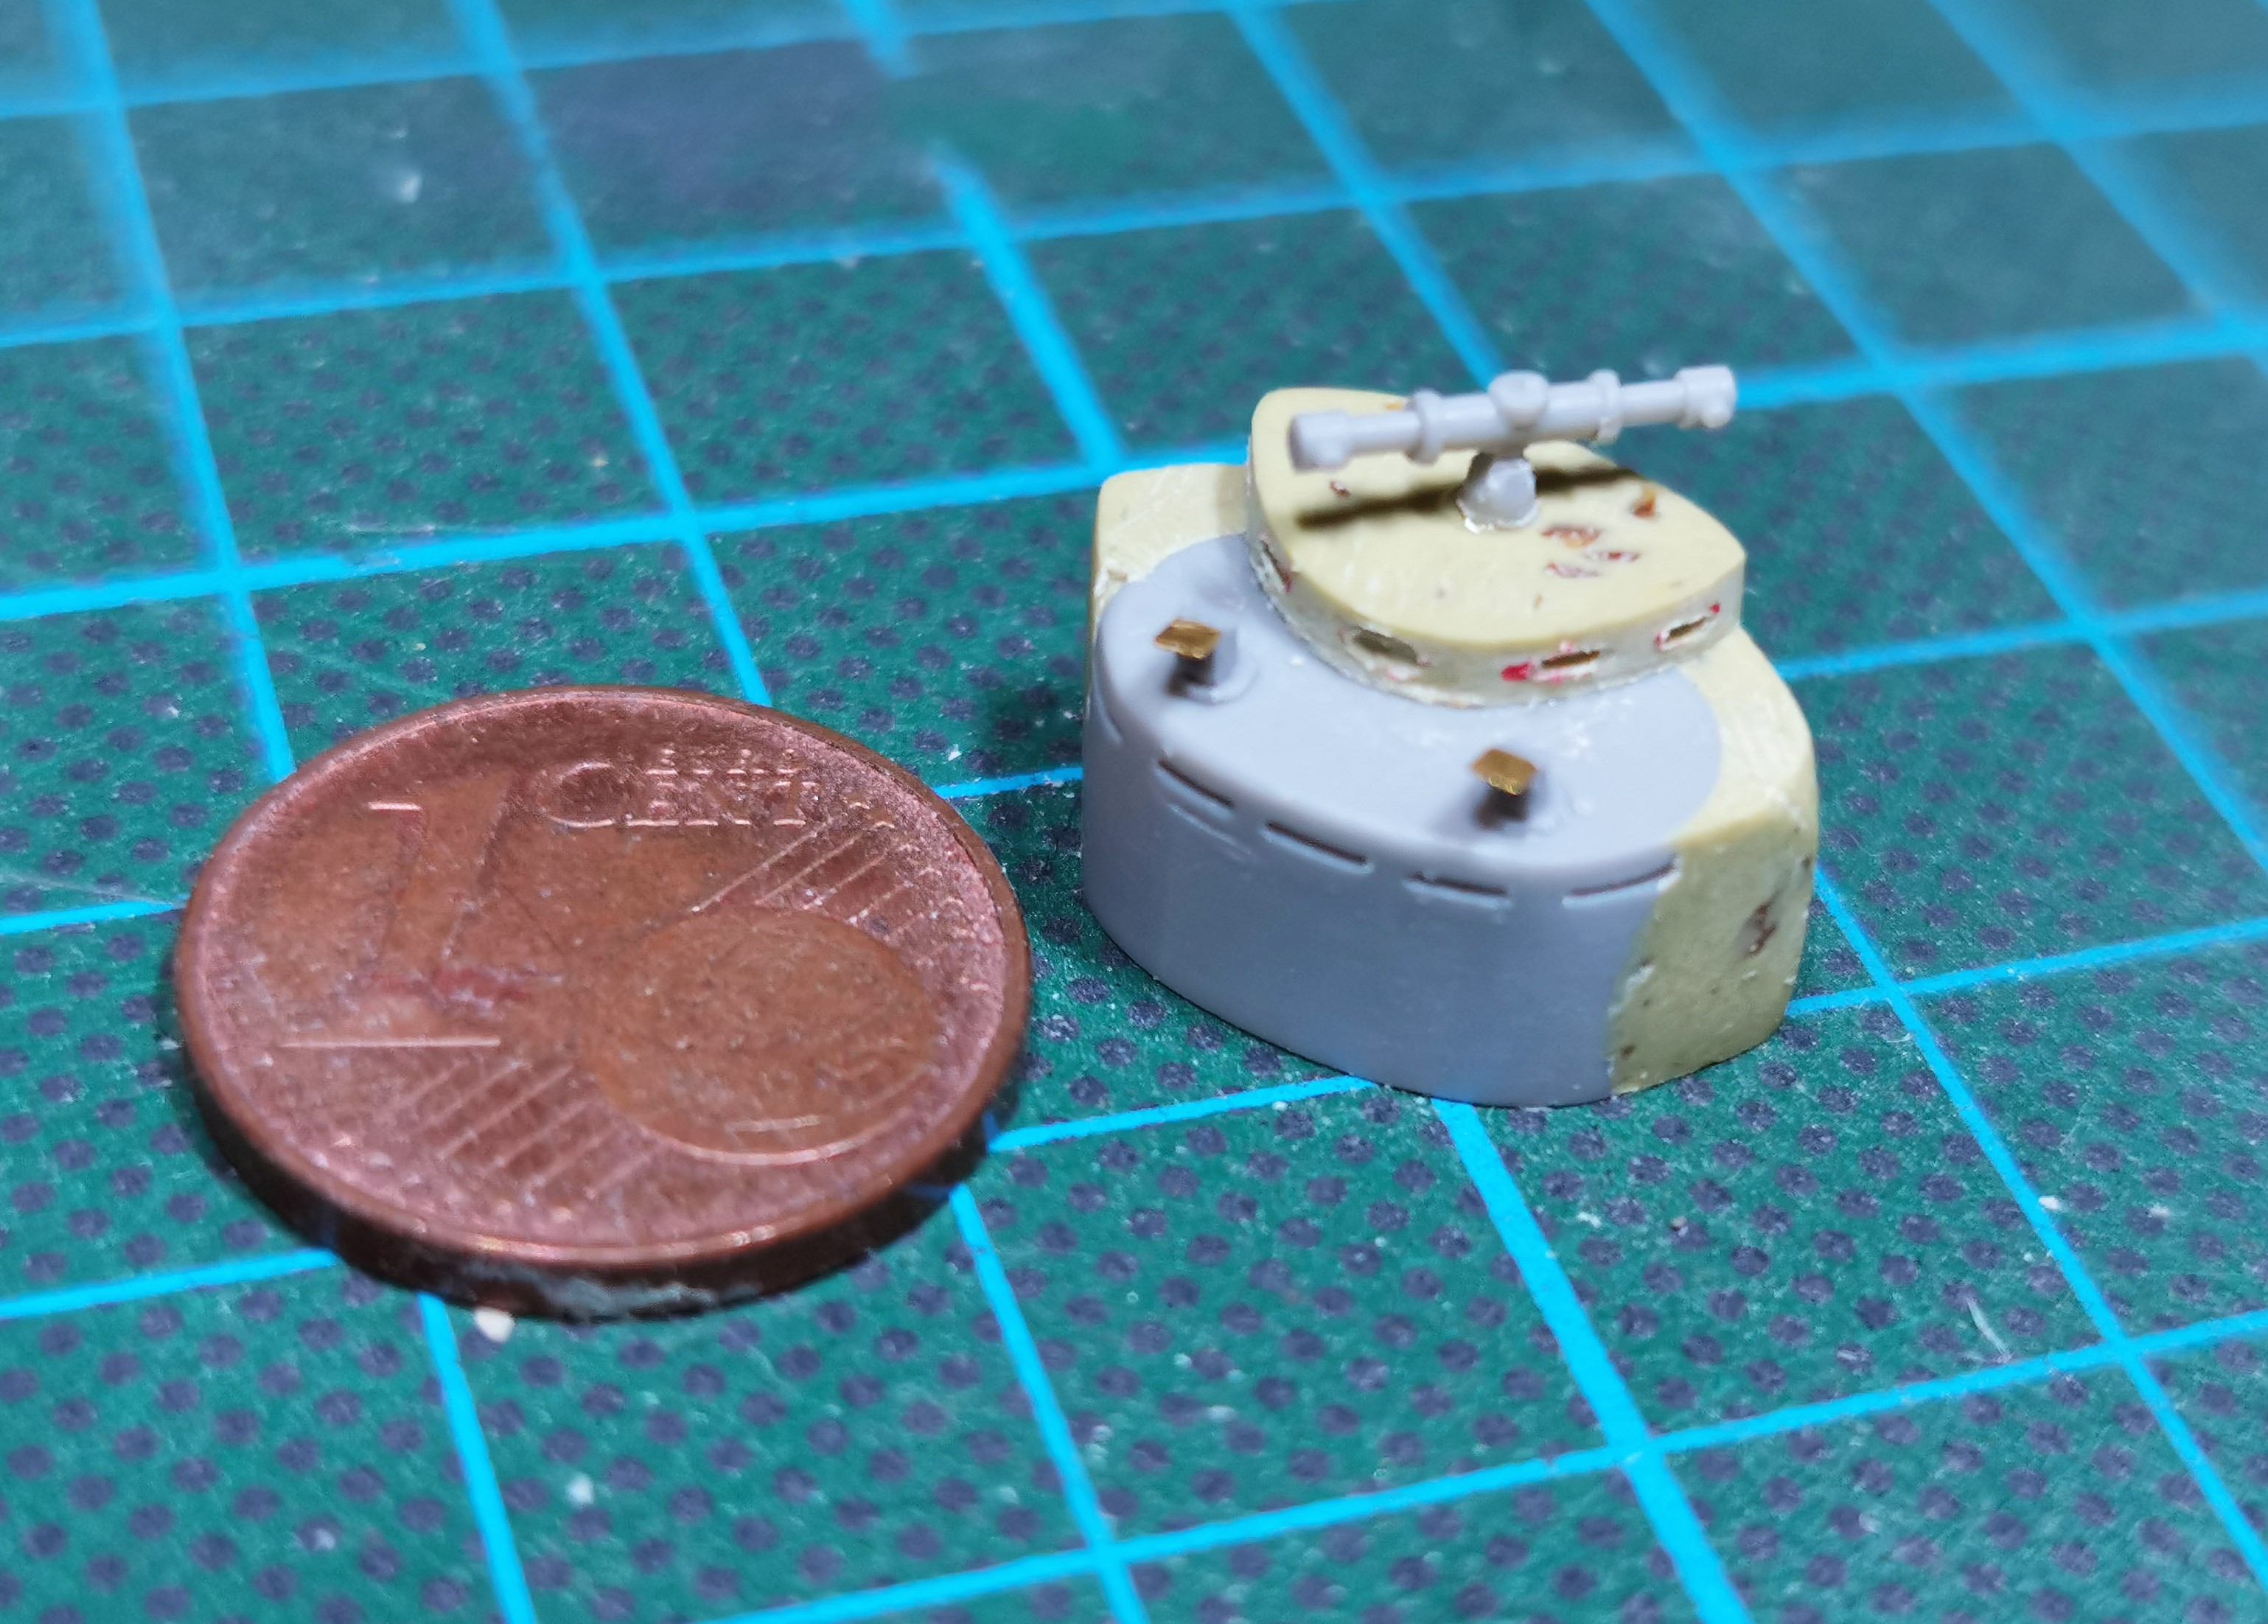
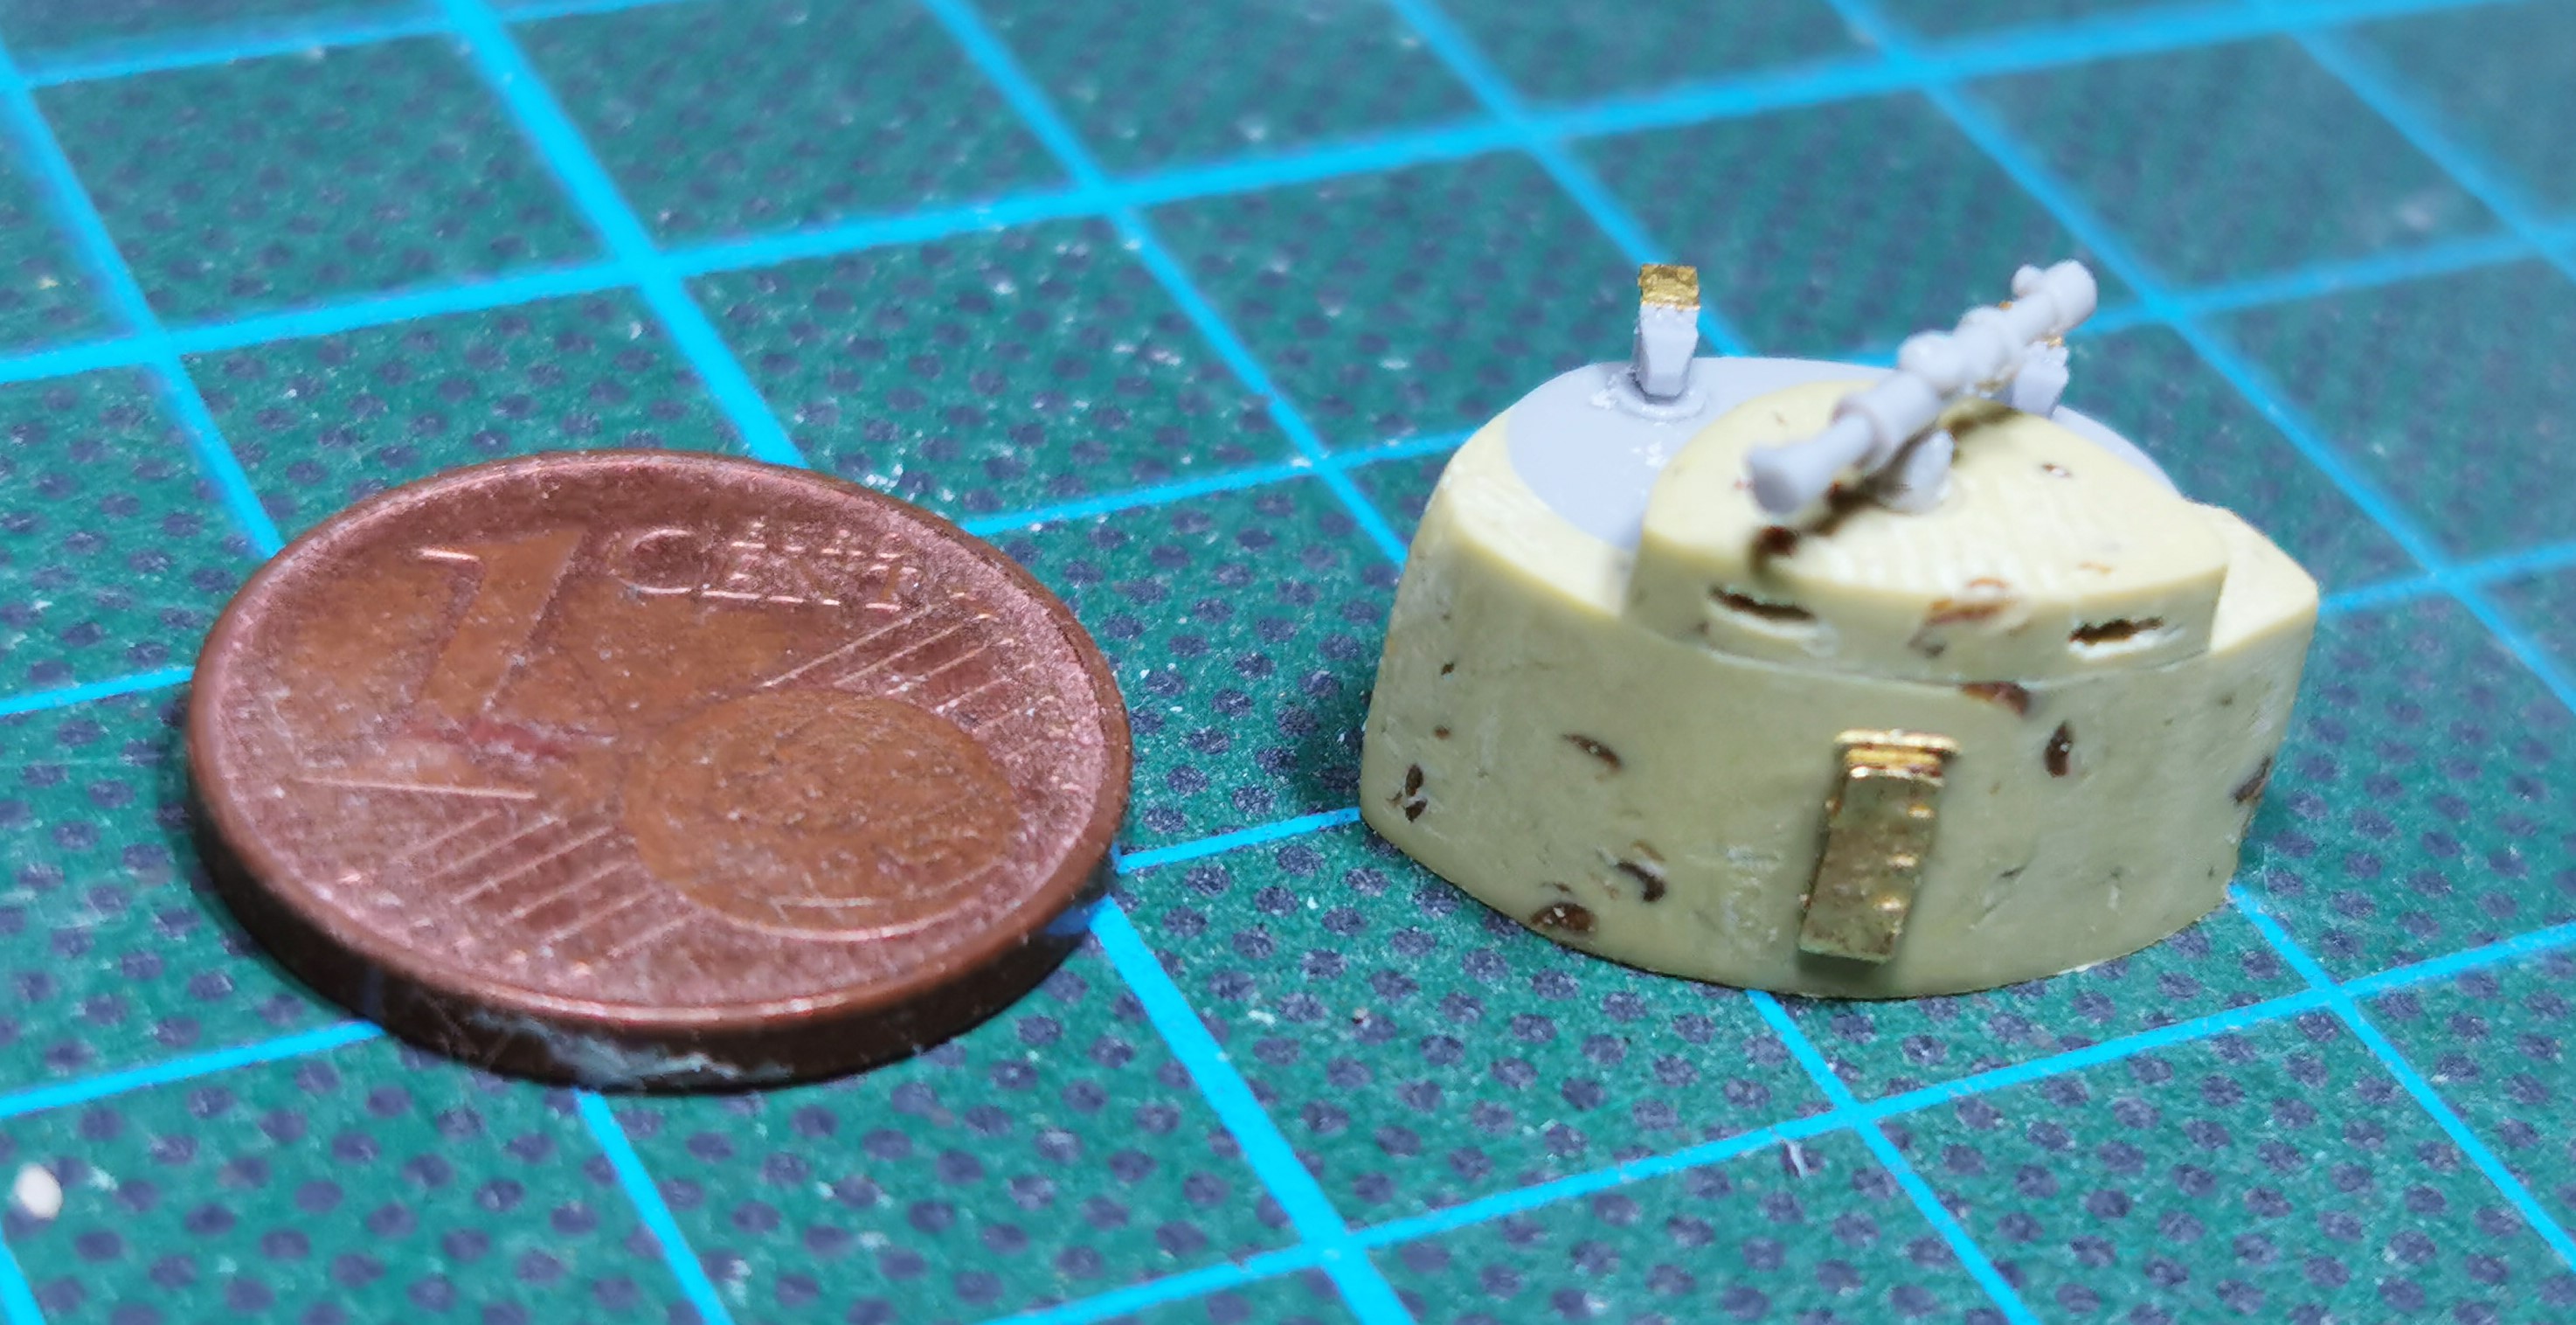
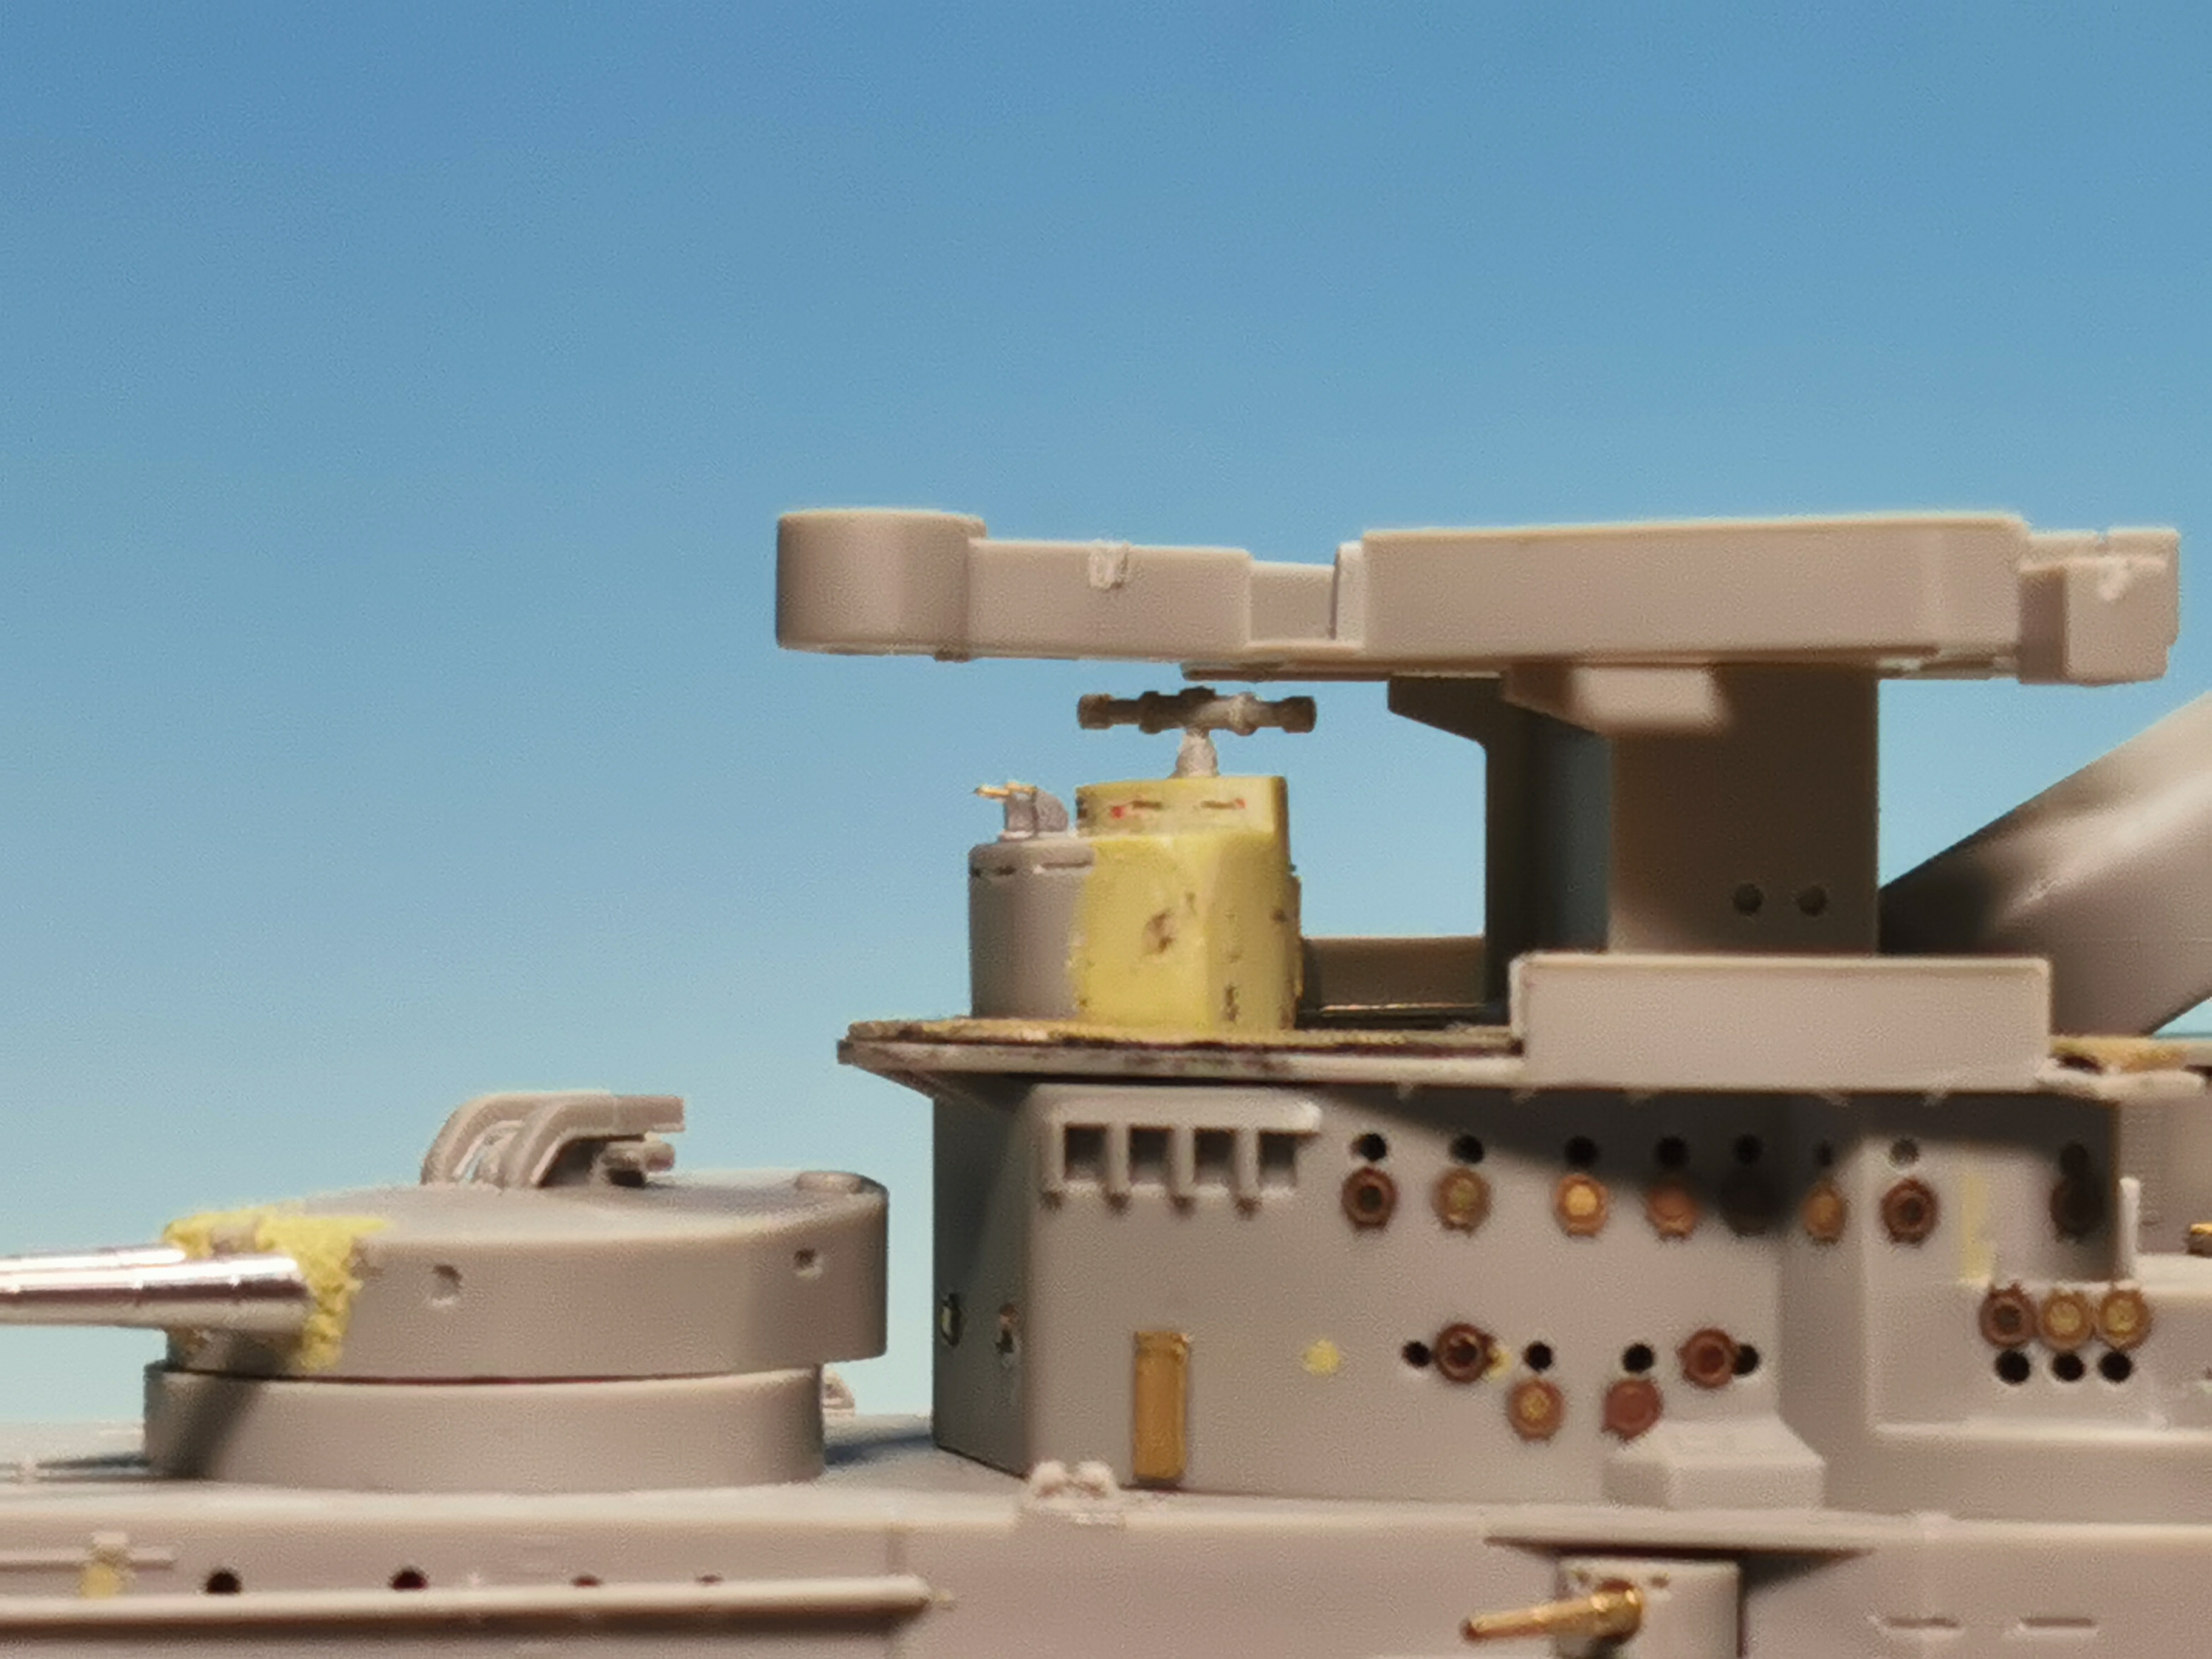
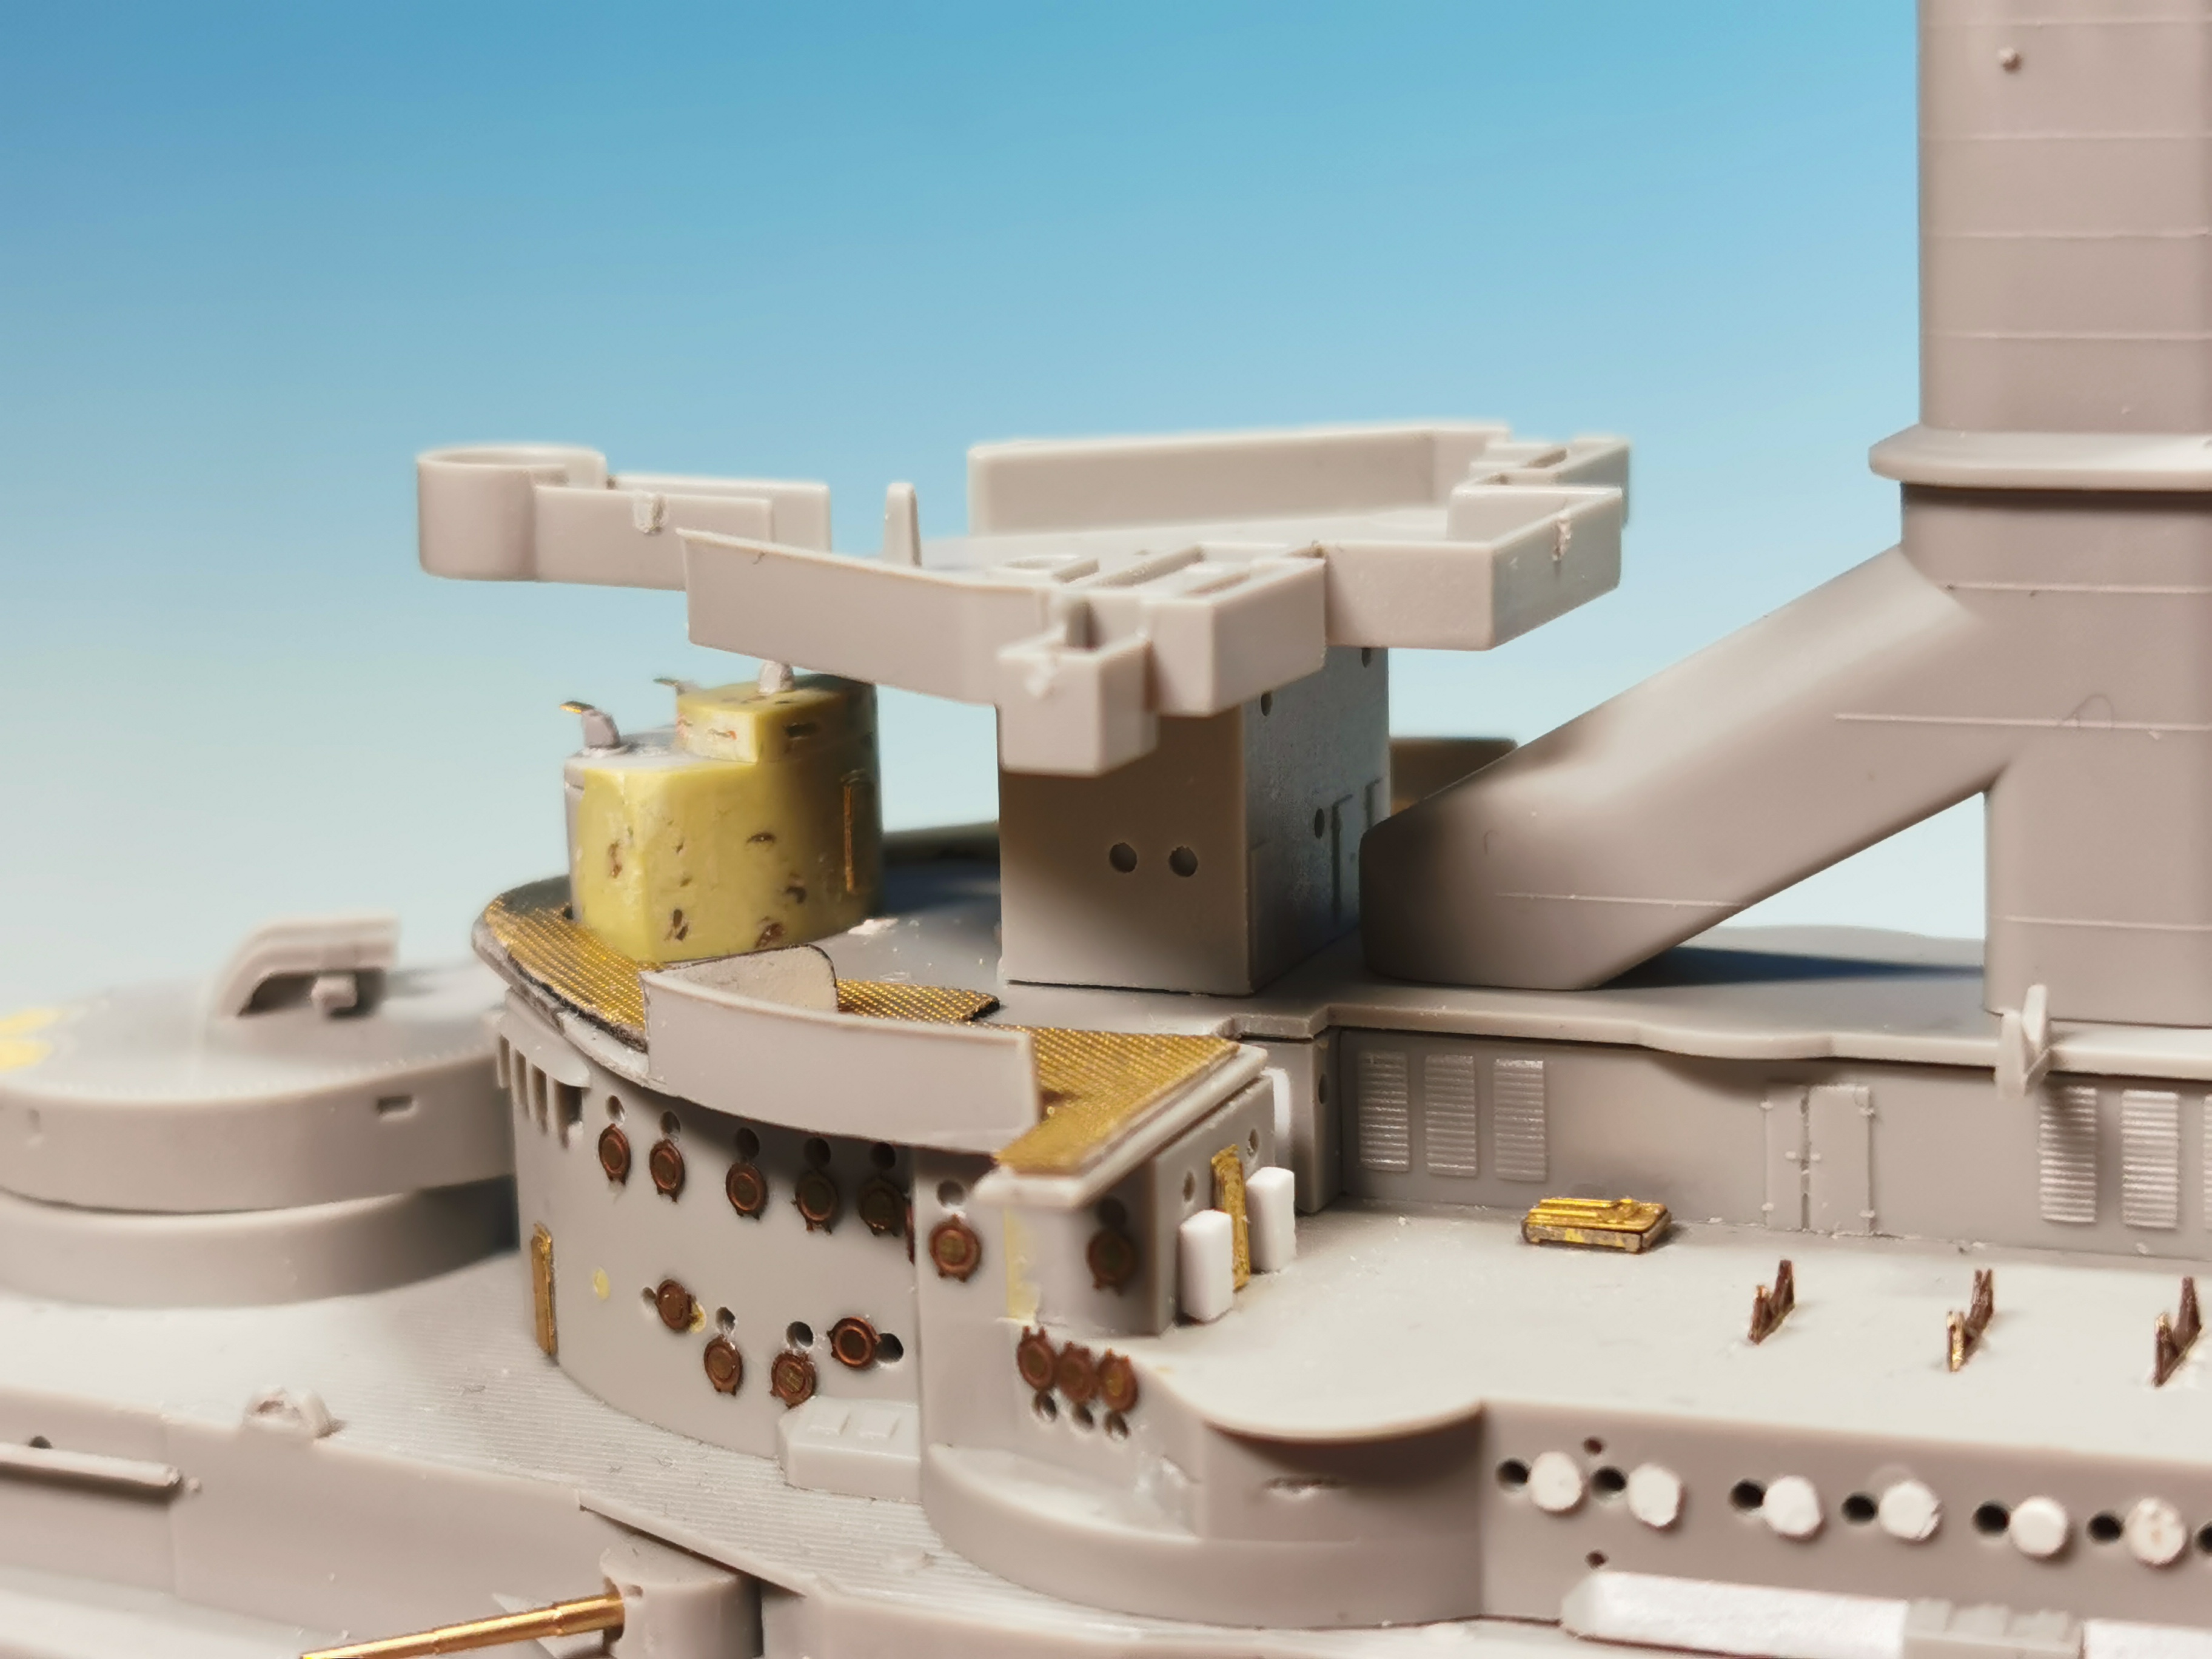
As the first problem solved I stumbled into the next one: The armored bridge is just resembled oval within TRUMPETER´s kit. This is not accurate, actually it should be oval in the frontside with sharp edges left and right and a concave backside. I tried to resemble this with putty. As this is just a small part care was necessary here. Another small observation slits were made with a 0,4 mm drill, the missing observation periscopes were taken from the great VETERAN Kriegsmarine Observation Equipment set and the also missing rangefinder at the roof of the armored bridge was borrowed from the kit as these parts nevertheless will later be replaced by the much better VETERAN´s one. There was just the missing entrance door to add out of my spareparts and the corrected armored bridge was finished


And this is how everything looks at the ship now:


It looks no much but it was quite some work. For me it is satisfying to know it looks now like the real deal so far


Work continues...
d6mst0
#453
Visit this Community
Texas, United States
Joined: August 28, 2016
KitMaker: 1,925 posts
Model Shipwrights: 1,298 posts
Posted: Sunday, July 26, 2020 - 10:24 AM UTC
Thomas,

Great effort on maintaining the correct detail. The armor housing looks like you smeared Pepper-Jack cheese all over the backside...LOL.

Mark
RussellE
#306
Visit this Community
Victoria, Australia
Joined: June 27, 2010
KitMaker: 3,959 posts
Model Shipwrights: 2,777 posts
Posted: Sunday, July 26, 2020 - 01:03 PM UTC
Thomas, as always, fantastic work
GazzaS
#424
Visit this Community
Queensland, Australia
Joined: April 23, 2015
KitMaker: 4,648 posts
Model Shipwrights: 249 posts
Posted: Sunday, July 26, 2020 - 09:39 PM UTC
Great update Thomas!
RedDuster
Visit this Community
England - South East, United Kingdom
Joined: March 01, 2010
KitMaker: 7,078 posts
Model Shipwrights: 6,649 posts
Posted: Monday, July 27, 2020 - 07:37 AM UTC
That looks like rather a lot of work to me Thomas,
great update.

cheers

Si
Black_sheep
Visit this Community
Bayern, Germany
Joined: December 11, 2009
KitMaker: 823 posts
Model Shipwrights: 551 posts
Posted: Monday, July 27, 2020 - 11:14 PM UTC

Quoted Text

Thomas,

Great effort on maintaining the correct detail. The armor housing looks like you smeared Pepper-Jack cheese all over the backside...LOL.

Mark


Hey Mark, dont´t tell them about my secret; I always sculpt my things with Pepper-Jack cheese No seriously: one putty component is getting dark at the outside after some time. Even if you stowe them airtight. Sometimes I shave off the very dark skins but it let itself work with no problems. But have no fear - after some paint no more smeared Pepper-Jack cheese will be visible
 _GOTOTOP