_GOTOBOTTOM
Campaigns
Want to be part of a group build? This is where to start, plan, and meet about them.
Clanky's MSW Staff Build Blog, 1/350 Takao
Clanky44
Visit this Community
Ontario, Canada
Joined: September 15, 2005
KitMaker: 1,901 posts
Model Shipwrights: 934 posts
Posted: Sunday, June 01, 2008 - 05:05 AM UTC
Here is my staff build selection. Aoshima's 350th Takao with WEM dedicated P.E. The slip showing the purchase of turned barrels (Voyager) and resin replacements (Veteran) for the AA guns is through Pacific Front Hobbies.

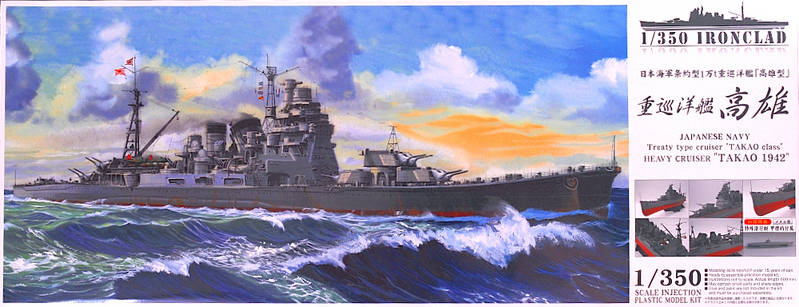
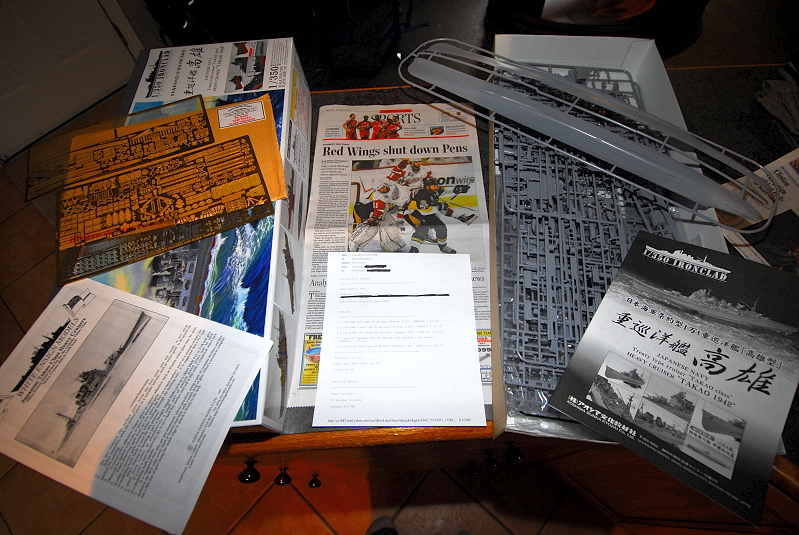
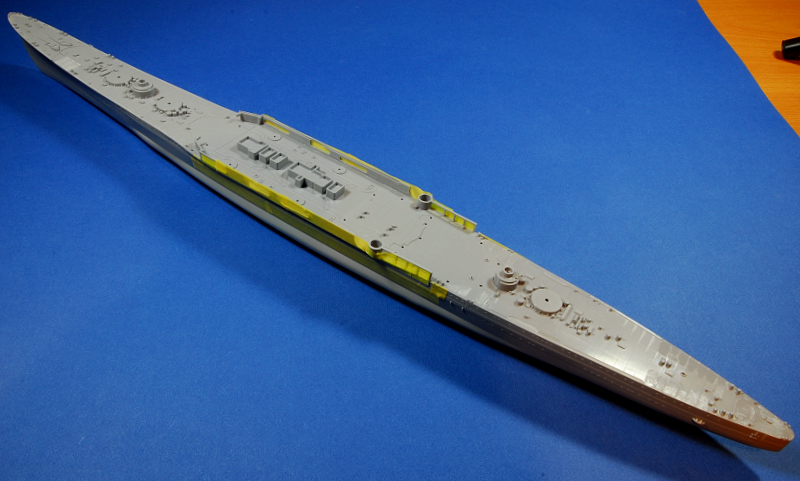
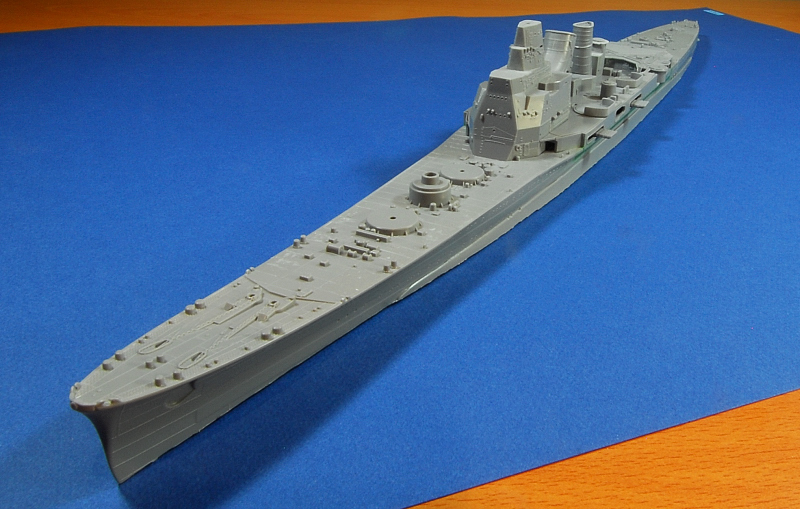
There are a couple of items not shown, one is the display case, which will be custom made by a friend and a brass plaque, which I haven't given much thought and probably won't until the model is close to completion, also the model will be waterlined, which will involve the use of sand for the warter effects.

I'm looking forward to having all of us participating in active build blogs over the next year. It should be a great learning experience and very rewarding.

Frank


redneck
Visit this Community
Pennsylvania, United States
Joined: June 06, 2005
KitMaker: 1,602 posts
Model Shipwrights: 665 posts
Posted: Sunday, June 01, 2008 - 05:50 AM UTC
Looks like a lice kit.

Good luck with it.
Gunny
Visit this Community
Pennsylvania, United States
Joined: July 13, 2004
KitMaker: 6,705 posts
Model Shipwrights: 4,704 posts
Posted: Sunday, June 01, 2008 - 06:20 AM UTC
Nice choice, Frank, I'm sure you will do her proud, mate...the first question that comes to my mind (and I might as well be the one to ask it ) is the hull plating issue on this kit, and are you going to try to rectify it, mate, or live with it (which IMO, I would probably do)?

Looking forward to watching this blossom, my friend!
Clanky44
Visit this Community
Ontario, Canada
Joined: September 15, 2005
KitMaker: 1,901 posts
Model Shipwrights: 934 posts
Posted: Sunday, June 01, 2008 - 06:27 AM UTC
Hi Mark,

I have tons of reference,... which I haven't looked at yet! ... so to answer your question, I'd have to say..... not a clue!!. First step is to spend time with the kit and examine what if anything needs to be altered.

Frank
grayghost666
#021
Joined: August 02, 2007
KitMaker: 2,458 posts
Model Shipwrights: 1,423 posts
Posted: Sunday, June 01, 2008 - 12:58 PM UTC
hello Frank,
good looking kit and an interesting subject.and i hope you will do a stet by step for your water/sand effect.
cheers,
Bruce
Clanky44
Visit this Community
Ontario, Canada
Joined: September 15, 2005
KitMaker: 1,901 posts
Model Shipwrights: 934 posts
Posted: Saturday, June 28, 2008 - 10:26 AM UTC
Starting work on my 350th Takao. The hull and and cross members fit well. The hull deck is divided into three sections all which fit decently but required care to reduce the amount of clean up afterwards.


The 'Large' type torpedo/stability bulges (B3/B4) which were added during the modernization of 1938/39 where glued after the torpedo enclosure sides (I8/I9) where installed and puttied smooth. If you glue the bulges first as the instructions state, the hull sides will be much more difficult to clean up.


Once the bulges where glued, the hull was marked for "waterlining" I looked at many references and marked out the cut line slightly lower than is necessary. That way, if I mess up, I can safely cut more.


Next up will be the dremel tool and the eye protection!

Frank
Clanky44
Visit this Community
Ontario, Canada
Joined: September 15, 2005
KitMaker: 1,901 posts
Model Shipwrights: 934 posts
Posted: Saturday, June 28, 2008 - 12:27 PM UTC
Here are the results from the chop shop... all went well, eye protection is a must as little half molten plastic bits fly everywhere!

Again, the cut is lower than the end result will show. About 4-5mm of the bottom will be in the water effects and will not be visible.


to get an appreciation on just how big these cruisers where, here's the hull next to the Nagato (that's yellow masking tape on the hull... not paint!)


Frank
DrDull
Visit this Community
Illinois, United States
Joined: February 23, 2006
KitMaker: 133 posts
Model Shipwrights: 128 posts
Posted: Saturday, June 28, 2008 - 04:11 PM UTC
Great start, Frank. It will be fun for us (maybe I should speak only for myself) 'amateurs' to see how you MSW staff guys go about building. I expect to learn a lot. Something I hadn't thought of - is it usual to assemble the deck to the hull before putting the superstructure parts onto the deck? I guess it makes sense, but the instructions for the kit I'm building (the first one I've done in many, many years) has the deck to hull mounting as the last step. I know that there is nothing sacred about instructions, and now I'm thinking it would be a lot easier for painting to get the deck on first. Anyway, I'll be following your work with great interest. Thanks. Barry
Clanky44
Visit this Community
Ontario, Canada
Joined: September 15, 2005
KitMaker: 1,901 posts
Model Shipwrights: 934 posts
Posted: Sunday, June 29, 2008 - 01:43 AM UTC
Hi Barry,

Regarding your Gleaves class DD, IMO, it would be easier to paint the deck/hull and then attach the deck to the hull as it would remove masking either. The question is do you attach the hull railing P.E. and then painted it by hand, if so, then this can be done.

There's countless different ways in constructing ship models, and regardless of your style, each ship you build will force you to try new techniques. It's something that is unheard on in building aircraft and armour models, and makes ship building all that much more distinctive and enjoyable.

Frank
skipper
Visit this Community
Lisboa, Portugal
Joined: February 28, 2002
KitMaker: 5,182 posts
Model Shipwrights: 4,070 posts
Posted: Sunday, June 29, 2008 - 02:18 AM UTC
Hi Frank

I like what I see and I have to admit that you had courage cutting those two beasts by the waterline (I wonder why they didn't consider that initially when engineering the model???)
Keep up


Rui
#027
Visit this Community
Louisiana, United States
Joined: April 13, 2005
KitMaker: 5,422 posts
Model Shipwrights: 5,079 posts
Posted: Sunday, June 29, 2008 - 07:52 AM UTC
Looking very good Frank.
redneck
Visit this Community
Pennsylvania, United States
Joined: June 06, 2005
KitMaker: 1,602 posts
Model Shipwrights: 665 posts
Posted: Monday, June 30, 2008 - 10:41 AM UTC
Looks great Frank.

Especially like the Nagato in yellow masking.
grayghost666
#021
Joined: August 02, 2007
KitMaker: 2,458 posts
Model Shipwrights: 1,423 posts
Posted: Monday, June 30, 2008 - 04:21 PM UTC
hello Frank,
loved what you have done to your ship,i wish i had the guts to try to do that.i did not know that the BB's and CA's were about the same hull size.
cheers,
Bruce
Karybdis
Visit this Community
Maryland, United States
Joined: December 27, 2006
KitMaker: 846 posts
Model Shipwrights: 740 posts
Posted: Monday, June 30, 2008 - 05:19 PM UTC
Good work as always, my man. And boy howdy, even more wacky hull cutting! You're giving us heart attacks here!
Clanky44
Visit this Community
Ontario, Canada
Joined: September 15, 2005
KitMaker: 1,901 posts
Model Shipwrights: 934 posts
Posted: Tuesday, July 01, 2008 - 03:58 PM UTC
Some additional progress photos. Everything in the next few shots is loosely placed on the hull deck, nothing will be glued until the parts are all painted.

Frank


bdpug
Visit this Community
California, United States
Joined: August 02, 2006
KitMaker: 25 posts
Model Shipwrights: 1 posts
Posted: Tuesday, July 01, 2008 - 05:19 PM UTC
Frank, I didn't know they had band waggoners even in Canada! Just kidding
Be nice, I'm a long suffering Kings fan and my other favorite team is anyone playing the sucks, er ducks.
I have always wanted to ask you if you have ever documented your painting style. Do you have any links to any articles you have written on your painting techniques?

I have been a big fan of yours for several years. Thanks for sharing your beautiful models with us.
Alan
Clanky44
Visit this Community
Ontario, Canada
Joined: September 15, 2005
KitMaker: 1,901 posts
Model Shipwrights: 934 posts
Posted: Tuesday, July 01, 2008 - 10:31 PM UTC
Thanks Alan,

I don't think I've ever documented my painting style, but if you go into my photos and check out some of my 48th scale armour build folders, (Hetzer and Panther) you can see the progression in the painting of a model and how I tend to layer on the colours. The Nagato thread here in MSW also has a similar progression.

P.M. me if you have any questions, I'd be glad to help,

Frank
 _GOTOTOP