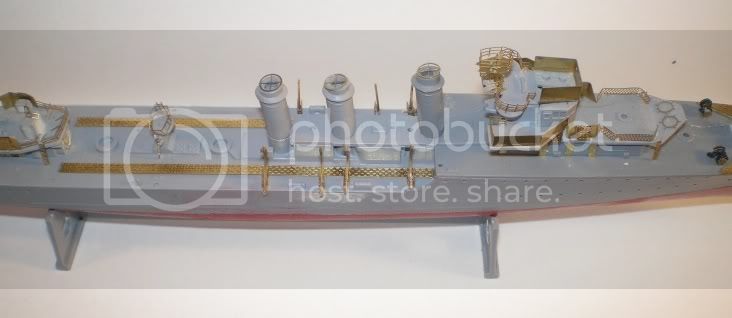
The subject of this WIP piece will be Mirages' ORP Wicher Destroyer and its' Photoetch set in 1/400 scale. Since I reviewed it, I figured that I might as well go ahead and build it. Besides, playing with all those parts sort of inspired me. For the history of the ship and a look at the parts and pieces you can refer to the Review Section.
First off as is my habit, I washed all the sprues in a bath of lukewarm water and liquid dish detergent. This gets rid of any oils from my mitts as well as anything that may be left over from the manufacturing process. The Photoetch set got its' own bath in a small dish of lacquer thinner to remove the clear coat that is put on there as well as any residues from manufacturing. Yes, they do clear coat the brass stuff, keeps it from turning a nice dark shade from oxidation while waiting for sale in the rack. While some may debate the issue of washing this stuff down, I just like to have as many things going in my favor as I can. When it comes time to paint and glue stuff together, I hate to have anything mess with my progress.
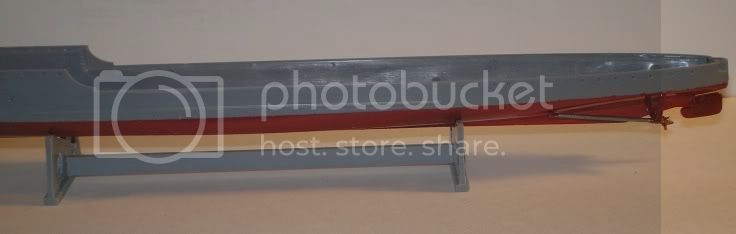
The first parts to go together were the three pieces that make up the display stand. As this is going to be a full hull model, it makes it sort of hard to get it to stay upright without something to hold it. After sanding down the mold lines with a sanding stick, I put the pieces together and glued them up with some Testors' Liquid Cement using a small paint brush to apply the stuff. Capillary action draws the Cement into the joints and makes a nice quick and easy bond. You need to be careful where you place your fingers when doing this, capillary action will also draw the liquid cement right up under an errant digit if placed too close to the joints.
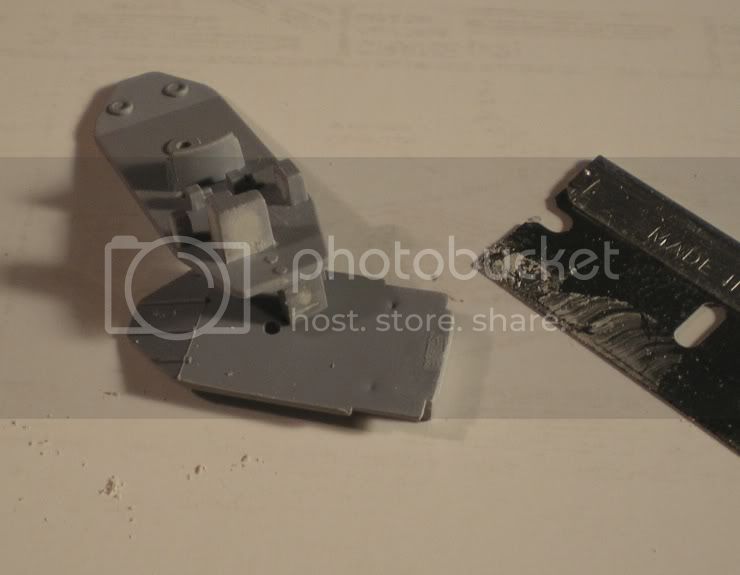
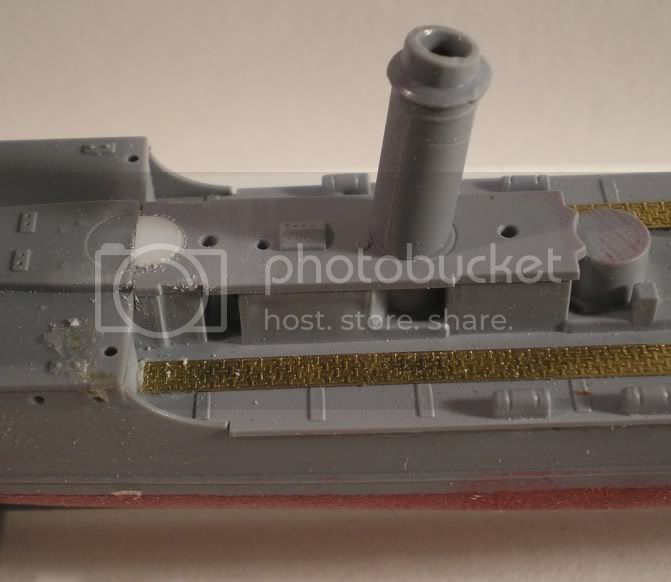
Once that was accomplished I broke out the two hull halves clipping them off the sprues and cleaning up the nubs. I noticed that the top center sprue attatchement point had a small dimple for some reason. A bit of Squadron White Putty soon sorted that out and I glued the hull halves together without any other incidents.
The next bit involved the PE set and there in lies another tale. They give you a pair of nicely done three bladed sections to replace the overly thick kit parts. According to the destructions, you have to remove the three blades from the small conical end pieces and then Super Glue the brass replacements in place. Not wanting to hassle with removing the blade remanents after trimming the blades loose, not to mention trimming my digits as well, I chose to heat up a bit of sprue, draw it out into conical shapes, cut them out and use them instead.

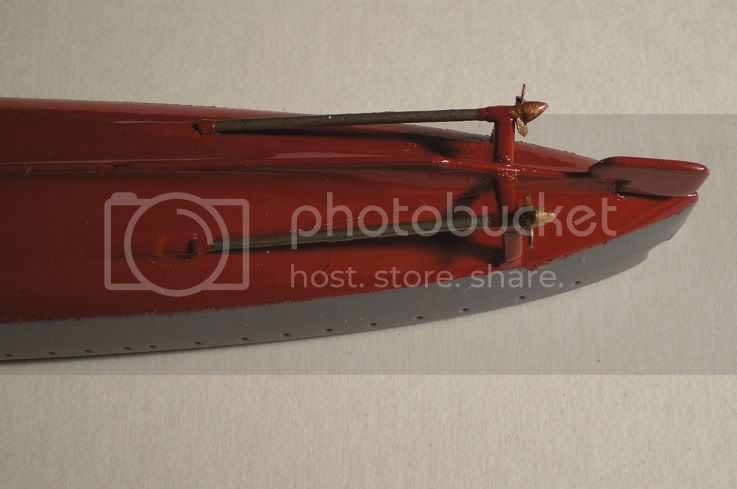
Once I had this stuff assembled, I used some more Testors' to add them to the bottom of the hull as well as the rudder. Next up came masking off the bottom of the hull to shoot a coat of Red on there. Being a cheap old goat, I keep a full sized rattlecan of plain old red enamel handy for such things. For basic colors like Black, Red and such, I don't see the need to spend money on the little expensive cans sold in Hobby shops when a $1.99 can will last ages for the small uses I have for it in model making. After it dried I brush painted the props with some Testors' Brass enamel and used some Testors' Steel enamel for the shafts.
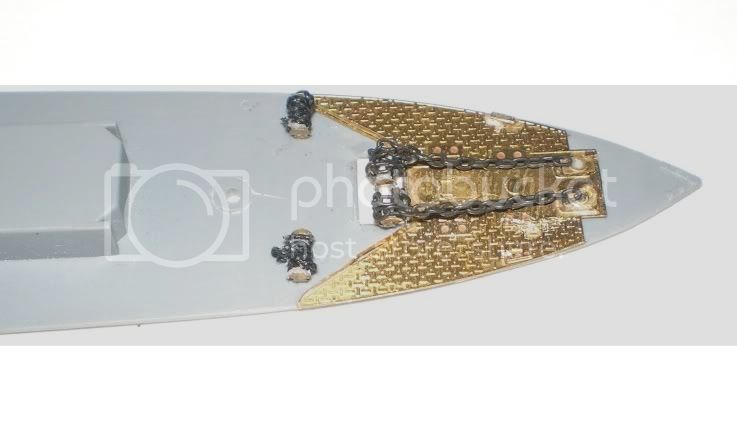
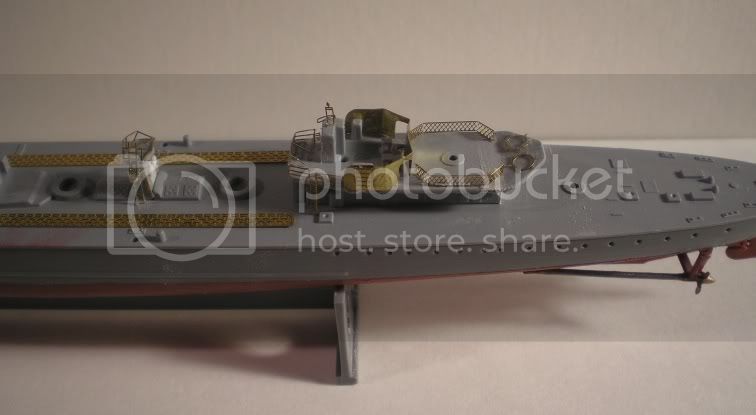
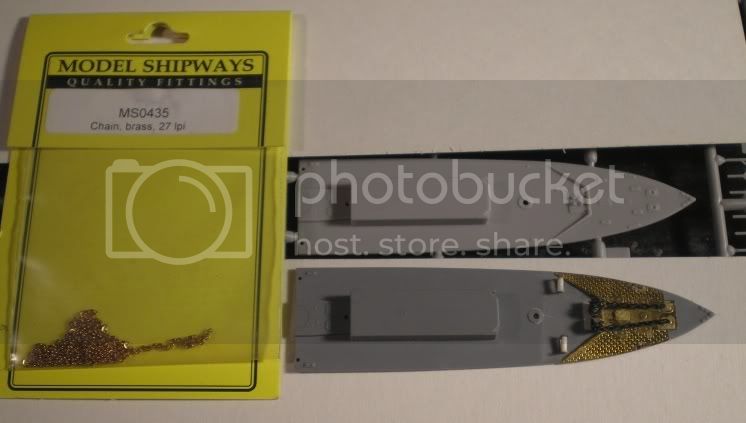
The next bit involved some more of the PE set. I like working from front to rear on these things so I clipped the foredeck part loose and working between the PE instructions and kit instructions figured out that a bit of sanding was required before I could apply the PE foredeck part. I used three sanding sticks in consecutively finer grades to whittle off the kit molded on parts and then replaced the hatch cover for the anchor windlasses with a bit of styrene sheet using the outline shadow of the original molding as a guide to placement. I used some Super Glue to add the foredeck treadplate section, the hatch cover and the two covers over the anchor chain locations. Next came the two anchor chain windlasses from the PE set. These were fairly easy to deal with using a pair of flat nosed pliers to hold and bend the parts ears up. A bit of 1mm styrene rod provided the axles and then rather than using the tiny PE one dimensional chain provided I substituted some Model Shipways 27 links per inch brass chain. The breakwater was Superglued in place, the two chain windlasses then I assembled the two cable reels, these look remarkably similar to the anchor windlasses, and put them in place behind the breakwater as well.
Looking at the two bare cable reels, I am used to working in 1/700 scale, the divine scale not requiring much else than a bit of styrene rod, I used some black thread to wrap around the bare reels. As I go from here the sides of the forward deck house will be next and on from there.