

Hi guys, first post on shipwright, have otherwise been lurking.
I found the cushion on the LCAC to be a bit problematic to install and rather boring looking, so I decided to remodel it, But I would like to know what everyone else thinks,
I modelled it out of milliput, this one is black so it will make the painting much easier... it is still a little rough, but I am mainly interested in what you guys think about the shape.
http://picasaweb.google.dk/nkululeko.jansson/LCAC144/photo#5240603808745298050


Go to modelshipwrights.com for the current dynamic site!
Site Related
Site related feedback, issues, or suggestions.
Site related feedback, issues, or suggestions.
Hosted by Jim Starkweather
WIP LCAC 1/144

plasticjunkie

Joined: August 23, 2007
KitMaker: 58 posts
Model Shipwrights: 4 posts

Posted: Saturday, August 30, 2008 - 10:26 PM UTC

Gunny

Joined: July 13, 2004
KitMaker: 6,705 posts
Model Shipwrights: 4,704 posts

Posted: Saturday, August 30, 2008 - 11:45 PM UTC
Ahoy Mr, Jansson, Welcome to Model Shipwrights mate!
Glad that you took the step further from lurking and decided to become active in our forums, the more the merrier!!
Overall shapewise, the cushion that you've made does looks good, in the deflated, idle position, other than the full baloon style kit part....

What are your plans for the display? Offloading some equipment, maybe?.........
Cheers,
~Gunny
Glad that you took the step further from lurking and decided to become active in our forums, the more the merrier!!
Overall shapewise, the cushion that you've made does looks good, in the deflated, idle position, other than the full baloon style kit part....
What are your plans for the display? Offloading some equipment, maybe?.........
Cheers,
~Gunny


gator
Vendor

#027
Joined: April 13, 2005
KitMaker: 5,422 posts
Model Shipwrights: 5,079 posts
Posted: Sunday, August 31, 2008 - 06:48 AM UTC
Very nice. As for as cargo, Dragon makes 1/144 M1A1 Abrams in diecast.
Kenny
Kenny
plasticjunkie
Joined: August 23, 2007
KitMaker: 58 posts
Model Shipwrights: 4 posts
Posted: Sunday, August 31, 2008 - 08:15 AM UTC
Ahoy hoy Mr. Smith.
Thank you for the welcome, glad to hear that shape wise I am shipshape.
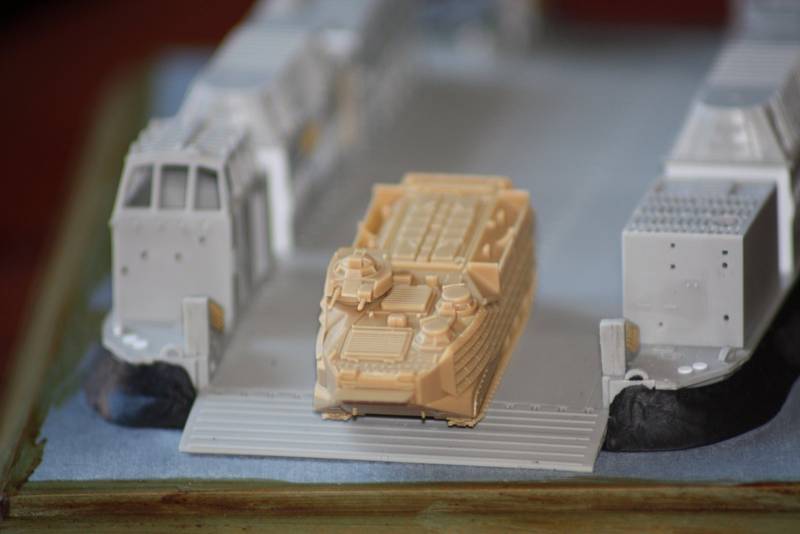
I initially planned just to have the LCAC on its own but it looked pretty naked without something disembarking. So I picked up an AAV7....it the only thing I can find at the moment, but seeing as I am assembling the JMSDF version, I may be making a mistake.
How did you get my image into your post like that? I have a few more images.
Mr Loup, thanks for the tip , but the tank you mention isn't available to me...
Thank you for the welcome, glad to hear that shape wise I am shipshape.
I initially planned just to have the LCAC on its own but it looked pretty naked without something disembarking. So I picked up an AAV7....it the only thing I can find at the moment, but seeing as I am assembling the JMSDF version, I may be making a mistake.
How did you get my image into your post like that? I have a few more images.
Mr Loup, thanks for the tip , but the tank you mention isn't available to me...
Gunny
Joined: July 13, 2004
KitMaker: 6,705 posts
Model Shipwrights: 4,704 posts
Posted: Sunday, August 31, 2008 - 10:28 AM UTC
Quoted Text
How did you get my image into your post like that? I have a few more images.
Aye, mate, here's a tutorial that will explain the process...once ya post a couple, it's really easy...

plasticjunkie
Joined: August 23, 2007
KitMaker: 58 posts
Model Shipwrights: 4 posts
Posted: Sunday, August 31, 2008 - 11:12 PM UTC
Thanks Mate.
very helpful info.
As promised the images.

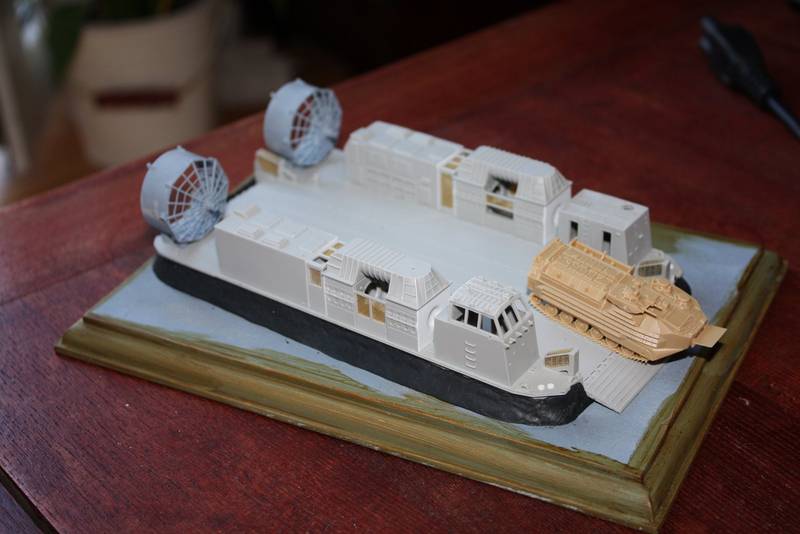

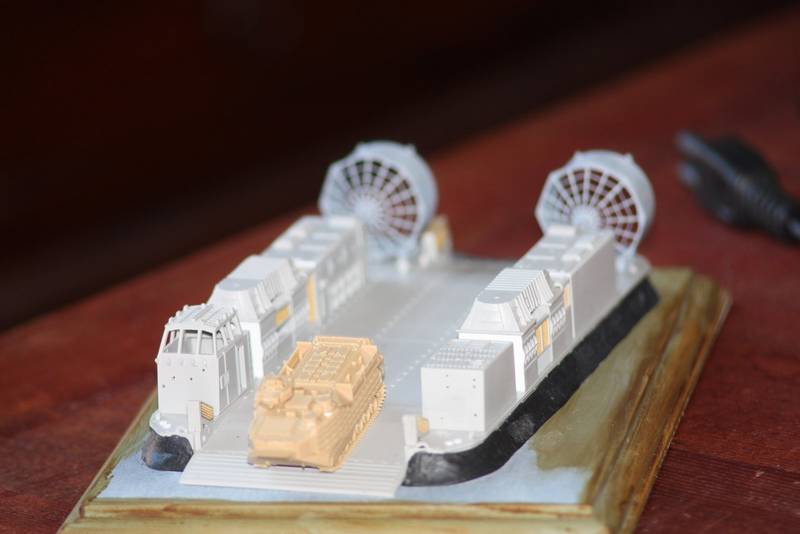

The final image shows the thinned down blade guards. I am still not very pleased with the inner most ring, but I don't dare thinning it more.
very helpful info.
As promised the images.
The final image shows the thinned down blade guards. I am still not very pleased with the inner most ring, but I don't dare thinning it more.
 |

WEB HOSTING BY


Copyright ©2021 Model Shipwrights and Kitmaker Network, a subsidiary of Silver Star Enterprises
All Rights Reserved. Please read our Conditions of Use and Privacy Policy.
All Rights Reserved. Please read our Conditions of Use and Privacy Policy.