Istanbul, Turkey / Türkçe
Joined: July 15, 2006
KitMaker: 104 posts
Model Shipwrights: 102 posts
Posted: Saturday, January 24, 2009 - 08:54 AM UTC
Zimbabwe
Joined: July 03, 2007
KitMaker: 3,529 posts
Model Shipwrights: 2,419 posts
Posted: Saturday, January 24, 2009 - 08:58 AM UTC
Looking really good. Are you planning on adding the portholes on the entier ship?

Istanbul, Turkey / Türkçe
Joined: July 15, 2006
KitMaker: 104 posts
Model Shipwrights: 102 posts
Posted: Saturday, January 24, 2009 - 09:09 AM UTC
Quoted Text
... Are you planning on adding the portholes on the entier ship?
I want to finish her how it looks in 1944, with extra AA on deck. I'll change bridge AA platform with a bit wider one and will revise aft island AA platform. I think most of the portholes will going to be sealed off. May be some row will stay open, I do not have enough reference material yet. Than I may add some ( I dont know how do you call ) ' wave shields ' open ones.
Regards

Serhan
Ontario, Canada
Joined: September 15, 2005
KitMaker: 1,901 posts
Model Shipwrights: 934 posts
Posted: Saturday, January 24, 2009 - 09:43 AM UTC
Hi Serhan,
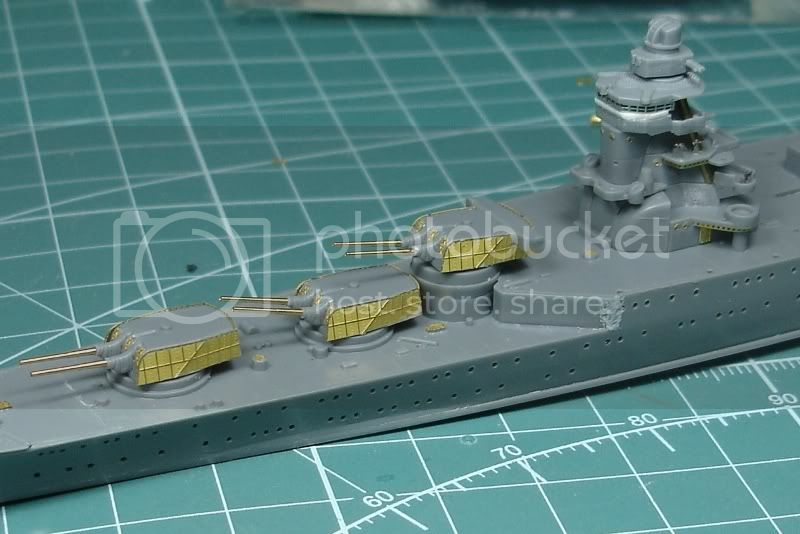
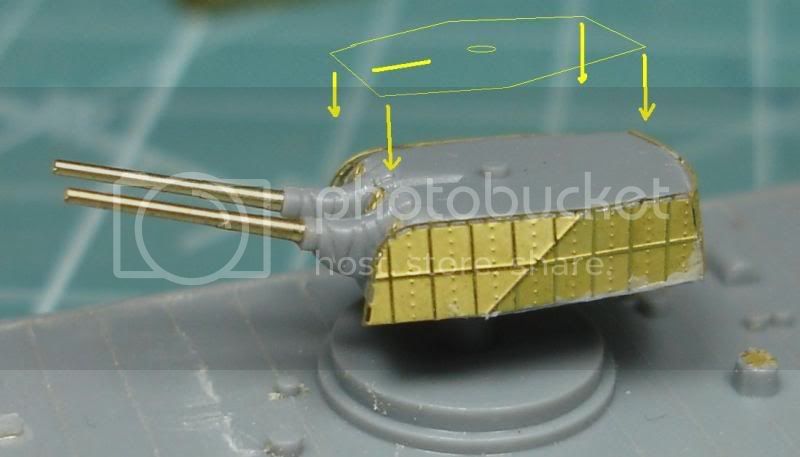
Another great build, and this time, a work in progress. The build looks good, the only critique I can give would be to sand the PE turret sides flush (level) with the plastic turret top.
I look forward to seeing further progress,
Frank
Currently working on:
350th Hasegawa Nagato
350th Hasegawa Isokaze
Istanbul, Turkey / Türkçe
Joined: July 15, 2006
KitMaker: 104 posts
Model Shipwrights: 102 posts
Posted: Saturday, January 24, 2009 - 10:07 AM UTC
Thank you Frank.
Normally this Thermal buffle set should be contain extra upper part for the turret tops but sadly not!. If I sand down those, I will lost nice details on joining points of those parts. I have to do something more

I was trying to forget it

Regards,
Serhan
Ontario, Canada
Joined: September 15, 2005
KitMaker: 1,901 posts
Model Shipwrights: 934 posts
Posted: Saturday, January 24, 2009 - 10:18 AM UTC
Hi Serhan,
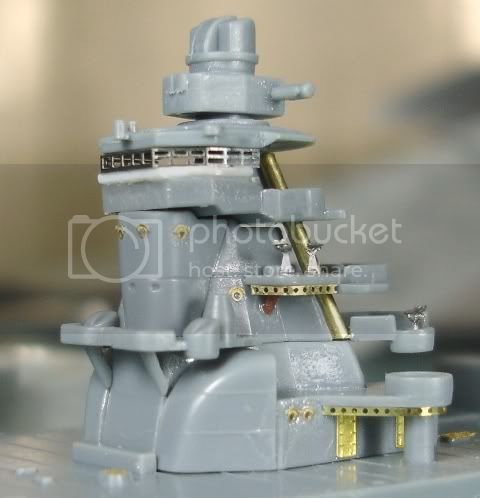
My mistake, upon seeing the close up of the turret PE, it's clear that the portion above the turret top is correctly placed.
well done,
Frank
Currently working on:
350th Hasegawa Nagato
350th Hasegawa Isokaze
Istanbul, Turkey / Türkçe
Joined: July 15, 2006
KitMaker: 104 posts
Model Shipwrights: 102 posts
Posted: Saturday, January 24, 2009 - 10:31 AM UTC
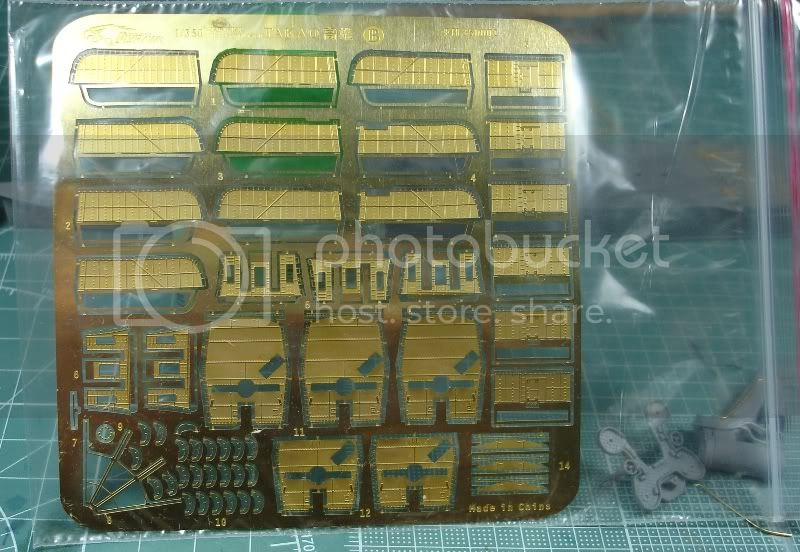
No problem Frank, thank you for your comments given. Actually I am not %100 sure that Suzuya had thermal buffle plates on her turrets but I did like this way. Thank god I wont have same problem on 1/350 Takao, Flyhawk includes turret top parts :
Regards
Serhan
Maryland, United States
Joined: December 27, 2006
KitMaker: 846 posts
Model Shipwrights: 740 posts
Posted: Saturday, January 24, 2009 - 01:03 PM UTC
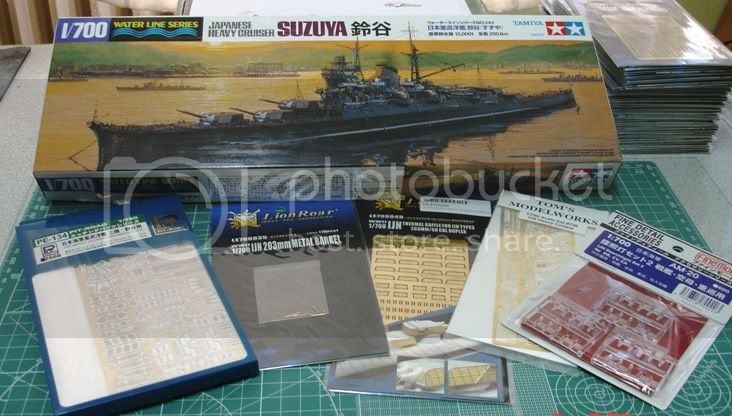
Wow, Serhan, you've really made an amazing first impression with all these posts! Very nice work! I also have those thermal baffles for my 1/700 Chokai and really like Lion Roar and Flyhawk products.
-------Dade =)
Works In Progress (Yikes!)... 1/250 Otaki IJN Musashi (since 2008!)... and whatever pops up to keep me from away from the Musashi... lol
Istanbul, Turkey / Türkçe
Joined: July 15, 2006
KitMaker: 104 posts
Model Shipwrights: 102 posts
Posted: Saturday, January 24, 2009 - 08:48 PM UTC
Many Thanks Dade,
I will try to keep it like first but I am very lazy and have very limited time due work, like most

Regards
Serhan
Istanbul, Turkey / Türkçe
Joined: July 15, 2006
KitMaker: 104 posts
Model Shipwrights: 102 posts
Posted: Saturday, January 31, 2009 - 02:52 AM UTC
Hello,
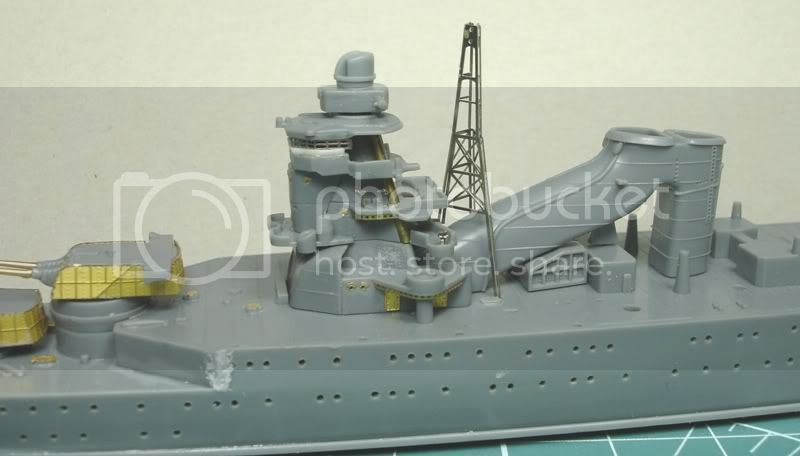
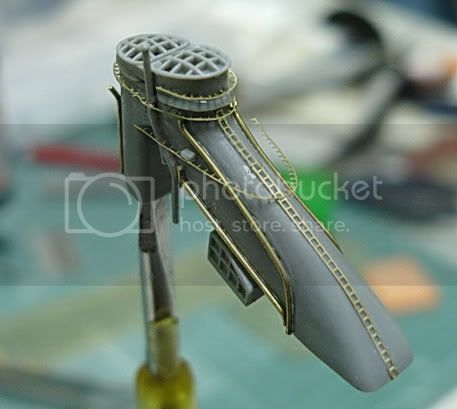
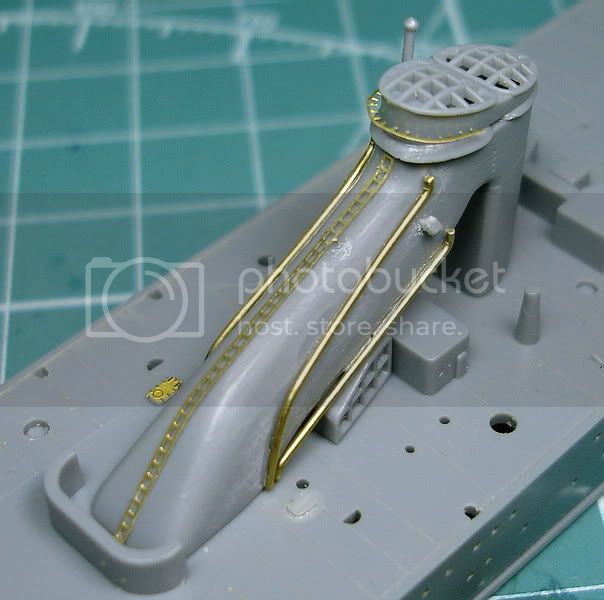
I had a small progress on funnel. I erased some details on funnel and replaced with brass rods. Support part under first curved funnel cancelled and replaced with aircraft holding detail on the catapults that I found most competible one as dimensions and something in structural. Hole in funnel support basement filled with a sprue part. I will try jackstays with modifying ladder p.e's from Tomsmodelworks.


Regards
Istanbul, Turkey / Türkçe
Joined: July 15, 2006
KitMaker: 104 posts
Model Shipwrights: 102 posts
Posted: Saturday, January 31, 2009 - 06:01 AM UTC
Tried one jackstay with smallest ladder of Toms set

. Same used for ladder along curved part of the funnel.
Regards
Nevada, United States
Joined: June 12, 2008
KitMaker: 552 posts
Model Shipwrights: 493 posts
Posted: Saturday, January 31, 2009 - 10:08 AM UTC
Nice work on your funnel Serhan, replacing the molded on stuff is lots of fun not to mention makes for a much more detailed appearance. Looking forward to your updates.
Jay Massey
treadhead1952
Las Vegas, NV
Ontario, Canada
Joined: September 15, 2005
KitMaker: 1,901 posts
Model Shipwrights: 934 posts
Posted: Saturday, January 31, 2009 - 10:23 AM UTC
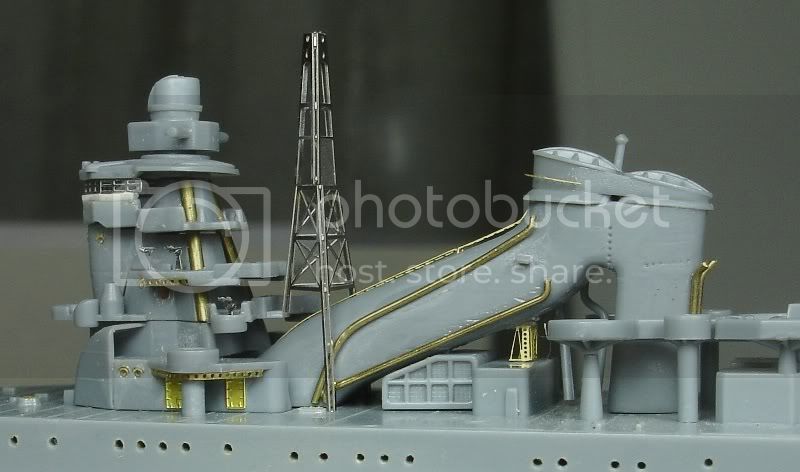
Great work Serhan!, the funnel additions make a big difference, the PE jackstays in particular.
thanks for sharing,
Frank
Currently working on:
350th Hasegawa Nagato
350th Hasegawa Isokaze
Istanbul, Turkey / Türkçe
Joined: July 15, 2006
KitMaker: 104 posts
Model Shipwrights: 102 posts
Posted: Saturday, January 31, 2009 - 10:40 AM UTC
Thank you for kind words Jay and Frank,
By adding two small pipes behind the funnel, pipe work around area is finished and now I can carry on jackstays.
Regards
Istanbul, Turkey / Türkçe
Joined: July 15, 2006
KitMaker: 104 posts
Model Shipwrights: 102 posts
Posted: Saturday, January 31, 2009 - 11:51 PM UTC
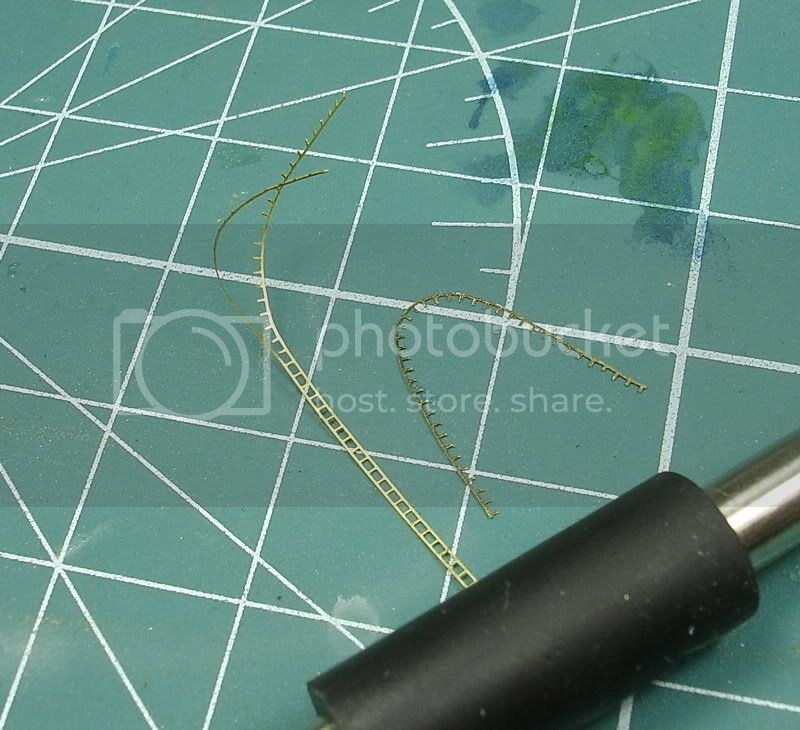
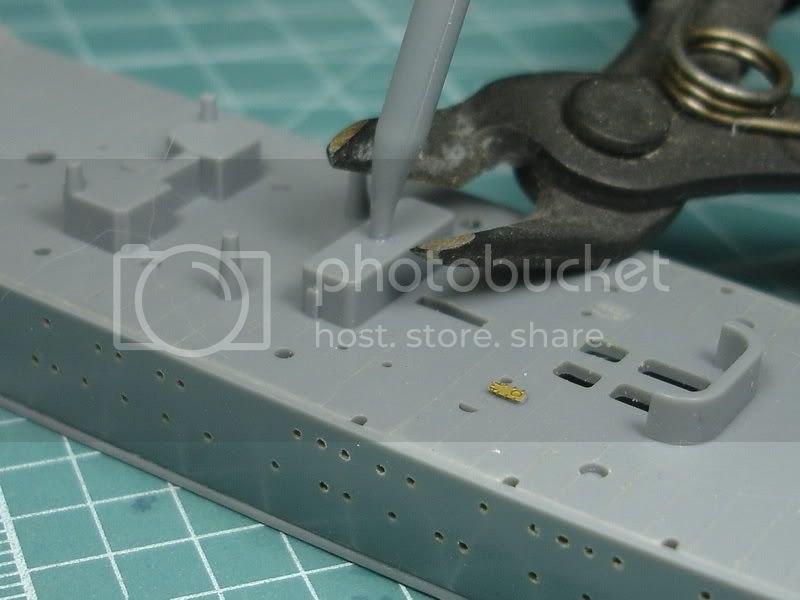
Preparing those jackstays is quite time consuming job. During cutting out one side of ladder, the part will need turning outwards by blades pressing force. After seperating parts, have to bend it inwards back. Problem starts here. Have to keep elipsodial shape on part will need. Sometimes small sections goes straight that not wanted situation. Have to be done section by section

Regards
Istanbul, Turkey / Türkçe
Joined: July 15, 2006
KitMaker: 104 posts
Model Shipwrights: 102 posts
Posted: Sunday, February 01, 2009 - 03:52 AM UTC
Maryland, United States
Joined: December 27, 2006
KitMaker: 846 posts
Model Shipwrights: 740 posts
Posted: Sunday, February 01, 2009 - 04:08 AM UTC
Excellent Serhan! There is a saying: "Measure twice, cut once." That reminds me of this.

-------Dade =)
Works In Progress (Yikes!)... 1/250 Otaki IJN Musashi (since 2008!)... and whatever pops up to keep me from away from the Musashi... lol
New Jersey, United States
Joined: October 18, 2007
KitMaker: 1,698 posts
Model Shipwrights: 1,514 posts
Posted: Monday, February 02, 2009 - 05:58 AM UTC
Beautiful and exacting work... cheers!