_GOTOBOTTOM
Ships by Class/Type: Destroyers
This forum covers all types of destroyers from all eras.
144 Fletcher Oil Canning Decision Time
Hatter50
Visit this Community
North Carolina, United States
Joined: June 17, 2006
KitMaker: 478 posts
Model Shipwrights: 82 posts
Posted: Monday, February 23, 2009 - 08:54 AM UTC
144 Fletcher Hull Oil Canning Decision Time

OK, I need a little bit of help here. I need some opinions……….I’m sure there are a ton of them out there.

I’ve got the new Revell 144 Fletcher and I have started my “oil canning” techniques to the hull. I'm looking for subtle.

The new Revell Hull:
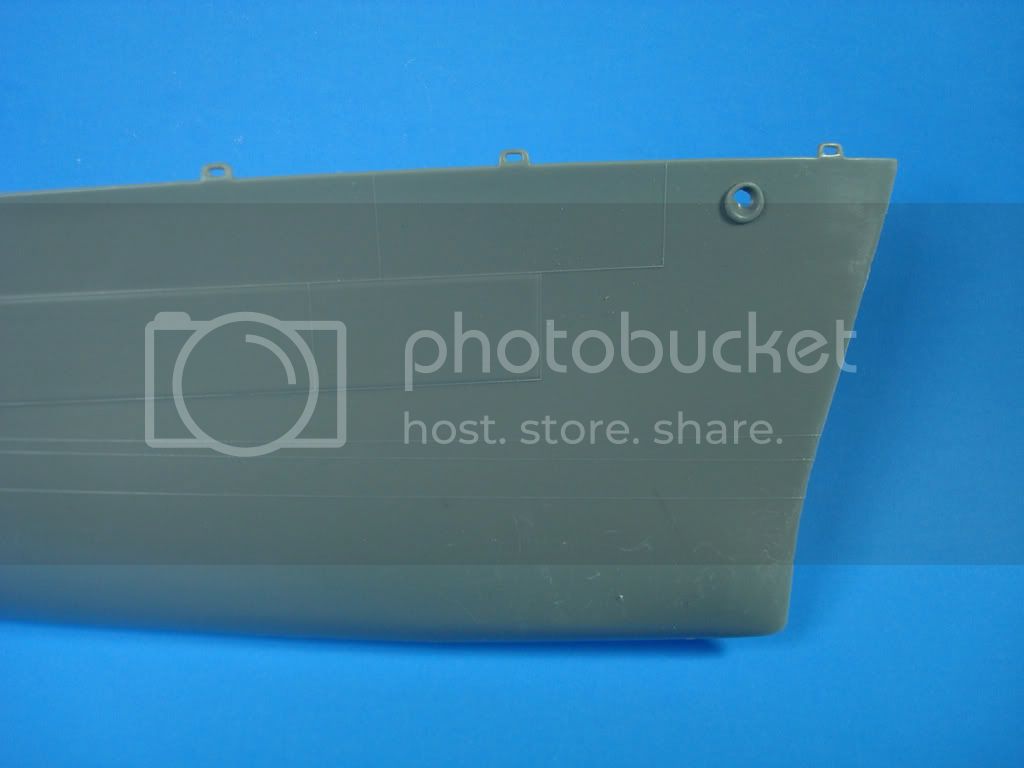

The Marking and beginning to Scrape:


The Sanded and Polished (as much as I could) and Primed hull:


I hesitate adding this close-up as it shows ALL the flaws:


What I did was:
1. Measure and mark from a set of plans.
2. Looked at countless photos of the oil canning on the real ships.
3. I scraped inside each square with an Exacto miniature curved blade.
4. Here’s the hard part:
a. I tried to sand INSIDE each square with home made mini sanders, rolled up sand paper, sand paper rolled around pencil eraser. All this to get ONLY the inside of the square. Used and eraser shield to spare the outer edges.
b. I used 2000 grit wet sand paper for a light sand over the whole thing.
c. The PROBLEM with the all over sanding is that the sand paper takes off the crisp edges to the squares. I’ve had to re-scrape to get my depth back.
5. 12000 grit polishing cloth over the whole thing. There are still small scrapes inside some of those squares.
6. Finally I sprayed Mr Surfacer 1000 over the oil canned area.

The big question is: Does what I’ve done look “reasonably” realistic? This is tough to do in 144 as the frames and stringers are very close. What I have here is about 3 weeks worth of work.

I plan to do a build log, but I need to get past this hurdle first.

Thanks for your input.

Regards
Steve

CaptSonghouse
Visit this Community
California, United States
Joined: August 08, 2008
KitMaker: 1,274 posts
Model Shipwrights: 1,236 posts
Posted: Monday, February 23, 2009 - 10:39 AM UTC
Hi Steve!

That's an extraordinary amount of work on such an effect. It's definitely not something that can be produced quickly, so taking your time and plodding through the entire process is the only way to go.

So far, so good.

--Karl
#027
Visit this Community
Louisiana, United States
Joined: April 13, 2005
KitMaker: 5,422 posts
Model Shipwrights: 5,079 posts
Posted: Monday, February 23, 2009 - 01:37 PM UTC
Steve, that looks very good.
MrMox
Visit this Community
Aarhus, Denmark
Joined: July 18, 2003
KitMaker: 3,377 posts
Model Shipwrights: 985 posts
Posted: Tuesday, February 24, 2009 - 01:32 AM UTC
So far it looks worth the effort - but sometimes a coat of paint is better to judge the overall effect.

If some of the marks is too pronounced you could try to reduce them a bit with a little putty on a finger.

Cheers/Jan
Firecaptain
Visit this Community
Virginia, United States
Joined: November 03, 2006
KitMaker: 165 posts
Model Shipwrights: 35 posts
Posted: Tuesday, March 17, 2009 - 12:56 PM UTC
WOW.....my fingers are cut sore and bleeding just from looking.......great work!
skipper
Visit this Community
Lisboa, Portugal
Joined: February 28, 2002
KitMaker: 5,182 posts
Model Shipwrights: 4,070 posts
Posted: Wednesday, March 18, 2009 - 01:09 AM UTC
Hi Steve

Your process of oil canning the hull is, apart from methodical and hard, the best effect in this scale I ever seen!
One interesting point is, and you have surely seen it on your references, that the oil canning effect is not equal all over.
I have some doubts only on how far it will extend into the hull down to the keel... where should it stop.


Rui
Hatter50
Visit this Community
North Carolina, United States
Joined: June 17, 2006
KitMaker: 478 posts
Model Shipwrights: 82 posts
Posted: Wednesday, March 18, 2009 - 03:58 AM UTC
Hey Rui,

From my references..........you are correct in "wondering" about the overall oil canning effects. What I plan on doing is to stop where I'm at on the sides, as they didn't get as much wave action and not as much tug boat action (my guess is here, nobody wanted a tugboat banging into the eng/fire rooms).

As for the belly, what I have seen is that the belly is strengthend with more frames and stringers lessening the effects. But if you look at a Fletcher launching with new paint and if the light is right.............you catch some "stressed skin" effects (from the welding and riveting) and not yet any oil canning. I believe that the oil canning on the underwater portions of the ship are lessened with the beefed up frames and stringers.


My plan for the belly is to measure and mark as i did the bow and stern, and then lighly give it some effects and then sand and polish. I "Believe" that this will give it just enough effect. The eye will see barely where the frames and stringers are.

Having said all that, here is a photo of the belly of a USCGC from 1936, approx same size. Belly is fairly smooth.


Again, my PLAN is for just enough scraping to provide a LITTLE relief. VERY subtle.

Comments suggestions always welcomed.

Regards
Steve
skipper
Visit this Community
Lisboa, Portugal
Joined: February 28, 2002
KitMaker: 5,182 posts
Model Shipwrights: 4,070 posts
Posted: Wednesday, March 18, 2009 - 04:03 AM UTC
IMHO, you're heading on the right course

Keep us posted, please.
Cheers,
Rui
Hatter50
Visit this Community
North Carolina, United States
Joined: June 17, 2006
KitMaker: 478 posts
Model Shipwrights: 82 posts
Posted: Wednesday, March 18, 2009 - 04:11 AM UTC
I wil Rui. But I'll jump over to the Build Blog for more updates. Thanks for the encouragement. That first CUT was a doozie. I held my breath.

Regards
Steve
 _GOTOTOP