_GOTOBOTTOM
Ships by Class/Type: Civilian Ships & Boats
Covers all non-sail civilian ships, craft, and boats.
Scratchbuilt Bunker Boat
Workboat
Visit this Community
Missouri, United States
Joined: August 11, 2010
KitMaker: 19 posts
Model Shipwrights: 14 posts
Posted: Tuesday, November 16, 2010 - 06:57 AM UTC
She will be a 114' steam powered purse seiner at 1/38 scale, so will finish to 36" LOA. The plans call for a somewhat fanciful version of the Helen Euphane, a US east coast fisherman after bunker (or mengaden, pogy, shad, alewife), a small, bony, oily, smelly fish used in fertilizer, paints, cosmetics, and fish meal. Some sources call this fish the most commercially important in American waters. There's a large fleet of boats of Helen's type on the Atlantic coast. You can see a slide show of the fleet at http://www.youtube.com/watch?v=0hciOrPKH6I , including a photo of Helen.

The plans call for balsa throughout, but I'm substituting hardwoods. She is plank on bulkhead construction, with 2X5mm sycamore planking, 1/4" poplar framing, and spruce & plywood superstructure. She will be R/C when finished. I did cheat a little with some ready made fittings (portholes, doors, rigging hdwe, and the like).

Induced by the promise of interest I had posted this log elsewhere, but that forum appears to be primarily for plastic kit builders, of mostly military subjects. Nice friendly people, but there was very little response there, so I'll try it here and I'll continue updating if the interest exists.

Here's the first of many photos that will show the progress of construction. These were all taken in a period of time ranging up to several months ago. Then I vacated my apartment and put my tools and materials in storage. I'm now crashing at my daughter's home, and idle until I get my own place and set up my workshop again. Until then I'll add what photos I have, with annotation, then this log will be updated as the project unfolds.

[img]http://pwww.mansfieldwoods.net/models/bunkermodel01.jpg/img]

Would someone please tell me why the second photo doesn't display?
old-dragon
Visit this Community
Illinois, United States
Joined: August 30, 2005
KitMaker: 3,289 posts
Model Shipwrights: 25 posts
Posted: Tuesday, November 16, 2010 - 10:45 AM UTC

That should do the trick...you were missing the last inner bracket .../img]..I changed it to [/img].
Workboat
Visit this Community
Missouri, United States
Joined: August 11, 2010
KitMaker: 19 posts
Model Shipwrights: 14 posts
Posted: Tuesday, November 16, 2010 - 11:43 AM UTC
Thanks Bob!
My mind is rotting away.
The photo, BTW, is of another model built from the same plans that I have. I'll also use the same colors.
Workboat
Visit this Community
Missouri, United States
Joined: August 11, 2010
KitMaker: 19 posts
Model Shipwrights: 14 posts
Posted: Tuesday, November 16, 2010 - 04:22 PM UTC
The cradle is built, the keel is laid, and the bulkheads are laid out for the scroll saw.


It's hard to see from this angle but the stringer laying on the building board is scribed in profile to establish the deck sheer. If that's as clear as mud, see next.


Now you can see that the stringers are attached to the upside down building board and scribed to define the position of the bulkheads so as to establish the sheer of the deck when it's laid.


And here's the frame right side up. The plans didn't provide for the blocking between bulkheads. I added them because of the weakness without them. I don't imagine this would have faired very well if built with the recommended balsa construction.


Some of the superstructure dry fitted. Now the deck sheer is obvious. The block forming the stern is balsa. It will serve to help the planking form some serious compound bends in that area.


Here's the frame for the wheelhouse. The posts are 1/4" square spruce. The roof and deck are from an 1/8" mahogany plywood door skin. I bought an approx 30"X6'9" piece of this for about $7 and I'll have enough for another 5 or 6 models out of it. It's really junk wood but the price is right.


The forward deckhouse with wheellhouse above dry fitted to the deck. The skins were a bit of a challenge. The radius of that bend around the wheelhouse is 1.5". I used 2 layers of 1/32" birch plywood, placed with the surface ply vertical.


More work on the superstructure while waiting for the planking to arrive. The 4X5 fish hatch is built over 1/8" plywood on a frame of 1/2 X 3/16 pine. The planking is from a 2X5mm sycamore sample sent to me from HobbyMill. The simulated caulking is done by running a #2 pencil along the edges of the plank before laying it. The color is imparted by a coat of sanding sealer (toxic stuff, use it outdoors only!).


Here's the fish hatch installed. It's removable for access to the R/C gear.


The crow's nest.


The Helen, as typical of such boats, carried two 32' purse boats on davits at the stern. These were used to set the seine, draw the purse closed, and assist in hauling the catch. I made them bread & butter style from 1/2 and 1/4" poplar sheet, and decked them with the sycamore planking.


A finished purse boat. The rowboat is callecd the striker. Think foreman of the operation. It stows on the fish hatch when underway.


Wheelhouse windows & doors installed. The opaque window material is salvaged from some packaging plastic. There's an off-white LED inside. It took most of 2 days to get those in and looking acceptable.


The forward deckhouse with the first of the portholes installed. These are brass, and come with the glass already installed. From Cornwall Model Boats (UK).


Another look at the forward deckhouse. The doors are plastic, also from Cornwall (an excellent source for fittings). Don't worry about the smeary paint; it's a first coat.


That's all for today. Stay tuned.
Workboat
Visit this Community
Missouri, United States
Joined: August 11, 2010
KitMaker: 19 posts
Model Shipwrights: 14 posts
Posted: Wednesday, November 17, 2010 - 02:36 AM UTC
The wires out the top of the wheelhouse are for navlights and a searchlight forward. A word about painting this model. I don't have an airbrush (maybe someday) and I'm painting challenged anyway. I got tired of paying the big bucks for one ounce bottles of Testor's and did an experiment. I know the main justification for model paints; pigment. I researched for the most heavily pigmented house paint available in this part of the world. Behr was my winner, and handily, available at my local Home Depot. I bought quarts of their best premium exterior acryllic (about $18 per quart) in the 2 colors I'm using. A lot of experimenting and failing finally produced the formula: one to one paint to water flows and covers beautifully. I'll not buy model paints in future for brush painting on wood. A word of caution, oil over acryllic, but never the opposite.


The very basic superstructure is done. Many details still to add.


The aft cabin is removable for access to the R/C gear.


The planking finally arrived. About 20% done in this photo. The colored dots are push pins used to hold the plank in position until the glue sets. I use the premium grade of Titebond, not because it's that much better than other PVA glues, but because the clamp time is half that of the others. I never use CA other than to temporarily hold a piece until the PVA or epoxy sets. CA joints on wood don't suit my purpose; too weak and brittle.


Here's another look at the aft cabin, now fully rigged. The stack is a piece of 1" PVC. Eventually I'll line that with 1/2" copper pipe and install a smoke generator. The turnbuckles and clevises actually work. They are also from Cornwall. I'll use more of the same later to anchor the ratlines and stays.


The planking is complete. This hull is single planked, because I chose to use a very thick (2mm or about 5/64") material. The reflection is due to a coat of sanding sealer, before sanding it down. The "stripe" of wood on the skeg is the doubler I added to accomodate a 5mm propeller tube within the 1/4" thickness of the keel. It's now ready for filling and sanding.


AlanL
Visit this Community
England - East Anglia, United Kingdom
Joined: August 12, 2005
KitMaker: 14,499 posts
Model Shipwrights: 1,919 posts
Posted: Wednesday, November 17, 2010 - 05:46 AM UTC
Terrific work.

Al
Workboat
Visit this Community
Missouri, United States
Joined: August 11, 2010
KitMaker: 19 posts
Model Shipwrights: 14 posts
Posted: Wednesday, November 17, 2010 - 10:13 AM UTC
Kind of you Al. Thanks!
Workboat
Visit this Community
Missouri, United States
Joined: August 11, 2010
KitMaker: 19 posts
Model Shipwrights: 14 posts
Posted: Wednesday, November 17, 2010 - 10:33 AM UTC
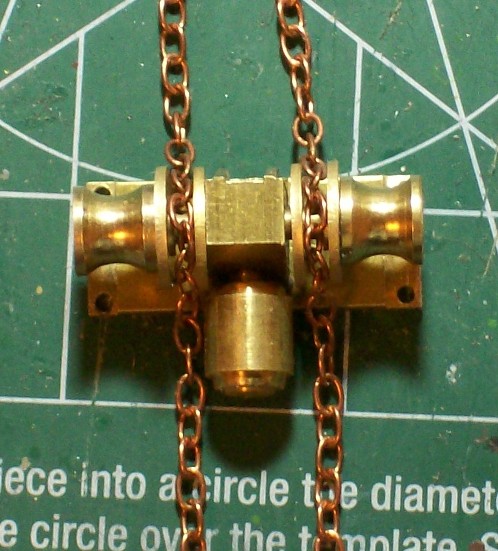
I don't own a lathe or a mill, and I wanted a steam winch for a chain achor rode. All I could find was This brass electric winch with two drums but no gypseys (chain gears). I filed off the peens holding the drums on the shaft, pressed them off, inserted brass washers to simulate the gypseys, and pressed them back on. This copper chain was all I could find that was to scale. It should be studded to be authentic, so this is a compromise. If anyone asks me why an electric winch on a 1902 vessel, my response will be "mind your own business" .


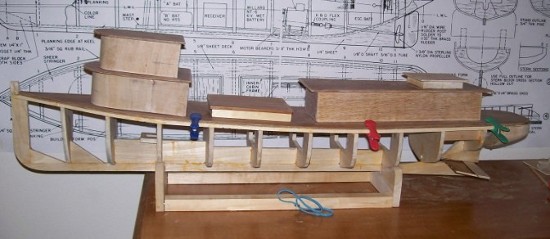
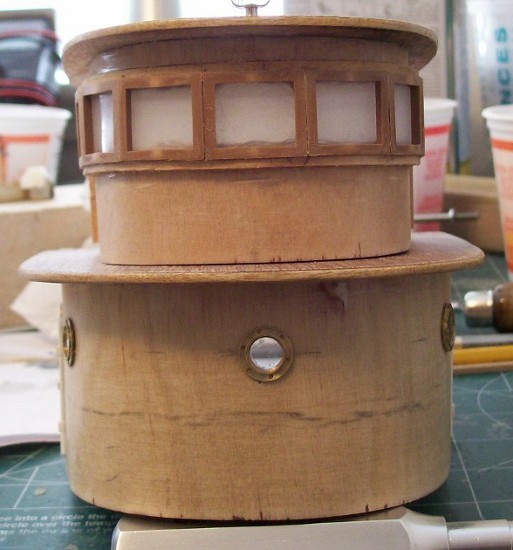
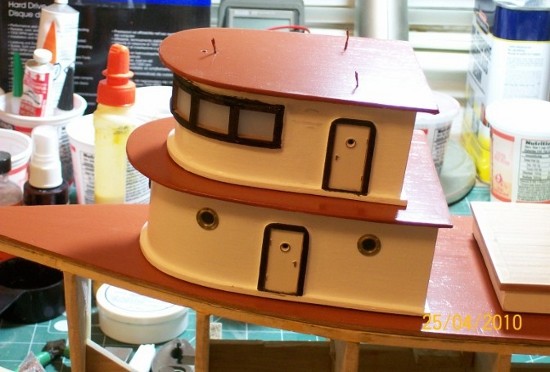
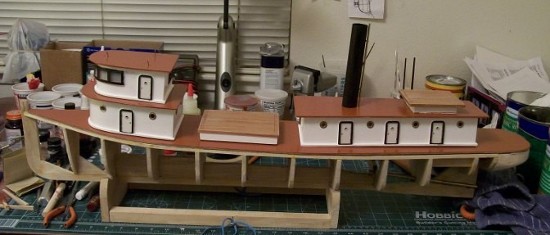
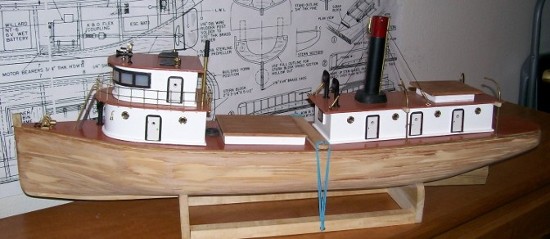
Here's the first photo of the superstructure on the planked hull. You can make out the purse boat davits on the stern, the anchor winch in the bow, and some added detail on the forward deckhouse and wheelhouse.


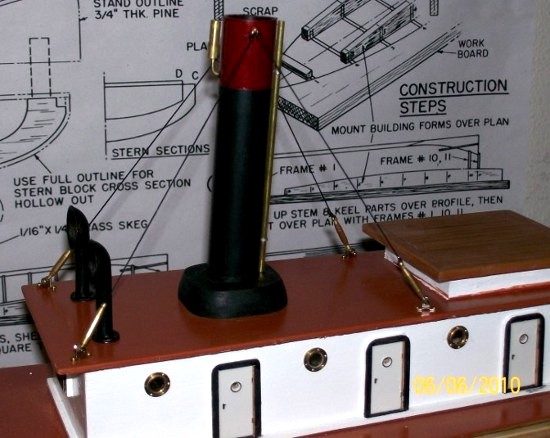
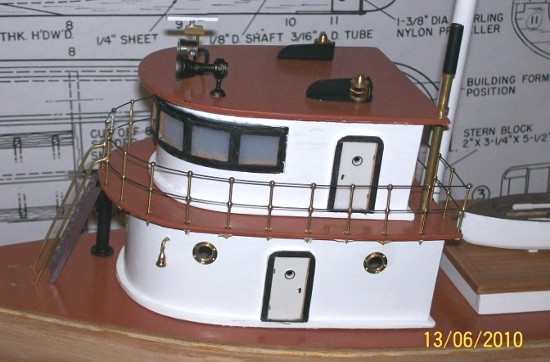
The railing is .025" piano wire which I annealed with a butane torch to make it bendable. The stanchions are from Cornwall. The ladder was fashioned here and its handrails are 3/64" brass rod. The navlights, searchlight, hooter, and radar antenna are also from Cornwall. The galley stack is a piece of 1/4" brass tube with a short length of 5/16" swaged onto the end of it. The hangar for the bell is out of scale; it will be changed.


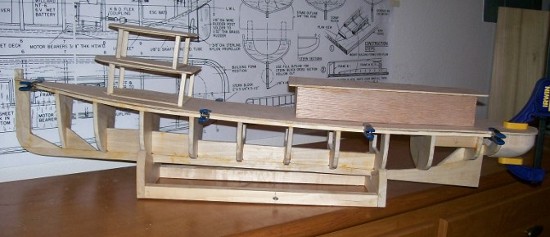
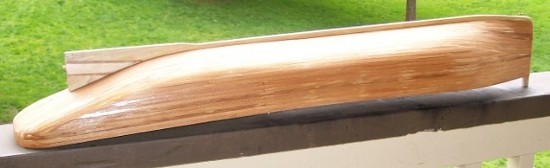
The rub rail installed. The stern piece is cut from 1/4" poplar, the stringers are 1/4 square spruce, hence the difference in color. Also visible is the 5/32" brass tube for the 1/8" rudder post.


The original anchors on the Helen (and most of the rest of the fleet) were danforth type, stowed on the deck and run outboard with a small davit on the bow. I had no room for all that gear plus the winch and wheelhouse companionway, so I went with navy type stockless anchors stowed outboard into hawsepipe fairleads, In this photo just dry fitted. Some of the fleet actually had this exact arrangement. The anchors are from Model Expo.


Here's the bow light, a white 3mm LED in a brass housing set below the crow's nest. I cut a groove from the light down to accomodate the wiring and backfilled it with the same filler I used on the hull.


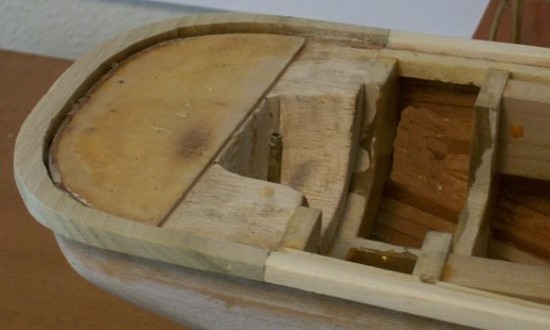
Here's the rudder servo and speed controller installed. The link to the rudder post is dry fitted. Also, a good view of the planking from inboard, coated with polyester resin for waterproofing.


The phenolic washer under the link is to prevent tinning the rudder post and tube together when soldering the link on. The washer has to fit snugly on the post.


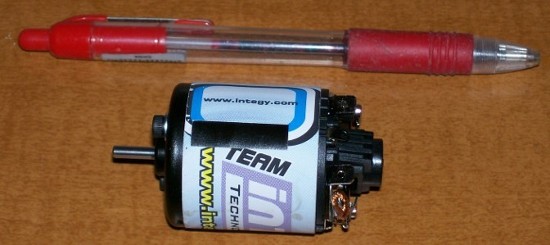
I'm using a 75 turn brush motor. I don't think I'll need a brushless because I'll be using 2.4ghz radio so I don't believe brush noise will be a problem. Time will tell.


First coat of paint on the hull. It's just to help me see where I need more filler & sanding. Also, the mast is stepped. Still to go: hang the boats, install the bulwarks and caprail, add the bitts, mooring bollard, stern rail, ratlines, boom, and rope rigging. Getting there!


Had to back up one. The plans made no provision for access to the rudder linkage. Too risky for me, so I added another removeable hatch.
Workboat
Visit this Community
Missouri, United States
Joined: August 11, 2010
KitMaker: 19 posts
Model Shipwrights: 14 posts
Posted: Wednesday, November 17, 2010 - 10:42 AM UTC
That brings me up to date. As I mentioned, I can't go any further until I get my stuff out of storage and my workshop set up.
cdnfurball
Visit this Community
Canada
Joined: July 31, 2018
KitMaker: 5 posts
Model Shipwrights: 5 posts
Posted: Friday, January 17, 2020 - 02:39 PM UTC
Rich, if you are still out there.... How's this build coming along ???
Workboat
Visit this Community
Missouri, United States
Joined: August 11, 2010
KitMaker: 19 posts
Model Shipwrights: 14 posts
Posted: Friday, January 17, 2020 - 04:15 PM UTC
I'm still around, as is the build, on my closet's top shelf. It's as it was, minus some damage from a heavy dresser mirror falling on it. That resulted in a loss of heart for number one, plus, I became heavily involved in animal rescue, became a humane trapper (build all my own traps), and coincidentally, turned 90 years of age. So, the failing motivation, combined with an extremely preoccupying "new" interest, added to my no longer steady hand/brain connection, all combined to prematurely end the project. I would love to hand it off to someone who would give it the passionate attention it deserves, and complete it.
cdnfurball
Visit this Community
Canada
Joined: July 31, 2018
KitMaker: 5 posts
Model Shipwrights: 5 posts
Posted: Tuesday, February 25, 2020 - 12:25 PM UTC
Sir, your wish to find a worthy builder, l hope comes true.

Your blog stating your build with guiding information motivated me into this project. The fact that non of these boats were the same. Their over all lengths varied widely as well.... So there is no right or wrong

Take care and thank you

Workboat
Visit this Community
Missouri, United States
Joined: August 11, 2010
KitMaker: 19 posts
Model Shipwrights: 14 posts
Posted: Tuesday, February 25, 2020 - 12:52 PM UTC
Do I take it correctly that you are also building one of these?
cdnfurball
Visit this Community
Canada
Joined: July 31, 2018
KitMaker: 5 posts
Model Shipwrights: 5 posts
Posted: Wednesday, February 26, 2020 - 01:27 PM UTC
Yes sir,. 36" o.a.l. what surprised me greatly, was the amount of ballast required to get this older girl sitting properly in the water.

I used 5 ply Baltic birch for my keel and bulk heads. Steamed basswood plank on on frame. Then 1/4 oz fiberglass cloth with 2 part epoxy over the planking... I'm


Workboat
Visit this Community
Missouri, United States
Joined: August 11, 2010
KitMaker: 19 posts
Model Shipwrights: 14 posts
Posted: Wednesday, February 26, 2020 - 03:42 PM UTC
I hope to see photos of your creation.
cdnfurball
Visit this Community
Canada
Joined: July 31, 2018
KitMaker: 5 posts
Model Shipwrights: 5 posts
Posted: Thursday, February 27, 2020 - 10:14 AM UTC
Rich, I'm better at building and drinking then computer stuff.

I'll see if my daughter can help me post some pictures. Ya know how these young'ngs are with these modern day gadgets.

JPTRR
Staff MemberManaging Editor
RAILROAD MODELING
#051
Visit this Community
Tennessee, United States
Joined: December 21, 2002
KitMaker: 7,772 posts
Model Shipwrights: 476 posts
Posted: Thursday, February 27, 2020 - 03:58 PM UTC
Hi Rich,

Marvelous work. I hope you find someone to take her over. What remains to be done?

10 years suspended build? I can relate.

Workboat
Visit this Community
Missouri, United States
Joined: August 11, 2010
KitMaker: 19 posts
Model Shipwrights: 14 posts
Posted: Thursday, February 27, 2020 - 04:18 PM UTC
What's left depends on two things. 1) finish as RC, or not, and 2) how much added detail wanted. As is the model is quite nearly complete for the shelf. It won't be true to the prototype, but one might not care. If a complete detail laden model is wanted, I'd estimate another 75 hours hands on, including repairing some damage and finishing.
TimReynaga
Staff MemberAssociate Editor
MODEL SHIPWRIGHTS
Visit this Community
California, United States
Joined: May 03, 2006
KitMaker: 2,500 posts
Model Shipwrights: 1,830 posts
Posted: Friday, February 28, 2020 - 01:19 AM UTC
Hi Rich,

That is one outstanding piece of work! Humbling to those of us who work only with plastic and resin kits...

Workboat
Visit this Community
Missouri, United States
Joined: August 11, 2010
KitMaker: 19 posts
Model Shipwrights: 14 posts
Posted: Friday, February 28, 2020 - 04:09 PM UTC
Thanks! I can't remember the name of the modeler's forum I used to be a member of (they kicked me out). They're based in the UK. If you can find them you'll see many scratch build logs that put my poor effort to shame. But we do it seeking our own satisfaction, not anyone else's, no?
cdnfurball
Visit this Community
Canada
Joined: July 31, 2018
KitMaker: 5 posts
Model Shipwrights: 5 posts
Posted: Tuesday, March 03, 2020 - 01:24 PM UTC
Sir, this is a hobby, NOT a competition ! In a hobby, the builder is the worst critic
If people can not appreciate the work, time and effort that one puts into their own work


screw those who judge
( other that the creator )


 _GOTOTOP