_GOTOBOTTOM
General Ship Modeling
Discuss modeling techniques, experiences, and ship modeling in general.
Submerged Submarine!
Buckeye198
Visit this Community
Ohio, United States
Joined: May 02, 2010
KitMaker: 596 posts
Model Shipwrights: 39 posts
Posted: Thursday, May 26, 2011 - 07:33 PM UTC
As some of you may know (ahemVonHengestahem), I got a sudden urge to make a diorama of a submarine in its natural element. For reference of what I'm trying to do, check this link: https://armorama.kitmaker.net/forums/167004#1402948

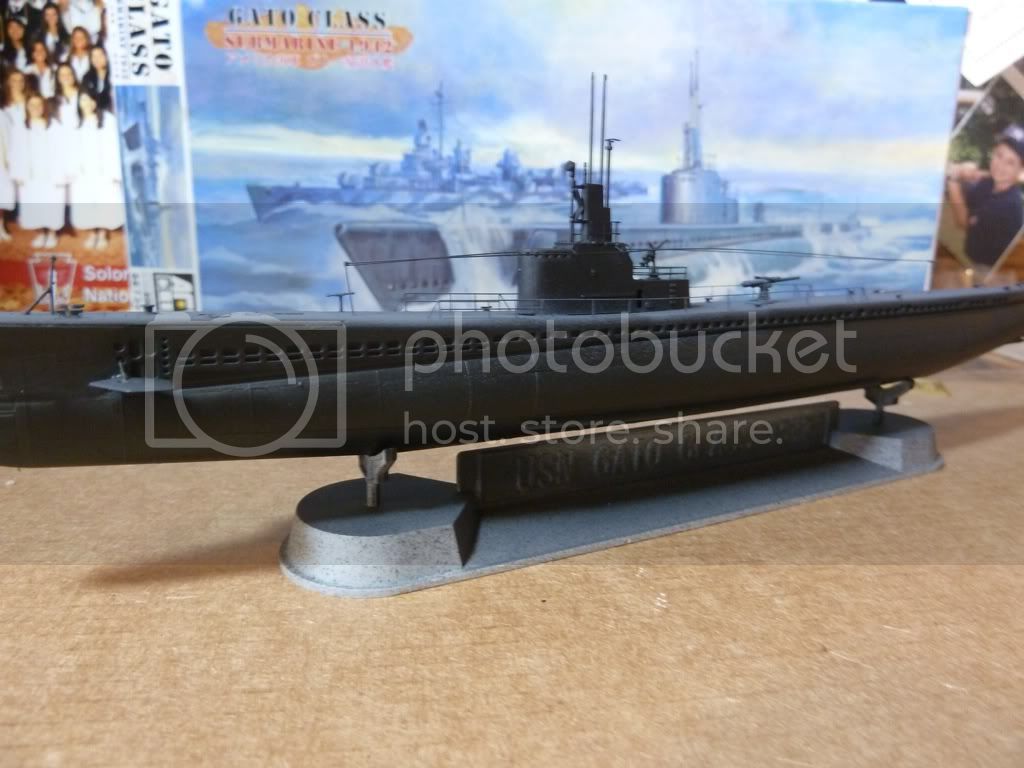
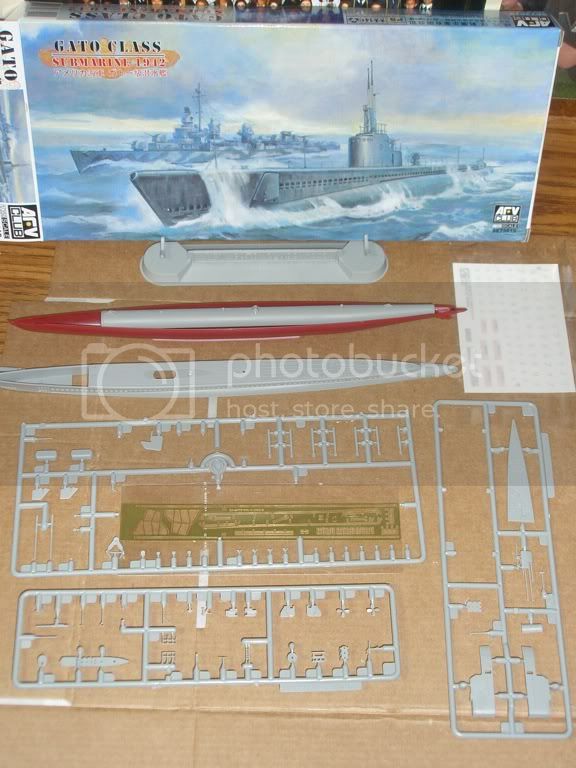
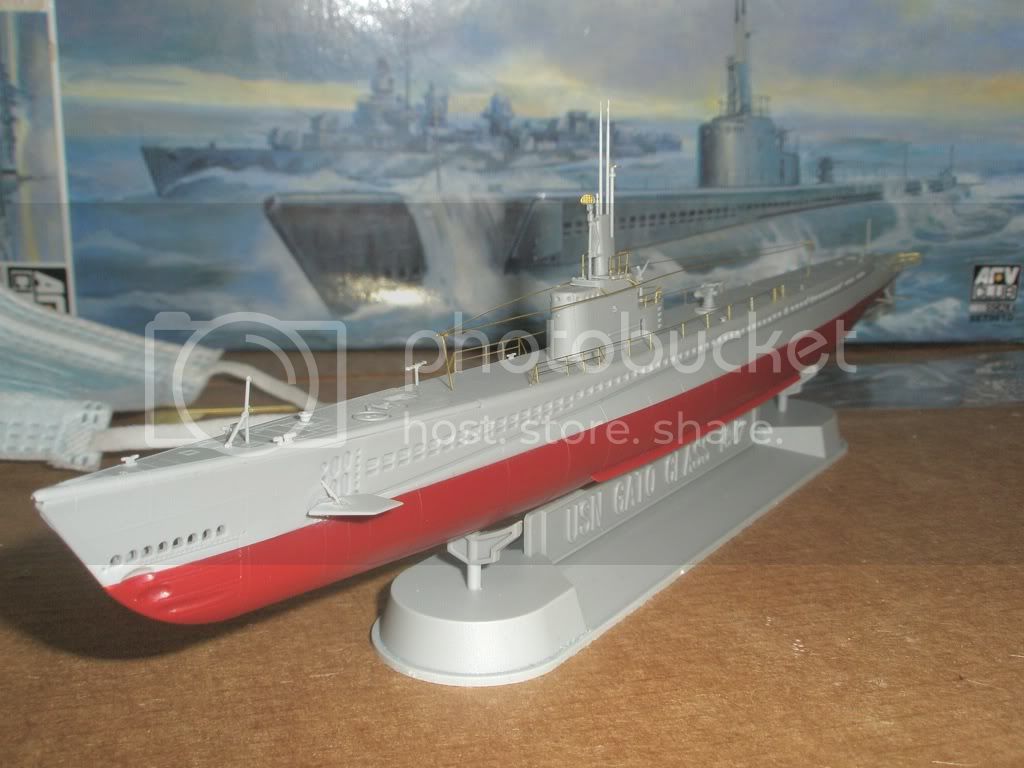
For the sub itself, I decided on the USS Cod, a Gato class sub now berthed in my hometown of Cleveland, OH. I grew up visiting the sub every year or so and so it has a soft spot in me heart. AFV Club made a VERY detailed model of a 1942 Gato, and I decided to just get it and suck up the possible inaccuracies of a 1942 kit for a sub launched in late 1943. I figured that since I couldn't find a picture of the Cod at its launch, I don't know what it initially looked like, and easily could've been in the style of the '42 Gatos.


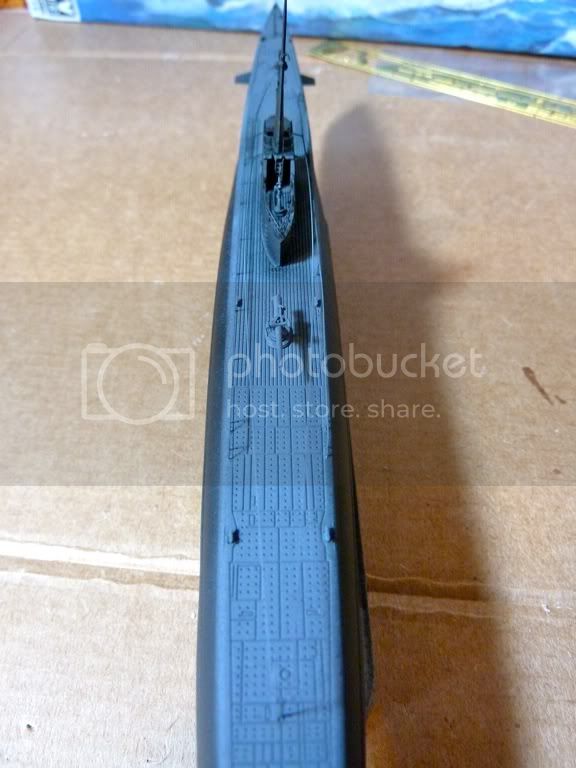
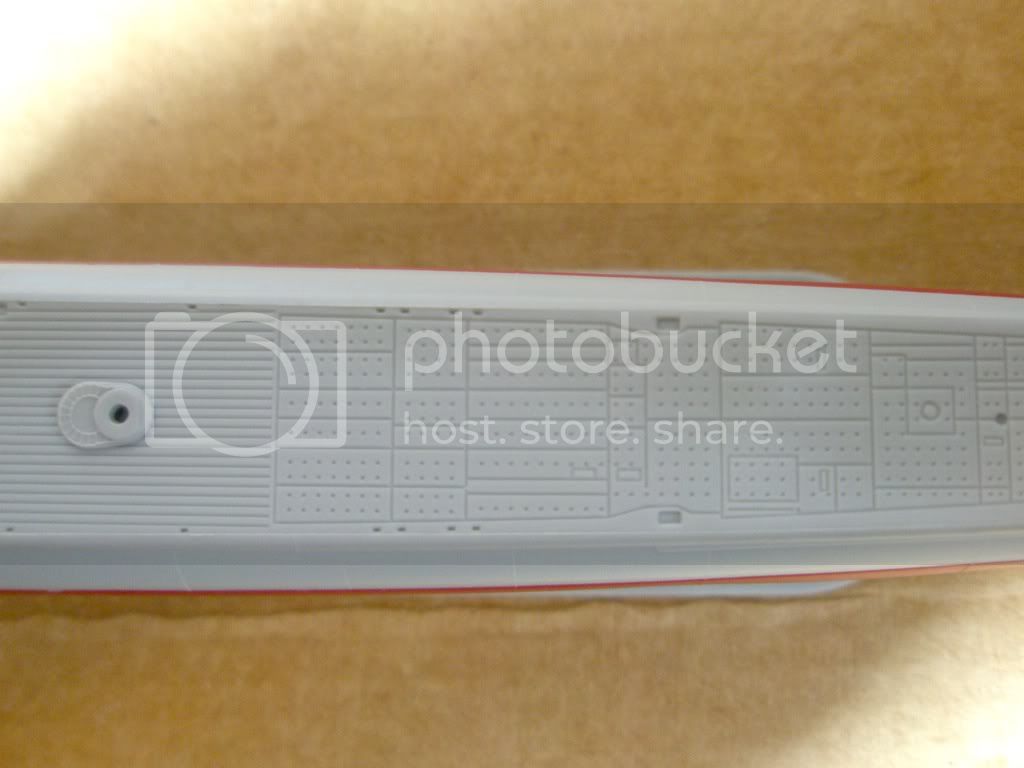
Check the details on this hunk!


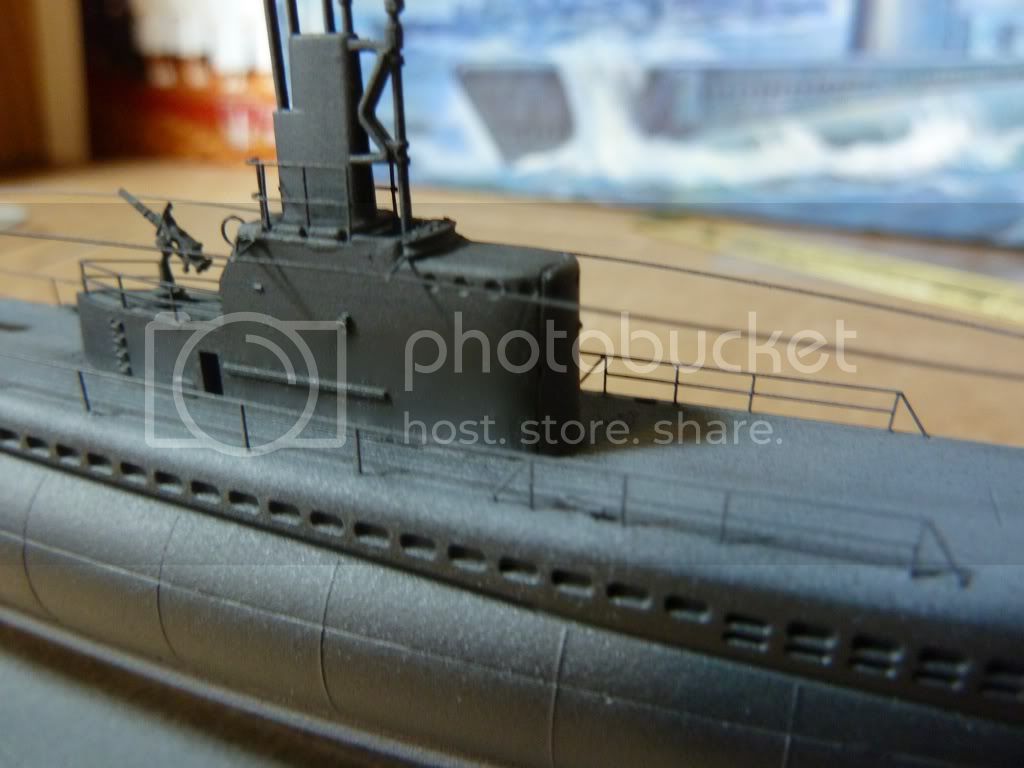
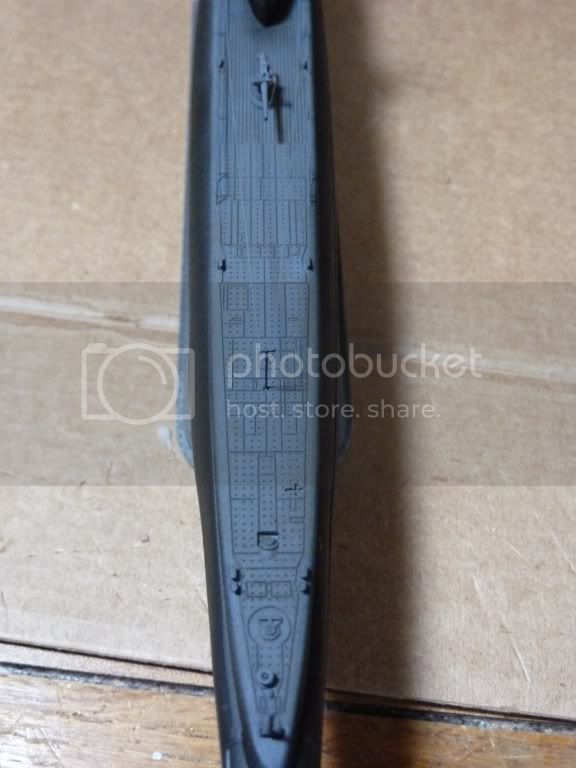
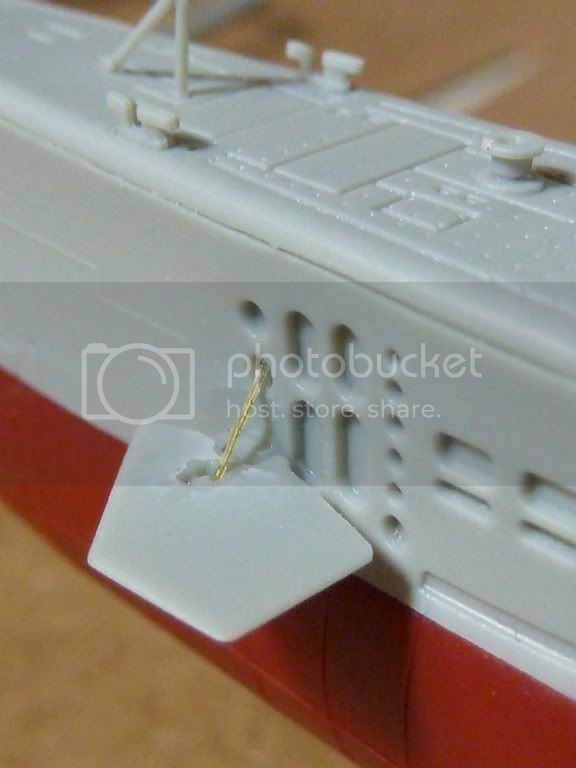
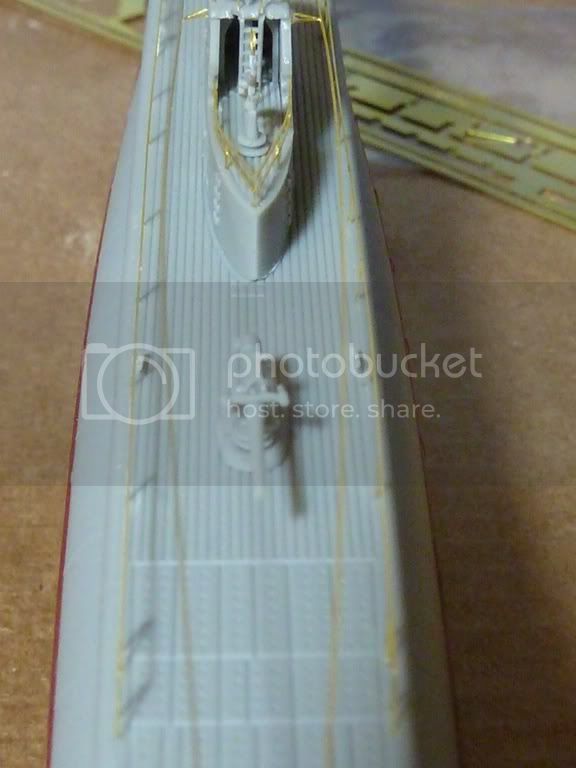
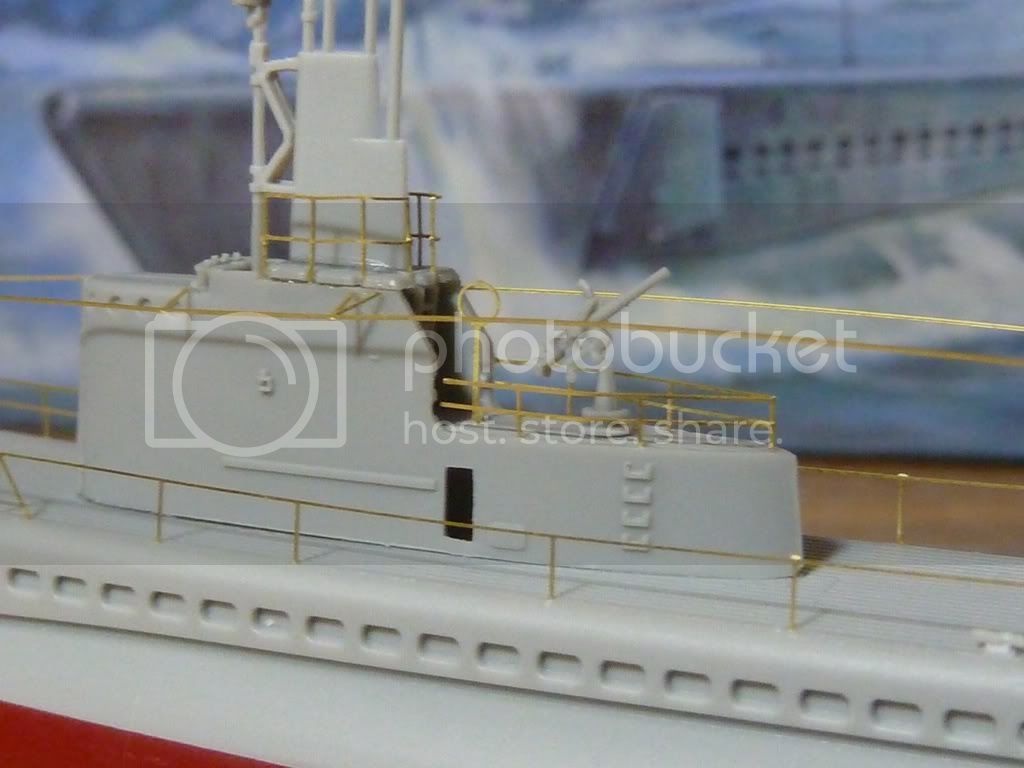
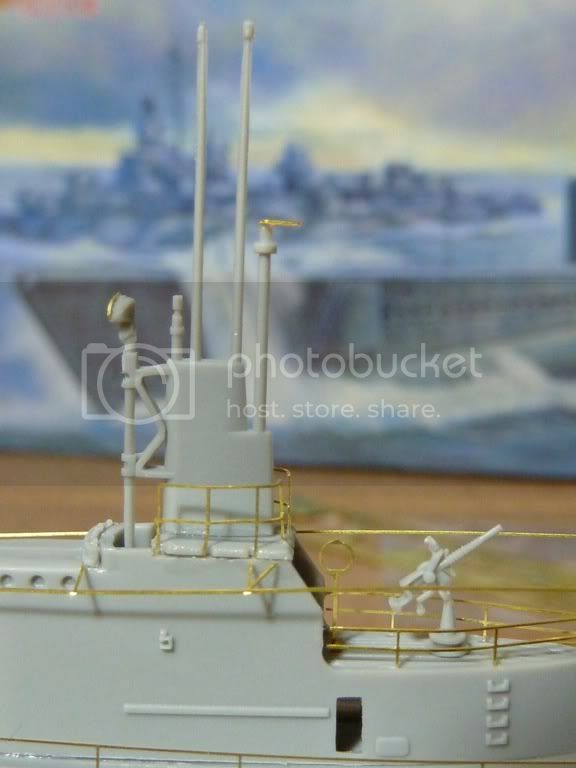
And now we get to the photoetched parts, included with the kit. It's clear to me that I need a whole new toolset if I'm to deal with PE's in the future. Still, they're pretty cool and they really ramp up the visual effect of a model. Figured I might as well experiment, since the minute details won't be the focus of this diorama.


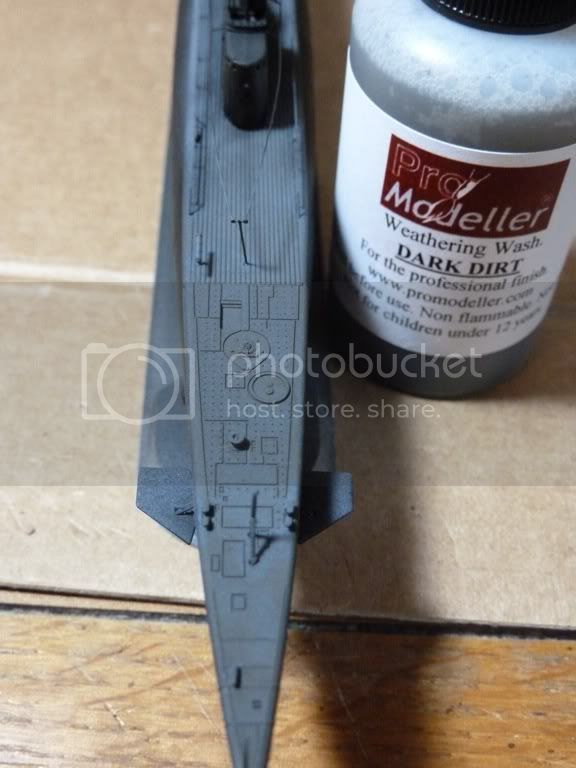
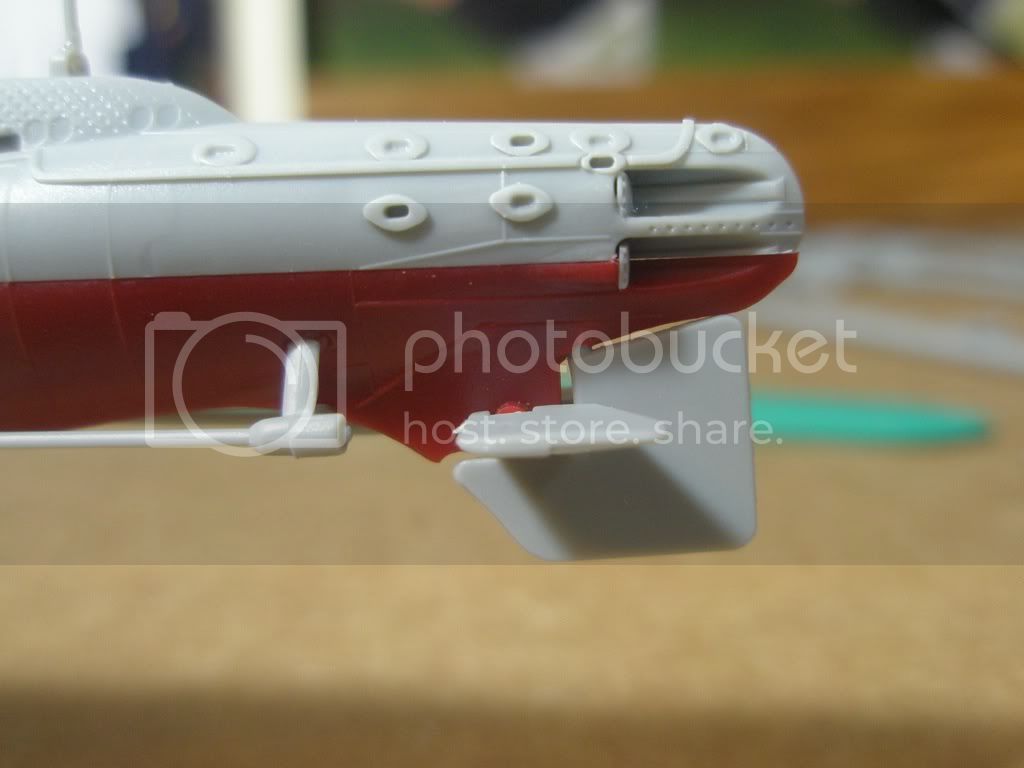
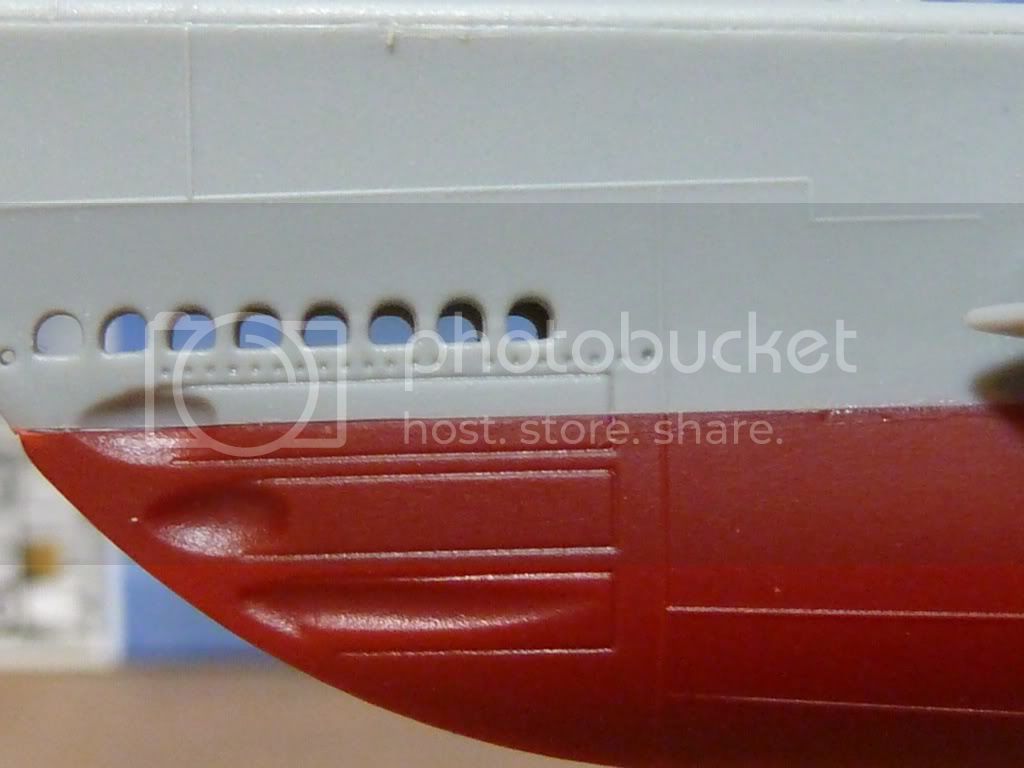
The Cod here boasts a 4" deck gun and a 20mm Oerlikon on the stern/only cigarette deck. Again, there's so little documentation of the ship's configurations, and since "no two Gatos are alike," I figured I could take some creative license with the armament. Also, that was all AFV Club gave me...so yeah...


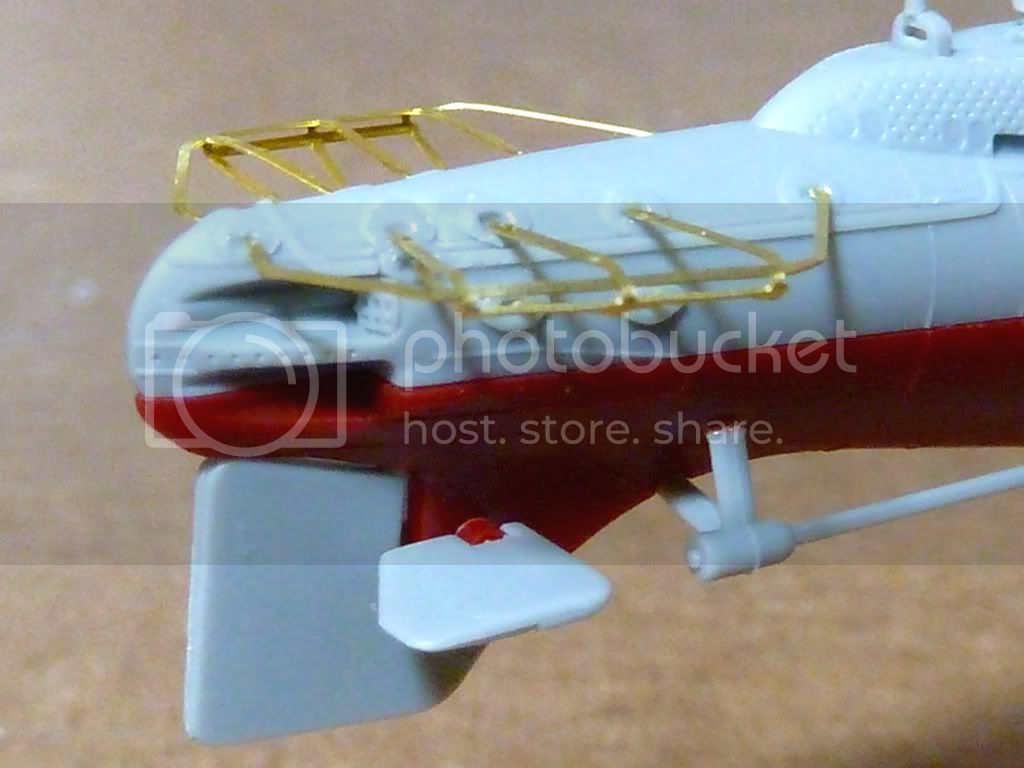
Lost one of the torpedo tube covers. Whoops. But look at that PE!


The propellers have intentionally been left off for two reasons. 1, it'll be easier to paint them the proper brassy color after the painting of the hull if they're not attached, and 2, I'm not sure how I want to model the props when in the water. Either stationary, spinning, or more likely, not even there and just covered by the cavitation. How I'll make the cavitation is another story.


Done with construction! Just gotta paint the model now, and then I can focus on the water. Wish me luck!


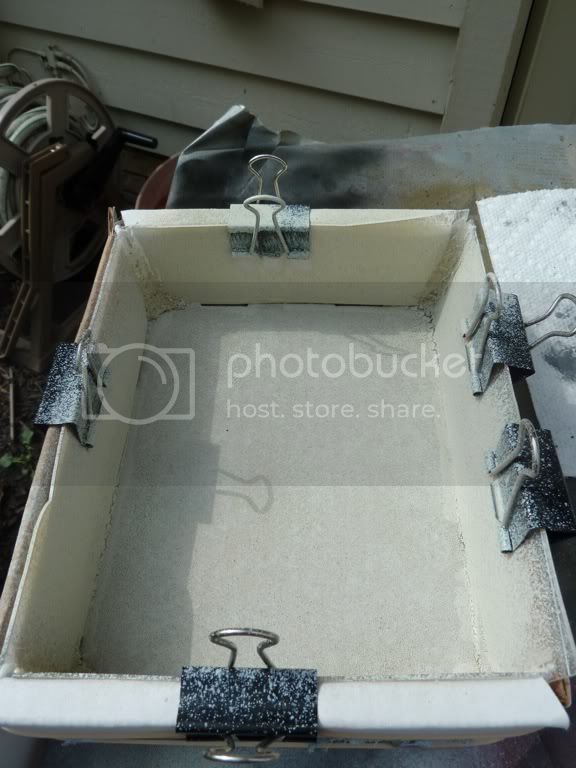
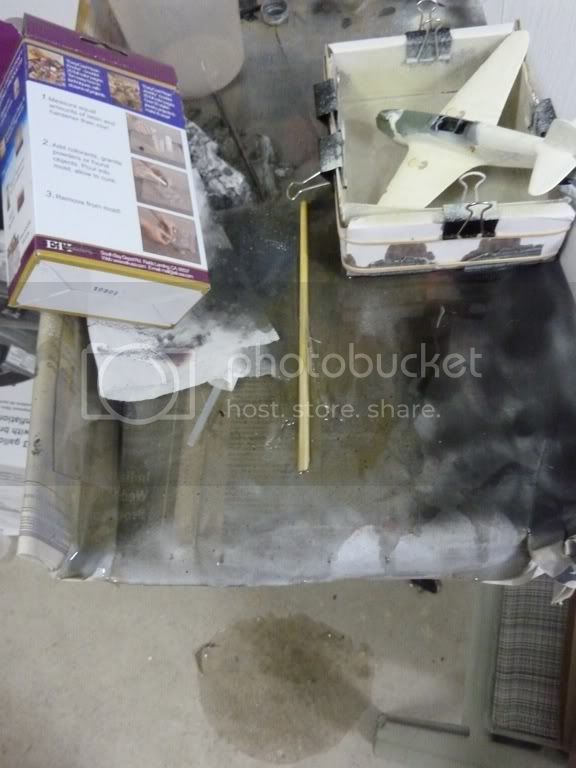
If anyone has used EasyCast epoxy before and has any hints about mold-making, tinting, protecting the model during casting, etc., please let me know!
Buckeye198
Visit this Community
Ohio, United States
Joined: May 02, 2010
KitMaker: 596 posts
Model Shipwrights: 39 posts
Posted: Friday, May 27, 2011 - 08:08 AM UTC
Finished painting today! Painted in accordance with the Navy's Measure 9 camouflage scheme for submarines (the standard for subs in the early years of WWII): flat black vertical surfaces, flat dark grey horizontal surfaces. My airbrush has been a little spotty lately, so it's not perfect. But it's hard to look pristine while in the midst of a wartime patrol.


I assure you the sides of the hull are in fact black. The lighting isn't doing the paint job justice.


I'm setting up my practice mold now and hope to have some layers done tonight.
vonHengest
Visit this Community
Texas, United States
Joined: June 29, 2010
KitMaker: 5,854 posts
Model Shipwrights: 350 posts
Posted: Friday, May 27, 2011 - 02:48 PM UTC
Wow, wasn't expecting so much brass Robby, looks good! Is she going to be at periscope depth or fully submerged?

I made it to Hobby Lobby today and would you believe that they 86'd almost all of the model train section? They had a few diorama supplies left and I grabbed the last bottle of RW, but they didn't have the stuff for making the waves with.
I also found some Polyester resin which I also picked up, looks like it'll be good stuff to work with as well.

Best of luck to you if you get a chance to start pouring the water tonight
Buckeye198
Visit this Community
Ohio, United States
Joined: May 02, 2010
KitMaker: 596 posts
Model Shipwrights: 39 posts
Posted: Friday, May 27, 2011 - 03:36 PM UTC

Quoted Text

Best of luck to you if you get a chance to start pouring the water tonight


Much appreciated! Here are my results from my practice pour:

I constructed the practice mold out of plexiglass sides held with Gorilla Glue and a cardboard box as a stabilizing base.


I ruined this Yak-1 years ago and held onto it, never certain when I'd need it again. I finally decided to use it as a practice model, submerging it in my first attempt at making epoxy-water. I added some spare decals just to see how/if the epoxy would affect them, and dunked the hunk in.


I came back a few hours later to find a GIANT puddle of epoxy a few millimeters thick hardened on the garage floor...


...As well as an empty box. I implore you all to THOROUGHLY check your molds for leaks before filling them with epoxy.


I'm going to head to Michael's over the weekend to get more epoxy as well as an actual box, since I obviously can't fashion one on my own...
vonHengest
Visit this Community
Texas, United States
Joined: June 29, 2010
KitMaker: 5,854 posts
Model Shipwrights: 350 posts
Posted: Friday, May 27, 2011 - 07:11 PM UTC
Good thing you practiced on your garage floor instead of say your workbench or kitchen.

I would suggest that on your next run you may want to fill your box with water and let it sit for a while like you did with the epoxy so that you can find any leaks before you try your next batch.
The boxes I've seen at Micheal's and Hobby Lobby are not watertight, being that the wood is only lightly connected using staples, screws, or wood glue.
MrMox
Visit this Community
Aarhus, Denmark
Joined: July 18, 2003
KitMaker: 3,377 posts
Model Shipwrights: 985 posts
Posted: Friday, May 27, 2011 - 08:35 PM UTC
A shame with the water - but i guess thats the Nature of water

Good work ón the submarine - are you going to give it a heavy layer of weathering ? Otherwise i am afraid that the details will be lost during encapsulation.

Looking forward seeing your second try ón the water!

Cheers/Jan
Buckeye198
Visit this Community
Ohio, United States
Joined: May 02, 2010
KitMaker: 596 posts
Model Shipwrights: 39 posts
Posted: Saturday, May 28, 2011 - 04:04 AM UTC
Jeremy, I guess I'll ask you how YOU are planning to make your mold? I've never built anything larger than my 1/32 Alouette II and I definitely don't have any carpentry tools or (more importantly) skills.

Jan, I'd like to weather it, but I'm not sure how. I've only weathered two of my 15 builds...how would you or anyone else suggest I improve this? Please keep in mind I'm still just a student, and so my budget is kinda thin...

Thank you both for your input though...Jeremy, good luck on your molds, and Jan, I hope to hear from you soon!
vonHengest
Visit this Community
Texas, United States
Joined: June 29, 2010
KitMaker: 5,854 posts
Model Shipwrights: 350 posts
Posted: Saturday, May 28, 2011 - 04:27 AM UTC
Robby, I would use waterproof silicone or caulking to seal the seems of your mold. In your case clear would be a good choice. It's readily available at Wal-Mart, automotive parts stores, and hardware stores.
I forgot to ask, but is that wax paper that you are using?
If I remember correctly, in the dio with the rusty submerged Sherman the build left the plexiglass on and trimmed it down when he was finished modeling the water. I am going to try coating the sides with a mold release agent and see if I can't just pop the resin brick out when I'm done.

As for weathering the sub, what you may want to do is highlight the tops of everything including minor surface details as if the sun were pointed directly over the top of the sub. This should give you an added illusion of scale depth as well.
Buckeye198
Visit this Community
Ohio, United States
Joined: May 02, 2010
KitMaker: 596 posts
Model Shipwrights: 39 posts
Posted: Saturday, May 28, 2011 - 04:56 AM UTC

Quoted Text

Robby, I would use waterproof silicone or caulking to seal the seems of your mold. In your case clear would be a good choice. It's readily available at Wal-Mart, automotive parts stores, and hardware stores.
I forgot to ask, but is that wax paper that you are using?
If I remember correctly, in the dio with the rusty submerged Sherman the build left the plexiglass on and trimmed it down when he was finished modeling the water. I am going to try coating the sides with a mold release agent and see if I can't just pop the resin brick out when I'm done.

As for weathering the sub, what you may want to do is highlight the tops of everything including minor surface details as if the sun were pointed directly over the top of the sub. This should give you an added illusion of scale depth as well.


I probably should've used wax paper. I thought about it, but I figured it would be good enough. So naive...anyway I think I'll probably use plexi again for the mold, but I'll be WAY more precise with my cuts and whatnot. I'm pretty sure I have some caulk lying around, so I'll be able to work on that. I think one of the keys to doing this correctly is using significantly thinner layers than what I used (the entire 16oz resin+hardener at once). This will allow for me/us to more closely monitor the integrity of the molds.

Quick thought: wax paper as the base (set it on some cardboard or something for stability) with plexi walls caulked together (and possibly to the base as well) that stand well within the base. When the resin has dried, walls are cut apart and separated from the base, and if the wax paper comes off, great. If not, trim it down to fit the brick. Sound about right?

Now to show how much of an amateur I am after modeling for nearly 10 years...how do I "highlight the tops of everything" on the sub? I'm getting pretty good at construction, but I have no idea about the painting!
vonHengest
Visit this Community
Texas, United States
Joined: June 29, 2010
KitMaker: 5,854 posts
Model Shipwrights: 350 posts
Posted: Saturday, May 28, 2011 - 01:30 PM UTC
Sounds like a plan! Looking forward to seeing how it works the second time around
Just out of curiosity, how many mils thick are your plexiglass panels?

For highlighting what you could do is something like this:

Mix up a slightly lighter batch of the base color and shoot through your airbrush with a relatively wide pattern from the top of the model and just dust it until you start seeing a slight difference in color. You may want to approach the model at shallow angles slightly off center so of tdc so that you can get a little dusting on the sides.

Then you mix an even lighter batch of the base color and dust the model directly from the top with a more narrow spray pattern. The color change should really start to pop now. Take a look at the model from normal viewing position and it should look like it has a relatively strong light source shining down on it from the top.

If you want, you can drybrush the last batch on the tops of details as well which will apply the paint a little thicker and give you a stronger contrast for the details.

Should look pretty sweet when you're done with this
rokket2001
Visit this Community
South Australia, Australia
Joined: March 28, 2005
KitMaker: 353 posts
Model Shipwrights: 331 posts
Posted: Saturday, May 28, 2011 - 01:34 PM UTC
Great idea to put a sub underwater...what about a glass display case with air inside, so that too much epoxy/whatever doesn't cloud things up? The old "dry for wet" trick of the movies?

I like the plane, you should do that as a dio too, a crashed and sinking plane, a pilot scrambling out...!

airbrush spotty - do you have a moisture trap? $15-20, works a treat!
surfsup
Visit this Community
Queensland, Australia
Joined: May 20, 2010
KitMaker: 1,230 posts
Model Shipwrights: 1,212 posts
Posted: Saturday, May 28, 2011 - 05:03 PM UTC
Lovely build and an even better Dio Idea. Look forward to this one......Cheers Markx
Spiderfrommars
Visit this Community
Milano, Italy
Joined: July 13, 2010
KitMaker: 3,845 posts
Model Shipwrights: 6 posts
Posted: Saturday, May 28, 2011 - 09:05 PM UTC
So you've decided to try

Well done, I'll follow you!
TracyWhite
Visit this Community
Washington, United States
Joined: January 18, 2005
KitMaker: 527 posts
Model Shipwrights: 464 posts
Posted: Sunday, May 29, 2011 - 05:12 AM UTC
A couple of notes. Look into dry brushing for some of the detailing:
http://www.totalmodel.com/workshop/pages/workshop_259.shtml
You can do this on the hull weld lines, etc. I'd experiment a bit, obviously, as you can over do it.

Also, large masses of resin curing will generate heat, which can destroy a model. I recommend pouring multiple layers to mitigate the heat release a bit.
http://www.aircraftresourcecenter.com/tnt1/001-100/TNT067_making-water_Geraths/tnt067.htm
Buckeye198
Visit this Community
Ohio, United States
Joined: May 02, 2010
KitMaker: 596 posts
Model Shipwrights: 39 posts
Posted: Sunday, May 29, 2011 - 09:41 AM UTC
My trip to Michael's today was a mix of good and bad. Good because I got 32oz of Castin'Craft resin for half-price, but bad because they were out of catalyst. So I went to the Home Depot across the way to see what they had. All I could find was 3M Fiberglass Resin. 32oz for half the price of Castin'Craft. I have NO idea if this stuff is comparable, but hopefully you guys can help. Will this stuff dry clear? Will it ruin plastic and enamel paints or decals? Or should I just wait the extra 6 days until Michael's gets a new supply of resin and catalyst? Thanks in advance!
vonHengest
Visit this Community
Texas, United States
Joined: June 29, 2010
KitMaker: 5,854 posts
Model Shipwrights: 350 posts
Posted: Sunday, May 29, 2011 - 11:41 AM UTC
If I remember correctly that 3M stuff dries white. I'll see if I can verify this for you.
On a side note, I wouldn't use that stuff unless you were really making something out of fiberglass.
vonHengest
Visit this Community
Texas, United States
Joined: June 29, 2010
KitMaker: 5,854 posts
Model Shipwrights: 350 posts
Posted: Sunday, May 29, 2011 - 11:47 AM UTC
According to the MSDS it is a light straw color.
MrMox
Visit this Community
Aarhus, Denmark
Joined: July 18, 2003
KitMaker: 3,377 posts
Model Shipwrights: 985 posts
Posted: Sunday, May 29, 2011 - 07:18 PM UTC

Quoted Text


Jan, I'd like to weather it, but I'm not sure how. I've only weathered two of my 15 builds...how would you or anyone else suggest I improve this? Please keep in mind I'm still just a student, and so my budget is kinda thin...


better late than never ... I hope

Anyway, it doesnt have to be expencive, it all goes on making the details stand out so they will be visible after you encapsulates it in the resin.

I will suggest a light wash: take a paint darker than the deck and hull color and thin it with whatever thins it. - take a fine brush and apply the wash to all lines, that is the deck and other low points on the build - that will make the lines in the deck pop out.

That takes care of the lows on the model - next step is making the highs stand out - a technique is "dry brushing" - take a flat soft brush, put on some light color - a light gray - and with a napkin take out most of the paint from the brush - an allmost dry brush is the target - whats left is applied to the model with gentle strokes - carefull not to get too much paint on it.

This way you will get both the lows and highs of the model stand out - giving it more contrast.

This would be a good read: https://archive.kitmaker.net//features/50

Cheers/Jan
Buckeye198
Visit this Community
Ohio, United States
Joined: May 02, 2010
KitMaker: 596 posts
Model Shipwrights: 39 posts
Posted: Monday, May 30, 2011 - 04:33 AM UTC
This is why I love this site...so many people who love models are all willing to help me with mine!! Seriously, thank you all very much! I have nothing to do today or tomorrow, so I'll try to officially finish my sub before I travel on Wednesday (shout-out to HobbyMasters in Red Bank, NJ--see you soon!), then I'll hopefully be able to get the resin to work this time. Oh and I think I'll be returning the 3M resin. I was hopeful it would work, but I won't risk it after I've come so far with the model. I'll do my best to get some pictures up tonight or tomorrow of my detail-highlighted sub, but for now, have a meaningful Memorial Day and thank a veteran! Semper Fi!
Buckeye198
Visit this Community
Ohio, United States
Joined: May 02, 2010
KitMaker: 596 posts
Model Shipwrights: 39 posts
Posted: Monday, May 30, 2011 - 01:31 PM UTC
True to my word...officially done with my sub tonight! Thanks to Jan, Jeremy, and Tracy for your helpful links and advice on weathering. I'd say the model looks much more realistic now, so thanks again! Now for the pictures:

My advertisement for Pro-Modeller washes. I applied it liberally using a Q-Tip to all surfaces with indented details (i.e. the deck) and let it sink in. It was kinda difficult to use as finely as I had to with all the PE in the way; I think it would be more effective if I could use a paper towel or something and really wipe the pigment all up in the model's business. Just too much thinner in this stuff to use it in small quantities.


Yeah, looks pretty nice now. I also drybrushed the raised details on the hull, but I couldn't get a good picture of it. Just trust me, it looks MUCH better with the drybrushing.


Went to a different Michael's today and got plenty of resin and catalyst as well as some other toys: some balsa to help with the mold, a bottle of Castin'Craft Mold Release, and something called "SceneARama Ripplin' Water Kit." You know it has to be cool because they used an apostrophe instead of a "g" in "Ripplin'." From what I read, SceneARama is a subdivision of Woodland Scenics, so this product will probably be an awful lot like (if not identical to) Realistic Water. Except that I got it for 20% off at Michael's.

As always, I'll update you all as I go. Jeremy, where are your subs?? Don't make me do all the trailblazing for our submerged model sagas!
Buckeye198
Visit this Community
Ohio, United States
Joined: May 02, 2010
KitMaker: 596 posts
Model Shipwrights: 39 posts
Posted: Tuesday, May 31, 2011 - 03:36 PM UTC
Well I've done all I can with my mold before I leave town tomorrow. Made a really good mold out of balsa, sprayed it with Future hoping to make a truly solid barrier for the resin and it ended up warping the wood. Balsa mold is a bust. I'll definitely be stopping off at HobbyMasters and maybe my Grandpa will have some words of wisdom for a quality mold.
MrMox
Visit this Community
Aarhus, Denmark
Joined: July 18, 2003
KitMaker: 3,377 posts
Model Shipwrights: 985 posts
Posted: Tuesday, May 31, 2011 - 11:12 PM UTC
Why not cast in a mold that you don“t have to remove ? - build it up in 2mm clear acryllic and trim the edges raising over the water after casting

This way you can glue the mold solid and just leave it.

Cheers/Jan
Buckeye198
Visit this Community
Ohio, United States
Joined: May 02, 2010
KitMaker: 596 posts
Model Shipwrights: 39 posts
Posted: Wednesday, June 01, 2011 - 12:38 AM UTC
Jan, would you believe that the thought NEVER occurred to me? That may very well be how I solve this problem...we'll see after my return though. Thank you very much for your help!!
vonHengest
Visit this Community
Texas, United States
Joined: June 29, 2010
KitMaker: 5,854 posts
Model Shipwrights: 350 posts
Posted: Wednesday, June 01, 2011 - 06:37 PM UTC
That's what the talented fella who submerged that rusty hulk of a Sherman in resin did. He found out that the plastic has to be a bit on the thick side so that it will not melt while the resin is curing.

I'll be picking up my subs either late this week or early next week. They are super small so painting should be quick and then I can get to the messy stuff

BTW, have you given consideration to adding a dye to your "water"?
Removed by original poster on 06/02/11 - 05:43:34 (GMT).
 _GOTOTOP