_GOTOBOTTOM
Ships by Class/Type: Destroyers
This forum covers all types of destroyers from all eras.
HMS Dryad Build
RedDuster
Visit this Community
England - South East, United Kingdom
Joined: March 01, 2010
KitMaker: 7,078 posts
Model Shipwrights: 6,649 posts
Posted: Saturday, November 26, 2011 - 06:30 AM UTC
Saw this baby at Telford and just had to have it. produced by JB-Models, it is HMS Dryad, a torpedo gunboat, built in 1893.

It is a well produced and complete Resin / etch kit. with turned brass barrels by Master Models.


The hull has been sprayed with Citidal Skull white,


The Black area on the hull has been masked. The hull is cast at the light waterline, not the full load.


and painted in, the yellow pinstripe above has also been added, by hand. Just needs a bit of tidying up.


and of course the red anti fouling adding.

Si
Gremlin56
Joined: October 30, 2005
KitMaker: 3,897 posts
Model Shipwrights: 3,301 posts
Posted: Saturday, November 26, 2011 - 04:59 PM UTC
Nice to see one of Jerzy Bin's little masterpieces out of the box Simon.
It's looking good so far. Just curiosity on my part, (due to a complete lack of experience with resin models), but wouldn't it have been easier to remove the resin plug underneath the ship before painting?
cheers,
Julian
RedDuster
Visit this Community
England - South East, United Kingdom
Joined: March 01, 2010
KitMaker: 7,078 posts
Model Shipwrights: 6,649 posts
Posted: Sunday, November 27, 2011 - 10:39 PM UTC
Hi Julian,

Thanks for your comments, leaving the resin plug in place for painting is a Baldrick style cunning plan, it is very useful handle during the painting process to keep manky paw prints off the paintwork.

The red has been added, still needs a small tidy up in this pic. The curves of the hull and fine moulded details did make masking a real bind.


One thing I did notice on rechecking the drawings was, I got the demarkation between the black & the white too low, (good job it was that way round) so re masked & re done. The yellow stripe, the deck painted and the plug removed.


Finally the four deck houses / casings were cleaned up & test fitted, which they did, perfectly.


more soon.

Si
surfsup
Visit this Community
Queensland, Australia
Joined: May 20, 2010
KitMaker: 1,230 posts
Model Shipwrights: 1,212 posts
Posted: Wednesday, November 30, 2011 - 02:11 PM UTC
Very unusual and very nice. Will be watching with interest Simon.....Cheers mark
beefy66
Visit this Community
England - North East, United Kingdom
Joined: October 22, 2007
KitMaker: 971 posts
Model Shipwrights: 645 posts
Posted: Wednesday, November 30, 2011 - 11:31 PM UTC
Nice one Simon good idea for the plug handle
Cheers Keith
RedDuster
Visit this Community
England - South East, United Kingdom
Joined: March 01, 2010
KitMaker: 7,078 posts
Model Shipwrights: 6,649 posts
Posted: Thursday, December 01, 2011 - 09:33 PM UTC
Thanks Mark / Keith.

Hope to get some time at the bench over the weekend., if so will post an update on monday.

Si
RedDuster
Visit this Community
England - South East, United Kingdom
Joined: March 01, 2010
KitMaker: 7,078 posts
Model Shipwrights: 6,649 posts
Posted: Sunday, December 04, 2011 - 03:32 PM UTC
A bit more progress, the deck houses have been painted & added.


Also some additional vents and lockers, have been added. Next I test fitted the flying bridge with the deckhouses in place, some fettling was needed, so I have decided this is the next major part to be added. it has been cleaned up, and painted, the 3 supports added and just need cutting to length and painting.


One issue I did find with the etch was the inclined ladders, the steps would not fold out, not etched through at the sides. fortunately I have some round the right length going spare, hand rails will need replacing, but they will work.

Si
RedDuster
Visit this Community
England - South East, United Kingdom
Joined: March 01, 2010
KitMaker: 7,078 posts
Model Shipwrights: 6,649 posts
Posted: Friday, December 09, 2011 - 06:15 AM UTC
Some more progress.

The flying bridge has been fitted, along with 4 mushroom vents on the fo'c'sle and one of the replacement ladders. Although the ladders are not quite correct, the handrails have been removed, and more appropriate ones will be fitted at a latter stage.


More progrss soon.

Si
Gremlin56
Joined: October 30, 2005
KitMaker: 3,897 posts
Model Shipwrights: 3,301 posts
Posted: Friday, December 09, 2011 - 06:55 AM UTC
Looking good Simon, very interesting to see how the ship was constructed as well.
Julian
RedDuster
Visit this Community
England - South East, United Kingdom
Joined: March 01, 2010
KitMaker: 7,078 posts
Model Shipwrights: 6,649 posts
Posted: Sunday, December 11, 2011 - 11:50 PM UTC
Thanks Julian,

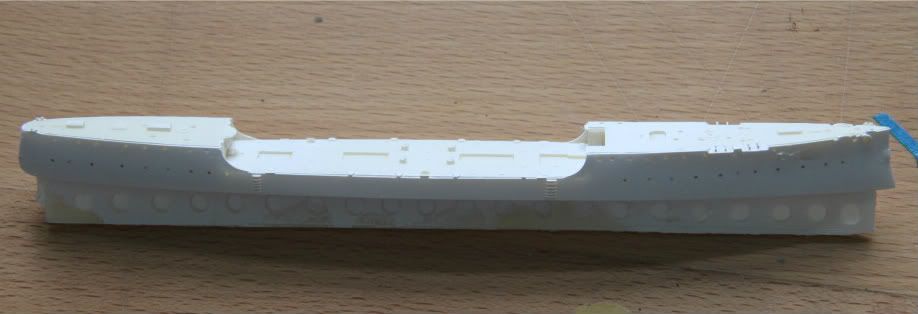
It certainly is an "interesting" vessel to build, the construction order is being worked out as I go along. The next job in my masterplan was to add the inboard railings to the flying bridge. I anticipated issues with the skylights on the deck houses if i tried to fit those first and then the railings, and wanded to fit the skylights before the vents to have room to manouver them.

So railing fitted.


I used Peter halls pre dreadnought railings, the kit ones have no gutter rail & being kack handed I mucked one of the up.

The skylights fitted, they look a bit messy, I have put a black wash over them to highlight the ports, and this is being allowed to dry before they are tidied up with a dry brush of off white.


I have aslo test fited the conning tower & bridge, Another Baldrick style cunning plan, get some of the larger resin out of the way, will be easier to sort through the smaller bits, and it I don't build & fit them, chances I will loose them.

more soon, Si
Gremlin56
Joined: October 30, 2005
KitMaker: 3,897 posts
Model Shipwrights: 3,301 posts
Posted: Monday, December 12, 2011 - 04:18 AM UTC
Just out of curiosity Simon: what was the LOA of the Dryad? 70 meters a good guess?
Julian
Gremlin56
Joined: October 30, 2005
KitMaker: 3,897 posts
Model Shipwrights: 3,301 posts
Posted: Monday, December 12, 2011 - 06:50 AM UTC

Quoted Text

Just out of curiosity Simon: what was the LOA of the Dryad? 70 meters a good guess?
Julian


Sorry, stupid of me, should have Googled. Wasn't far off though, 80 meters instead of 70, which makes for a finicky little build in 1/350th. I think you are going great guns with the railings Simon.
cheers,
Julian
RedDuster
Visit this Community
England - South East, United Kingdom
Joined: March 01, 2010
KitMaker: 7,078 posts
Model Shipwrights: 6,649 posts
Posted: Monday, December 12, 2011 - 09:23 PM UTC
Thanks Julian,

The railings are a bit "cut and shunt" to get the stantions in the right place, but getting there.

She's not too bad, the hull as about 9" long in old money, I just love these Victorian oddballs.

Si
Gremlin56
Joined: October 30, 2005
KitMaker: 3,897 posts
Model Shipwrights: 3,301 posts
Posted: Tuesday, December 13, 2011 - 02:59 AM UTC
"Big 9" as Judge Dread would have said. That is pretty small for me with my armoured glass goggles
I can't build or paint anything without my optivisor nowadays, without it everything is one big blur
cheers mate,
Julian
RedDuster
Visit this Community
England - South East, United Kingdom
Joined: March 01, 2010
KitMaker: 7,078 posts
Model Shipwrights: 6,649 posts
Posted: Sunday, December 18, 2011 - 10:25 PM UTC
I know what you mean regarding the eyesight Julian. That's wjy I moved up to 1/350th from 1/700th.

A bit more progress over the weekend. The funnels and vents have been added to the deckhouses. I have angled the vents pointing over the port bow.


Another cunning plan, If, once based, I have the relative wind blowing at an angle on the bow, then the smoke from the after funnel will clear the mainmast and rigging, and make thinks a lot easier.

Si
Gremlin56
Joined: October 30, 2005
KitMaker: 3,897 posts
Model Shipwrights: 3,301 posts
Posted: Monday, December 19, 2011 - 04:53 AM UTC
Looking good Simon, last of the multicoloured warships. I love the red vent interiors and the yellow stacks. Wikileaks has a photo of the Dryad in grey, which shows how bland warships have become since 1900. This looks the real Victorian deal.
Julian
RedDuster
Visit this Community
England - South East, United Kingdom
Joined: March 01, 2010
KitMaker: 7,078 posts
Model Shipwrights: 6,649 posts
Posted: Tuesday, December 20, 2011 - 10:01 PM UTC
Thanks Julian,

It is nice having a bit of color on the bench. To be honest I am not sure the shades are correct, but they are best guess, and I rather like the effect.

Si
Gremlin56
Joined: October 30, 2005
KitMaker: 3,897 posts
Model Shipwrights: 3,301 posts
Posted: Wednesday, December 21, 2011 - 06:11 AM UTC
That's what counts Simon, at the end of the day you have to be happy with your own build. I like the scheme you have chosen too
Cheers,
Julian
RedDuster
Visit this Community
England - South East, United Kingdom
Joined: March 01, 2010
KitMaker: 7,078 posts
Model Shipwrights: 6,649 posts
Posted: Wednesday, December 21, 2011 - 09:53 PM UTC
Thanks Julian.
TAFFY3
Visit this Community
New York, United States
Joined: January 21, 2008
KitMaker: 2,531 posts
Model Shipwrights: 1,244 posts
Posted: Thursday, December 22, 2011 - 02:04 AM UTC
Hello Simon, She is coming along quite nicely. I like the color scheme also, and I agree with Julian. I've come to realize that a model will be on my shelf a lot longer than on a table at a show or contest. Constructive criticism is always welcome, but as long as I'm satisfied with the finished model, 'all's right with the world'. I do find the pre-Dreadnought era ships much more visually appealing than the current warships. The color schemes and structural features, such as the 'flying bridge', are more eye catching than today's stealthier designs. An Aegis cruiser is certainly lethal, but to me it looks more like a yacht than a 'proper' warship. Al
RedDuster
Visit this Community
England - South East, United Kingdom
Joined: March 01, 2010
KitMaker: 7,078 posts
Model Shipwrights: 6,649 posts
Posted: Thursday, December 22, 2011 - 10:07 PM UTC
Thanks Al,

I too enjoy the pre dreadnought era, and particulary the Victorian / Edwardian black / white & buff schemes. There certainly were some oddball designs.

I try to make the best guess with the colours, these probably are a bit bright, but I am happy with them.

Si
RedDuster
Visit this Community
England - South East, United Kingdom
Joined: March 01, 2010
KitMaker: 7,078 posts
Model Shipwrights: 6,649 posts
Posted: Monday, December 26, 2011 - 06:00 AM UTC
The structure under the bridge has been added, 12 small peices of etch. The fwd breakwater has also been added.


the bridge has been added, along with would I asume is the chartroom, this is an etched structure, which works rather well.


more soon

Si
RedDuster
Visit this Community
England - South East, United Kingdom
Joined: March 01, 2010
KitMaker: 7,078 posts
Model Shipwrights: 6,649 posts
Posted: Monday, January 02, 2012 - 11:25 PM UTC
Decided to get the last of "big" lumps dealt with, and have started on the boats.

all the boats & most of the relevent etch has been pre painted.


One steam launch, well under way, boiler, funnel & engine come as three tiny seperate resin parts, they have been built painted and added to the boat, along with some of the etch.


more soon.

Si


 _GOTOTOP