England - East Anglia, United Kingdom
Joined: August 12, 2005
KitMaker: 14,499 posts
Model Shipwrights: 1,919 posts
Posted: Thursday, November 29, 2012 - 04:58 AM UTC
Hi folks,
I picked up the Revelle UDT boat recently and though I would make an RN LCP(R). When I originally looked into this boat I couldn't find any references for RN use but a few months ago I came across a number of pictures of them being used by the RN. Although the pictures were taken in the UK the boats were in D Day colours.
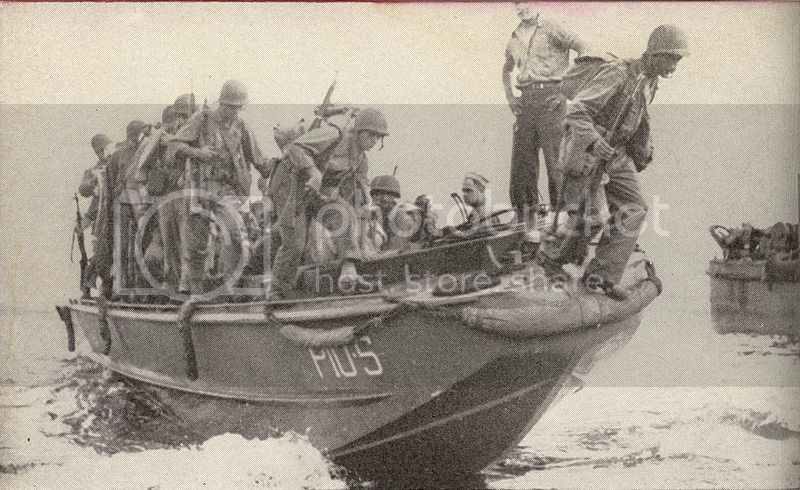
I also found some pictures of them landing British Troops in Italy so another project got born.
There will be no side armour with this one, but it should be a fun build.
Cheers
Al

'Action this Day'
Winston Spencer Churchill
Indiana, United States
Joined: August 19, 2007
KitMaker: 2,184 posts
Model Shipwrights: 204 posts
Posted: Thursday, November 29, 2012 - 07:22 AM UTC
Hey Alan, This will be interesting and I'll follow it. Have 3 landing craft to do myself but they will be U.S.M.C. south Pacific. Nice little L.C. but needs some tender loving care to bring it up to par. I'd like to find the early one with no bow exit used at the Cannal.
There is no return policy on time spent
England - East Anglia, United Kingdom
Joined: August 12, 2005
KitMaker: 14,499 posts
Model Shipwrights: 1,919 posts
Posted: Friday, November 30, 2012 - 10:18 AM UTC
Hi Bob,
If the light is good I'll post up some pics tomorrow.
IS this what your looking for?
LCP L
If you go to British Pathe and search under Landing Craft WW2 you should get some good footage.
I'm using this one for my reference.
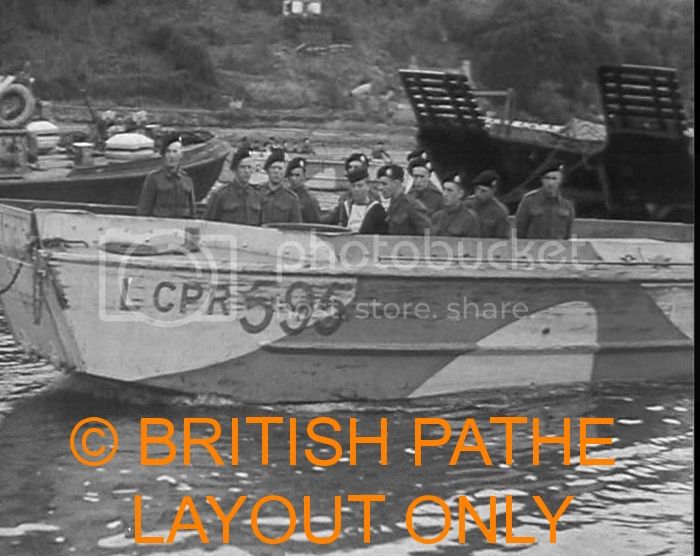 http://www.britishpathe.com/search/query/Landing+Craft+WW2
 Cheers
Al
'Action this Day'
Winston Spencer Churchill
Indiana, United States
Joined: August 19, 2007
KitMaker: 2,184 posts
Model Shipwrights: 204 posts
Posted: Friday, November 30, 2012 - 03:36 PM UTC
Hey Alan, thanks for the link.And yup, that's the one. Unfortunately my skills are not that good and will have to wait for a styrene kit to come out. Maybe Italeir is reading, hint.
There is no return policy on time spent
England - East Anglia, United Kingdom
Joined: August 12, 2005
KitMaker: 14,499 posts
Model Shipwrights: 1,919 posts
Posted: Friday, November 30, 2012 - 10:05 PM UTC
Hi Bob,
Italeri have a suggestions link on their web site and needless to say I sent in some requests for more LCs

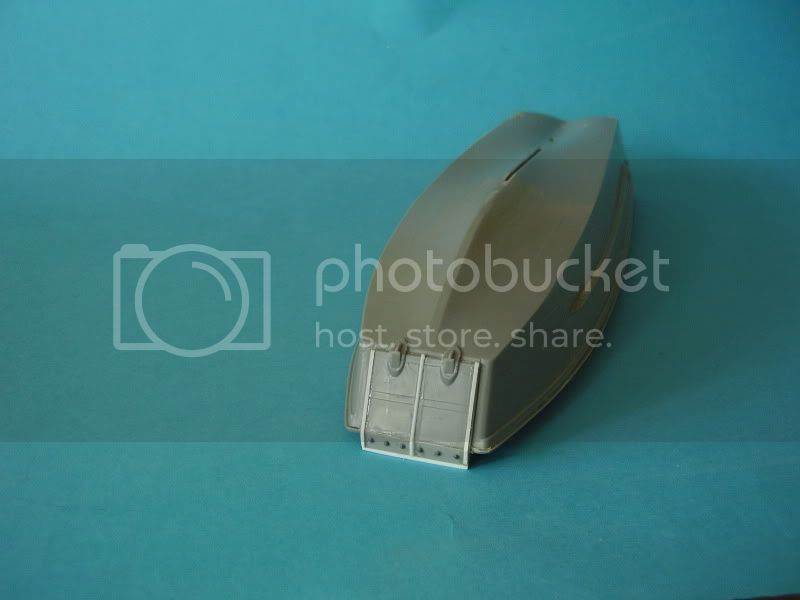
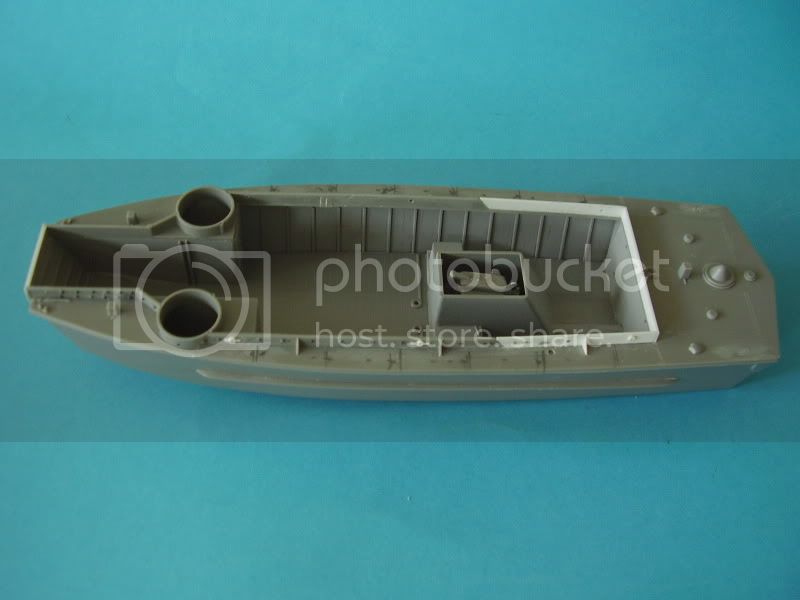
The kit is the old Momogram one the only difference I can see is this one is in grey styrene.
The kit parts are still chunky but about 7 parts puts the basic boat together so it's a quick result to see some progress.


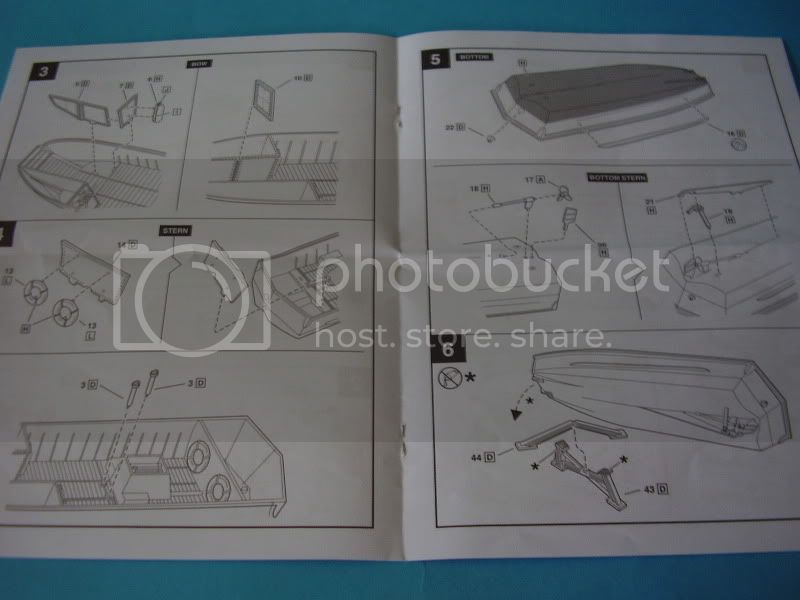
Instructions are in a nice booklet form and the kit has one set of decals

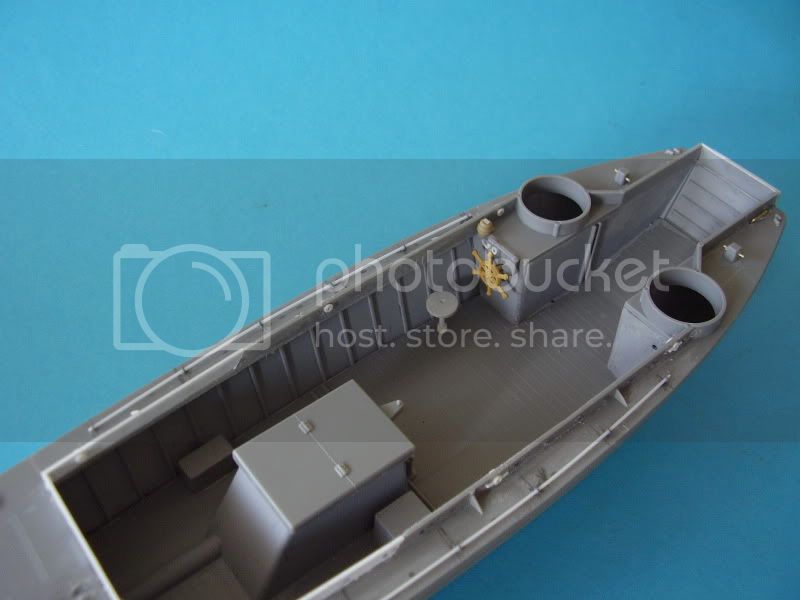
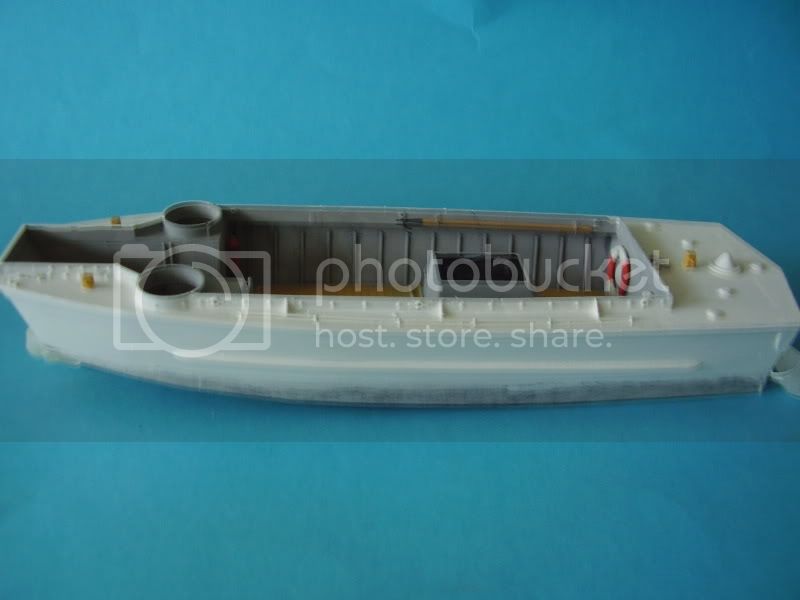
Following the example on British Pathe I have added the missing rear portion of on the upper rear deck and started to add some rivet detail. I removed the side and rear deck cleats and added some detail to the front of the ramp. On the ramp I removed the top section (that comes attached to the upper deck) and repositioned it as a separate item. As the ramp comes molded to the hull I scribed a grove down the side and across the bottom to give a more 3D effect.
I don't have any pictures of the interior but will add some dials around the wheel area and replace the fire extinguisher and probably add a compass which I can nick form the LRDG kit.


There appears to be a grab rail along the length of each side of the deck so I will attempt to add this using eye bolts and styrene.
Cheers
Al
'Action this Day'
Winston Spencer Churchill
England - East Anglia, United Kingdom
Joined: August 12, 2005
KitMaker: 14,499 posts
Model Shipwrights: 1,919 posts
Posted: Saturday, December 01, 2012 - 09:43 PM UTC
Hi folks,
A bit more progress,
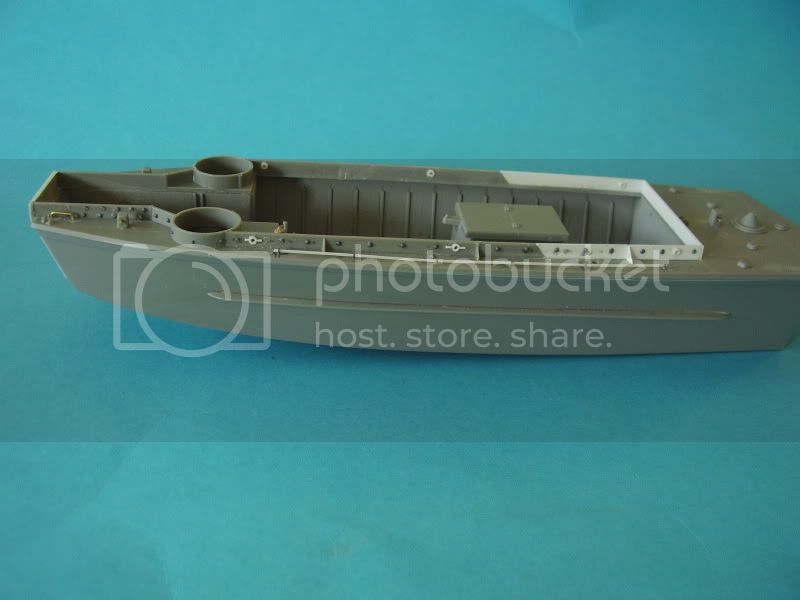
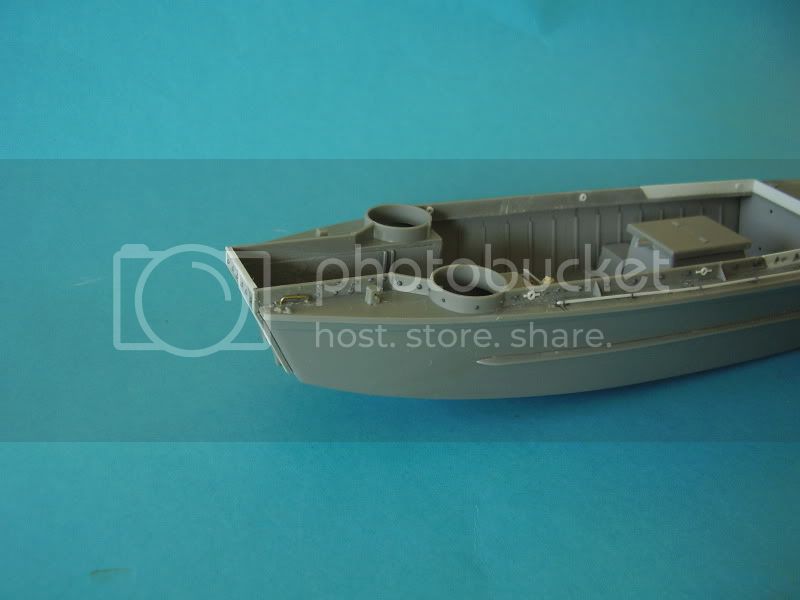
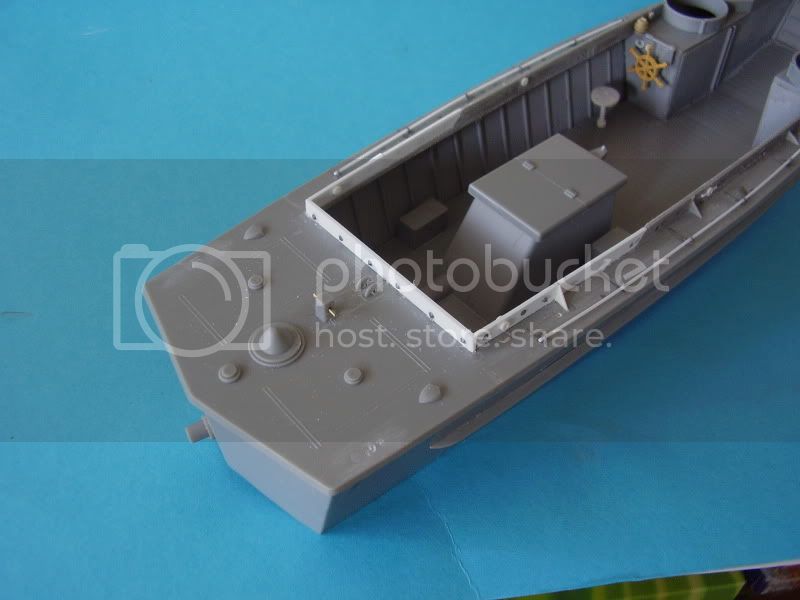
Almost finished the detail on the port side. Cut of most of the molded detail on the deck and replace it with brass rod where appropriate.
Added a little detail around the wheel area.
Still the starboard side to complete but just waiting on the arrival of some more rivets.

Cheers
Al
'Action this Day'
Winston Spencer Churchill
England - East Anglia, United Kingdom
Joined: August 12, 2005
KitMaker: 14,499 posts
Model Shipwrights: 1,919 posts
Posted: Sunday, December 02, 2012 - 01:07 AM UTC
Hi folks,
Some good footage here of the LCPL, LCV, LCA and LCM Mk 3 in pre invasion training.
http://www.britishpathe.com/video/royal-marines-training/query/marines+war+preparationAl
'Action this Day'
Winston Spencer Churchill
England - East Anglia, United Kingdom
Joined: August 12, 2005
KitMaker: 14,499 posts
Model Shipwrights: 1,919 posts
Posted: Sunday, December 02, 2012 - 10:14 PM UTC
Hi folks,
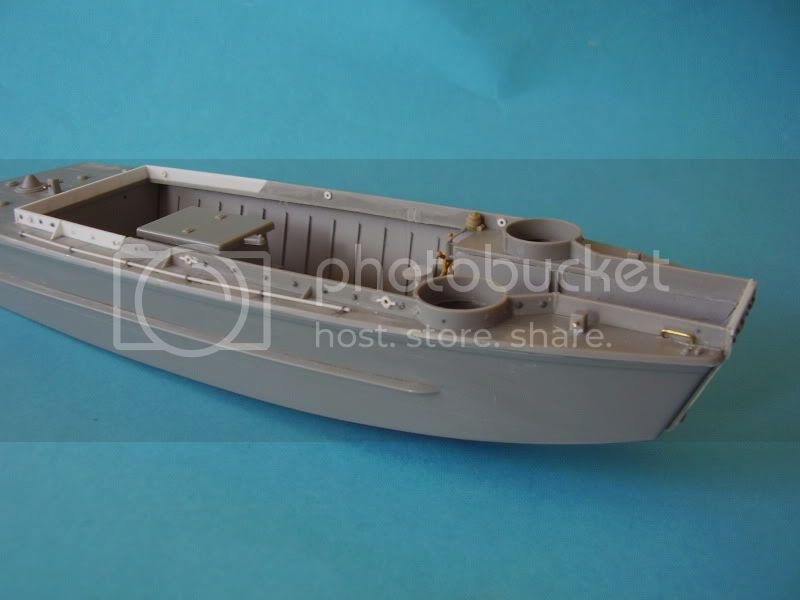
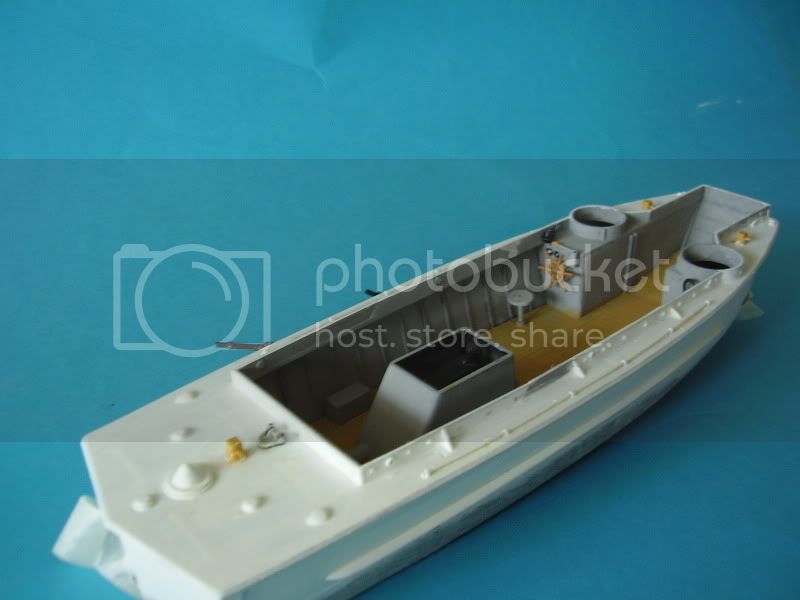
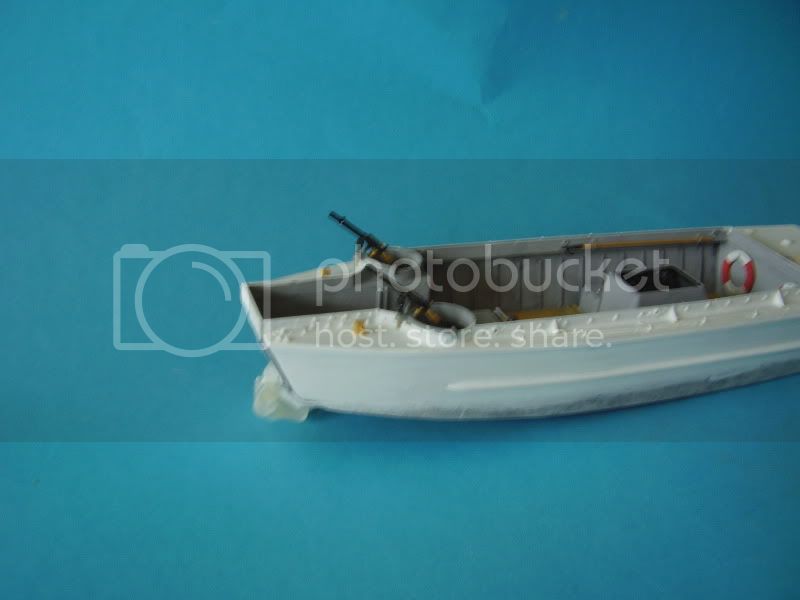
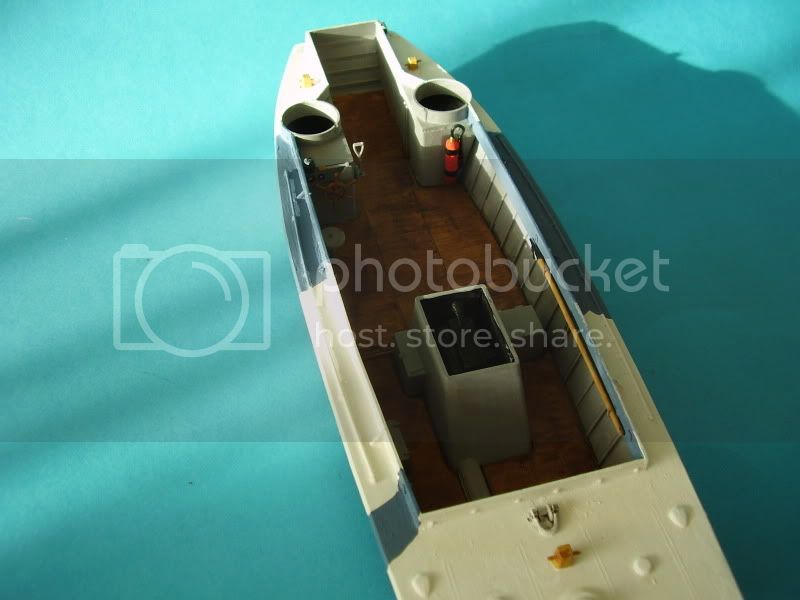
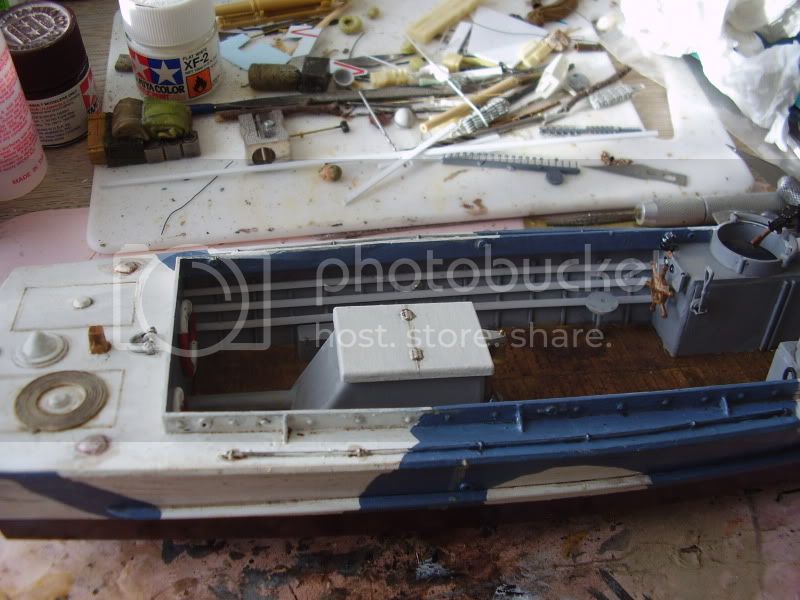
Whilst I'm waiting on some chain and more rivets I got on with adding some internal features and getting a base coat on.
I added some dials by the wheel, a boat hook on the starboard side, and the life rings. I made the fittings for these from scrap PE bent to shape. I also added a decent fire extinguisher from the U Models set and some catches and hinges on the unknown boxes in the well.
I have some filing to do around the joints of the extended boards and I though I might add a couple of Lewis Guns for fun but that's just a thought.
For the ramp fixings I've added a couple of O rings to attach the chain to and will add some half rings to the ramp and some kind of release mechanism on the starboard side.
Finish wise I though I'd go for white with a blue camo, need to find the correct 'blue' though and rather than have a grey well deck a wooden coloured option instead.
Progress so far:
Cheers
Al
'Action this Day'
Winston Spencer Churchill
New York, United States
Joined: January 21, 2008
KitMaker: 2,531 posts
Model Shipwrights: 1,244 posts
Posted: Monday, December 03, 2012 - 03:18 AM UTC
Hello Alan, It's coming along very nicely. I built one several years back as the UDT version. I didn't have a lot of references at the time, so I used a little creative license. One thing I found out afterwards is that there is a throttle lever on the right side, just forward of the the helmsman's position. It looks kind of like a shovel handle. Two of the same type of handle can be seen on an LCM.

Al

England - East Anglia, United Kingdom
Joined: August 12, 2005
KitMaker: 14,499 posts
Model Shipwrights: 1,919 posts
Posted: Monday, December 03, 2012 - 09:54 AM UTC
Thanks Al.
The British Pathe footage is the first time I've seen one up close enough to make out any details, meaning I'll have to upgrade the USN version I did at some point!
SO the throttle is on the RHS of the box?
Cheers
Al
'Action this Day'
Winston Spencer Churchill
New York, United States
Joined: January 21, 2008
KitMaker: 2,531 posts
Model Shipwrights: 1,244 posts
Posted: Monday, December 03, 2012 - 10:25 AM UTC
[Quoted text] SO the throttle is on the RHS of the box?
Cheers
Al
Yes, it is on the RHS of the portside box, just forward of the corner. There is a movie called "The Frogmen", about the UDT's. It has some good footage of an LCP(R). It's the usual Hollywood WW2 pic, but watchable.
Al
Indiana, United States
Joined: August 19, 2007
KitMaker: 2,184 posts
Model Shipwrights: 204 posts
Posted: Monday, December 03, 2012 - 02:24 PM UTC
Hey Al, coming along very nicely. Seems you're teaching the old dog new tricks.
There is no return policy on time spent
Queensland, Australia
Joined: May 20, 2010
KitMaker: 1,230 posts
Model Shipwrights: 1,212 posts
Posted: Monday, December 03, 2012 - 02:47 PM UTC
Very nice work you have done so far. Look forward to seeing some more.....Cheers Mark
If I was your Wife I would Poison your Tea
If I was your Husband, I would drink it.
England - East Anglia, United Kingdom
Joined: August 12, 2005
KitMaker: 14,499 posts
Model Shipwrights: 1,919 posts
Posted: Monday, December 03, 2012 - 11:39 PM UTC
Hi Al,Bob and Mark,
Thanks for looking in folks and the comments
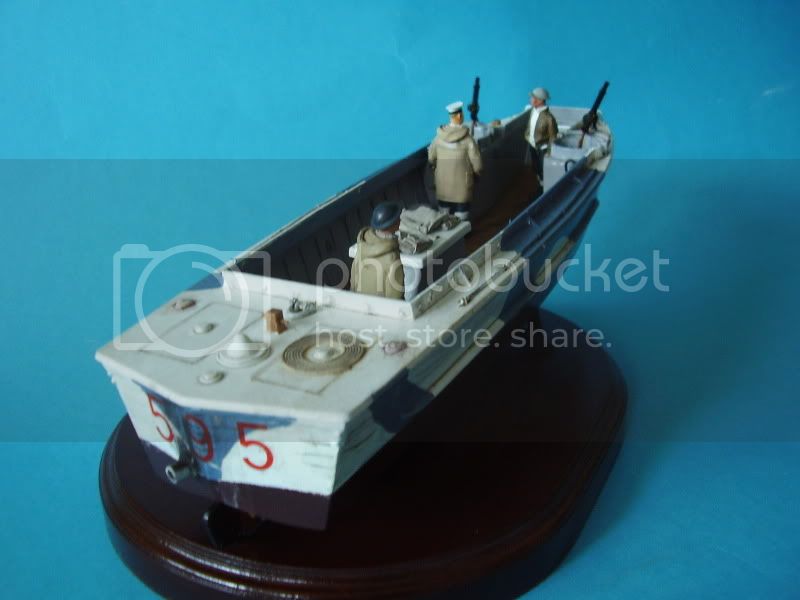
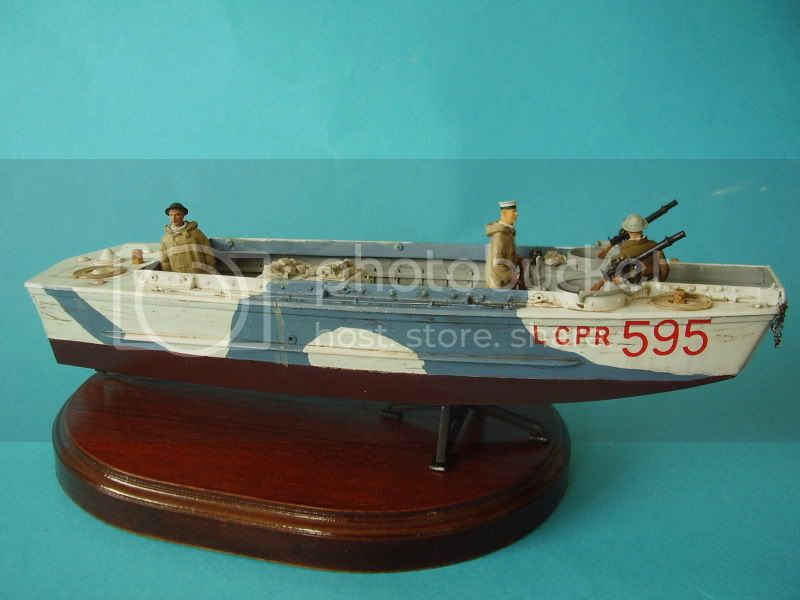
Here we are with a basic colour scheme on, some decals added. You'll notice the L and 5 on the real boat are off set. I didn't try and copy this as my 5 wasn't a good fit for the area so I had to nudge everything forward. I also added the throttle Al mentioned in the post above.
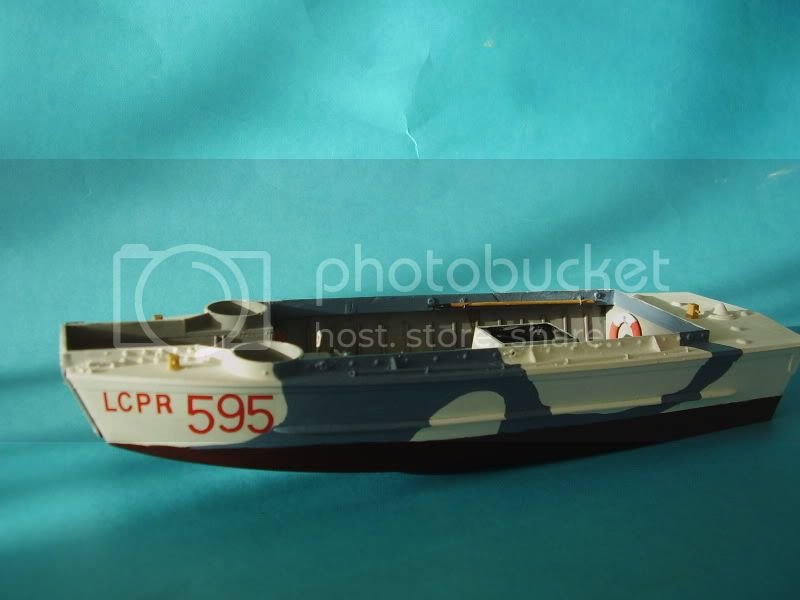
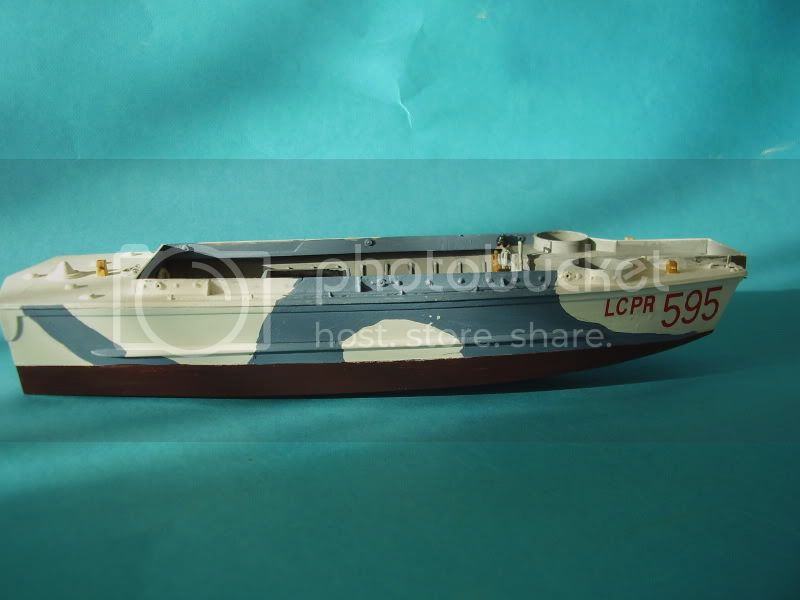


The chain and rivets arrived this morning so I can finish off the missing detail and then start work on the ramp arrangement.
Cheers
Al
'Action this Day'
Winston Spencer Churchill
England - East Anglia, United Kingdom
Joined: August 12, 2005
KitMaker: 14,499 posts
Model Shipwrights: 1,919 posts
Posted: Tuesday, December 04, 2012 - 10:32 PM UTC
Hi folks,
Well I reset the decals to be more in keeping with the picture, added the chain to the front of the ramp and some of the missing rivets on the starboard side. Started a little weathering.


In this picture it looks to me like there is a bilge hole about half way down the lower hull, which would make sense. What I then noticed was that unlike the kit these early boats don't seem to have the support brackets (blobs) present on the aft end of the boat! Does anyone agree or is it just my eyes. I hadn't noticed that before so may need to do a little more surgery if I'm right.

Cheers
Al
'Action this Day'
Winston Spencer Churchill
New York, United States
Joined: January 21, 2008
KitMaker: 2,531 posts
Model Shipwrights: 1,244 posts
Posted: Wednesday, December 05, 2012 - 04:20 AM UTC
What I then noticed was that unlike the kit these early boats don't seem to have the support brackets (blobs) present on the aft end of the boat! [Quoted text]
Hello Alan, I'm not sure exactly what you're referring to? If you mean that flat piece on the side of the boat, right at the stern, that curves aft, then it is barely visible in the photo, partly obscured by the printed lettering. Love the color scheme by the way, much prettier than the American boats.
Al
England - East Anglia, United Kingdom
Joined: August 12, 2005
KitMaker: 14,499 posts
Model Shipwrights: 1,919 posts
Posted: Wednesday, December 05, 2012 - 09:00 AM UTC
Yes,
too late lol.
Al
Edit, Looking at the picture Al, it would appear to me that the corner supports are much smaller that the kit ones. What do you think. I've already filed them off but could adda smal version if you think they are actually there?
Cheers
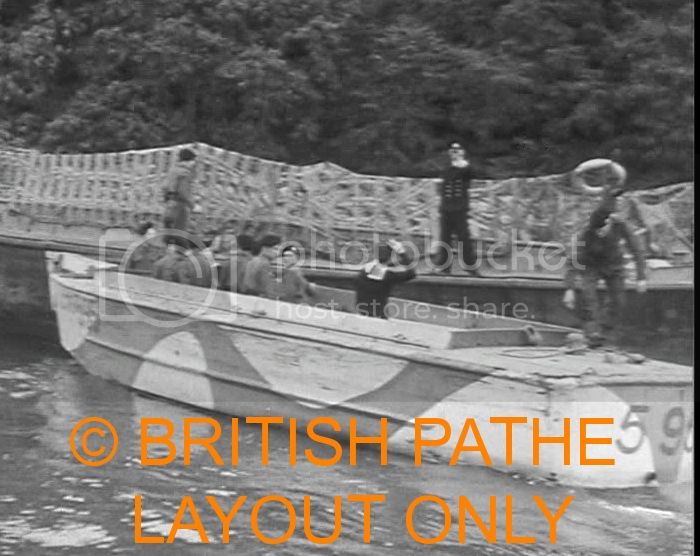
Al
Here is another pic from the same footage that is a little clearer.
'Action this Day'
Winston Spencer Churchill
England - East Anglia, United Kingdom
Joined: August 12, 2005
KitMaker: 14,499 posts
Model Shipwrights: 1,919 posts
Posted: Friday, December 07, 2012 - 03:57 AM UTC
Hi folks,
Another general ship question. The boat has no horizontal ribs, to do think this is correct?
Cheers
Al
'Action this Day'
Winston Spencer Churchill
New York, United States
Joined: January 21, 2008
KitMaker: 2,531 posts
Model Shipwrights: 1,244 posts
Posted: Friday, December 07, 2012 - 06:33 AM UTC
Edit, Looking at the picture Al, it would appear to me that the corner supports are much smaller that the kit ones. What do you think. I've already filed them off but could adda smal version if you think they are actually there? [Quoted text]
Alan, I think they are there, but not as thick as the kit portrays them. It seemed clearer to me in the original photo.
Al
England - East Anglia, United Kingdom
Joined: August 12, 2005
KitMaker: 14,499 posts
Model Shipwrights: 1,919 posts
Posted: Friday, December 07, 2012 - 07:24 AM UTC
Thanks Al,
Another job to do lol.
Alan
'Action this Day'
Winston Spencer Churchill
United Kingdom
Joined: June 09, 2012
KitMaker: 7 posts
Model Shipwrights: 6 posts
Posted: Friday, December 07, 2012 - 12:35 PM UTC
Hello Alan,
Had a look at a few photos I have of RN LCP(R) and there are no Blobs on the stern area in any of them.
The Coxswains seat is not shown in any of them either.
There are three horizontal boards that are on the frames running from bow to stern. They start about 12 inches down and appear to be about 4 inches wide. Spacing between each board looks to be 2 or 3 inches.
Always good to see another LC model.
Regards
Danny
England - East Anglia, United Kingdom
Joined: August 12, 2005
KitMaker: 14,499 posts
Model Shipwrights: 1,919 posts
Posted: Friday, December 07, 2012 - 08:54 PM UTC
Hi Danny,
PM on route.
Many thanks, that more or less confirms what I was thinking. The boards should be reasonably easy to add. The coxswains seat is an add on to cover a hole in the kit floor, so a field mod lol. I think I covered the last one with a box.
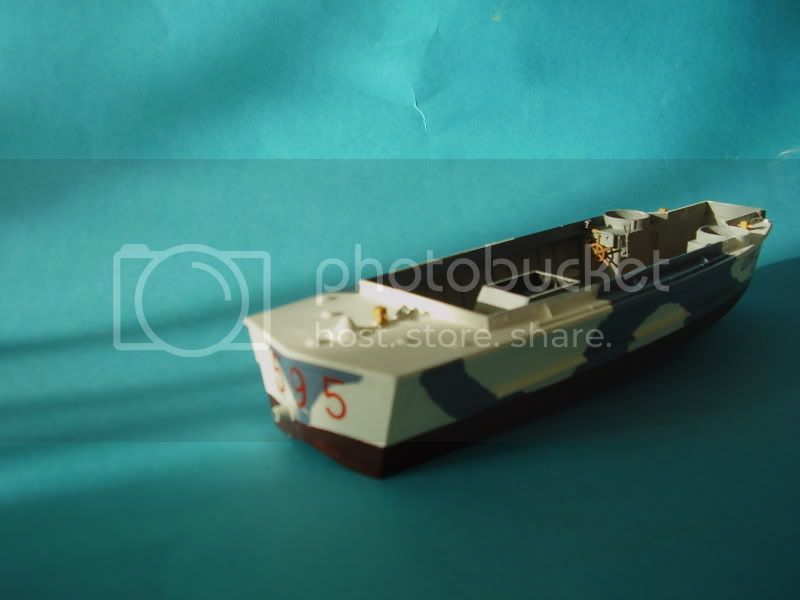
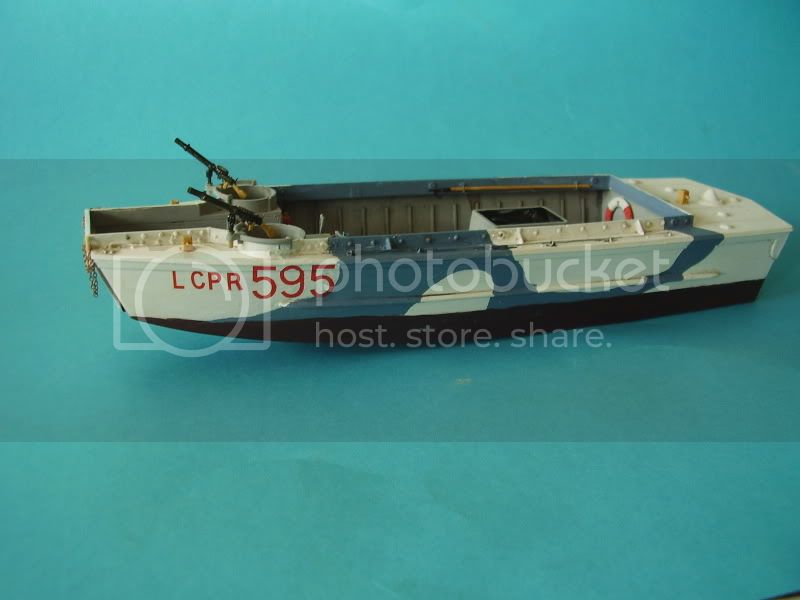
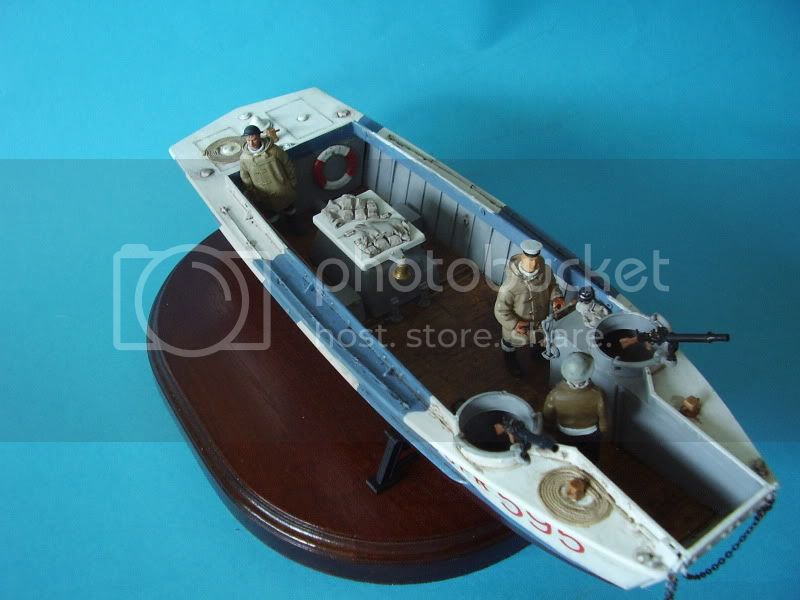
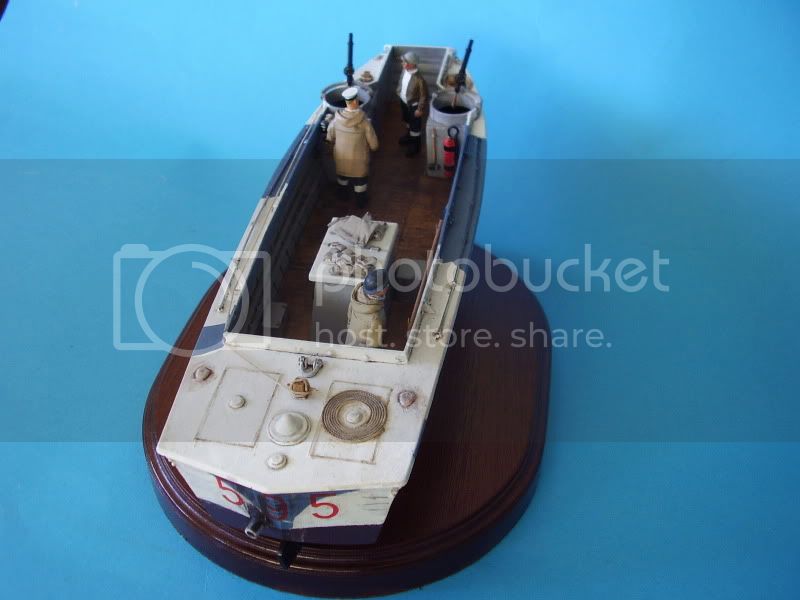
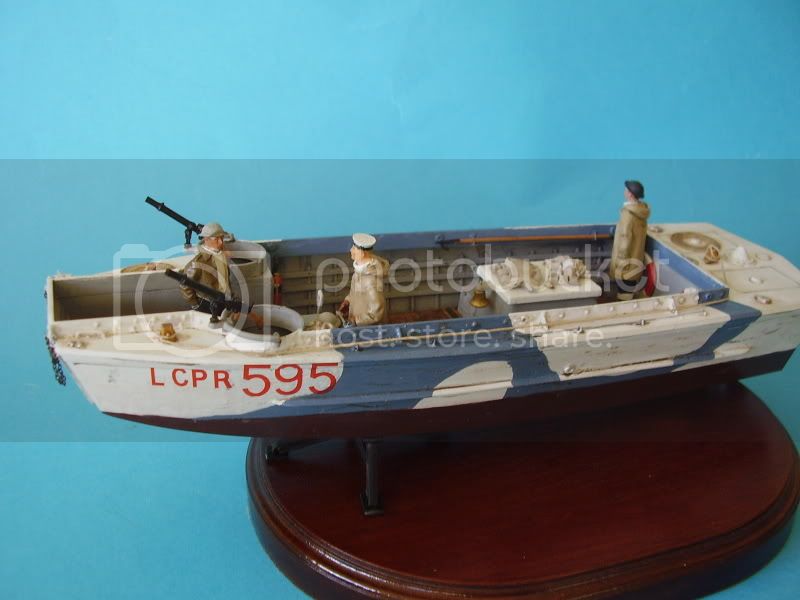
Here she is with a few crew on board and most of the work done. Working on ALs last post I had added a very small corner bracket on the stern/sides, but they can be removed as necessary.
Cheers
Al
'Action this Day'
Winston Spencer Churchill
England - East Anglia, United Kingdom
Joined: August 12, 2005
KitMaker: 14,499 posts
Model Shipwrights: 1,919 posts
Posted: Friday, December 07, 2012 - 10:49 PM UTC
Hi folks,
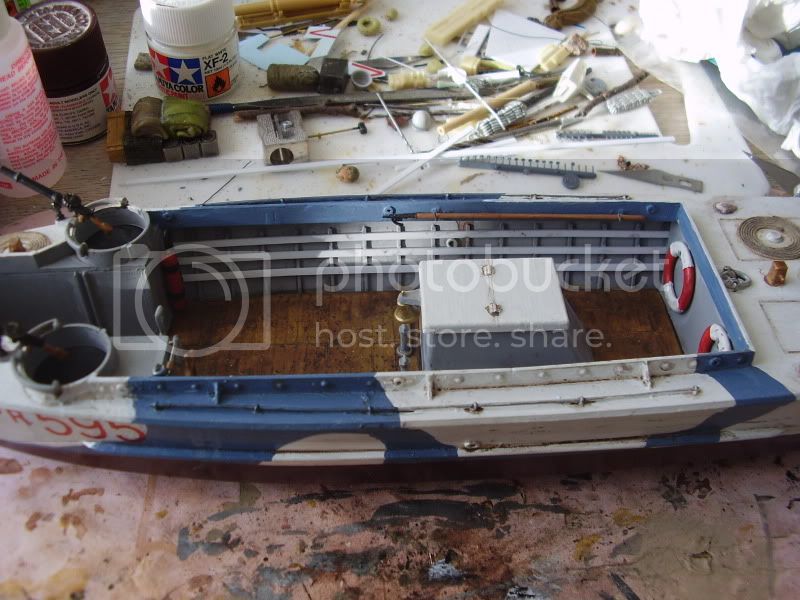
Based on Danny's last post and the Mk 1 eyeball I've added the missing horizontals. Hope they are reasonably close to what is required. Part of what determined where I put them was the drain hole I had previously added on either side.
Cheers
Al
'Action this Day'
Winston Spencer Churchill
England - East Anglia, United Kingdom
Joined: August 12, 2005
KitMaker: 14,499 posts
Model Shipwrights: 1,919 posts
Posted: Saturday, December 08, 2012 - 01:00 AM UTC
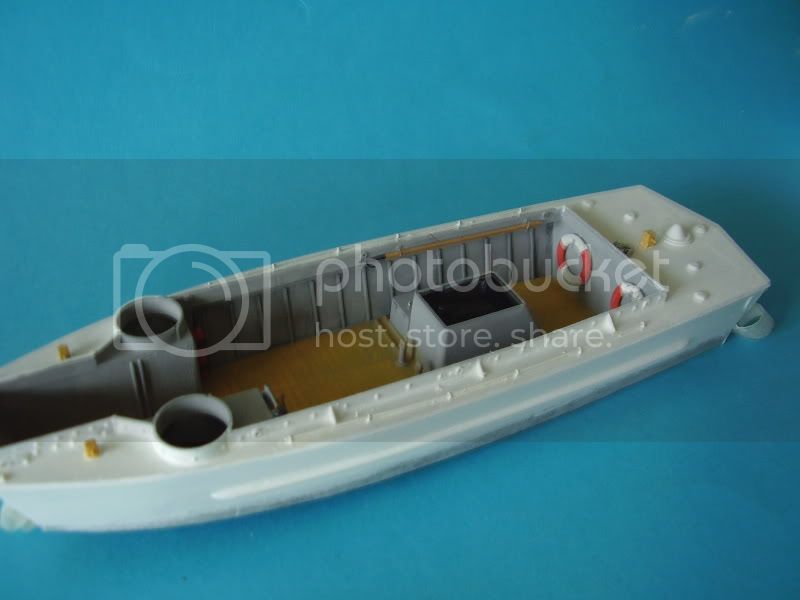
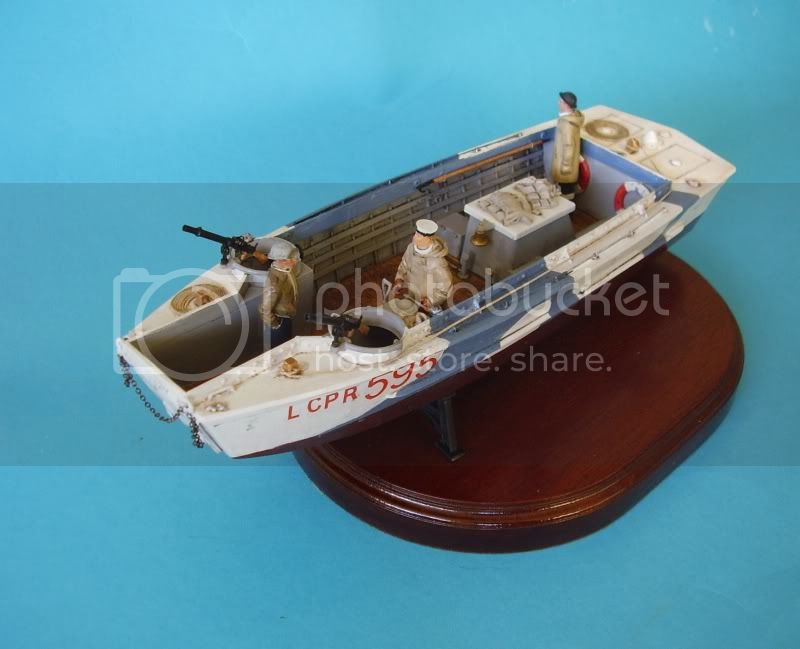
Added a small catch to the ramp and weathered in the additional boards.
Does anyone know if these boats were steel or wood construction?
The horizontals give opportunity for 'hanging' a few things
So I'll have to think on that and whether or not to add any kind of load be it people or equipment.

Thanks all
Al
'Action this Day'
Winston Spencer Churchill
England - East Anglia, United Kingdom
Joined: August 12, 2005
KitMaker: 14,499 posts
Model Shipwrights: 1,919 posts
Posted: Saturday, December 08, 2012 - 02:50 AM UTC
Hi folks,
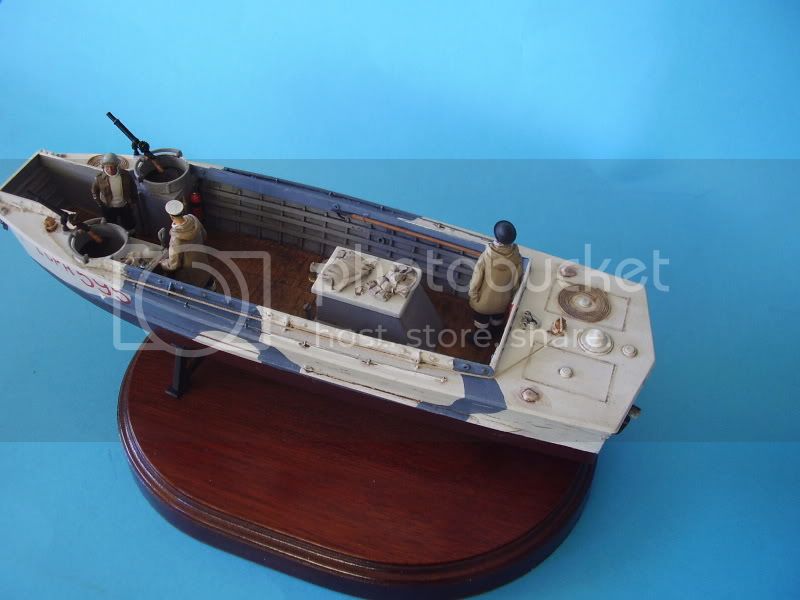
This was a fun build, I picked up some more useful information about the boat, which probably means an upgrade of the original effort at some point but for now I'm calling this one done.
Added a helmet for the coxswain, some rope on the port side and a sledge hammer as additional equipment.


Cheers
Al
'Action this Day'
Winston Spencer Churchill


