_GOTOBOTTOM
Ships by Class/Type
For discussions on ships by class and type.
LCS-2 USS Independence 1/350 Trumpeter
flugwuzzi
Visit this Community
Lower Austria, Austria
Joined: November 02, 2007
KitMaker: 633 posts
Model Shipwrights: 23 posts
Posted: Sunday, December 16, 2012 - 05:12 AM UTC
Hi folks!

I hope my build blog is right here - I could't find a category for LCS ;-)
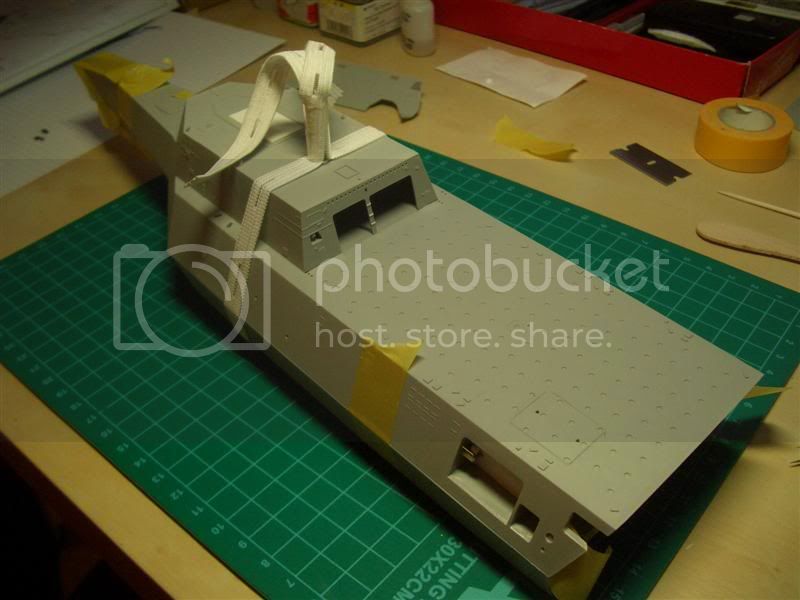
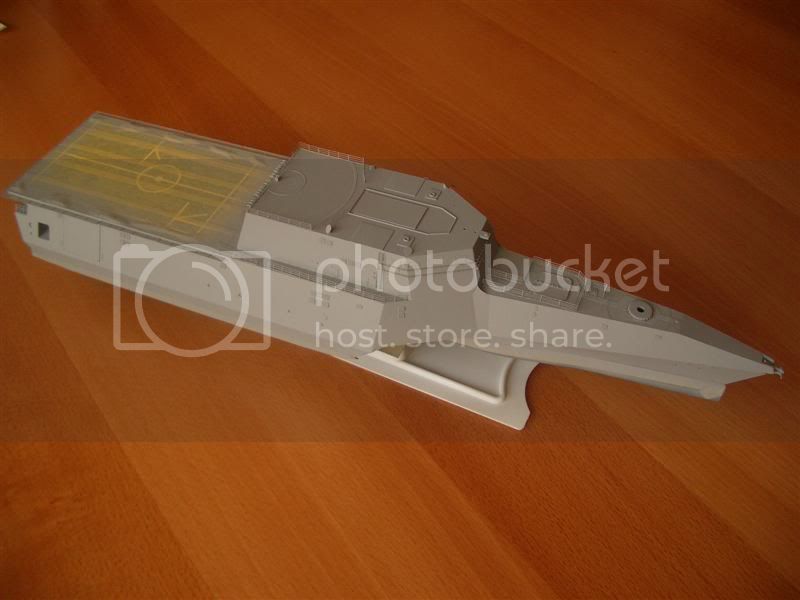
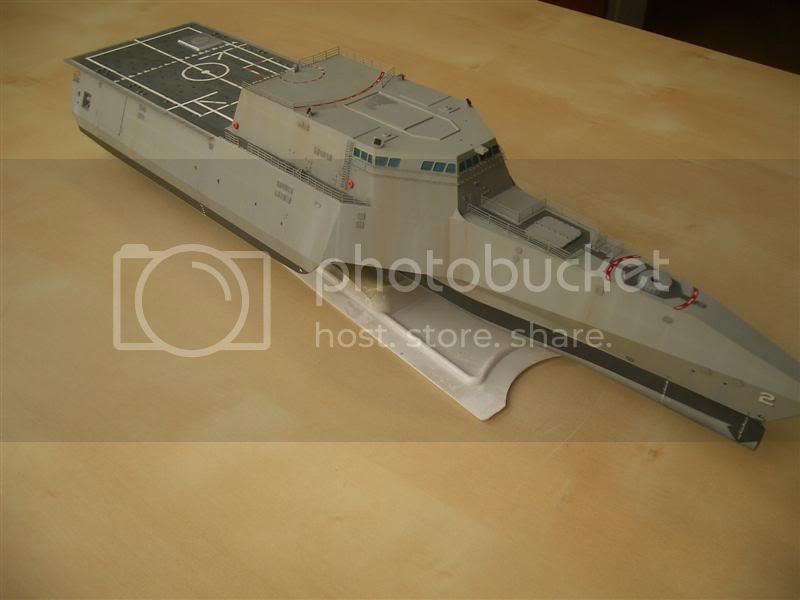
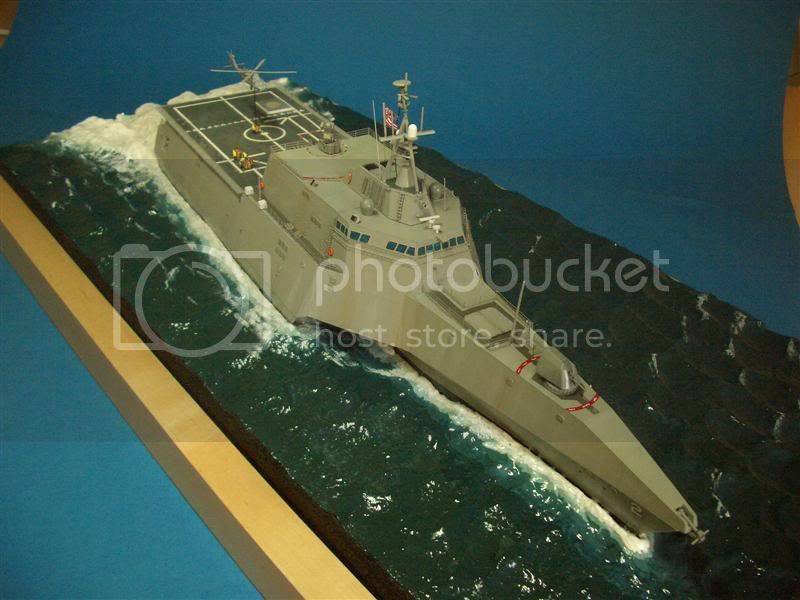
Normally I like to build tank models in 1/35. But when I saw pictures and a promo clip of the LCS-2 USS Independence on youtube http://www.youtube.com/watch?v=guAsACGgOqk&feature=player_embedded .. I was hooked.
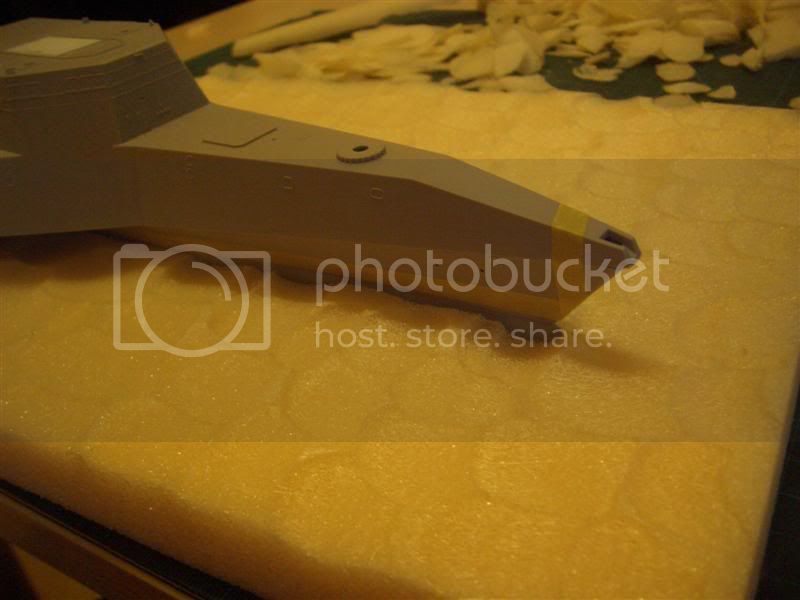
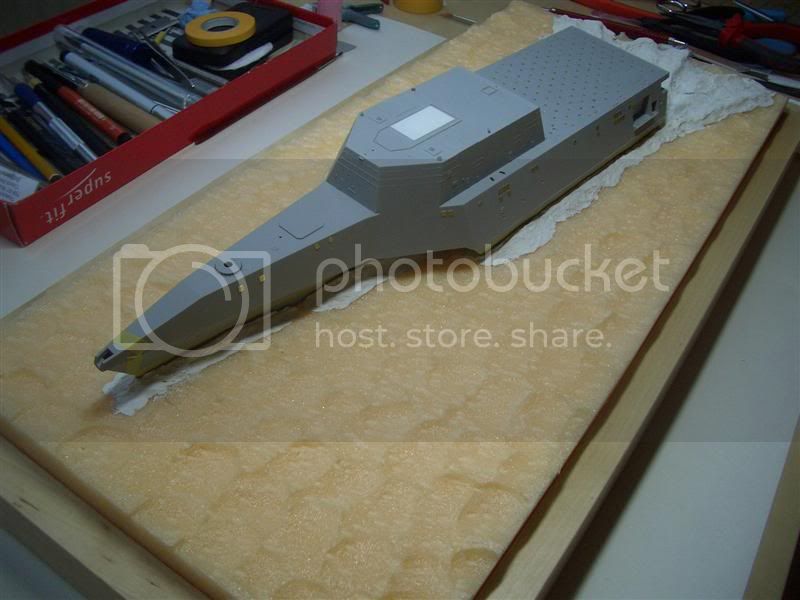
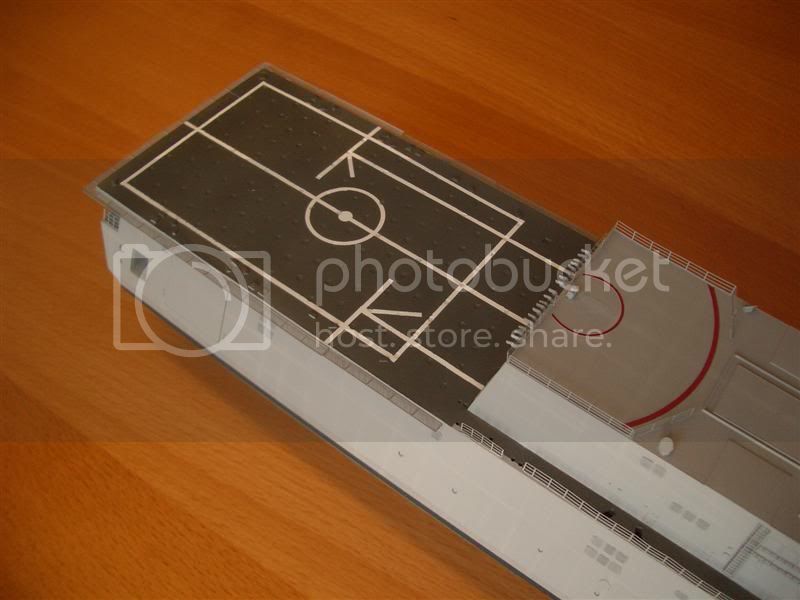
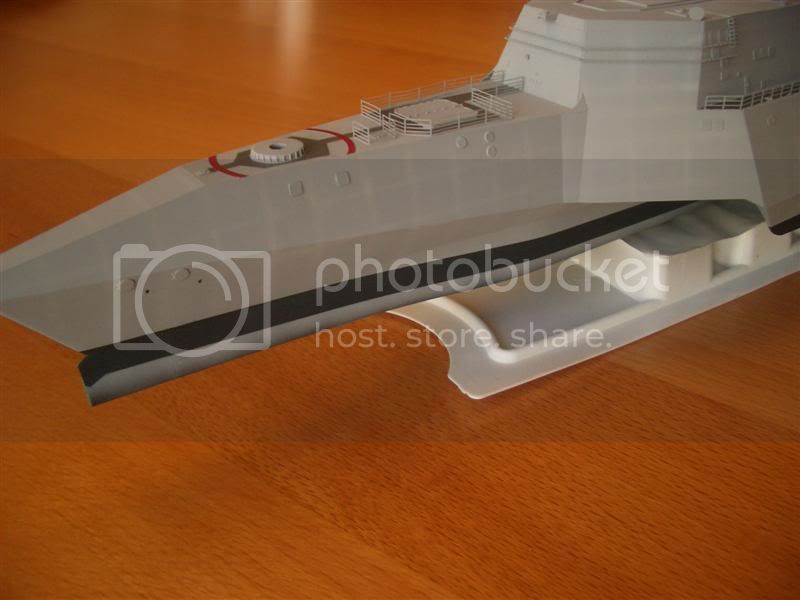
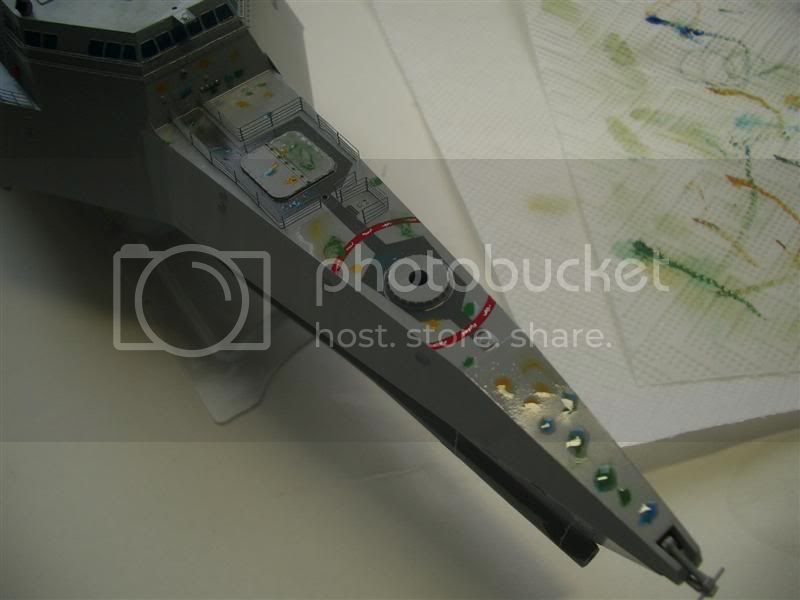
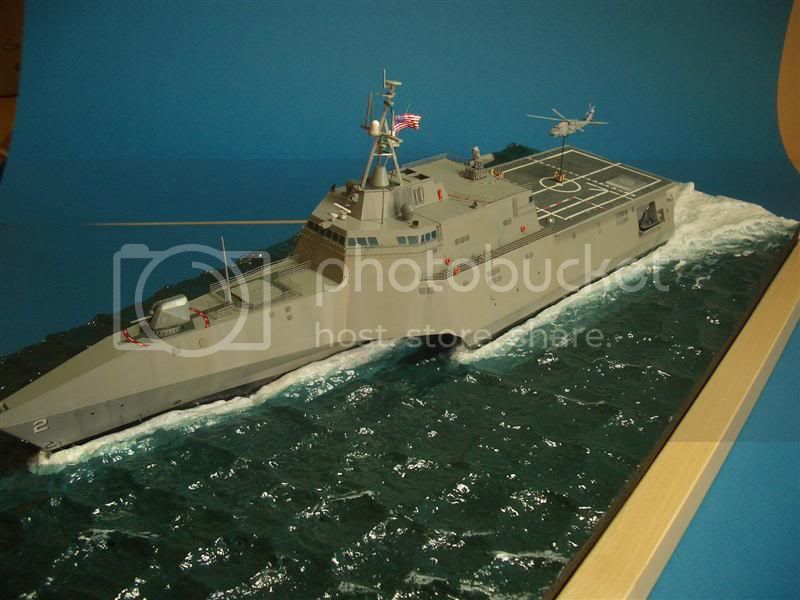
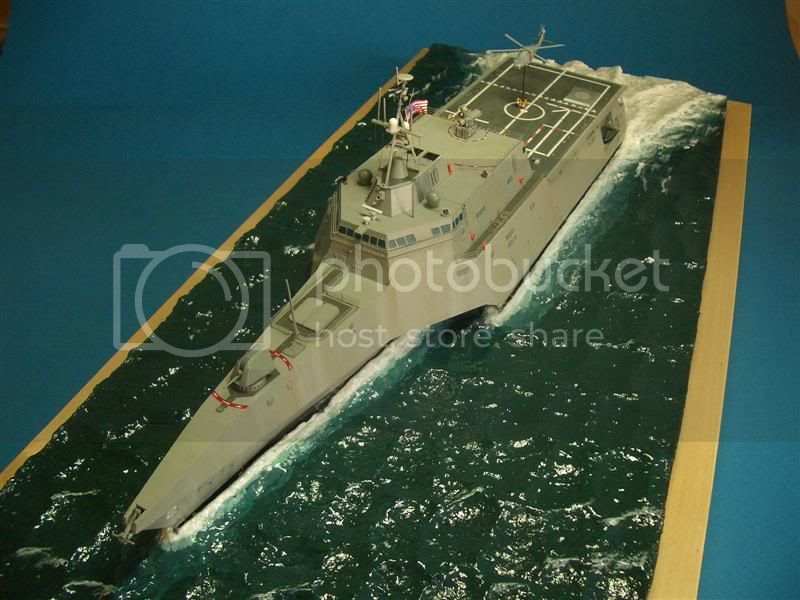
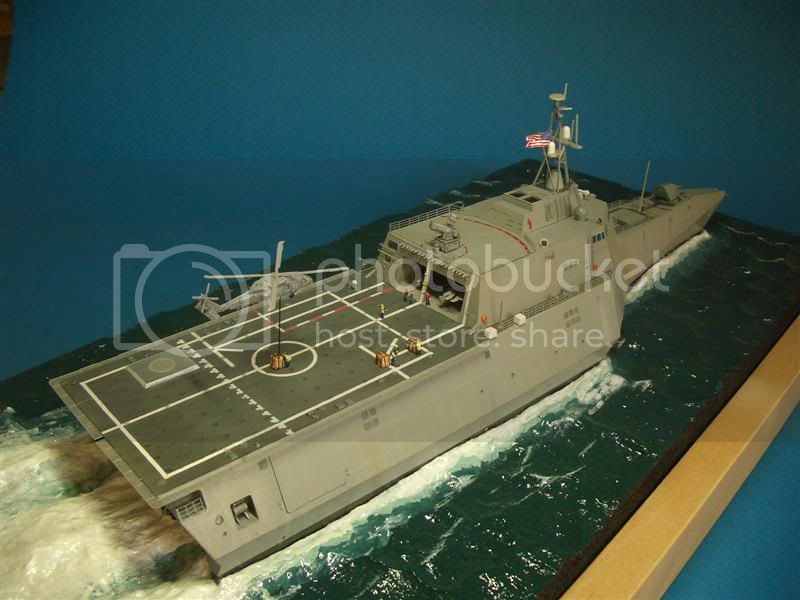
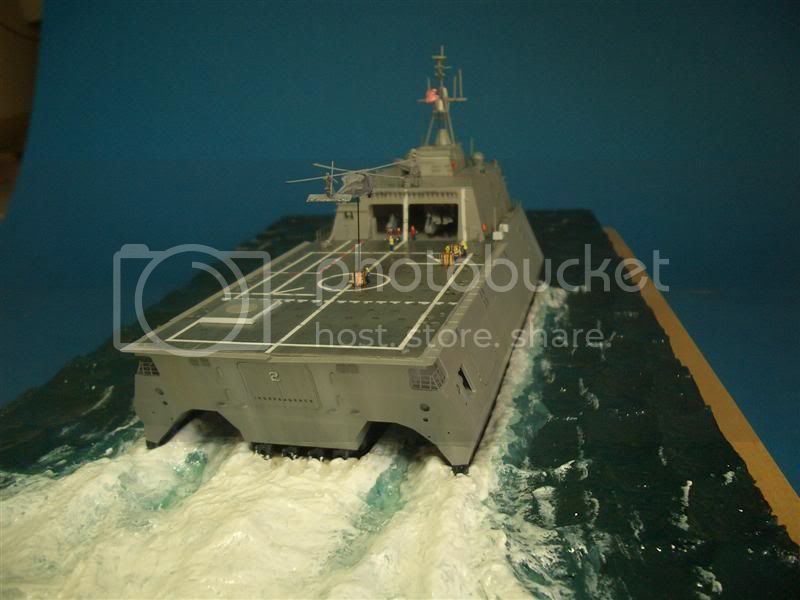
I really like the modern and clean design of this trimaran

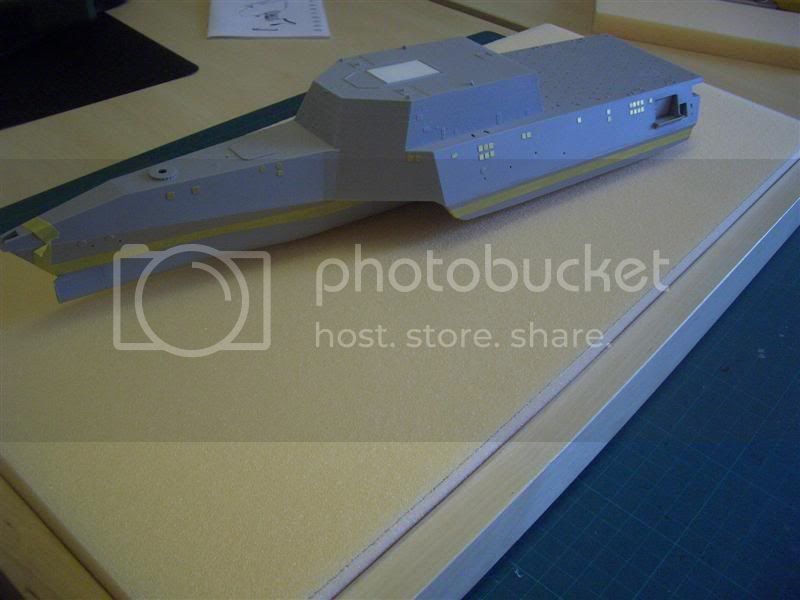
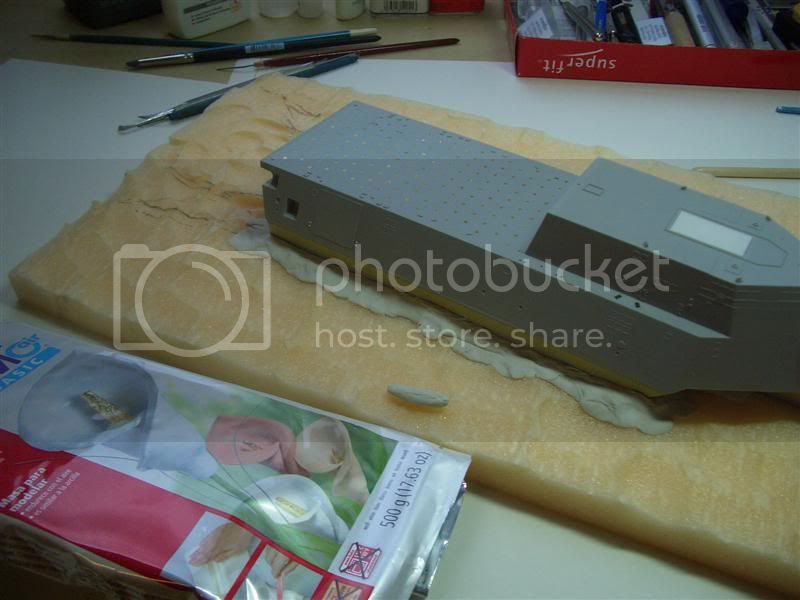
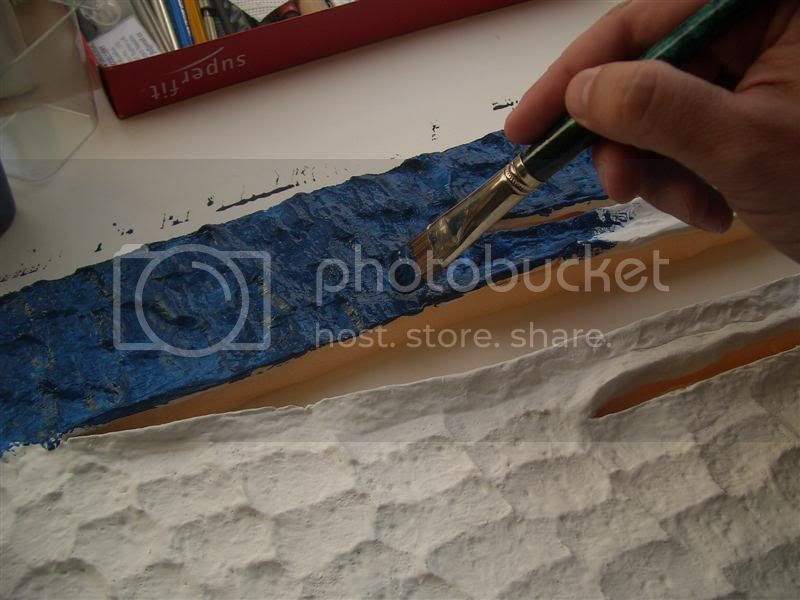
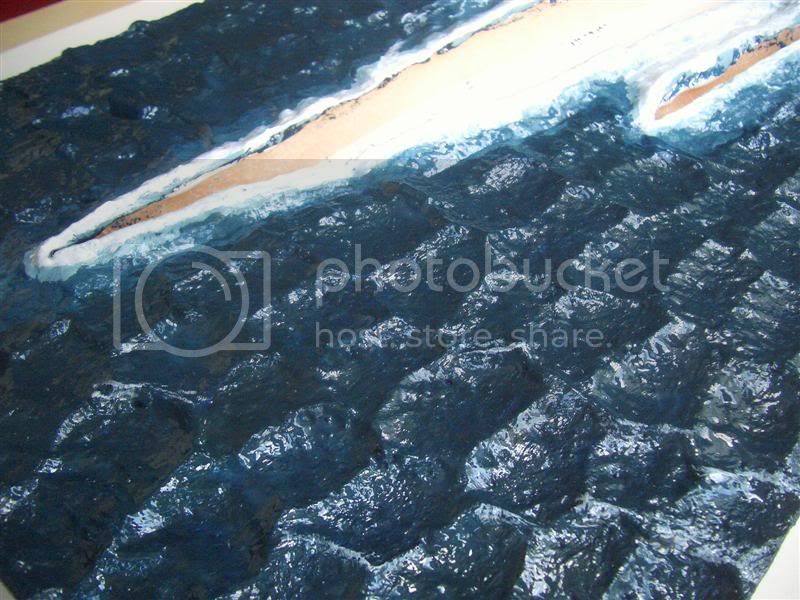
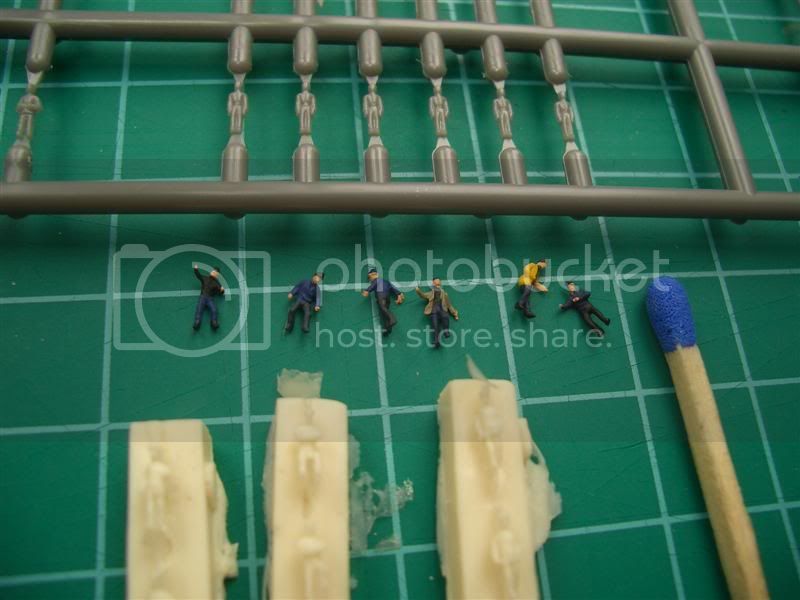
So I ordered the Trumpeter Kit, PE-Railings from Gold Medal Models and Figures from Preiser and L'arsenal. I also want to display the ship in some "water".


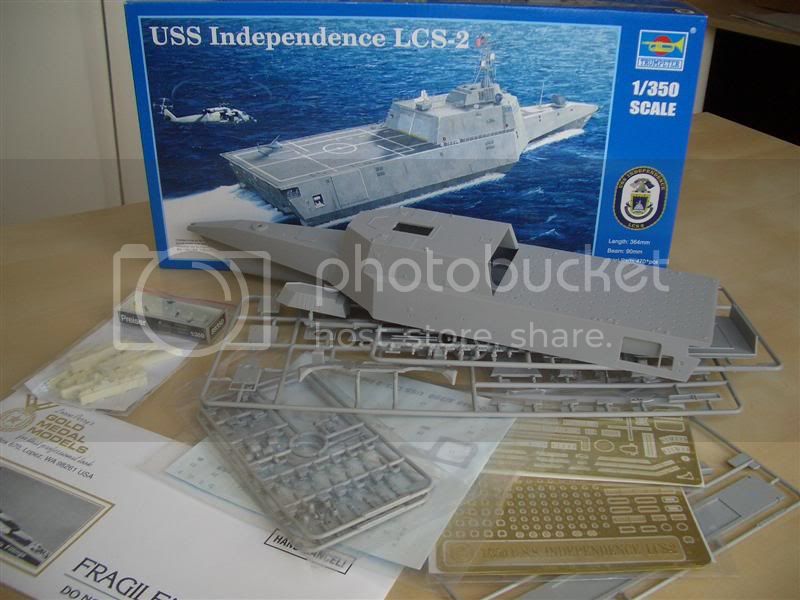
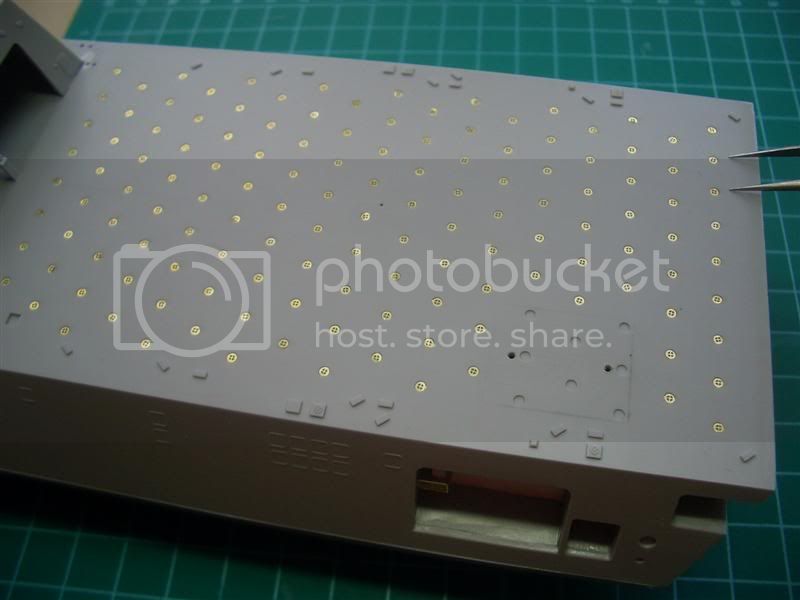
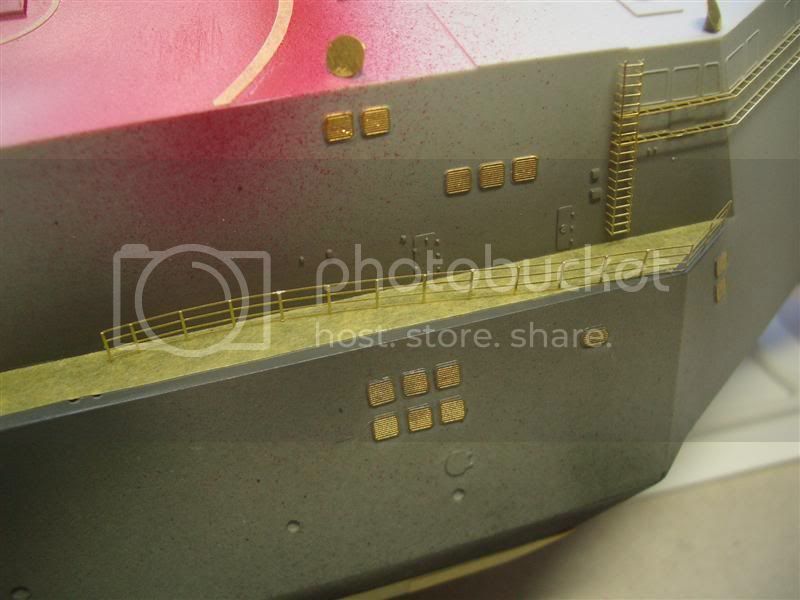
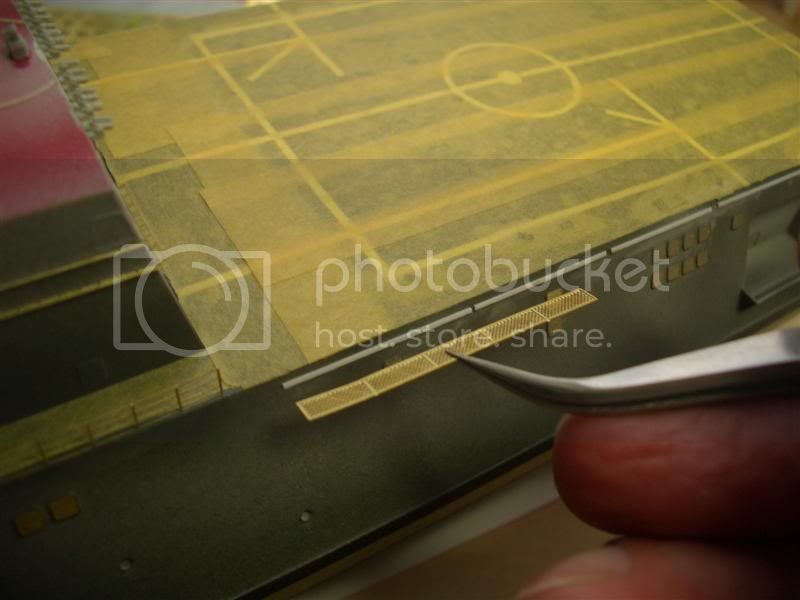
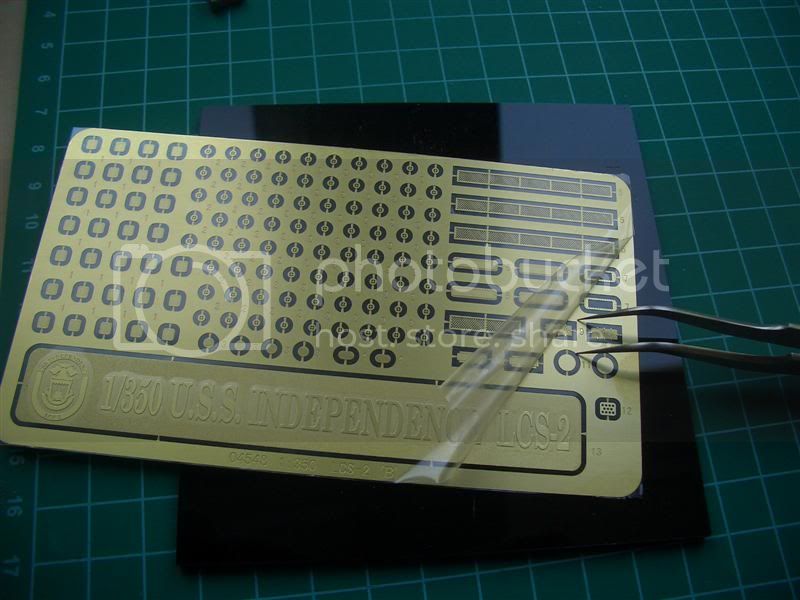
Lots of PE parts comes with the Trumpeter-Kit. But there are no plastic parts instead of them, in case you don't like to work with photo etched parts. So you must go with the tiny PE parts.


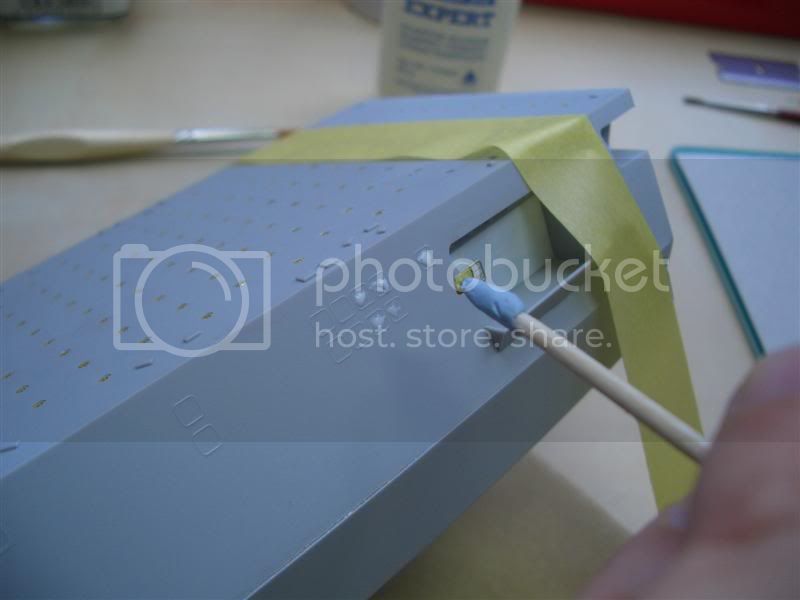
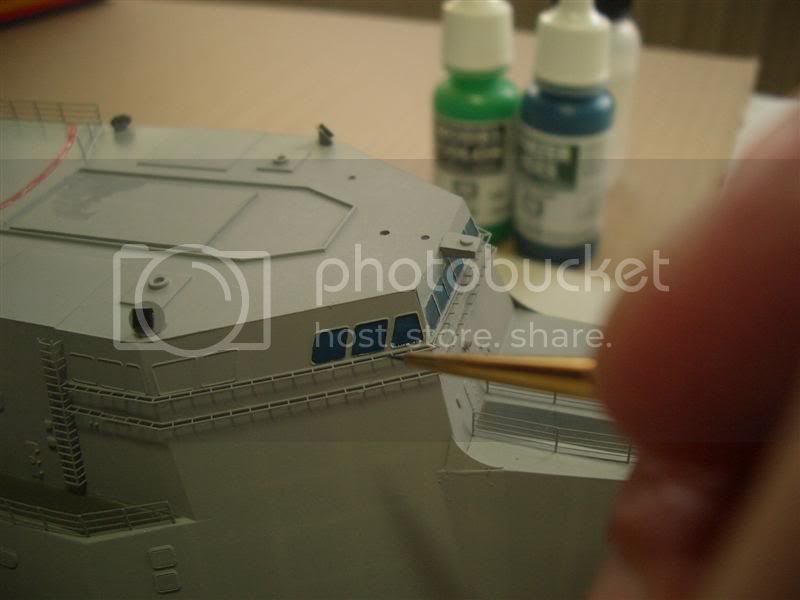
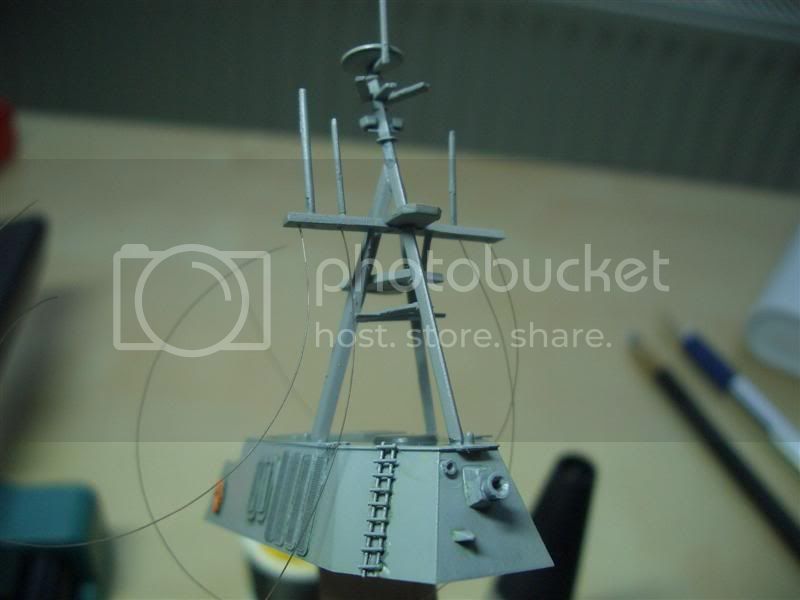
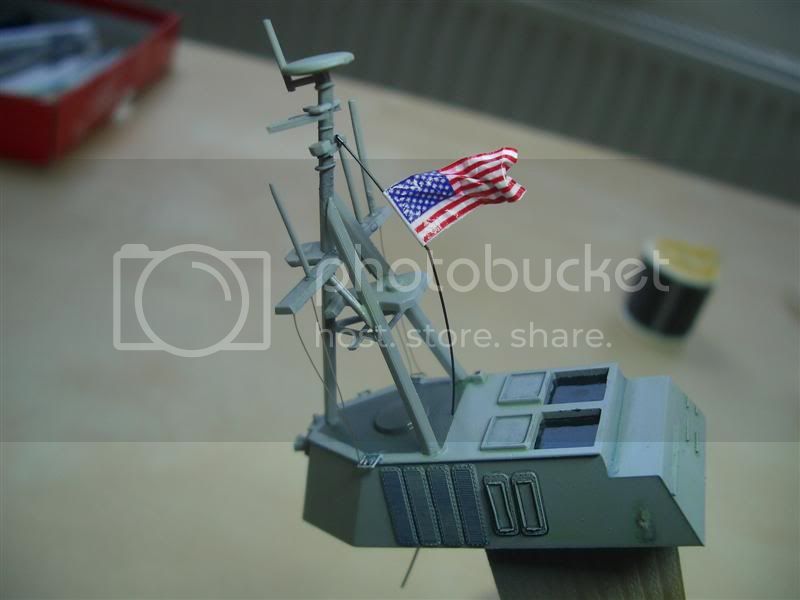
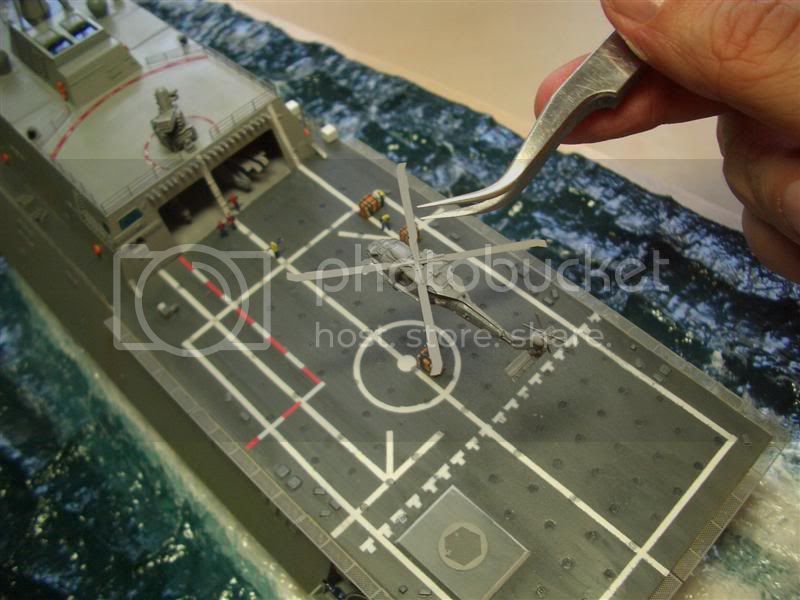
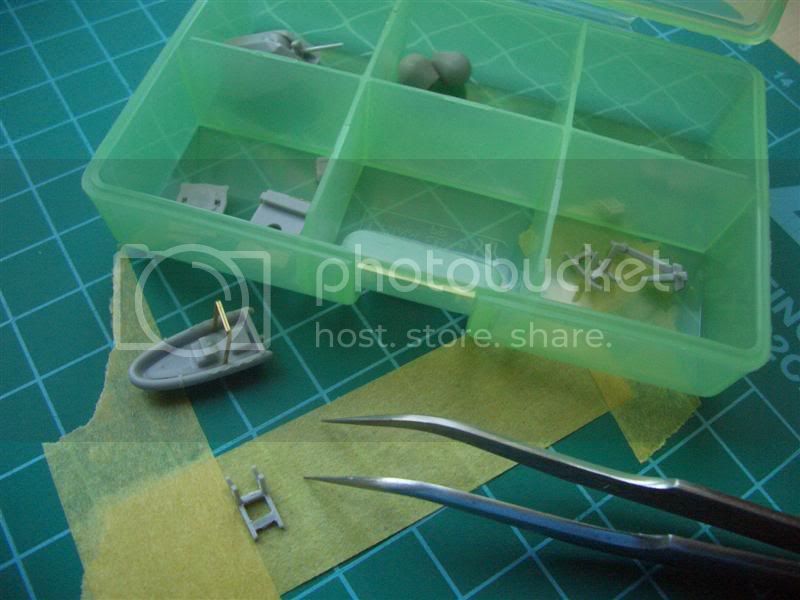
Most important tools for the fine parts are a good pair of tweezers, sharp xacto blades, good files, toothpicks and blue-tac. I started using them on the mast.


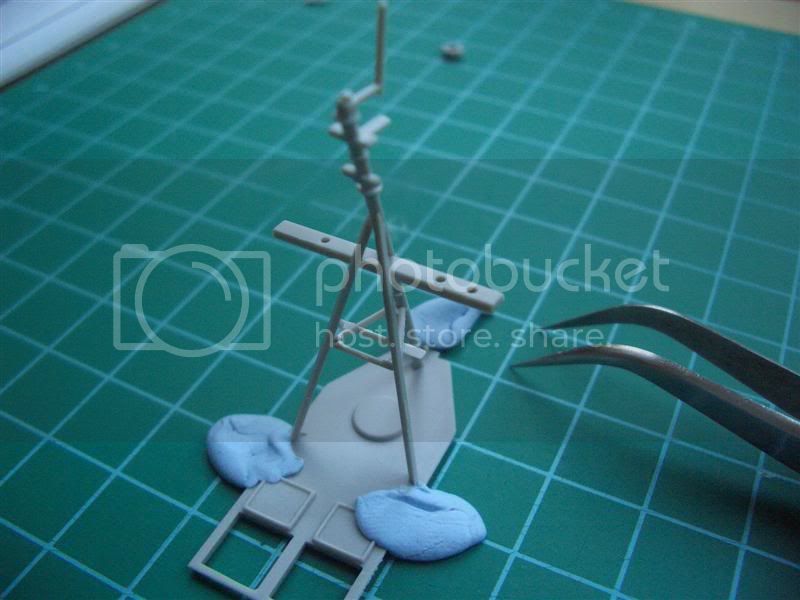
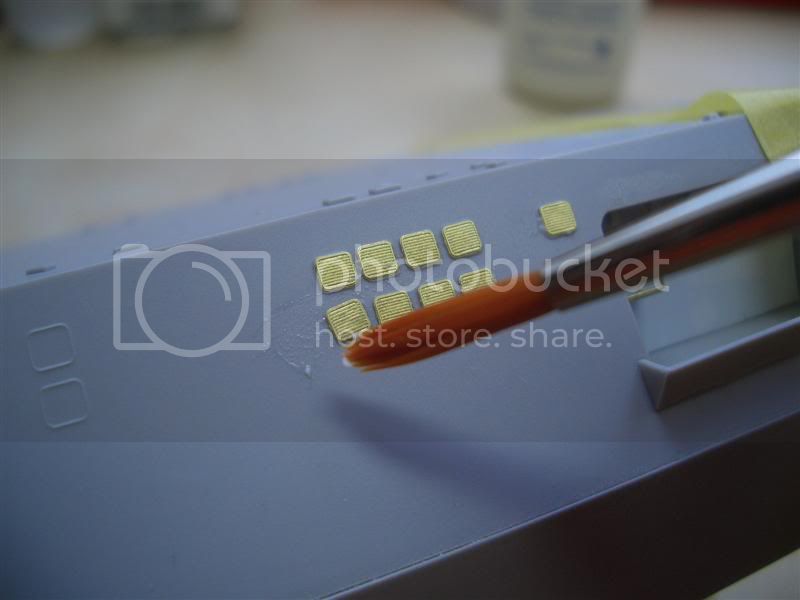
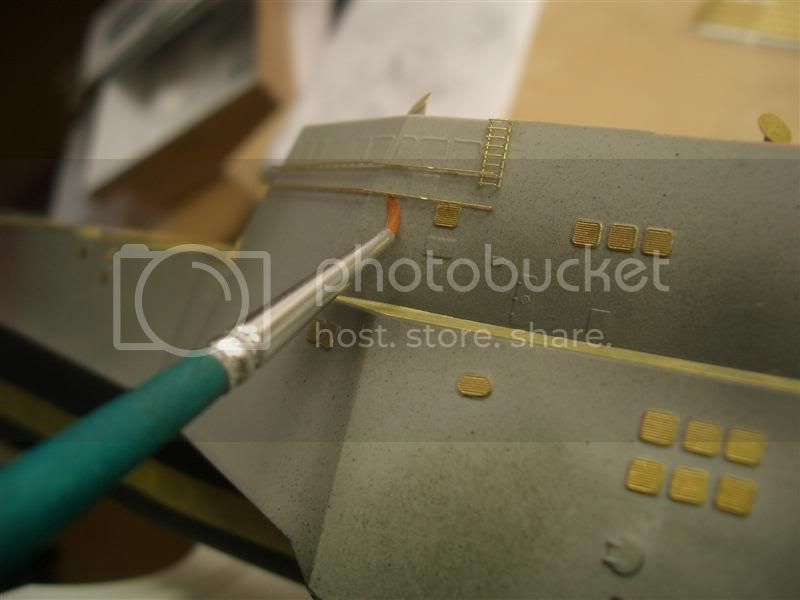
First I startd gluing pe-parts with cyanoacrylat glue but later I switched to wood-glue, so I had more time for positioning the parts correct. The bond is strong enough for such small pe-parts.


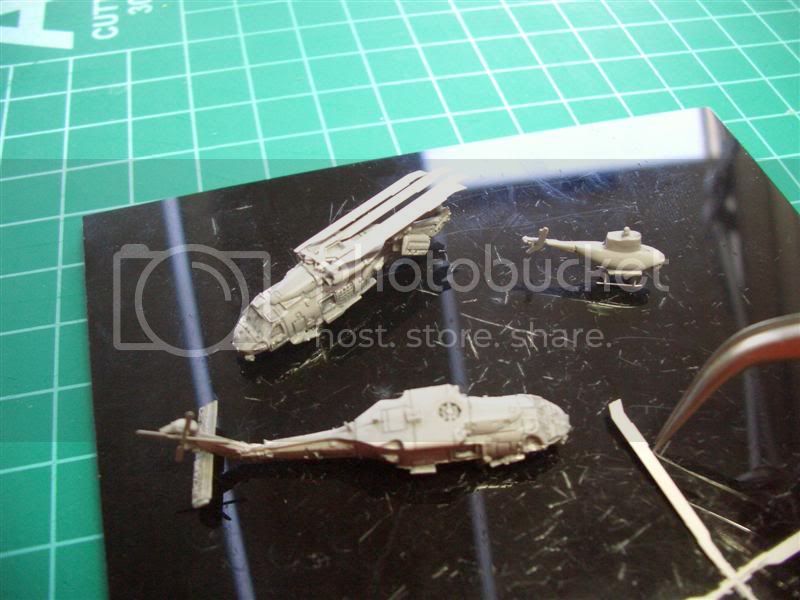
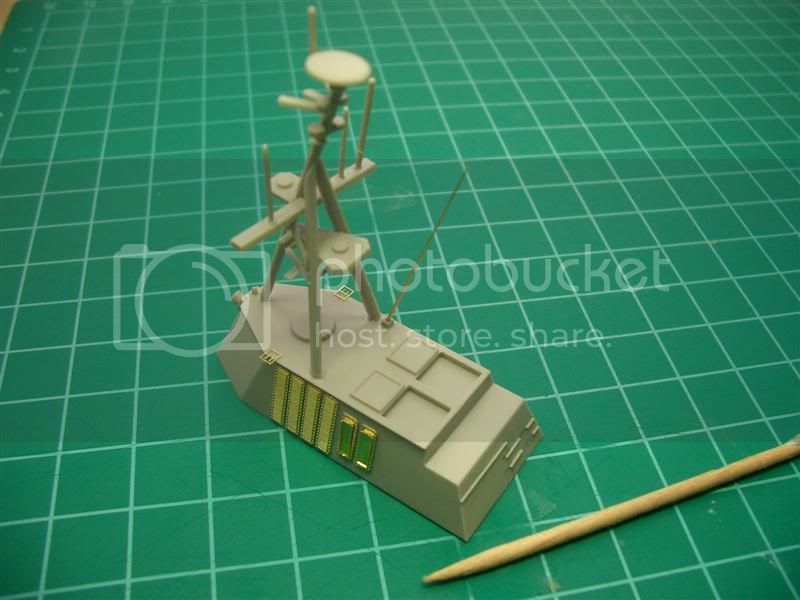
Some parts are very delicious - of course I broke two antennas and I replaced them with some leftover brass-antennas from tank-modelling (Manufacturer is BMK, Article: 1,4m Stabantenne german). I also used 2 belt-buckles for rigging attachment points ;-)


Very important for happy modelling is safe storage of small parts - I use old pill-boxes for that.


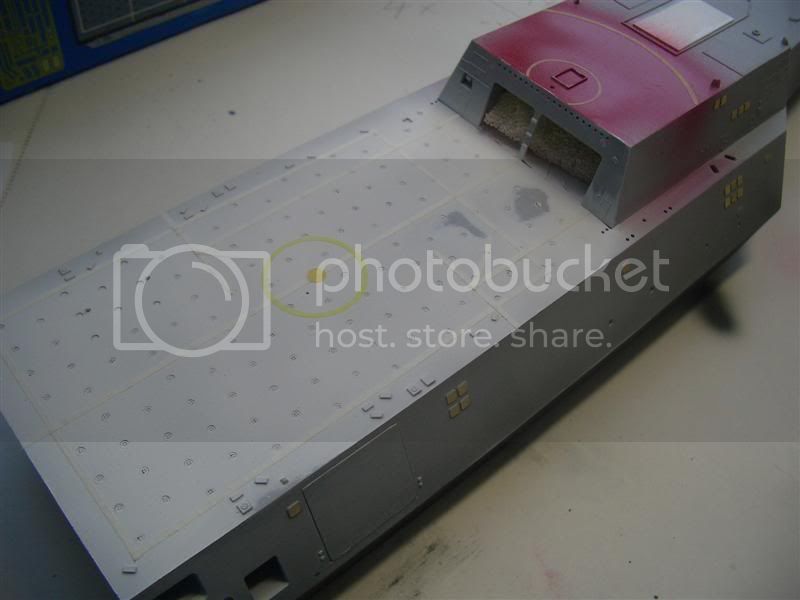
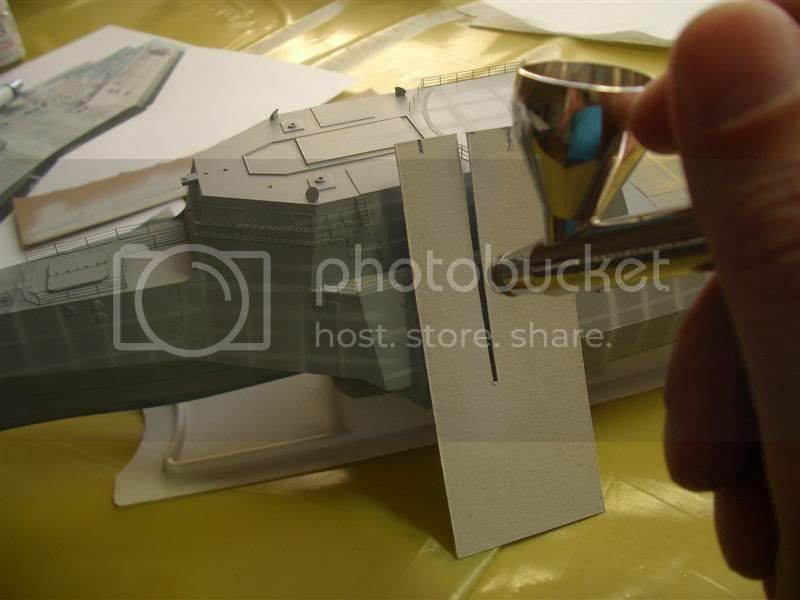
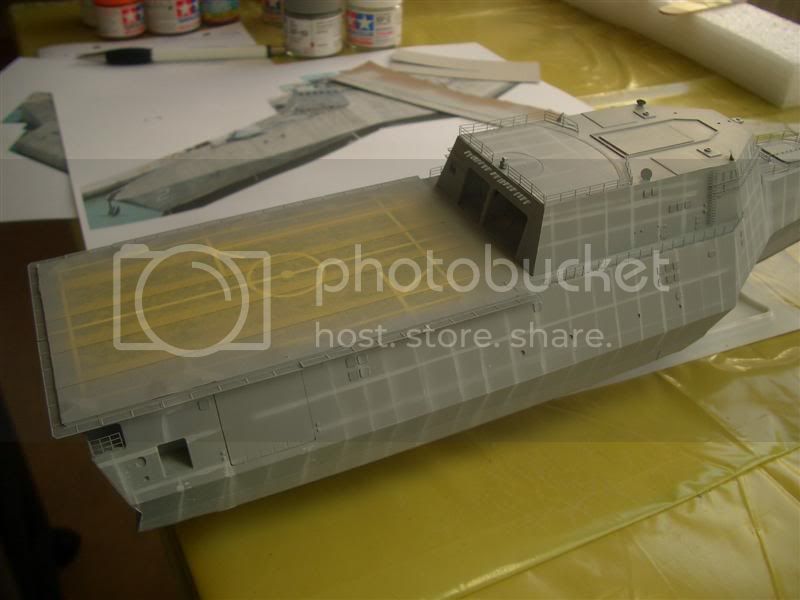
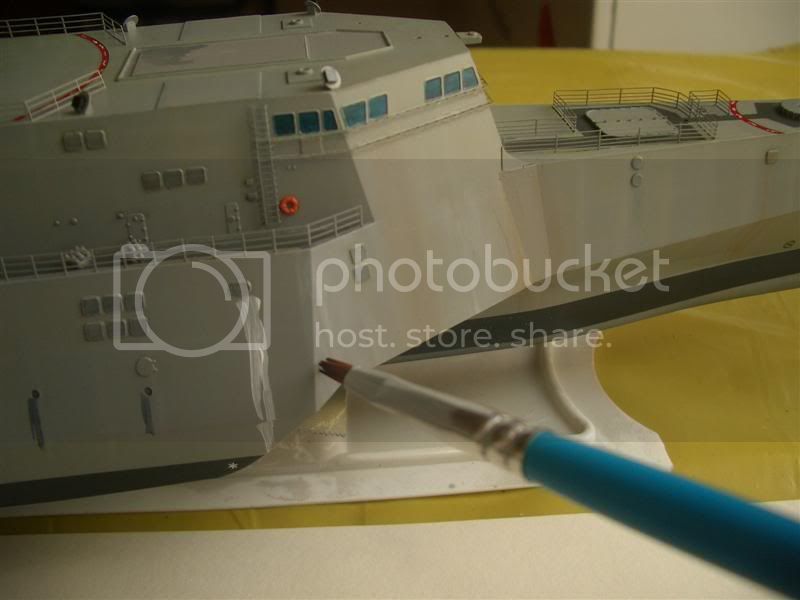
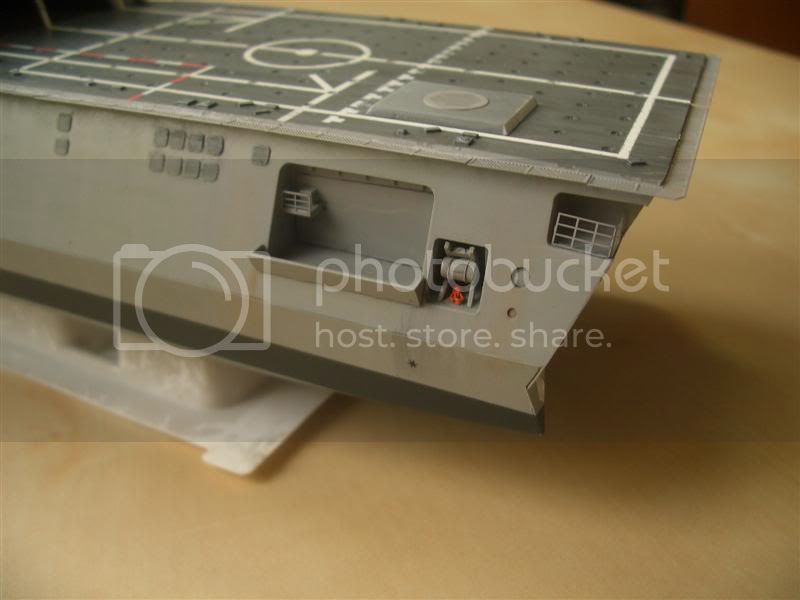
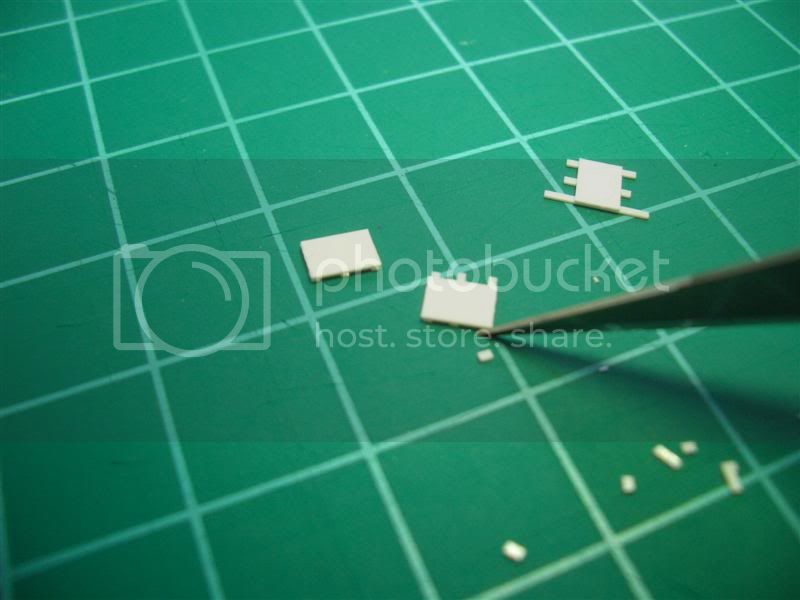
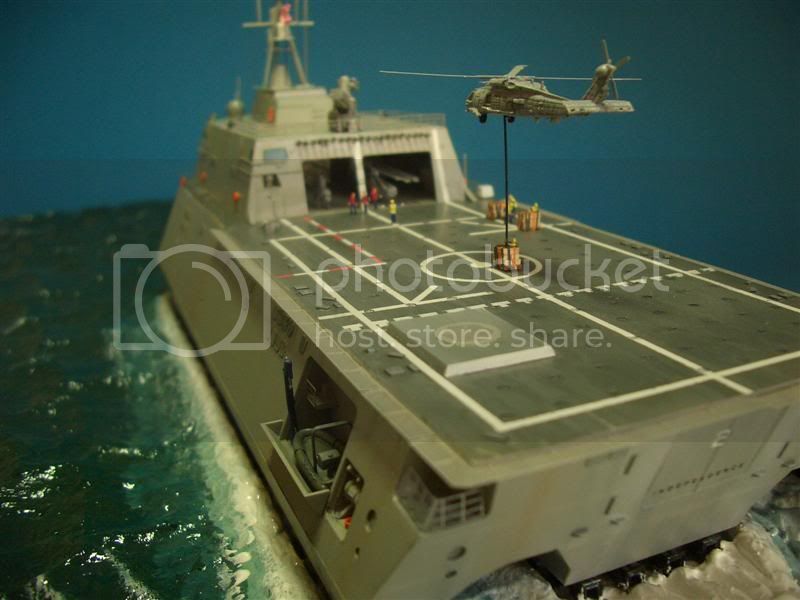
I wanted open hangar doors - but sadly there is no interior for the hangar in the trumpeter kit. So I had to do some improvements from scratch.


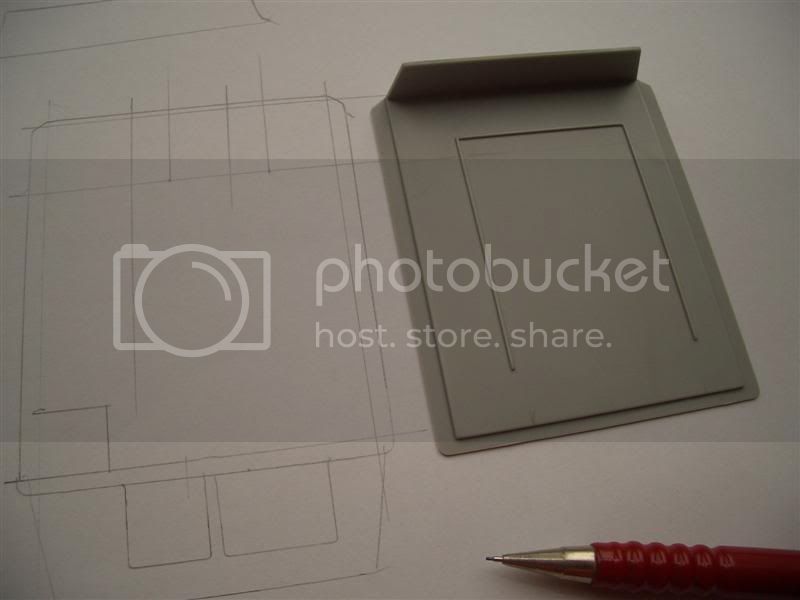
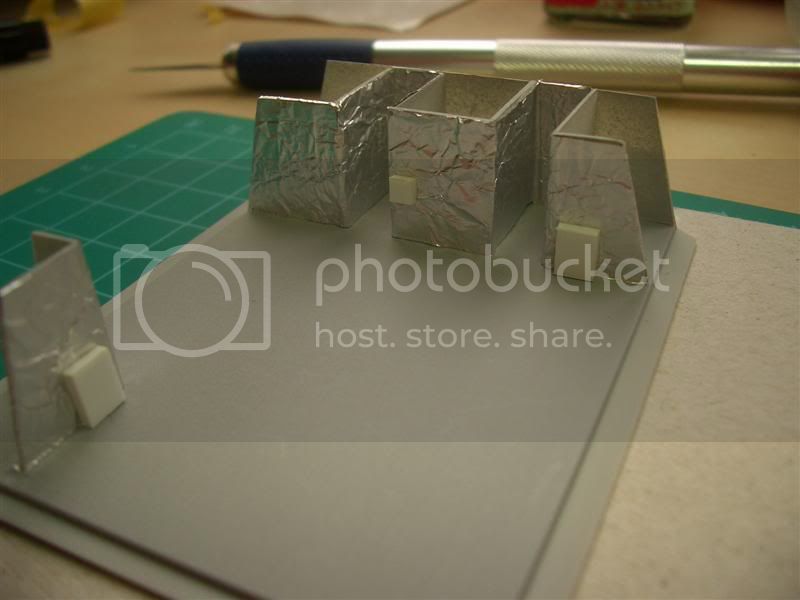
Walls are made from styrene plates.


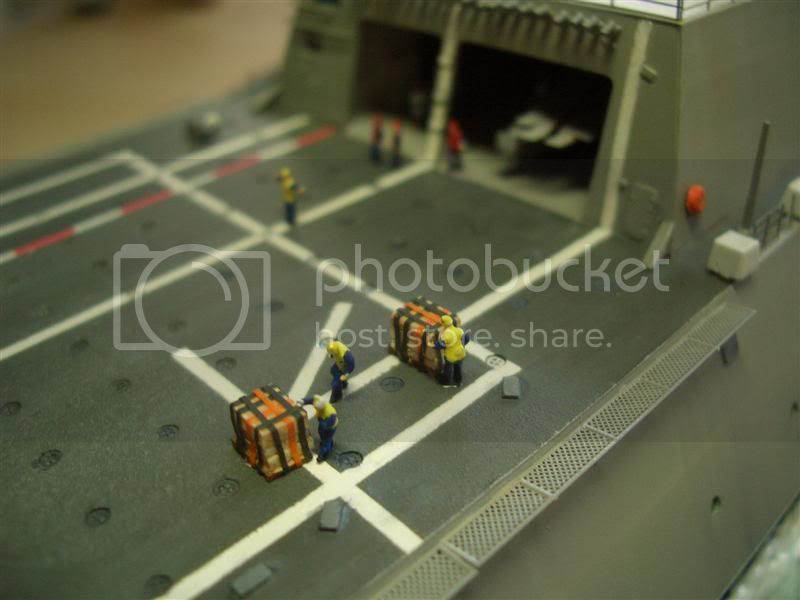
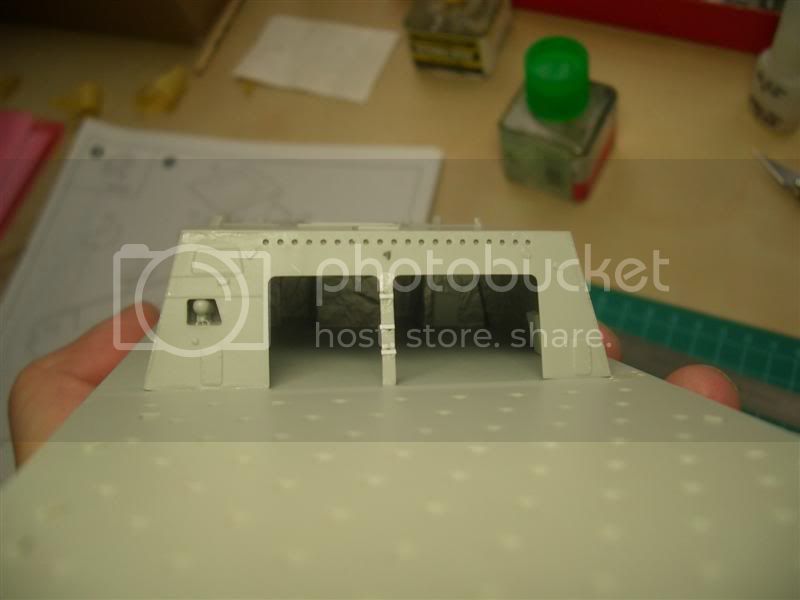
Some reference pictures from the real thin showed the interior walls covered with something like aluminium foil - I thried to imitate that with kitchen aluminium foil.


Finally we will not see much from the interior - but the interior looks better than nothing.


So far the start of my LCS-2 project. More will come shortly.
Sorry, my english writing is not that good it should be and I donīt know much of correct maritime therms. I hope you will forgive me ... Iīm constantly working on it ;-)

Cheers
Walter
flugwuzzi
Visit this Community
Lower Austria, Austria
Joined: November 02, 2007
KitMaker: 633 posts
Model Shipwrights: 23 posts
Posted: Monday, December 17, 2012 - 02:25 AM UTC
OK, lets go on with the next part ... maybe some of you find somthing useful in here ...

Fitting of the Trumpeter Kit is quit ok. But there is no option for a waterline-model (I planned to build one ;-).
It looked complicated to mee to saw the trimaran hull down to the correct waterline height. So I decided to go with the full-hull and to cut out the water-base.

The white thin bands are rubber-bands for fixing the model while gluing


Gluing down the lots of tie-downs on the flight deck was a real challenge for me. After I went crazy ... I tried the meditating way with smooth music ... and it was much better. Thankfully Trumpeter put more pe-tie-downs on the plate than necessary ... my carpet monster was quite hungry ;-)


For small pe-parts I like to use white wood glue. First I put a drop of the glue in place with a toothpick.


Then I place the pe-part with the toothpick & blue-tac into place. Because it bonds not in seconds I can correct the position of the part easily. Too much blue is simply wiped away with a wet brush.


MAKING WATER FOR MY MODEL

While the glue was hardening I started with my water-base. I used expanded polystyren (XPS plate, some kind of insulating material from the hardware store). First the polystyren is placed in an picture frame and cut into shape with a hobby knife. Then I positioned the hull on the plate to find the right position. I also marked a waterline on the hull with tamiya tape for cutting the right depht.


Some wives were cut out with a hot wire (Proxxon). Danger fume ... don`t forget to open the window and use protection.


Waves were cut out like small chips. I tried to find a good size, shape and direction for the waves.
It was a little bit tricky to cut out the shape and put the trimaran hull into the right place. I think a single hull would be easier ;-)


Then I pierced small waves into the xps plate (with the brush handle). I tried to do some irregular shapes.


The stern wave was made of FIMO Air basic - an airdrying clay. But the clay got some cracks and shrinked while drying. I had to fix it. Maybe Iīll use something like Epoxy Sculp or Magic Sculp the next time I design waves.


Here you can clearly see the cracks :-(


When the clay was hard and dry I painted the waterbase two times with white color (I normally use it for painting interior walls). But I was not satisfied with the result - the color produced alsways some bubbles. Maybe it would be better to cover all the xps plate with clay?


Then I mixed the basic color of the water from cheap acrylic colors from the hobbyshop. I painted the color on with a brush ... most of the small bubbles disappeared now :-)


I also painted two tones of lighter green round the ships contour.


Now I painted the sprinkling water white. I also added some spray to the waves with white acrylic colour.
Finally all the waterbase was panted 2 times with thick coats of Future/Pledge.


So far for this update.
If there are too much pics in the thread ... foregive me ;-)

cheers
Walter
MrMox
Visit this Community
Aarhus, Denmark
Joined: July 18, 2003
KitMaker: 3,377 posts
Model Shipwrights: 985 posts
Posted: Monday, December 17, 2012 - 03:23 AM UTC
Very nice work, you are moving fast forward !

One can never have too many pictures in a post
i like your technique on making water - interesting

Cheers/Jan
35th-scale
Visit this Community
Kildare, Ireland
Joined: November 21, 2007
KitMaker: 3,212 posts
Model Shipwrights: 124 posts
Posted: Tuesday, December 18, 2012 - 09:05 AM UTC
Looking very good Walther. Great work on the hanger interior.

Hopefully you can inspire me to resume my stalled build here

Love how you did the water!
flugwuzzi
Visit this Community
Lower Austria, Austria
Joined: November 02, 2007
KitMaker: 633 posts
Model Shipwrights: 23 posts
Posted: Tuesday, December 18, 2012 - 07:27 PM UTC
Jan, Sean ... thanks for your interest and your kind words.

@Sean ... I saw your build blog, but sadly you stopped it.
I hope you will find some inspiration to finish your model ;-)
flugwuzzi
Visit this Community
Lower Austria, Austria
Joined: November 02, 2007
KitMaker: 633 posts
Model Shipwrights: 23 posts
Posted: Tuesday, December 18, 2012 - 07:28 PM UTC
After finishing the "sea" I switched back to the ship.
I found a lot of pictures from the LCS-2 but showing many differences in details. So I picked one date and build the details and markings to these referencece pics. Some markings were not on the decal sheets - so I had to paint them myself.

The Decals for the flight deck made some trouble. They twisted around and didnīt stick well on the model. Maybe it was my fauilt, but I could not place them on the model :-( So I had to repaint the markings with the airbrush. First a white coat - then masking the lines with tamiya tape - then spraying the flightdeck base colour.


Before I sprayed the base color I glued the railings in place. Also here I used white PVA glue ... Iīm not a big fan of ca-glue ;-)


The railings were very delicate - I didīt clean them very well ;-) after cutting them from the fret.
Excessive PVA glue was easily swept away with a moistened brush.


Several times I popped off the pe-nettings from the flight deck. To make them more stable I glued in some small strip styrene. Now I could attach the pe-nettings much better and the bonding is also mor stable. After painting you nearly cantīt see the small improvement.


Here I used a railing from White Ensign Model from UK because the kitīs railing did not match to the layout seen on the reference pictures from lcs-2.


I also ordered Seahawks and a Phalanx CIWS from VETERAN. Really great aftermarket parts made from resin. To make a SeaRAM the Gatling gun was removed.


So far for this update - hope you enjoyed following this build.
cheers
Walter
surfsup
Visit this Community
Queensland, Australia
Joined: May 20, 2010
KitMaker: 1,230 posts
Model Shipwrights: 1,212 posts
Posted: Tuesday, December 18, 2012 - 09:12 PM UTC
Really enjoying your work on this one and following with interest.....Cheers mark
flugwuzzi
Visit this Community
Lower Austria, Austria
Joined: November 02, 2007
KitMaker: 633 posts
Model Shipwrights: 23 posts
Posted: Wednesday, December 19, 2012 - 08:03 PM UTC
Thanks Markg, good to know ;-)

PAINTING
Painting the distinctive steel plate structure was not easy. First I masked the plates with tamiya tape - but the lines were too sharp and didnīt look "right".
Next I tried brushing the lines freehand - but with no good result, looked really messy and irregular. Finally I cut a template from cardboard and sprayed the steel plate structure.

First things first ... the basecoat is a mix of Tamiya XF19 Sky Grey and white.


After basecoat I sprayed the lines (very light grey). I used some reference pics to match the right alignment of the lines. I had to be very careful because all pe-railings were already glued in place. It worked quite well. Not perfect, but the result looked ok to me.


Here another shot:


When the lines were dry I oversprayed them with thin coats of Tamiya XF-19 ... they still shine slightly through this overspray.


Trumpter provides us with decals for the bridges windows. I didnīt like the decals and painted the windows with acrylic color (mix of Vallejo AV 309 Periscopes and AV 936 Transparent Green).


WEATHERING
On many reference pics you can clearly see weathering effects on this relatively new ship. I used Oil Colors for my weathering attemts.

First some Filters with Oil Colors (diluted with white spirit) to achieve subtile irregular fading.


Details got a pinwash with Paynes-Grey Oil Color.
Watermarks and other effects on the hull were also painted with oil colors. Then the color was faded away with a brush moistened with white spirit.


The flight deck was weathered with Oilcolor Paynes-Grey and White.


Now the ship looked a little bit more used ;-)


Thats all for today, hope you will also follow the next steps.
Cheers
Walter
flugwuzzi
Visit this Community
Lower Austria, Austria
Joined: November 02, 2007
KitMaker: 633 posts
Model Shipwrights: 23 posts
Posted: Friday, December 21, 2012 - 12:54 AM UTC
Not much interest in modern ships these days ;-)

Working on the mast.

Thankfully not too much rigging on this ship ;-)
It was done with thin fishing line and glued with ca-glue.


Surprisingly there was no stars & stripes banner provided with the decal sheet. I made it on the computer and printed the banner on white decal sheet, sealed it with clear cote, glued the decal on a sheet of thin cigarette-paper. Then I cut the decal out and glued it to a line of stretched spure. To simulate a litte bit of dynamic I crumpled the flag with my fingers and tried to create a moving shape. This workes best before decals are completely dry.


THE CREW

I like shipmodels with busy crews. Best place for crew action on uss independence is the flight deck. A nice vertical replenishment scene would be nice ... I thought before I saw the size of a 1/350 figure ;-)

There are no figures in this Trumpter kit, so I ordered Figures from Fujimi (injection plastic and a little bit static), a figure set from PREISER (prepainted, very well sculpted and a bit pricy - 6 pcs. about 11 Euros), and finally figures from L'Arsenal (resin and very fragile).


I chose 5 pcs. from Preiser and 3 pcs. from L'Arsenal. For better handling/paintig I put them with double sided adhesive tape on a plastic film box.


First the figures got a coat of primer (Skull White from Games Workshop) and then I painted them with acrylic colors from Andrea and Vallejo. Didnīt paint the eyes this time ;-)

I was not sure about the right color scheme for the flight deck operating crew. At that time there werenīt reference pics from the uss independence crew available. I painted them as seen on crews of uss freedom an some ohter us ships.


Pallets and cargo for the vertrep-operation were made from styrene strips and also painted with acrylc colors.


Straps were made from tamya tape and painted. I drilled a hole into the cargo and a guitar string was used to mount the "flying" Seahawk.


The crew was carefully glued on the deck with ca-glue. The red dressed guys are firefighters I think ;-)


These guys are preparing the cargo palletes and the straps (or nettings?)


Enough action for today ...

Thanks for looking. Comments/critiques are welcome and appreciated!

cheers
Walter

MrMox
Visit this Community
Aarhus, Denmark
Joined: July 18, 2003
KitMaker: 3,377 posts
Model Shipwrights: 985 posts
Posted: Friday, December 21, 2012 - 01:54 AM UTC
Its difficult to offer any criticism to a textbook build - very well done, i like the effect of the "panel"lines.

Nice touch with the "action" and cargo pellets.

Cheers/Jan
flugwuzzi
Visit this Community
Lower Austria, Austria
Joined: November 02, 2007
KitMaker: 633 posts
Model Shipwrights: 23 posts
Posted: Saturday, December 22, 2012 - 12:36 AM UTC
Thanks for your comment Jan, really appreciate it.

Asyou can read this ... the end of the world did not happen last day/night

So I can finish this build blog.
The seahawks are from VETERAN. The Seahwaks provided with the Trumpeter Kit are not bad, but the helos from Veteran are much better. Excellent work from these guys. The simple drone is from the Trumpeter kit. I painted the helis with Vallejo AV 50 Light Gray and gave them a wash with dark oil color. For the small decals I used Microset/sol with no problems.


One seahawk with folded rotor blades and the drone found their place in the hangar.

I drilled a hole into the seahawks belly, put it on the gutitar string and used again white pva glue for this.


Last details were carefully glued in place and the model is finished.

Here are some pics from the completed model .. in spring I will take some outdoor pictures for better color.


I really enjoyed building this interesting ship .. maybe Iīll also build the USS Freedom in the future.

I hope you got a litte bit inspiration from this build.
Thanks for watching, have fun and Merry Christmas.

Cheers
Walter
russamotto
Visit this Community
Utah, United States
Joined: December 14, 2007
KitMaker: 3,389 posts
Model Shipwrights: 151 posts
Posted: Saturday, December 22, 2012 - 08:08 AM UTC
Very nice build, and a good reference. I've got a Bronco kit to build, and this help a lot.
flugwuzzi
Visit this Community
Lower Austria, Austria
Joined: November 02, 2007
KitMaker: 633 posts
Model Shipwrights: 23 posts
Posted: Tuesday, December 25, 2012 - 03:15 AM UTC
Russ, thanks for your kind words.

I hope you have also a lot of fun building your kit. Let us know about your progress :-)

cheers
Walter
35th-scale
Visit this Community
Kildare, Ireland
Joined: November 21, 2007
KitMaker: 3,212 posts
Model Shipwrights: 124 posts
Posted: Tuesday, December 25, 2012 - 03:29 PM UTC
Really top class job Walther! If I ever get back to mine will be referencing this thread quite a lot.....thanks!
trahe
Visit this Community
Virginia, United States
Joined: April 03, 2006
KitMaker: 1,158 posts
Model Shipwrights: 117 posts
Posted: Thursday, December 27, 2012 - 03:02 AM UTC
Very nice! I will certainly be trying your weathering technique with the oils. Thank you for sharing!
flugwuzzi
Visit this Community
Lower Austria, Austria
Joined: November 02, 2007
KitMaker: 633 posts
Model Shipwrights: 23 posts
Posted: Thursday, December 27, 2012 - 10:14 PM UTC
Hi folks,
glad you enjoyed this build blog.

Iīm looking forward to see your Independeces ;-)

Have fun.
Cheers
Walter
 _GOTOTOP