1/72 Flower Class Corvette / DJ Parkins PE
California, United States
Joined: July 02, 2009
KitMaker: 962 posts
Model Shipwrights: 19 posts
Posted: Saturday, March 23, 2013 - 12:22 PM UTC
Good day all
I have started what I hoe will be a great build of Revell 1/72 Flower class Corvette with Davis Perkins PE sets. I have built the Matchbox version years ago and it really built up to a good looking model back then. I have started building the kit and I forgot to post so here we go.
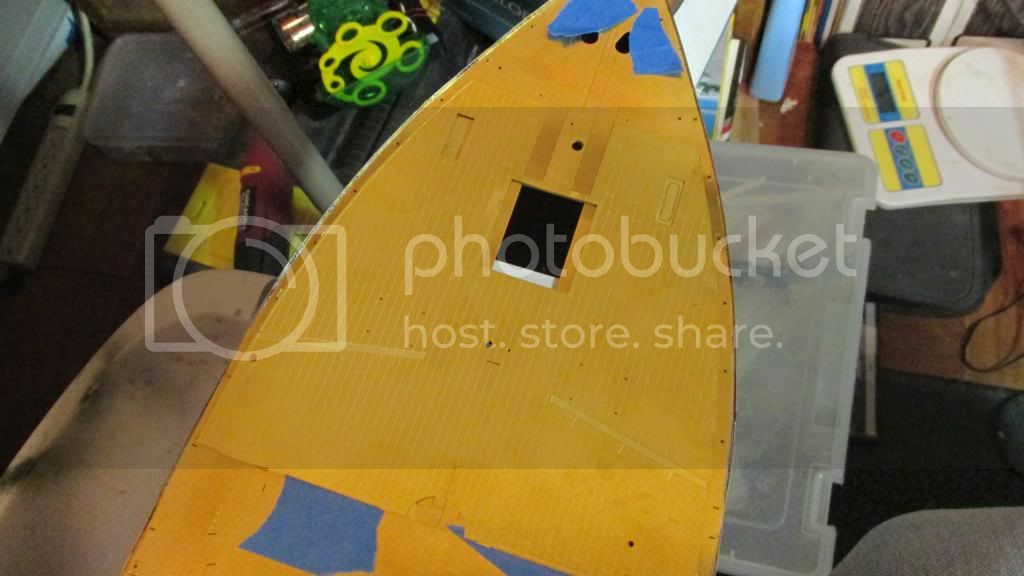
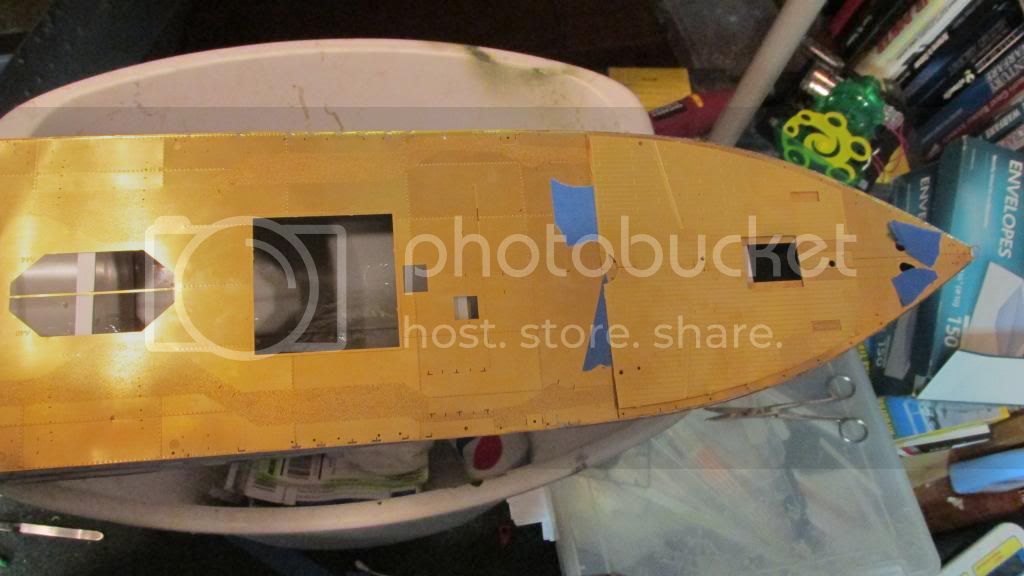
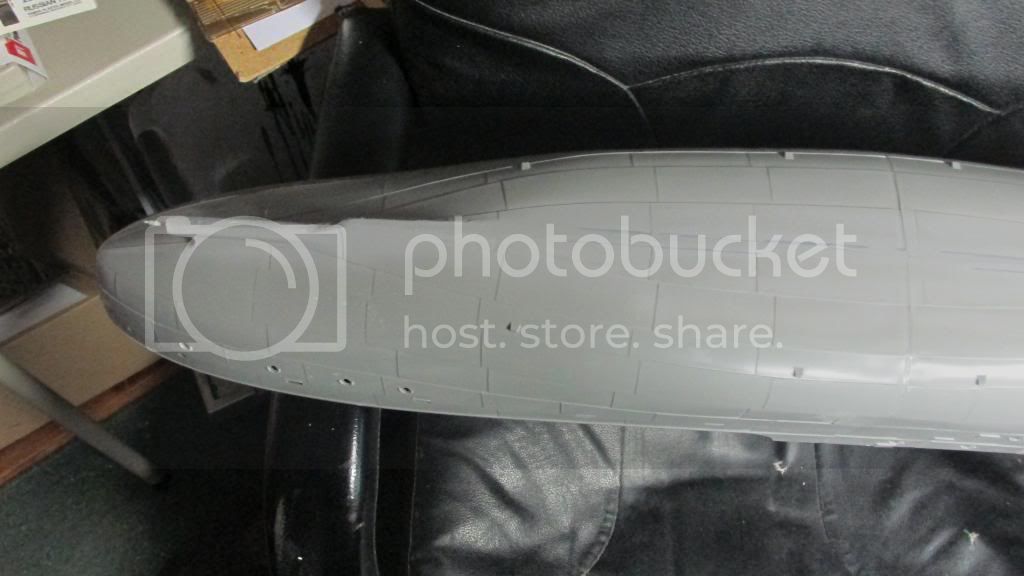
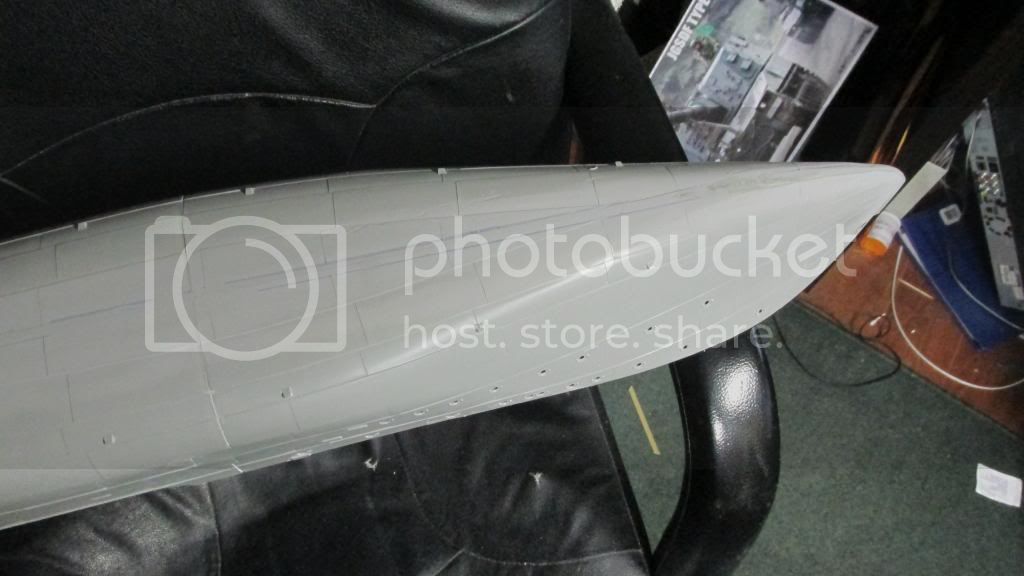
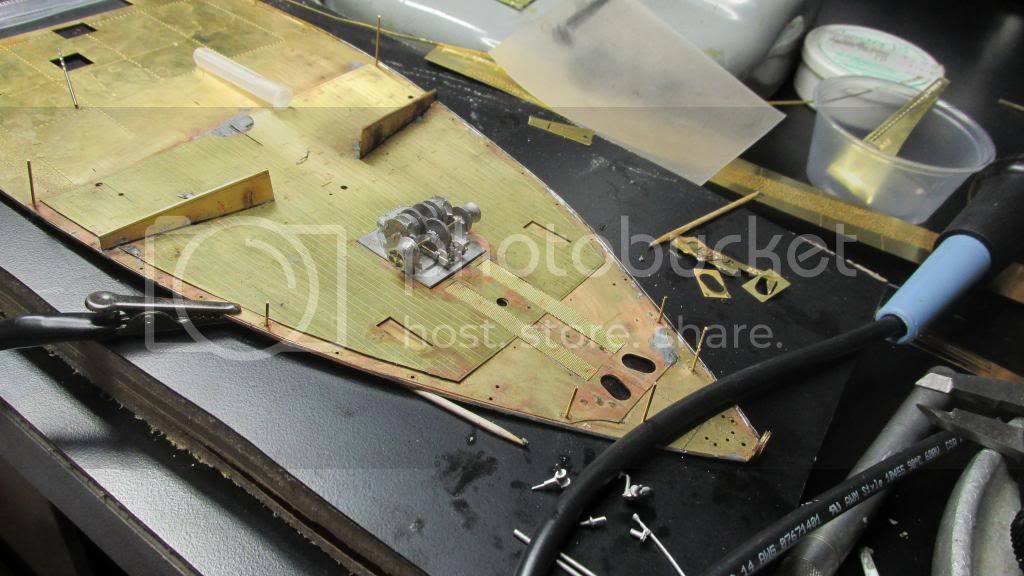
First I have cut off the over done keel and cut the ridge around the Scuttles .

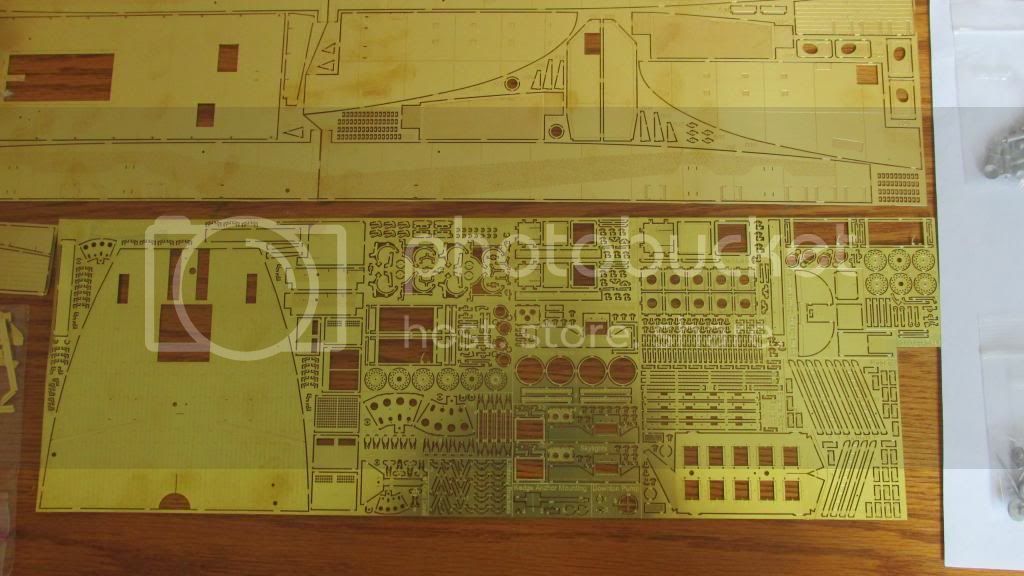
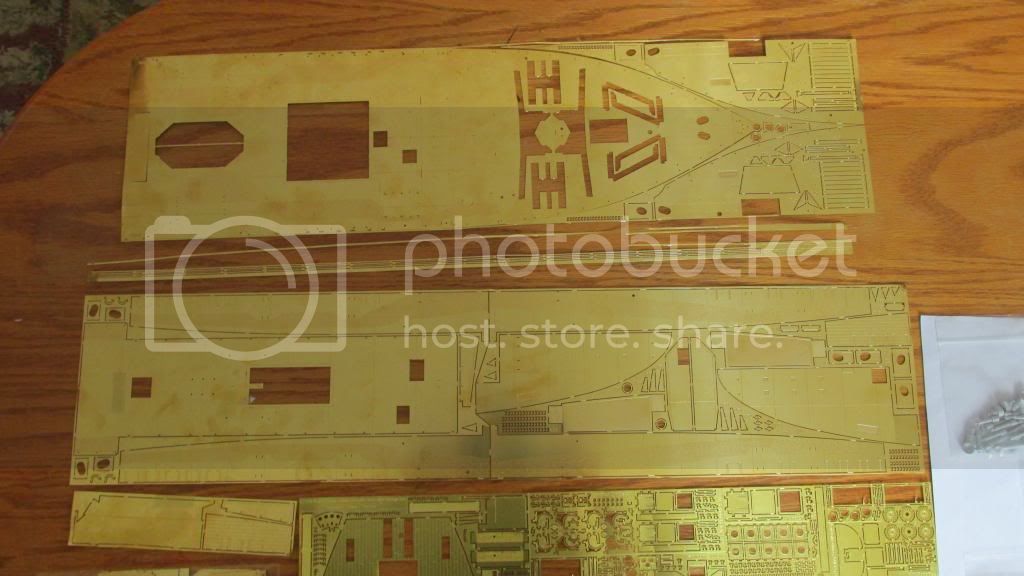
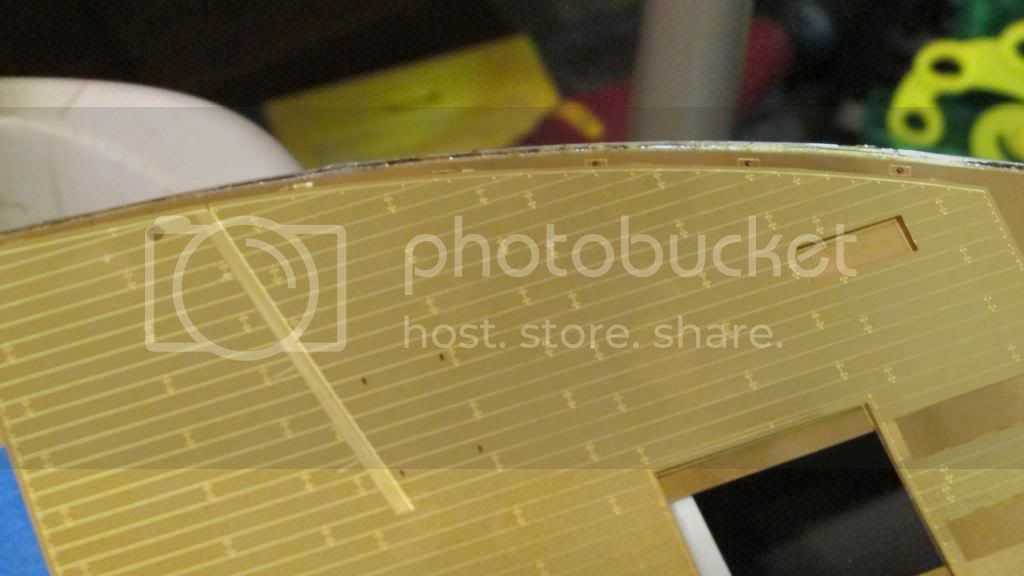
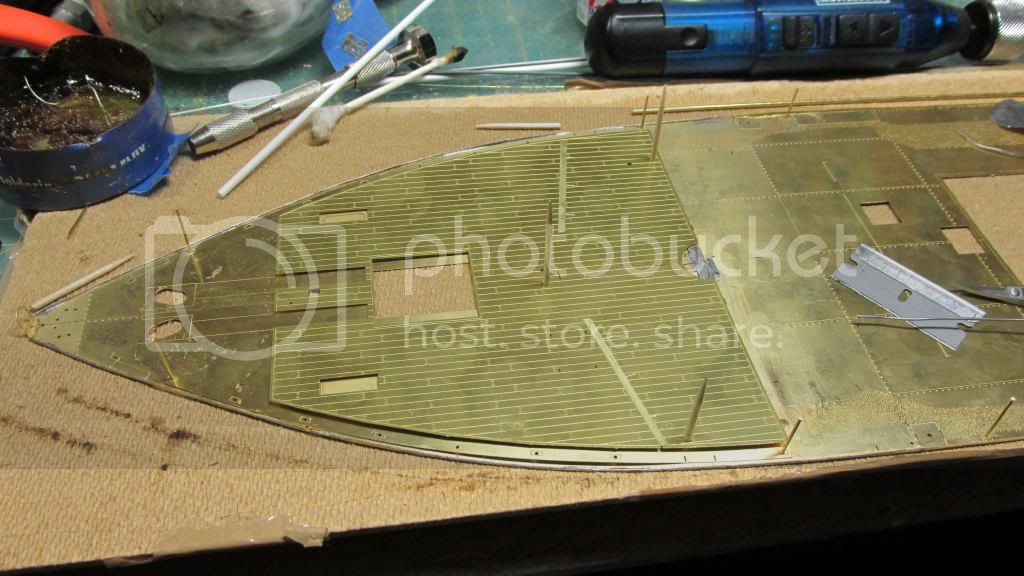
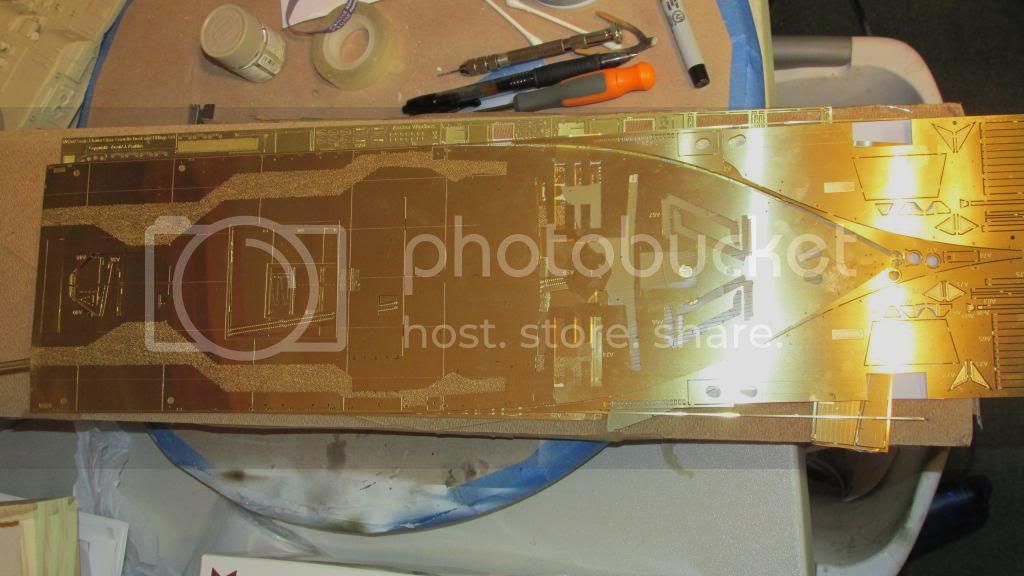
And here is the deck PE , I will have better pictures as I have not set my office up for this build yet
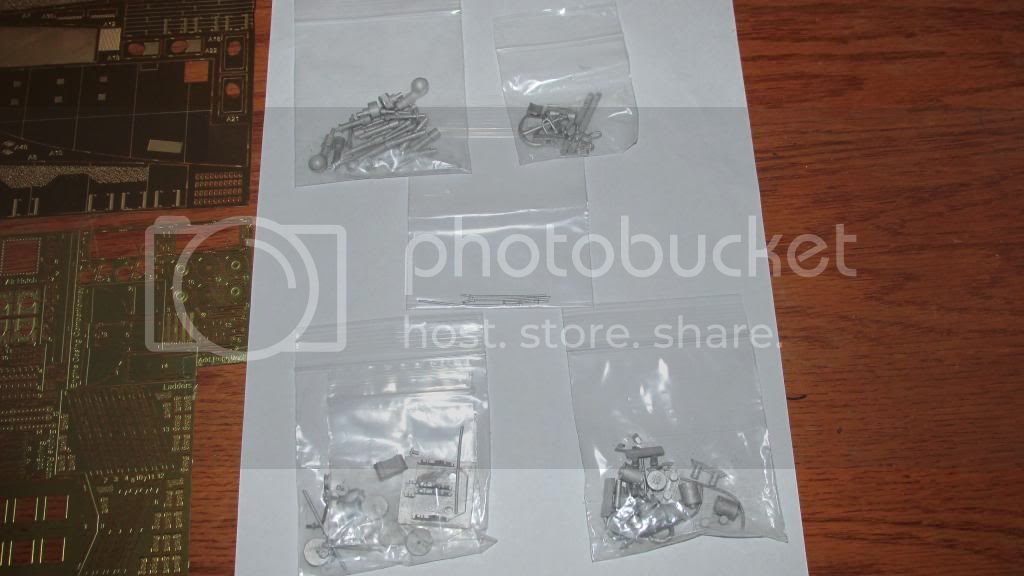
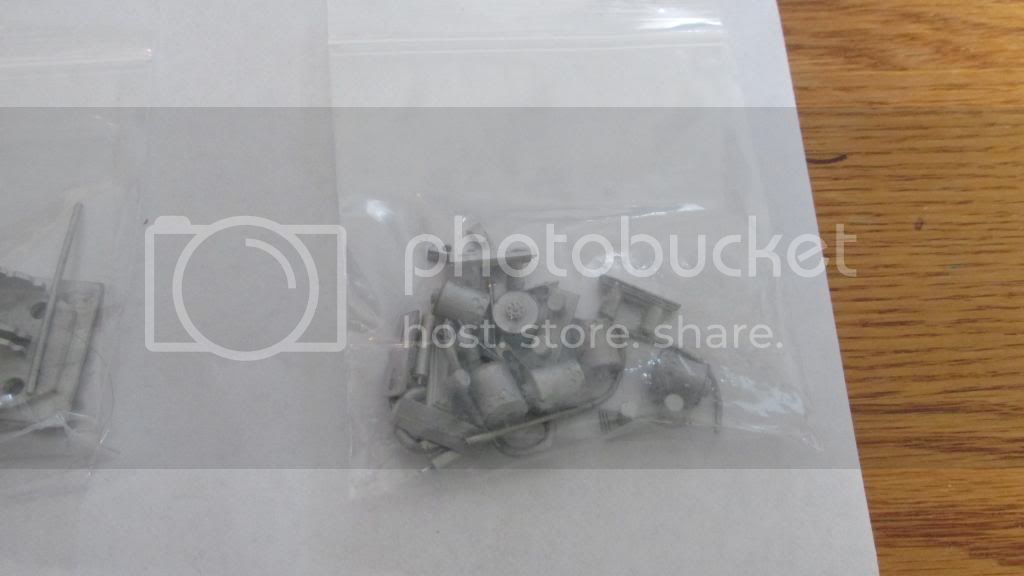
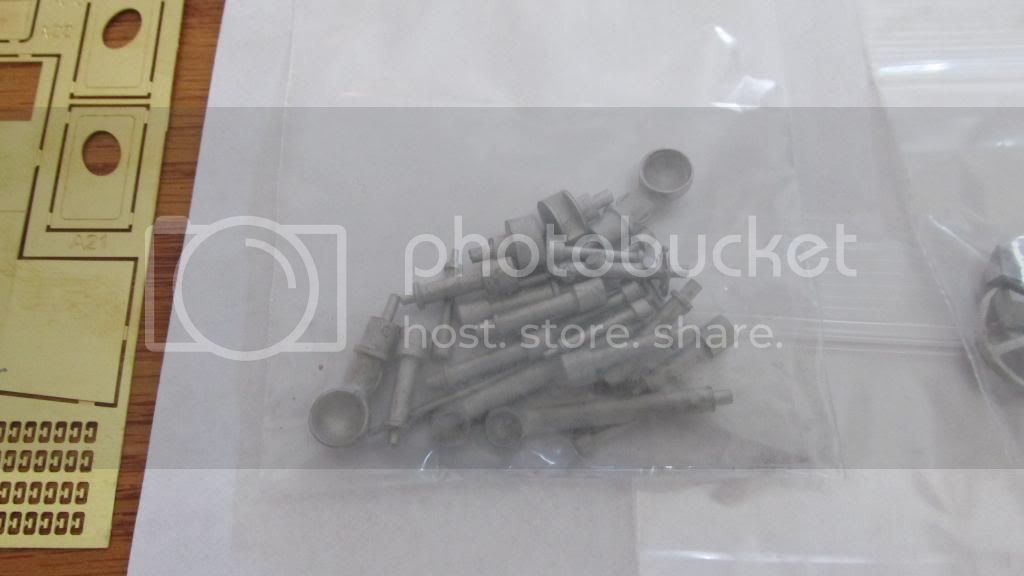
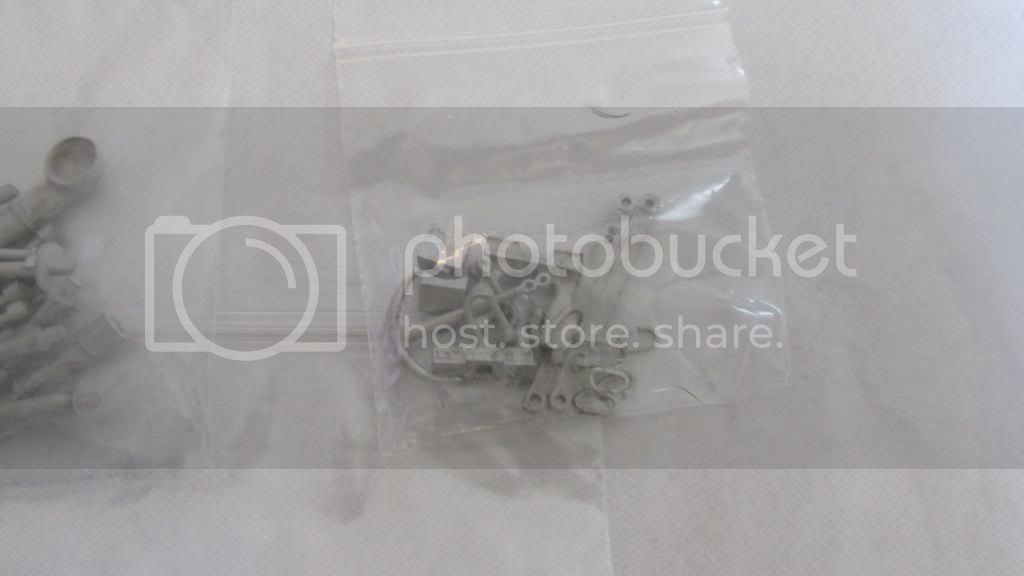
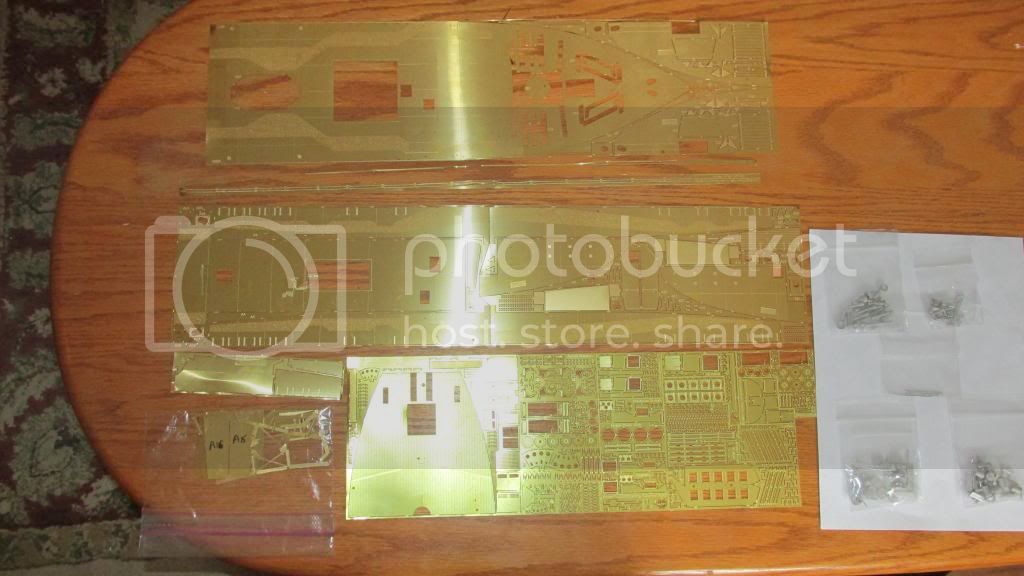
I always have my parts sorted,
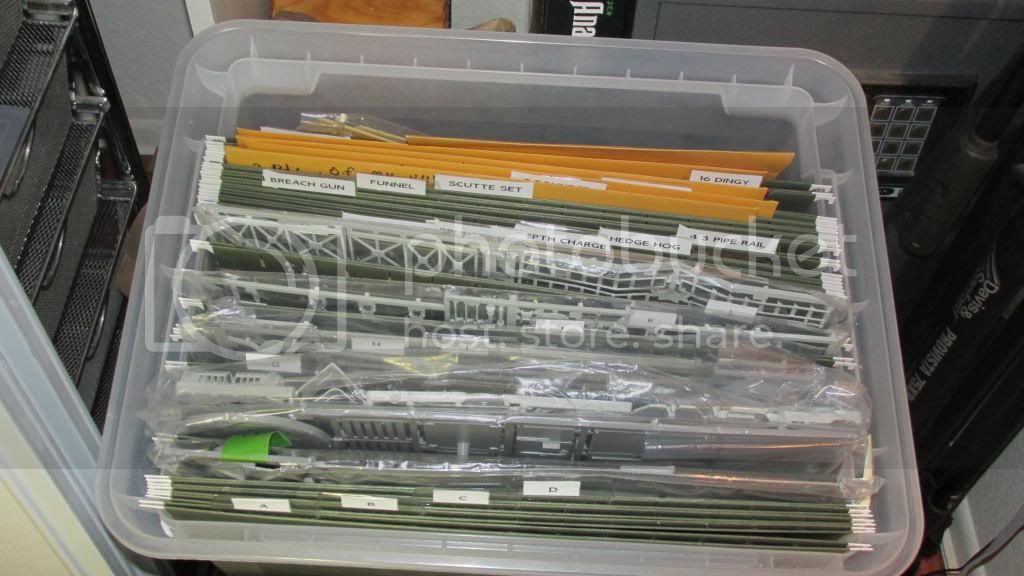
plastic first and PE in the back. I have all the sets except the life boats as I have not decided what ship I am building, but I am leaning towards the Bluebell I will photograph each PE set as I bring them out, but the deck alown is 2 sheets roughly 18" long and just filled with lots of parts that have to be numbered and cut out to get to the main deck. I will be working with plastic, PE, resin and white metal. I am toying with the idea of plaiting the hull with brass because of the overly done molding. I am not the fastest builder but will get it done. *** I want to warn all of the US builders of a very serious problem , Identify Theft. I went to send my Federal Taxes in and some on had filed on my SS number . now my refund could be up to 2 years from collecting. Watch that number.** ok back to build.
I hope you enjoy the build.
Jim

We don't need no education...
We don't need no thought control...
No dark sarcasm in the classroom...
Teacher leave those kids alone!
California, United States
Joined: July 02, 2009
KitMaker: 962 posts
Model Shipwrights: 19 posts
Posted: Monday, March 25, 2013 - 05:29 AM UTC
We don't need no education...
We don't need no thought control...
No dark sarcasm in the classroom...
Teacher leave those kids alone!
Joined: October 30, 2005
KitMaker: 3,897 posts
Model Shipwrights: 3,301 posts
Posted: Monday, March 25, 2013 - 05:32 AM UTC
DJ's add-ons are fantastic. Love the photos.I am looking forward to following your build,
cheers,
Julian

California, United States
Joined: July 02, 2009
KitMaker: 962 posts
Model Shipwrights: 19 posts
Posted: Wednesday, March 27, 2013 - 08:24 AM UTC
We don't need no education...
We don't need no thought control...
No dark sarcasm in the classroom...
Teacher leave those kids alone!
Massachusetts, United States
Joined: January 03, 2010
KitMaker: 2,159 posts
Model Shipwrights: 1,400 posts
Posted: Sunday, March 31, 2013 - 10:05 PM UTC
Great job so far Jim! Love this kit! Was thinking of picking it up myself at some point! I like you patience my friend!! I would be soldering too, but hinestly would be able to control using CA to keep builing! Have you tried "Soldering Paste"? Like useding electronics. Come in a syringe, a little goes a long way and melts at real low temps. Almost with a light bulb. Just started using some myself and there is no flux needed either. Light anding, pasted, heat and done!
Kepp up the great work!! A belated Happy Easter to you as well!!

California, United States
Joined: July 02, 2009
KitMaker: 962 posts
Model Shipwrights: 19 posts
Posted: Monday, April 01, 2013 - 01:13 AM UTC
Todd:
Can you recommend a brand? I am still using flux form a company called Kester, kinda looks like tar and I am 53 and my dad gave it to me when I was 16. a little goes a long way, does the material you speak of have the solder in it also?
I placed my order Wed last week from Micro-mark and received an email saying 8 business days, no tracker. you wound think placing a $200 dollar order you would get a tracker , the next level of shipping for 3 day was $69.00 I think I will call today.
Jim
We don't need no education...
We don't need no thought control...
No dark sarcasm in the classroom...
Teacher leave those kids alone!
Massachusetts, United States
Joined: January 03, 2010
KitMaker: 2,159 posts
Model Shipwrights: 1,400 posts
Posted: Monday, April 01, 2013 - 05:22 AM UTC
Hi Jim!
I have been using Solder-it:
http://www.ebay.com/itm/Silver-Bearing-Solder-Paste-NEXT-DAY-SHIPPING-25OZ-7-1-GRAMS-/181097064089?pt=LH_DefaultDomain_0&hash=item2a2a39e699This is to the cheaper side for Silver soldering paste and this was free shipping from the link above. Actually came in about 4 or 5 days. Sold in harware stores, Radio Shack and Sears too I believe. Flux and solder all in one. .25 oz syringe. Seems like a tiny amount but goes a long way. After seeing the size of the deck it might be safer to pick up two.
There are more expensive brands on the market. This work fine for me. Applied with a tooth pick or tiny brush, pretty much get the soldering tip close and it melts towards the heat. I have even used a lighter once...not recomended though. The melting point is real low on this stuf, maybe 430F. I know there are even lower ones on the market, but again, price goes up from there. I think the most was about 40 or 50 USD for 1/2 ounce. A spec is all that is needed on most applications.
When doing the deck, you will want to work this ion sections I would think. A little trick to keep what you soldered together while soldering next to it is to add a heat sink...alligator clip or something metal that will draw the heat befor it get to the already soldered sections.
Give it a shot. for the $10 per tube, free shipping
California, United States
Joined: July 02, 2009
KitMaker: 962 posts
Model Shipwrights: 19 posts
Posted: Monday, April 01, 2013 - 11:21 AM UTC
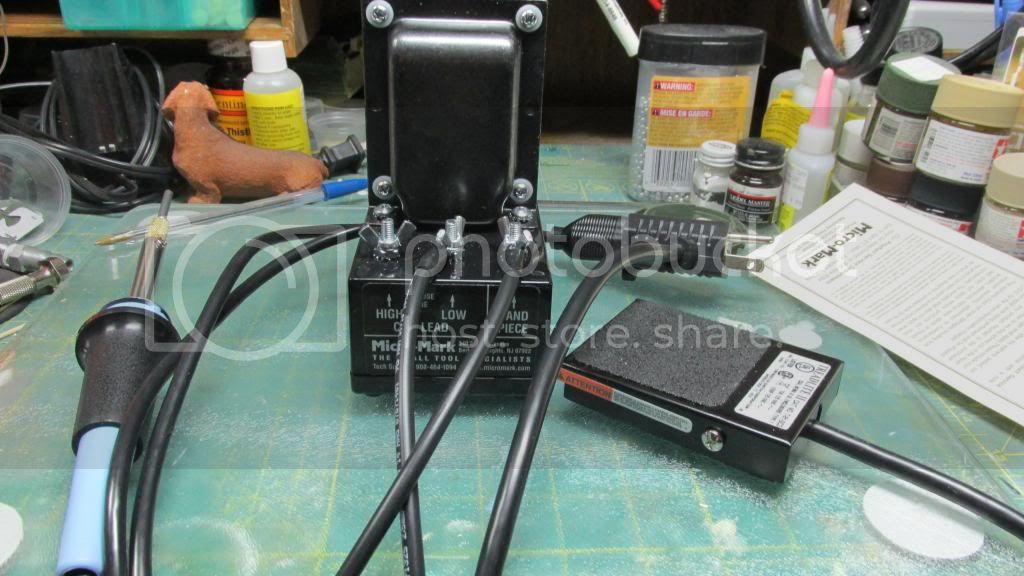
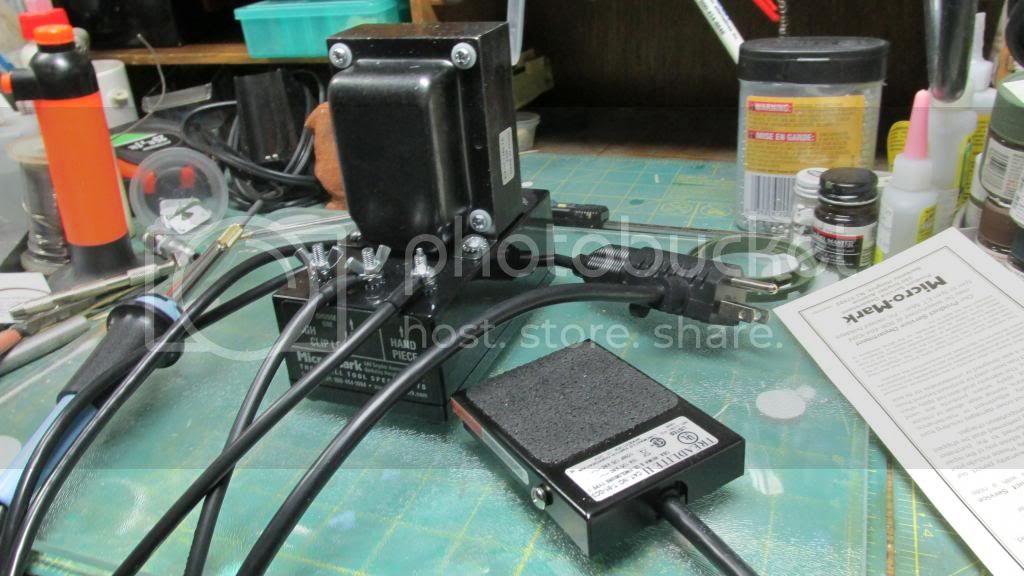
I placed an order for 2 tubes, The forward deck is 3 layers of pe and I tinned all 3 layers and I have a Solder station that will go up to 500 degrees and it would not bond. I bought a resistive soldering station and with your suggestion of solder I hope it will work. when the station gets here , hopefully by Friday I am going to do s lot of testing to learn how it works. you clip an alligator clip to the piece and then you have a carbon rod to spot solder with a foot pedal and it is instant heat at just that area. It is mostly used in model railroad details. I bought the solder rod like a soldering iron, they also make a clamp type solder also, but these are expensive tools so I will give a demonstration before I work on the deck. Micro-mark sells them but they have the worst shipping of any company I have ever dealt with. 8 business days from New Jersey @ 14.00. Priority mail was $69.00 that is just plain over charging. But what can you do. I will work on the hull while waiting. This is going to be a learning process and I hope if any one is watching will pick up tips and also help me with suggestions. Evening all
Jim
We don't need no education...
We don't need no thought control...
No dark sarcasm in the classroom...
Teacher leave those kids alone!
Texas, United States
Joined: June 29, 2010
KitMaker: 5,854 posts
Model Shipwrights: 350 posts
Posted: Monday, April 01, 2013 - 03:02 PM UTC
All of that PE is making me a bit dizzy, but it's going to be quite the stunning build once you finish adding all of it. Let us know how the new solder works when you try it out!
California, United States
Joined: July 02, 2009
KitMaker: 962 posts
Model Shipwrights: 19 posts
Posted: Friday, April 12, 2013 - 05:23 AM UTC
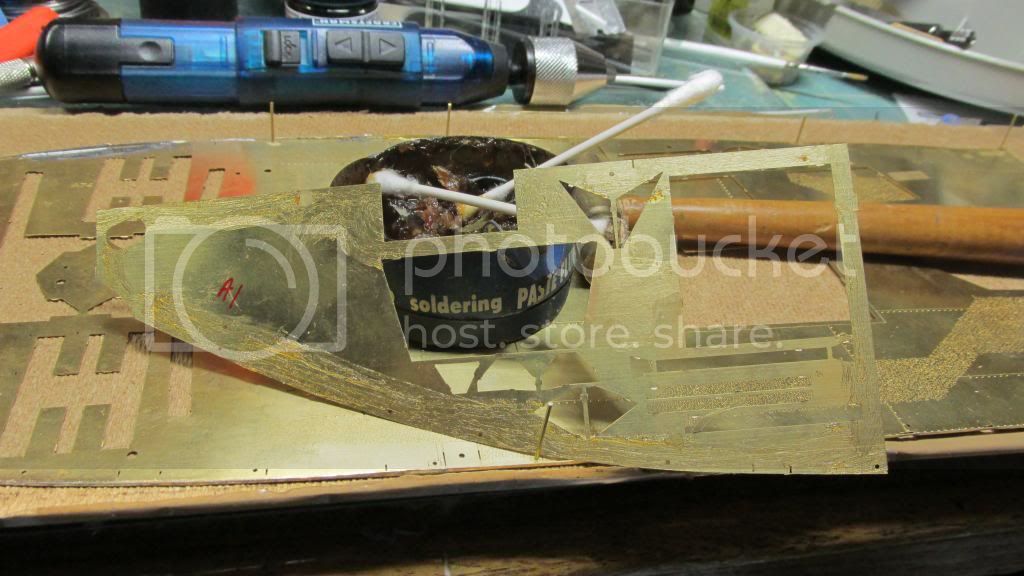
Sorry been a way due to family issues, any how my resistive soldering kit arrived and I will say its the way to go
I have the deck pinned in place to keep the deck flat, the windlass about it took 2 days to get it right and still have the pe to put on it
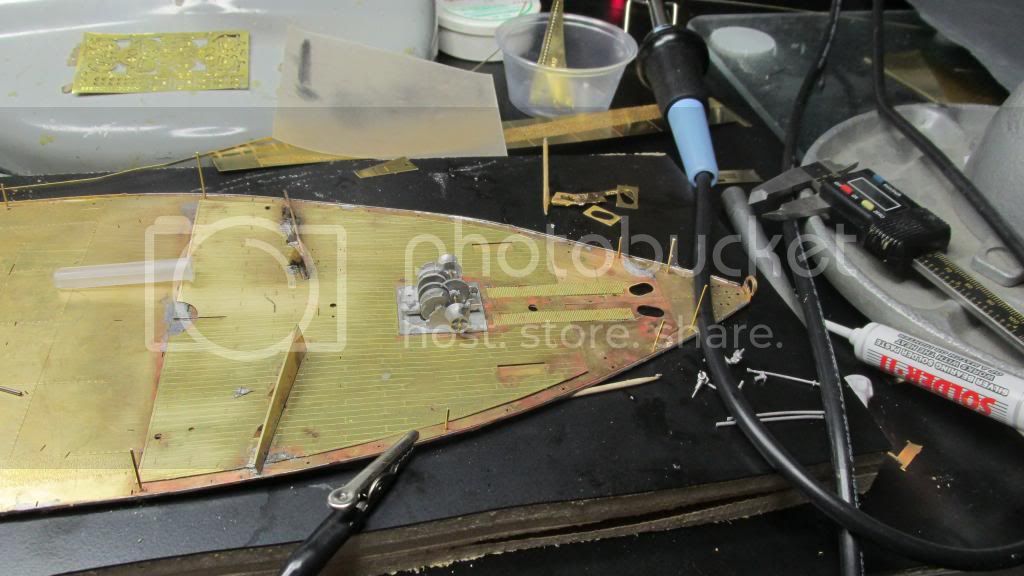
The black is from carbon burn that will clean off. I an still learning how to solder as it is quite different than standard soldering.
More later
Jim
We don't need no education...
We don't need no thought control...
No dark sarcasm in the classroom...
Teacher leave those kids alone!
South Australia, Australia
Joined: August 14, 2007
KitMaker: 5,926 posts
Model Shipwrights: 2,624 posts
Posted: Friday, April 12, 2013 - 05:45 PM UTC
I have a feeling I might try the CA way first..
I did high reliabilty soldering while I was in the air force, and a bit of micro-miniature circuit repair, but it looks like I would be needing one of the big inch thick soldering irons I used to use for instrument cases if I was going to solder those nice big heat-sink-like sheets.
Maybe even some Gator glue...
You may be right, I may be crazy.
Texas, United States
Joined: June 29, 2010
KitMaker: 5,854 posts
Model Shipwrights: 350 posts
Posted: Saturday, April 13, 2013 - 01:38 PM UTC
We hope everything is ok with your family Jim. And very nice work with the resistive soldering, slow is definitely the way to go here.
California, United States
Joined: July 02, 2009
KitMaker: 962 posts
Model Shipwrights: 19 posts
Posted: Saturday, April 13, 2013 - 01:51 PM UTC
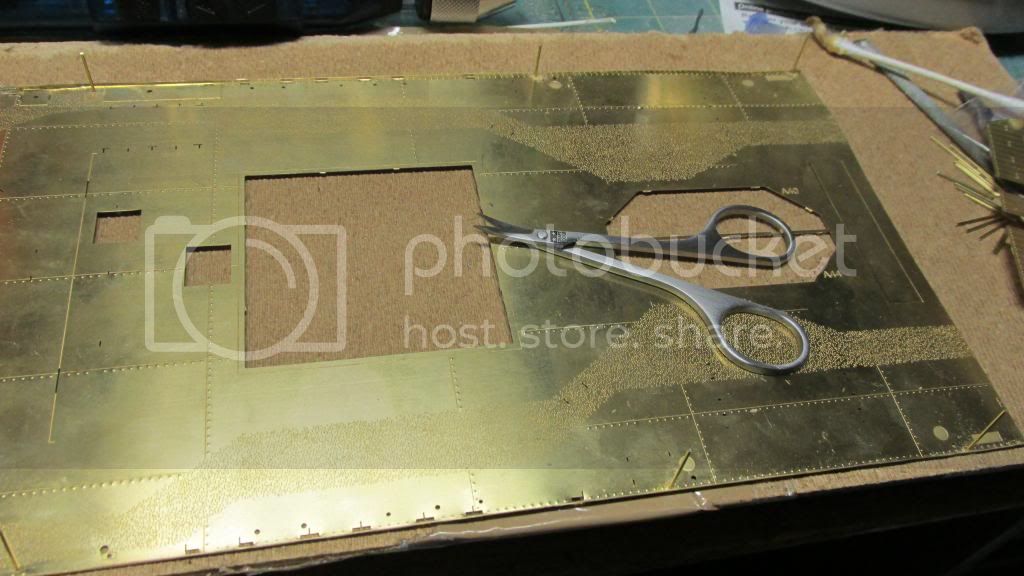
Slow and organized, There are so many parts in the deck . I cut the different areas and put them in a seperate plastic bag and then taped to a sheet of paper and placed in a note book so I wont loose the parts and it makes it a lot easier to find things.. I worked on the hull today and I am almost ready to glue the deck in place , then the fun really starts.
have a good evening all
Jim
We don't need no education...
We don't need no thought control...
No dark sarcasm in the classroom...
Teacher leave those kids alone!
California, United States
Joined: July 02, 2009
KitMaker: 962 posts
Model Shipwrights: 19 posts
Posted: Monday, April 15, 2013 - 11:44 AM UTC
Good Day all
When I started this build I did not conceive the amount of parts involved: for example each port hole , or scuttle is 4 parts x 50 or 200 parts that have to be cut cleaned painted and glued in place, so I hired a helper,, He is on the deck which is glued in place. Scuttle work is for the TV room in evening.
My 2 solder stations a YILIUA 992DA with a heat gun that will run up to 500 deg. nice little kit and a microlux 65 watt resistive soldering station with carbon probes and I pick up a 280 Watt American beauty station, good price on EBay and a temporary table in the Man Cave for the build.
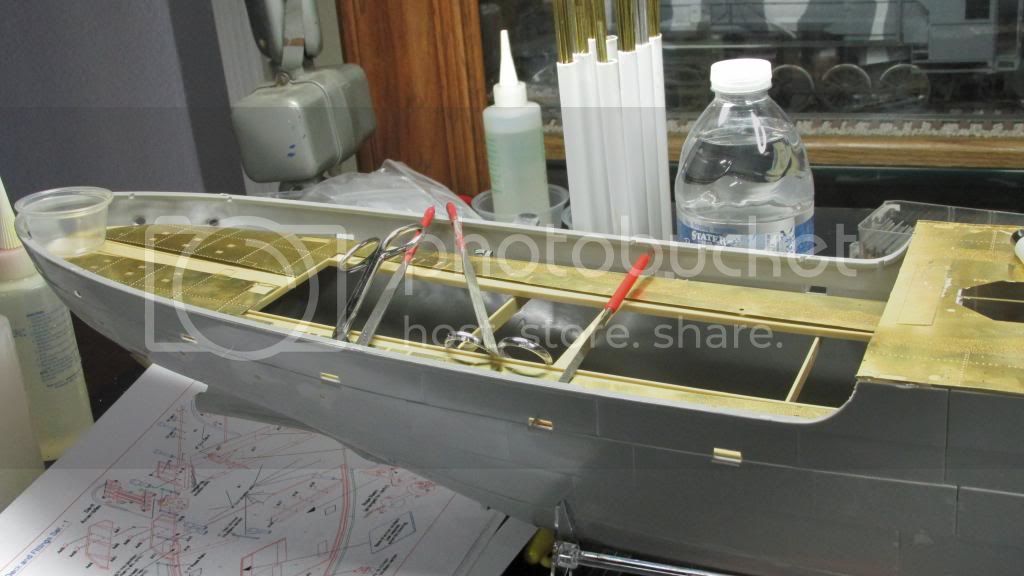
The last is a temporary placement of the lower deck. I have a little bit of filling on the upper deck also if you plan on using this PE sets add separate brackets to support the upper deck. I plan on adding LED lighting in the ship and running lights, wiring will be easier as I can use the deck as a ground plate . and if OSHA is watching I will get my helper a hard hat. Have a good evening all
Jim
We don't need no education...
We don't need no thought control...
No dark sarcasm in the classroom...
Teacher leave those kids alone!
Arizona, United States
Joined: October 26, 2006
KitMaker: 25 posts
Model Shipwrights: 20 posts
Posted: Saturday, August 31, 2013 - 03:28 AM UTC
You've taken on quite a task. I know, I did the same and have included pics in my Gallery. Good luck to you.
Kevin
California, United States
Joined: May 14, 2008
KitMaker: 534 posts
Model Shipwrights: 55 posts
Posted: Sunday, September 01, 2013 - 09:25 PM UTC
Wow, I didn't realize that Kit maker network also has ship section as well. All this time I was hanging out in armor and aviation part and missing out on all this cool ship modeling.
You sir, are building one of my favorite ship and I too looked through Davids Flightpath sets for this beauty. It just with US $$ exchange rate to GBP made me took a step back from getting those beautiful PE sets. So, I'll just follow your build and droll on my computer table

Mike

#084
Quebec, Canada
Joined: September 14, 2005
KitMaker: 2,485 posts
Model Shipwrights: 1,157 posts
Posted: Monday, September 02, 2013 - 07:53 AM UTC
Hi Mike,
Sadly, Jim Davis (Teaker 11) passed away on July 7, 2013.
We will never see this great project completed.

Joe
California, United States
Joined: May 14, 2008
KitMaker: 534 posts
Model Shipwrights: 55 posts
Posted: Monday, September 02, 2013 - 09:13 AM UTC
Oh Joe, that is such sad news. I would have loved to see this build ,but I'm sure Jim is building his ultimate model up at the heavens gates
South Australia, Australia
Joined: August 14, 2007
KitMaker: 5,926 posts
Model Shipwrights: 2,624 posts
Posted: Wednesday, October 30, 2013 - 04:45 PM UTC
Quoted Text
Oh Joe, that is such sad news. I would have loved to see this build ,but I'm sure Jim is building his ultimate model up at the heavens gates
RIP Jim


Crap... now I am bummed out...
I have an idea that might just help out here...
Kindest Regards
Warren
You may be right, I may be crazy.
California, United States
Joined: May 14, 2008
KitMaker: 534 posts
Model Shipwrights: 55 posts
Posted: Wednesday, October 30, 2013 - 05:09 PM UTC
Open to any new ideas as long it helps to complete this kit. So, bring it on!!
United Kingdom
Joined: February 03, 2011
KitMaker: 30 posts
Model Shipwrights: 28 posts
Posted: Wednesday, October 30, 2013 - 08:44 PM UTC
Looking really good and watching with interest
#084
Quebec, Canada
Joined: September 14, 2005
KitMaker: 2,485 posts
Model Shipwrights: 1,157 posts
Posted: Wednesday, October 30, 2013 - 11:12 PM UTC
Originally Posted: Monday, September 02, 2013 - 03:53 PM GMT
Hi James,
Sadly, Jim Davis (Teaker 11) passed away on July 7, 2013.
We will never see this great project completed.
Joe
United Kingdom
Joined: February 03, 2011
KitMaker: 30 posts
Model Shipwrights: 28 posts
Posted: Thursday, October 31, 2013 - 07:34 AM UTC
Joe thanks for telling me I am so embarrassed...
May he rest in peace.
#084
Quebec, Canada
Joined: September 14, 2005
KitMaker: 2,485 posts
Model Shipwrights: 1,157 posts
Posted: Thursday, October 31, 2013 - 02:25 PM UTC
Ahoy James,
No need to be.
Seeing that you are building one of these beasts too,
I will be watching your build with great interest!
Cheers,
Joe
United States
Joined: November 24, 2015
KitMaker: 54 posts
Model Shipwrights: 18 posts
Posted: Wednesday, December 23, 2015 - 02:29 AM UTC
What an awesome idea RE: organizing the parts trees!