_GOTOBOTTOM
Ships by Class/Type: Destroyers
This forum covers all types of destroyers from all eras.
IJN Sakura
treadhead1952
Visit this Community
Nevada, United States
Joined: June 12, 2008
KitMaker: 552 posts
Model Shipwrights: 493 posts
Posted: Thursday, October 03, 2013 - 09:31 AM UTC
Hi All,

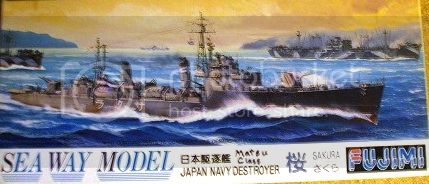
I have been going over my collection of ship models to decide what to build next and it looks like the old Fujimi offering of the IJN Sakura is getting the nod. I chose this one for a couple of reasons. It is an older molding from back in the early '70's, as such it has a few inaccuracies that need to be addressed. The newer Tamiya kit is a much better one to get and I will be getting one of them soon enough to build as the class leader Matsu. It is a very basic kit with two tiny frets of parts that just barely cover the requirements. Whereas the real ship carried a fair sized compliment of single 25mm AA gun mounts, the kit just barely has representations of the triples that were spotted here and there. The stern of the real ship was nicely rounded, this particular kit has a square stern that will need to be fixed. As usual for my builds figure that PE, resin and styrene bits will figure heavily in the construction process, not only to add details but to make corrections for the inadequacies of this old kit.

The original Sakura, which translates to Cherry Blossom, was laid down on the ways at the Yokosuka Naval Arsenal on 2 June 1944, the hull launched on 6 September 1944 and completed on 25 November 1944. While her double Kampon boilers allowed for a top speed of about 27.8 knots or 32 MPH when in battle trim, as a convoy escort vessel a more sedate 18 knots was listed to give her the long legs of about 3500 Nautical Miles.


The Matsu Class of destroyers was a late war expedient to allow the empire to replace losses in the destroyer fleet with the much less expensive builds as well as faster completion time of these ships. Later versions named as the Tachibana Class did away with the double bottoms and other features as the funds to build ships dried up and materials became more difficult to obtain.
TimReynaga
Staff MemberAssociate Editor
MODEL SHIPWRIGHTS
Visit this Community
California, United States
Joined: May 03, 2006
KitMaker: 2,500 posts
Model Shipwrights: 1,830 posts
Posted: Thursday, October 03, 2013 - 12:37 PM UTC
Jay,

I built one of these a long time ago; not a bad kit, really. It just needs some good old fashioned modeling technique! One way to make an accurate model and save yourself the modification of the foremast and squared stern would be to build her up as one of the 23 units of the second (Tachibana) group. Fujimi did a reasonably good job with this kit in representing that variant – they just mislabled it as a Matsu!

The Tachibanas were: Tachibana, Nire, Tsuta, Hagi, Kaki, Shii, Nashi, Sumire, Enoki, Kusunoki, Odake, Hatsuzakura, Kaba, Hatsuume, Yaezakura, Tochi, Yudake, Katsura, Wakazakura, Azura, Sakaki, Kuzu, and Hishi.

Good luck with it!

regards,
Tim
treadhead1952
Visit this Community
Nevada, United States
Joined: June 12, 2008
KitMaker: 552 posts
Model Shipwrights: 493 posts
Posted: Thursday, October 03, 2013 - 03:08 PM UTC
Hi Tim,

Yeah, I was grubbing about looking for web references for the Matsu Class when I ran across David Frasier's article on Steel Navy about his Fujimi Sakura kit. He scored his up in Canada for $2.50 in Canuckle Bucks which really makes this old kit priced around $12.56 off of Amazon expensive. By the time you add shipping from Japan, it is going to be around $21 US. Of course, I don't know how long ago he wrote his little review.

http://www.steelnavy.com/tachiban.htm

Even so I don't know, I always like to paddle upstream with these things. This is pretty much what you get in the box with this one.


As you can see, I have already removed the Linoleum Cross Strips from just aft of the Pilot house to just in front of the after deck house. The early Matsu class did sport linoleum so mine is going to have some, just not from the breakwater all the way aft to the stern. The Pit Road/Sky Wave IJN Navy Extra Equipment sets and PE is going to furnish most of the armament for this little ship as well as a few other things. I also get to drill in the port holes here and there with a #79 drill bit in a Pin Vise since they were bashful about adding them in the kit.
treadhead1952
Visit this Community
Nevada, United States
Joined: June 12, 2008
KitMaker: 552 posts
Model Shipwrights: 493 posts
Posted: Thursday, October 10, 2013 - 03:10 PM UTC
Hi All,

I have been having entirely too much fun through the week with doctors, shopping and the like, but I did manage to turn to and get some things done with the little ship. The first thing to deal with was to remove the depth charge racks from the fan tail. Using a nice wide flat blade in an Xacto Handle makes this nice and easy. Since I wanted to change the shape of the fan tail as well I was going to have to replace the tread plate there also.


To perform the shape change I used my mini bench grinder, a tool that I scored from one of our local Harbor Freight stores. As I recall it cost me around $12 on sale and is basically just like a full sized twin wheel bench grinder, just way smaller with a wheel size of about 2 and 1/2 inches. It made short work of the fan tail.


With that done I had to fill in the openings created when the extra material was ground off. I used some White Squadron Putty to do the deed, let it harden up then whittled it back down smooth.


I used some "On The Mark" IJN Tread Plate Material to replace the now scarred up area from the depth charge rack removal. I also sanded it back down smooth before super gluing the aluminum Tread Plate down. With it in place and the glue hardened up I used some Model Master Acryl in Yokosuka Naval Arsenal Gray to turn it the right color.

treadhead1952
Visit this Community
Nevada, United States
Joined: June 12, 2008
KitMaker: 552 posts
Model Shipwrights: 493 posts
Posted: Thursday, October 10, 2013 - 03:17 PM UTC
#2
Since I would also be adding some more of this same material to the center area of the ship where the stacks, torpedo launcher and other items needed to go I needed to do some more work there. I removed the raised circular mounting for the Torpedo Launcher first then sanded it smooth. Making sure that the drilled holes for the accessories were in good register was next up.


Cutting a piece of the Tread Plate came next. Before gluing it down with some Super Glue I took care of adding all the holes for the accessories by carefully measuring things off and drilling them in. Once the holes were in the right spots I glued it down and let the Super Glue set up.


With this decks settled down I could start adding things. I did file the splinter shields off of the Gun Mount positions and added some scrap brass fret material for a more scale appearance. I also added a pair of depth charge deck extensions from some scrap styrene before adding the two depth charge racks I had removed. Using one of the Extra Parts sets from Sky Wave/Pit Road I came up with a pair of "Y" Gun Depth Charge Launchers and more Depth Charge Racks to go on the after deck space to the rear of the after Gun Mount. My little ship is starting to take shape.

 _GOTOTOP