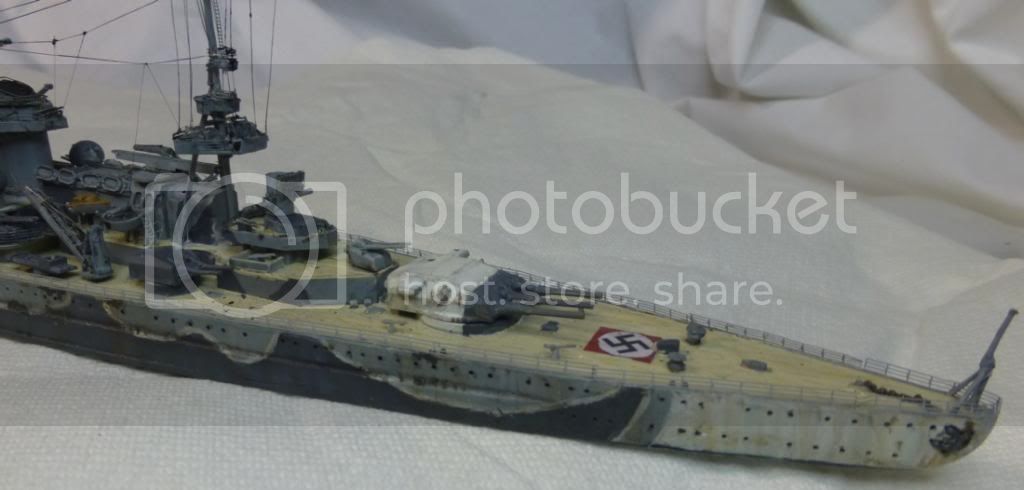
Tamiya 1/700 Scharnhorst
Tom's PE; Masts and yards scratch from brass rod & PE
Paints: Vallejo Model Color, Golden Fluid Acrylics, Revell Aquacolor
Weathering: Iwata Com.Art, oils, AK Streaking Grime
Rigging: Berkeley Fireline Crystal; 1lb test (¼ lb test diameter); 0.06 diameter
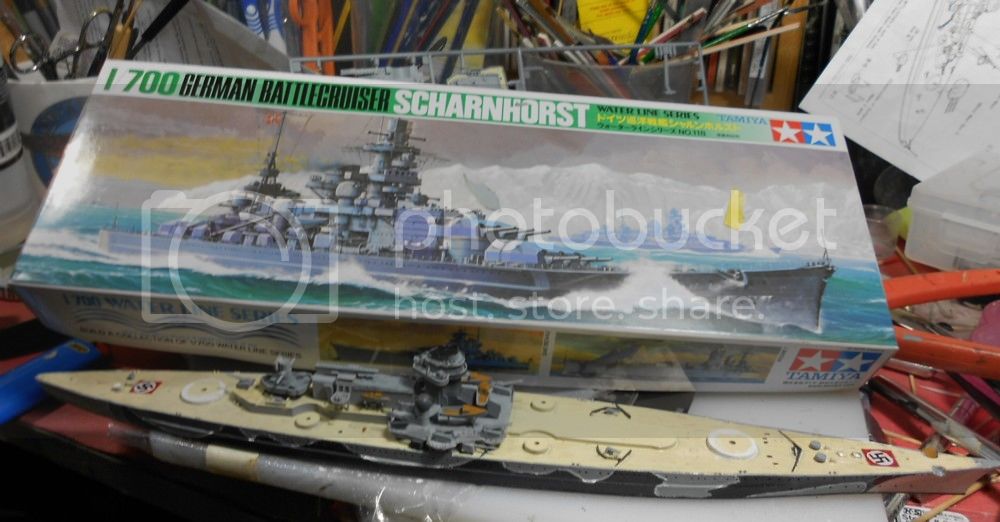
Finally finished what I thought would be a simple build (for a ship) and received some unexpected lessons along the way. Any slips were driver error because I found the model very good. It's old and the fit and alignments aren't as good as you might find in a modern DML offering, but in general things went together very nicely. I found the detail perfectly adequate. My kit was “made in Japan” and building it reminded me why that logo gained such respect in the 70's. Along the way I was greatly helped by some splendid builds of the DML 1/350 or Heller 1/400 Scharnhorst found on Model Warship. The Scharnhorst threads were likewise valuable. Too late I stumbled on a splendid and very detailed dio build on a Spanish site which helped with the rigging. Some of my PE woes might have been avoided if I had remembered to refer to the Japanese Hobby Search dealer which posts full instructions for most models sold.
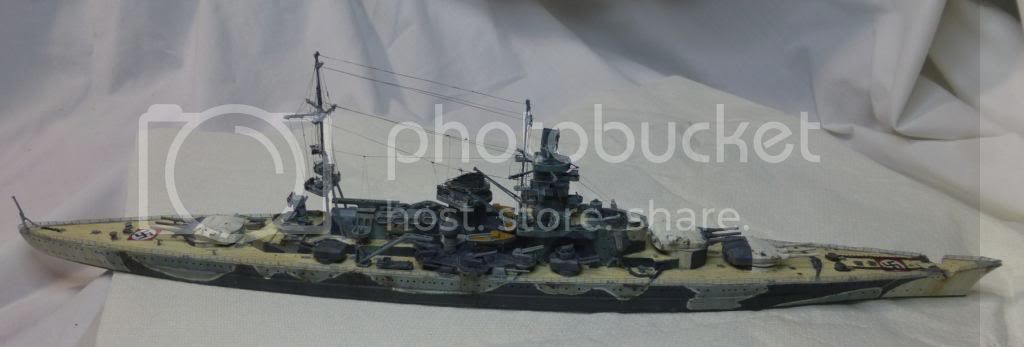
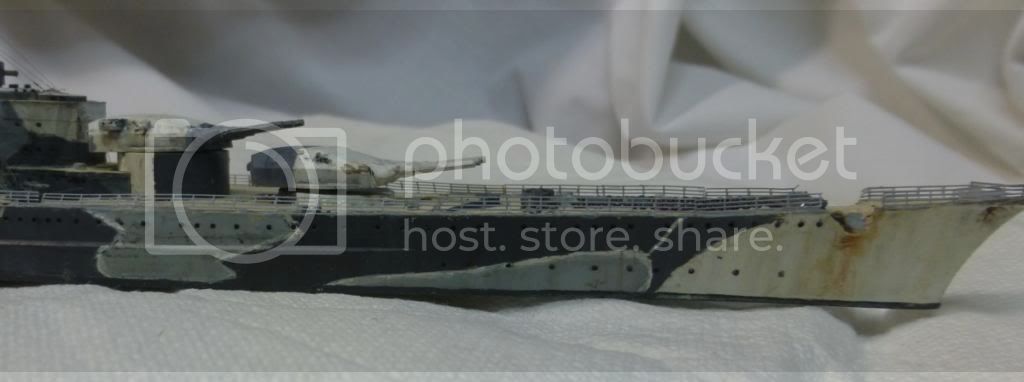
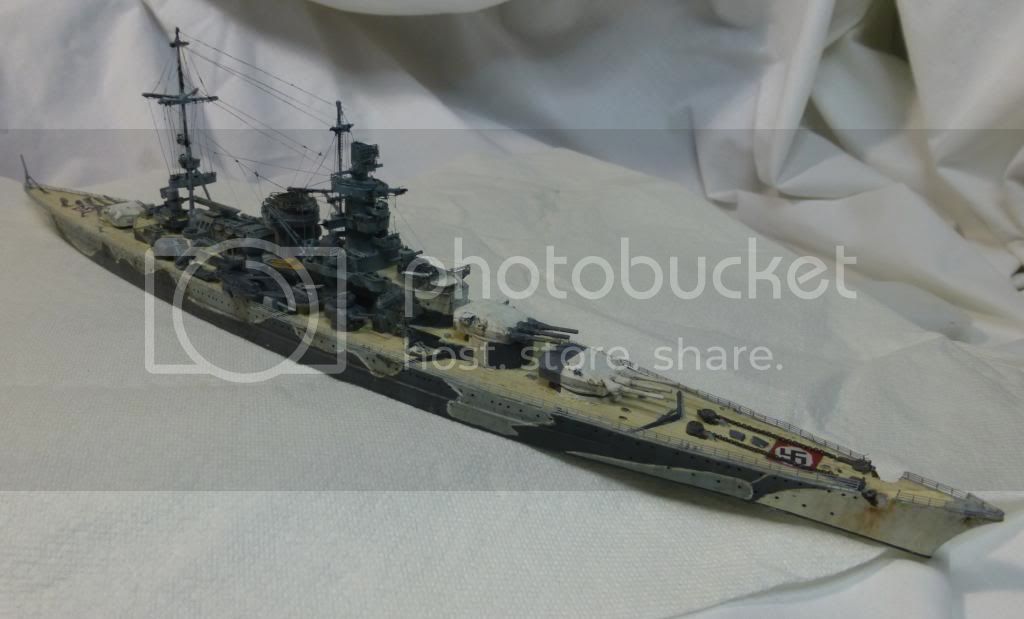
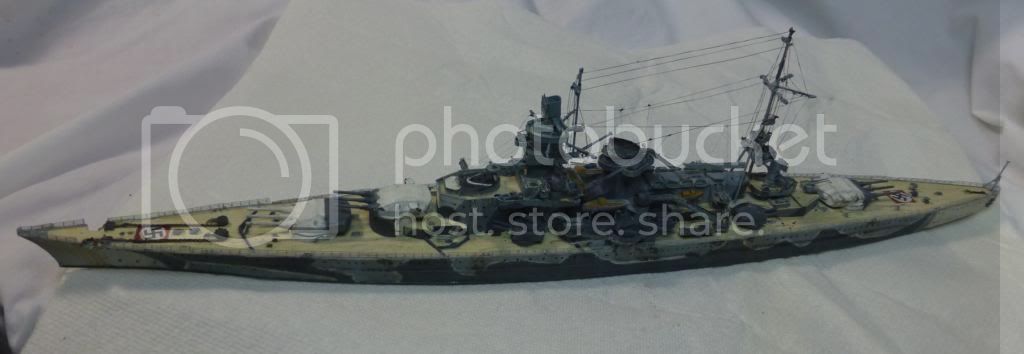
I could have simplified the task by picking an early war paint scheme, but history had its way and I gave Scharnhorst the complex scheme it wore during it's destruction at the Battle of the North Cape December 26, 1943. The ship was given the scheme in July while in its last port of Alta Fjord in Norway. Alta is the farthest north genuine town on the planet so in July Kriegsmarine planners were facing a 23 hour day and the possibility of surface action between the Scharnhorst and destroyers against a British convoy bound to Murmansk (surprisingly close to Alta) so based a disruptive scheme on the Norwegian landscape. The doomed operation, however, was launched on December 26 when there was a 23 hour night, so I suppose the ship could have been painted yellow. Here she is in her last summer:
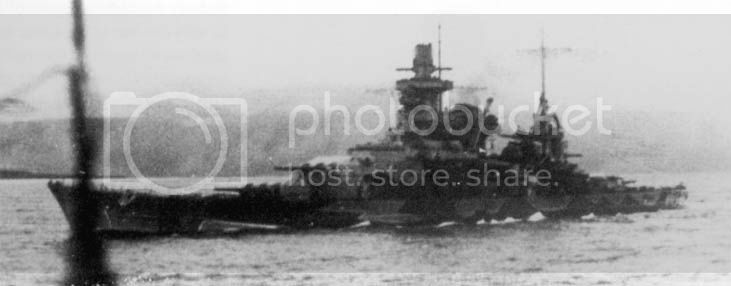
Because the camo scheme included the superstructure as well as the hull, I figured (rightly) that this would add some real time and make planning the build more complex. As long as I was in for project, I tried to get as much as possible right. I spent a lot of time with KM colors and came up the following:
RAL 9002 Weiss – Vallejo Model Color “Off White”
RAL 7016 Dunkelgrau 1: found on boot topping and one section of the hull and a portion of the bridge was done with Vallejo Model Color “Black Gray.”
RAL 7024 Dunkelgrau 2: the dark gray camo color found on the hull, turrets and part of the superstructure. It was made from Vallejo Model Color “German Gray” with “Pale Blue Gray” used for scale.
RAL 7001 Hellgrau: the light gray camo color and the peacetime color for ship hulls, came from a combination of Revell Aqua Color Satin Gray (#374) lightened with MC “Light Neutral Gray.”
RAL 7000 Dunkelgrau 51: found only on the central superstructure. It was a combination of Revell Aqua Color Grau (#51) mixed even up with Vallejo MC “Dark Blue Gray.”
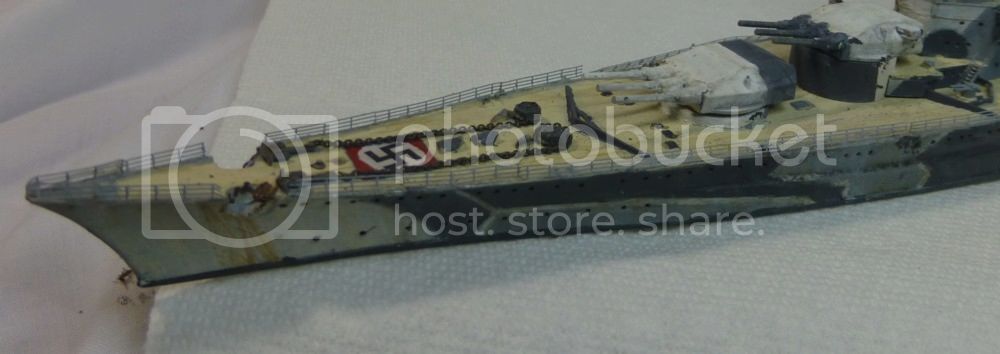
The deck is a combination of Golden Fluid Acrylic Buff and Ocher. I later hand painted very fine lines of three different earth colors.
When painting the hull I tried a masking technique favored by a fine Brit aviation guru. I masked the whole thing in Tamiya masking tape, then drew the camo lines with a Sharpie. Then I used Xacto's pen-like mini cutter and gingerly cut away the tape and either removing it or putting it back on depending upon the circumstance. There were no scratches visible when done.

The base coats are best seen as ship slowly went together. Actually I was pretty pleased. I'm not a heroic modeler but have found Mr. Baumann's advice to scratch build masts in brass to be spot on. Tamiya's masts did look the part but I didn't see them standing up to the rigging and I was right. The main mast was done with Albion Alloy sliding tubes which is as close to a taper as I could get. I know the yards were aligned differently, but I sacrificed accuracy for strength. Unfortunately I used Tamiya's yards that protrude from under the bridge – they were nicely shaped but proved hard to rig properly. Although I didn't take a build photo, I did surgery on some railings and used them for rigging under the yards. I also looked for places on the vessel to stick bits of railing to use as contact points for rigging. A better modeler would have gotten more out of Tom's PE set. I'm still coming to terms with the craft and many of the pieces here were extremely fine. The instructions provided made some errors, but I simply didn't quite understand what was required for some parts. As my wife reminds me often, I am not good at “multi-tasking” and some PE bits correctly done were annihilated later by a misplaced thumb. It was still worth the candle.
During the build I did try out some new toys and techniques with great success. First, early in the build I stumbled on the “Favorite Tips” thread on Model Warship. I was skeptical about Mr. Baumann's advise to use scissors on PE – I had always used Xacto #16 and #11 blades. But I got out my best scissors and found they worked very well. So I bought the recommended Fiskars which work very nicely indeed, although I think a decent sewing or hobby equivalent would be satisfactory. I blew $20 and bought Swiss Rubis tweezers and consider it money well spent. They weren't always ideal for rigging (probably my problem) but worked like a charm for “fiddly” bits. Pushed the envelope with the Xacto knife too. The Brit noted above recommends using an old #11 blade as an application tool for CA. You don't use the tip, but rather apply it like you were cutting a surface. You get a very fine and precise application and it was great for railings. Lastly, I've always had trouble eliminating spare line during rigging. I even spent some real money on some very good razor fly tying scissors. A light bulb went on and I tried a brand new #11 Xacto blade to trim knots or contact points and it worked like a charm. So there I was with three Xacto knifes – one for applying CA, one for applying Aleene's tacky glue and one to cut line. Put different colors of masking tape on the handles – not good at multi-tasking. (The other Xacto knife mentioned above looks like a pen and only works with the mini-blade.) Luckily Xacto stuff is cheap and bulk blades cheaper yet. I changed the sharp one at least once a day.
Below are some pics of the build before weathering.


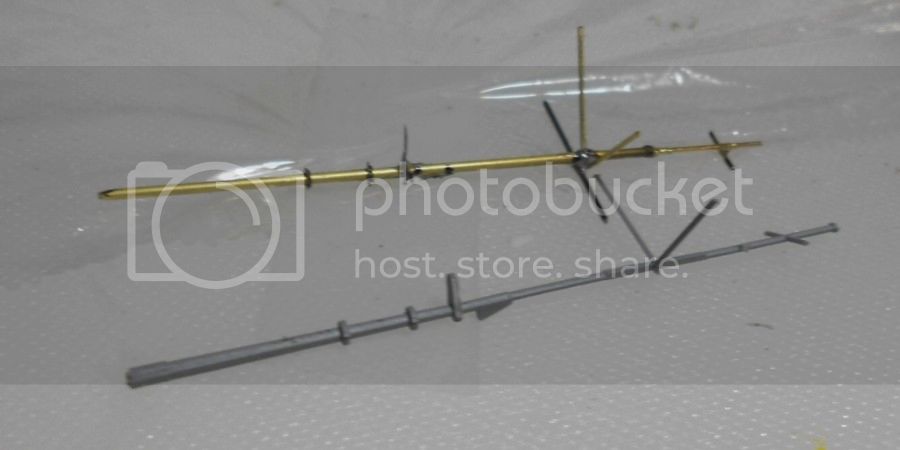


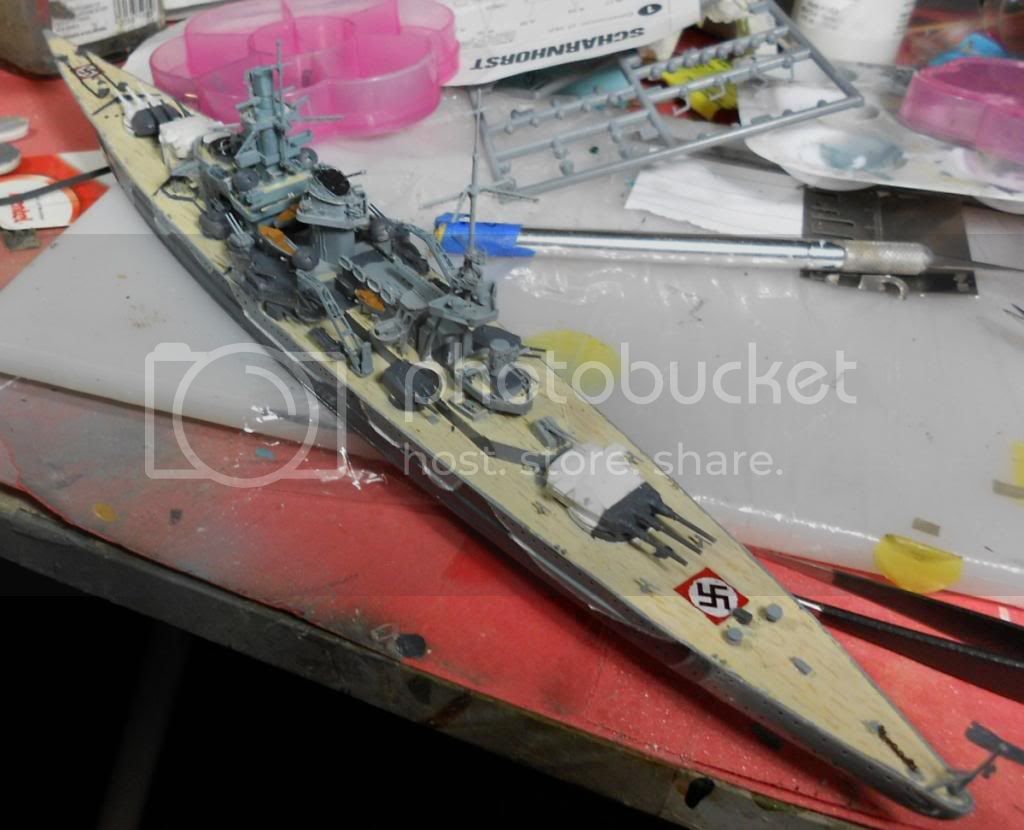
I wasn't exactly sure what degree of weathering I wanted. Scharnhorst didn't go very far during 1943 and was repainted above waterline in July. (How well such maintenance was done in mid 1943 when the squeeze was on in KM for materials and manpower, I don't know.) So I didn't attack the ship the way I would have done a model of one of its RN opponents in the North Cape and there's very little rust. But I had visions of the arctic weather, arctic winds and rains while anchored, and a ship and its crew dying during a battle where the seas were so bad that cruisers couldn't keep speed not to mention a blizzard. And the arctic night. I just couldn't see Scharnhorst looking like it had left the showroom floor. And I've come to the conclusion that a waterline kit takes to serious weathering far better than a full hull. It's hard to imagine a weathered ship out of the water – it's just not how I think of them. (A sub would be fine. I loved sub movies when I was a kid and can't imagine them on the surface.)
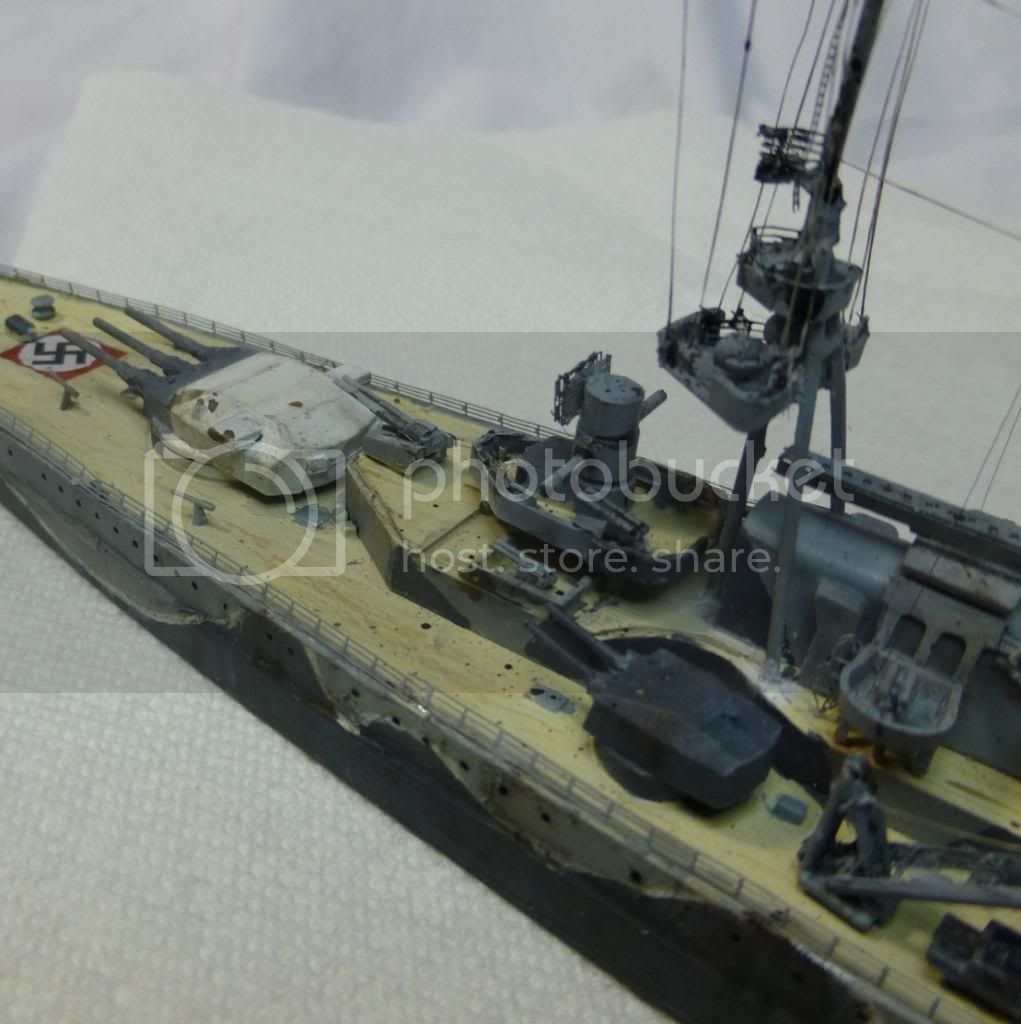
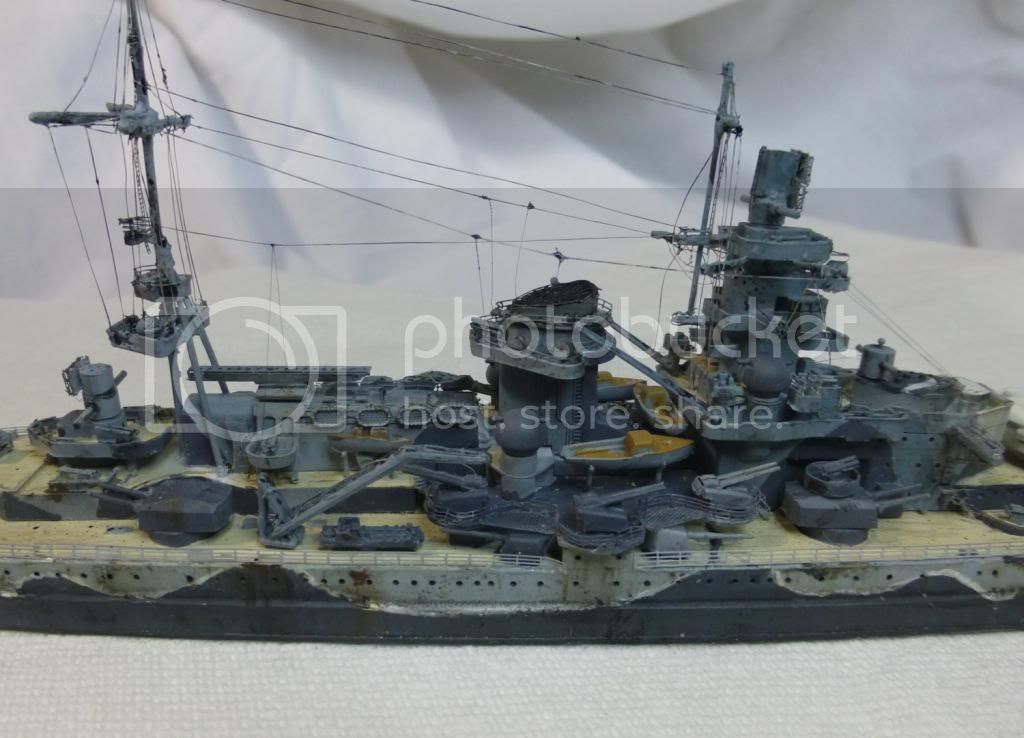
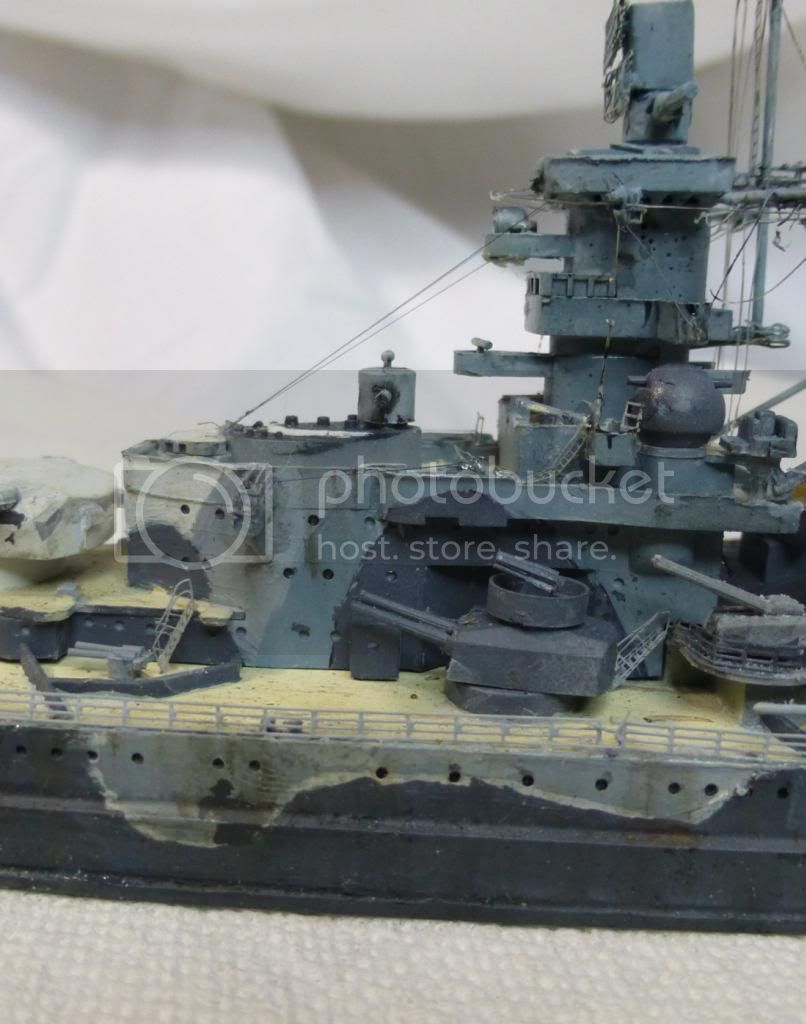
I like David Griffith's filter technique. I'm not really sure if an armor modeler would use it that way, but the random applications of several oil colors certainly breaks up the base coat color and it adds a subtle streaking effect also. I don't like turpenoid and used to employ high quality mineral spirits for filters. Thanks to a tip on an armor site, I now use Ronsonol to thin the oils. Sounds odd, no doubt, but it dries remarkably fast and leaves less residue than turpenoid. (Try it out on an old kit – very useful.) I added some heavier streaking using AK's “Streaking Grime” for Dunkelgrau tanks and gray hulled ships. I'm not a great believer in expensive proprietary washes etc, but these are good products. For washes I use Iwata Com.Art acrylic paints. They are hard to describe – a little like a cross between an acrylic paint and a pigment. They're made for almost any surface except plastic which is what makes them so good for weathering. (I originally read about them on a model railroading site.) I use transparent colors although they also come in opaque. When you use transparent black or transparent dark smoke Com.Art the stuff lays down in a very thin layer. It's the easiest wash I've ever used to remove – if a dried bit is made wet it can be removed (or mostly removed) the next day. While wet, you apply with one brush and take excess off with another. It does a very nice job of shadowing. (I really like it for aircraft panel lines. In my humble, minor panel lines are often over shadowed, but with Com.Art you can get and keep a layer entirely inside even a very small panel line.) But what I really like is the odd, almost grimy texture of the stuff. Even a light application will give a kind of very subtle dirty appearance. Light transparent colors are very good for fading and blending multi-colored decks. The overall effect is of a generally untidy machine but without the heavy impact of streaking with enamels or oils. You can see the effect pretty well in this detail from the ship's superstructure:
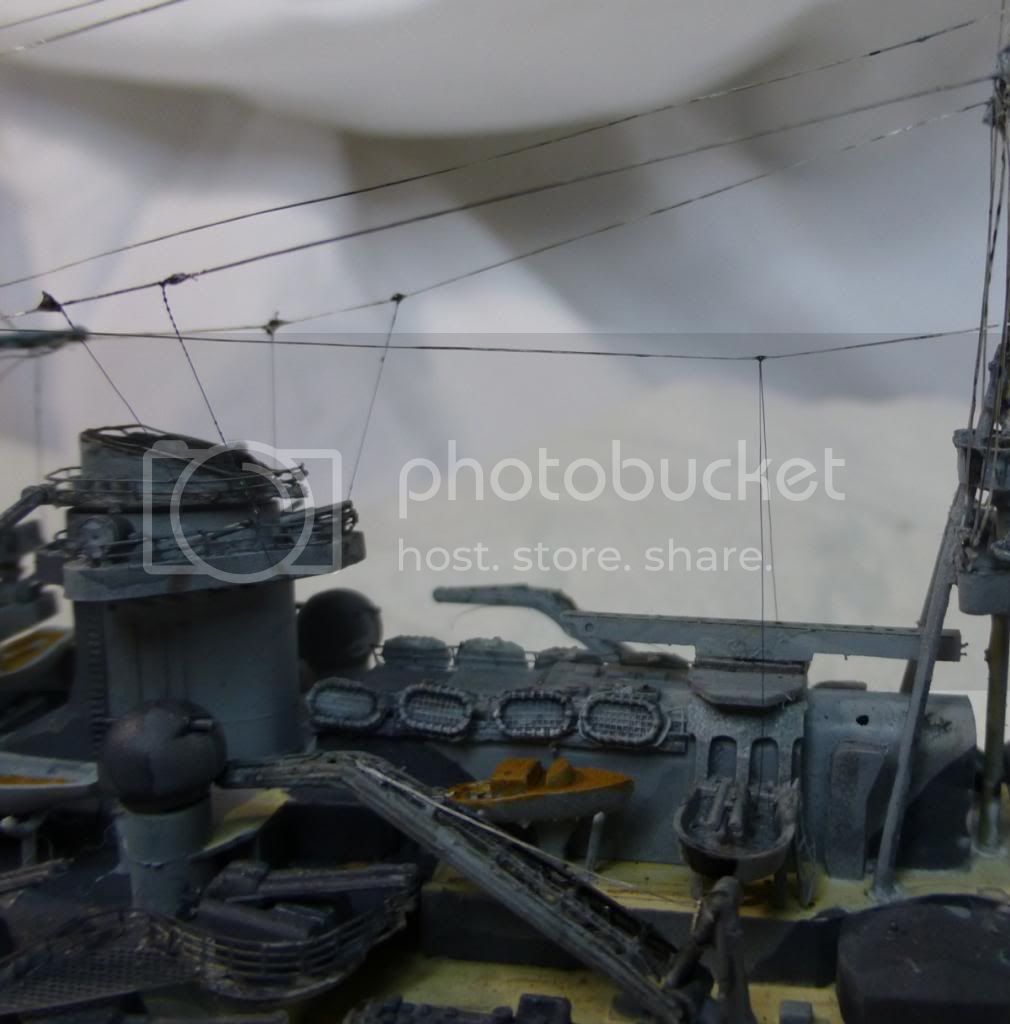
I still struggle with rigging and I'm beginning to fear that I'm not every going to enjoy it. I intended to rig the whole ship with 20 Den Uni-Caenis. I used it on a destroyer last time around, but the job was far easier. In any case, I found the stuff very hard to work with – it may be my eye and hand are not up for thread that I often find invisible. I put on five seperate strands of the stuff on the front of the br
idge and was getting an ulcer and cursing at inatimate objects. It also dawned on me that when five feet away I could see the stuff at all which rather defeats the purpose of rigging. (I've made streched sprue by the gross but still can't figure out how to connect them to brass without destroying it. Valuable for planes and tanks though.) Instead I switched to Berkeley Fireline. This stuff is a fused filament line of one lb test but has the diameter of a ¼ lb fly tippet. (.06mm) It has just a little memory which is actually helpful. I'm not sure how much thicker it is than the 20 Den Uni, but it is considerably thinner than some 60 Den Uni that I have. (In the photo above you can see some 20 Den Uni strung over a strand of Fireline: the diameters are not dramatically different to my eye. Working with Fireline, however, is far easier.) And, because it's a filament, it tightens up nicely with the incense treatment. The problem I've had with it before is that it's surprisingly hard to trim because of the fused filaments. That difficulty disappeared when confronted with a new #11 Xacto. One problem remained. Fireline is made for ice fishing and is clear. A lot of modelers rig ships with light colored line so I thought I'd leave it alone. It didn't look right. So gave the lot a careful brushing with Com.Art dark smoke and the effect is a little like colored glass. I like it.
Using the 20 Den also multiplied a problem I have. I can't rig a 1/700 ship without holding it and the harder the line is to see the more holding. And the more holding the better the chance to damage or destroy PE. I continued to mess up my own model with Fireline too. I amplified this problem by putting on the railings before rigging. According to my build notes, I've done this on my other ship models. But this was a 1/700 and I wanted to put more line on. By the end I had thumbed almost every piece of railing. I was not happy about this because according to my standards the railing process had gone very smoothly. Tom's railing is nicely detailed but not too fine and I was cutting precisely with the newly arrived Fiskars. I used the invaluable Aleene's Tacky Craft Glue to fix the railing and then ran a very thin line of CA to hold it. So things looked good before my thumbs got to work while rigging. A more dedicated modeler would have put on new railing, but I was suffering from project fatigue and settled for a repair job. And the last thing done was snapping off the plastic stern flagstaff, a part that should have been the last to go on. So I stuck it back on with Aleene's and CA and called it a wrap.
Considering the time I spent I can't claim success on this model. But I don't think it was a complete botch either and I've never made a model during which I learned more about modeling than this one. I hope so anyway. Although I approach ship modeling with fear and trembling it gives back much. It's also very important for me to grow accustomed to 1/700. Space is a real issue at my house. And I've found that a major 1/350 build is two months or more so I can only do one of those in a year. If I can get adequate results from 1/700 kits I think I'll be able to keep my plane-tank-ship cycle going.
Eric
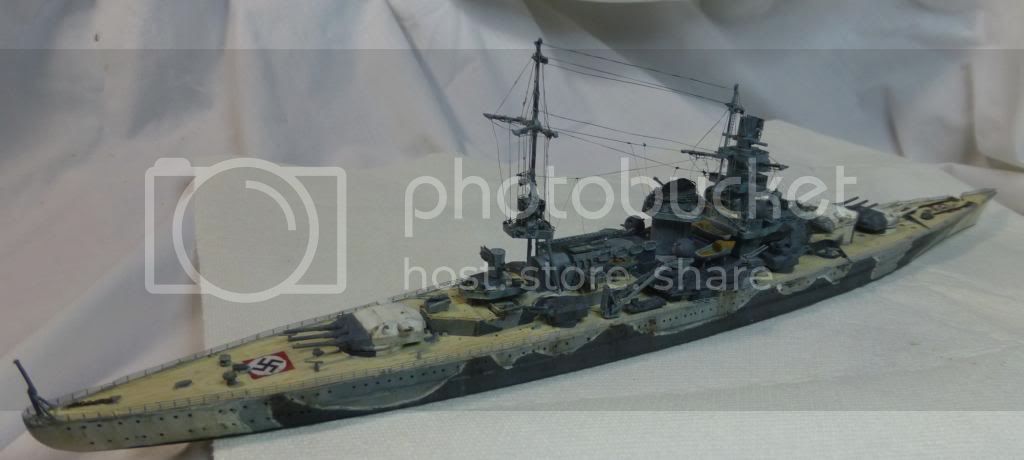
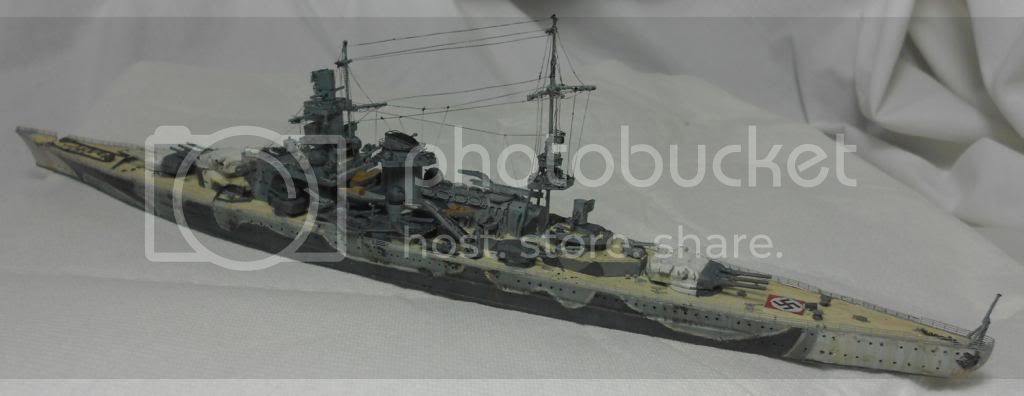
Pics of the completed kit below:


