_GOTOBOTTOM
Ships by Class/Type: Cruisers
Topics covering cruisers both past and present.
HMS Aurora, Flyhawk 1/700 build log
Deranius
Visit this Community
Novi Sad, Serbia & Montenegro
Joined: April 08, 2014
KitMaker: 60 posts
Model Shipwrights: 56 posts
Posted: Sunday, June 05, 2016 - 03:24 AM UTC
Hi everyone,
First small intro. My name is Rade Marjanovic, astrophysicist from Novi Sad, Serbia. Hooked on ship modelling by my father, retired Yugoslav navy officer.
Todd MIchalak was nice to send me this kit for my first build log. I am rather new to modelling so if you think there is anything worth mentioning feel free to do it. Anyhow here it goes.

Flyhawk started producing ship models quite recently and was known to ship modelers before only as aftermarket (PE) company.

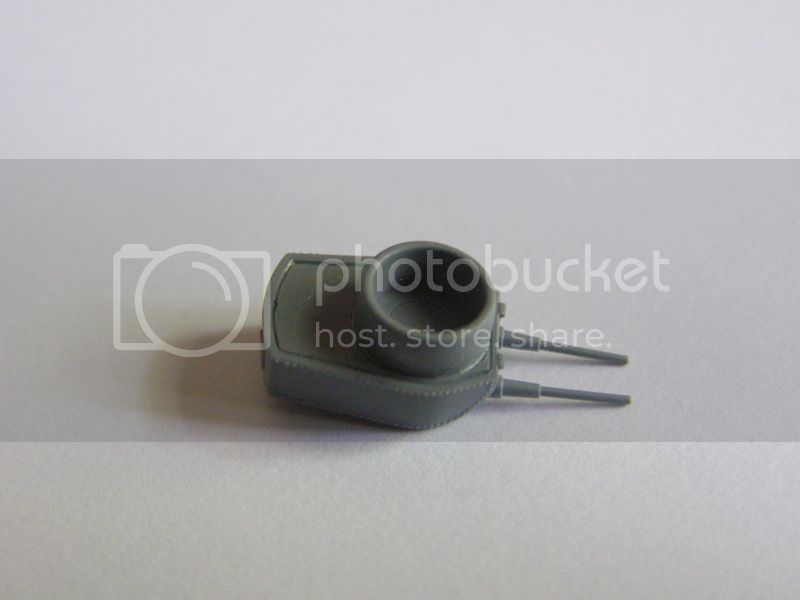
But, by venturing in the world of plastic they proved that ships can be produced with same precision as PE. The kit itself is highly detailed and not for those with faint heart (check very nice review by Todd). Some parts are less than one millimeter in size.

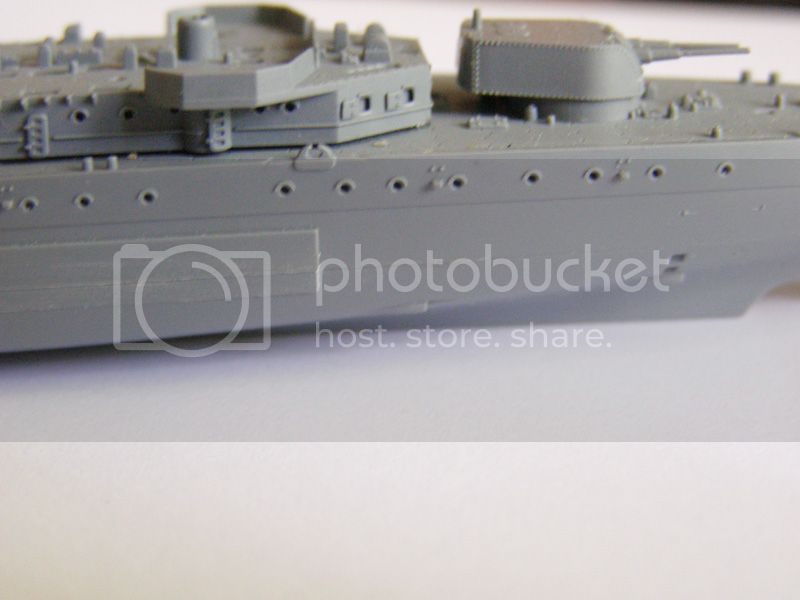
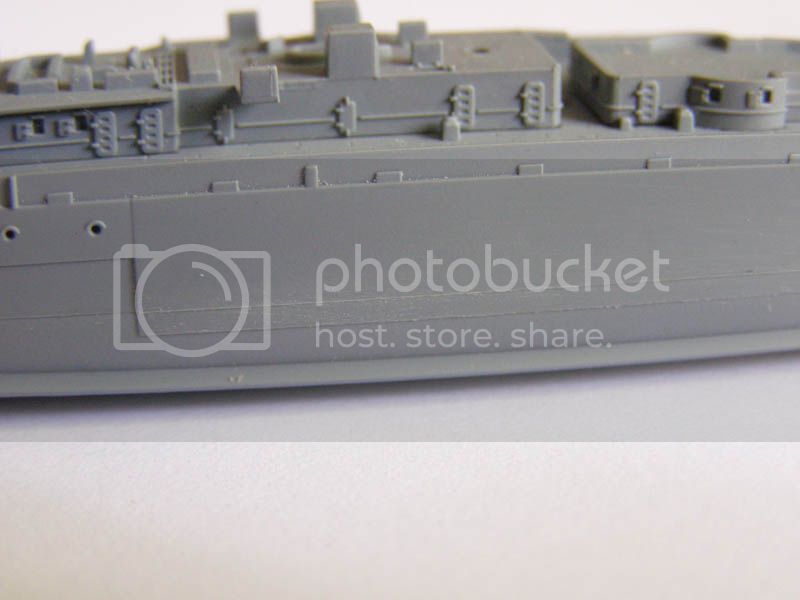
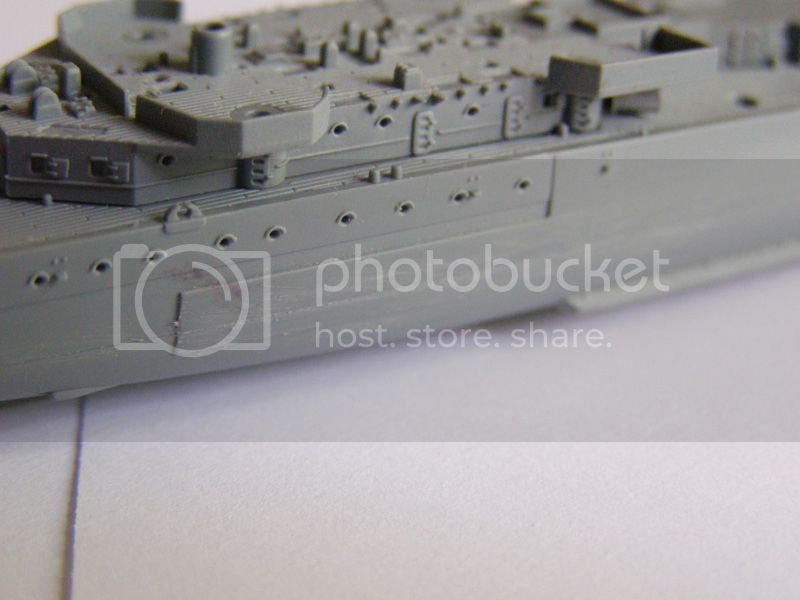
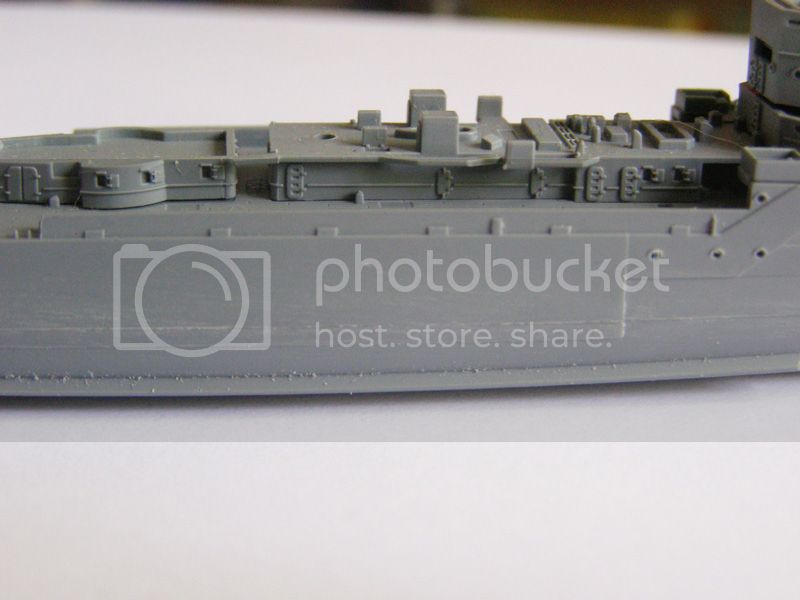
Parts of the kit are very crisp with no flash whatsoever and very small if any ejector pin marks.
During the build of this particular kit I am going to use only parts that came in the box and Uschi's Rig that thing rigging thread of superfine size as only aftermarket.

The box contains a sheet of PE that I will also use (my first encounter with PE).

As one can see there are a lot of my firsts with this kit . Hopefully all will turn out good.
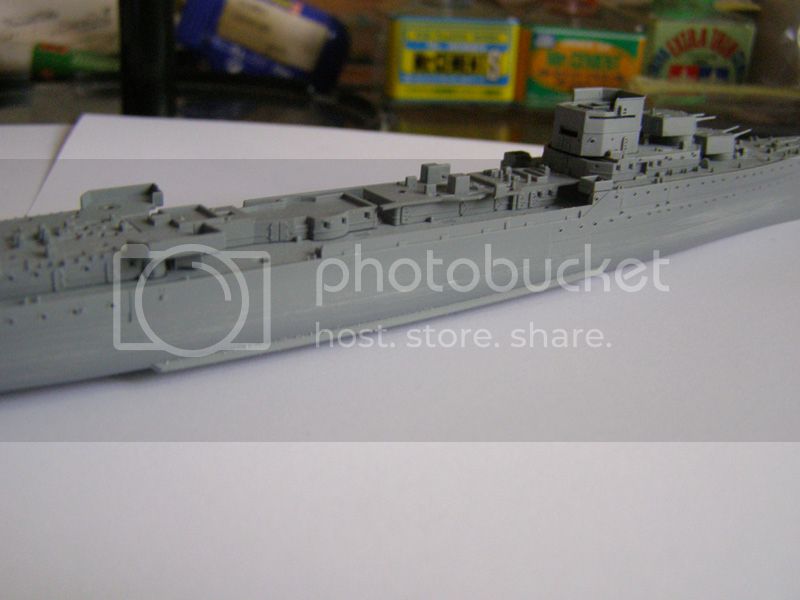
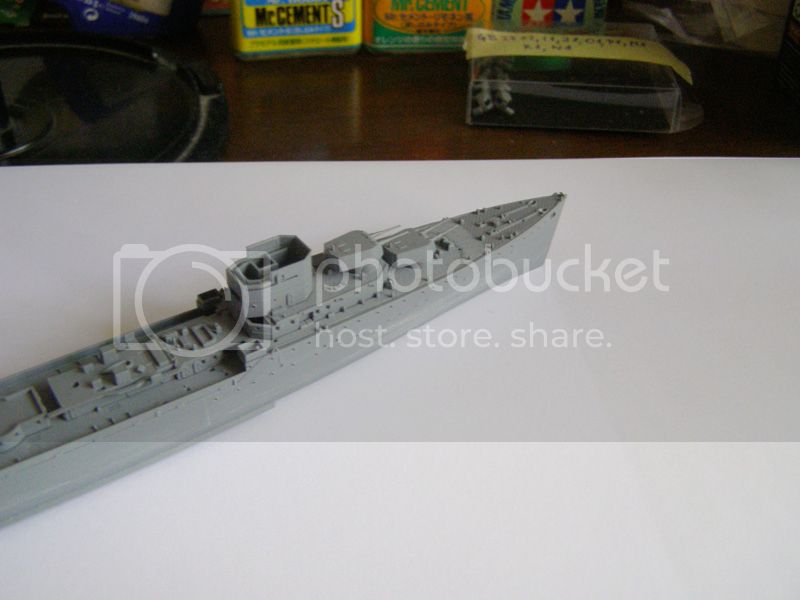
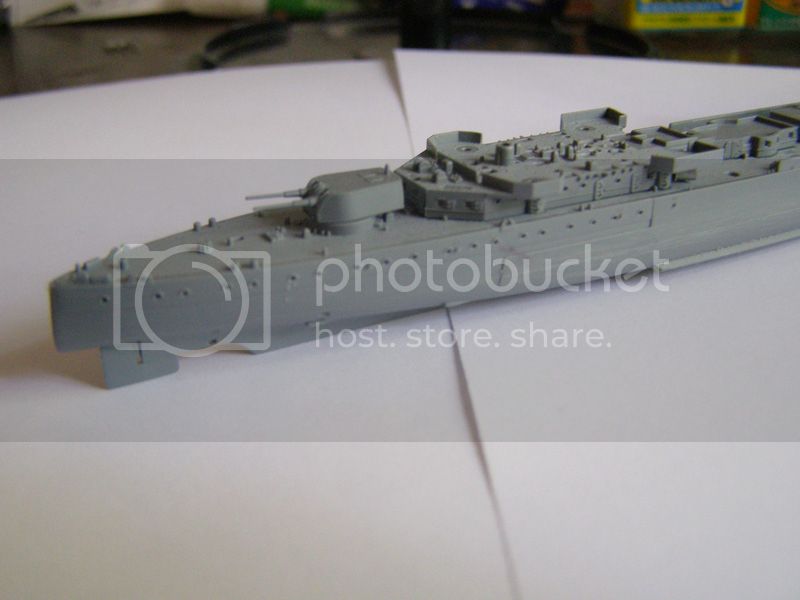
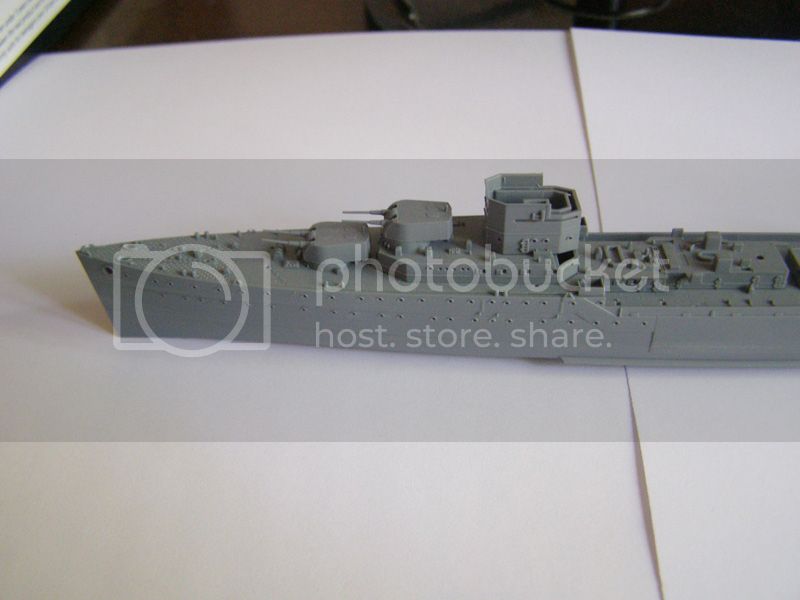
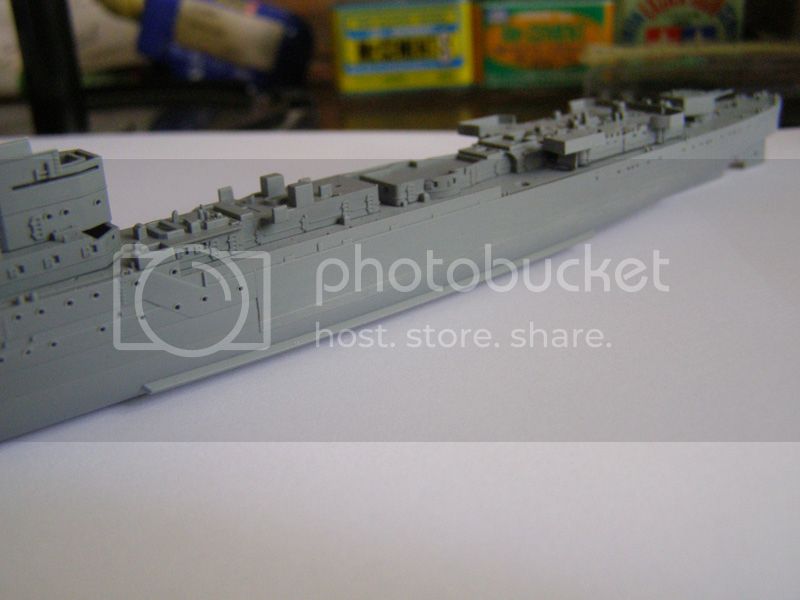
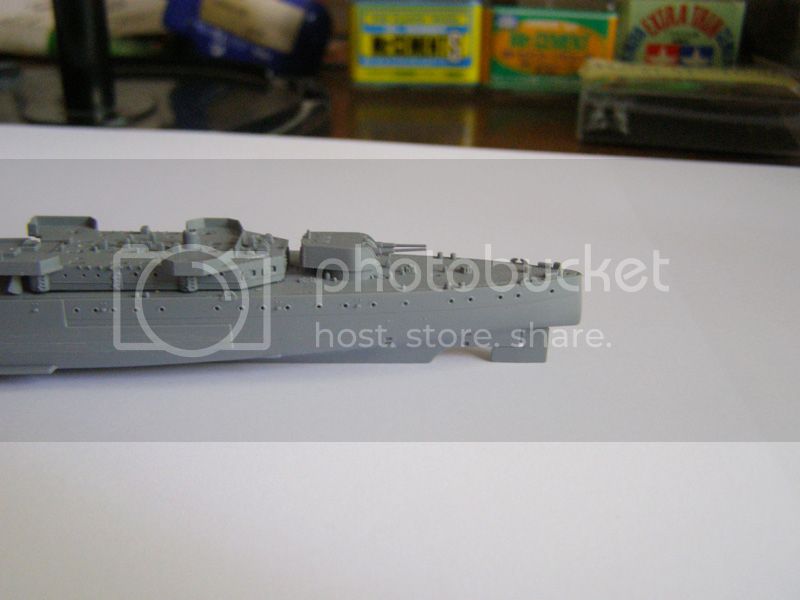
Firstly I glued the hull halves (upper and lower) and immediately stumbled upon a problem.

The lower half of the hull (underwater part) is bent a little on ends, probably by ejector pins, which resulted in poorer than expected fit with upper half (which can be seen on the images above). This had a consequence of slight misalignment along the whole length of the seams and the armor plating is the most obvious example of that.

However I plan to fix it with some light sanding and filling if necessary. Next thing i tried dry fitting the decks. They fitted perfectly, and this was the most dreaded part for me, as I don't want to loose any details by sanding.


As for the aftermarkets available there are metal barrels set, wooden deck and paint masks all by Flyhawk.
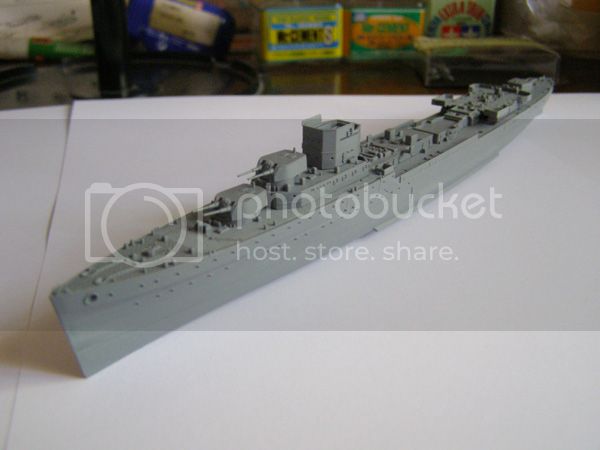
This is where I stopped for now. I am waiting for the magnifying glass with LED to arrive so I can continue with smaller parts. In the meanwhile, fixing the seams between hull halves and hull painting are to be done. Feel free to comment.
TRM5150
Visit this Community
Massachusetts, United States
Joined: January 03, 2010
KitMaker: 2,159 posts
Model Shipwrights: 1,400 posts
Posted: Sunday, June 05, 2016 - 04:04 AM UTC
Woo Hoo! Glad to see the kit arrived safely my friend! From what I seen inside the box, you should have a blast building this one! Off to a great start too! Looking forward to following along with your progress! Enjoy!
JJ1973
#345
Visit this Community
Niedersachsen, Germany
Joined: August 22, 2011
KitMaker: 1,835 posts
Model Shipwrights: 1,832 posts
Posted: Sunday, June 05, 2016 - 09:15 AM UTC
Welcome on board, Rade, and welcome to ship modeling!!

Well - for a 'first' in so many aspects, you have chosen some project - wow!! That's one beautiful kit, and a fine ship - and I would wish so hard Flyhawk would do those kits in 1 / 350, meanwhile they are offering a range of very interesting cruisers, and yours is one of them.
But 1 / 700 is just to tiny for my to build. I am working with magnifier glasses for my 1 / 350...

I wish you best of luck with this wonderful project and I'll be following!!

(Misaligning upper and lower hull - tell me about it due to the size of your model, you should be fine soon. I spent the better part of the last two weekends filling and sanding with the Hood...)

Cheers,
Jan
Deranius
Visit this Community
Novi Sad, Serbia & Montenegro
Joined: April 08, 2014
KitMaker: 60 posts
Model Shipwrights: 56 posts
Posted: Sunday, June 05, 2016 - 12:06 PM UTC
Thank you for words of encouragement guys.
As for the misalignment of the hull halves, it could have been avoided (like it was with their HMS Naiad kit, at least according to the dry fit) by adding one more ejector pin in the middle (because bow and stern sides of the lower hull are bent downwards compared to the middle section). At least those are my two cents... But it wouldn't deter me from the kit to stretch the build endlessly. Now off to my daily job.
RedDuster
Visit this Community
England - South East, United Kingdom
Joined: March 01, 2010
KitMaker: 7,078 posts
Model Shipwrights: 6,649 posts
Posted: Monday, June 06, 2016 - 11:08 PM UTC
Really like the look of those Flyhawk kits Rade,

Will be following your build with much interest.

I can see you are off to a good start.

Cbeers

Si
Deranius
Visit this Community
Novi Sad, Serbia & Montenegro
Joined: April 08, 2014
KitMaker: 60 posts
Model Shipwrights: 56 posts
Posted: Tuesday, June 07, 2016 - 01:50 AM UTC

Quoted Text

Really like the look of those Flyhawk kits Rade,

Will be following your build with much interest.

I can see you are off to a good start.

Cbeers

Si


Thank you Si,
I am a bit tired last few day, because there are deadlines at work, so still no update... Hopefully I will do some work before weekend, because I am on trip for weekend.
Deranius
Visit this Community
Novi Sad, Serbia & Montenegro
Joined: April 08, 2014
KitMaker: 60 posts
Model Shipwrights: 56 posts
Posted: Saturday, June 25, 2016 - 09:14 PM UTC
Finally an update on the build. I took some time to try and sand the excess plastic on the armored belt area in the middle and you can see the results.


It might look as overdone in some places but the primer will show. If it turns out to be overly sanded I will probably glue some thin strips of styrene.

The turrets with the main guns are a four part assembly and are pretty straightforward with perfect fit.


The deck sits rather nice on the ship’s hull as is the case with superstructure and deck. Dry fit checks show no major cracks and faults and there would be no issues with those in final build-up. Maybe just occasional misalignment between some details on the superstructure, like catwalks and similar.


So far the build has been rather easy and linear, but my compressor died few days ago so that is the reason that only this small amount of job has been done. Hopefully that will change soon.

RedDuster
Visit this Community
England - South East, United Kingdom
Joined: March 01, 2010
KitMaker: 7,078 posts
Model Shipwrights: 6,649 posts
Posted: Sunday, June 26, 2016 - 11:32 PM UTC
Nice work Rade,

She looks like she is going together very neatly. The level of detail is better than some 1/350th kits.

Bad news regarding your compressor, hope you get it sorted soon.

Cheers

Si
Deranius
Visit this Community
Novi Sad, Serbia & Montenegro
Joined: April 08, 2014
KitMaker: 60 posts
Model Shipwrights: 56 posts
Posted: Monday, June 27, 2016 - 12:28 AM UTC
It is a very neat build with lots of extraordinary details. As for the compressor, hopefully it will be finished soon. Although it is DIY version built from refrigerator, and while it is in the dockyard I might even add a tank to it, since it doesn't have one...
TRM5150
Visit this Community
Massachusetts, United States
Joined: January 03, 2010
KitMaker: 2,159 posts
Model Shipwrights: 1,400 posts
Posted: Monday, June 27, 2016 - 04:15 AM UTC
Looking good there Rade! Looks like the parts are falling together for you! I know the tiny piece grind should kick in soon! All those ammo cabinets, bollards and what have you! Keep it going! Best of luck getting the comp. fixed too!
JJ1973
#345
Visit this Community
Niedersachsen, Germany
Joined: August 22, 2011
KitMaker: 1,835 posts
Model Shipwrights: 1,832 posts
Posted: Saturday, July 02, 2016 - 11:33 PM UTC
Rade,

very good progress and a vey nice update, absolutely fine work of yours!!

The amount of detail to the kit's parts is astonishing for a 1/700 - these Flyhawk kits seem to be really great kits!

Looking forward to your progress!

Cheers,
Jan
Deranius
Visit this Community
Novi Sad, Serbia & Montenegro
Joined: April 08, 2014
KitMaker: 60 posts
Model Shipwrights: 56 posts
Posted: Sunday, July 10, 2016 - 02:46 AM UTC
Small update. Just glued the anchors, anchor winches and crane together (sorry no pics of these as I am not home), but will take a break of week or so, since I am on vacation.
TRM5150
Visit this Community
Massachusetts, United States
Joined: January 03, 2010
KitMaker: 2,159 posts
Model Shipwrights: 1,400 posts
Posted: Sunday, July 10, 2016 - 03:56 AM UTC
Any progress is good progress! Enjoy the little vacation.
Deranius
Visit this Community
Novi Sad, Serbia & Montenegro
Joined: April 08, 2014
KitMaker: 60 posts
Model Shipwrights: 56 posts
Posted: Monday, July 11, 2016 - 04:07 AM UTC
Thank you, I will enjoy it certainly...
Deranius
Visit this Community
Novi Sad, Serbia & Montenegro
Joined: April 08, 2014
KitMaker: 60 posts
Model Shipwrights: 56 posts
Posted: Monday, August 29, 2016 - 09:15 PM UTC
Hello everyone... It has been a long time, due to my 'old' compressor acting up all the time like a stubborn girl. But then I decided to bite the bullet and bought this little beastie:


So there will be some more on the topic updates as of this weekend I hope.
TRM5150
Visit this Community
Massachusetts, United States
Joined: January 03, 2010
KitMaker: 2,159 posts
Model Shipwrights: 1,400 posts
Posted: Monday, August 29, 2016 - 09:54 PM UTC
Glad to hear you're bac up and running again Rade! Nice looking compressor!
Deranius
Visit this Community
Novi Sad, Serbia & Montenegro
Joined: April 08, 2014
KitMaker: 60 posts
Model Shipwrights: 56 posts
Posted: Monday, August 29, 2016 - 10:10 PM UTC
I removed the 'armor' as it prevents the normal cooling of the compressor and regular operation of safety valve. The 'armor' can be used as holder for airbrushes. It cost me around 100 Eur though...
JJ1973
#345
Visit this Community
Niedersachsen, Germany
Joined: August 22, 2011
KitMaker: 1,835 posts
Model Shipwrights: 1,832 posts
Posted: Thursday, September 01, 2016 - 11:59 PM UTC
Hi Rade,

certainly looks like a fine compressor. A properly working one is essential for airbrushing, otherwise you are running danger to ruin parts of your build by uncontrolled spraying of color. Looking forward to see progress on your fine cruiser!

Cheers,
Jan
 _GOTOTOP