_GOTOBOTTOM
Ships by Class/Type: Submarines
Topics on submarines of all types and eras.
Merit's X-Craft build
TAFFY3
Visit this Community
New York, United States
Joined: January 21, 2008
KitMaker: 2,531 posts
Model Shipwrights: 1,244 posts
Posted: Sunday, July 10, 2016 - 08:32 PM UTC
I started this kit and I must say that for the most part it's been an enjoyable experience. Like any kit it's not 'perfect'. So, first, the bad, which is minor, really. The major niggle is the prop, which has woefully undersized blades. Eduard makes a PE set (#53153) for this kit which includes replacement blades. On a side note, Eduard's instructions show a template which is not included on the actual fret. I opted to use a prop from the spare's box. Maybe not 100% accurate, but much better looking than the kit supplied one. The other place where the kit falls short are the parts for the tow cable which are pitiful. Again replaced with some from the armor spares box.


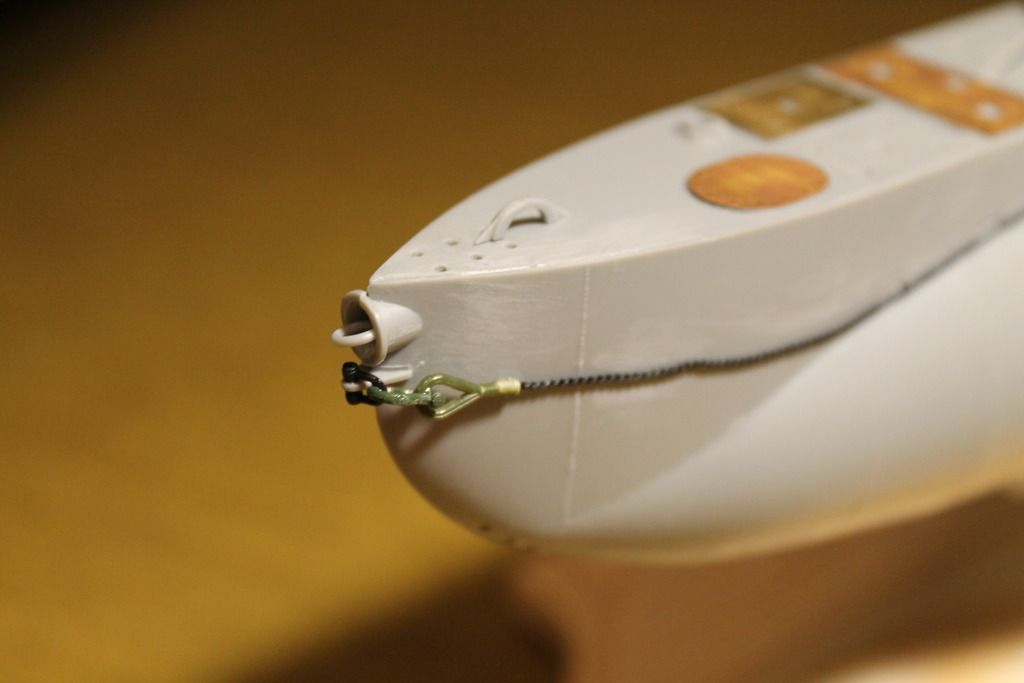
Merit includes these parts but the instructions forget to mention the actual cable, along with the ones that support the 'Side Cargoes'.


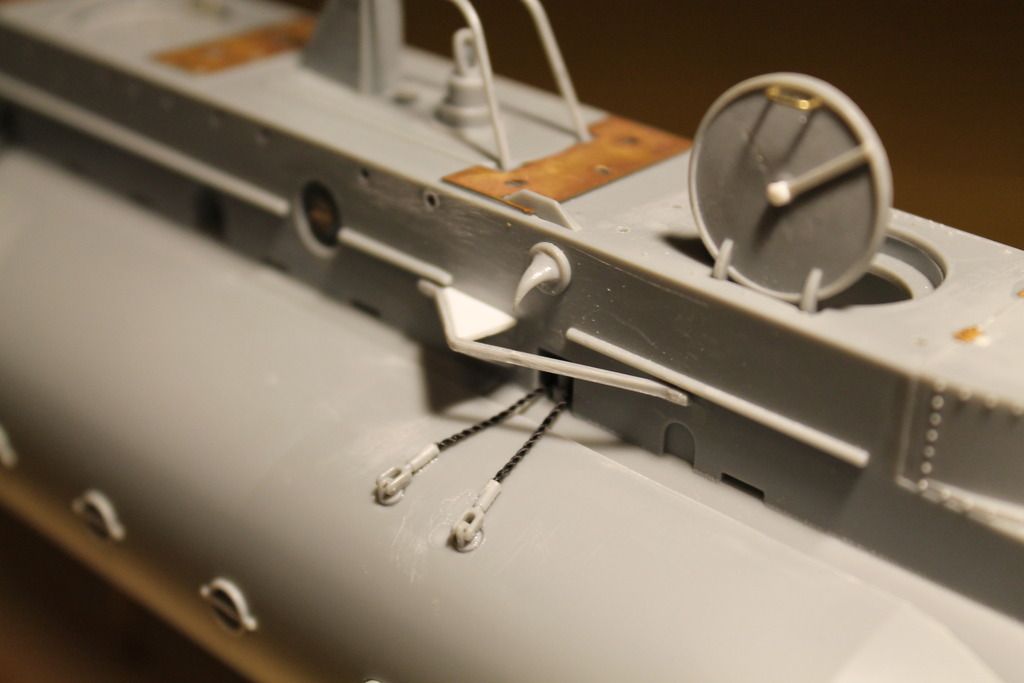
I used Nylon Beading Cord. It's used for making bracelets, and available in the crafts section at Hobby Lobby or Michael's. It can be attached with superglue, takes paint, and can be dry-brushed.

Despite these niggles, I'd recommend this kit to anyone interested in the subject. It's the only reasonably priced game in town in this scale anyway. The fit is very good. I just needed a little putty along the keel and lower hull. The deck is molded to the right-side hull half. Assembly is quick and easy. There are a lot of small parts that require careful clean-up however. One mistake that Merit makes is the linkages for the diving plane. They have them on both sides of the hull, they should only be on the starboard side.


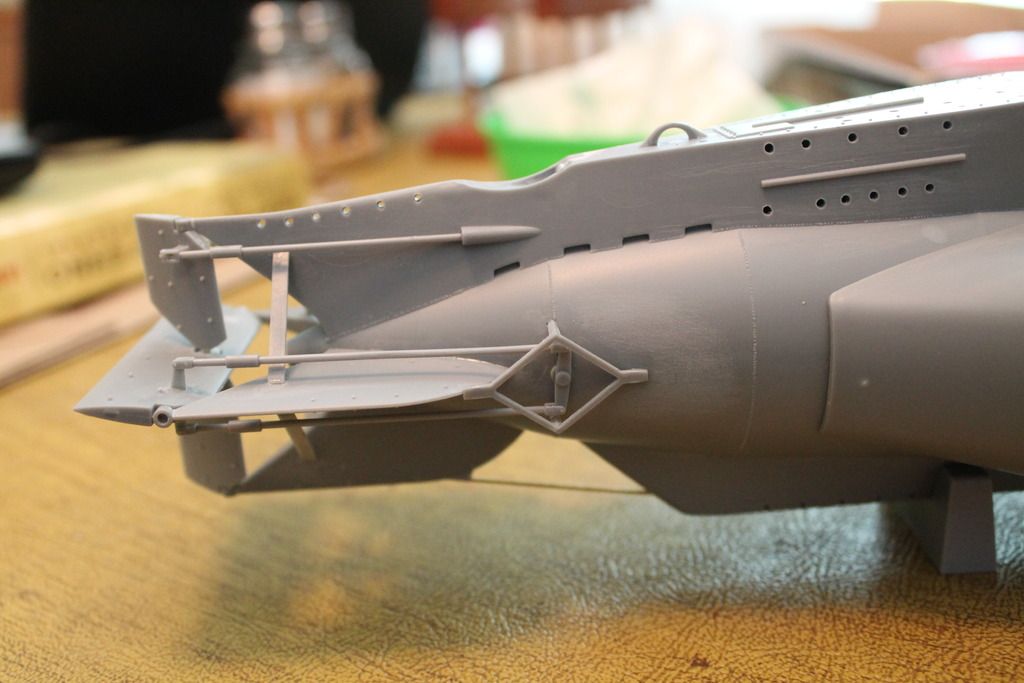
A simple matter to correct, fill a couple of holes and add the guard that runs from the hull to the fin, I used brass rod for mine. With a little effort the planes, rudder, and their linkages can be made movable. Although the linkages are supposed to snap together, the joints are weak and they would need to be drilled and pinned together. While on the subject of guards, I'd recommend replacing the kit supplied plastic ones (C2, C3, & C6) with brass rod. The plastic ones are delicate,and prone to breakage (ask how I know). It also saves on cleaning up those parts.

I mentioned Eduard's set earlier, while not absolutely essential, it does improve the kit. The kit supplies a small PE fret which includes these plates along the keel.


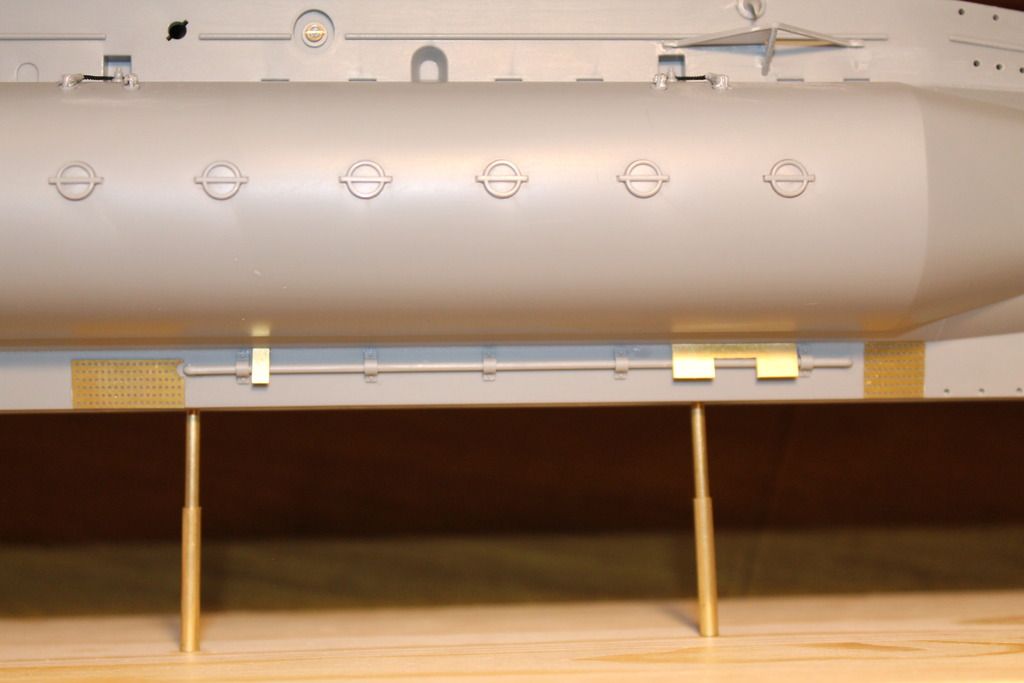
However, the kit PE parts are merely dimpled, while Eduard's are actual holes and look nicer. Also, they'll take a wash better than the kit's parts. Eduard also supplies some small bits and pieces and some deck hatches.


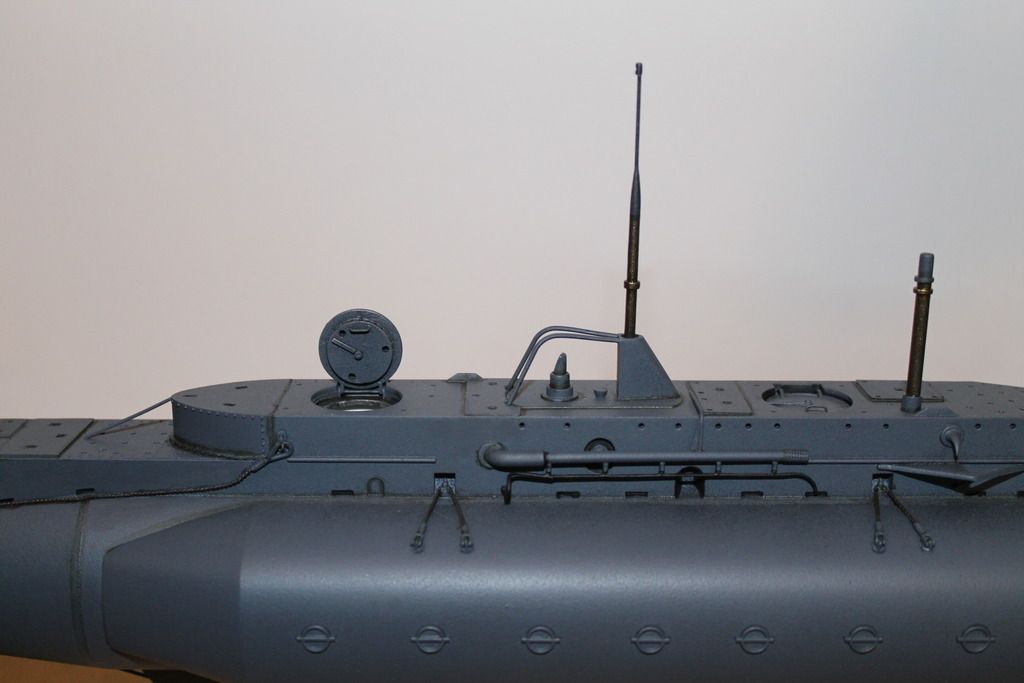
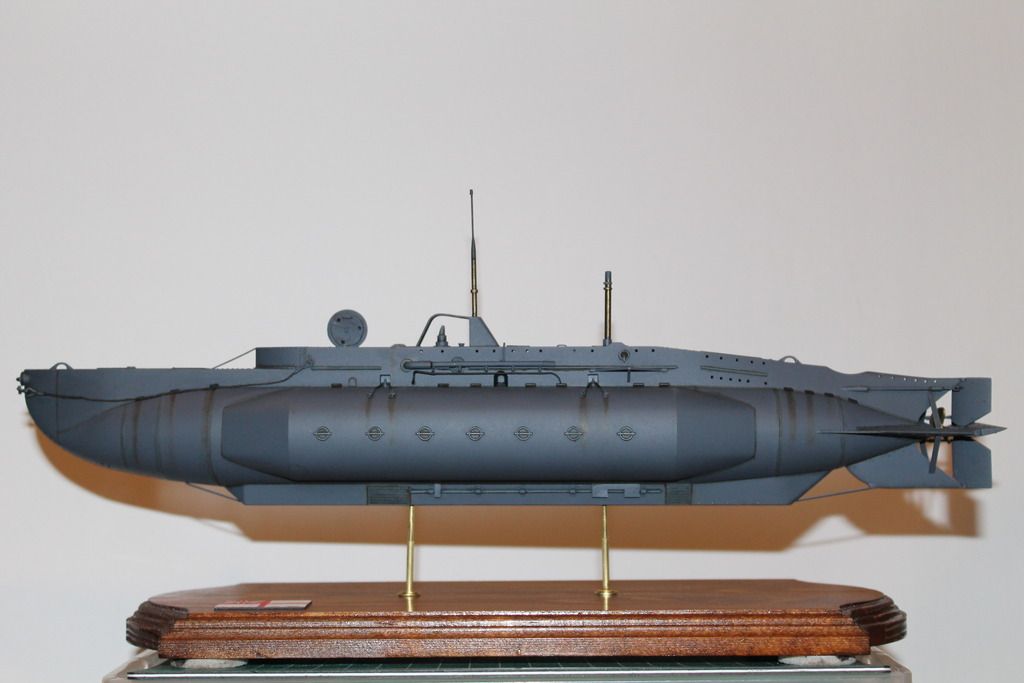
Again, not essential to complete a decent looking model, but an improvement in appearance (BTW I don't own stock in Eduard, nor am I a paid spokesman for them). You might also note in the photo, the periscope. It needs a little correction if you plan on displaying it raised. The snorkel can benefit from a little TLC.


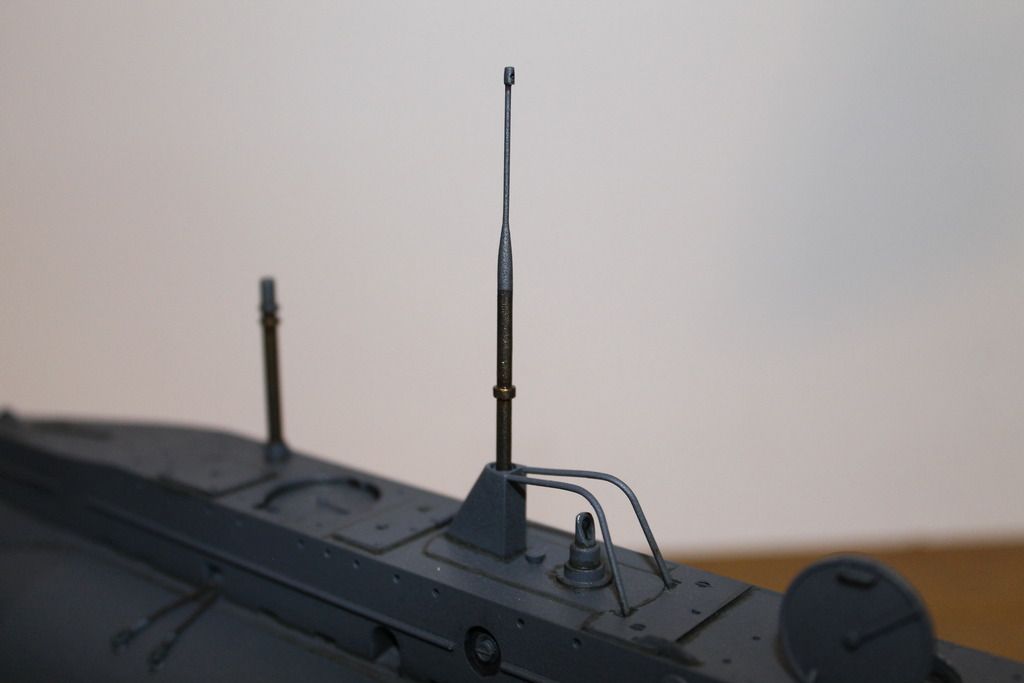
Knowing it would break almost certainly, I replaced part C1 with brass rod and added the small triangular brace with thin card stock. Eduard supplied the perforated upper section. It was my 1st attempt at rolling a flat PE piece into a cylinder, and was thankfully easier than I expected, or should I say feared. The snorkel can be left movable. I plan on leaving mine lowered and added the wire lead that should go from the antenna to the left side of the hull.

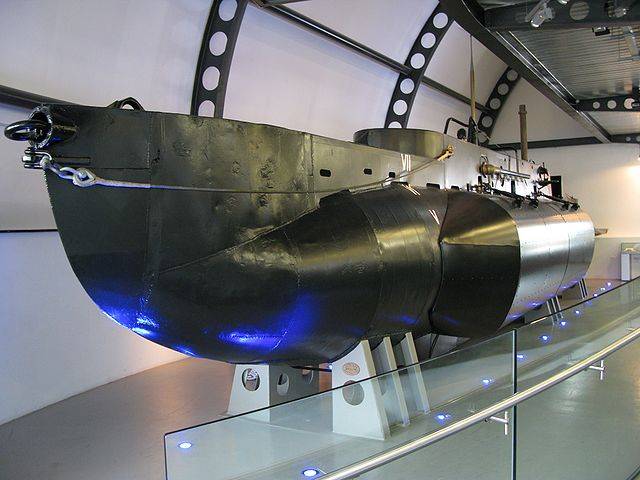
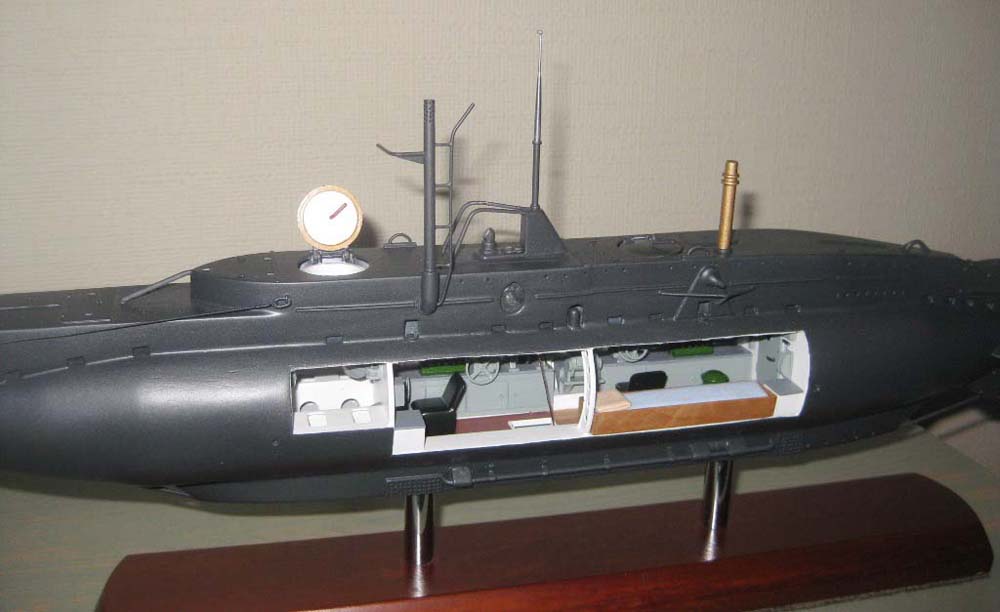
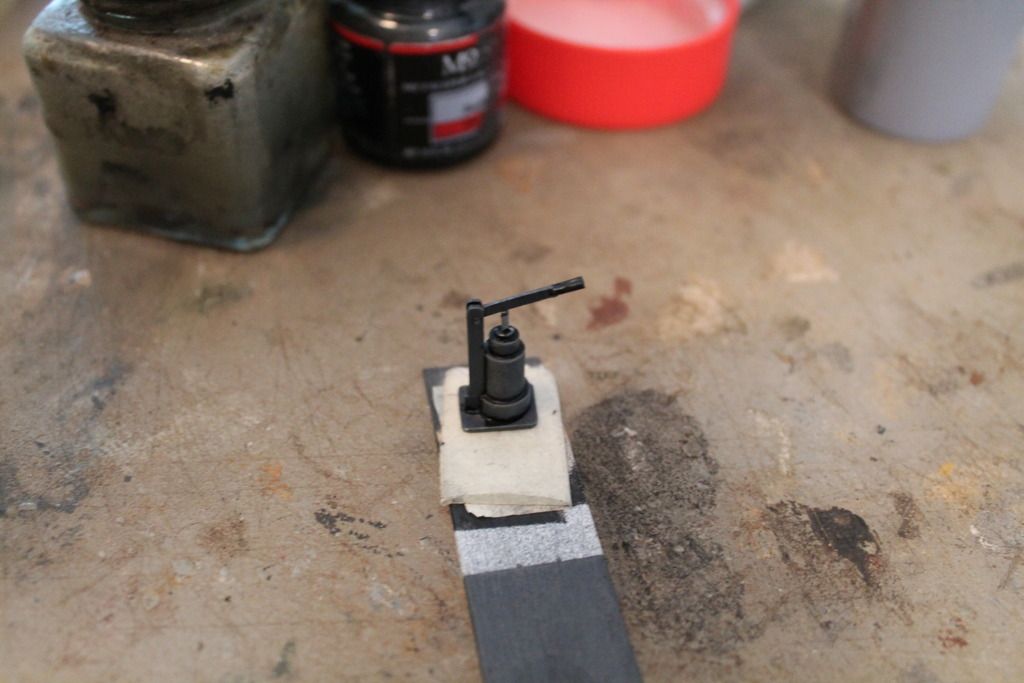
I wanted to leave a hatch open, for visual interest. Being afflicted with AMS, I didn't want to look into a "Black Hole". So I did what anyone afflicted with this dread condition would do, scratched a partial interior. The Wet/Dry Compartment was used by the diver to exit and enter. Pictures were hard to come by, so I make no claims for 100% accuracy. But, being a firm believer in "anything is better than nothing", I proceeded. 1st, the escape trunk.


Next, the hatch between the compartments.


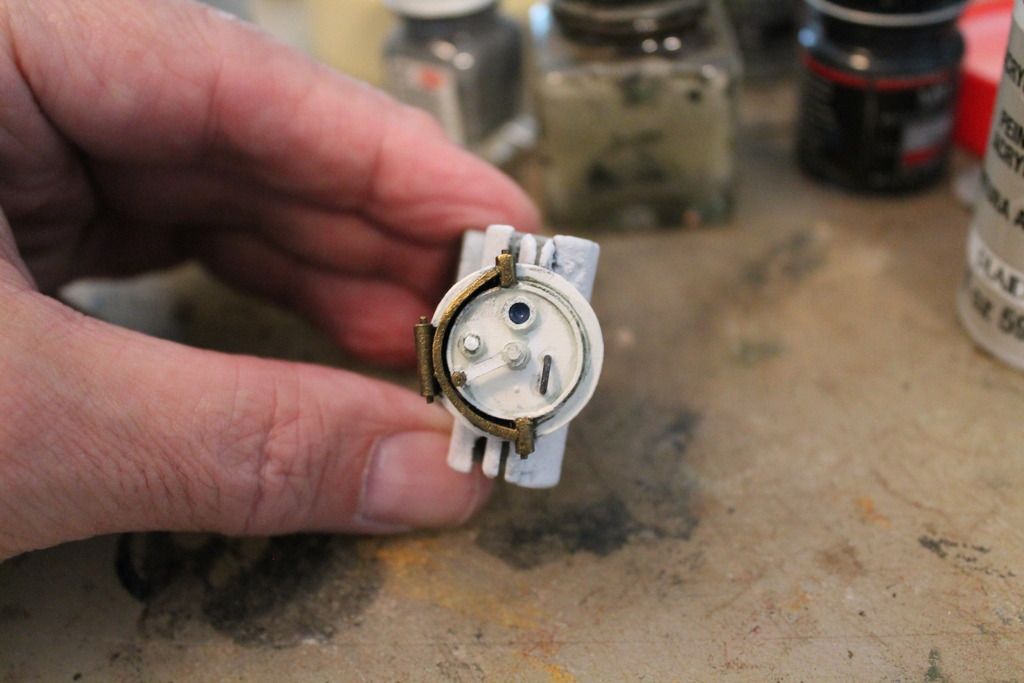
One of my 'references' was the film, "Above Us The Waves". In one scene, where a diver enters this compartment, I noticed what looked like a hand pump. Here's my interpretation.


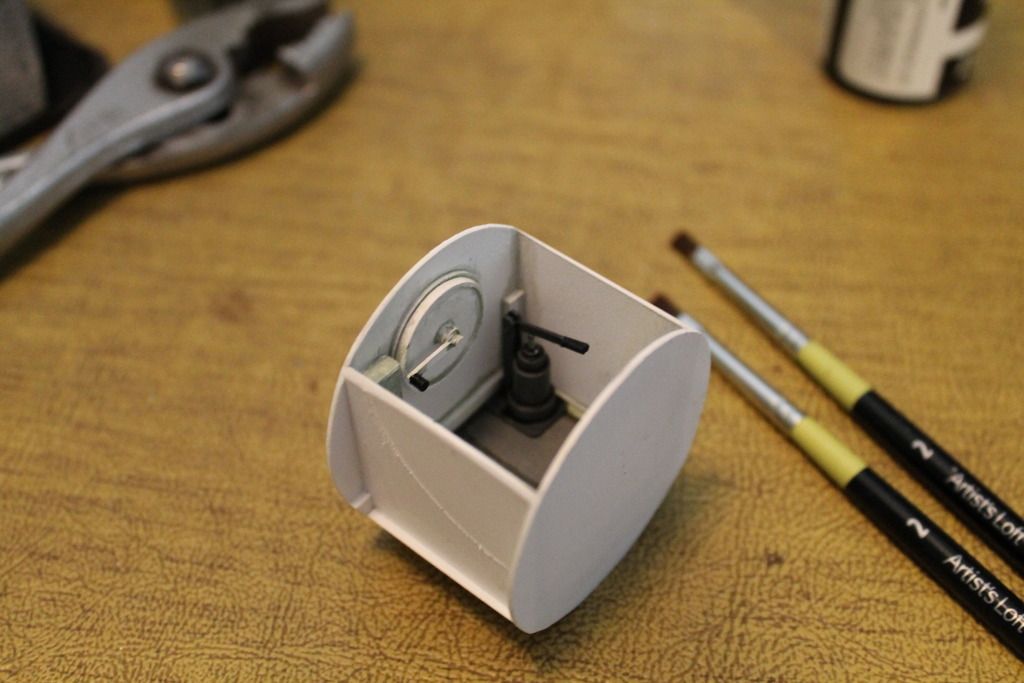
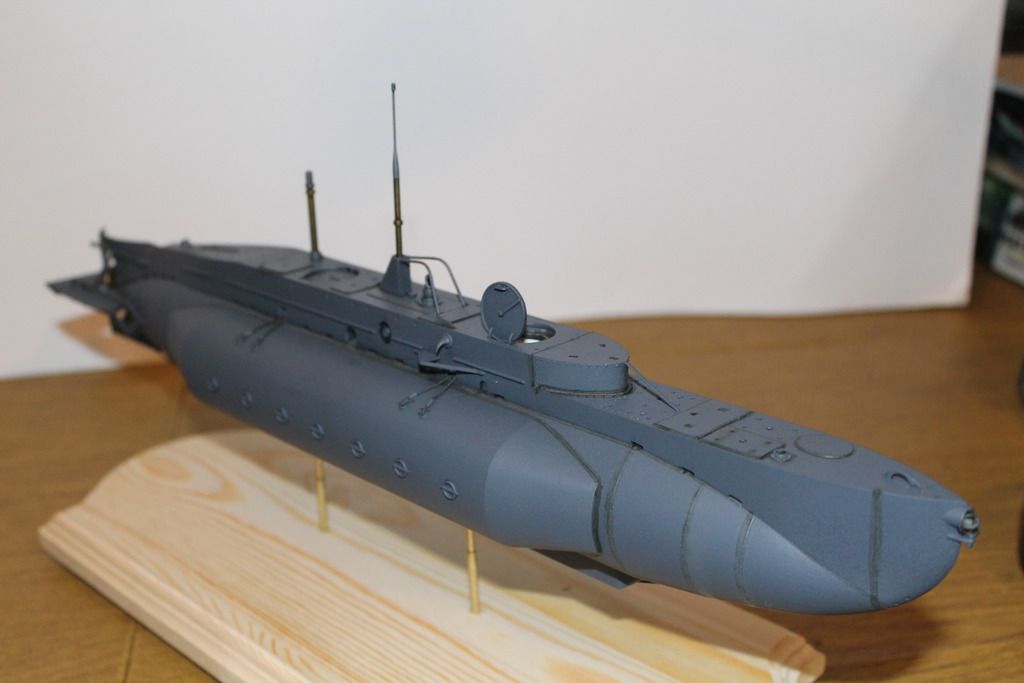
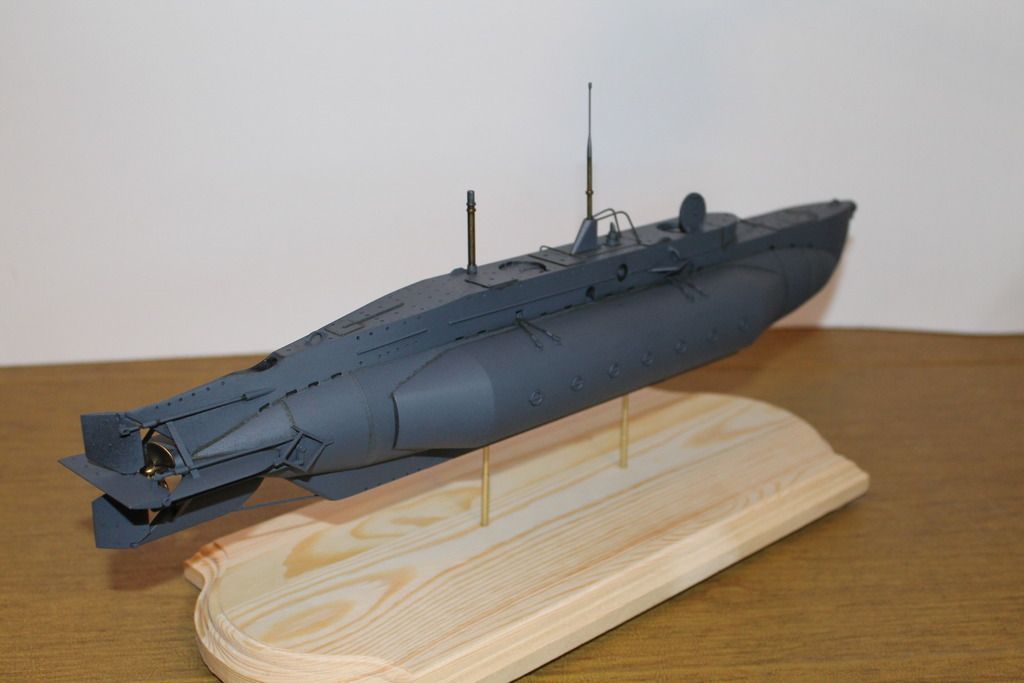
Not a lot can be seen through the hatch, but I'm happy with the result. Unfortunately I couldn't get a decent photo of it completed and installed. To finish up, I got some paint on the boat, so I'll leave you with a few pictures of where it stands.


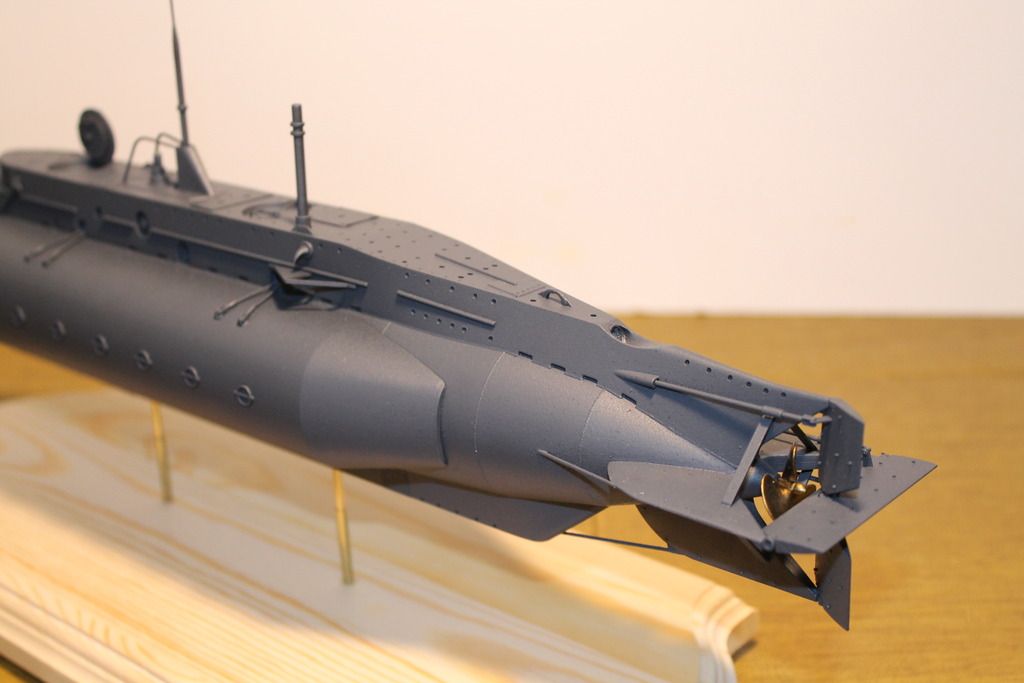
That' all for now. Next up, some weathering, and one or two crew members on deck. Al
RedDuster
Visit this Community
England - South East, United Kingdom
Joined: March 01, 2010
KitMaker: 7,078 posts
Model Shipwrights: 6,649 posts
Posted: Sunday, July 10, 2016 - 11:17 PM UTC
Very nice job indeed Al,

puts my OOB build to shame. Crew figures are a good thing, I used one, just to give a sense of scale.

Cheers

Si
Grauwolf
#084
Visit this Community
Quebec, Canada
Joined: September 14, 2005
KitMaker: 2,485 posts
Model Shipwrights: 1,157 posts
Posted: Monday, July 11, 2016 - 03:56 AM UTC
Al,
Very nice job on that sub! and your addition of the extra detail really makes it unique.
Do you plan on some weathering?
Cheers,
Joe
TAFFY3
Visit this Community
New York, United States
Joined: January 21, 2008
KitMaker: 2,531 posts
Model Shipwrights: 1,244 posts
Posted: Monday, July 11, 2016 - 05:20 AM UTC

Quoted Text

Very nice job indeed Al,

puts my OOB build to shame. Crew figures are a good thing, I used one, just to give a sense of scale.

Cheers

Si


Thanks, Simon. I like to use a figure for the same reason and a little human interest. Al
TAFFY3
Visit this Community
New York, United States
Joined: January 21, 2008
KitMaker: 2,531 posts
Model Shipwrights: 1,244 posts
Posted: Monday, July 11, 2016 - 05:22 AM UTC

Quoted Text

Al,
Very nice job on that sub! and your addition of the extra detail really makes it unique.
Do you plan on some weathering?
Cheers,
Joe


Thanks, Joe. Yes, I do plan on some weathering. Don't think these boats got too beat-up though, so I'll keep it light. Al
Biggles2
Visit this Community
Quebec, Canada
Joined: January 01, 2004
KitMaker: 7,600 posts
Model Shipwrights: 833 posts
Posted: Tuesday, July 12, 2016 - 04:46 AM UTC
What scale is this...1/35; 1/48; 1/72?
TAFFY3
Visit this Community
New York, United States
Joined: January 21, 2008
KitMaker: 2,531 posts
Model Shipwrights: 1,244 posts
Posted: Tuesday, July 12, 2016 - 05:26 AM UTC

Quoted Text

What scale is this...1/35; 1/48; 1/72?


It is 1/35th scale (about 18" long). Al
TAFFY3
Visit this Community
New York, United States
Joined: January 21, 2008
KitMaker: 2,531 posts
Model Shipwrights: 1,244 posts
Posted: Tuesday, July 12, 2016 - 08:08 PM UTC
A small update, got the snorkel mounted, in the retracted position.


Also added some washes, they look starker in the photos for some reason.


And some details painted.


The night periscope is molded in the retracted position, and has a flat face. So I drilled it out and used a drop of epoxy to simulate the glass lens. That tube aft of the attack periscope is a Projector Compass which was also retractable. Merit provides a part so that you can show it lowered if you prefer. That's it for now, thanks for looking. Al (P.S.) The 'Side Cargoes' weren't glued into position on this model. They come molded with two hollow posts on the inside that fit through two corresponding holes in each hull half. I used two small screws with a couple of washers to secure each one into place. Figured it would be neater, easier, and look more prototypical. Al
JJ1973
#345
Visit this Community
Niedersachsen, Germany
Joined: August 22, 2011
KitMaker: 1,835 posts
Model Shipwrights: 1,832 posts
Posted: Wednesday, July 13, 2016 - 09:35 AM UTC
Very nice build, looks great!!

These 'big scale' kits have a completely different charge than the 1/350 that I normally do. The details aren't so much smaller, it's basically a completely different focus! Really great work on bringing out all the details!

Cheers,
Jan
TAFFY3
Visit this Community
New York, United States
Joined: January 21, 2008
KitMaker: 2,531 posts
Model Shipwrights: 1,244 posts
Posted: Wednesday, July 13, 2016 - 02:30 PM UTC

Quoted Text

Very nice build, looks great!!

These 'big scale' kits have a completely different charge than the 1/350 that I normally do. The details aren't so much smaller, it's basically a completely different focus! Really great work on bringing out all the details!

Cheers,
Jan


Thank you, Jan. The challenge is to add some life to what is basically a monotone paint job. Al
Gotrek58
Visit this Community
Nordrhein-Westfalen, Germany
Joined: January 11, 2009
KitMaker: 673 posts
Model Shipwrights: 386 posts
Posted: Wednesday, July 13, 2016 - 10:45 PM UTC
Hi Al,
nice build and improvements! Merits X-craft is waiting under my workbench and I'm waiting for Eduards PE-set.
But there's also waiting a small sub in its dock to be finished...
BTW, I want to scratch a better pericope head for the X-craft, but couldn't find a pic of the real part.


Michael
TAFFY3
Visit this Community
New York, United States
Joined: January 21, 2008
KitMaker: 2,531 posts
Model Shipwrights: 1,244 posts
Posted: Thursday, July 14, 2016 - 01:25 AM UTC

Quoted Text

Hi Al,
nice build and improvements! Merits X-craft is waiting under my workbench and I'm waiting for Eduards PE-set.
But there's also waiting a small sub in its dock to be finished...
BTW, I want to scratch a better pericope head for the X-craft, but couldn't find a pic of the real part.


Michael


Hello Michael, Unfortunately, usable images seem to be few and far between. I did find these and used them, and a little "By Guess and by God".


I usually find a really good photo of what I was looking for after the model is finished. BTW, I saw your post about the Type XXI, in 1/72. That will be mighty tempting I must say. Al
Cosimodo
#335
Visit this Community
Auckland, New Zealand
Joined: September 03, 2013
KitMaker: 1,808 posts
Model Shipwrights: 871 posts
Posted: Thursday, July 14, 2016 - 05:23 AM UTC
Great build Al and the minimal weathering seems to suit it. I guess they didn't last long to be too much worse for wear. And I like your added details to a kit that seems pretty reasonable out of the box.

cheers

Michael
TAFFY3
Visit this Community
New York, United States
Joined: January 21, 2008
KitMaker: 2,531 posts
Model Shipwrights: 1,244 posts
Posted: Thursday, July 14, 2016 - 06:40 AM UTC

Quoted Text

Great build Al and the minimal weathering seems to suit it. I guess they didn't last long to be too much worse for wear. And I like your added details to a kit that seems pretty reasonable out of the box.

cheers

Michael


Thanks Michael, It does build into a good looking model right out of the box. With the exception of the previously mentioned prop, and the bits for the tow cable. I don't think these boats saw the heavy weathering that would be caused by a long patrol in rough seas, like a Fleet Boat would have endured. Some rust maybe, but not a lot. A little fading of the paint on the upper works. There might be some bare metal showing here or there, That's about it I would think. Al
TAFFY3
Visit this Community
New York, United States
Joined: January 21, 2008
KitMaker: 2,531 posts
Model Shipwrights: 1,244 posts
Posted: Friday, July 15, 2016 - 05:23 AM UTC
Hello again, did some work on the base, staining it and giving it a coat of polyurethane.


The 'White Ensign' came from the kit's decal sheet. I applied it to a piece of plastic which had been sprayed flat white first. After the decal set, I flat-coated it, and when dry, it was epoxied was to the base. Merit gives you two flags on the decal sheet, one 'straight' and one 'waving'. No staff is provided for them though. It would be easy to make one from brass or plastic rod if desired. I do think that the flags are a little too large. A smaller sized one would be more appropriate for this boat. However, I do remember reading in "The Longest Day" that one of the two boats that were assigned to mark either end of the three British beaches (to the chagrin of the CO of the boat it was code-named Operation Gambit) flew an over-sized ensign to make sure there were no "Friendly Fire" incidents. IIRC These boats were equipped with lights and extra antennae and would make an interesting subject if some photos could be found of what they looked like. I also started working on the crew.


Their positions are tentative and the heads are only pinned in place. I find painting the heads separately to be much easier. The figures are from "Wee Friends" by Friendship Models, out of England. The sailor's head is from Hornet, but I don't recall where the officer's head came from. That's it for now, all comments and/or questions are welcomed. Al
RedDuster
Visit this Community
England - South East, United Kingdom
Joined: March 01, 2010
KitMaker: 7,078 posts
Model Shipwrights: 6,649 posts
Posted: Saturday, July 16, 2016 - 02:02 PM UTC
Nice figures Al,

The officer in particular looks just right for a X craft officer.

The boar is looking good too, nice subtle weathering.

Cheers

Si
TAFFY3
Visit this Community
New York, United States
Joined: January 21, 2008
KitMaker: 2,531 posts
Model Shipwrights: 1,244 posts
Posted: Saturday, July 16, 2016 - 06:24 PM UTC

Quoted Text

Nice figures Al,

The officer in particular looks just right for a X craft officer.

The boar is looking good too, nice subtle weathering.

Cheers

Si


Hello Simon, Thanks, I thought the figure wearing the battle dress jacket had the right look too. I picked up him along with the other rating way back when Italeri first announced that they were going to bring out an X-craft. I was really glad that Merit picked up the gauntlet when Italeri fumbled it. The head that he came with was wearing a helmet. I had used him as is when I did my Vosper. I still have quite a few 'heads' leftover from that project. Maybe I'll find a use for them someday. Still can't recall where the officer's head came from though, don't think it was Hornet. Al
TAFFY3
Visit this Community
New York, United States
Joined: January 21, 2008
KitMaker: 2,531 posts
Model Shipwrights: 1,244 posts
Posted: Monday, July 18, 2016 - 06:00 PM UTC
Added a little more weathering, some streaking down the hull using Mig's 'Tracks Wash'.


Don't know if it's my technique, lighting, or just a foible of digital cameras, but the streaks look darker in the photos than they do on the model. The Tracks Wash has a brownish tinge to it and works well for a light rust effect. Also added some wash around those perforated PE plates on the keel. I believe that they are the inlets for the ballast tanks.


Hope to get some primer on the figures today and will post again when they are done. Thanks for looking. Al
RedDuster
Visit this Community
England - South East, United Kingdom
Joined: March 01, 2010
KitMaker: 7,078 posts
Model Shipwrights: 6,649 posts
Posted: Tuesday, July 19, 2016 - 12:39 AM UTC
Nice job Al,

Weathering looks about right, considering these craft did not have a very long life.

Cheers

Si
TAFFY3
Visit this Community
New York, United States
Joined: January 21, 2008
KitMaker: 2,531 posts
Model Shipwrights: 1,244 posts
Posted: Tuesday, July 19, 2016 - 05:59 AM UTC

Quoted Text

Nice job Al,

Weathering looks about right, considering these craft did not have a very long life.

Cheers

Si


Thanks Simon, I agree about the weathering, I think it looks about right. Got a question for you, I want to add the staff and White Ensign to the aft end of the deck. Does anybody that you know make them? As I mentioned, the ones in the kit are a bit too big. Might try printing one and see how it turns out. Al
JJ1973
#345
Visit this Community
Niedersachsen, Germany
Joined: August 22, 2011
KitMaker: 1,835 posts
Model Shipwrights: 1,832 posts
Posted: Tuesday, July 19, 2016 - 09:18 AM UTC
Hi Al,

I agree with Si entirely, looks pretty good!!

Cheers,
Jan
TAFFY3
Visit this Community
New York, United States
Joined: January 21, 2008
KitMaker: 2,531 posts
Model Shipwrights: 1,244 posts
Posted: Tuesday, July 19, 2016 - 09:10 PM UTC

Quoted Text

Hi Al,

I agree with Si entirely, looks pretty good!!

Cheers,
Jan


Thanks Jan, Appreciate it. Al
TimReynaga
Staff MemberAssociate Editor
MODEL SHIPWRIGHTS
Visit this Community
California, United States
Joined: May 03, 2006
KitMaker: 2,500 posts
Model Shipwrights: 1,830 posts
Posted: Tuesday, July 19, 2016 - 09:40 PM UTC
Hi Al,

This build looks great! Can't wait to see it with the figures on board!

TAFFY3
Visit this Community
New York, United States
Joined: January 21, 2008
KitMaker: 2,531 posts
Model Shipwrights: 1,244 posts
Posted: Tuesday, July 19, 2016 - 10:00 PM UTC

Quoted Text

Hi Al,

This build looks great! Can't wait to see it with the figures on board!


Thanks Tim, Still not sure if I'm going to go with just one figure, or both. Al
RedDuster
Visit this Community
England - South East, United Kingdom
Joined: March 01, 2010
KitMaker: 7,078 posts
Model Shipwrights: 6,649 posts
Posted: Tuesday, July 19, 2016 - 11:29 PM UTC
Hi Al,

If I don't have a spare white ensign the right size in the decal box, I have an image file with an ensign on it, I am not up to speed on decal printing, but that would work, or onto thin paper, actually thin paper even doubled might be more scale in 1/35th.

Hope that helps.

Cheers

Si
 _GOTOTOP