_GOTOBOTTOM
Ships by Class/Type: Destroyers
This forum covers all types of destroyers from all eras.
DKM Z-31, 1943 - Dio build 1/350
Harry_at_BFM
Visit this Community
Colorado, United States
Joined: February 04, 2007
KitMaker: 594 posts
Model Shipwrights: 556 posts
Posted: Sunday, August 13, 2017 - 10:09 AM UTC
Got some work done on the rafts.
Trying something new this time with the PE glue-up

RussellE
#306
Visit this Community
Victoria, Australia
Joined: June 27, 2010
KitMaker: 3,959 posts
Model Shipwrights: 2,777 posts
Posted: Sunday, August 13, 2017 - 04:33 PM UTC
nice project here Harry

following along with interest
Harry_at_BFM
Visit this Community
Colorado, United States
Joined: February 04, 2007
KitMaker: 594 posts
Model Shipwrights: 556 posts
Posted: Saturday, August 19, 2017 - 04:10 AM UTC
Thank you, Russell

Since, I have not had time to start setting up my new hobby room and I am no longer allowed to paint anywhere, but my new hobby room(SWMBO), I thought I would tackle some of the PE work with has been primed with Mr. Surfacer black.
Getting ready to add the ventilators to the main stack.
I will use my favorite PE glue Aleene’s Fast grab (available at Hobby Lobby)


The 2 pieces that hold the louvers have no real attachment points, so I placed the stack onto the deck and used this for my reference on gluing worked out great.


There is no gap on the piece it is just an undercut.


I will now start attaching the PE more photos tomorrow.

TRM5150
Visit this Community
Massachusetts, United States
Joined: January 03, 2010
KitMaker: 2,159 posts
Model Shipwrights: 1,400 posts
Posted: Sunday, August 20, 2017 - 07:10 AM UTC
Clean work my friend....you're Z is looking great! Good tip on the glue! Been using standard white PVA for a while on most of my PE. Can't beat the cleanup!
Harry_at_BFM
Visit this Community
Colorado, United States
Joined: February 04, 2007
KitMaker: 594 posts
Model Shipwrights: 556 posts
Posted: Sunday, August 20, 2017 - 08:51 AM UTC
Thank You, Todd.

I have been using Elmers New Clear for small PE and clear parts works great! But, I still use clear nail polish for PE going into RTV molds.


I am just a slow worker anymore , but I did manage to get the Pz.1b done.


RussellE
#306
Visit this Community
Victoria, Australia
Joined: June 27, 2010
KitMaker: 3,959 posts
Model Shipwrights: 2,777 posts
Posted: Sunday, August 20, 2017 - 02:37 PM UTC
That's one great looking Pz Harry!
Harry_at_BFM
Visit this Community
Colorado, United States
Joined: February 04, 2007
KitMaker: 594 posts
Model Shipwrights: 556 posts
Posted: Sunday, August 20, 2017 - 10:45 PM UTC
Thanks, Russell.

Still need to do the dessert base, then we will see what the judges think in October.
Harry_at_BFM
Visit this Community
Colorado, United States
Joined: February 04, 2007
KitMaker: 594 posts
Model Shipwrights: 556 posts
Posted: Monday, August 21, 2017 - 01:35 AM UTC
Quick Question Everyone.

I have look through all my reference books, but can not tell what color the undersides of the protruding decks on the Z series were colored????
RussellE
#306
Visit this Community
Victoria, Australia
Joined: June 27, 2010
KitMaker: 3,959 posts
Model Shipwrights: 2,777 posts
Posted: Monday, August 21, 2017 - 02:14 AM UTC
For the undersides, Harry, personally I'd go with whatever colour you're using for the vertical surfaces.
Harry_at_BFM
Visit this Community
Colorado, United States
Joined: February 04, 2007
KitMaker: 594 posts
Model Shipwrights: 556 posts
Posted: Monday, August 21, 2017 - 08:42 AM UTC
Thanks Russell.

I am using DKM 50 & 51, I think I will use the lighter gray 50, thanks again.
JJ1973
#345
Visit this Community
Niedersachsen, Germany
Joined: August 22, 2011
KitMaker: 1,835 posts
Model Shipwrights: 1,832 posts
Posted: Monday, August 21, 2017 - 08:49 AM UTC
Harry,

very nice work and a nice tank as well!

For the undersides, I would agree with Russ, even though I can't prove it. The darker deck color, where it is not planked, would normally be nonskid of some kind or another, or cortizene as the RN used it. No reason at all for undersides, just for practical reasons - and many things on warships are done for practical reasons - undersides would most likely be painted as the vertical surfaces around them.

Cheers,
Jan
Harry_at_BFM
Visit this Community
Colorado, United States
Joined: February 04, 2007
KitMaker: 594 posts
Model Shipwrights: 556 posts
Posted: Monday, August 21, 2017 - 09:38 AM UTC
Thanks Jan.

Yes, I think you and Russell are correct. I will use the lightest gray used in the camouflage, as it wont look too dark on the undersides.
Harry_at_BFM
Visit this Community
Colorado, United States
Joined: February 04, 2007
KitMaker: 594 posts
Model Shipwrights: 556 posts
Posted: Tuesday, August 22, 2017 - 01:20 AM UTC
Just a small update. Been working on setting up my new hobby room mostly.

I decided to leave a few doors open on the lower main bridge superstructure. I just used a few pieces of card and put in some walls when you look into the doors, most likely never to be seen.

Added the louvers and painted the secondary stack structure (yes, I fixed the wonky louver (amazing what you see when you take a photo that the eye misses completely).


TRM5150
Visit this Community
Massachusetts, United States
Joined: January 03, 2010
KitMaker: 2,159 posts
Model Shipwrights: 1,400 posts
Posted: Tuesday, August 22, 2017 - 07:20 AM UTC
Nice thought adding a little see-thru action! Looking good Harry!
Harry_at_BFM
Visit this Community
Colorado, United States
Joined: February 04, 2007
KitMaker: 594 posts
Model Shipwrights: 556 posts
Posted: Wednesday, August 23, 2017 - 04:21 AM UTC
Thanks, Todd.

Another small update all the louvers are on. I have been painting small parts. I must say the small details in this kit are just amazing, some of the best I have seen.
And I have stepped on the bridge for the last time (don’t Know how it keeps finding my feet). 
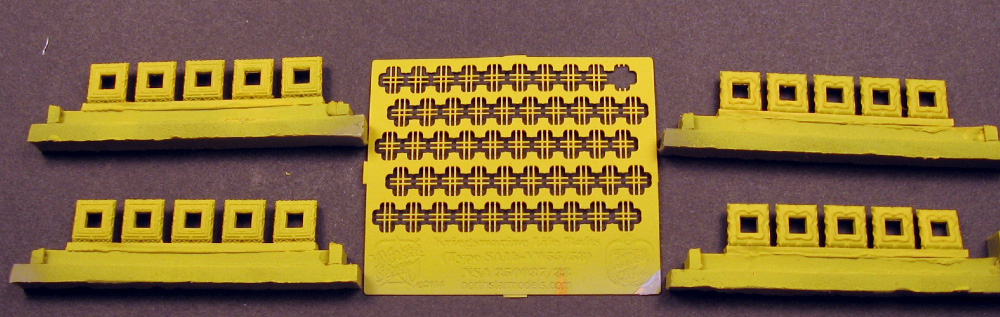
So, I opened another kit and have rebuilt the bridge.


Harry_at_BFM
Visit this Community
Colorado, United States
Joined: February 04, 2007
KitMaker: 594 posts
Model Shipwrights: 556 posts
Posted: Thursday, August 24, 2017 - 04:17 AM UTC
Hi Guys,

Another monster update.

Took about 20 minutes to get the PE netting in the right position.

Only 31 more to go................


RussellE
#306
Visit this Community
Victoria, Australia
Joined: June 27, 2010
KitMaker: 3,959 posts
Model Shipwrights: 2,777 posts
Posted: Thursday, August 24, 2017 - 04:55 AM UTC
31 x 20minutes = ?

Great progress here though Harry. Please don't step on the bridge again
Harry_at_BFM
Visit this Community
Colorado, United States
Joined: February 04, 2007
KitMaker: 594 posts
Model Shipwrights: 556 posts
Posted: Thursday, August 24, 2017 - 09:52 PM UTC
Hi Russell,

Yea, I know 10 1/2 hours.

I did get about 9 more done last night, a little better on the time not much.

Oh, the bridge LOL.

BTW, I have a Z-31 kit for sale only missing bridge parts. LOL
d6mst0
#453
Visit this Community
Texas, United States
Joined: August 28, 2016
KitMaker: 1,925 posts
Model Shipwrights: 1,298 posts
Posted: Friday, August 25, 2017 - 12:16 AM UTC
Sorry about you bridge. Had a similar experience, so now I use a Jewelers apron to help catch those parts trying to escape my grasp.
RussellE
#306
Visit this Community
Victoria, Australia
Joined: June 27, 2010
KitMaker: 3,959 posts
Model Shipwrights: 2,777 posts
Posted: Sunday, August 27, 2017 - 08:11 AM UTC

Quoted Text


BTW, I have a Z-31 kit for sale only missing bridge parts. LOL


 _GOTOTOP