Building the Dragon 1/350 USS Gearing (1945)
South Australia, Australia
Joined: August 14, 2007
KitMaker: 5,926 posts
Model Shipwrights: 2,624 posts
Posted: Monday, November 19, 2018 - 01:20 PM UTC
Quoted Text
Hi Warren,
The old Dragon instructions up to their tricks again.
Nice progress though.
Be careful about the requested adjustment to the title, or the apostrophe police will be after you!!

Cheers
Si

Unfortunately a worse problem is not getting notifications. Nothing has been done as yet. Bit slow in reviewing emails.
You may be right, I may be crazy.

#306
Victoria, Australia
Joined: June 27, 2010
KitMaker: 3,959 posts
Model Shipwrights: 2,777 posts
Posted: Monday, November 19, 2018 - 09:15 PM UTC
ah! The apostrophe curse is over! Getting notifications at last!
Now the curse of the Dragon instructions

Nicely handled though Warren

Stay home and build models!
In 1/72
Gloster Gladiator MkII for the Bi-planes Campaign
In 1/350
Airfix 1:350 Type 45 Destroyer
England - South East, United Kingdom
Joined: March 01, 2010
KitMaker: 7,078 posts
Model Shipwrights: 6,649 posts
Posted: Monday, November 19, 2018 - 09:30 PM UTC
Look's like it's been done.
Cheers
Si
South Australia, Australia
Joined: August 14, 2007
KitMaker: 5,926 posts
Model Shipwrights: 2,624 posts
Posted: Monday, November 19, 2018 - 09:49 PM UTC
Thanks to whoever fixed the apostrophe problem. Maybe you should consider changing the chat program?
I got the Navy Blue applied to the lower hull tonight. Will need another coat though I am sure.
You will also be happy to know that my 1:1 scale car collection will be growing again on the weekend.
You may be right, I may be crazy.
#377
Texas, United States
Joined: June 27, 2010
KitMaker: 1,481 posts
Model Shipwrights: 1,332 posts
Posted: Tuesday, November 20, 2018 - 02:40 AM UTC
Warren,
Nice start on your Gearing. I love the Dragon subjects but as you mentioned, a lot of fiddly parts and a bit over engineered pushes me to delay starting the ones I have in my stash.
Looking forward to following along with your build.
Dave
In Dry Dock #1: 1/350 IJN SHOKAKU (Fujimi)
In Dry Dock #2: 1/350 IJN Tama (Aoshima)
#306
Victoria, Australia
Joined: June 27, 2010
KitMaker: 3,959 posts
Model Shipwrights: 2,777 posts
Posted: Tuesday, November 20, 2018 - 03:12 PM UTC
Quoted Text
Thanks to whoever fixed the apostrophe problem. Maybe you should consider changing the chat program?
I got the Navy Blue applied to the lower hull tonight. Will need another coat though I am sure.
You will also be happy to know that my 1:1 scale car collection will be growing again on the weekend.
I sent a PM about it to Todd Michalak (your blog's moderator) a couple of nights back Warren-never got a reply, but it soon changed, so someone must've seen the PM.
Thanks to whoever changed it.
Come to think of it-has anyone heard from Todd lately?
Stay home and build models!
In 1/72
Gloster Gladiator MkII for the Bi-planes Campaign
In 1/350
Airfix 1:350 Type 45 Destroyer
South Australia, Australia
Joined: August 14, 2007
KitMaker: 5,926 posts
Model Shipwrights: 2,624 posts
Posted: Thursday, November 22, 2018 - 12:21 PM UTC
Can anyone recommend a method of removing old paint from an airbrush tip? I thought I had removed it all but Life Color can be a pain to remove. Water doesn't wok, or thinners... will acetone do the job?
You may be right, I may be crazy.
AussieReg
 Associate Editor
#007
Victoria, Australia
Joined: June 09, 2009
KitMaker: 8,156 posts
Model Shipwrights: 154 posts
Posted: Thursday, November 22, 2018 - 07:04 PM UTC
Warren, I'm subscribed and following. I've had a real building drought for months and really need to get back to the bench to move on with my
Gearing Class Odyssey .
Cheers, D
ON the bench
Revell 1/24 '53 Corvette (building as '54)
Revell 1/24 BMW 507 Coupe and Cabrio
Italeri 1/48 Me262 B-1a/U1 Nightfighter
Monogram 1/24 '57 Chevy Nomad
Dragon 1/350 USS Frank Knox DD-742
Queensland, Australia
Joined: May 20, 2010
KitMaker: 1,230 posts
Model Shipwrights: 1,212 posts
Posted: Thursday, November 22, 2018 - 11:35 PM UTC
Hey Warren. Nice work so far.....Cheers Mark
If I was your Wife I would Poison your Tea
If I was your Husband, I would drink it.
Colorado, United States
Joined: June 22, 2018
KitMaker: 275 posts
Model Shipwrights: 273 posts
Posted: Friday, November 23, 2018 - 05:03 AM UTC
Damian: On your own thread, which I found very interesting, you asked what the difference was in the Frank Knox (as a DDR) and Chevalier (again as a DDR). Hope this helps.
The Gearing Class was considered up until 1950 or so, as a long hulled Sumner and not a class of their own. When Frank Knox was built and commissioned as a DD, she was armed identically to any other Sumner. Starting with the Philippines campaign the need was identified for a radar picket destroyer. While the Fletchers and Sumners were fulfilling this requirement they lacked height finding radar and vectoring equipment to direct intercepting fighters. The need was for more space and the solution was to rapidly convert or complete long hulled Sumners (Gearings) to fill this role. Most were converted while building and had the optimum rig for DDR work. Chevalier was one of these and she completed with the after bank of torpedo tubes deleted in favor of an additional quad forty mount, and twin 20mm guns. The twin 20mm's were not a one for one replacement for singles in all cases.
Knox as stated was commissioned as a DD, but before she went to the Pacific, she received the DDR electronic gear, but kept the after bank of torpedoes. She was also commissioned with single 20mm mounts. I do not know if the singles were replaced by twins before deployment, although I doubt it. The need was great and everyone was in a hurry to get this capability in the fleet for Okinawa and the impending invasion of Japan. There was also a shortage of twin 20mm's, and most of those available were sent to the west coast yards to be used for the anti-Kamikaze upgrades.
One clue to twins or singles is the shape of the 20mm bulwarks on the stern. Generally if the shape was triangular it meant that there were three singles, just like the mid war modification to the Fletchers. An oval shape usually denoted 2 20mm twins mounts. Don't take this as gospel though. It is only a general statement, and each ship in the class must be thoroughly researched prior to building.
South Australia, Australia
Joined: August 14, 2007
KitMaker: 5,926 posts
Model Shipwrights: 2,624 posts
Posted: Friday, November 23, 2018 - 06:56 PM UTC
Quoted Text
Warren, I'm subscribed and following. I've had a real building drought for months and really need to get back to the bench to move on with my Gearing Class Odyssey .
Cheers, D
Thanks Damien.
You may be right, I may be crazy.
South Australia, Australia
Joined: August 14, 2007
KitMaker: 5,926 posts
Model Shipwrights: 2,624 posts
Posted: Friday, November 23, 2018 - 06:57 PM UTC
Quoted Text
Hey Warren. Nice work so far.....Cheers Mark
Thanks Mark and Chuck.
You may be right, I may be crazy.
#345
Niedersachsen, Germany
Joined: August 22, 2011
KitMaker: 1,835 posts
Model Shipwrights: 1,832 posts
Posted: Monday, November 26, 2018 - 06:49 AM UTC
Nice progress Warren,
despite the great help from the Dragon instructions...
Cheers,
Jan
South Australia, Australia
Joined: August 14, 2007
KitMaker: 5,926 posts
Model Shipwrights: 2,624 posts
Posted: Monday, November 26, 2018 - 07:37 AM UTC
Quoted Text
Nice progress Warren,
despite the great help from the Dragon instructions...
Cheers,
Jan
Thanks Jan.
Was very busy with 1/1 vehicles on the weekend but found time to finish the painting of the hull and glue them together..
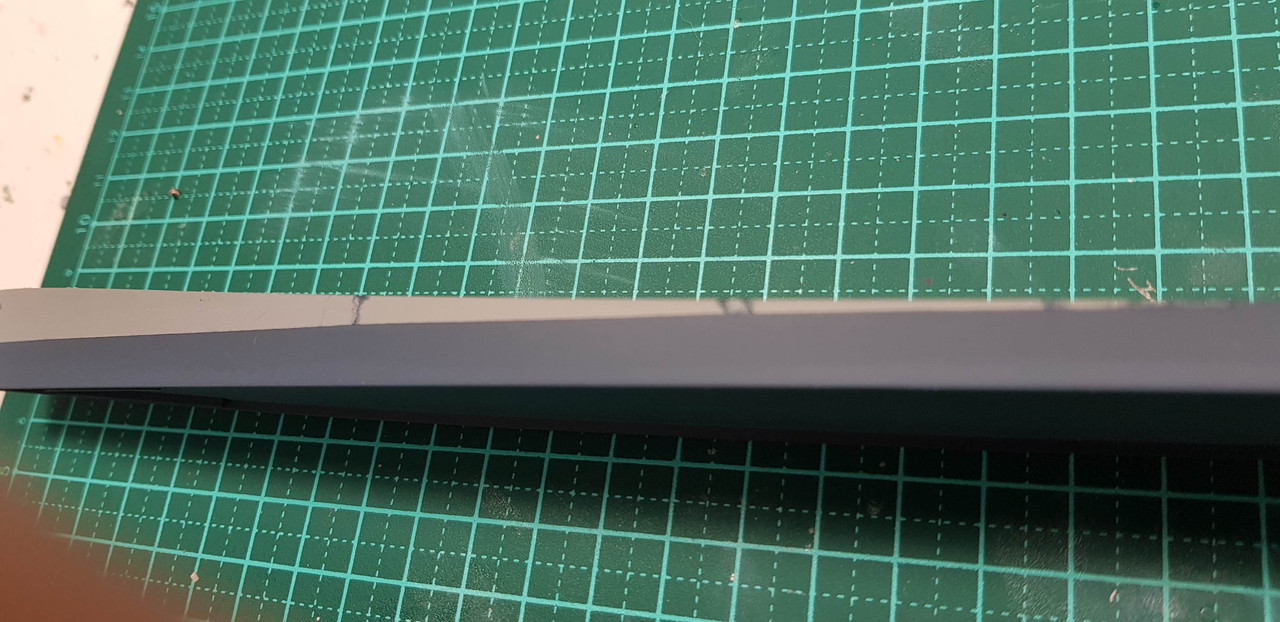

A few runs due tp using second-hand tape (yes sometimes I am scabby) but nothing a few brush strokes didn't fix.
Then I made a start on the decals for the decks..

Don't worry, they aren't silvered just a bit glossy. A coat of matt clear should fix that.
That's it for now
Cheers
Warren
You may be right, I may be crazy.
#306
Victoria, Australia
Joined: June 27, 2010
KitMaker: 3,959 posts
Model Shipwrights: 2,777 posts
Posted: Monday, November 26, 2018 - 08:53 AM UTC
looking very nice Warren
Interesting to see you paint the hull before attaching the deck???
How'd you go with cleaning that airbrush? I've heard of people using ultra sonic jewellery cleaners for acrylic paints?
Stay home and build models!
In 1/72
Gloster Gladiator MkII for the Bi-planes Campaign
In 1/350
Airfix 1:350 Type 45 Destroyer
South Australia, Australia
Joined: August 14, 2007
KitMaker: 5,926 posts
Model Shipwrights: 2,624 posts
Posted: Monday, November 26, 2018 - 09:33 AM UTC
Quoted Text
looking very nice Warren
Interesting to see you paint the hull before attaching the deck???
How'd you go with cleaning that airbrush? I've heard of people using ultra sonic jewellery cleaners for acrylic paints?
Hey Russell.
I have been using one of those ultrasonic cleaners for decades. Firstly in my time as a techo in the RAAF and I bought one about 10 years ago to clean the airbrush which it does very well, except with Life Color paints for some reason.
I eventually cleaned the tip by soaking it in acetone overnight, but I still want to get a spare and a 0.4 one as well but the Australian distributors couldn't even be bothered answering an email so I will have to get one from overseas.
Cheers mate
Warren
You may be right, I may be crazy.
#306
Victoria, Australia
Joined: June 27, 2010
KitMaker: 3,959 posts
Model Shipwrights: 2,777 posts
Posted: Monday, November 26, 2018 - 09:51 AM UTC
Quoted Text
Quoted Text
looking very nice Warren
Interesting to see you paint the hull before attaching the deck???
How'd you go with cleaning that airbrush? I've heard of people using ultra sonic jewellery cleaners for acrylic paints?
Hey Russell.
I have been using one of those ultrasonic cleaners for decades. Firstly in my time as a techo in the RAAF and I bought one about 10 years ago to clean the airbrush which it does very well, except with Life Color paints for some reason.
I eventually cleaned the tip by soaking it in acetone overnight, but I still want to get a spare and a 0.4 one as well but the Australian distributors couldn't even be bothered answering an email so I will have to get one from overseas.
Cheers mate
Warren
that sounds about right of the distributors: only ever wanting to sell new product but slack on the support

Can't help much more on the acrylic paint question though, as I'm still a toxic avenger with the enamels

Stay home and build models!
In 1/72
Gloster Gladiator MkII for the Bi-planes Campaign
In 1/350
Airfix 1:350 Type 45 Destroyer
South Australia, Australia
Joined: August 14, 2007
KitMaker: 5,926 posts
Model Shipwrights: 2,624 posts
Posted: Thursday, November 29, 2018 - 07:25 PM UTC
Quoted Text
Can't help much more on the acrylic paint question though, as I'm still a toxic avenger with the enamels
Toxic indeed! I remember when I was a young taker getting headaches from using enamel paint.
Oh well.. on with the build. I finished applying the decals to the decks..

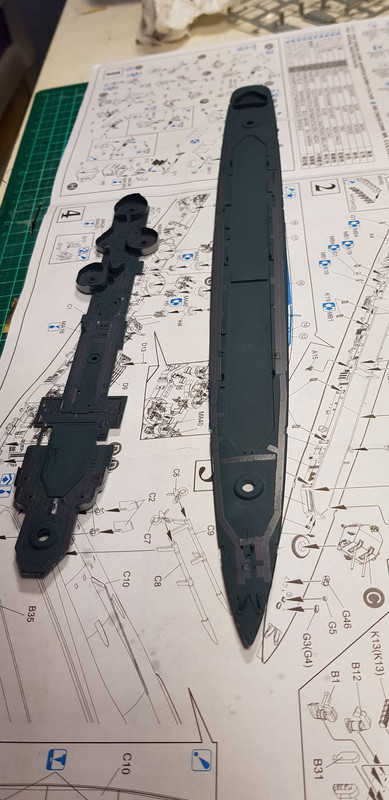
Then I glued the deck into the hull, which makes sense to me rather than trying to do it woth everything assembled like Dragon suggests.

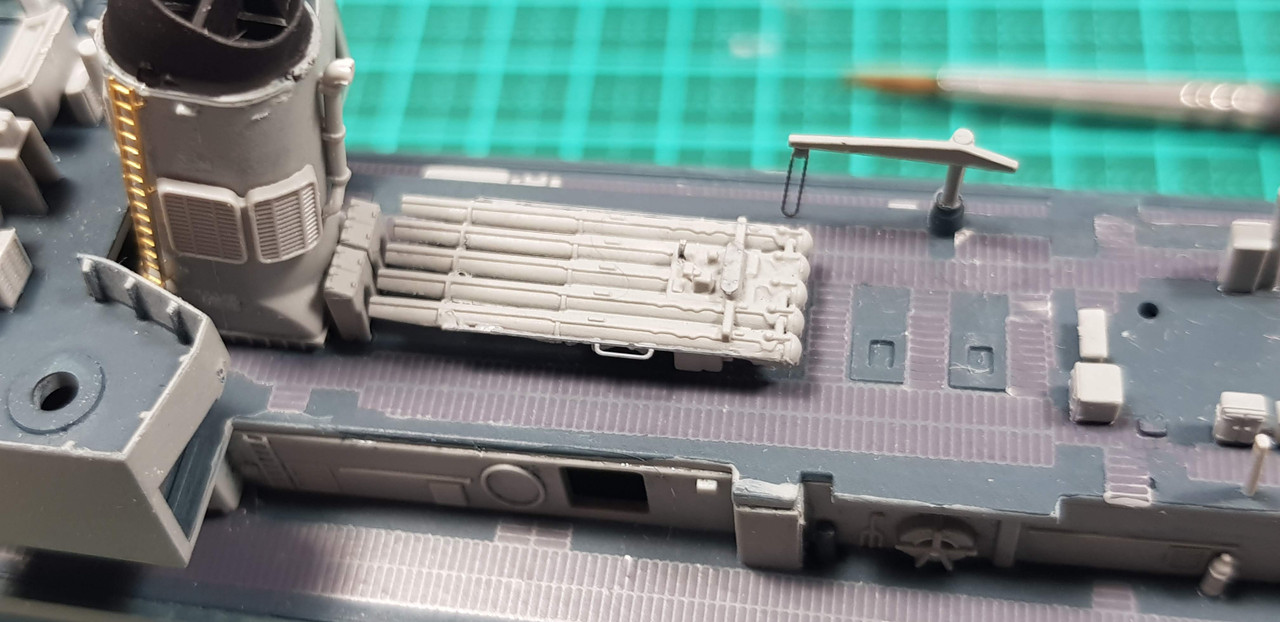
Then I went back to look at the instructions and I realised I hadn't finished step one yet as I still had more guns to build like these quad bofors..

After that I glued down lots of deck parts on some masking tape with the intention of spraying them, but I changed my mind and attacked them with a hairy stick along with some superstructure sides..

And that is the state of play at the moment. Away at the Adelaide Motorsport Festival tomorrow with one of my old crocks.
Until next time,
Warren
You may be right, I may be crazy.
England - South East, United Kingdom
Joined: March 01, 2010
KitMaker: 7,078 posts
Model Shipwrights: 6,649 posts
Posted: Saturday, December 01, 2018 - 09:52 PM UTC
Nice work Warren.
The deck walkways look good in place, sub assemblies coming together too.
Cheers
Si
#453
Texas, United States
Joined: August 28, 2016
KitMaker: 1,925 posts
Model Shipwrights: 1,298 posts
Posted: Saturday, December 01, 2018 - 10:24 PM UTC
Warren,
Nice progress so far, glad to see that the unfinished step wasn't a critical step.
Mark

#306
Victoria, Australia
Joined: June 27, 2010
KitMaker: 3,959 posts
Model Shipwrights: 2,777 posts
Posted: Sunday, December 02, 2018 - 08:43 AM UTC
Quoted Text
Quoted Text
Can't help much more on the acrylic paint question though, as I'm still a toxic avenger with the enamels
Toxic indeed! I remember when I was a young taker getting headaches from using enamel paint.
And that is the state of play at the moment. Away at the Adelaide Motorsport Festival tomorrow with one of my old crocks.
I still get memories of my child hood every time I crack open the enamel thinners
Sounds like my weekend: spent at a "Saturday night Live" Car show

Things are looking good on the salty front

Stay home and build models!
In 1/72
Gloster Gladiator MkII for the Bi-planes Campaign
In 1/350
Airfix 1:350 Type 45 Destroyer
South Australia, Australia
Joined: August 14, 2007
KitMaker: 5,926 posts
Model Shipwrights: 2,624 posts
Posted: Wednesday, December 05, 2018 - 06:39 PM UTC
Hello all.
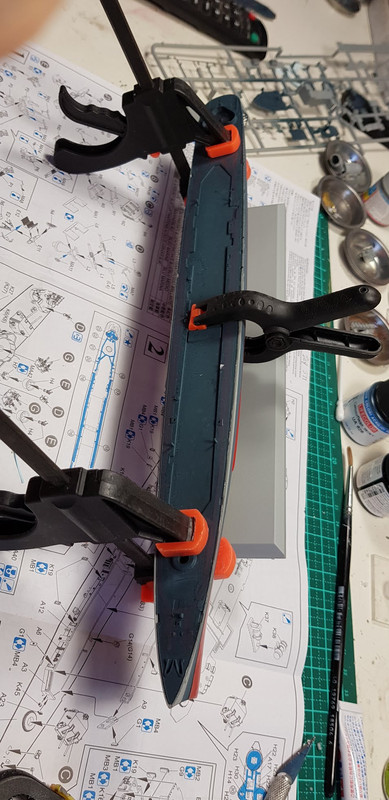
Only a couple of photos but some major advances withe the model. First deck of the superstructure is on!


The stand is not permanent as I glued it with Gator Glue which is easy to remove if you want.
I am off to the bench again in a few minutes.
Cheers
Warren
You may be right, I may be crazy.
South Australia, Australia
Joined: August 14, 2007
KitMaker: 5,926 posts
Model Shipwrights: 2,624 posts
Posted: Saturday, December 08, 2018 - 10:25 PM UTC
Got a little more done on the Gearing. The top deck and bridge..
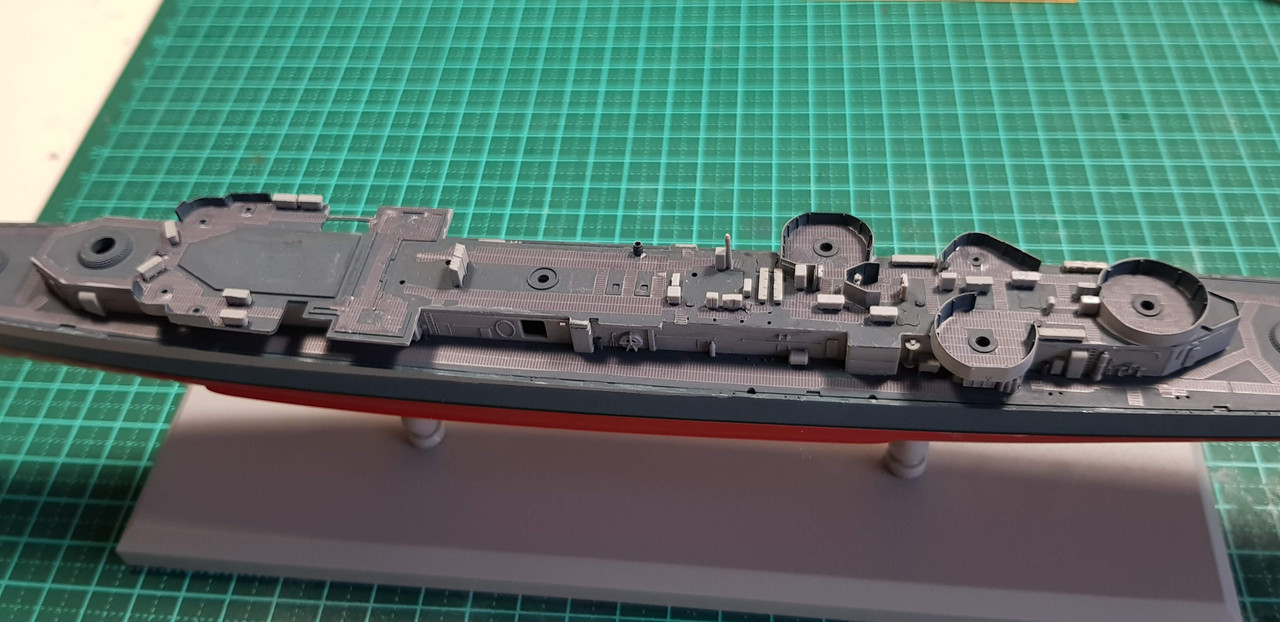
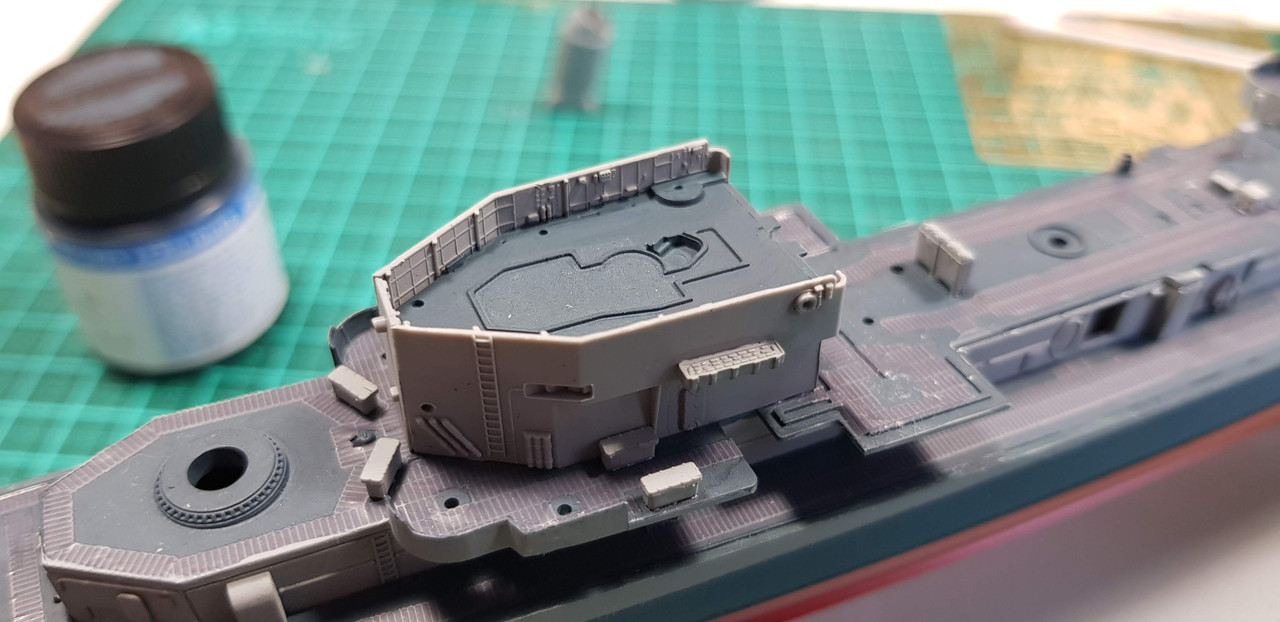
Mid-ships Gun platform top..
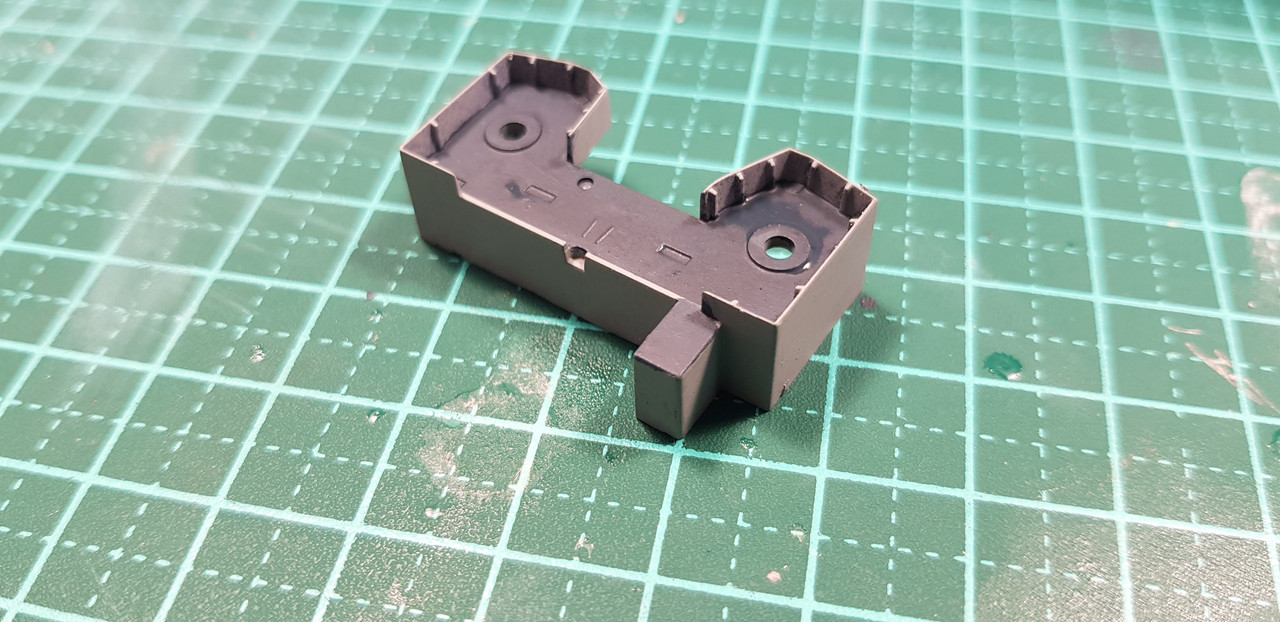
and bottom..

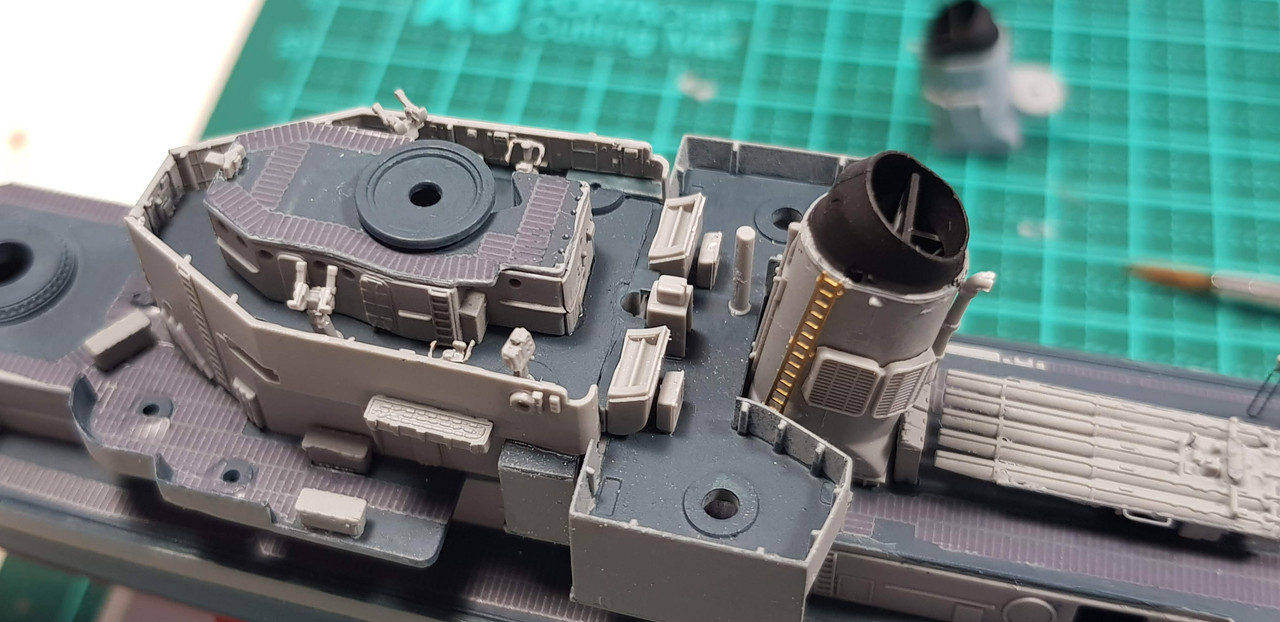
More superstructure bits on..
You may be right, I may be crazy.
#453
Texas, United States
Joined: August 28, 2016
KitMaker: 1,925 posts
Model Shipwrights: 1,298 posts
Posted: Sunday, December 09, 2018 - 12:38 AM UTC
Warren,
She is coming together nicely, really liking all the detail.
Mark
England - South East, United Kingdom
Joined: March 01, 2010
KitMaker: 7,078 posts
Model Shipwrights: 6,649 posts
Posted: Sunday, December 09, 2018 - 07:14 AM UTC
Hi Warren,
some rapid progress, looking good.
Cheers
Si


