_GOTOBOTTOM
Ships by Class/Type: Frigates
This is for topics on modern Frigates. For the sailing variety they should still go under Sailing.
Australian FFG (Oliver Hazard Perry Class)
Choowy
Visit this Community
Victoria, Australia
Joined: April 17, 2015
KitMaker: 125 posts
Model Shipwrights: 125 posts
Posted: Monday, November 05, 2018 - 12:21 PM UTC
Hi all, started this build a few years ago and have been working on it on and off. Purchased the Pontos PE kit for it and will post the progress so far.

I've tended to go for the earlier era appearance, about the time HMAS Darwin came to Australia (1985) fresh out of Todd Shipyards in the US.

Its got the extended flight deck, but some of the other colour schemes will vary (all black anti foul instead of black, red) black whips, SPS-49 and pre ships boat conversion. So its technically not time period accurate but the appearance that I preferred.


Choowy
Visit this Community
Victoria, Australia
Joined: April 17, 2015
KitMaker: 125 posts
Model Shipwrights: 125 posts
Posted: Monday, November 05, 2018 - 12:37 PM UTC
The Academy kit is pretty nice, I haven't built any model for 25+ years.

Hull in 2 pieces. Added the PE as I went so you need to plan ahead a little and see what they provided and where they want you to put it.


[/url][url=https://flic.kr/p/2gKakBg]_MG_0027

Kit has the option for both short and long hull versions. Stern extension fits well.


Kit didn't have the stabiliser fins so I had to make my own and they are not technically in the correct location, a little aft than in real life but it was easier to trim the provided skegs back and place them close to the end.


d6mst0
#453
Visit this Community
Texas, United States
Joined: August 28, 2016
KitMaker: 1,925 posts
Model Shipwrights: 1,298 posts
Posted: Monday, November 05, 2018 - 02:20 PM UTC
Ned,

Nice start. Is that a one piece hull?

Mark
RussellE
#306
Visit this Community
Victoria, Australia
Joined: June 27, 2010
KitMaker: 3,959 posts
Model Shipwrights: 2,777 posts
Posted: Tuesday, November 06, 2018 - 12:17 AM UTC
Following with interest Ned.

As a fellow Aussie it's good to see an RAN vessel being built
Choowy
Visit this Community
Victoria, Australia
Joined: April 17, 2015
KitMaker: 125 posts
Model Shipwrights: 125 posts
Posted: Tuesday, November 06, 2018 - 12:22 PM UTC
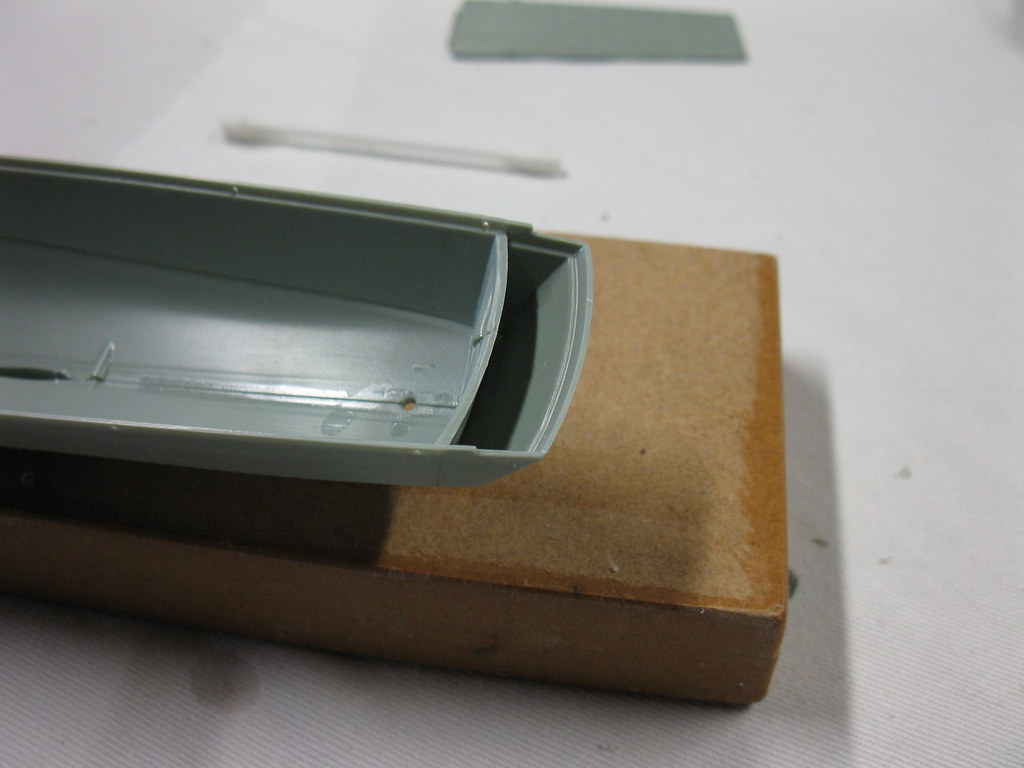
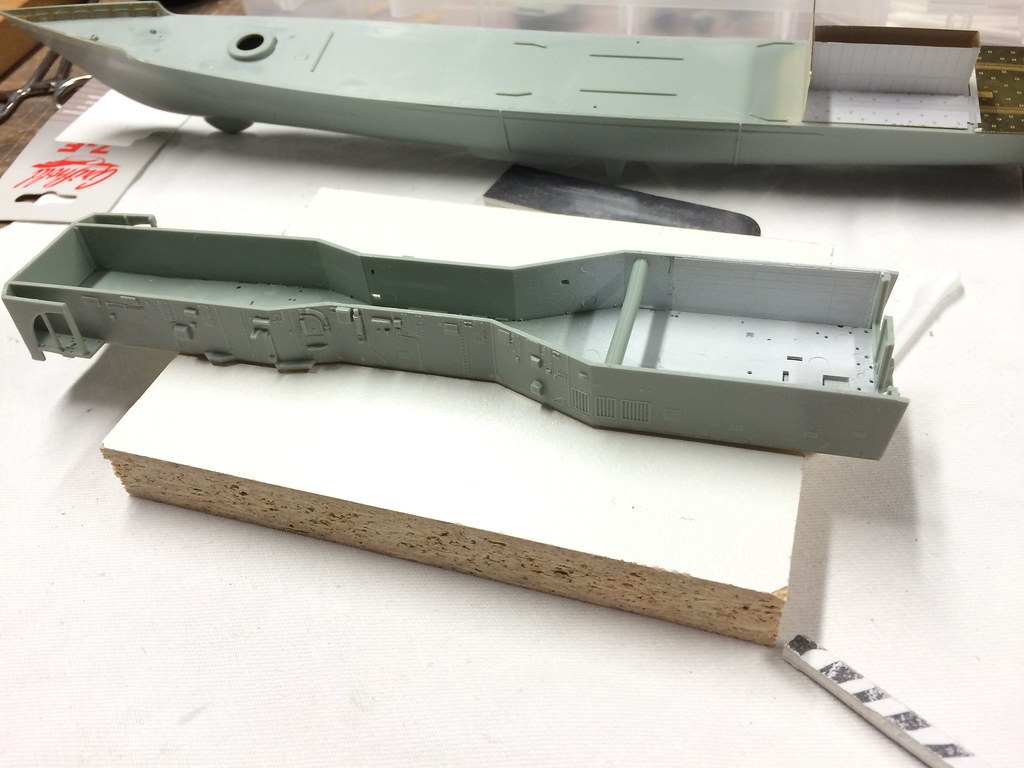
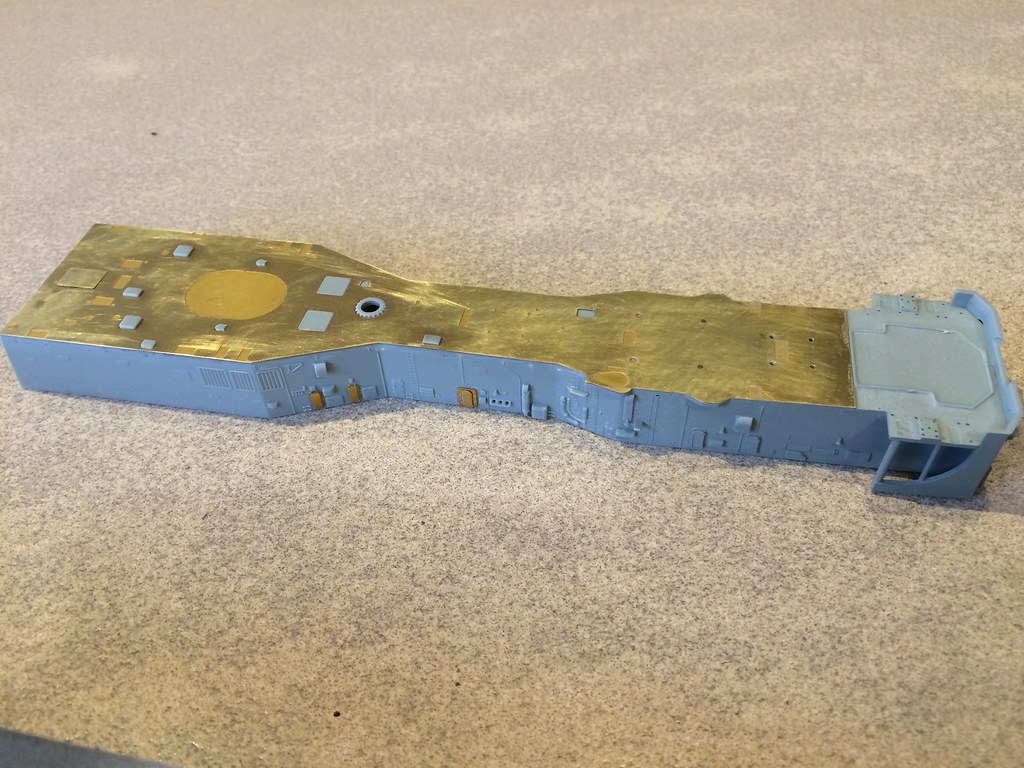
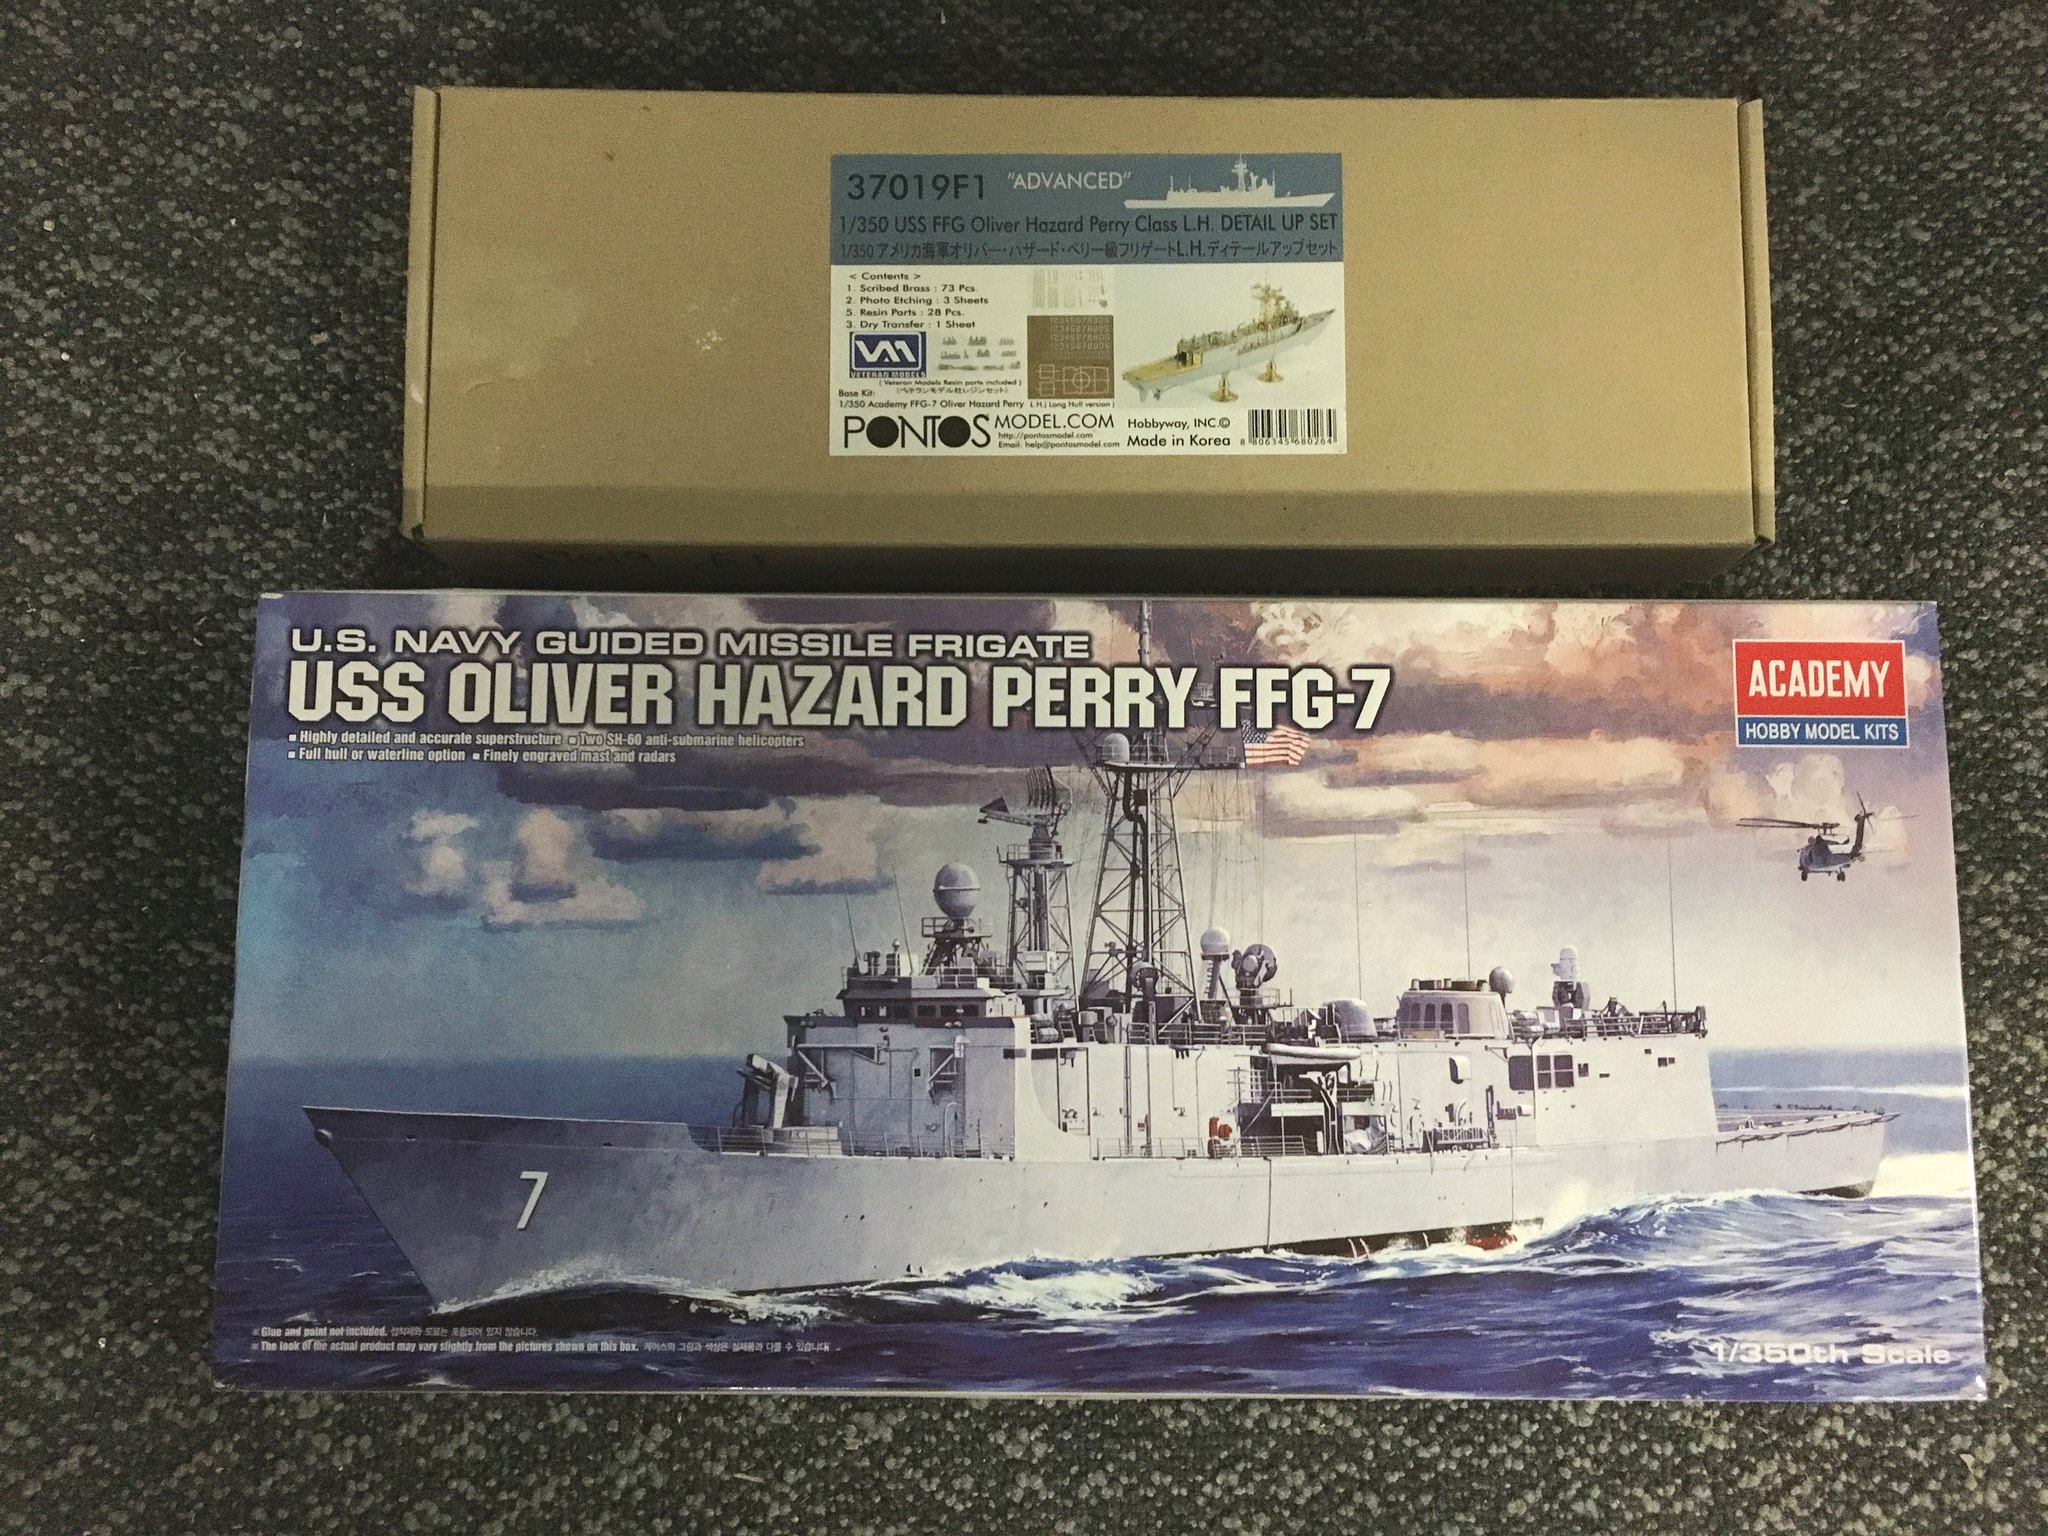
Thanks Mark, 2 piece hull with scribe lines for a waterline model.

Cheers Russell, something a bit different.

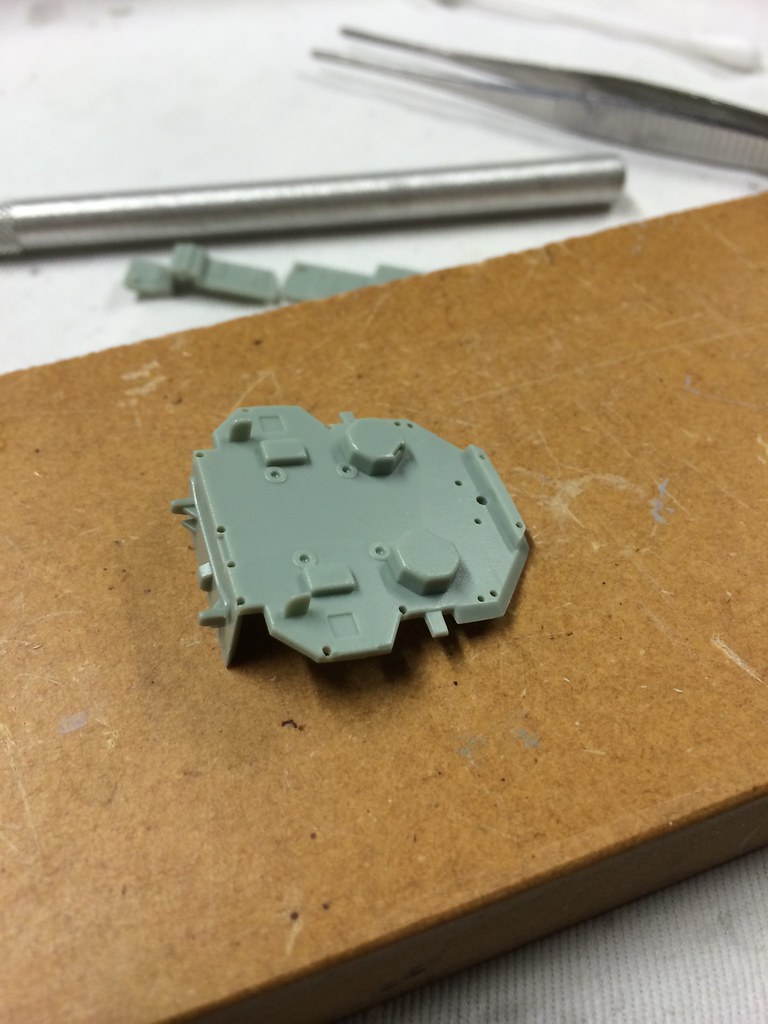
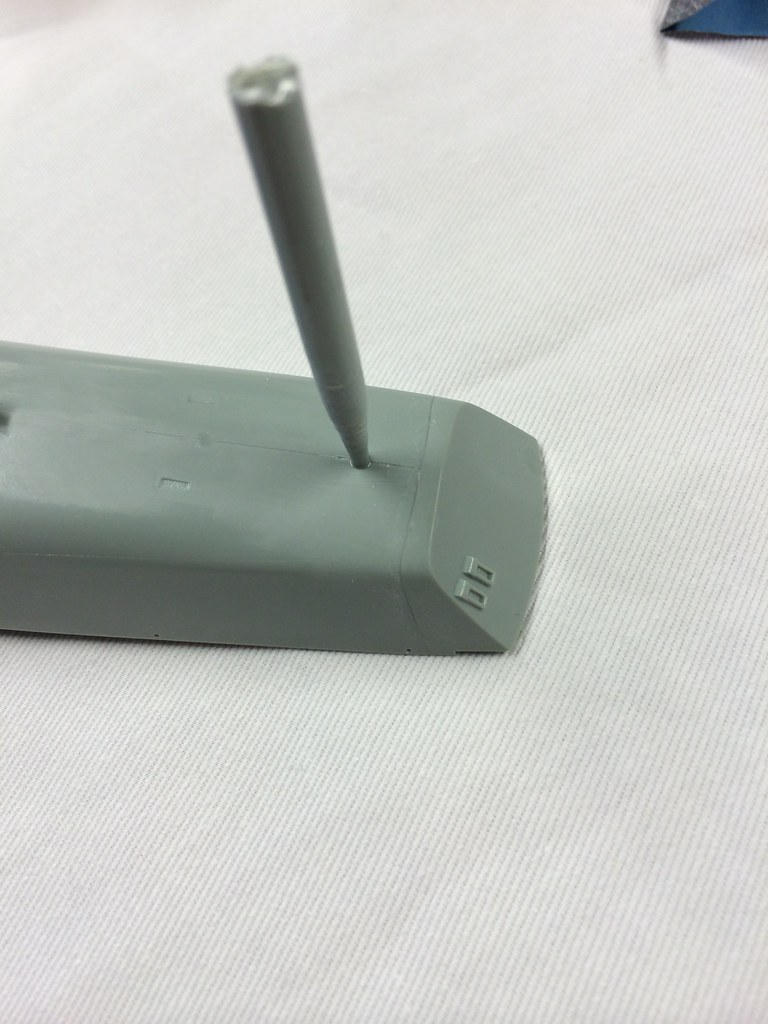
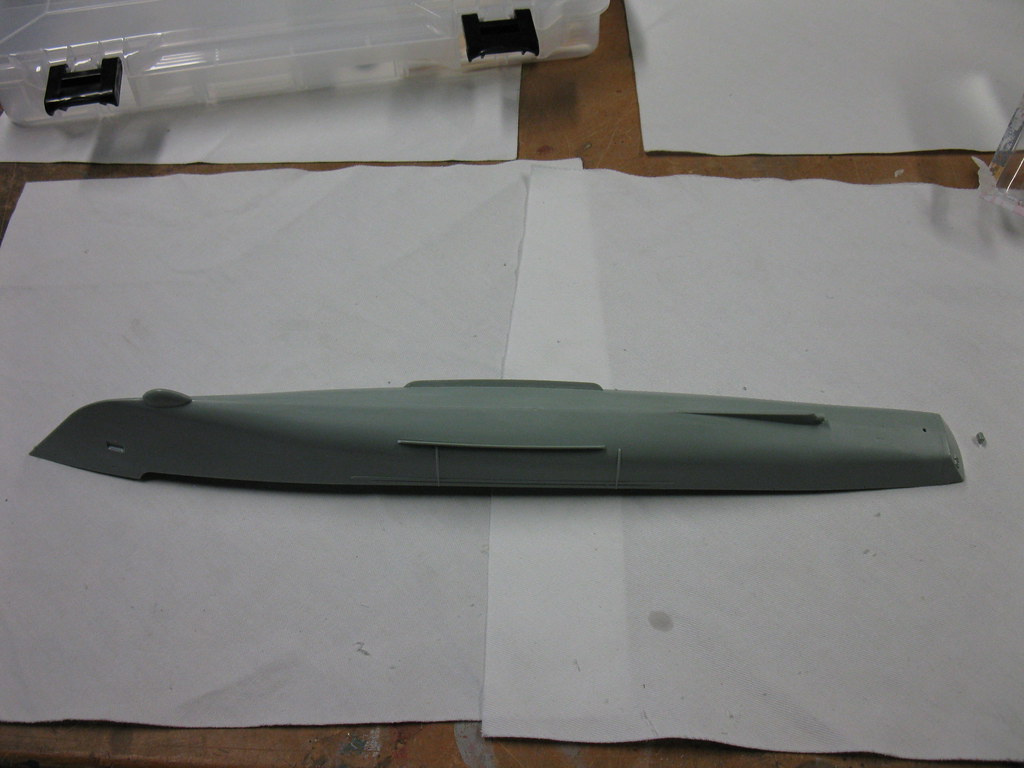
Had to fill the rudder hole as its offsett in OHP FFG's to starboard a little.


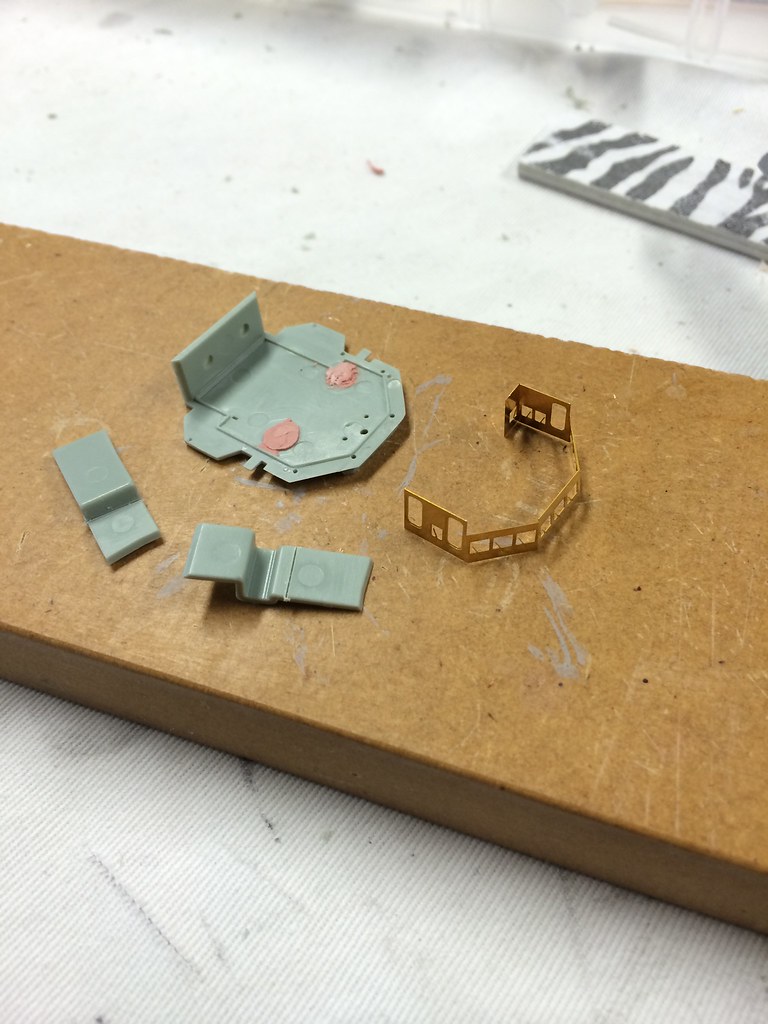
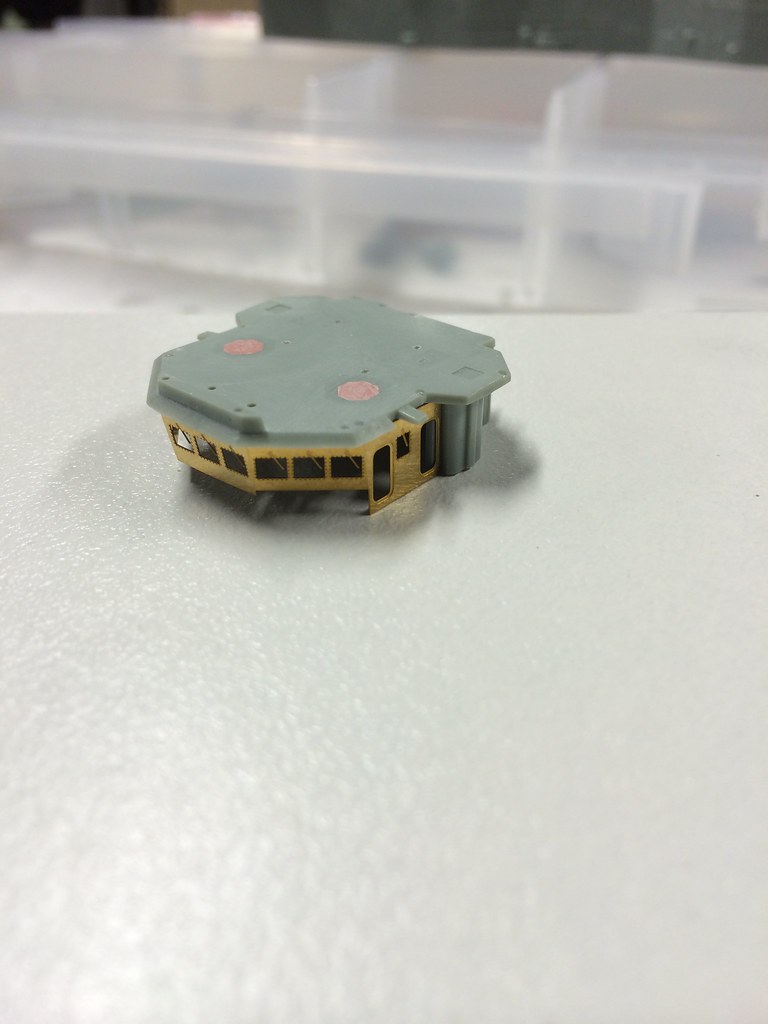
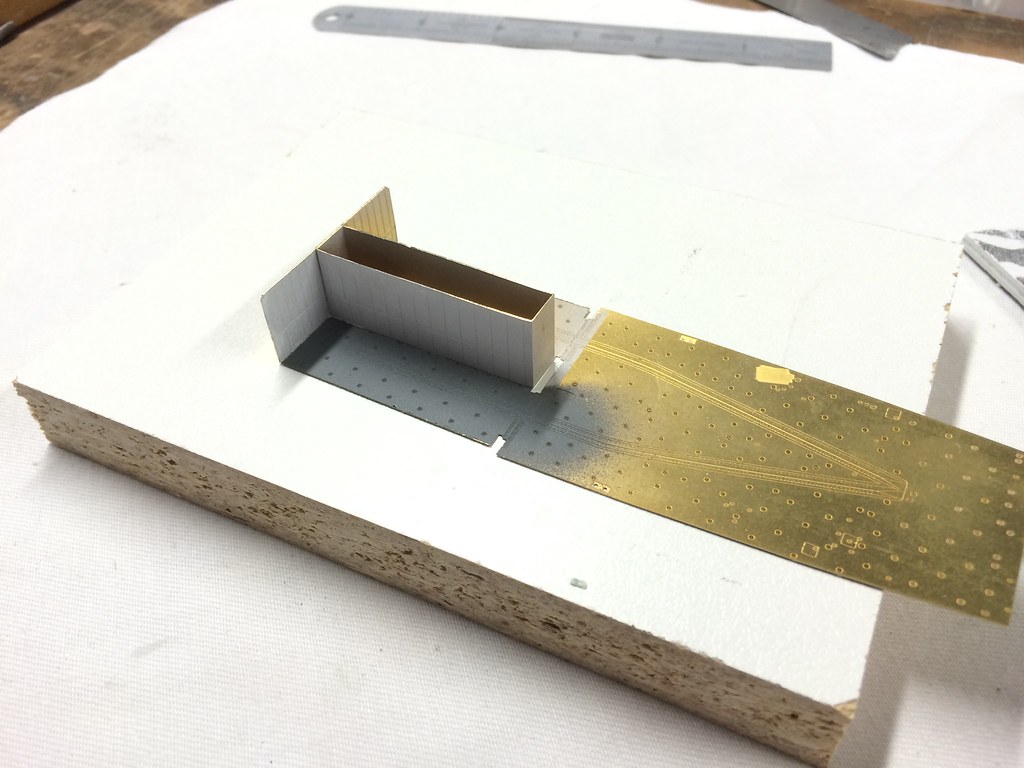
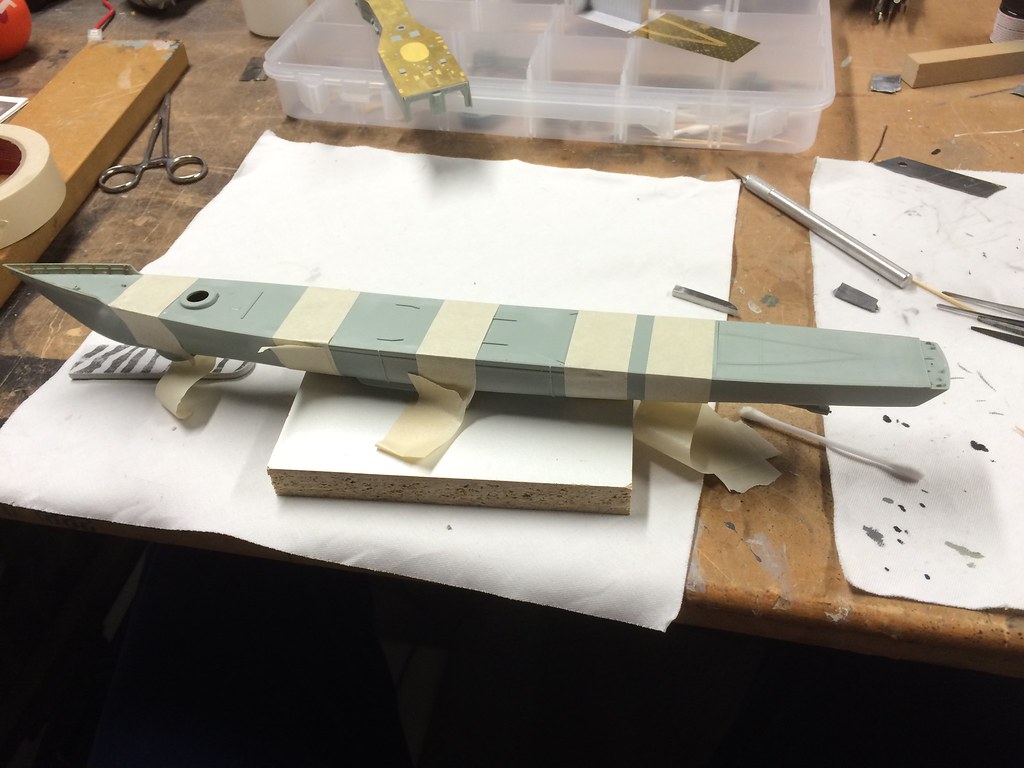
Attached the flightdeck, it then has a PE flightdeck which fits on top later.


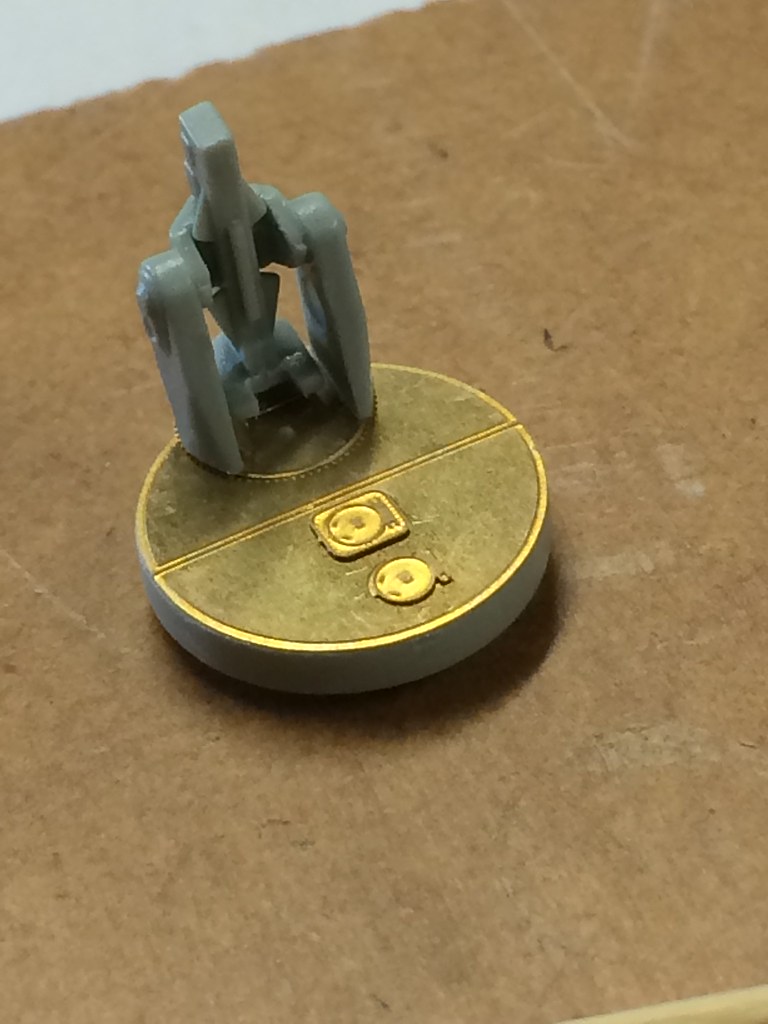
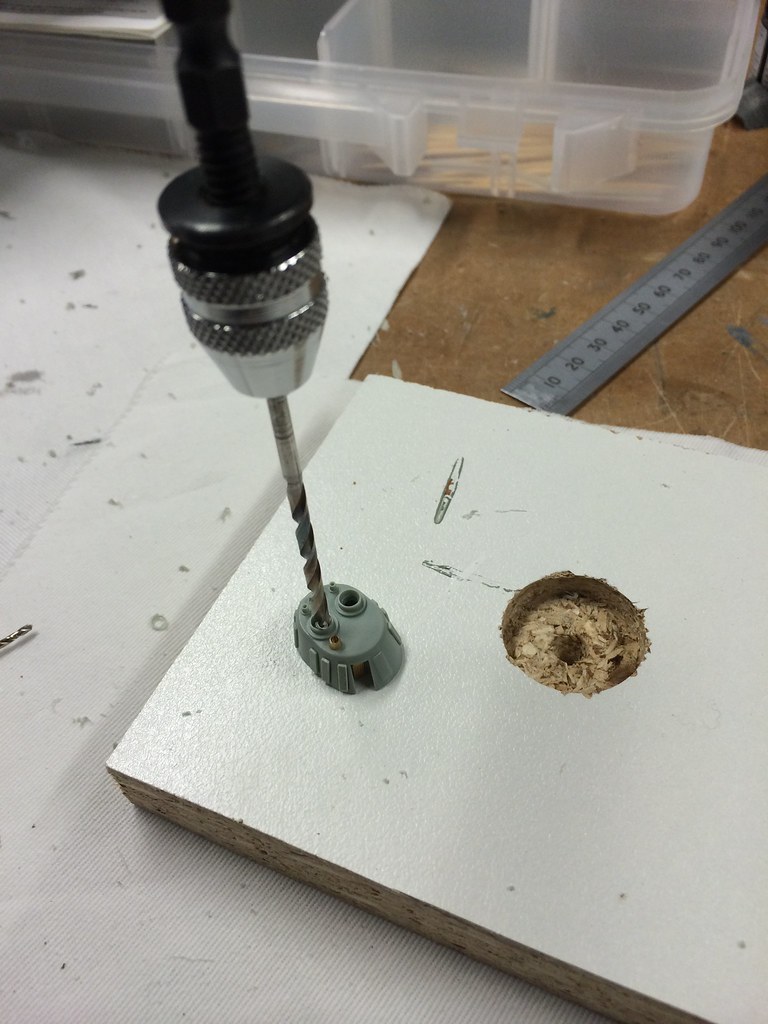
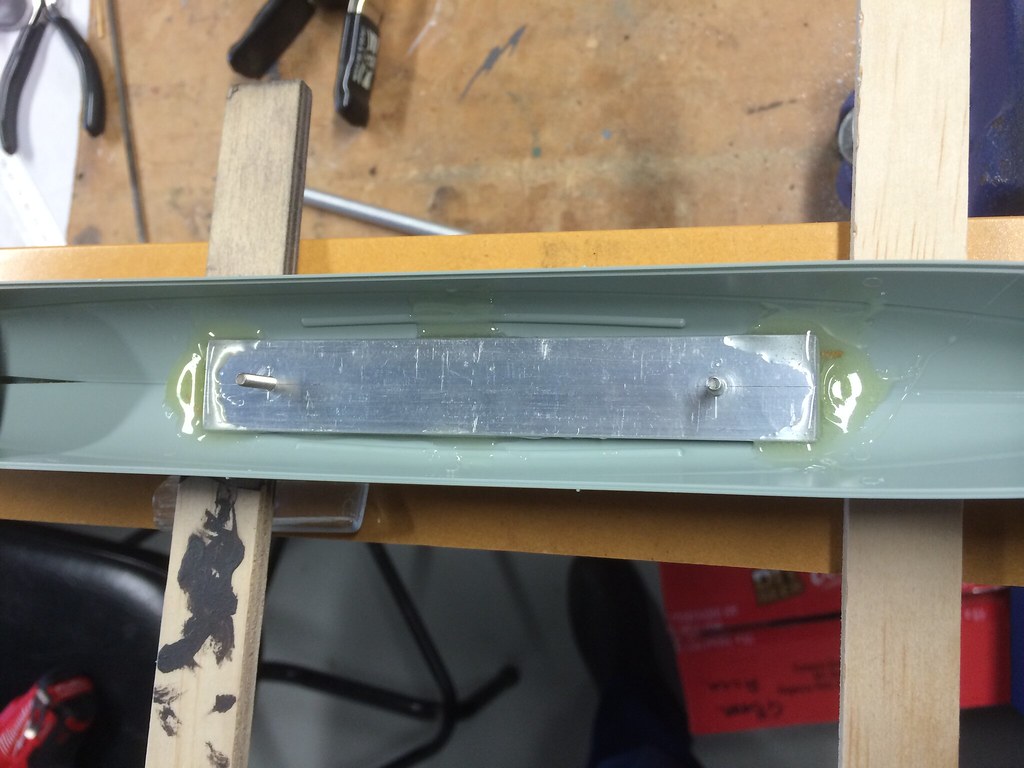
Drilled and tapped an aluminium piece to allow it to be fixed to a base later.


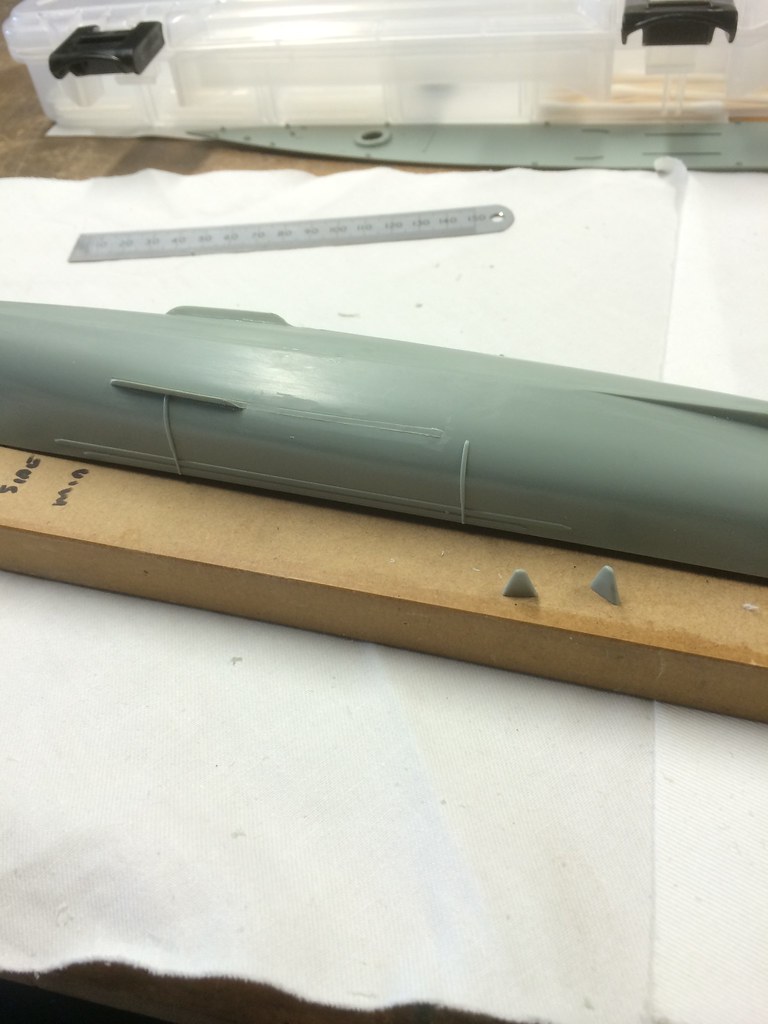
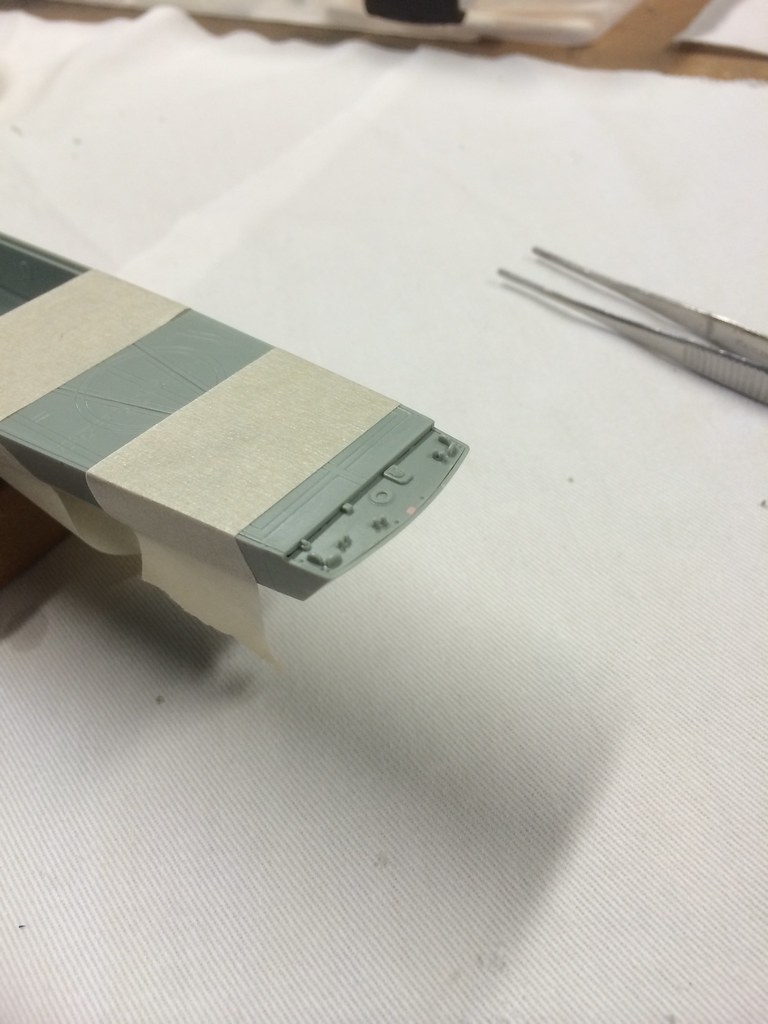
Added main deck, fit was really good.


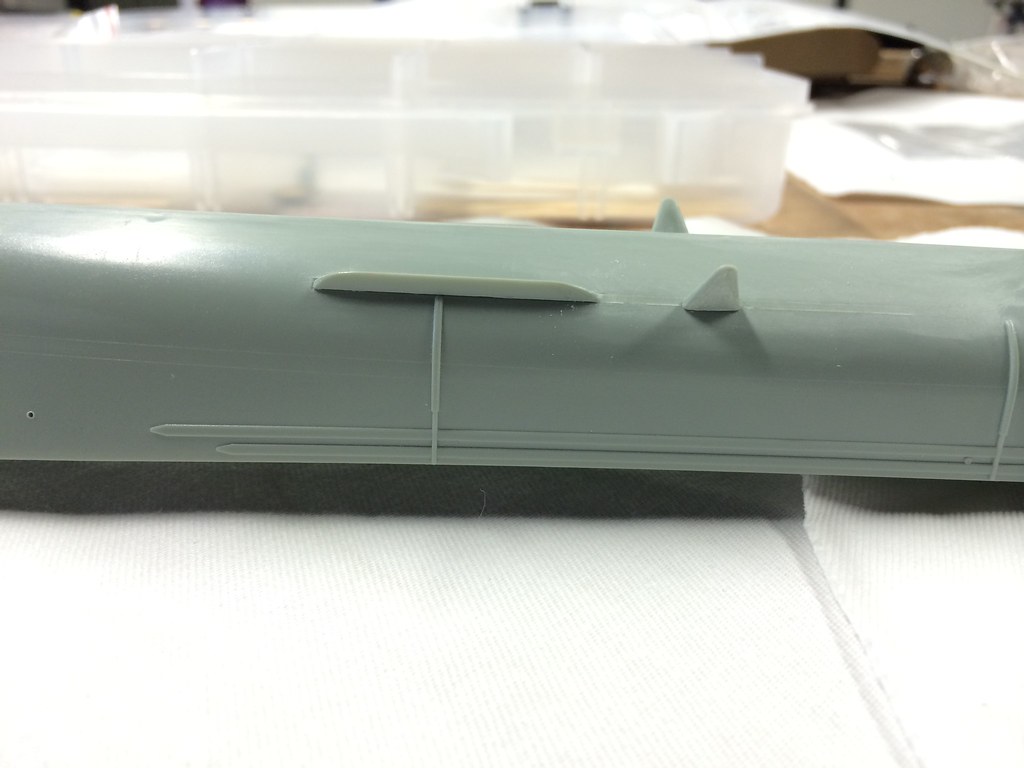
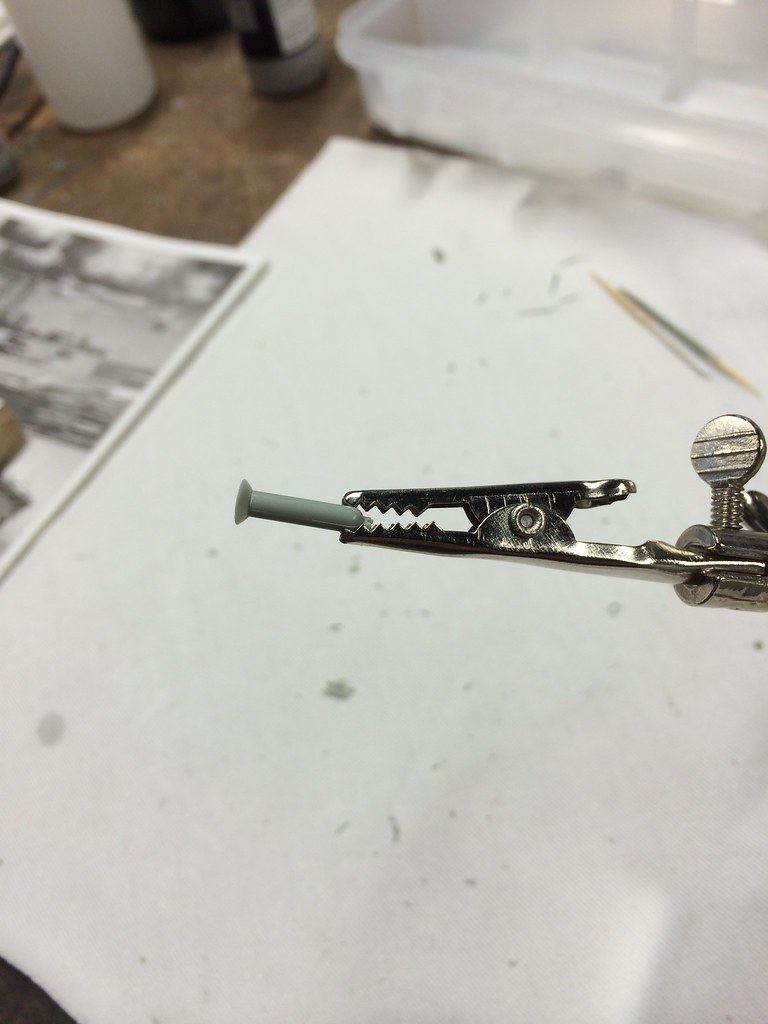
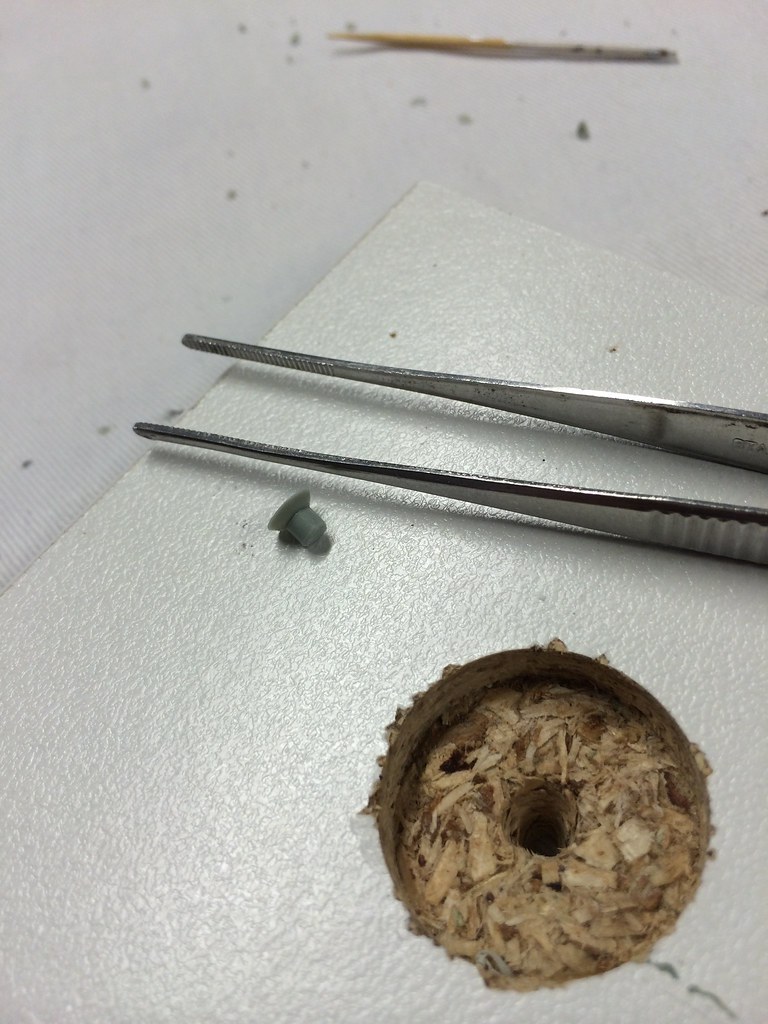
Added some of the discharge holes and used a heated nail to form a slight raised round to represent the welds.


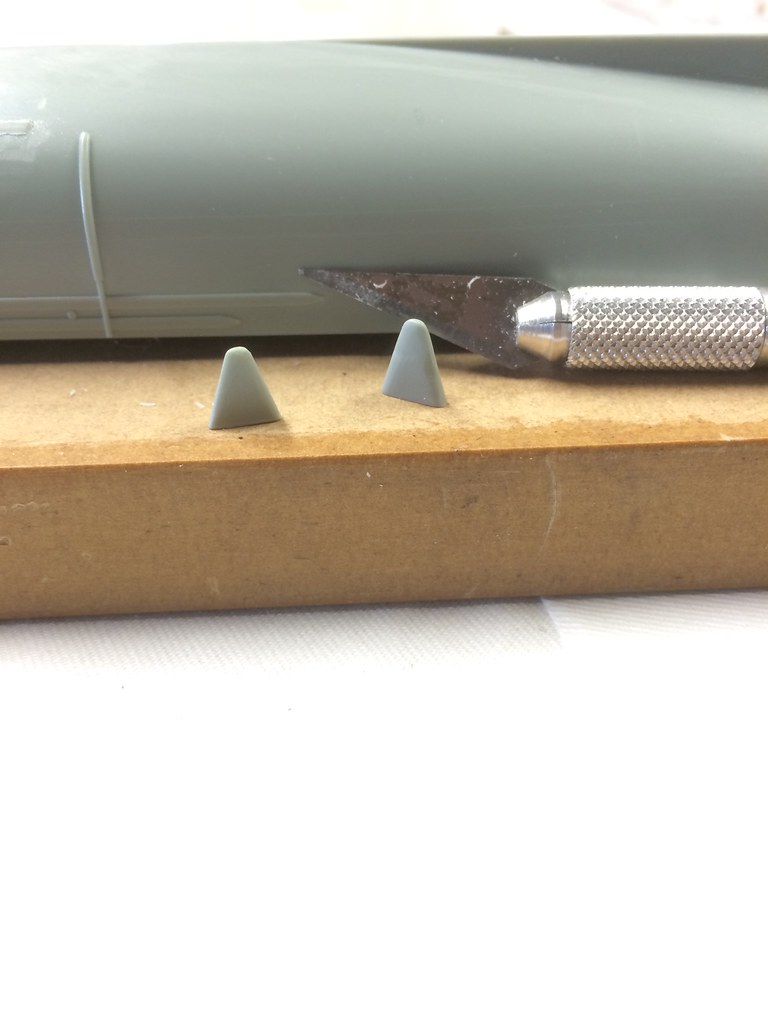
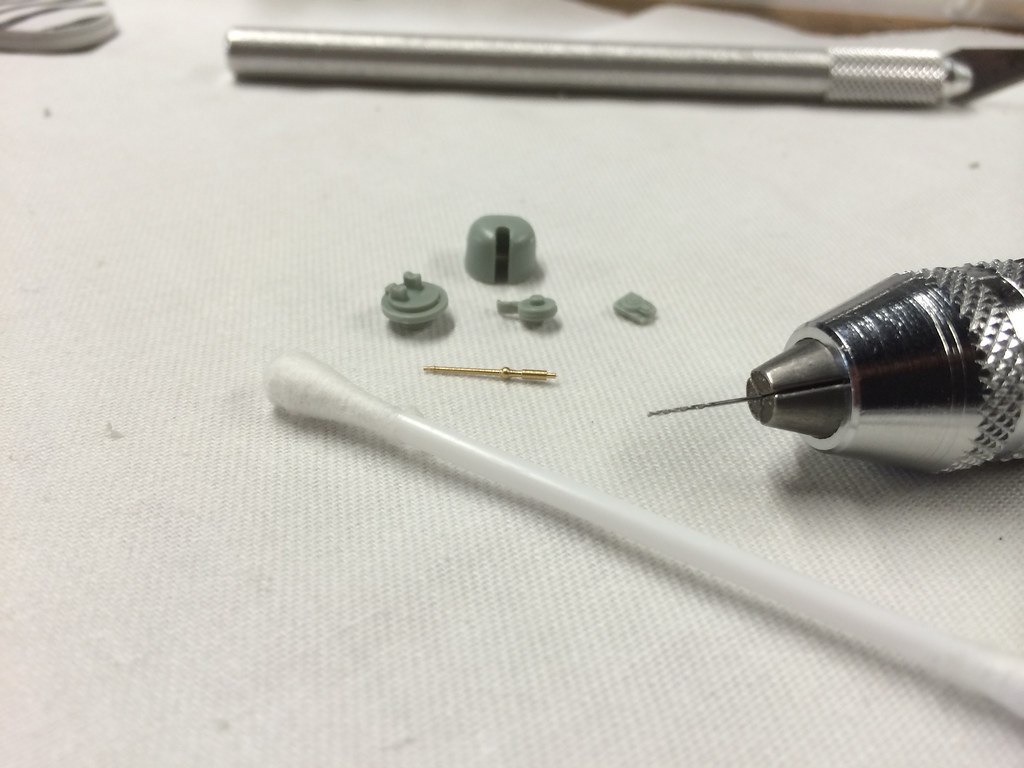
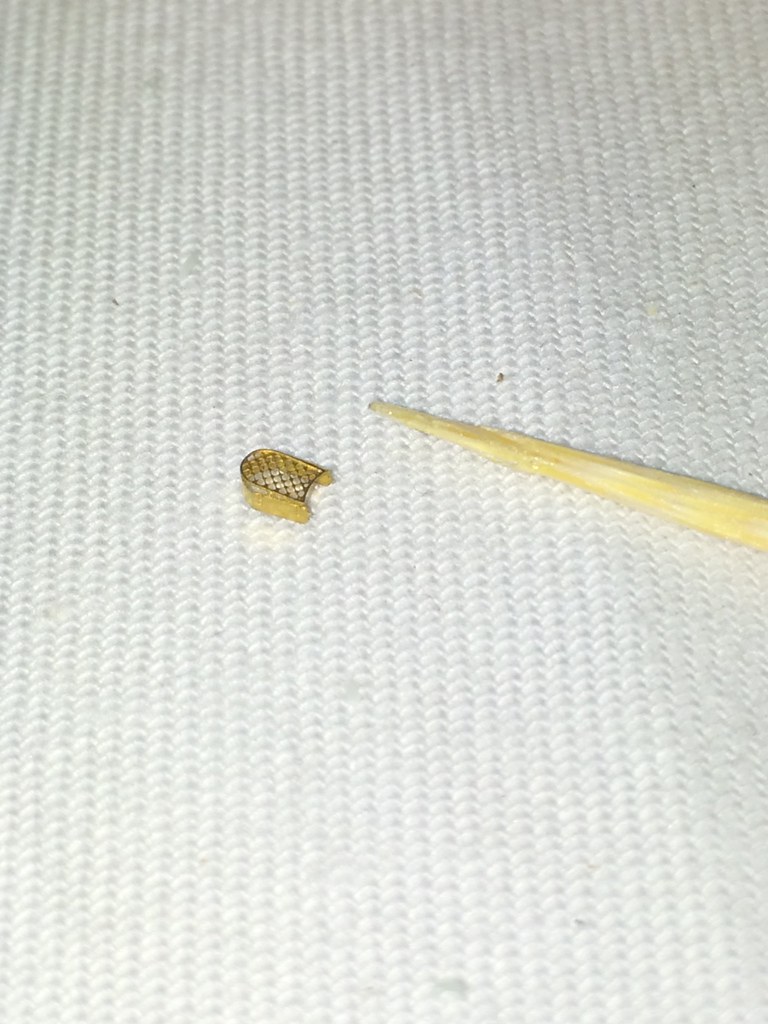
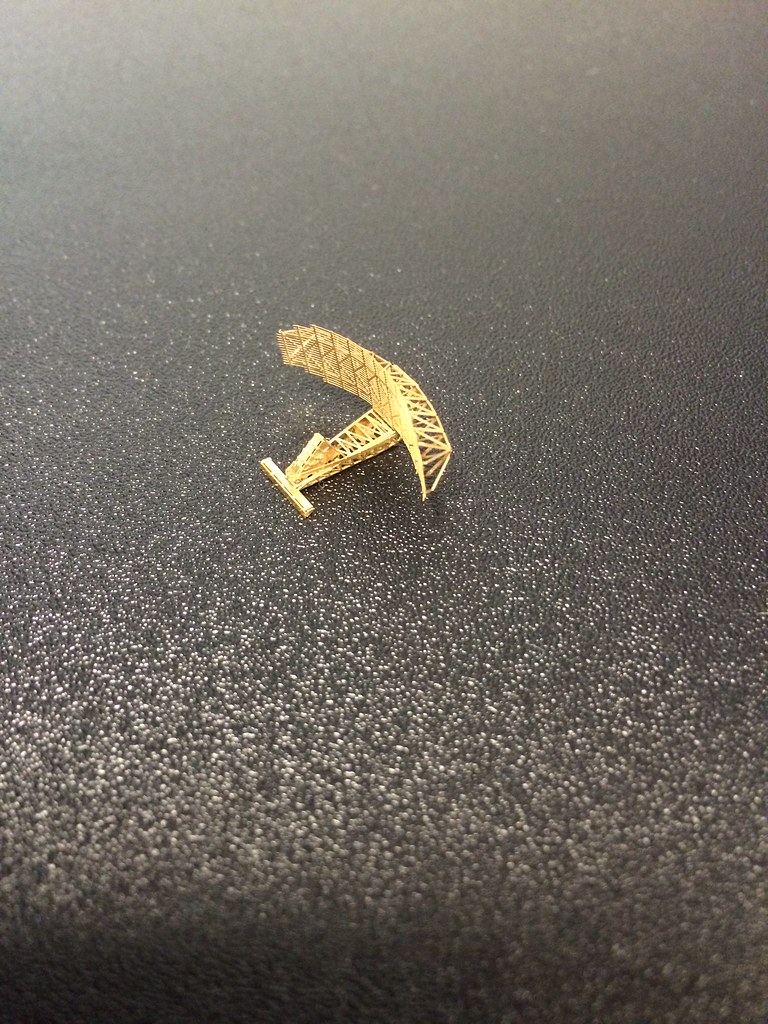
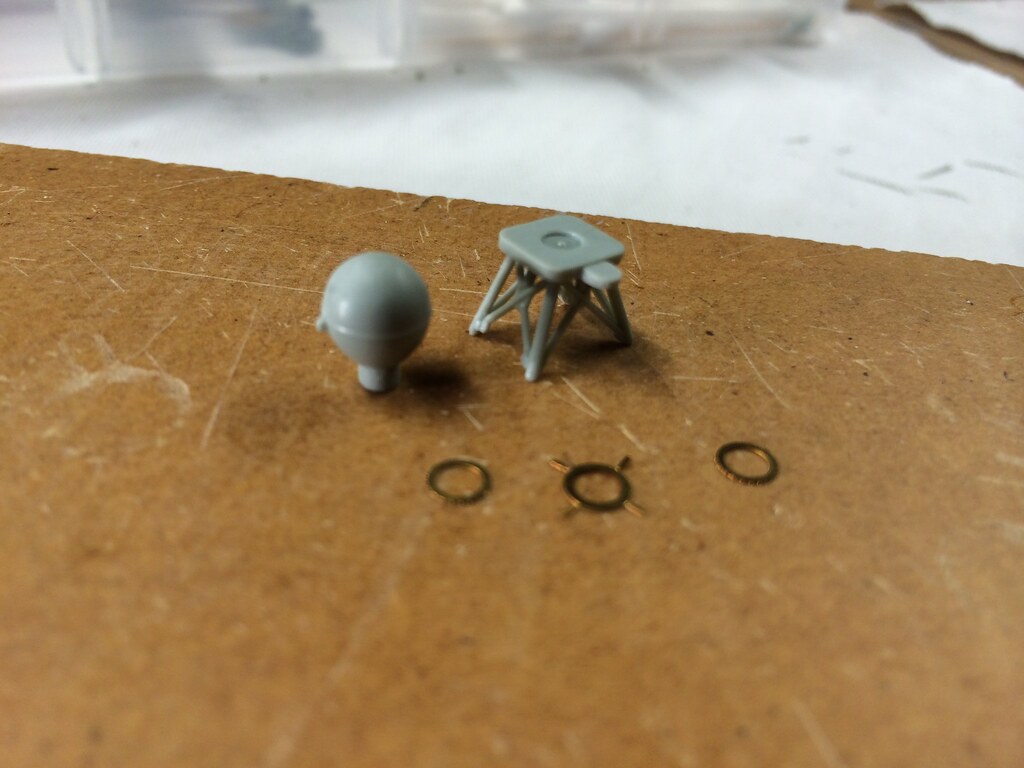
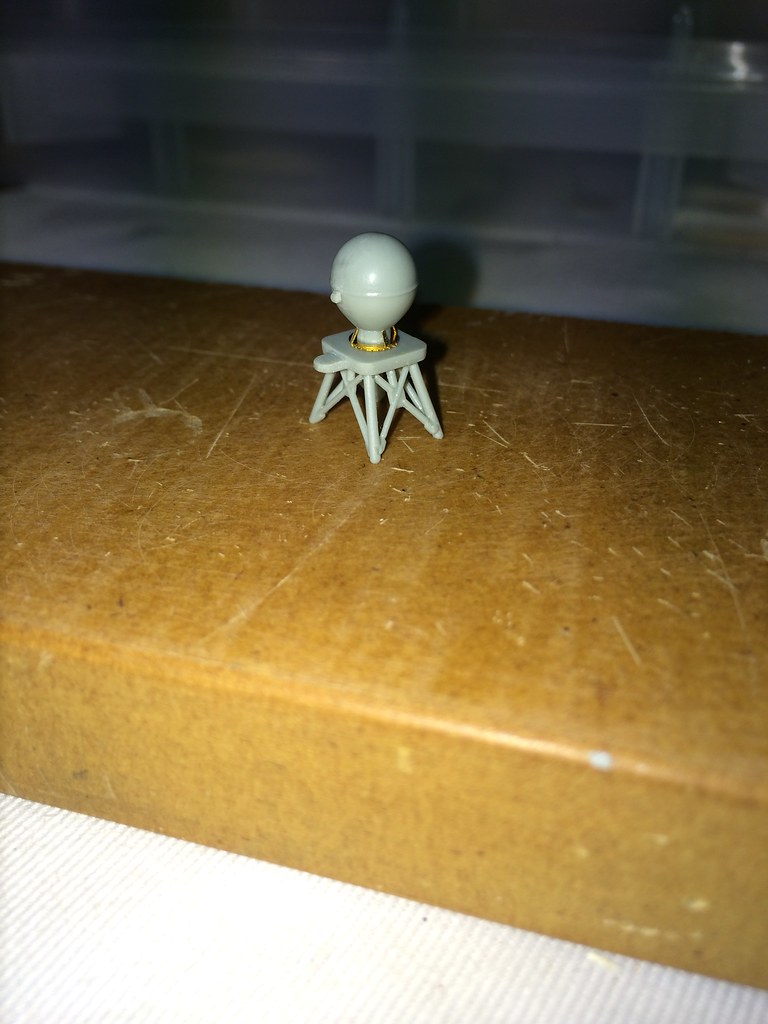
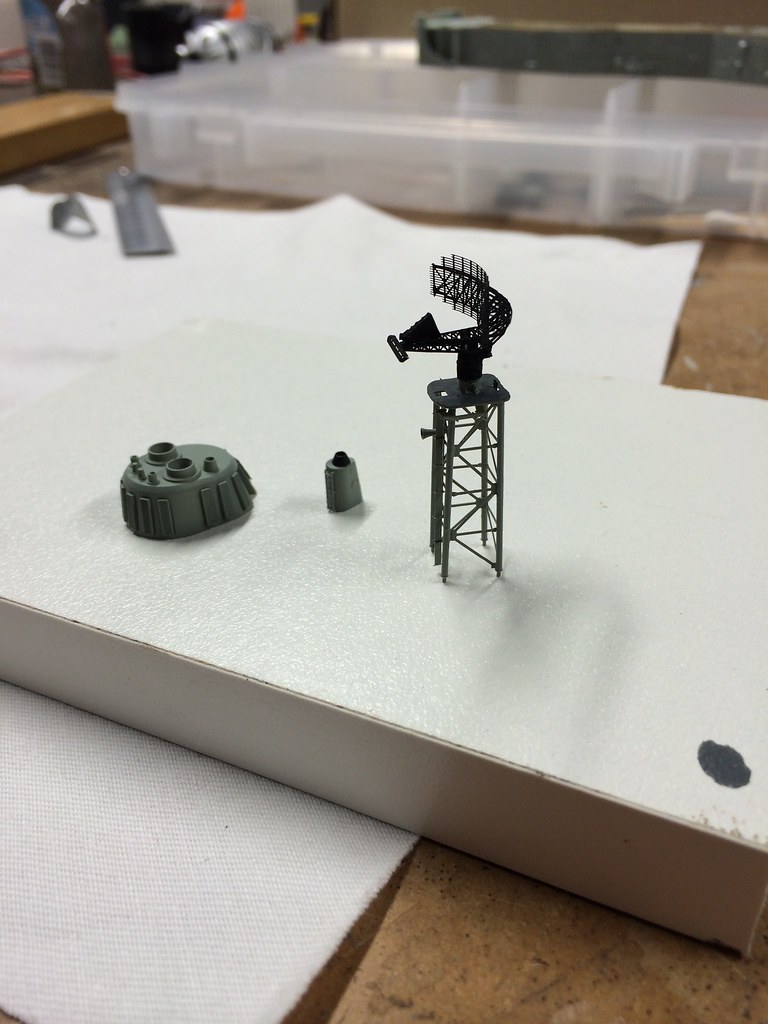
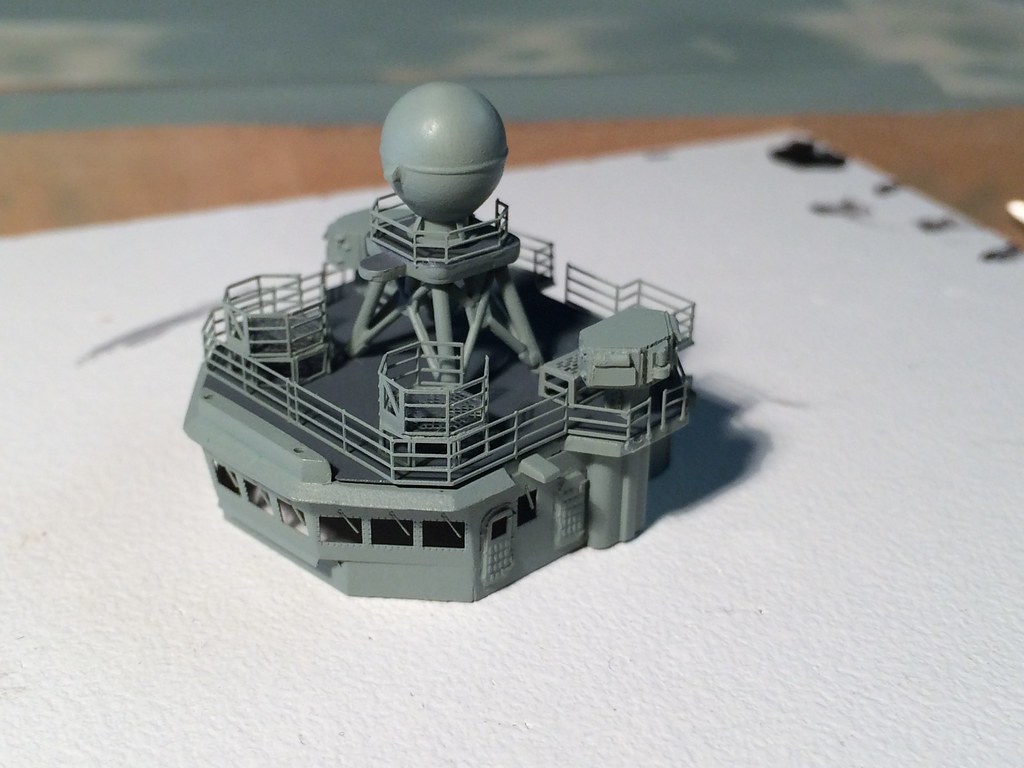
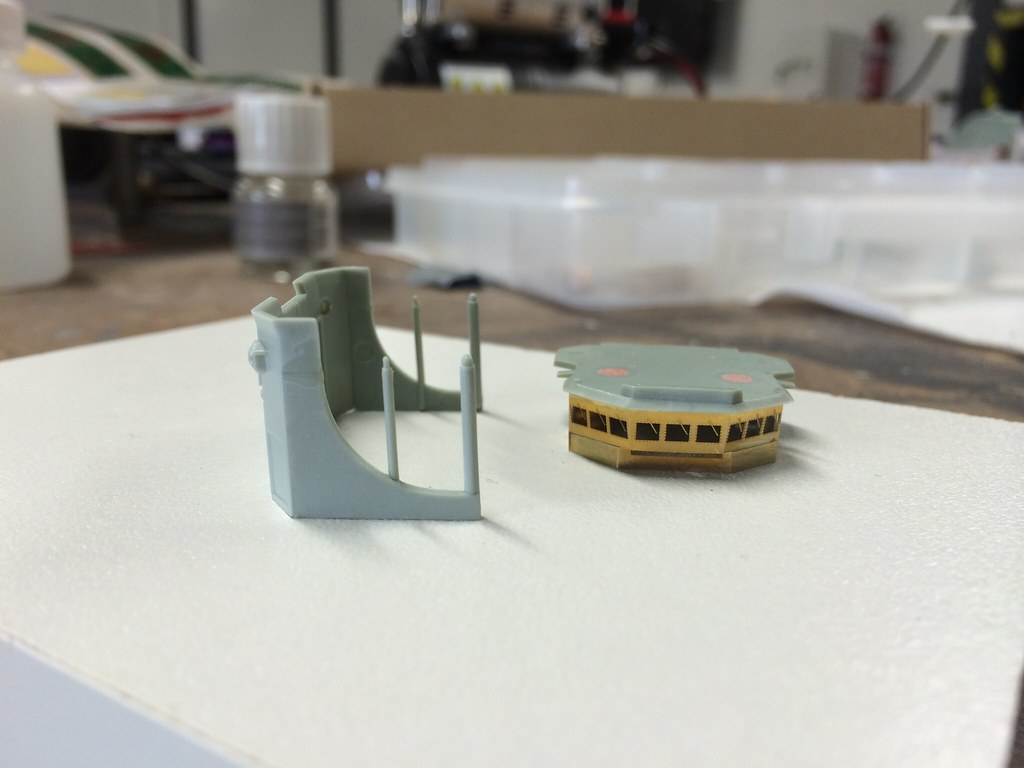
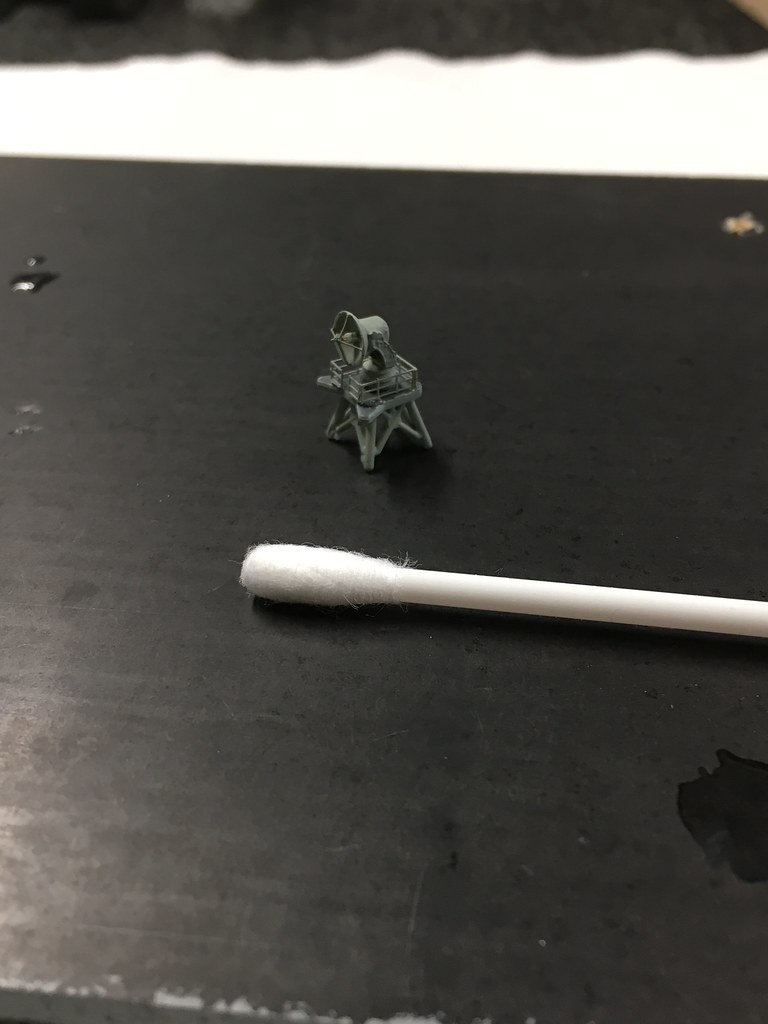
The Pontos resin pieces are excellent. Kit CIWS and resin for comparison.


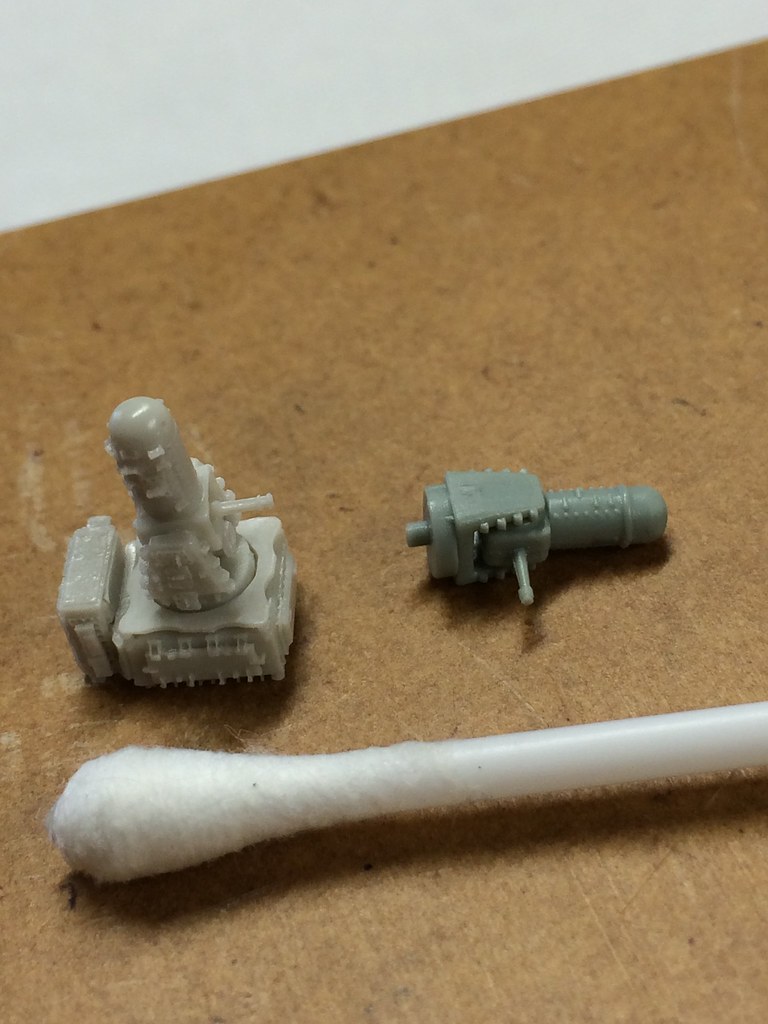
Nice to switch to something smaller for a quick result.


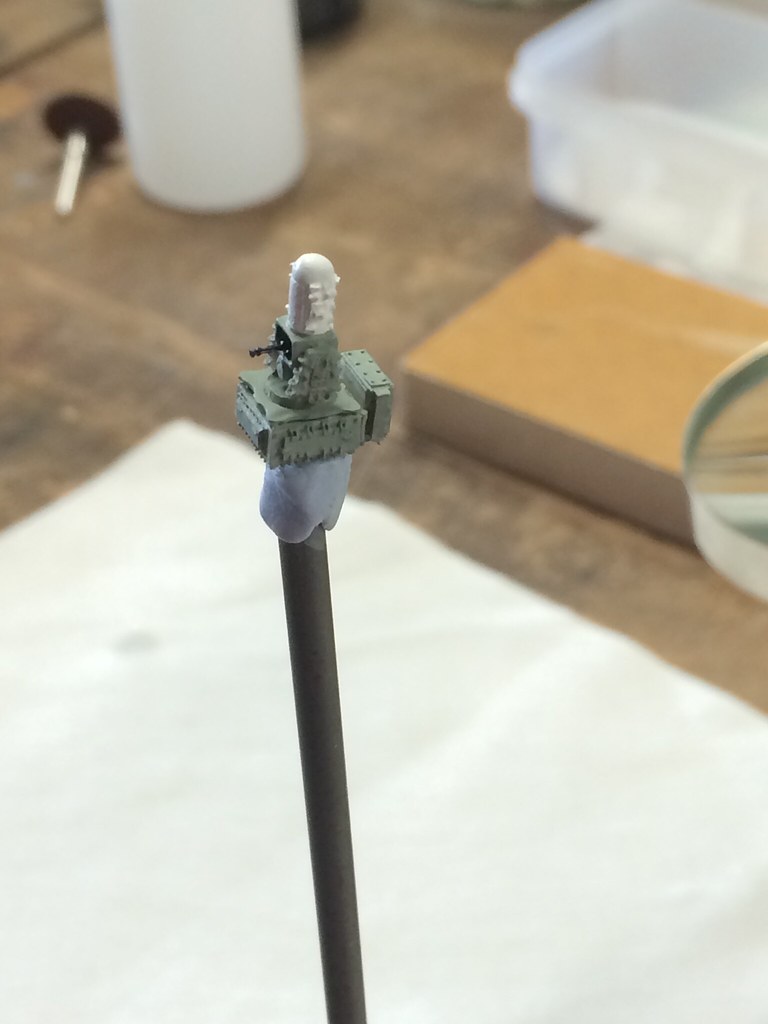
Point of interest, to get the right colour I just bought a sample pot of interior acrylic paint and thinned it down so I could spray it. That's really the only way you can buy this colour off the shelf. For anybody wanting the old R.A.N colour for "ships side grey" its N42 (storm grey)and for the deck its N63 Pewter. They have just started to adopt a more US style haze grey on the ships. Sprays and brushes on really well.
d6mst0
#453
Visit this Community
Texas, United States
Joined: August 28, 2016
KitMaker: 1,925 posts
Model Shipwrights: 1,298 posts
Posted: Tuesday, November 06, 2018 - 02:47 PM UTC
I knew it was a two piece hull. You did such a nice job removing the seam.

Mark
Choowy
Visit this Community
Victoria, Australia
Joined: April 17, 2015
KitMaker: 125 posts
Model Shipwrights: 125 posts
Posted: Wednesday, November 07, 2018 - 11:36 AM UTC

Quoted Text

I knew it was a two piece hull. You did such a nice job removing the seam.

Mark


Thanks Mike.

Some more of the smaller components.

Mk13 launcher. Some nice Pontos additions, the inner and outer magazine ring access hatches. Notched out the lower end of the launcher arm that sits over the load position.


76mm gun turret gets a new Pontos barrel. .5mm hole required.


Drilled out the main engine exhaust holes on the stack. Added the vents and some PE


Anchor chain cover grate.


SPS-49 search radar. That was pretty full on to roll and put together.


CAS dome with PE extras. Added an extra detail on the front also. Didn't use the PE base platform as the side tubular supports were flat and they didn't look quite right, the kit piece wasn't too bad. Railings to be added later.


d6mst0
#453
Visit this Community
Texas, United States
Joined: August 28, 2016
KitMaker: 1,925 posts
Model Shipwrights: 1,298 posts
Posted: Wednesday, November 07, 2018 - 11:38 AM UTC
Ned,

That radar looks awesome, nice work. Hope you have no troubles installing it.

Mark
trahe
Visit this Community
Virginia, United States
Joined: April 03, 2006
KitMaker: 1,158 posts
Model Shipwrights: 117 posts
Posted: Thursday, November 08, 2018 - 12:03 AM UTC
Ned,

Looking good! Great work with that PE!
ChurchSTSV
Visit this Community
Arizona, United States
Joined: September 20, 2017
KitMaker: 350 posts
Model Shipwrights: 175 posts
Posted: Thursday, November 08, 2018 - 04:04 AM UTC
Gorgeous work. I have a Kirov coming and this thread is an inspiration!
Quincannon
Visit this Community
Colorado, United States
Joined: June 22, 2018
KitMaker: 275 posts
Model Shipwrights: 273 posts
Posted: Thursday, November 08, 2018 - 04:56 AM UTC
Ned: I am curious as to how you are going to deal with the holes in the deck and superstructure that are meant for the kit supplied plastic railings. There must be a hundred or so.
Choowy
Visit this Community
Victoria, Australia
Joined: April 17, 2015
KitMaker: 125 posts
Model Shipwrights: 125 posts
Posted: Thursday, November 08, 2018 - 02:06 PM UTC

Quoted Text

Ned,

That radar looks awesome, nice work. Hope you have no troubles installing it.

Mark


Thanks Mark, it went on OK, needed some quick set epoxy to hold it at the right position.
Choowy
Visit this Community
Victoria, Australia
Joined: April 17, 2015
KitMaker: 125 posts
Model Shipwrights: 125 posts
Posted: Thursday, November 08, 2018 - 02:32 PM UTC
Thanks Thomas, Charlie!

Chuck there wasn't a huge number of holes to fill, all the superstructure holes were on the vertical surface near the top, the others were spread apart a bit and filled easily.


I ended up using the flat PE cross bracing for the 49 mast and it looks Okay, much better than the kit supplied one.
There is also a Pontos lower mounting assembly for the radar dish supplied. They include a PE waveguide run that is pretty close to the original and a nice detail.

Painted the main funnel and radar parts.


Bridge keeps the top and loses some of the window section and also the raised sections (AAC platforms).


New PE section and some of the sides are kept to interface with the PE.


Completed base section.


Painted and railings, PE deck piece and CAS dome, SLQ-32 antennas.


I don't know how you guys build lots of these ships, never again!! This has been on the go for 3 years. What was I thinking buying a PE kit, adds 250+ extra pieces!! Still I'm too far in to turn back.
Cosimodo
#335
Visit this Community
Auckland, New Zealand
Joined: September 03, 2013
KitMaker: 1,808 posts
Model Shipwrights: 871 posts
Posted: Thursday, November 08, 2018 - 06:44 PM UTC
This looking fantastic Ned. Great work on the PE especially the radar as getting the curve right with brass is always tricky.

cheers
Michael
JJ1973
#345
Visit this Community
Niedersachsen, Germany
Joined: August 22, 2011
KitMaker: 1,835 posts
Model Shipwrights: 1,832 posts
Posted: Friday, November 09, 2018 - 12:20 AM UTC
Ned,

your build is looking fantastic so far, excellent work on all the details and really crisp!! Great work!

I was about to say this is a great start at a fast pace, but if I understand right, you've been working on here for quite a while - three years if I get it right?? Still great work!

And I'm in for all your further post's , looking forward to your progress on this fine build!

Cheers,
Jan
ChurchSTSV
Visit this Community
Arizona, United States
Joined: September 20, 2017
KitMaker: 350 posts
Model Shipwrights: 175 posts
Posted: Friday, November 09, 2018 - 03:04 AM UTC
Dat PE doe!!

Excellent work so far! I want to work with PE, but I don't know if I could ever achieve this level!

Choowy
Visit this Community
Victoria, Australia
Joined: April 17, 2015
KitMaker: 125 posts
Model Shipwrights: 125 posts
Posted: Monday, November 19, 2018 - 10:17 AM UTC

Quoted Text

This looking fantastic Ned. Great work on the PE especially the radar as getting the curve right with brass is always tricky.

cheers
Michael


Thanks Michael, I think I used a small rod and rolled it across a cloth to get it to curve gently.
Choowy
Visit this Community
Victoria, Australia
Joined: April 17, 2015
KitMaker: 125 posts
Model Shipwrights: 125 posts
Posted: Monday, November 19, 2018 - 10:19 AM UTC

Quoted Text

Ned,

your build is looking fantastic so far, excellent work on all the details and really crisp!! Great work!

I was about to say this is a great start at a fast pace, but if I understand right, you've been working on here for quite a while - three years if I get it right?? Still great work!

And I'm in for all your further post's , looking forward to your progress on this fine build!

Cheers,
Jan


Thanks Jan, yes I started this a few years back (been slow going) but took pics along the way.
Choowy
Visit this Community
Victoria, Australia
Joined: April 17, 2015
KitMaker: 125 posts
Model Shipwrights: 125 posts
Posted: Monday, November 19, 2018 - 10:23 AM UTC

Quoted Text

Dat PE doe!!

Excellent work so far! I want to work with PE, but I don't know if I could ever achieve this level!


Thanks Charlie, I got some tips form the many excellent builders on this site. Go slow and less is more initially. Do a piece at a time. Might find you spent an hour and only managed to build 2 boxes. Once you get the shape holding together you can go back and add some CA in places where it wont be seen for strength. Also find that paint can form a reasonable bond too.
Choowy
Visit this Community
Victoria, Australia
Joined: April 17, 2015
KitMaker: 125 posts
Model Shipwrights: 125 posts
Posted: Monday, November 19, 2018 - 10:41 AM UTC
You get a nice PE flight deck and hanger with tie down points and RAST detail.


Sprayed the Port side only as I planned to have the hanger door rolled up. Needed to file some of the brass away so I could get a decent fit when the superstructure goes on.


Forward superstructure and spray shields, there's PE replacements for the support columns but I stayed with the molded kit after a clean up as it was close to the original post.


All together with a strut to help with the alignment


I'm not too sure the PE top deck adds much value and it did prove to be a lot of work to clean up the fit around the edge where it meets the plastic. Everything lines up perfectly, its just a lot of risky work to get such a large surface area glued down and sitting flat.

I did have to remove a small PE section aft of the bridge that I didn't line up but I don't think its an issue.


Needed to modify the kit STIR director. Took the dish off and made a new cabinet enclosure.


The PE parts were OK.


RussellE
#306
Visit this Community
Victoria, Australia
Joined: June 27, 2010
KitMaker: 3,959 posts
Model Shipwrights: 2,777 posts
Posted: Monday, November 19, 2018 - 09:22 PM UTC
Motoring along nicely Ned!

Nice detail on the "dish"
rolltide31
#377
Visit this Community
Texas, United States
Joined: June 27, 2010
KitMaker: 1,481 posts
Model Shipwrights: 1,332 posts
Posted: Tuesday, November 20, 2018 - 03:40 AM UTC
Ned,

Just catching up on this post. Amazing work with the PE and details. The Pontos set definitely sets this apart!

Dave
RedDuster
Visit this Community
England - South East, United Kingdom
Joined: March 01, 2010
KitMaker: 7,078 posts
Model Shipwrights: 6,649 posts
Posted: Tuesday, November 20, 2018 - 07:44 PM UTC
Hi Ned,

Just picked up on this build.

Great work so far, the upgrade looks well up to Pontos' usually complete standard.

will be following along for the ride.

Cheers

Si
Choowy
Visit this Community
Victoria, Australia
Joined: April 17, 2015
KitMaker: 125 posts
Model Shipwrights: 125 posts
Posted: Wednesday, November 28, 2018 - 03:32 PM UTC

Quoted Text

Motoring along nicely Ned!

Nice detail on the "dish"


Thanks Russell, false work-rate though, a lot of this is old work freshly posted.
Choowy
Visit this Community
Victoria, Australia
Joined: April 17, 2015
KitMaker: 125 posts
Model Shipwrights: 125 posts
Posted: Wednesday, November 28, 2018 - 03:33 PM UTC
Thanks Dave, yep it really adds depth (and man hours!!)
 _GOTOTOP