_GOTOBOTTOM
General Ship Modeling
Discuss modeling techniques, experiences, and ship modeling in general.
Building the Bronco 1/35 Seehund
warreni
Visit this Community
South Australia, Australia
Joined: August 14, 2007
KitMaker: 5,926 posts
Model Shipwrights: 2,624 posts
Posted: Tuesday, December 25, 2018 - 09:36 PM UTC
Hello all.

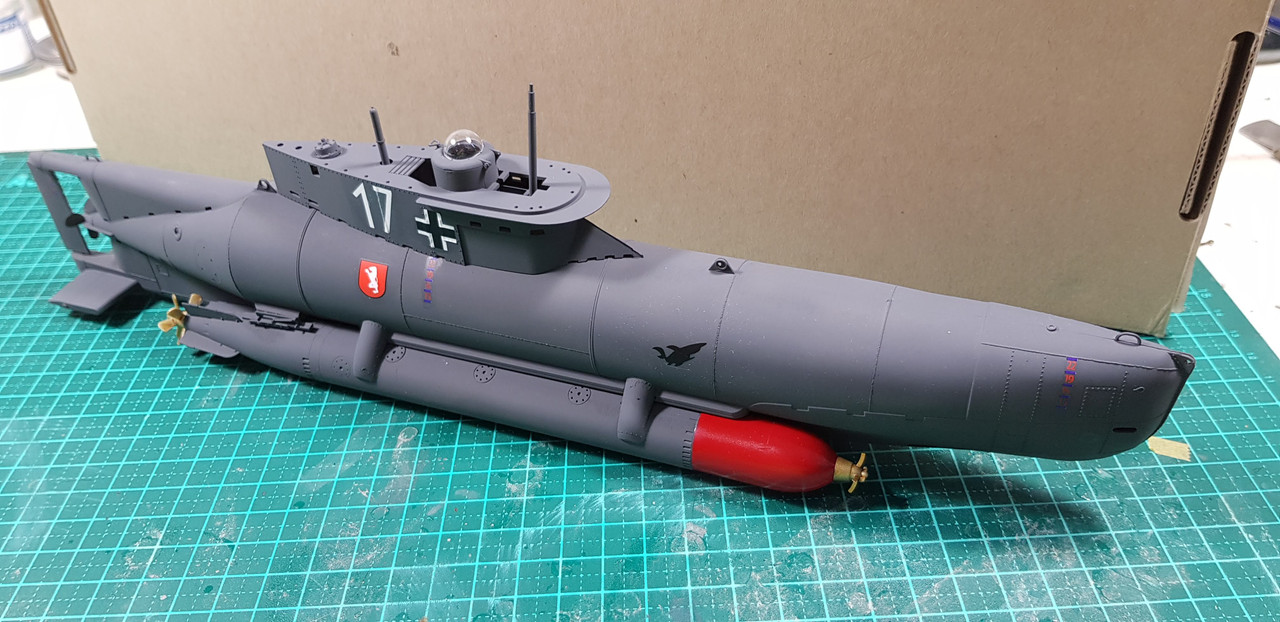
Well I finished the Barchino and decided to start another kit in search of love. I bought this Bronco 1/32 kit at a model show with no box for just $19 which I thought was a good bargain. Seeing it has no box I didn't want to leave it sitting in the shed unprotected for too much longer so here it is, my second build these holidays.

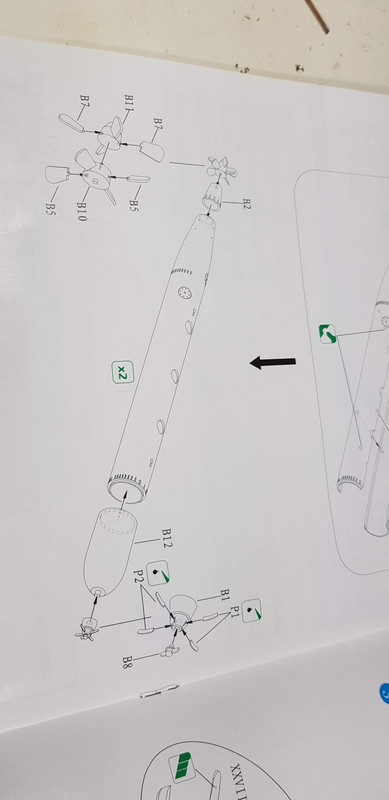
First up I will go through the bag contents. Instructions are printed in colour on glossy paper.


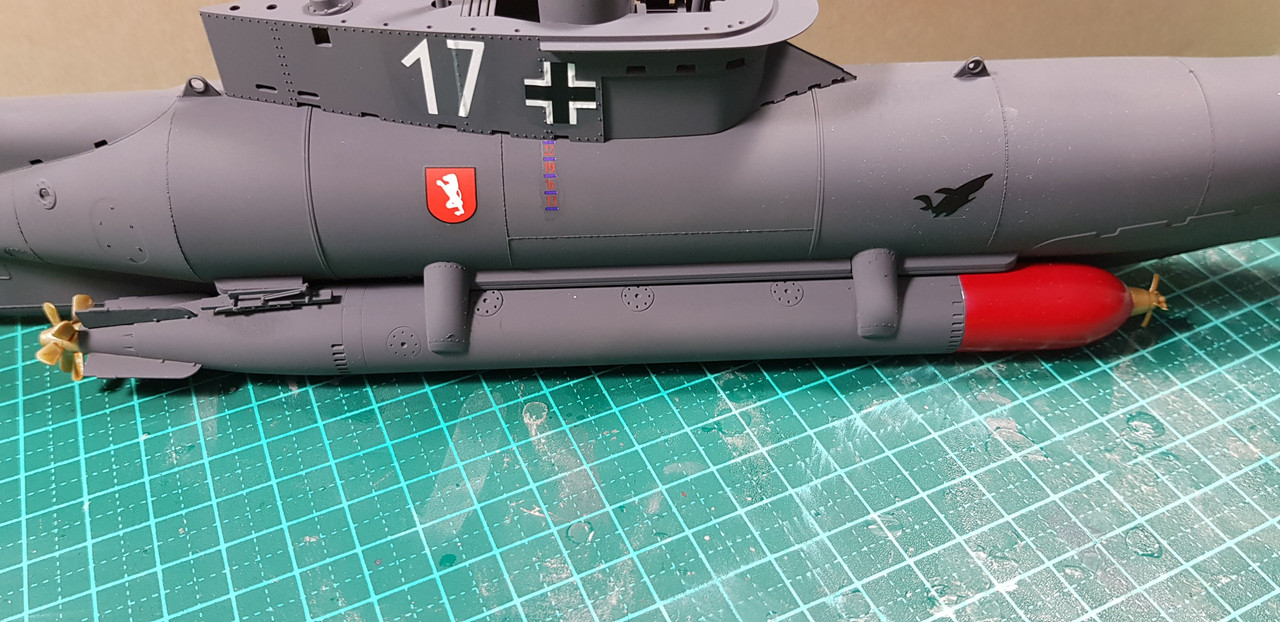
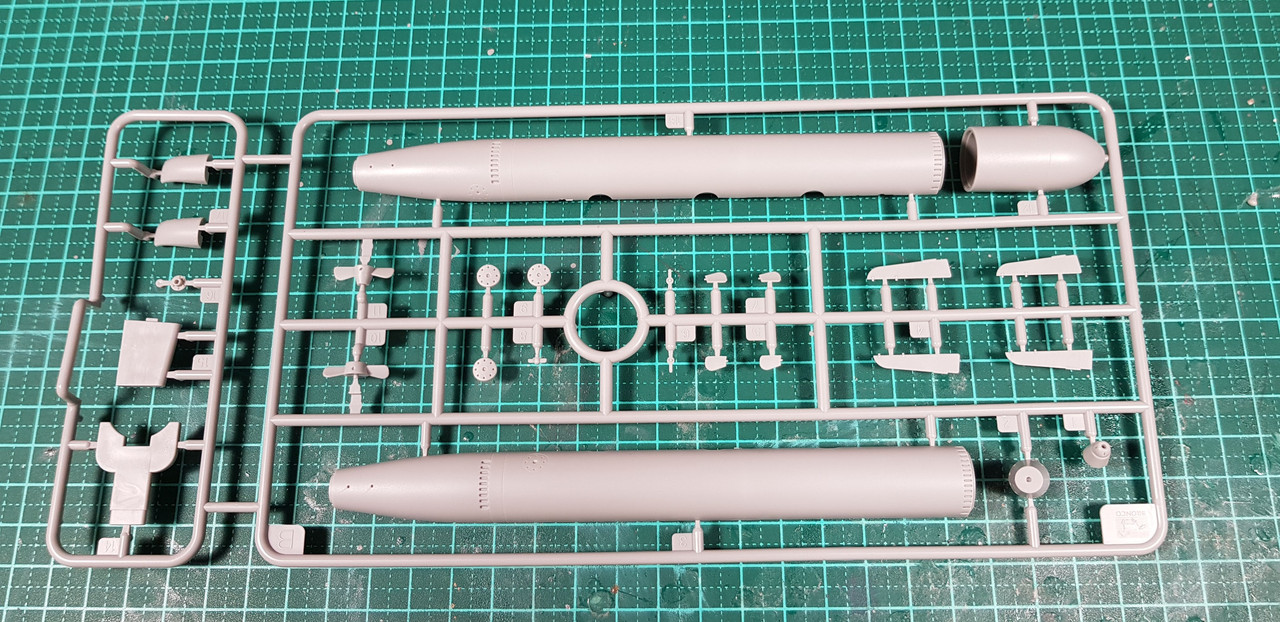
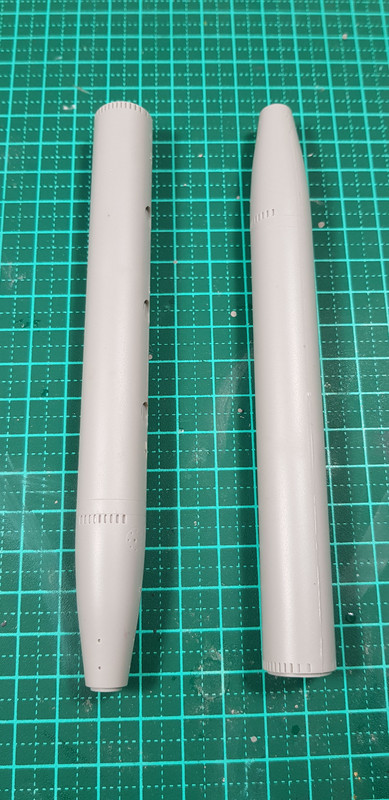
Then we have five sprues of grey plastic,.. First one was the two hull halves. Then we have two identical sprues, one for each torpedo..


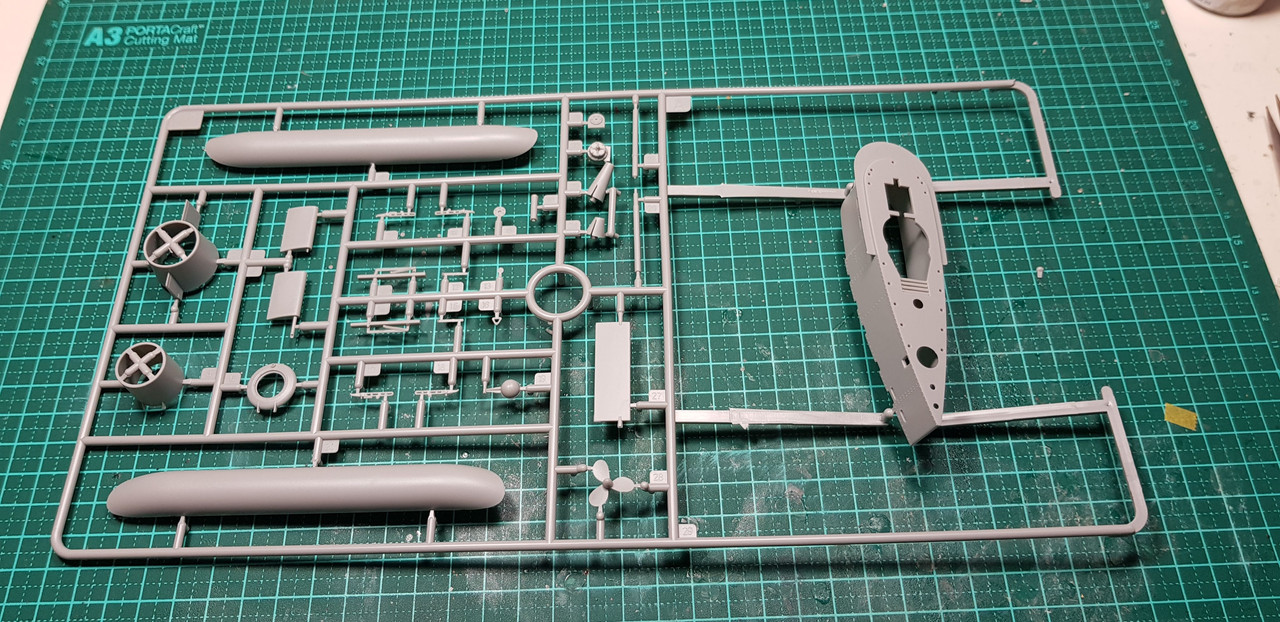
Then a fourth sprue for hull details..


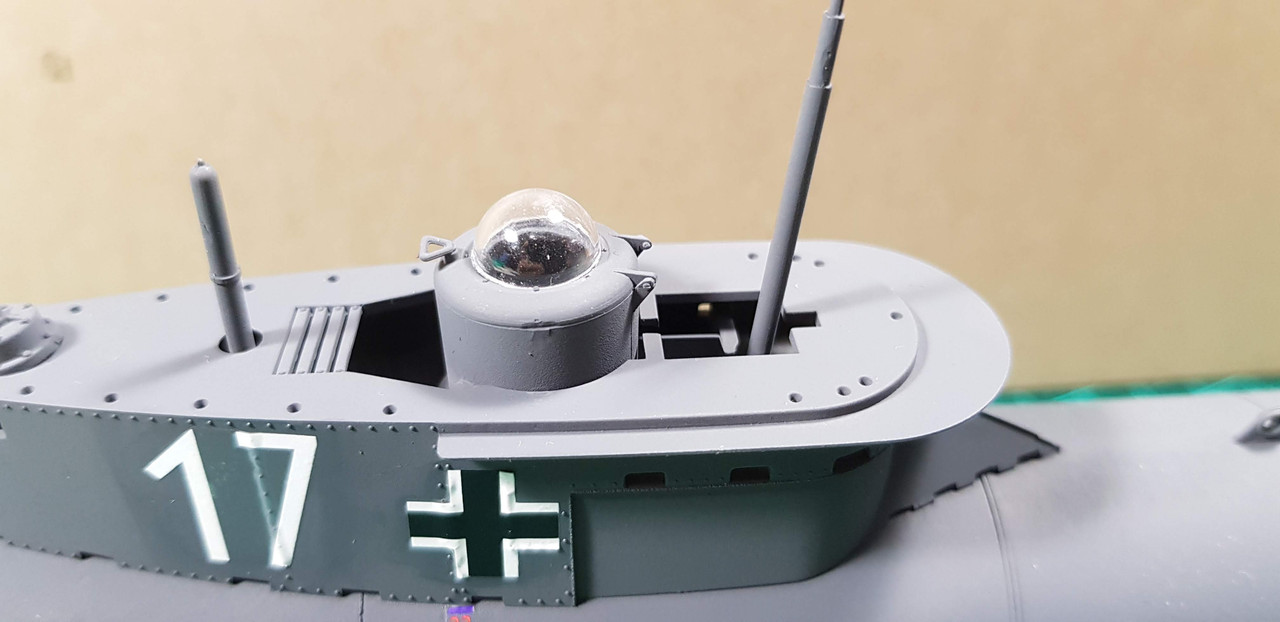
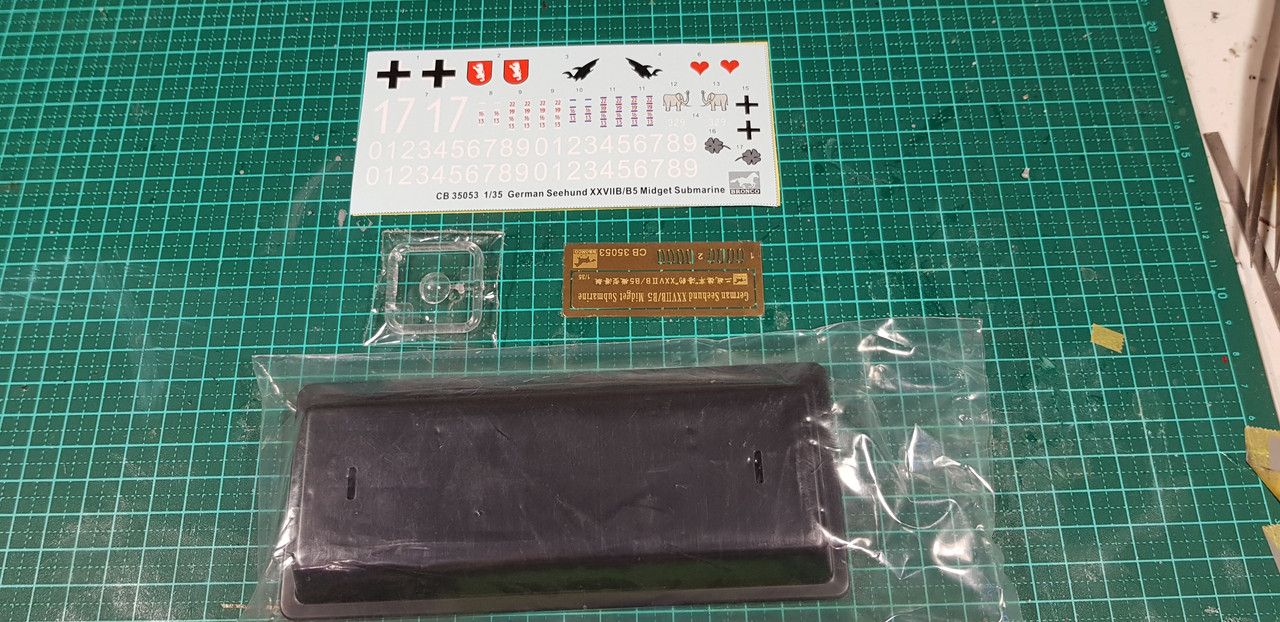
Then a clear sprue, a fret pf {E and a decal sheet and a stand..


So five times more complicated than the Barchini then, and much bigger. So I dived straight in and started by opening a few holes in the hull so I could put the rudder in the right location..


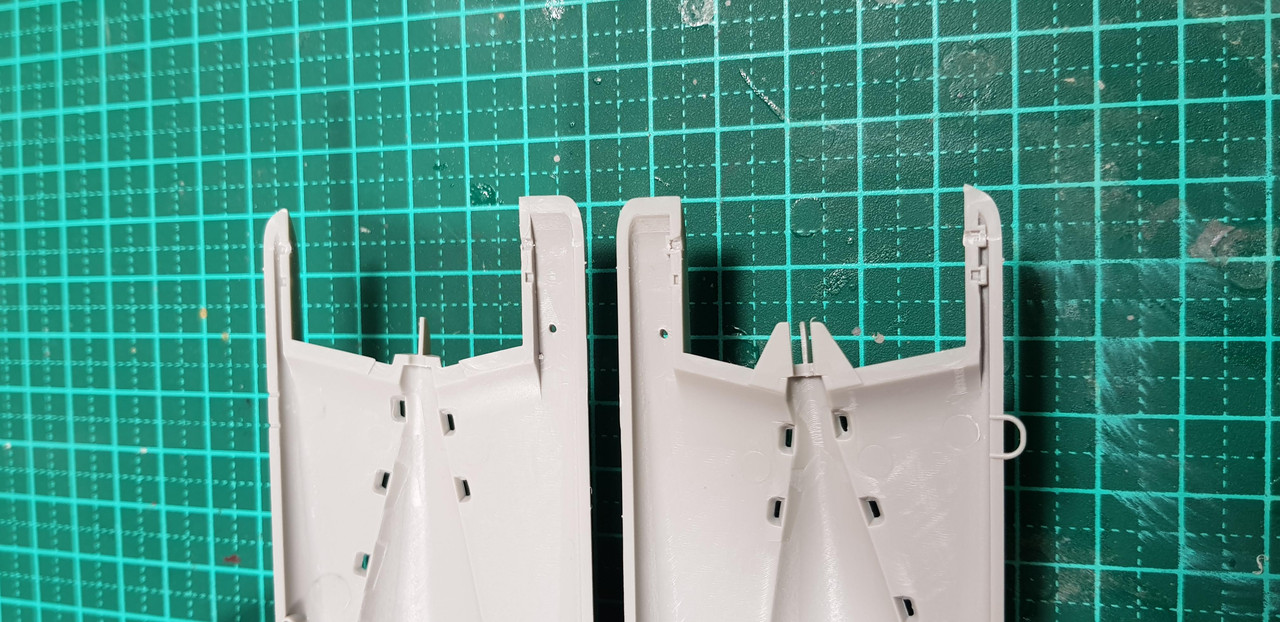
This pro-activeness contrasted markedly with my complete failure to open up some holls in both torpedos before I glued the halves together..


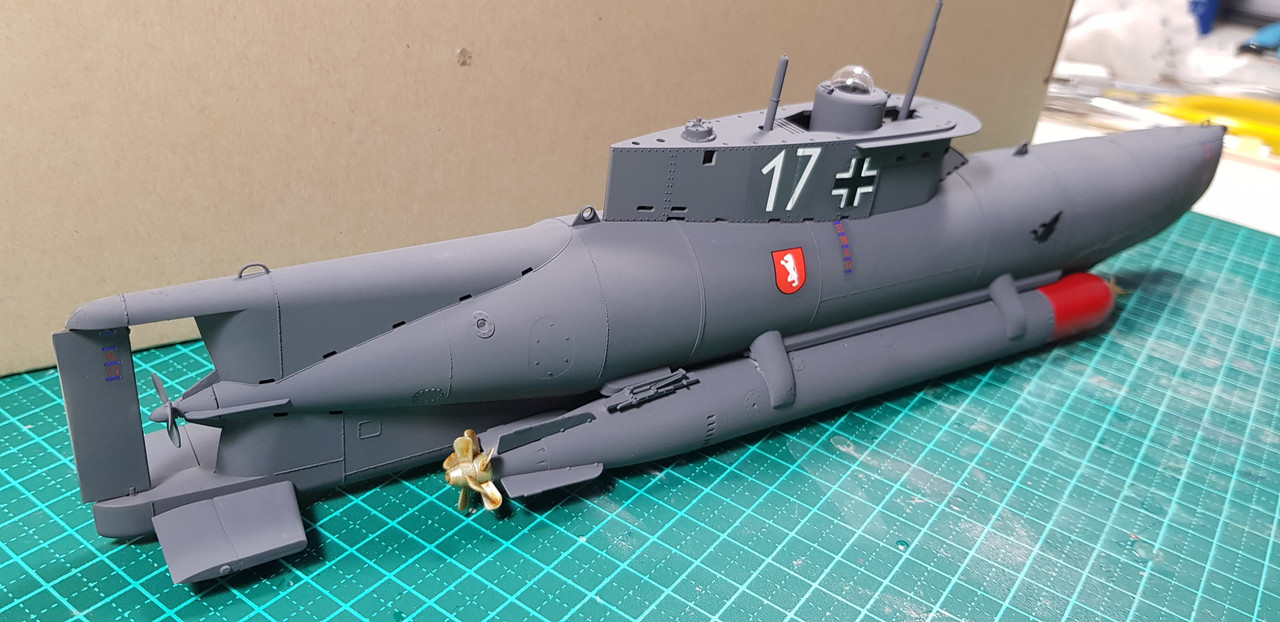
Then I completed the three propellors needed for each torpedo. A contra=rotating setup for the back of each torpedo..


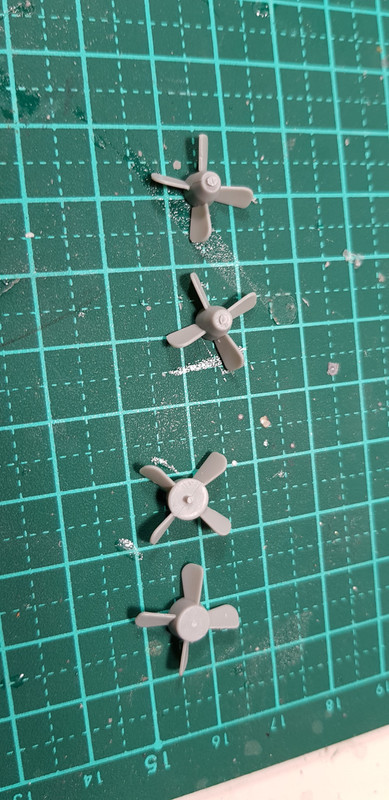
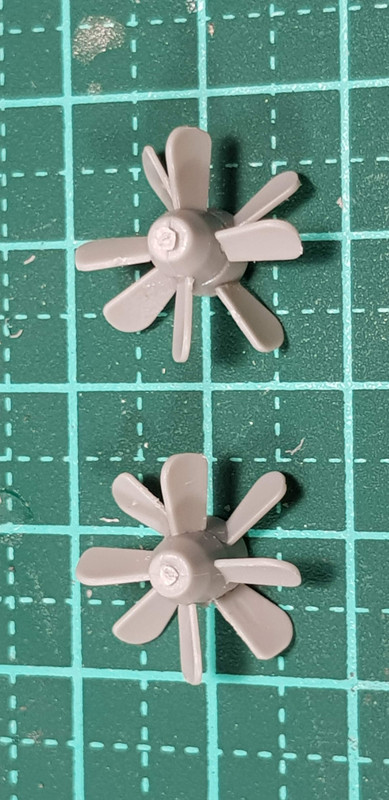
And a PIA four blade one for the nose of each torpedo..


PIA because the blades have only a tiny area to adhere to. Would have been better to make the blades a bit longer and have slots for them to go into. Then I decided to dry-assemble the hill halves..


Hmmm.. the halves touched at the front and the back but not the middle. Looks like living life dangerously had warped the hull halves a bit. Oh well, npthing that a bit of brute force andsome clamps can't fix ")


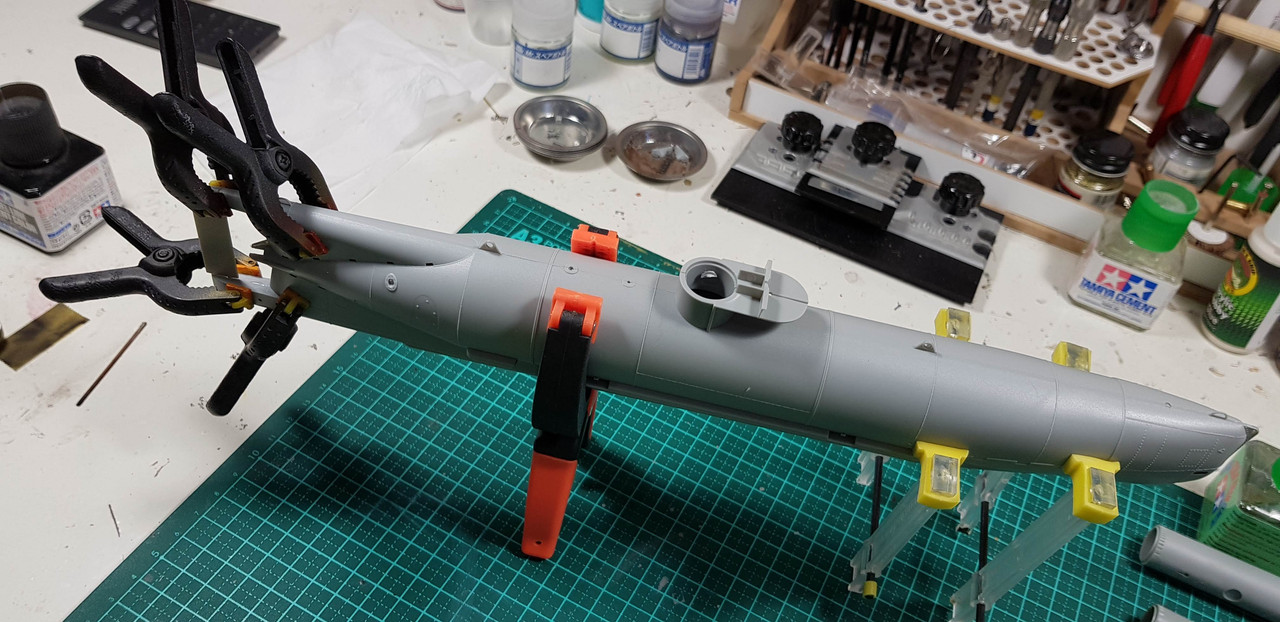
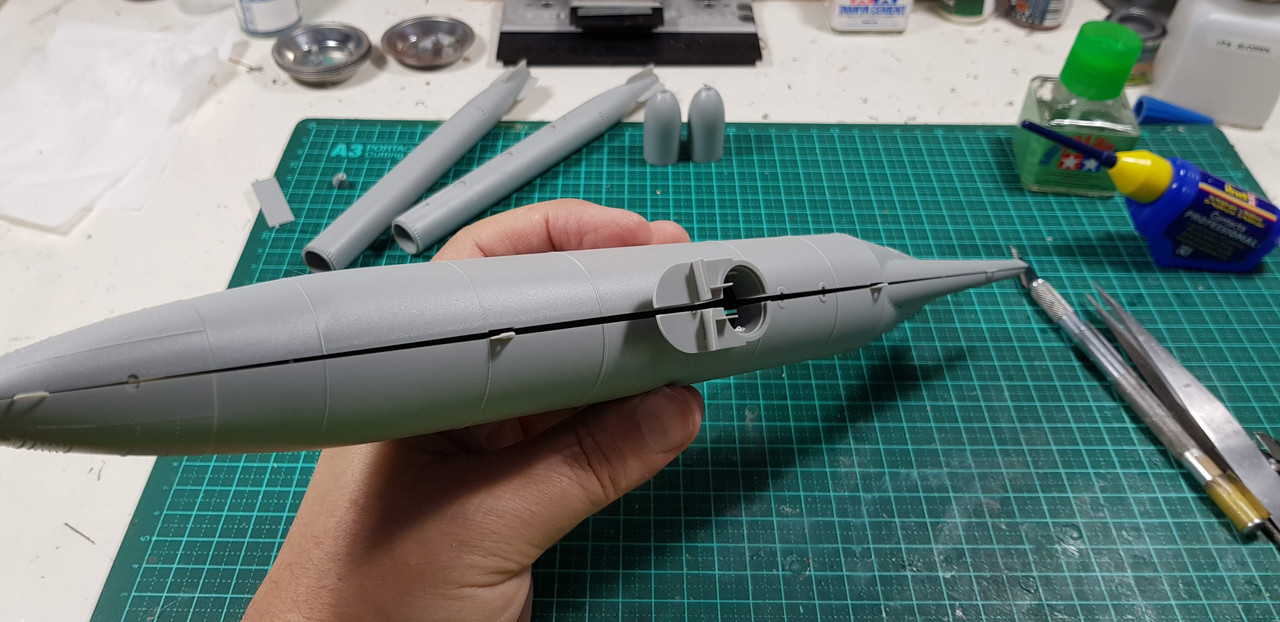
I had also completed most of the torpedo assembly in the mean time, but don't want to completely assemble them as painting them will be much easier if I don't assemble them.

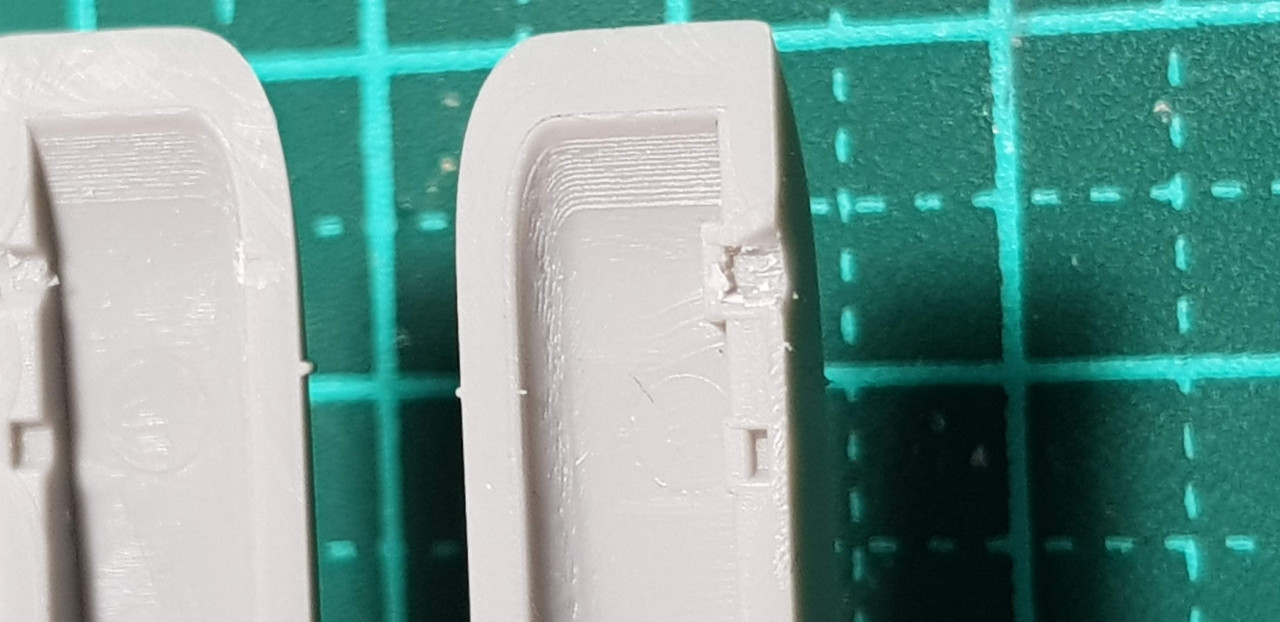
If you look closely in this orifice you can see the remains of one of the nasty ejection towers Bronco moulded on the inside of the hull. I have to try and remove the rest of it beofre I can insert a tube into that hole with a hatch on top. I didn't notice then before I assembled the hull halves. We shall see what happens tomorrow,

Cheers

Warren
Grauwolf
#084
Visit this Community
Quebec, Canada
Joined: September 14, 2005
KitMaker: 2,485 posts
Model Shipwrights: 1,157 posts
Posted: Wednesday, December 26, 2018 - 09:26 AM UTC
AH!....a submarine!...will follow with interest.

Great start Warren....looks like it will a very nice model.

Cheers,
warreni
Visit this Community
South Australia, Australia
Joined: August 14, 2007
KitMaker: 5,926 posts
Model Shipwrights: 2,624 posts
Posted: Wednesday, December 26, 2018 - 10:25 AM UTC

Quoted Text

AH!....a submarine!...will follow with interest.

Great start Warren....looks like it will a very nice model.

Cheers,


Marvellous powers of observation there my friend.

I will try and do this simple kit justice.
d6mst0
#453
Visit this Community
Texas, United States
Joined: August 28, 2016
KitMaker: 1,925 posts
Model Shipwrights: 1,298 posts
Posted: Wednesday, December 26, 2018 - 01:02 PM UTC
Warren,

Nice choice on a new start. I always liked the looks of that submarine with those torpedoes hanging on the outside.

Mark
warreni
Visit this Community
South Australia, Australia
Joined: August 14, 2007
KitMaker: 5,926 posts
Model Shipwrights: 2,624 posts
Posted: Wednesday, December 26, 2018 - 06:12 PM UTC
The construction is finished and the painting has begun. The torpedo heads have been reddened and the props on the torpedos all painted gold.

Now to see how they come out.

Cheers
Warren
RedDuster
Visit this Community
England - South East, United Kingdom
Joined: March 01, 2010
KitMaker: 7,078 posts
Model Shipwrights: 6,649 posts
Posted: Wednesday, December 26, 2018 - 08:42 PM UTC
Hi Warren,

Nice start, got this beast in the stash, will be along for the ride.

Cheers

Si
warreni
Visit this Community
South Australia, Australia
Joined: August 14, 2007
KitMaker: 5,926 posts
Model Shipwrights: 2,624 posts
Posted: Saturday, December 29, 2018 - 07:18 AM UTC
Thanks Si.

Finished!


Yeah yeah, I took some artistic licence with the colour scheme but I am happy with the result.

Cheers
Warren
TimReynaga
Staff MemberAssociate Editor
MODEL SHIPWRIGHTS
Visit this Community
California, United States
Joined: May 03, 2006
KitMaker: 2,500 posts
Model Shipwrights: 1,830 posts
Posted: Saturday, December 29, 2018 - 08:03 AM UTC

Quoted Text

Yeah yeah, I took some artistic licence with the colour scheme but I am happy with the result.


Hi Warren,

Artistic license or not, you got a pleasing result!
warreni
Visit this Community
South Australia, Australia
Joined: August 14, 2007
KitMaker: 5,926 posts
Model Shipwrights: 2,624 posts
Posted: Saturday, December 29, 2018 - 09:43 AM UTC

Quoted Text


Quoted Text

Yeah yeah, I took some artistic licence with the colour scheme but I am happy with the result.


Hi Warren,

Artistic license or not, you got a pleasing result!


Thanks mate.
Grauwolf
#084
Visit this Community
Quebec, Canada
Joined: September 14, 2005
KitMaker: 2,485 posts
Model Shipwrights: 1,157 posts
Posted: Sunday, December 30, 2018 - 11:45 PM UTC
That turned out really nice!

Any plans to do some weathering?

Cheers and Happy New Year!
TimReynaga
Staff MemberAssociate Editor
MODEL SHIPWRIGHTS
Visit this Community
California, United States
Joined: May 03, 2006
KitMaker: 2,500 posts
Model Shipwrights: 1,830 posts
Posted: Monday, December 31, 2018 - 01:31 AM UTC

Quoted Text

That turned out really nice!

Any plans to do some weathering?

Cheers and Happy New Year!


If you do, don't add much - these things didn't last long enough to get very weathered!

RedDuster
Visit this Community
England - South East, United Kingdom
Joined: March 01, 2010
KitMaker: 7,078 posts
Model Shipwrights: 6,649 posts
Posted: Monday, December 31, 2018 - 02:20 AM UTC
Very nice job Warren,

The "Artistic license" added a bit of colour and interest.

Cheers

Si
warreni
Visit this Community
South Australia, Australia
Joined: August 14, 2007
KitMaker: 5,926 posts
Model Shipwrights: 2,624 posts
Posted: Monday, December 31, 2018 - 04:44 AM UTC

Quoted Text

That turned out really nice!

Any plans to do some weathering?

Cheers and Happy New Year!


No mate. As Tim says these things were barely used and I don't think this one eve hit the water. I sm not a weathering guy. Everything looked new at least once in its operational career.

Thanks to you and Tim for the comments.

Cheers
Warren
warreni
Visit this Community
South Australia, Australia
Joined: August 14, 2007
KitMaker: 5,926 posts
Model Shipwrights: 2,624 posts
Posted: Monday, December 31, 2018 - 04:47 AM UTC

Quoted Text

Very nice job Warren,

The "Artistic license" added a bit of colour and interest.

Cheers

Si


And covers the fact I forgot to paint the torpedo's body black before I attached them..

Thanks mate
Warren
d6mst0
#453
Visit this Community
Texas, United States
Joined: August 28, 2016
KitMaker: 1,925 posts
Model Shipwrights: 1,298 posts
Posted: Monday, December 31, 2018 - 05:30 PM UTC
Warren,

Nice and fast finish. Really, awesome job the paint work make her look like factory new.

Mark
warreni
Visit this Community
South Australia, Australia
Joined: August 14, 2007
KitMaker: 5,926 posts
Model Shipwrights: 2,624 posts
Posted: Monday, December 31, 2018 - 07:44 PM UTC

Quoted Text

Warren,

Nice and fast finish. Really, awesome job the paint work make her look like factory new.

Mark


Yes Msrk, I found a picture of one somewhere and it looked very clean and new at the time.

Cheers
Warren
 _GOTOTOP