_GOTOBOTTOM
General Ship Modeling
Discuss modeling techniques, experiences, and ship modeling in general.
Flyhawk Bismarck build
russamotto
Visit this Community
Utah, United States
Joined: December 14, 2007
KitMaker: 3,389 posts
Model Shipwrights: 151 posts
Posted: Friday, July 03, 2020 - 12:02 PM UTC
This will be a build log of the Flyhawk 1/700 Bismarck that I reviewed previously. I will add what information I have regarding different parts of the build for general information and ask anyone who wishes to add facts and details to contribute freely.

The build starts with side box construction of different armament, beginning with the 38cm main guns. Turret #1, Anton, started with rangefinders but it was found that the position of the turret was too wet for them to be effective so they were removed. The other three turrets retained them.

Johnny Horton's song says the Bismarck had the biggest guns, but the 38cm-15 inch (14.96 for purists) were fairly common and matched the Italian Littorio class and French Richelieu class, which was the prompt for Germany to put them on the Bismarck. HMS Hood also carried 15" guns. At the time Bismarck was commisioned, 402mm (16 inch) guns were onboard the Japanese Nagato class, HMS Nelson class and the US Colorado and North Carolina class. In terms of weight of projectiles and range, Bismarck was fairly average.

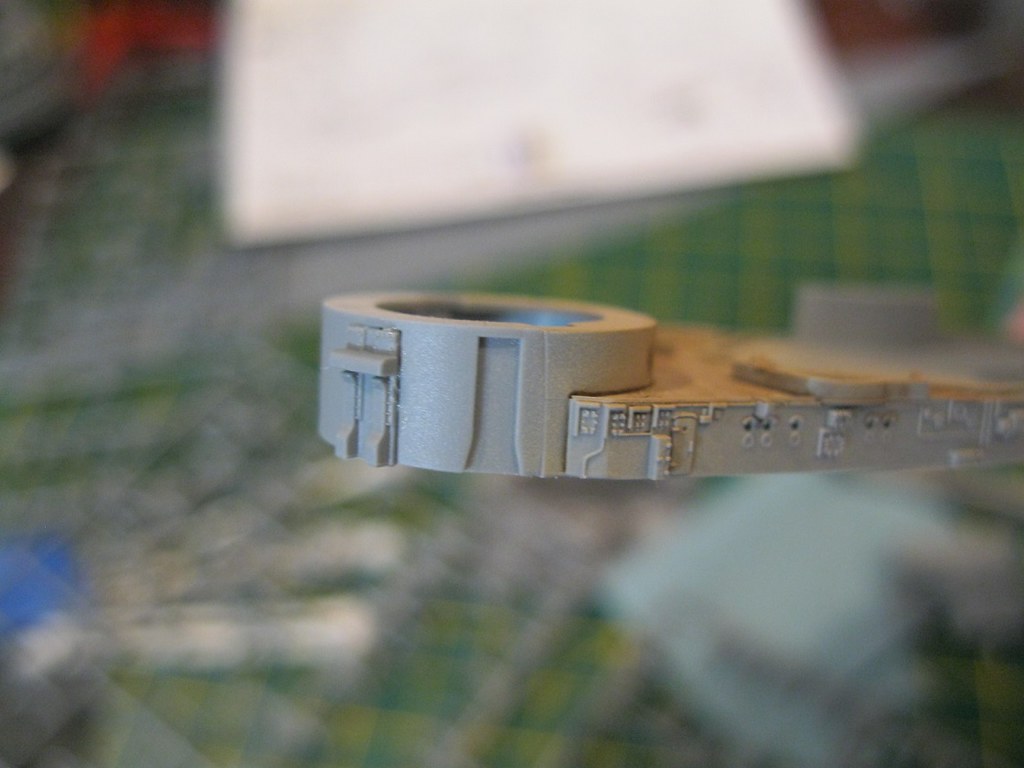
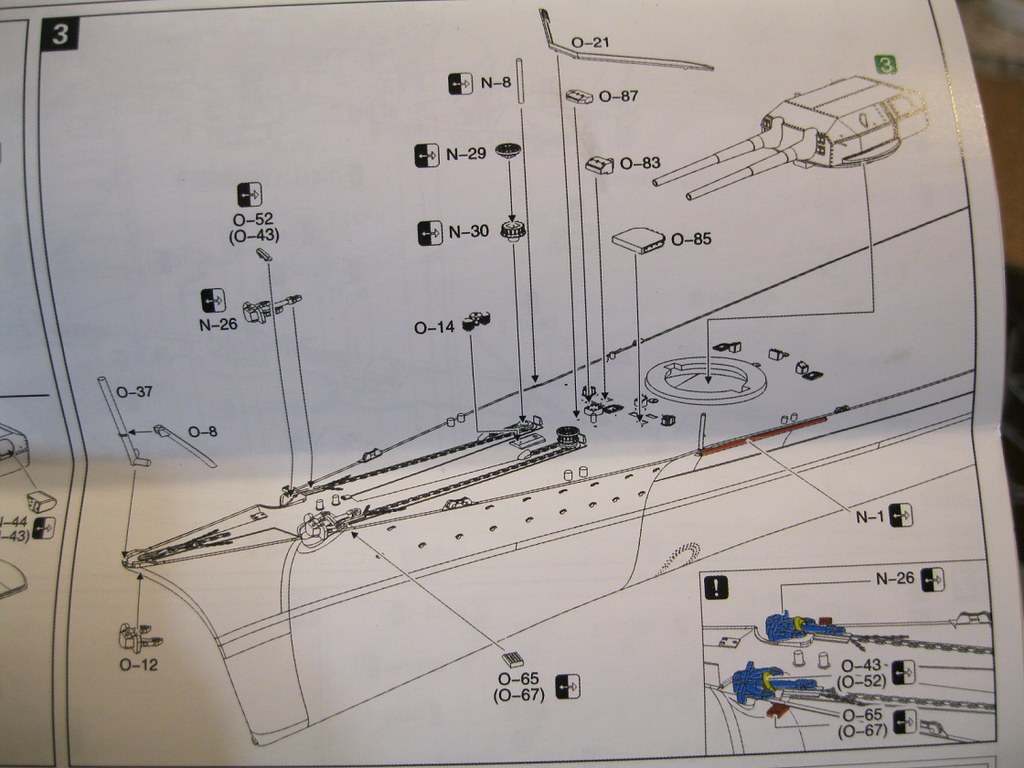
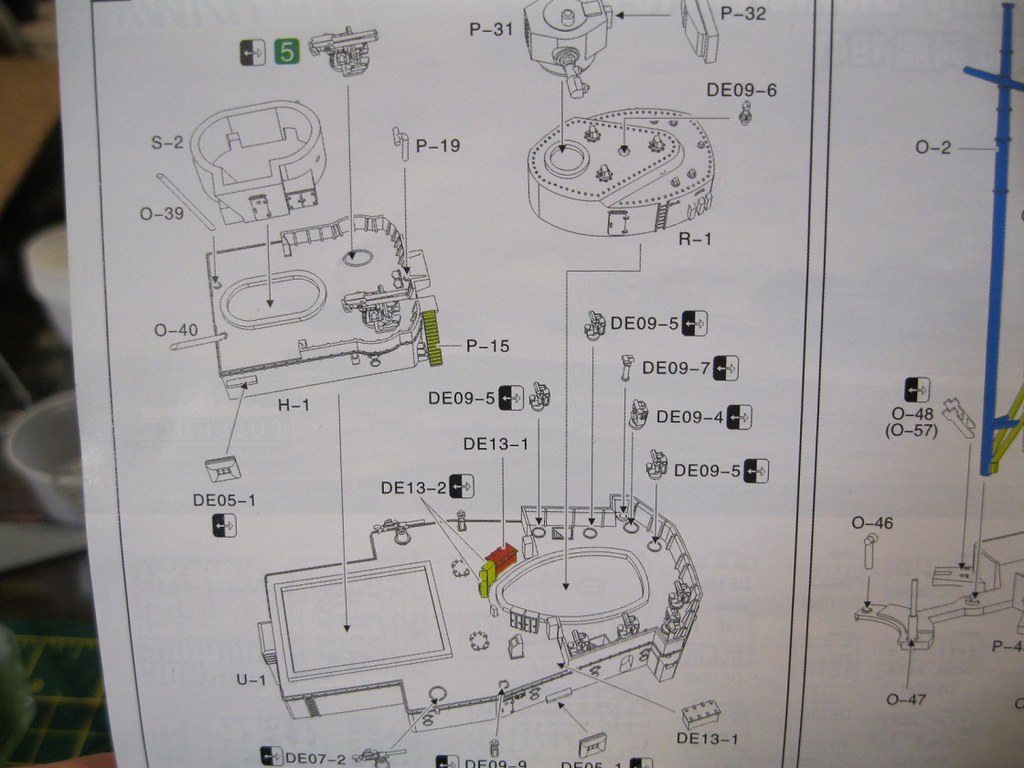
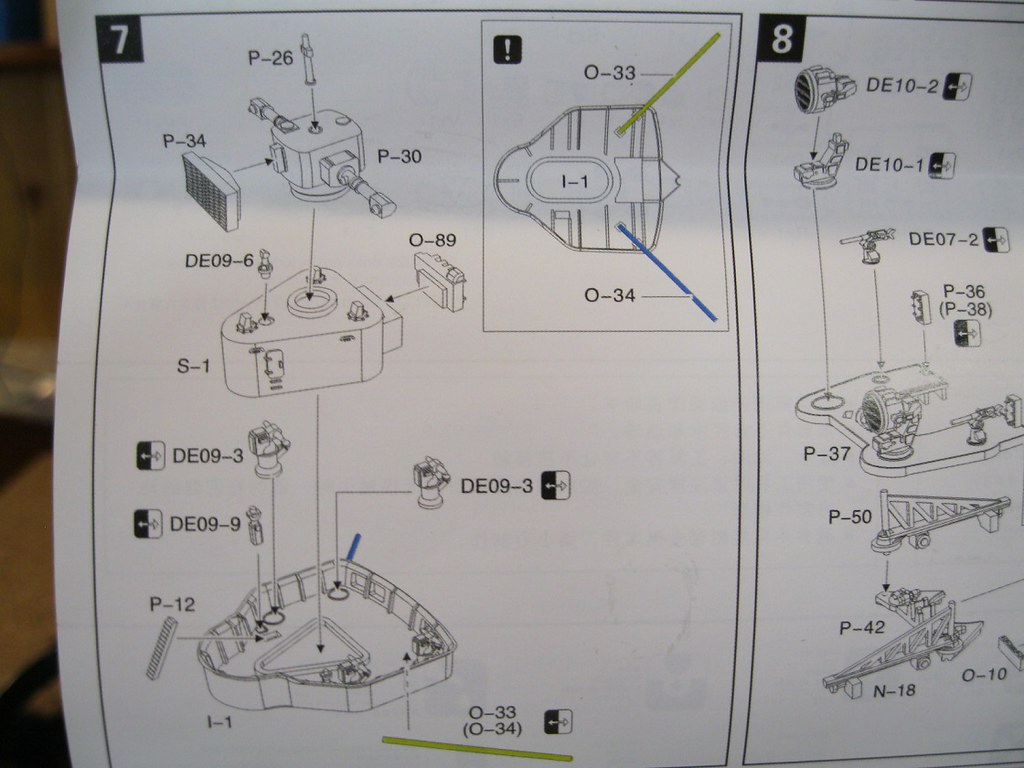
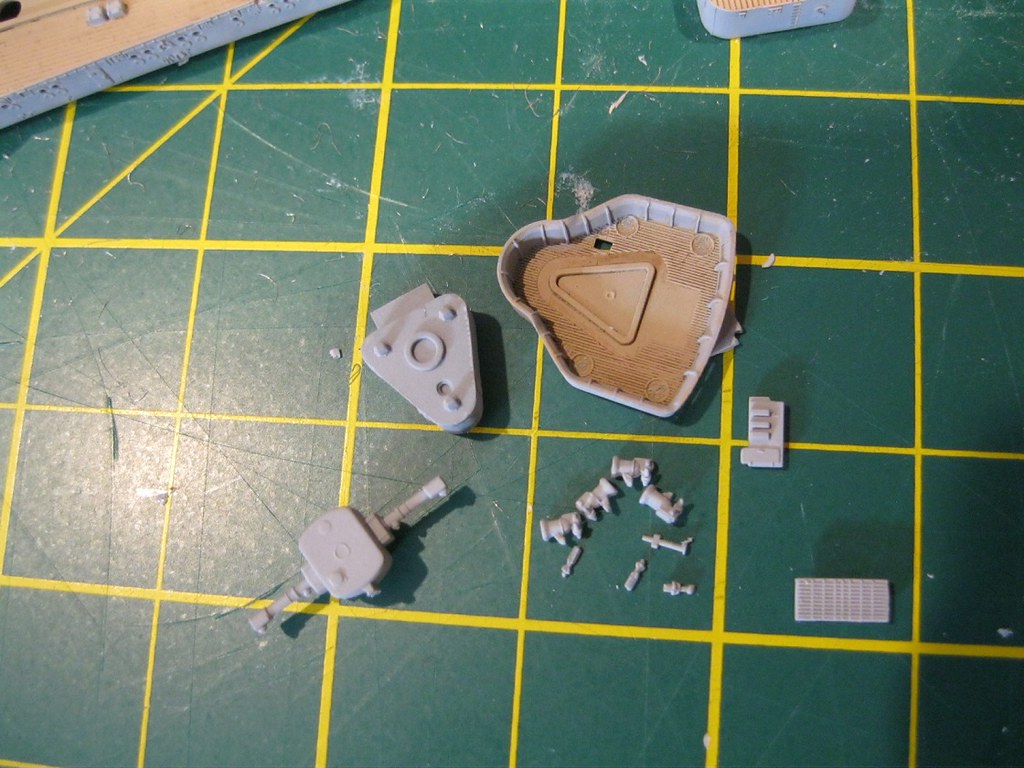
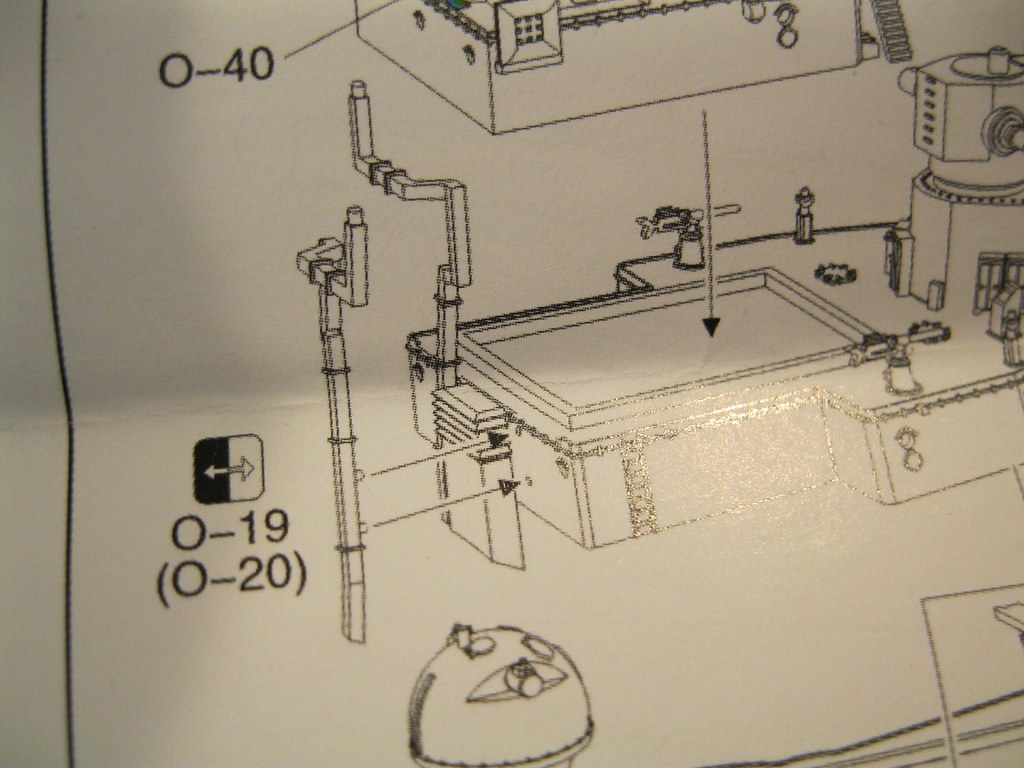
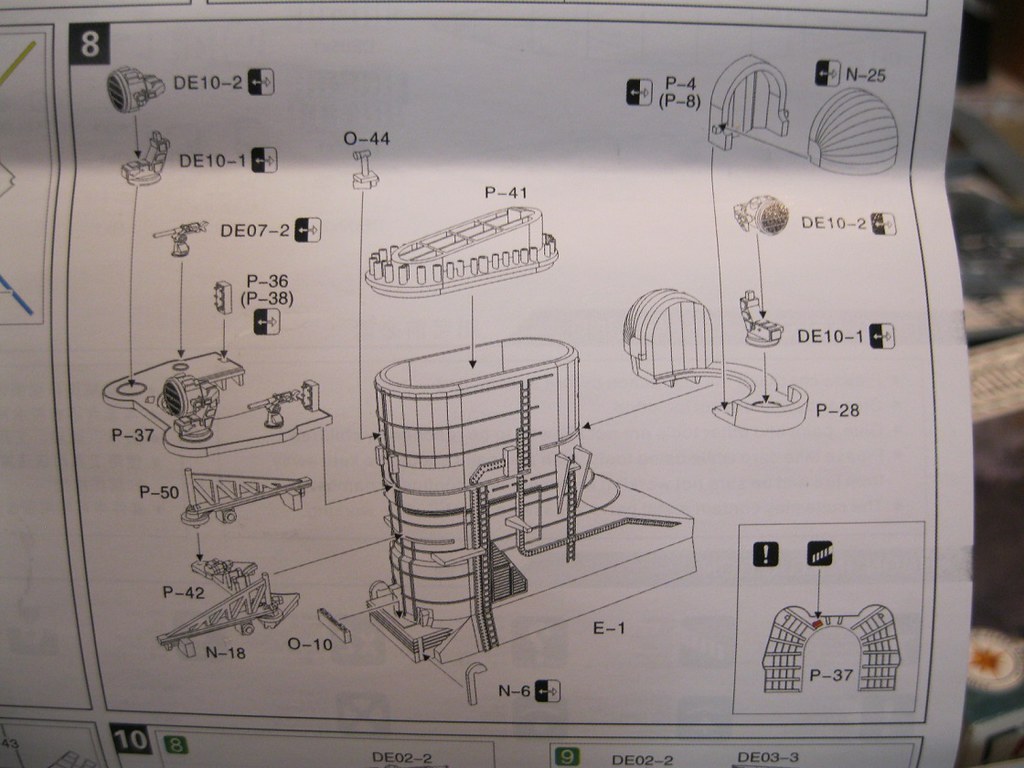
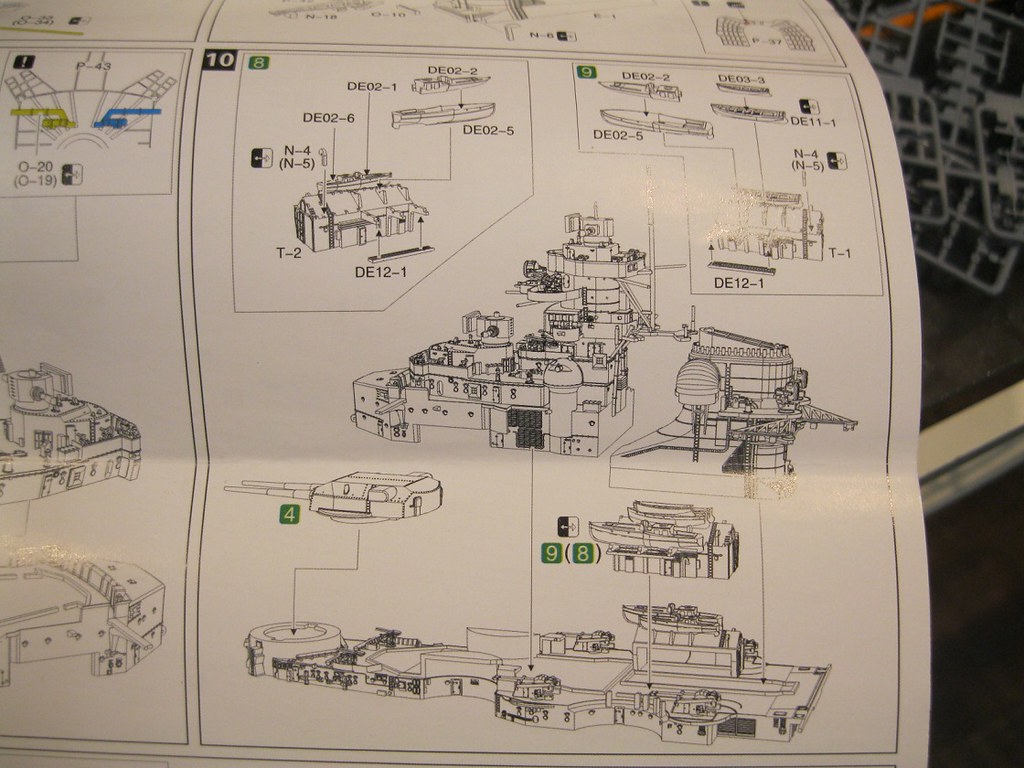
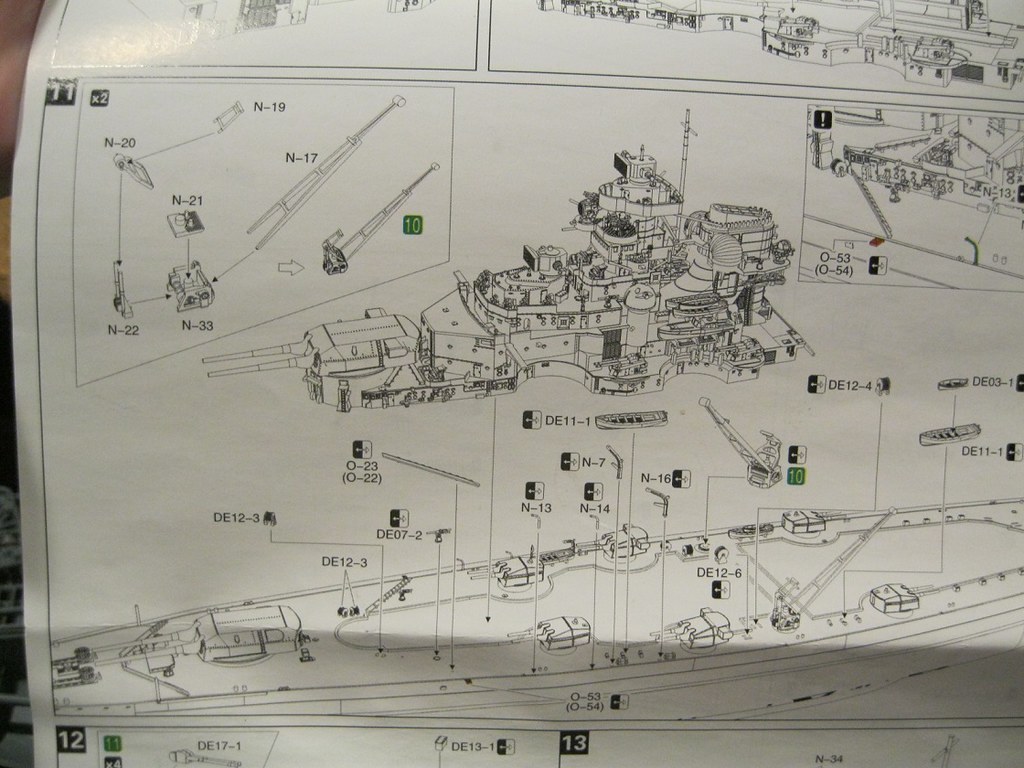
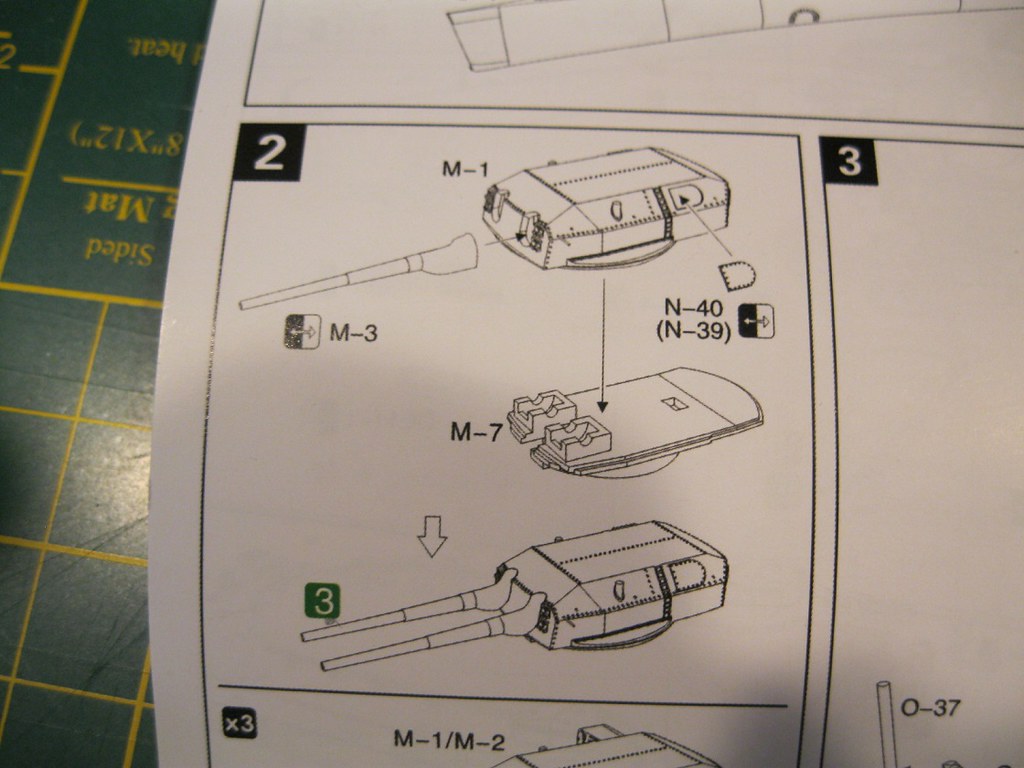
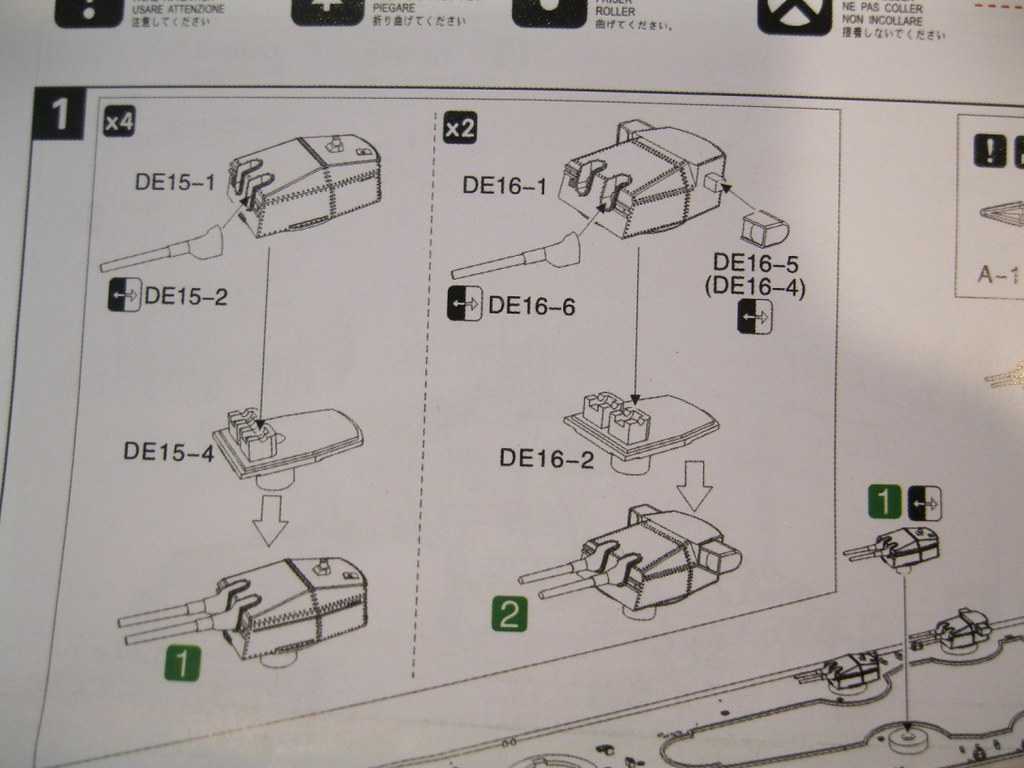
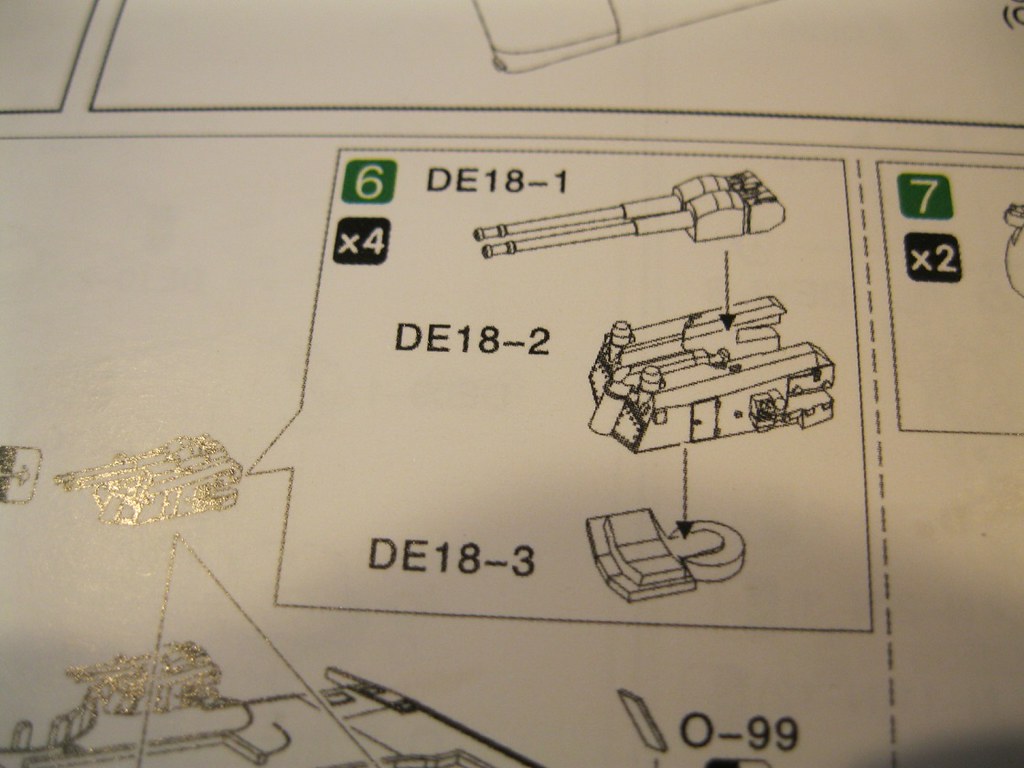
The instructions are very straightforward. You have the option of using guns with or without blast bags. The bags are shown in place at least by the time Hitler visited the ship on May 5, 1941, and it looks like in some photos they were in place by late March. I am building Bismarck as she appeared after the Battle of Denmark Straight, so blast bags are in place. Detail on the turret parts is excellent.

IMG_0182 by russell amott, on Flickr
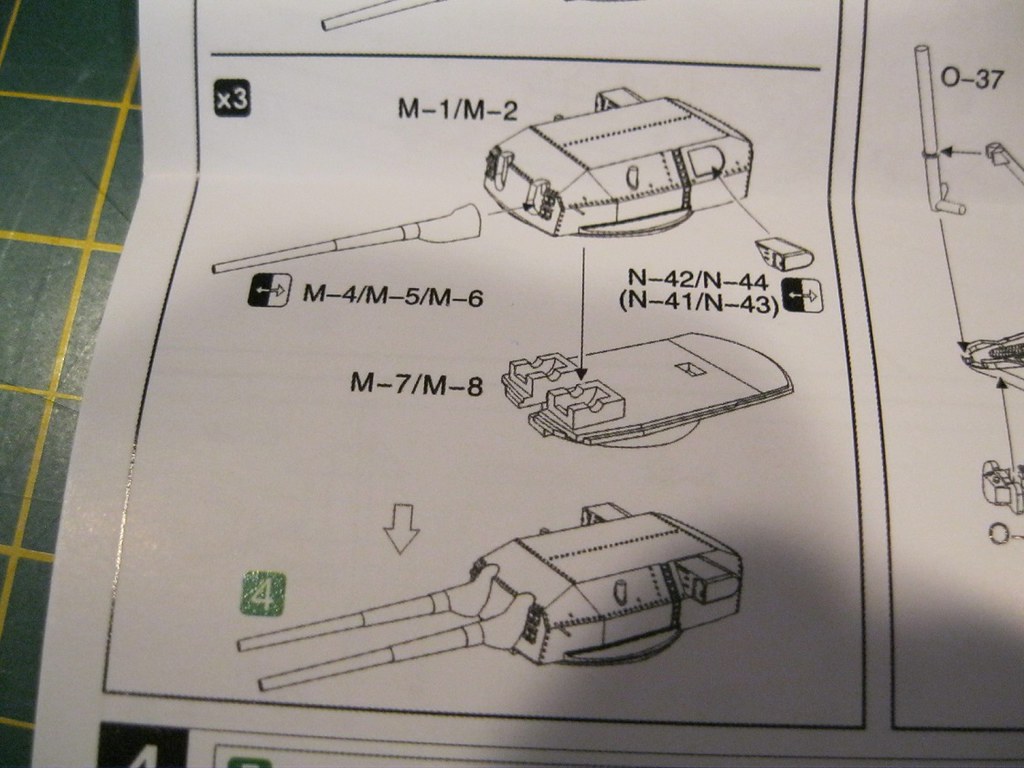
IMG_0183 by russell amott, on Flickr
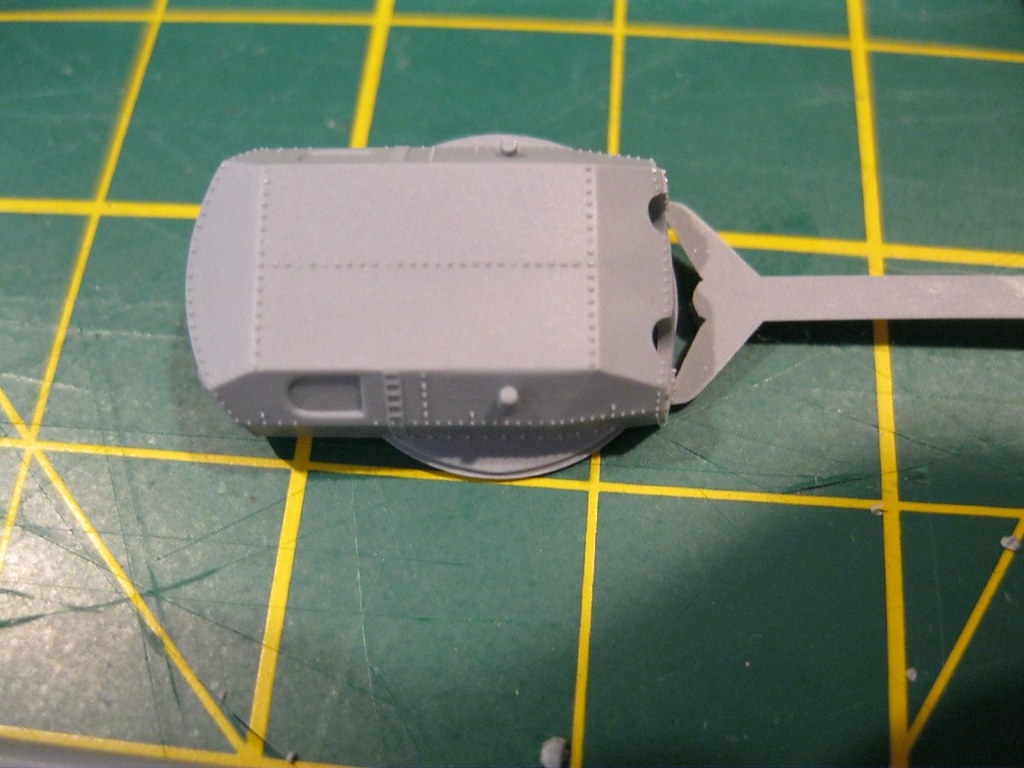
IMG_0184 by russell amott, on Flickr
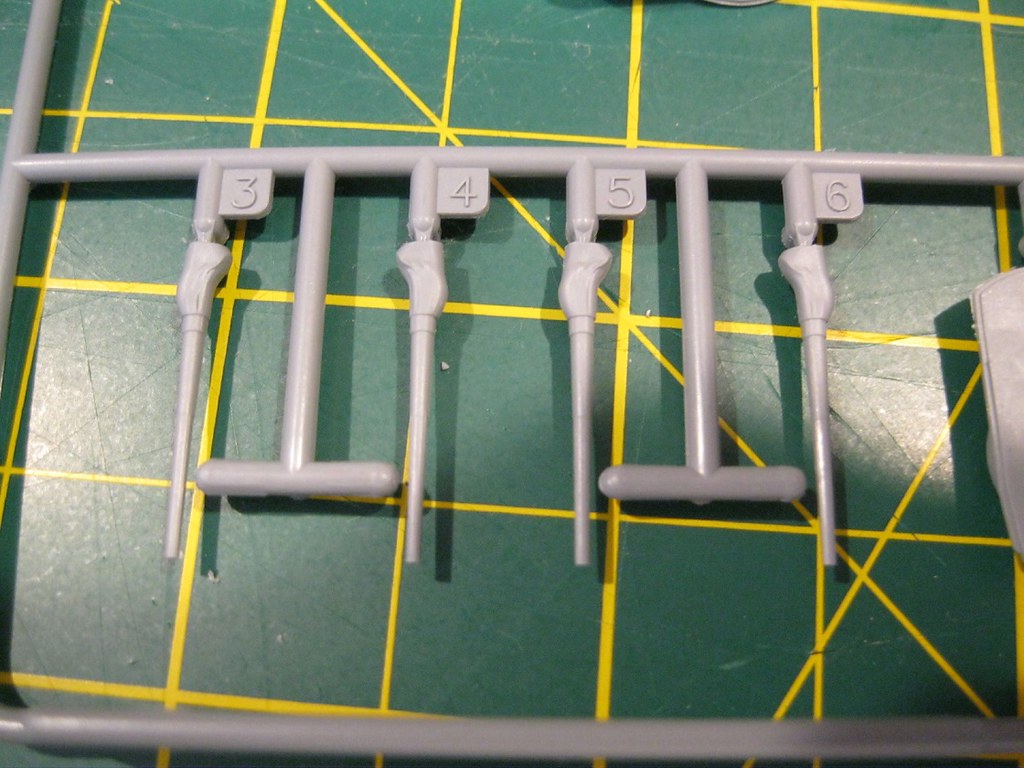
IMG_0185 by russell amott, on Flickr
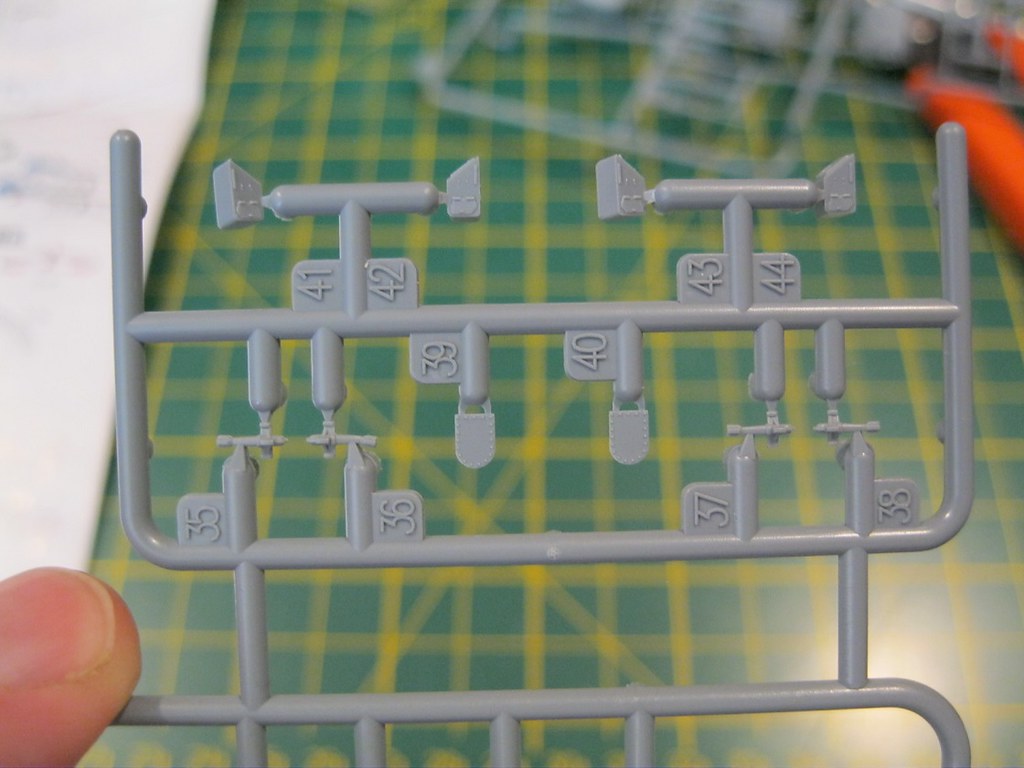
IMG_0186 by russell amott, on Flickr
IMG_0187 by russell amott, on Flickr
IMG_0188 by russell amott, on Flickr
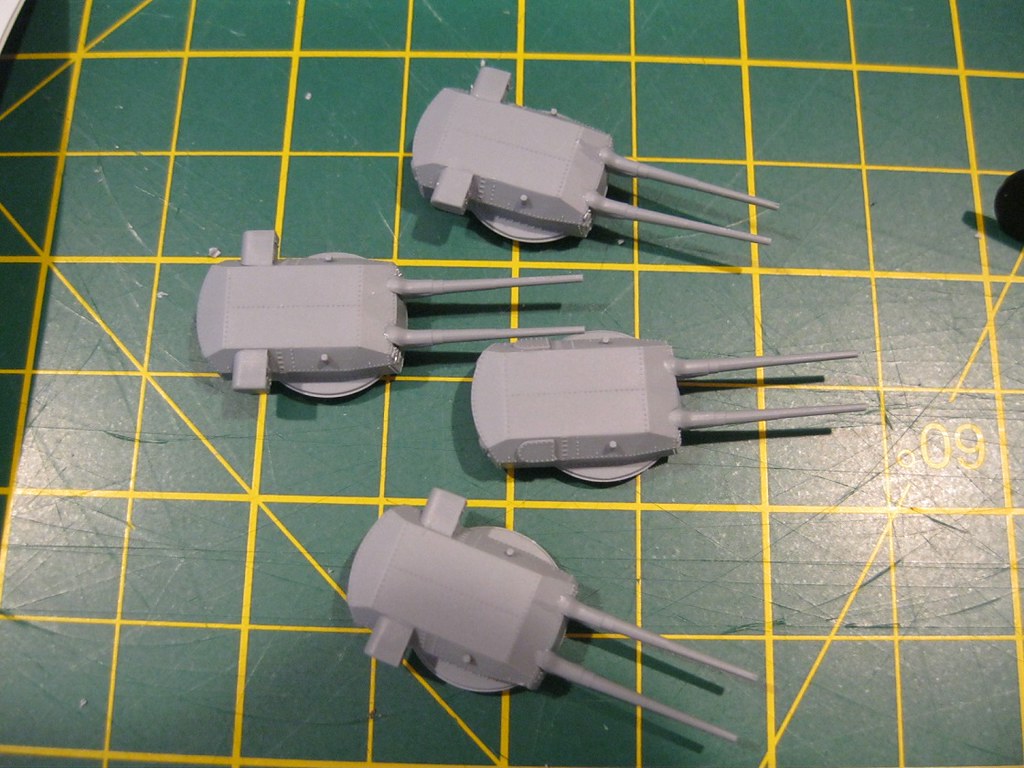
IMG_0189 by russell amott, on Flickr
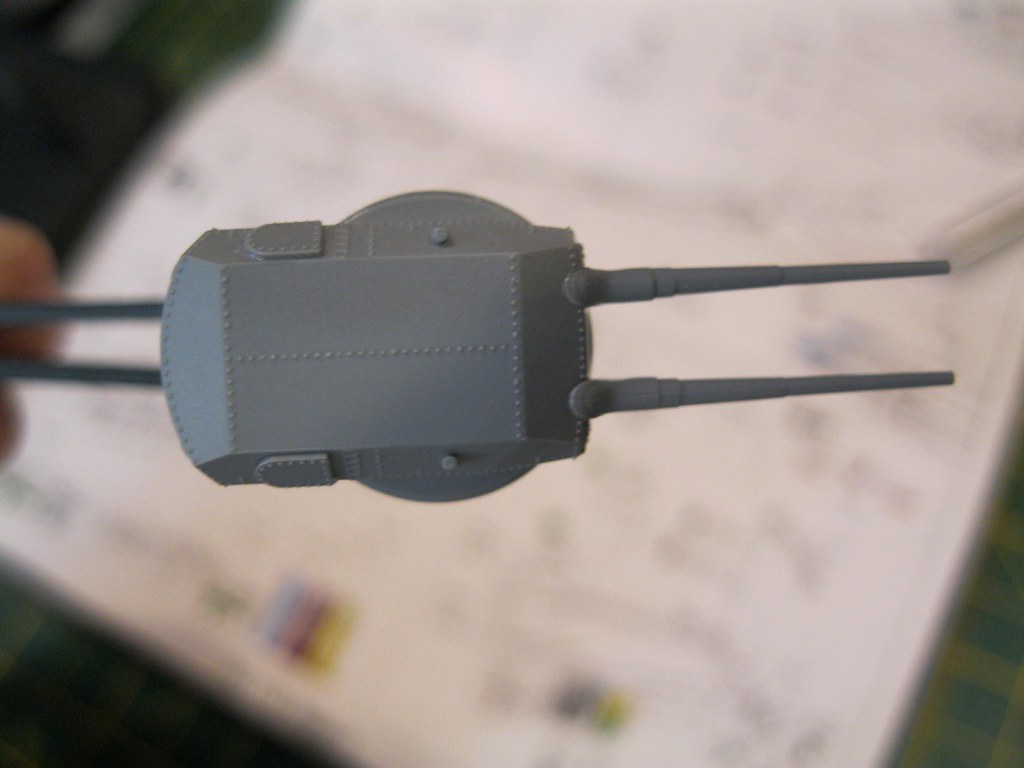
IMG_0190 by russell amott, on Flickr
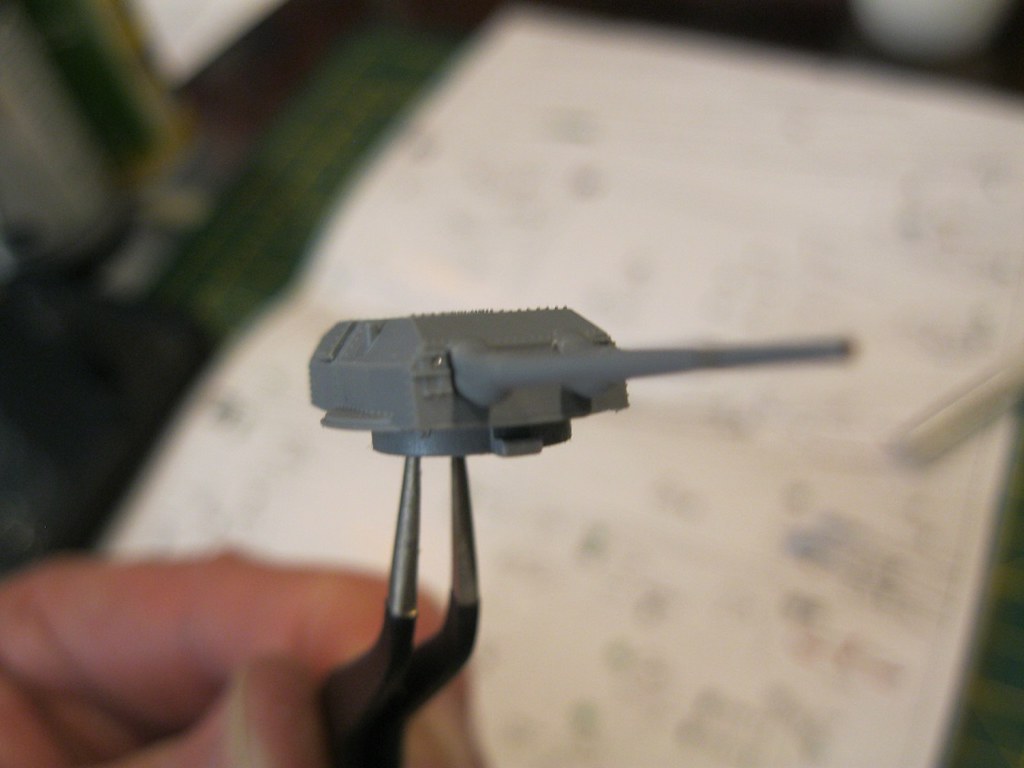
IMG_0191 by russell amott, on Flickr
IMG_0192 by russell amott, on Flickr
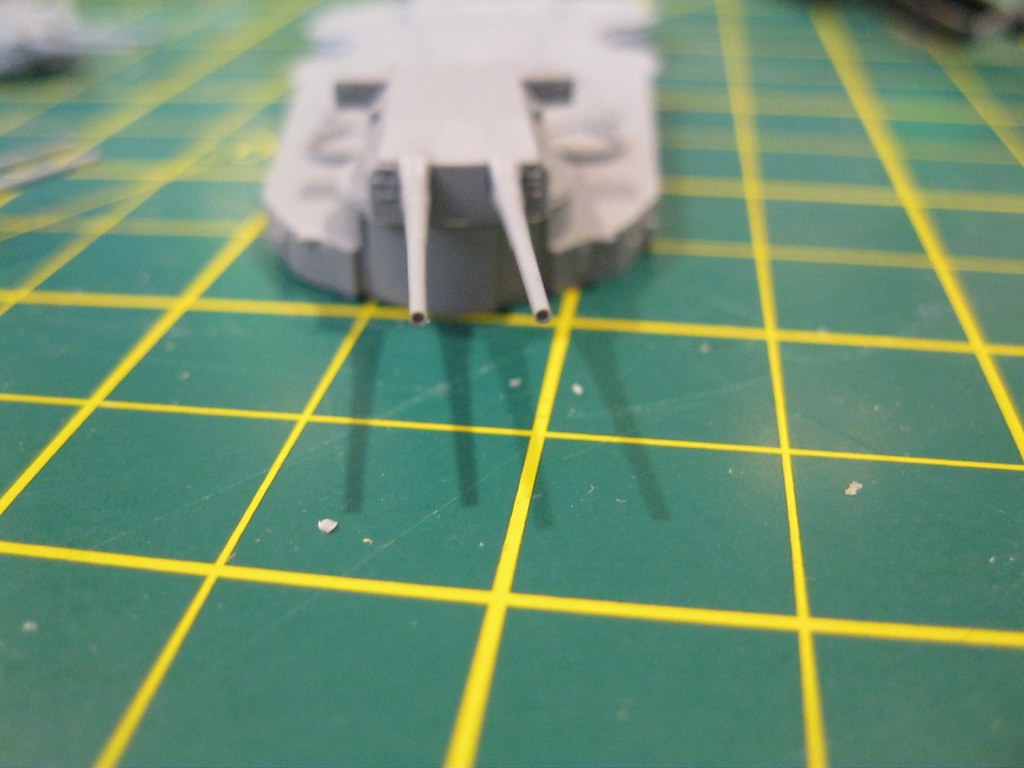
IMG_0193 by russell amott, on Flickr

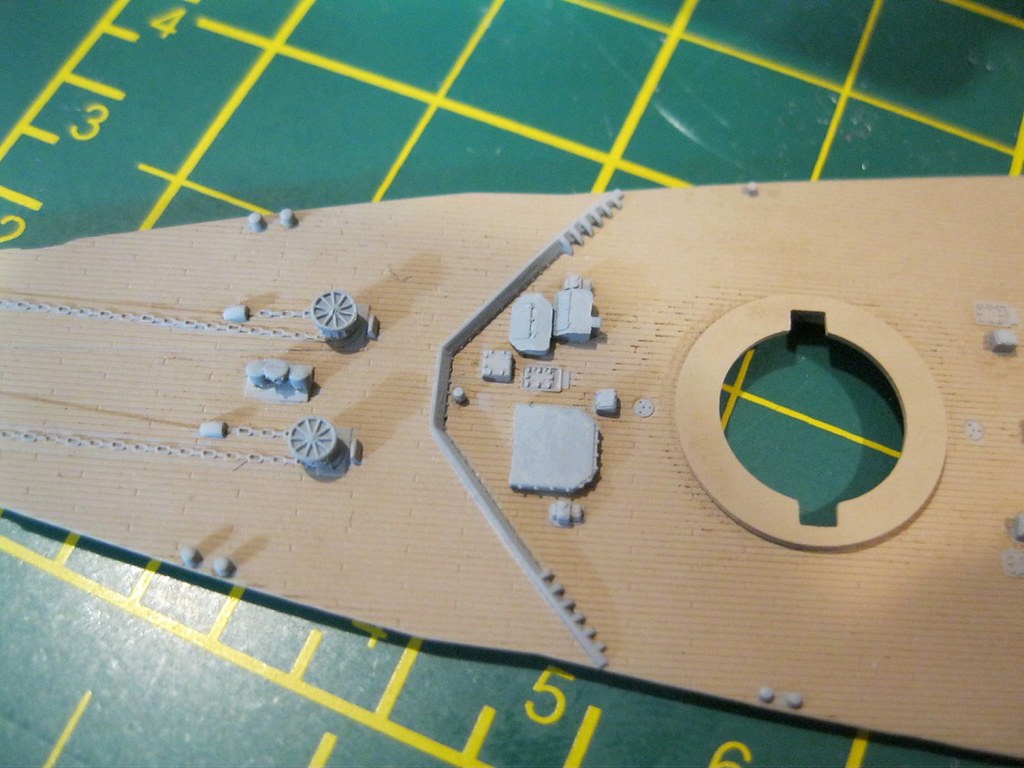
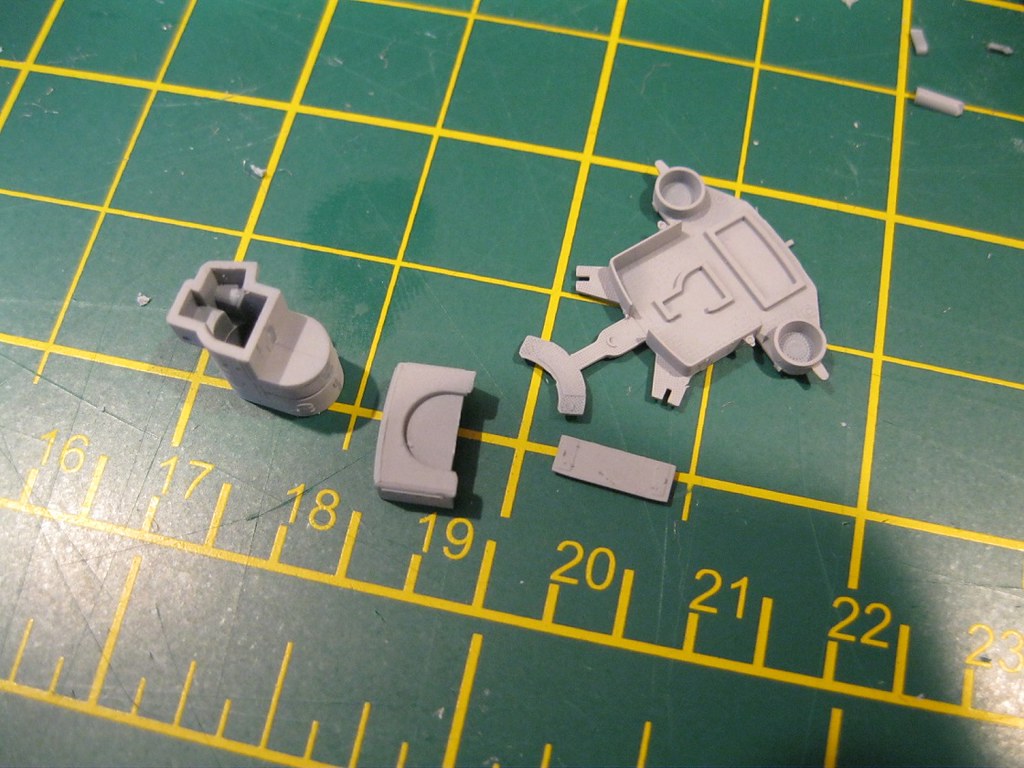
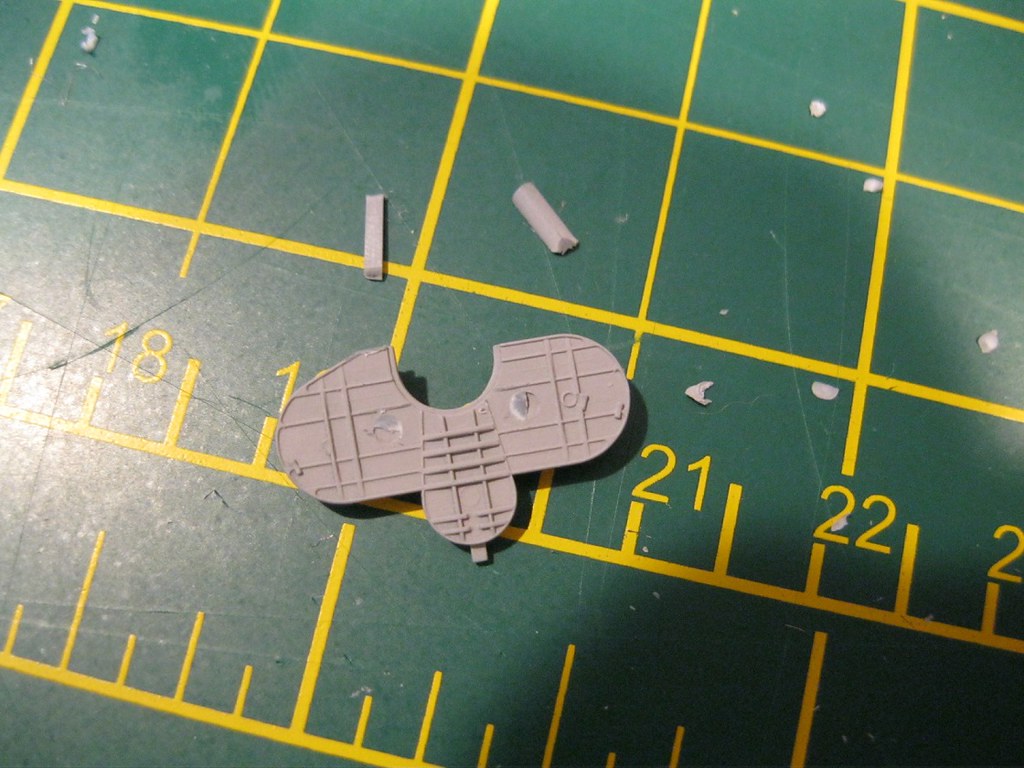
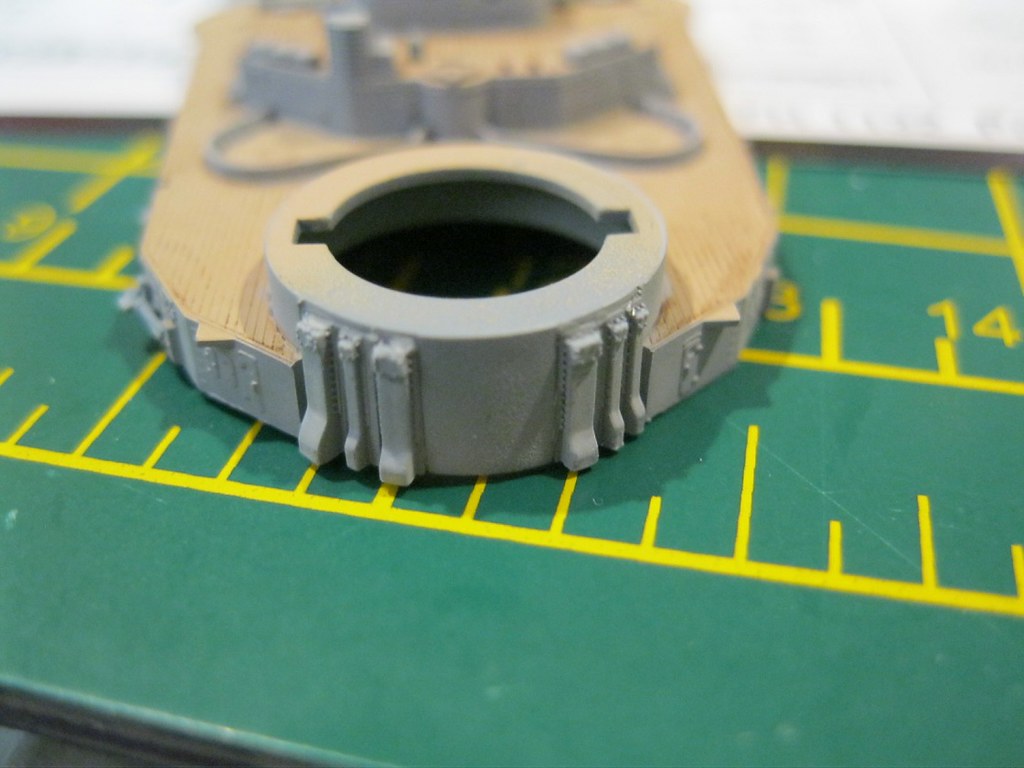
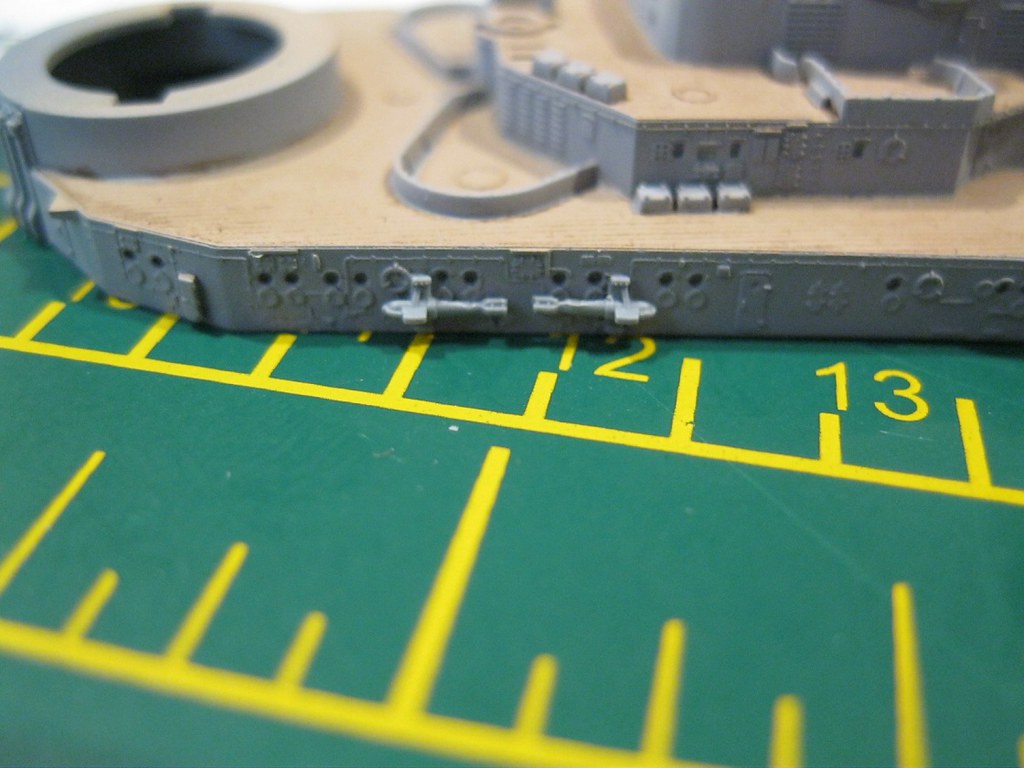
Secondary armament consisted of 6 twin turret mounted 15cm (5.9 inch) guns. Again, the option is provided for guns with and without blast bags. Two of the turrets are equipped with rangefinders.
IMG_0173 by russell amott, on Flickr
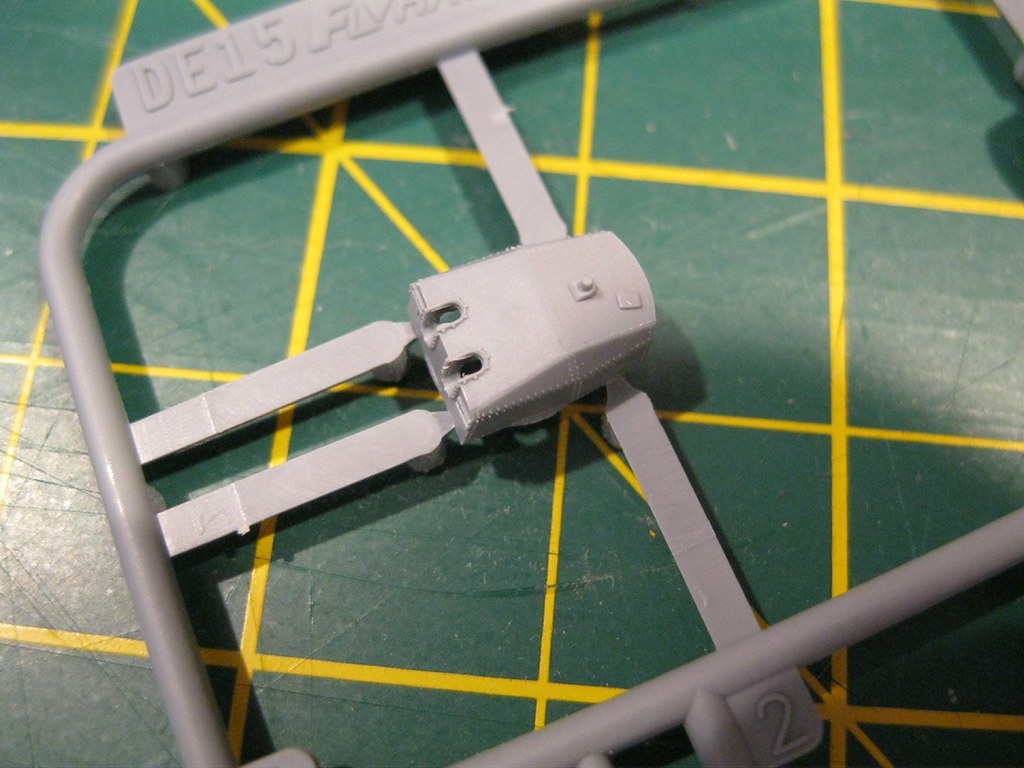
IMG_0174 by russell amott, on Flickr
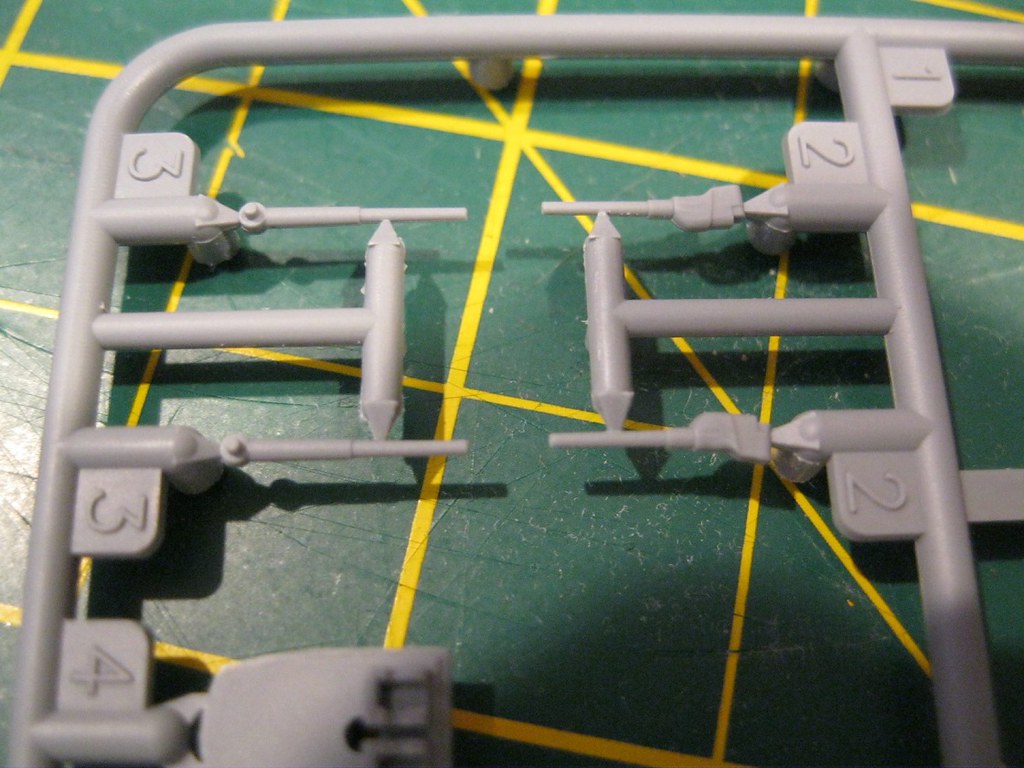
IMG_0175 by russell amott, on Flickr
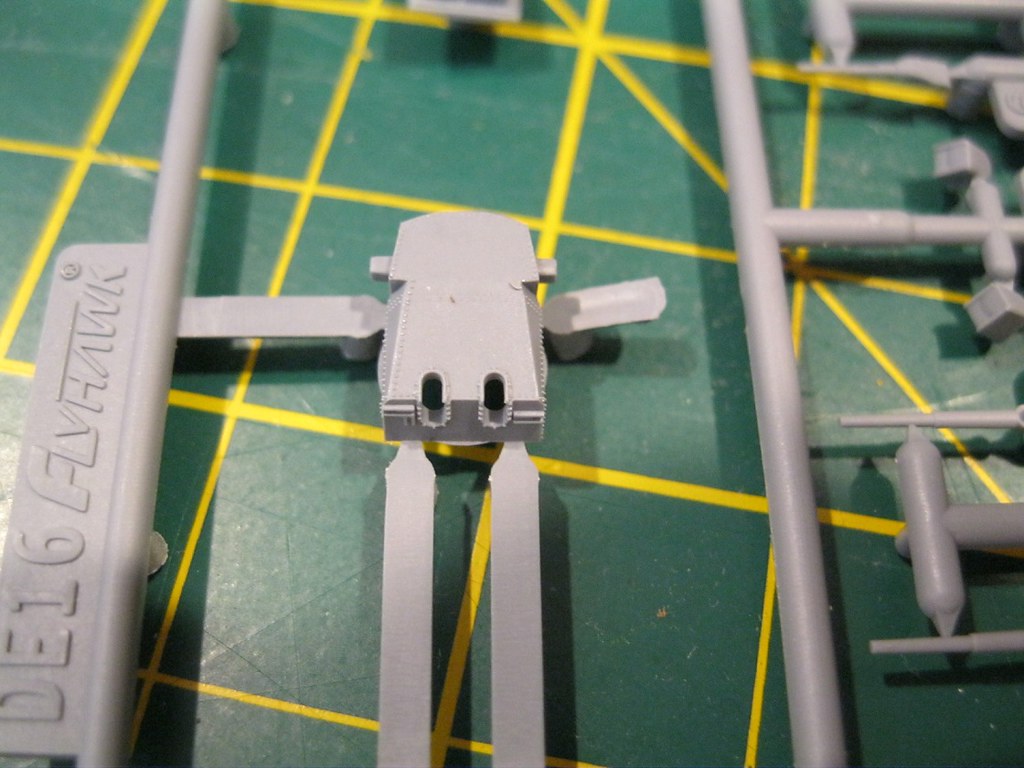
IMG_0176 by russell amott, on Flickr
IMG_0177 by russell amott, on Flickr
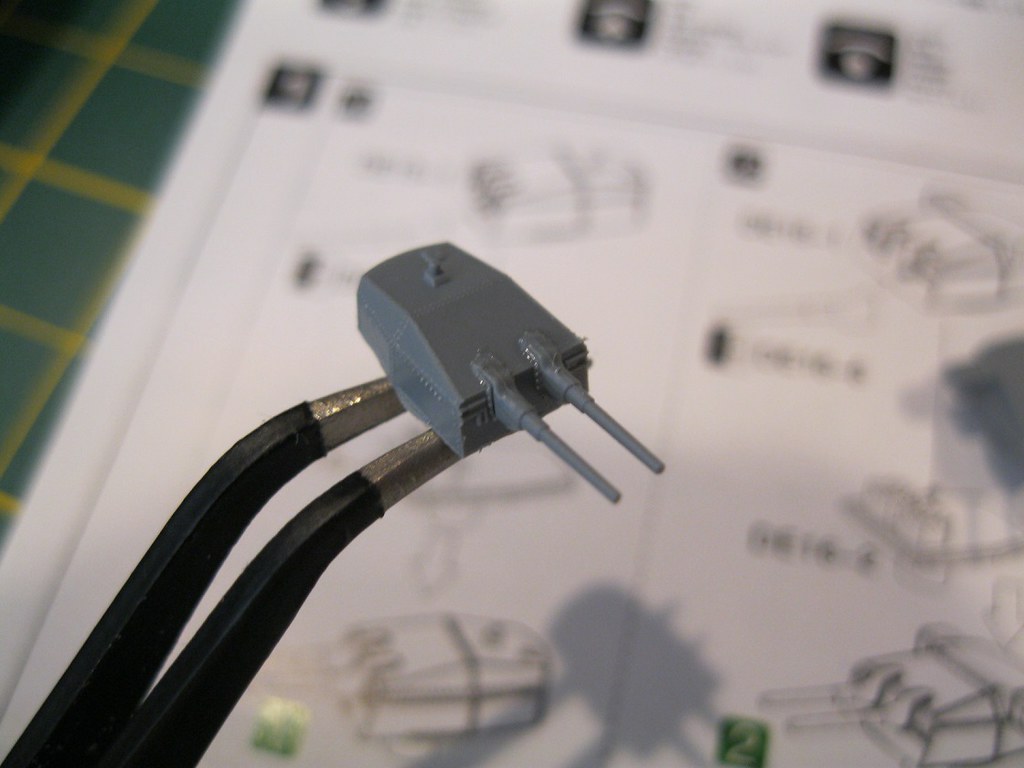
IMG_0178 by russell amott, on Flickr
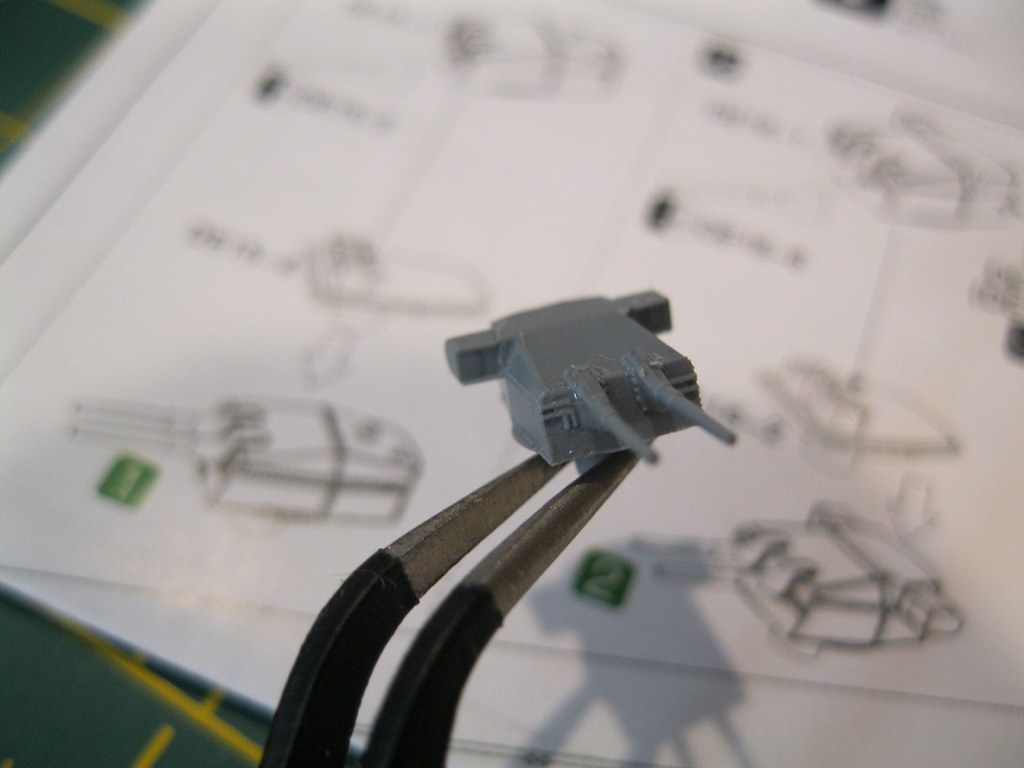
IMG_0179 by russell amott, on Flickr
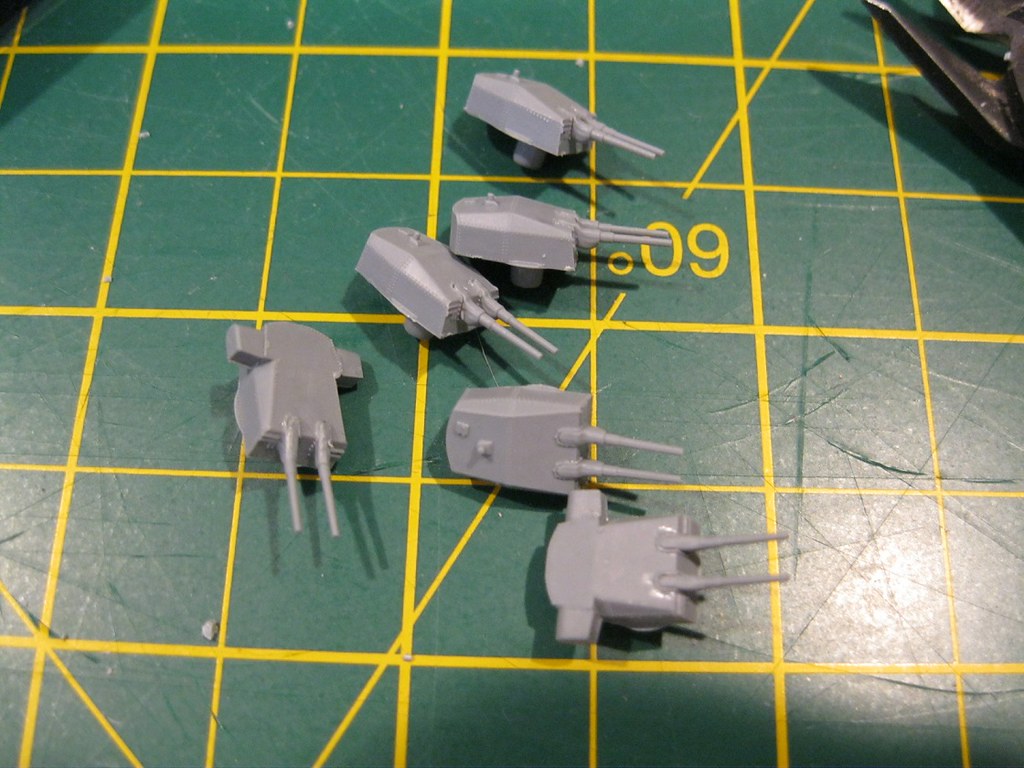
IMG_0180 by russell amott, on Flickr
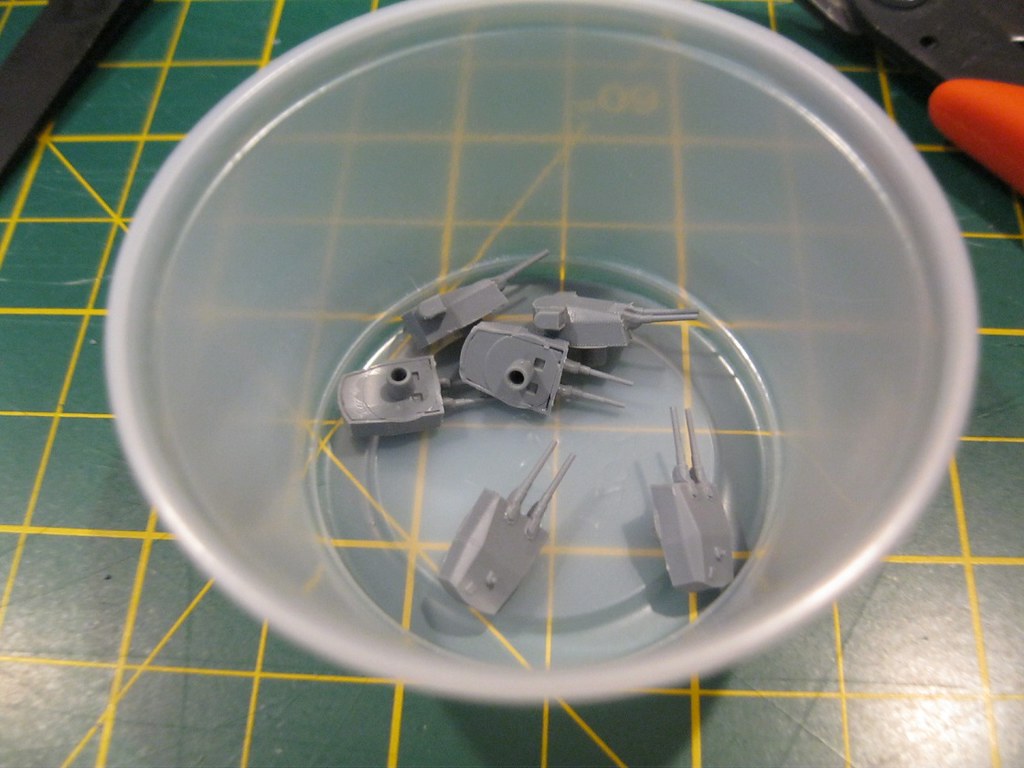
IMG_0181 by russell amott, on Flickr

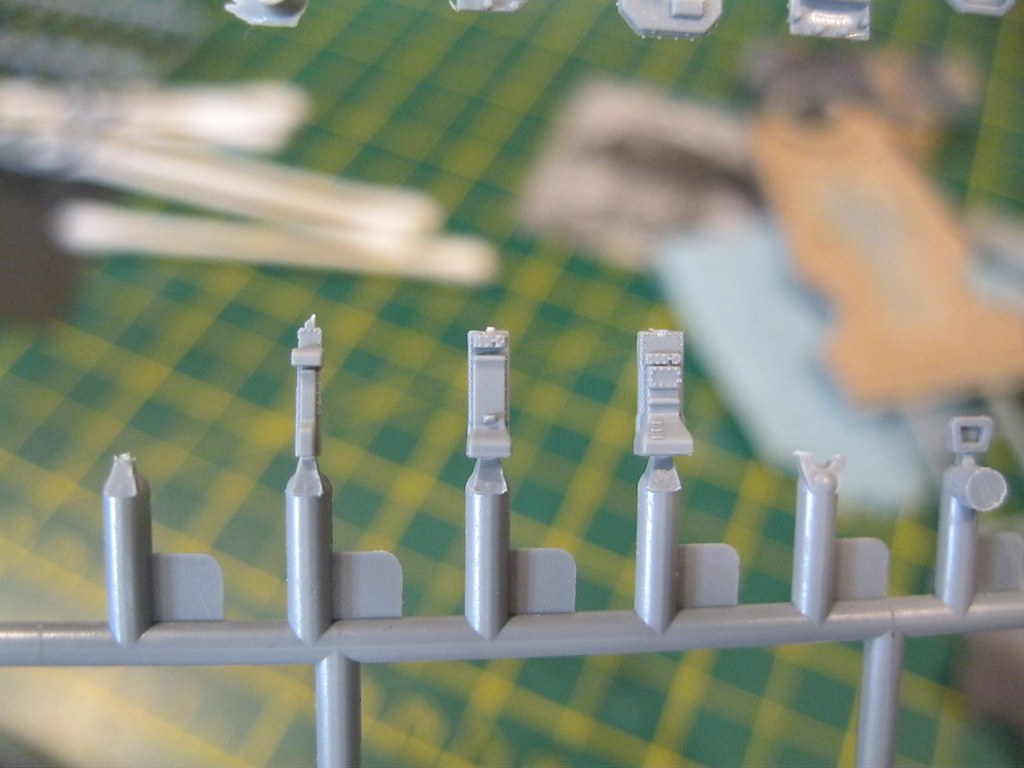
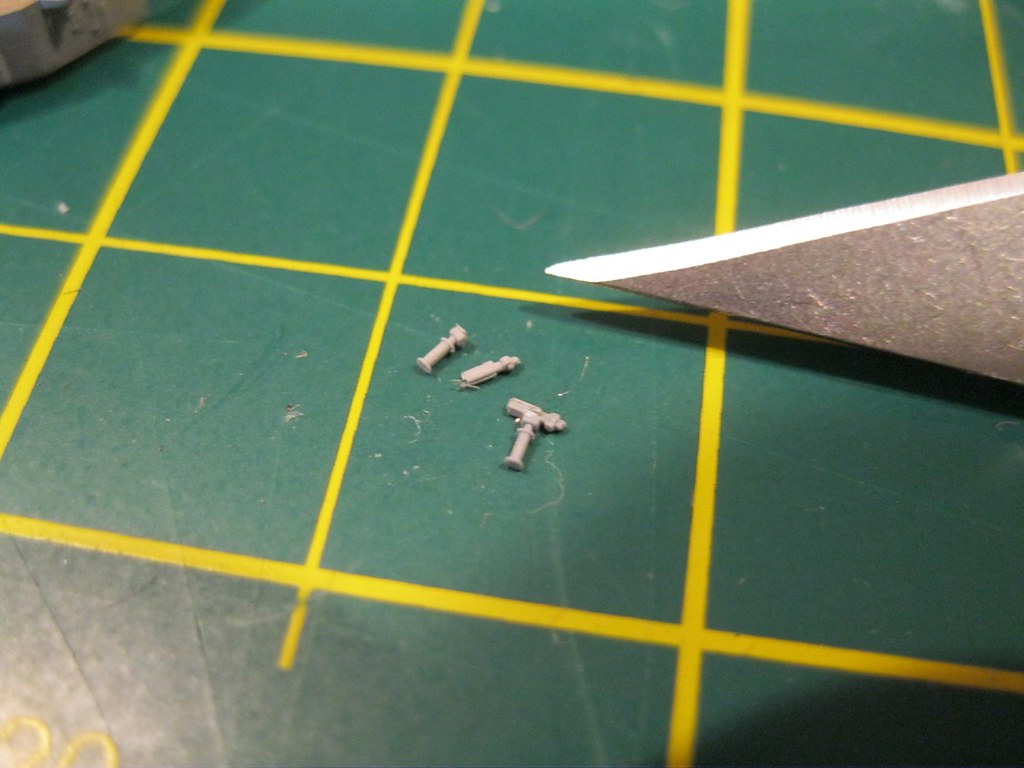
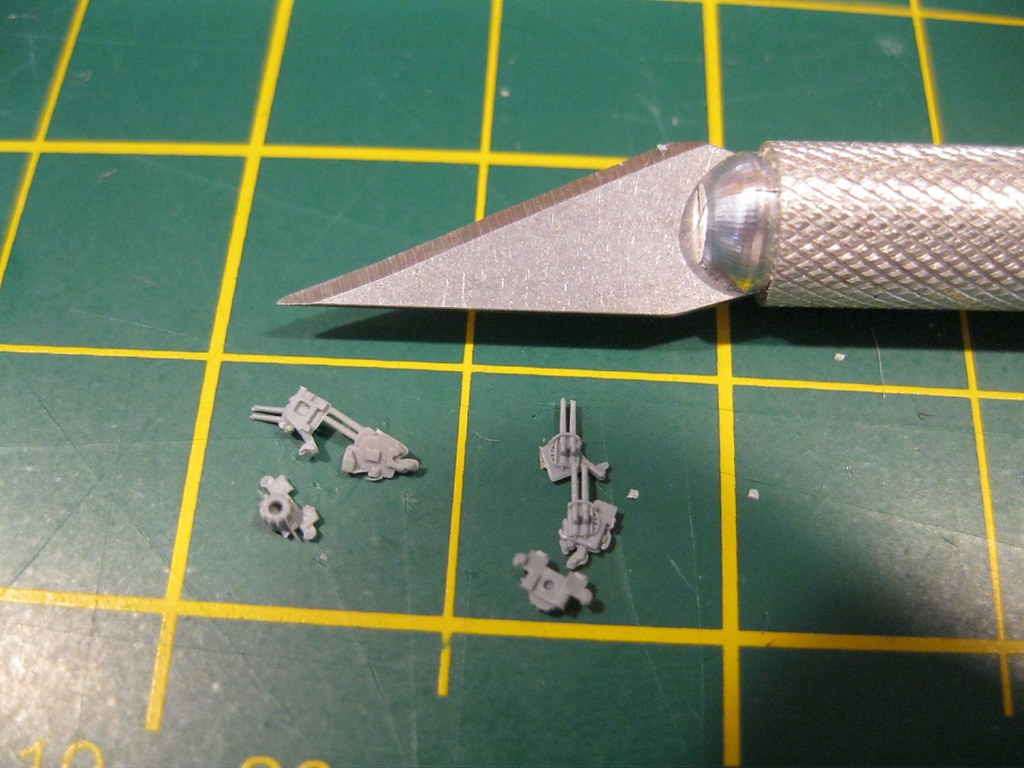
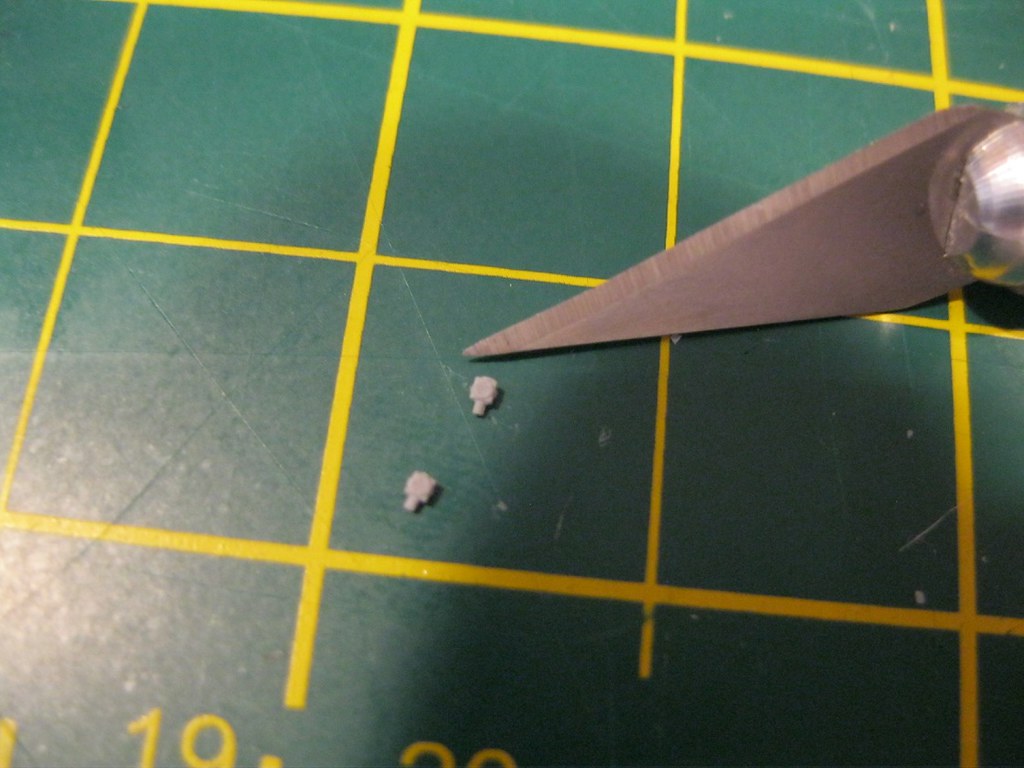
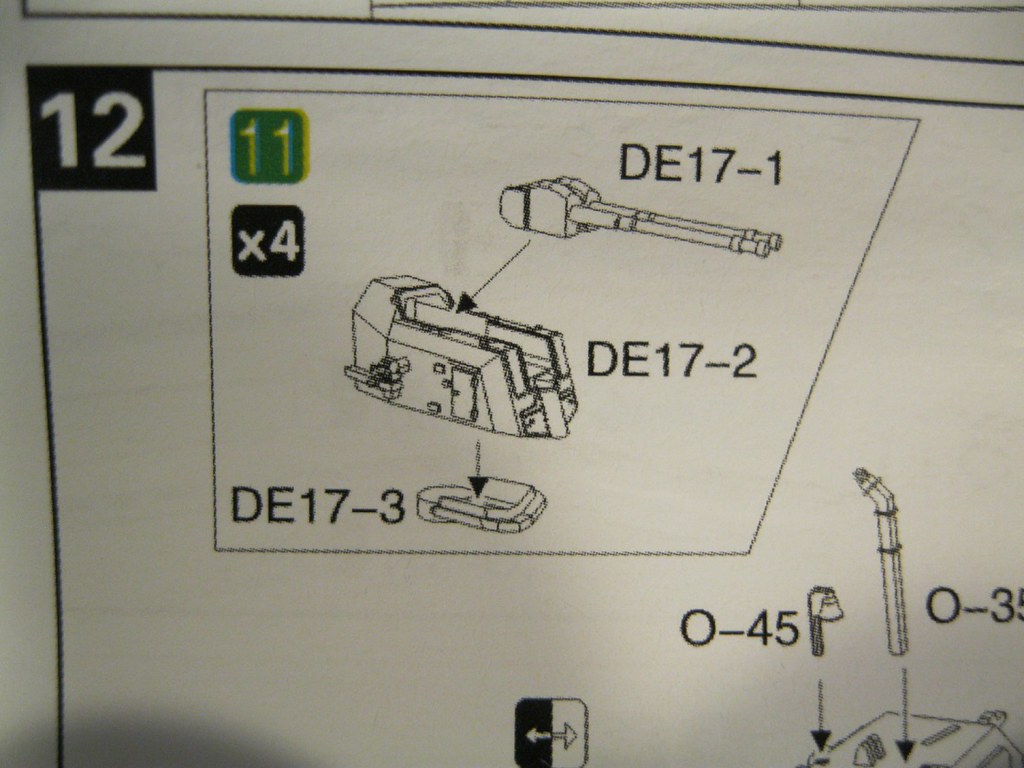
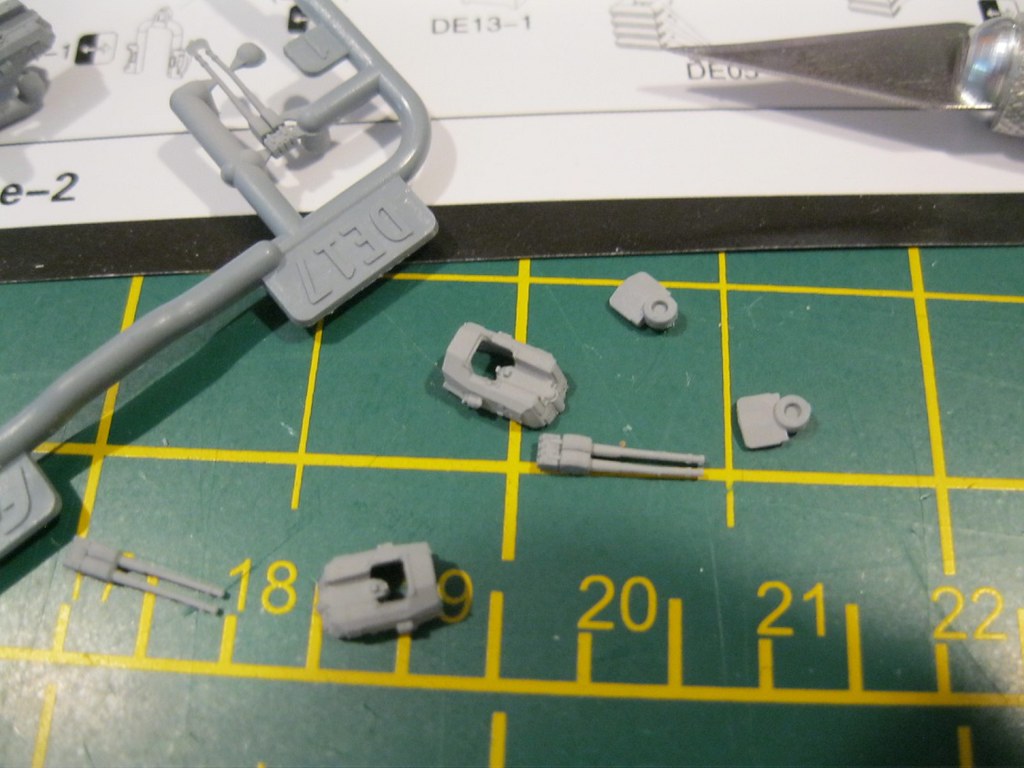
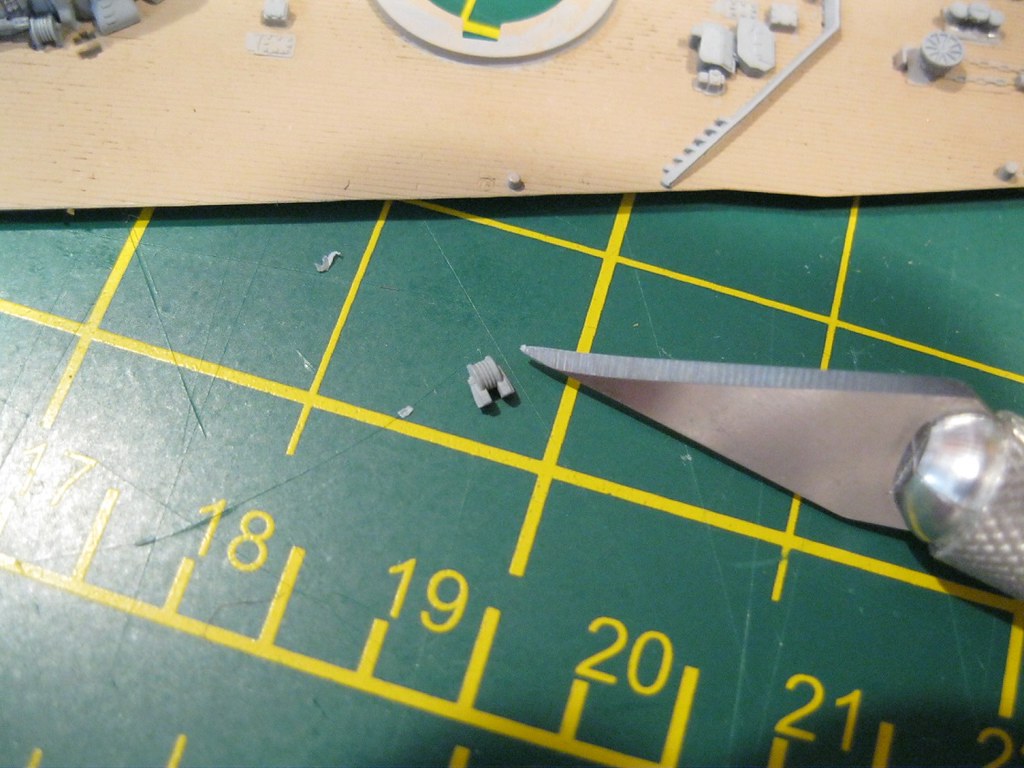
Next are the 3.7cm twin mounts. These are very tiny and consist of three parts-base, gun mount and guns. There is a small groove on the bottom of the guns that sits on one edge of the gun mount. I set the bases on a piece of tape and built up from there. Tape was also used to hold the parts while I cut them from the sprue to keep from losing them. There is a small sprue attachment point on the side of the gun barrels that I could not entirely remove for fear of ruining the guns.

IMG_0194 by russell amott, on Flickr
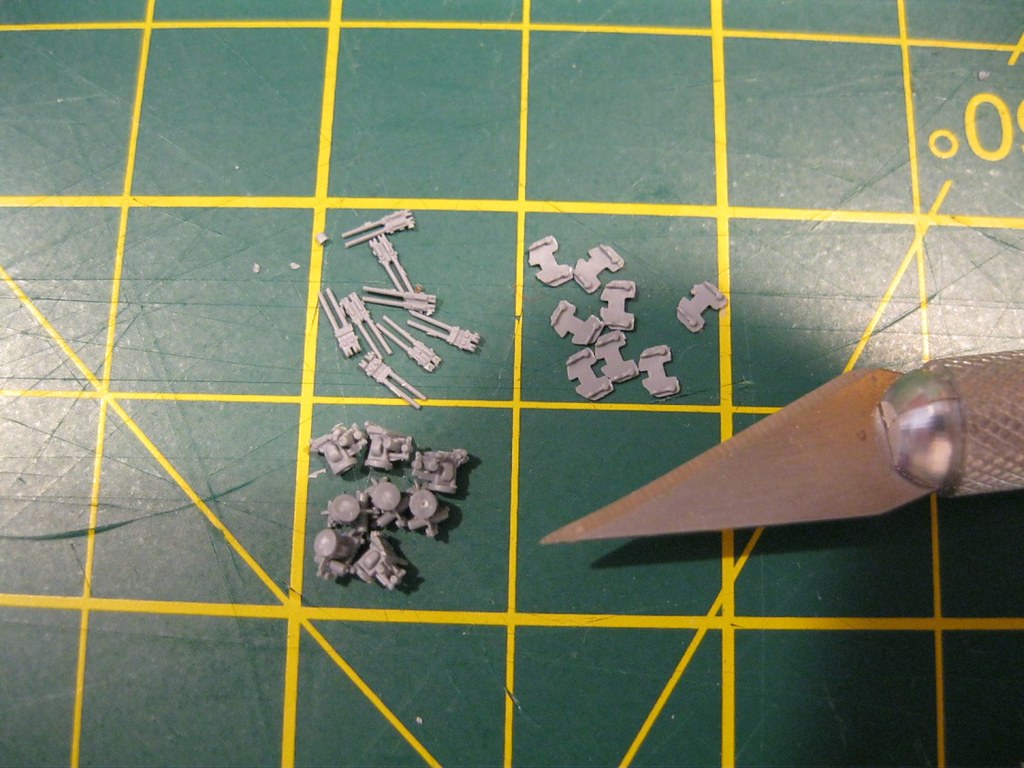
IMG_0195 by russell amott, on Flickr
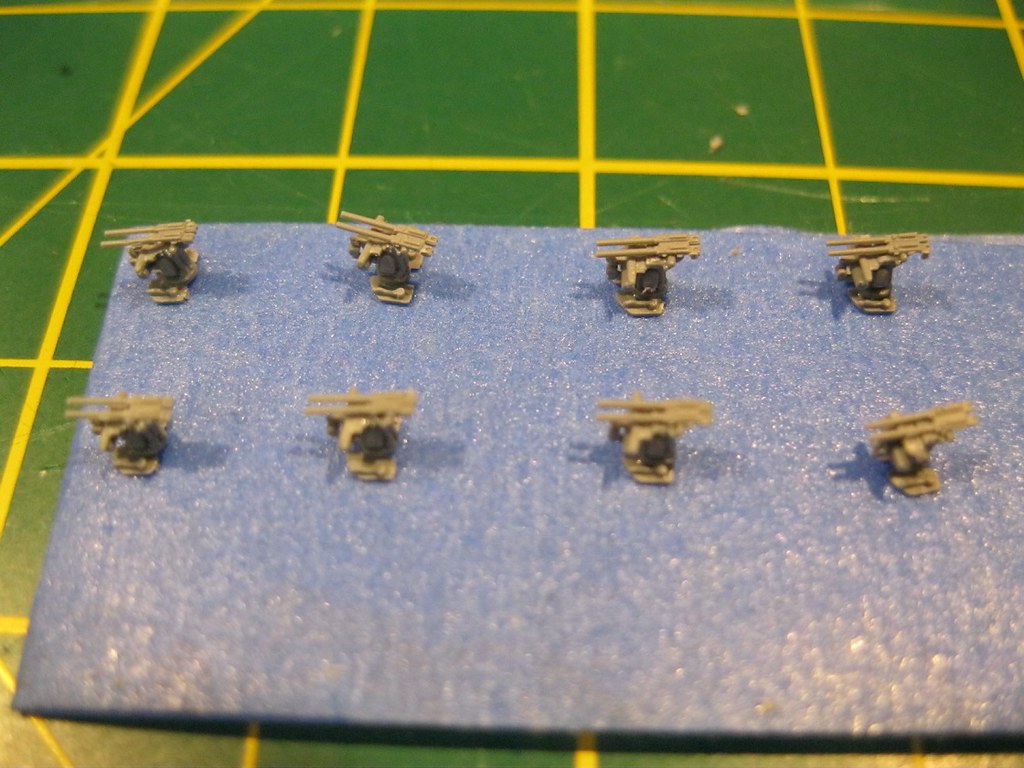
IMG_0196 by russell amott, on Flickr

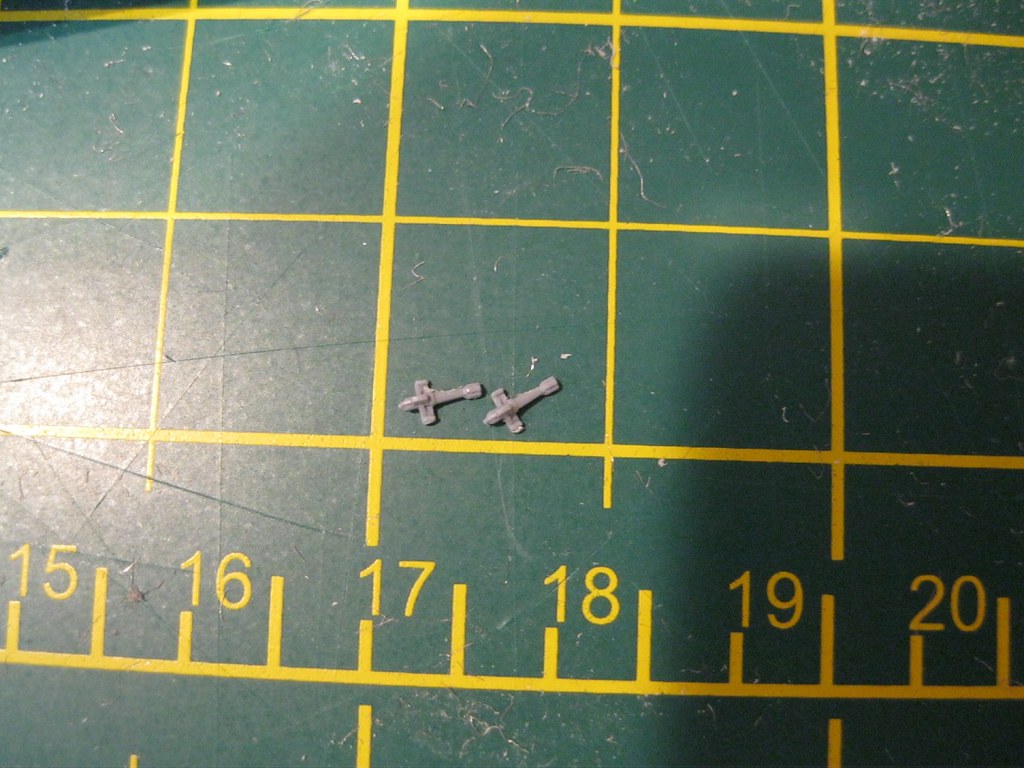
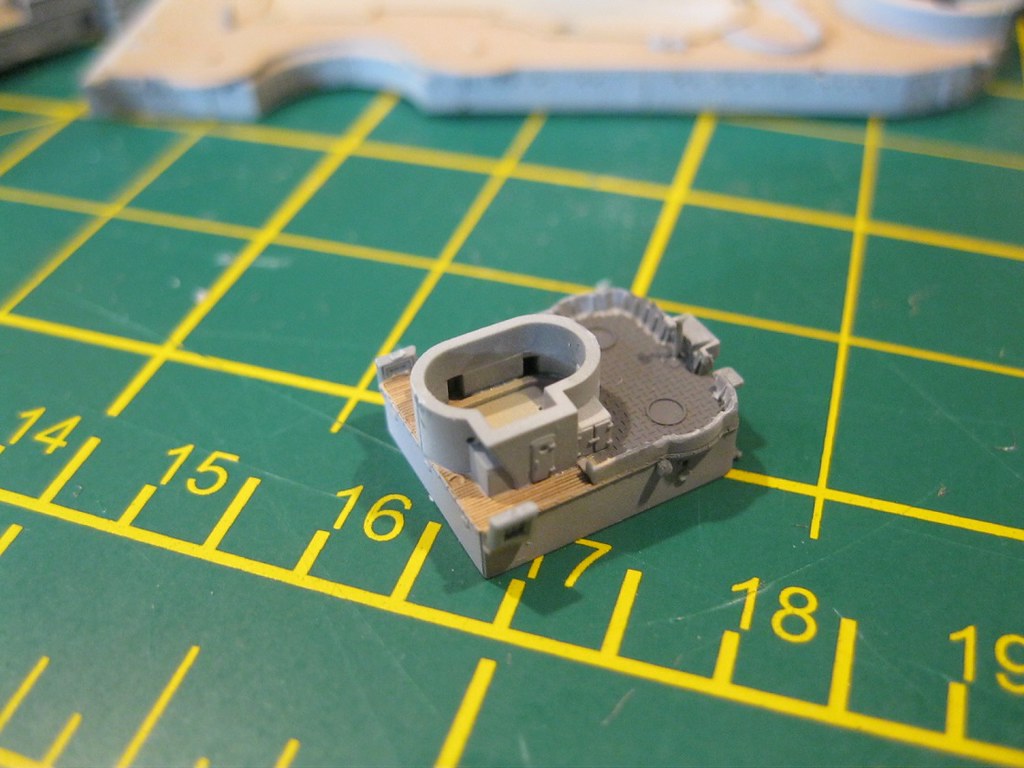
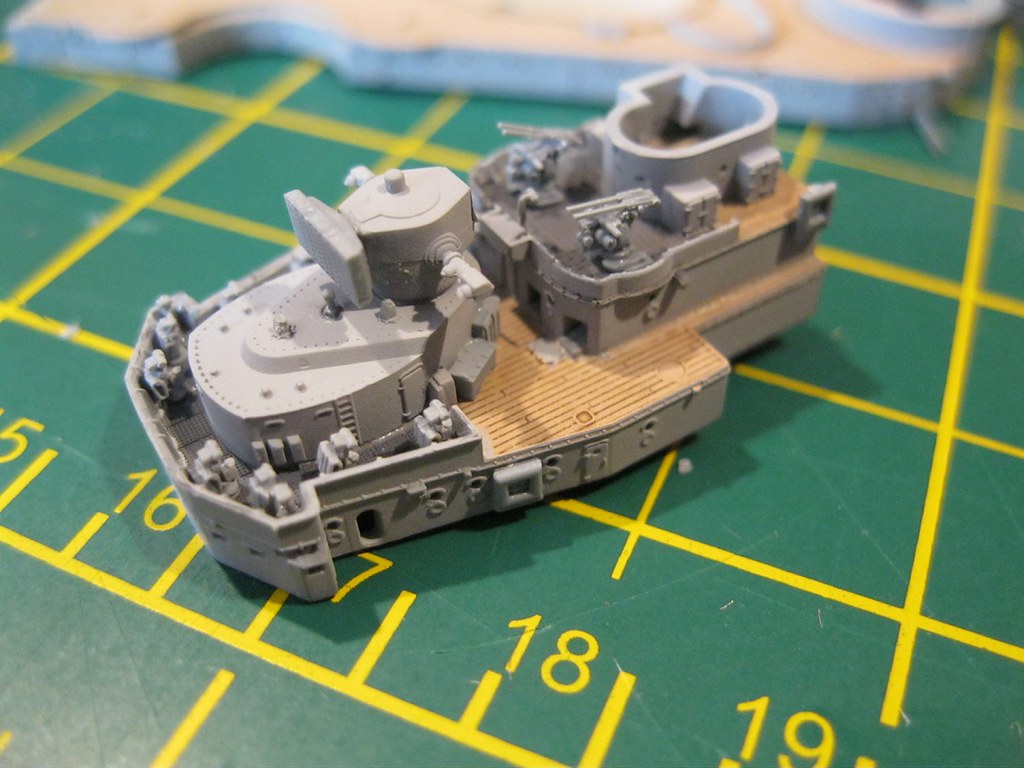
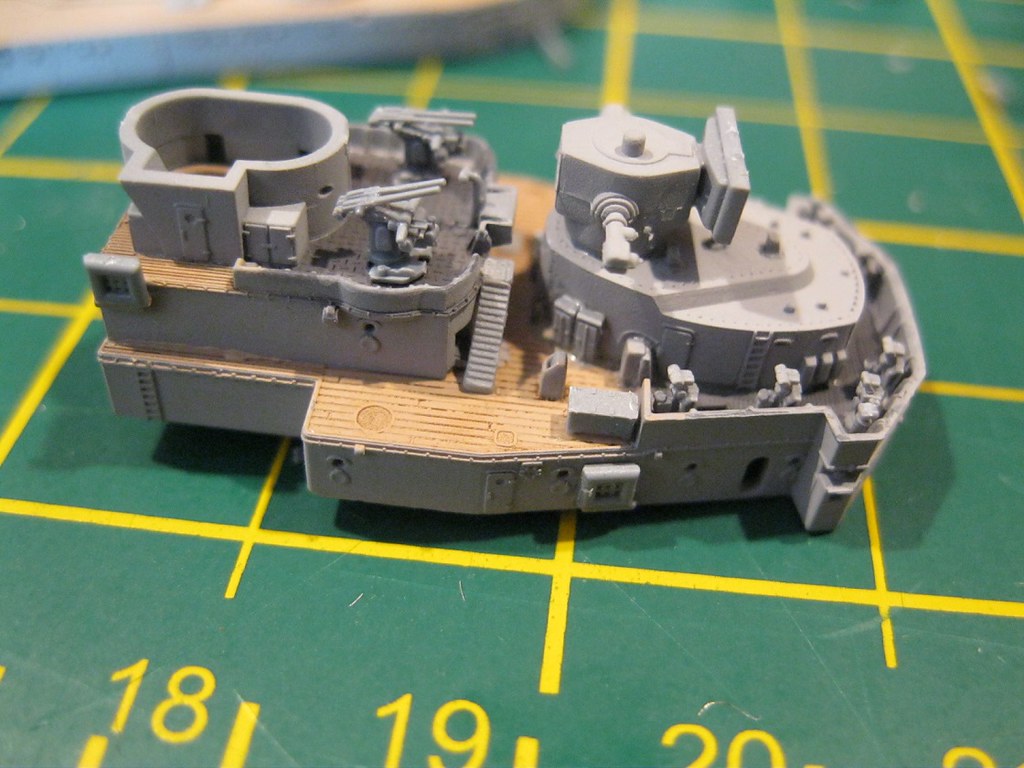
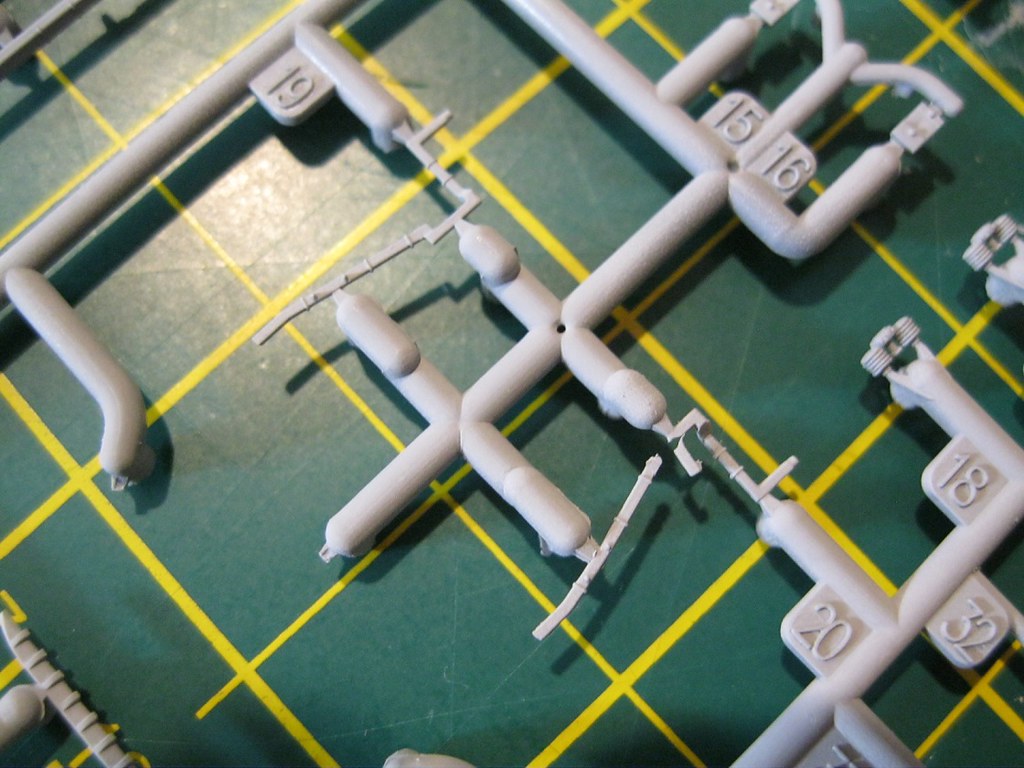
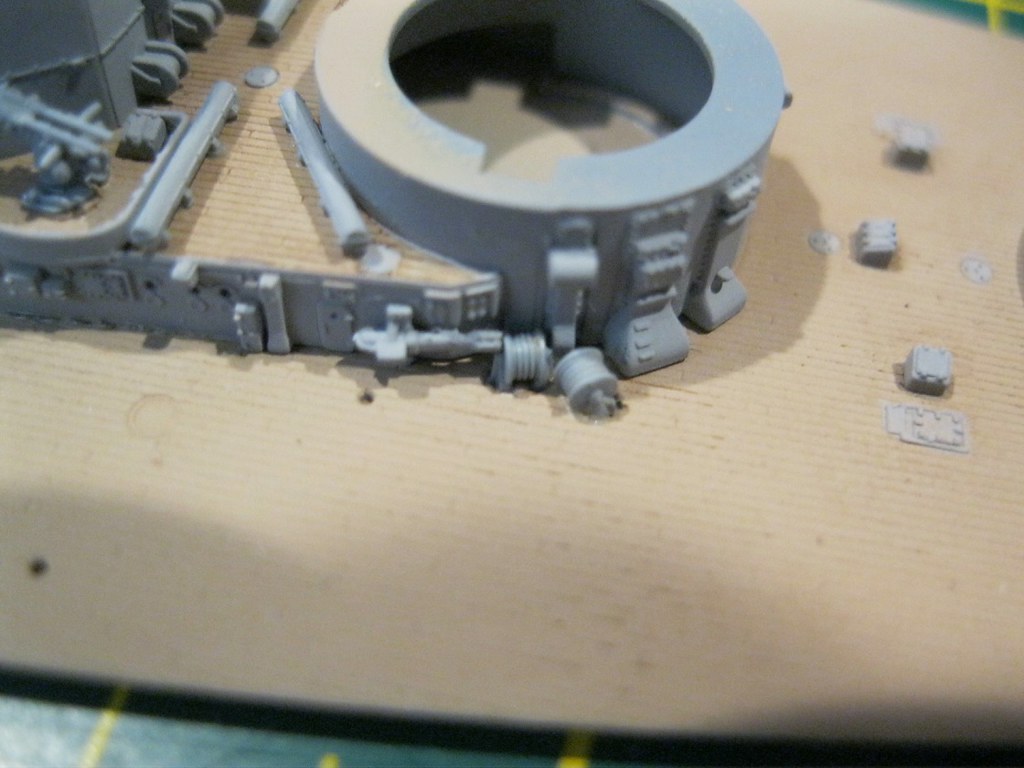
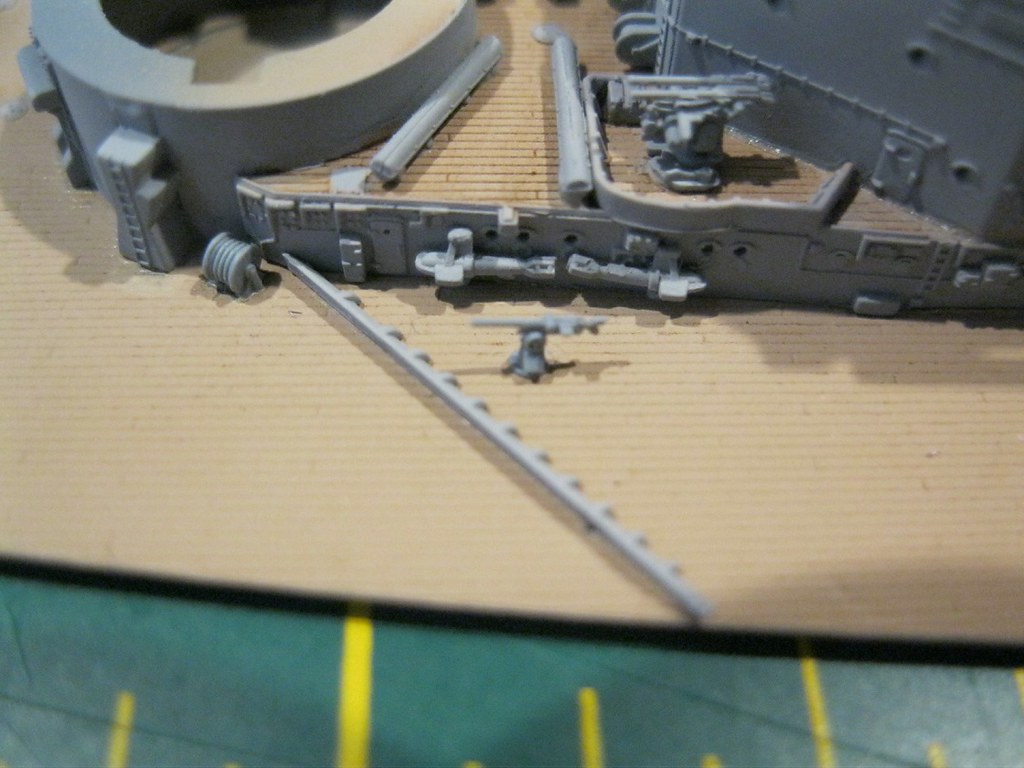
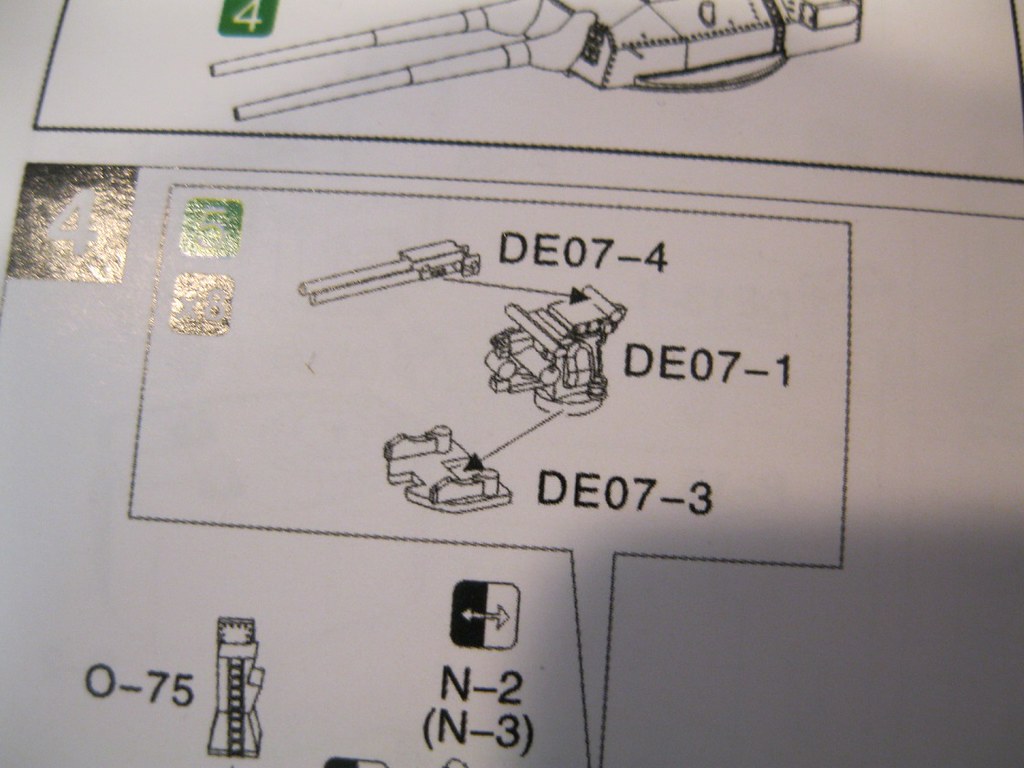
Next up is the first set of 10.5cm twin anti-aircraft guns. Two different types of mounts are used on Bismarck. Again, the parts are small and delicate, and I found a small amount of flash present, particularly built up on the top rear of the gun mounts that required careful trimming. Each gun consists of a base, mount and guns. Again, there are sprue attachment points on the sides of the barrels that are tricky to clean up.

IMG_0197 by russell amott, on Flickr
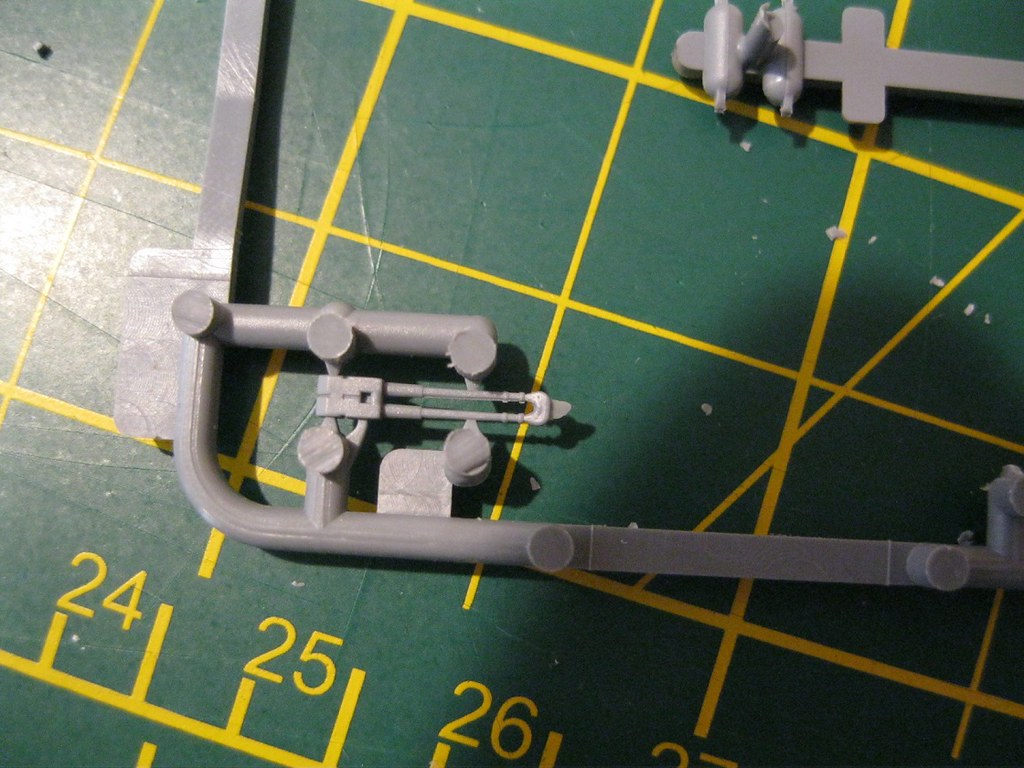
IMG_0198 by russell amott, on Flickr
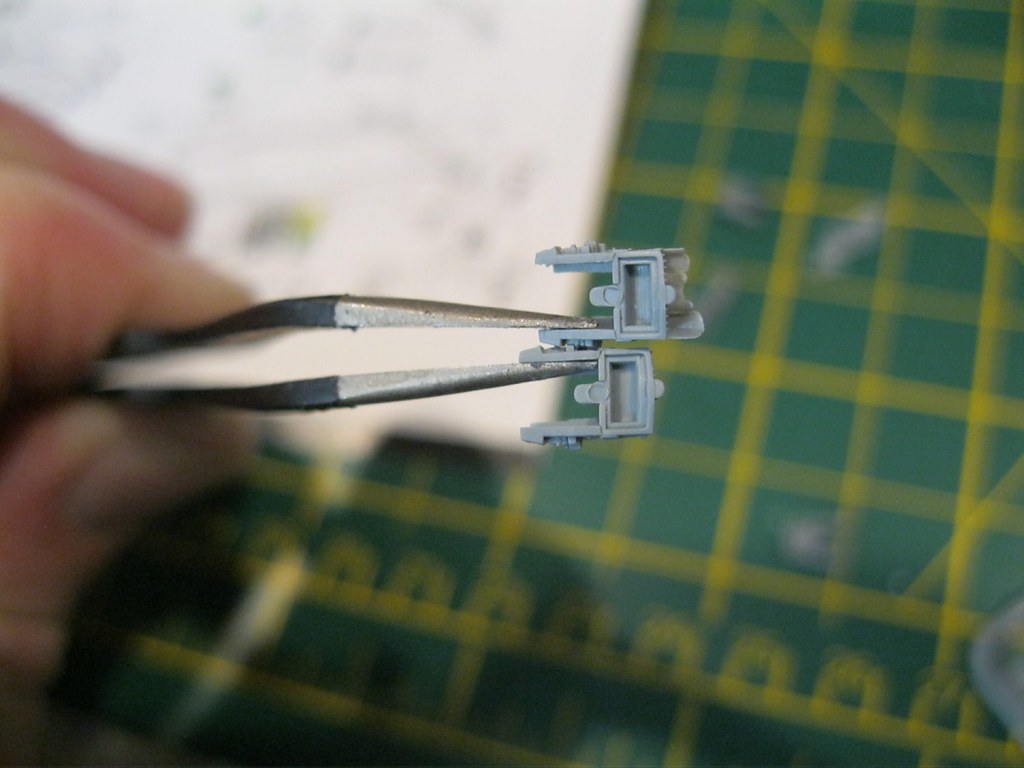
IMG_0199 by russell amott, on Flickr
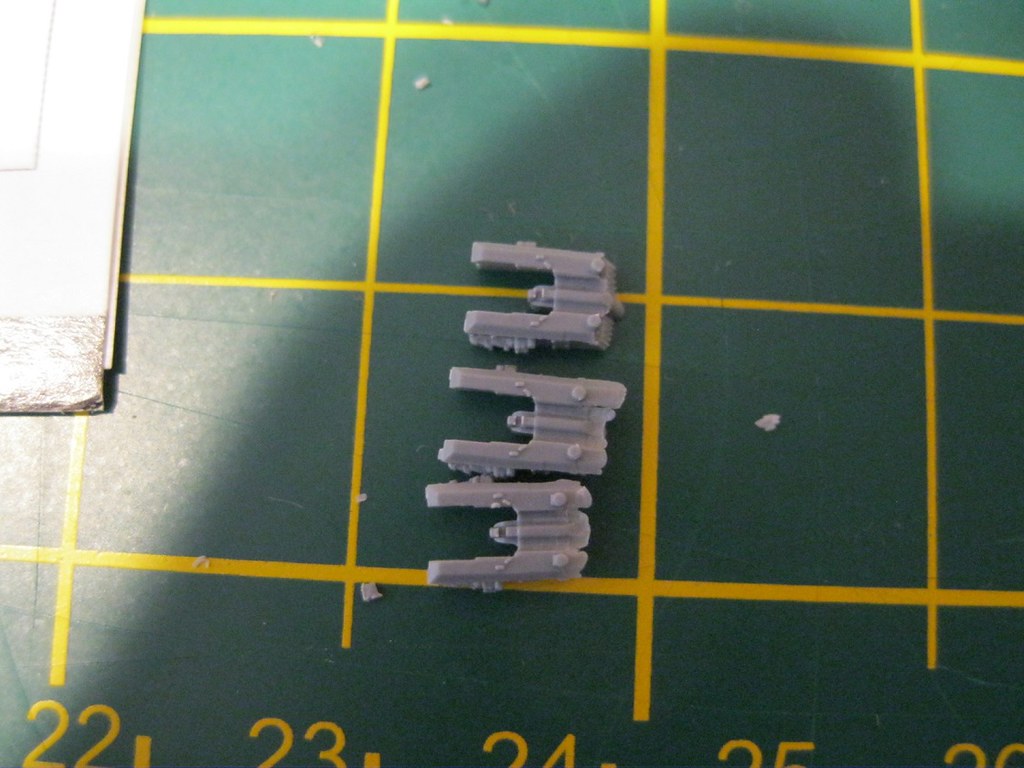
IMG_0200 by russell amott, on Flickr
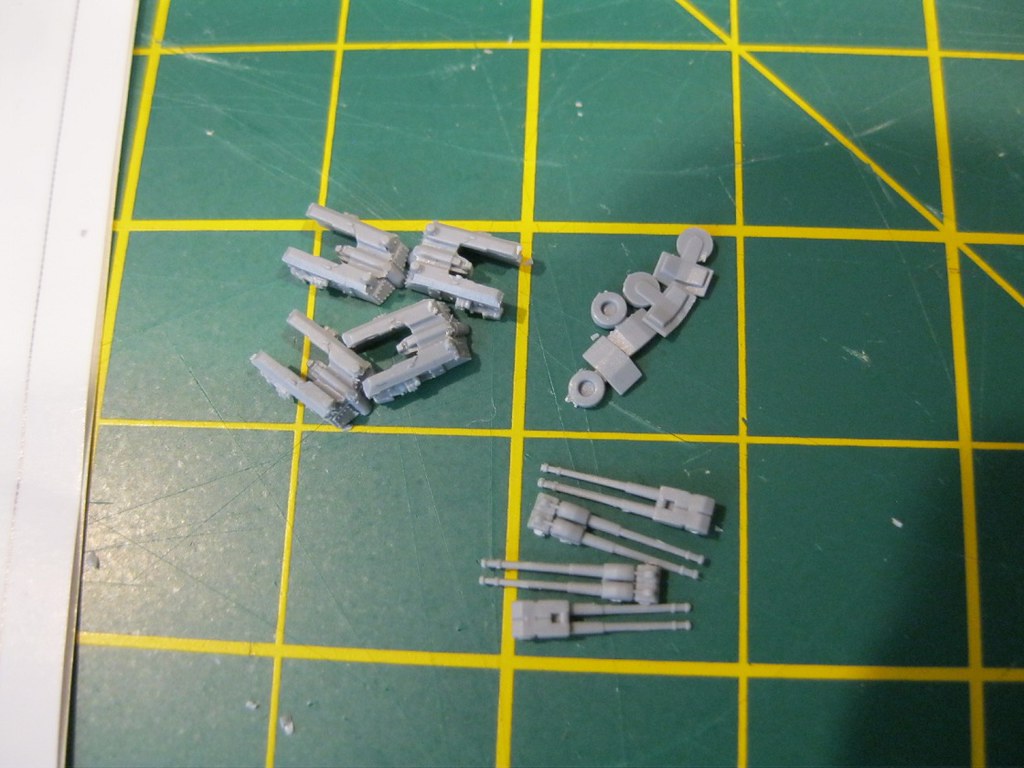
IMG_0201 by russell amott, on Flickr
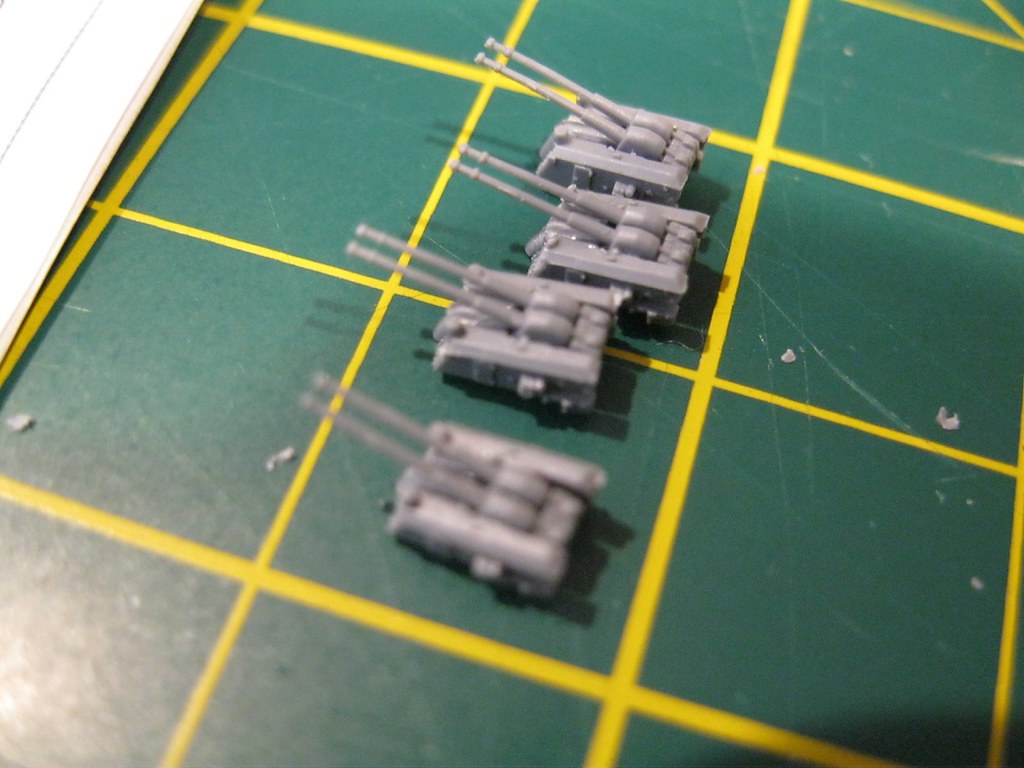
IMG_0202 by russell amott, on Flickr

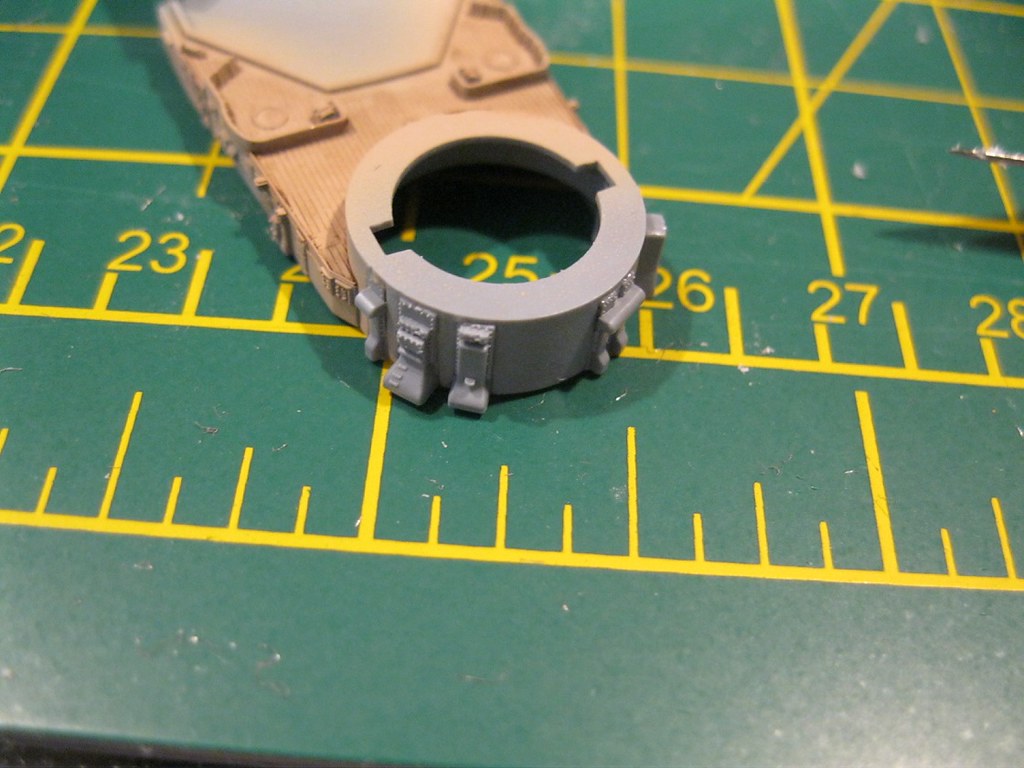
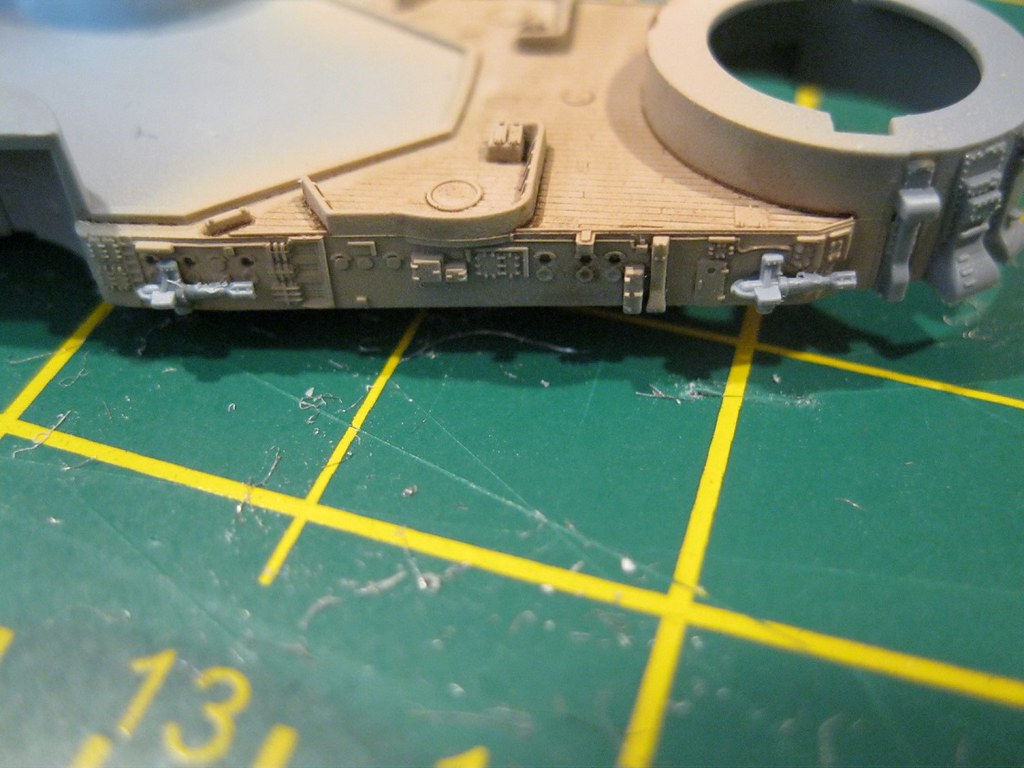
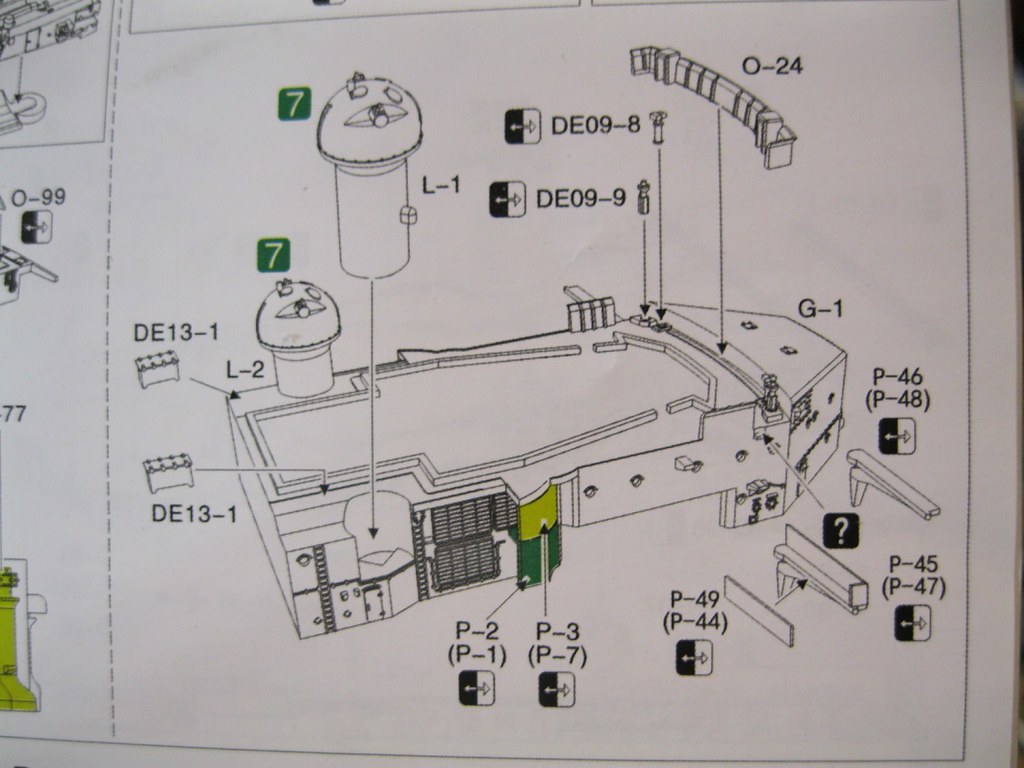
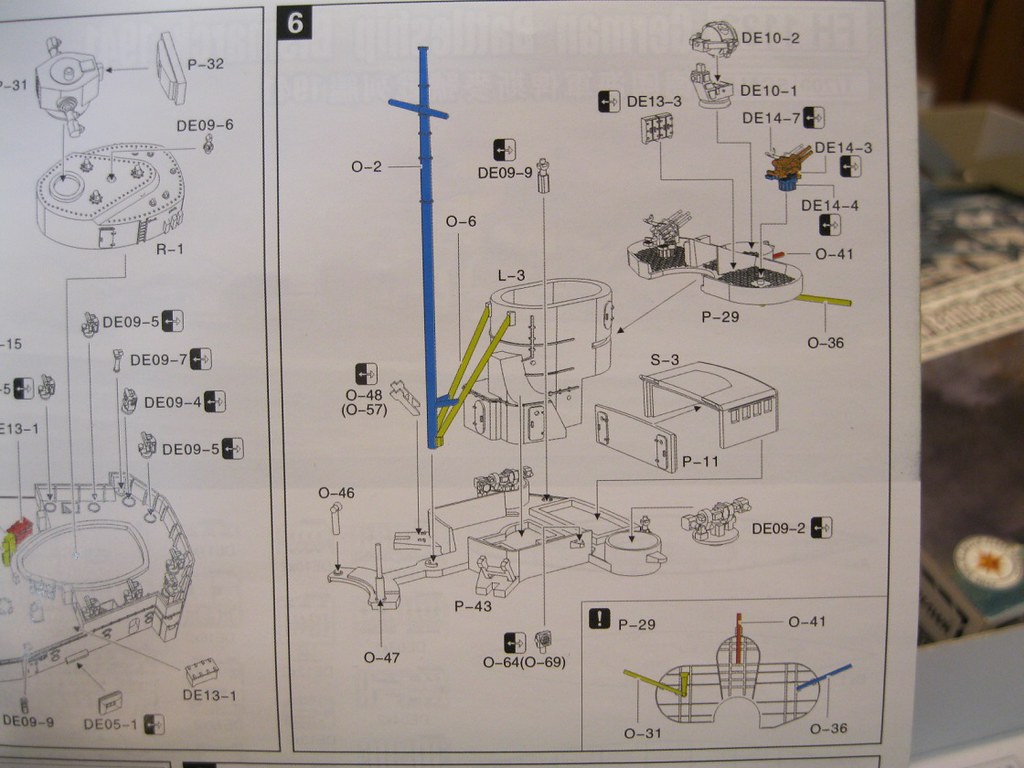
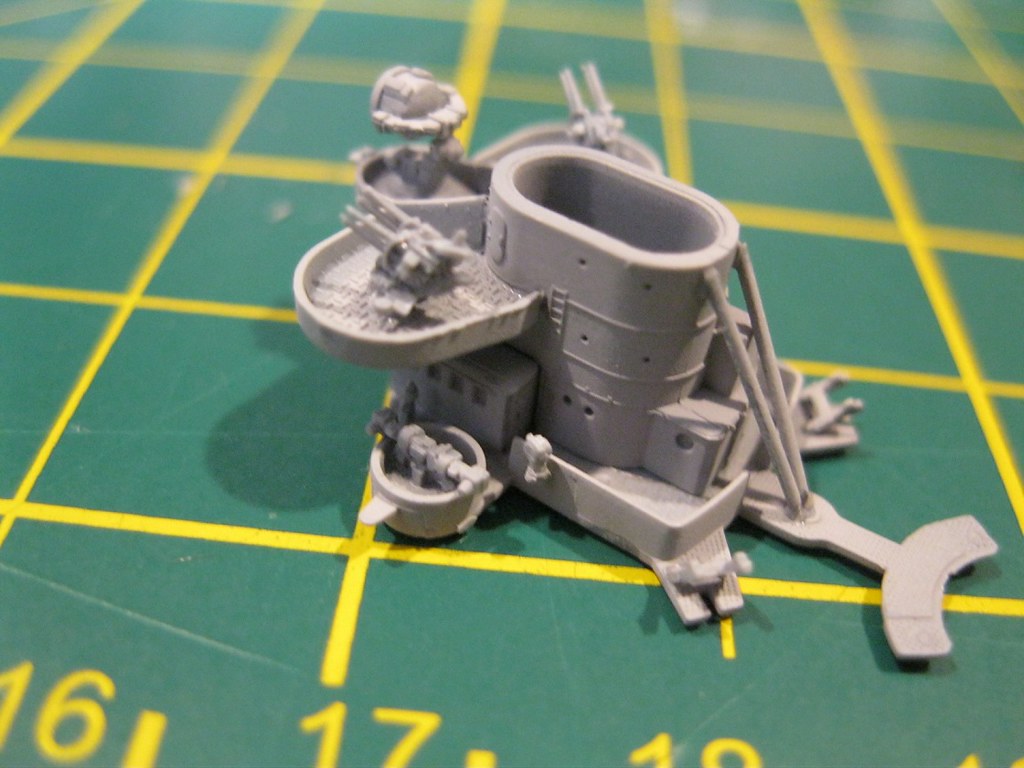
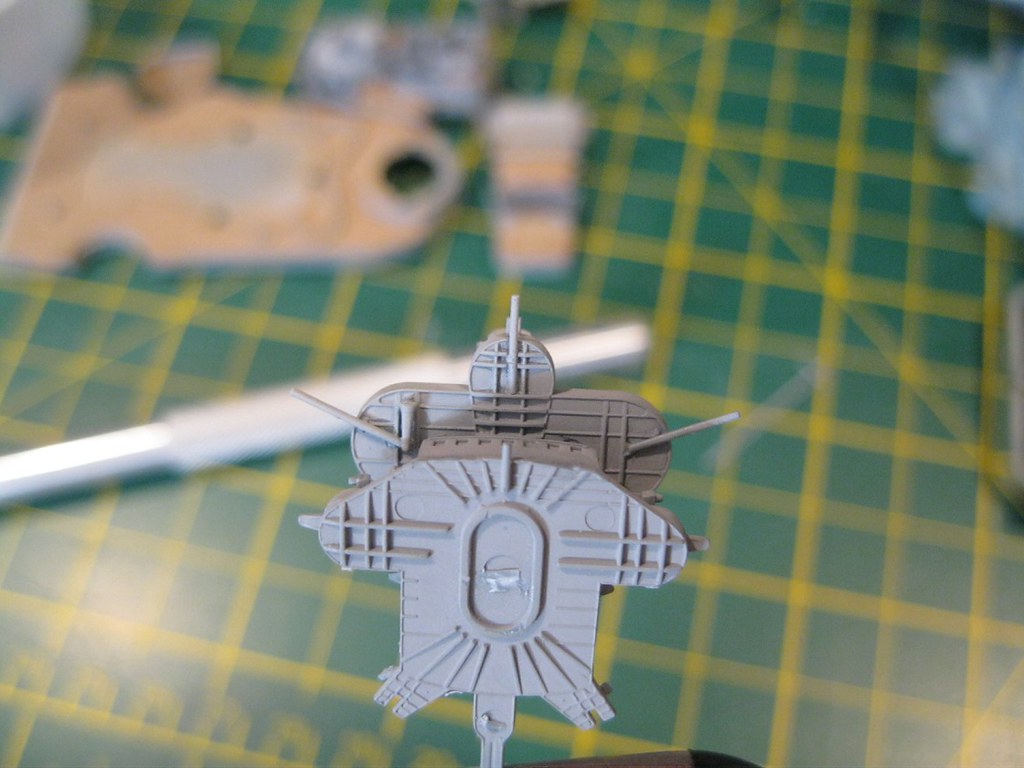
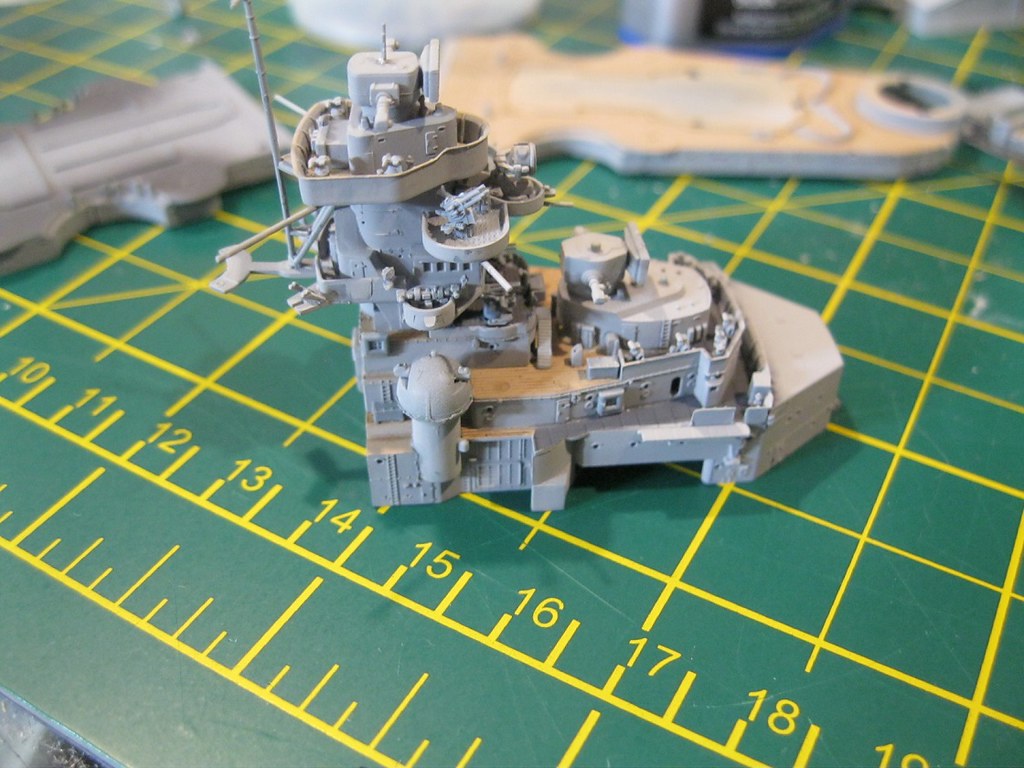
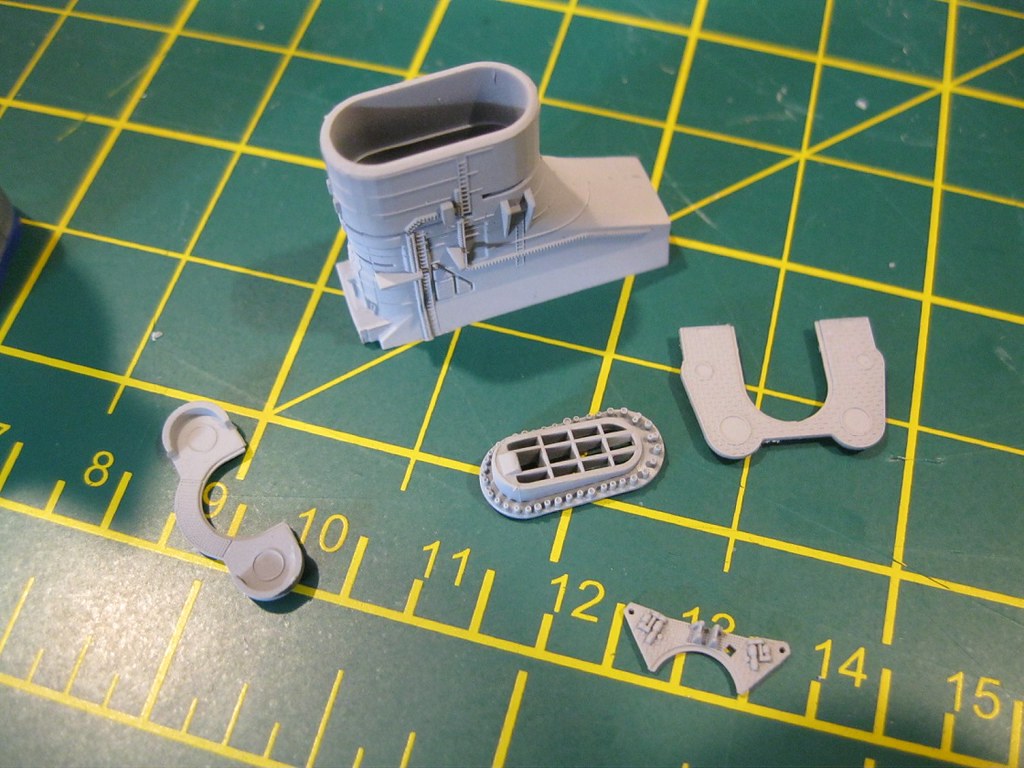
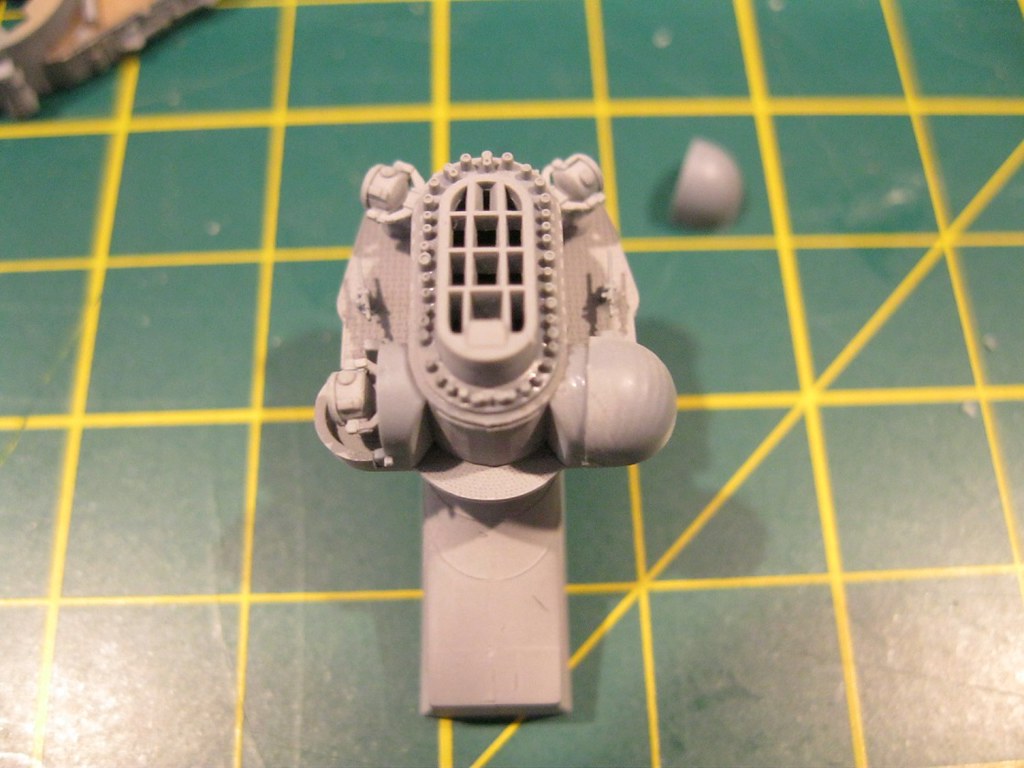
Next is the stereoscopic rangefinders. The dome is a single piece but the rangefinders are keyed and fit was difficult, particularly because of the small size of the parts.

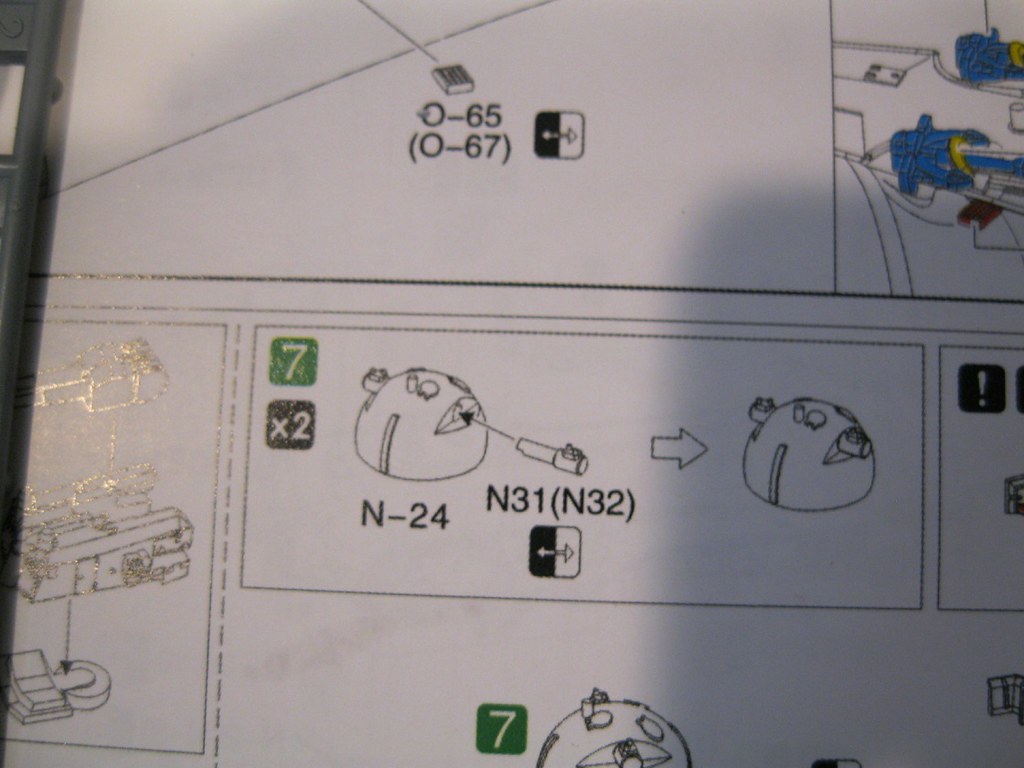
IMG_0203 by russell amott, on Flickr
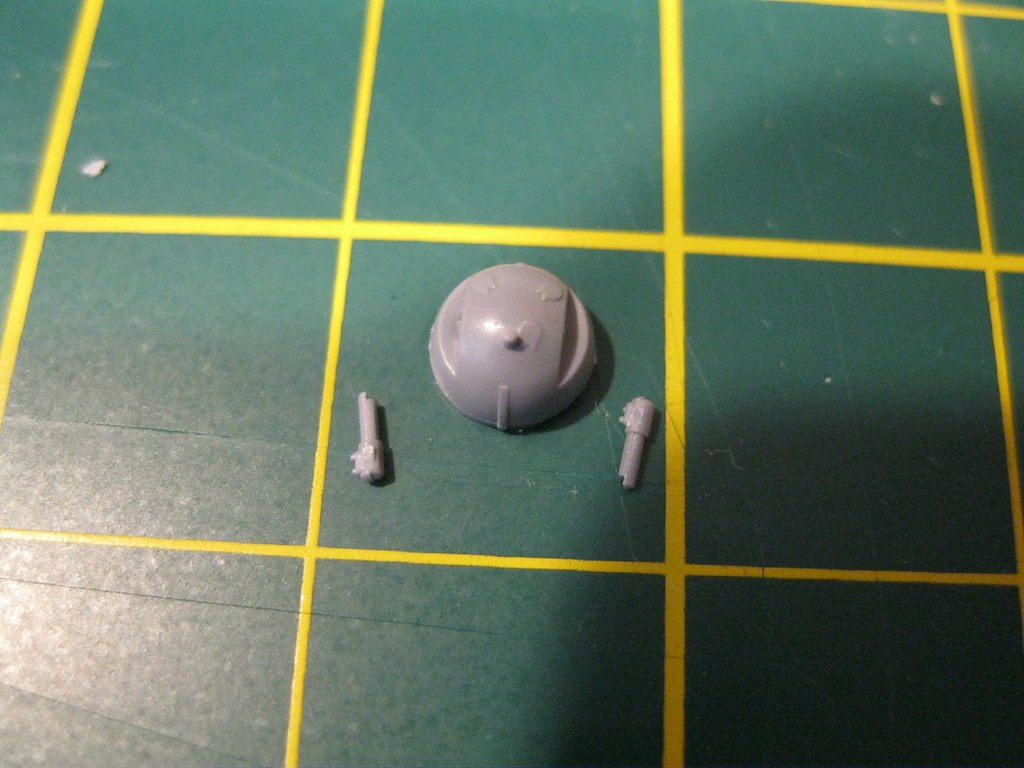
IMG_0204 by russell amott, on Flickr
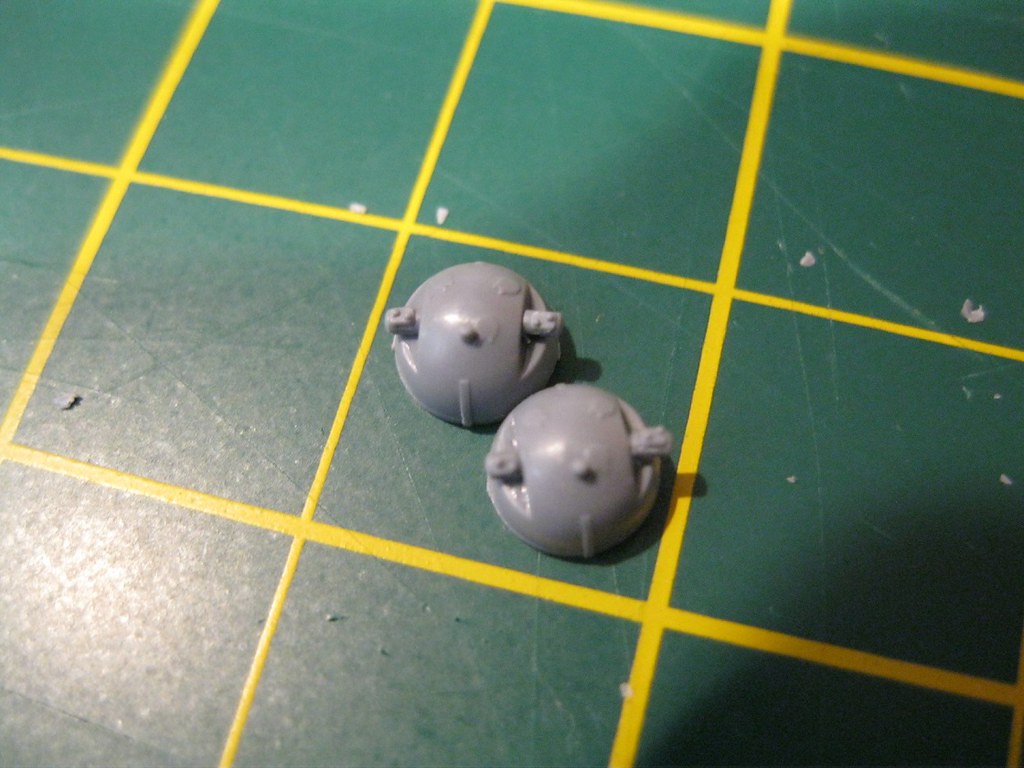
IMG_0205 by russell amott, on Flickr

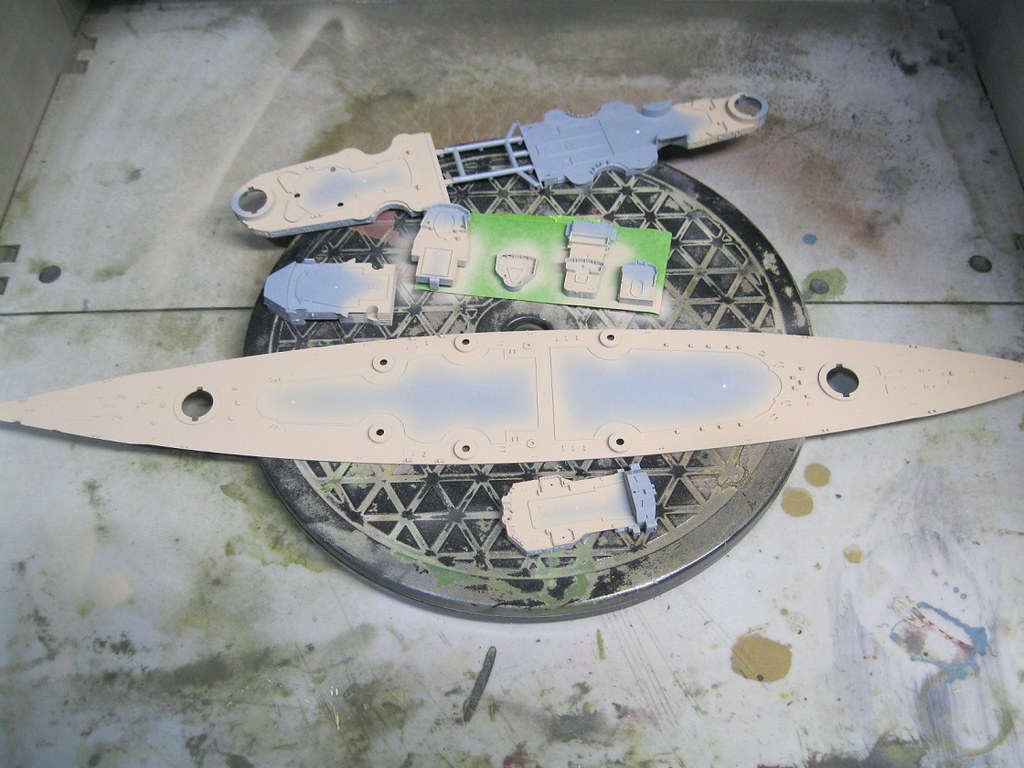
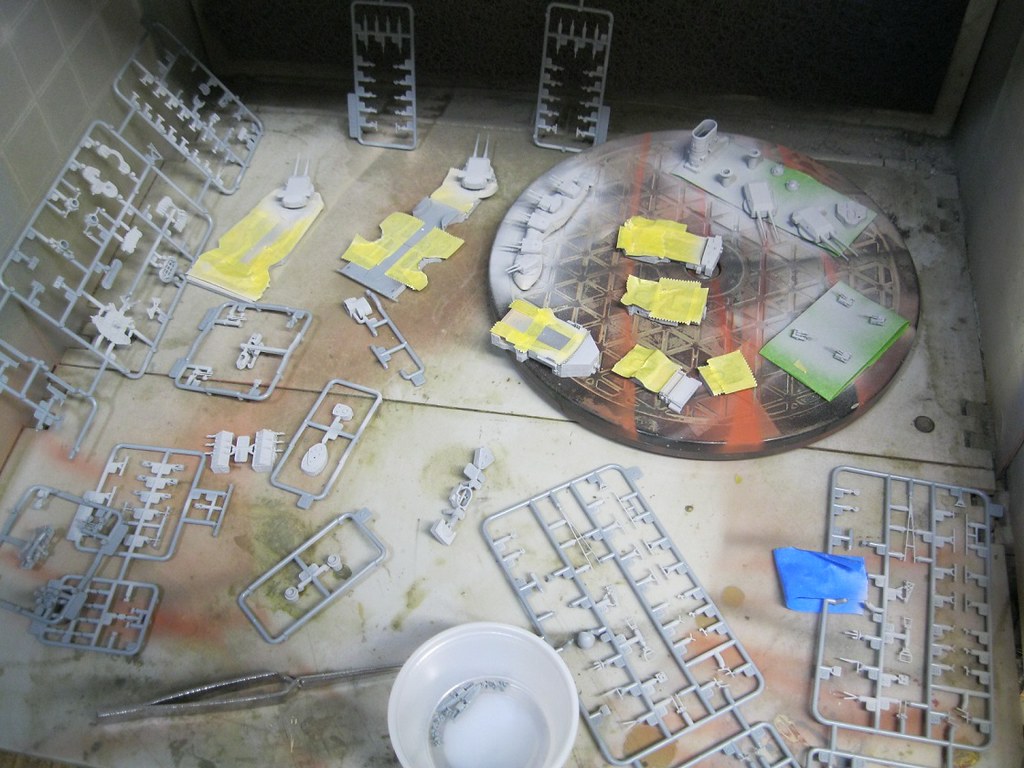
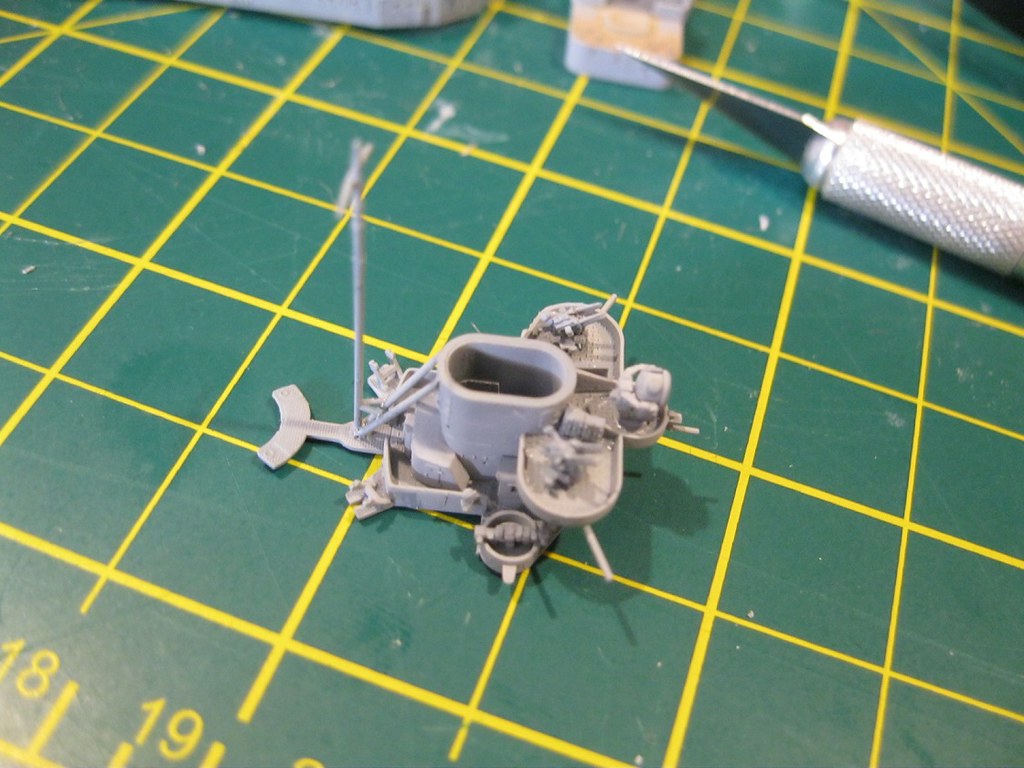
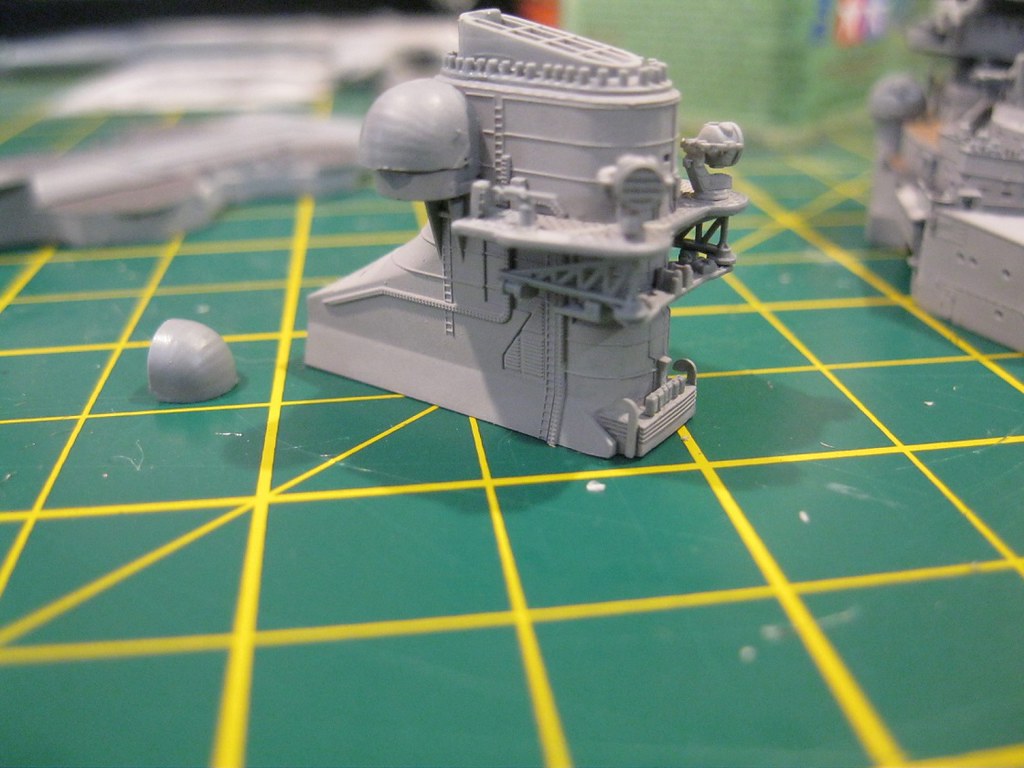
All these parts are safely collected in small plastic cups to keep them sorted. Next up will be the hull. I am opting for the full hull though the damage to the bow will be a problem. Any comments or corrections are most welcome. Thank you for looking.


TimReynaga
Staff MemberAssociate Editor
MODEL SHIPWRIGHTS
Visit this Community
California, United States
Joined: May 03, 2006
KitMaker: 2,500 posts
Model Shipwrights: 1,830 posts
Posted: Friday, July 03, 2020 - 12:34 PM UTC
Wow, Russ, looking good so far! This Flyhawk effort is MILES ahead of the Aoshima 1/700 Tirpitz I built as a teenager back in the 1970s...
d6mst0
#453
Visit this Community
Texas, United States
Joined: August 28, 2016
KitMaker: 1,925 posts
Model Shipwrights: 1,298 posts
Posted: Saturday, July 04, 2020 - 04:42 AM UTC
Russ,

Off to a fine start. The detail looking petty good from this kit.

As for the 15" guns, it always seems that the German navy was always ready to reduce the gun sizes on their ships to gain armor or speed and sometimes both. Look at the Scharnhorst, she was as large, armored as any battleship at the time but only carried 11" guns. I think even now some would call her a battleship and some a battlecruiser.

Mark
phantom_phanatic309
#372
Visit this Community
United Kingdom
Joined: March 10, 2010
KitMaker: 2,568 posts
Model Shipwrights: 220 posts
Posted: Saturday, July 04, 2020 - 06:34 AM UTC
Looking really good Russ.

I recently bought their HMS Aurora and was very surprised at the detail and how clean the tooling is. Not a single sign of flash on any parts!
Flyhawk have really set a new standard for 1/700 warships.
russamotto
Visit this Community
Utah, United States
Joined: December 14, 2007
KitMaker: 3,389 posts
Model Shipwrights: 151 posts
Posted: Friday, July 10, 2020 - 01:35 PM UTC
Mark and Stephen, thank you for chiming in. The detail really is amazing, but getting it put into place is time consuming. Magnified reading glasses were not powerful enough so I went with an optivisor, which made a big difference for me.

I started by painting the wooden decks and then the steel plate areas, though I realize I didn't cover enough of the metal deck area. This was followed by a light wash of burnt umber to help show the detail in the deck.
IMG_0206 by russell amott, on Flickr
IMG_0207 by russell amott, on Flickr
IMG_0208 by russell amott, on Flickr
IMG_0210 by russell amott, on Flickr

I then worked on the hull. The upper and lower hull sections did not match up well. Plans of the ship show the armor belt blended into the lower hull and the join was uneven along the sides. It took some work to get things cleaned up.
IMG_0211 by russell amott, on Flickr
IMG_0212 by russell amott, on Flickr
IMG_0213 by russell amott, on Flickr

Step 4 in the instructions starts the assembly of the upper citadel structure of the ship. I left the AA guns off where I could for fear I would knock them off. Also the stairs until the deck sections are joined.

IMG_0214 by russell amott, on Flickr
IMG_0215 by russell amott, on Flickr
IMG_0216 by russell amott, on Flickr
IMG_0217 by russell amott, on Flickr
IMG_0218 by russell amott, on Flickr
IMG_0219 by russell amott, on Flickr

The bridge structure was next. I opted to pose the bridge wings closed as it would have been once into the Atlantic. Seas were generally rough and worsening as the week went on. Again, there are a lot of tiny details.

IMG_0220 by russell amott, on Flickr
IMG_0221 by russell amott, on Flickr
IMG_0222 by russell amott, on Flickr
IMG_0223 by russell amott, on Flickr

Before I went any further, I weighed options and decided to paint the upper citadel and details, reasoning it would be easier to touch up small areas than try to reach around and paint after. I also picked out the small details on the deck sections.

IMG_0224 by russell amott, on Flickr
IMG_0226 by russell amott, on Flickr

I added the details to the main deck level and finished what I could with the sections in step 4.

IMG_0227 by russell amott, on Flickr
IMG_0229 by russell amott, on Flickr
IMG_0231 by russell amott, on Flickr
IMG_0233 by russell amott, on Flickr

Step 5 is construction of the upper sections of the forward citadel structure.

IMG_0234 by russell amott, on Flickr
IMG_0235 by russell amott, on Flickr
IMG_0236 by russell amott, on Flickr
IMG_0237 by russell amott, on Flickr

That last structure took close to two hours to construct. I managed to drop a couple of pieces but fortunately was able to find them quickly. I don't know the color for the balsa life rafts and haven't seen a reliable reference for them. Please help if you know. Also anything else I need to correct before I get too far. Thank you for watching.
TimReynaga
Staff MemberAssociate Editor
MODEL SHIPWRIGHTS
Visit this Community
California, United States
Joined: May 03, 2006
KitMaker: 2,500 posts
Model Shipwrights: 1,830 posts
Posted: Friday, July 10, 2020 - 03:03 PM UTC
Russ, That Burnt Umber wash over the tan deck is super effective! I thought when I first saw it that you had used real wood veneer.

d6mst0
#453
Visit this Community
Texas, United States
Joined: August 28, 2016
KitMaker: 1,925 posts
Model Shipwrights: 1,298 posts
Posted: Saturday, July 11, 2020 - 03:17 AM UTC
Russ,

Again fine progress. It comes as a shock when ship hull pieces match up without some type of adjustment or putty...LOL. I love single piece hulls but then they make up for it with main decks that will need to be adjusted... can't win.

MIG makes a wash for wood that I use on my builds that really make the boards on the deck pop out and show their detail.

Mark
russamotto
Visit this Community
Utah, United States
Joined: December 14, 2007
KitMaker: 3,389 posts
Model Shipwrights: 151 posts
Posted: Sunday, July 19, 2020 - 06:57 AM UTC
Tim and Mark, sorry for the delayed reply. The detail on the wood planking is very fine and simply amazing. It doesn't take much to bring it out. The rest of the detail is just as good.

I have continued work on the upper structure. I opted to build everything following the instructions and doing sub assemblies but left off some items out of fear I would damage them by handling. Some tiny parts, like the quad 20mm mounts, are very fiddly and very difficult to align, and there was a bit of flash cleanup as well. There are also some ejector pins to remove from the underside of many of the platforms. Step 6:

IMG_0238 by russell amott, on Flickr
IMG_0239 by russell amott, on Flickr
IMG_0240 by russell amott, on Flickr
IMG_0241 by russell amott, on Flickr
IMG_0242 by russell amott, on Flickr
IMG_0243 by russell amott, on Flickr
IMG_0244 by russell amott, on Flickr
IMG_0245 by russell amott, on Flickr
IMG_0246 by russell amott, on Flickr

Step 7 is the top of the citadel and radar structure. Crows nest? I followed the instructions carefully but were I to do it again I would install only the small inner details and assemble the whole structure and then finish off with all the details. All of the sections, with lots of fragile detail, make it very difficult to assemble without damage while getting enough pressure to set the parts together.

IMG_0247 by russell amott, on Flickr
IMG_0248 by russell amott, on Flickr
IMG_0249 by russell amott, on Flickr
IMG_0250 by russell amott, on Flickr
IMG_0251 by russell amott, on Flickr

There were very few parts knocked off in shipping and only a couple that were damaged. These vent stacks were an exception with one being snapped. There is a picture of how they should look as seen from below so you know how to line them up. There are two support beams that reach out from a lower level to the same overhang that these sit under. They are installed in an earlier step so I had to carefully thread them into place. I added the lower section of the broken piece and then attached the upper section.

IMG_0252 by russell amott, on Flickr
IMG_0253 by russell amott, on Flickr
IMG_0254 by russell amott, on Flickr

German ships were designed to have a lower overall profile and much effort went into creating a simplified structure while including redundancies. Much of the design was a holdover from the WW1 Bayern class with modern improvements. It also served to limit weight and provided a streamlined appearance in comparison with contemporary ships. Step 8 is the assembly of the single stack and structure. There are two search lights in protected half-dome covers at the top rear of the structure. I would guess the dome was more for protection against smoke from the stack as it is at the rear of the structure. With the domes in place the lights inside are completely hidden. As I look at the instructions I see that I forgot to install part 0-44, so I will have to go back and add that.

IMG_0255 by russell amott, on Flickr
IMG_0256 by russell amott, on Flickr
IMG_0257 by russell amott, on Flickr
IMG_0258 by russell amott, on Flickr

Step 9 was the assembly of the citadel structure. Step 10 adds the stack structure to the citadel and the hangars and boats. I will need to paint the boats before they are installed. I also need to paint the dark gray decking aft of the hangars. This structure is a weeks worth of work. I can only wear the opti-visor for so long before eye strain starts to get to me and I need to stretch my legs.

IMG_0259 by russell amott, on Flickr
IMG_0260 by russell amott, on Flickr

Next up will be finishing the hangars and boats and adding all the rest of the details to the structure and doing some touch up with the paint. Then the rear of the citadel structure and finishing the deck. My plan is to add these to the deck and then install it to the hull. Test fitting several times has shown a good and tight fit with the hull and so far it has been easier to place things on the hull while it is flat against the cutting mat. Again, comments, corrections and tips are welcome and needed. I haven't done as many ships as other subjects, but a kit like this is a confidence builder because the detail looks so good.
d6mst0
#453
Visit this Community
Texas, United States
Joined: August 28, 2016
KitMaker: 1,925 posts
Model Shipwrights: 1,298 posts
Posted: Sunday, July 19, 2020 - 09:48 AM UTC
Russ,

Shaping up nicely, she sure has a lot of detail I can see why it would take of week for one assembly.

Mark
JJ1973
#345
Visit this Community
Niedersachsen, Germany
Joined: August 22, 2011
KitMaker: 1,835 posts
Model Shipwrights: 1,832 posts
Posted: Thursday, July 30, 2020 - 09:34 AM UTC
Hi Russ,

that's absolutely amazing, this kit in this scale. As a 1/350 scale builder just now doing my first ever 1/700 build and really struggling with its tininess what you are doing here is just amazing. And the kit really seems to be fantastic!
I'm in and following with great interest!

Cheers
Jan
Kevlar06
Visit this Community
Washington, United States
Joined: March 15, 2009
KitMaker: 3,670 posts
Model Shipwrights: 173 posts
Posted: Thursday, July 30, 2020 - 10:45 AM UTC
An excellent build so far Russ. I think the detail in this kit rivals the detail in the much larger Tamiya 1/350 offering. I haven’t built many ships lately, but your build of this kit is causing me to look closely at that corner of my stash!
VR, Russ
RussellE
#306
Visit this Community
Victoria, Australia
Joined: June 27, 2010
KitMaker: 3,959 posts
Model Shipwrights: 2,777 posts
Posted: Sunday, August 02, 2020 - 12:07 AM UTC
amazing work on an amazingly tiny kit!

Nice progress, Russ
russamotto
Visit this Community
Utah, United States
Joined: December 14, 2007
KitMaker: 3,389 posts
Model Shipwrights: 151 posts
Posted: Sunday, August 02, 2020 - 06:07 AM UTC
Mark, Jan, Russ and Russell, thank you. Progress has been a little slow but your comments have been encouraging.

I have spent some time researching small details and working on getting the hull painted. I was looking for information on the color of the ships boats, turret tops and 38cm gun barrels. I have seen the boats painted white or gray with black or red bottoms. Most seem to indicate a black bottom and the same light gray as the superstructure with mahogany finish on the wood. They are tiny and details are freehand. It looks like the turret tops were painted on the 22nd after Bismarck was underway, along with the identification bands on the decks. I have also been reading through this document: https://www.yumpu.com/en/document/read/12480849/the-wreck-of-dkm-bismarck-a-marine-forensics-analysis-1-the-

As far as actual building, steps 12 and 13 are the rear superstructure. Lots of tiny details to add around the sides. I placed what I could and then added the additional deck layers. While that set I built the rear 10.5cm anti-aircraft mounts which are different from the foreward mounts. I added more of the details around the forward superstructure and then placed the rear build up to the deck. Question for those in the know, what would the color of the hoses on the reels be?

IMG_0261 by russell amott, on Flickr
IMG_0262 by russell amott, on Flickr
IMG_0263 by russell amott, on Flickr
IMG_0264 by russell amott, on Flickr
IMG_0265 by russell amott, on Flickr
IMG_0266 by russell amott, on Flickr
IMG_0267 by russell amott, on Flickr
IMG_0268 by russell amott, on Flickr
IMG_0269 by russell amott, on Flickr
IMG_0270 by russell amott, on Flickr
IMG_0271 by russell amott, on Flickr
IMG_0272 by russell amott, on Flickr
IMG_0273 by russell amott, on Flickr

Once the two structures were in place I could add the catapult and the single etch piece in this boxing version. The etch part goes over the two plastic sections.

IMG_0274 by russell amott, on Flickr
IMG_0275 by russell amott, on Flickr

Started on the ships boats. It was easier to keep them on the sprues to get the details. I will get these done so they can be added to the hangars and get the deck and hull attached. I am worried that many details will be destroyed if I add too much before I get them attached.

IMG_0276 by russell amott, on Flickr
d6mst0
#453
Visit this Community
Texas, United States
Joined: August 28, 2016
KitMaker: 1,925 posts
Model Shipwrights: 1,298 posts
Posted: Sunday, August 02, 2020 - 11:26 PM UTC
Russ,

She is shaping up nicely. I amazed with all the detail for a kit of that scale. You would think you are assembling a Dragon kit.

Mark
RussellE
#306
Visit this Community
Victoria, Australia
Joined: June 27, 2010
KitMaker: 3,959 posts
Model Shipwrights: 2,777 posts
Posted: Monday, August 03, 2020 - 01:22 AM UTC
Russ the details on this kit are incredible...

It makes me wonder what their first 1/350 effort will be like (HMS Prince of Wales)...

Meanwhile, your efforts are paying off as she comes together
russamotto
Visit this Community
Utah, United States
Joined: December 14, 2007
KitMaker: 3,389 posts
Model Shipwrights: 151 posts
Posted: Monday, August 03, 2020 - 05:33 AM UTC
Mark and Russell, thank you. I have had to mark a lot of bits on the instructions that I am waiting to place until near the end of the build. There is a lot going on and some tiny parts are easy to miss.

The deck boats were removed before heading out into the Atlantic. Would the mounts and davits have been removed as well or kept in place?

1/350 would be packed with even more detail. It would be time consuming but the end result would be very impressive.
RussellE
#306
Visit this Community
Victoria, Australia
Joined: June 27, 2010
KitMaker: 3,959 posts
Model Shipwrights: 2,777 posts
Posted: Monday, August 03, 2020 - 02:48 PM UTC

Quoted Text

Mark and Russell, thank you. I have had to mark a lot of bits on the instructions that I am waiting to place until near the end of the build. There is a lot going on and some tiny parts are easy to miss.

The deck boats were removed before heading out into the Atlantic. Would the mounts and davits have been removed as well or kept in place?

1/350 would be packed with even more detail. It would be time consuming but the end result would be very impressive.


Sorry Russ, can't help with the fit out prior to her leaving on her final mission...

I'm hoping Flyhawk get around to releasing a 1/350 HMS Illustrious at some point...
JJ1973
#345
Visit this Community
Niedersachsen, Germany
Joined: August 22, 2011
KitMaker: 1,835 posts
Model Shipwrights: 1,832 posts
Posted: Friday, August 07, 2020 - 09:03 AM UTC
Russ,

absolutely impressing. I'd never think this is 1/700!! And your work is spot on, great attention to detail. Even though I'm quite interested in Bismarck, your questions (hose reel; mounts and davits for the boats) really go into depth. I hav no idea about the hose reel but would expect that the mounts and davids for the boats would have left in place.

Cheers
Jan
TimReynaga
Staff MemberAssociate Editor
MODEL SHIPWRIGHTS
Visit this Community
California, United States
Joined: May 03, 2006
KitMaker: 2,500 posts
Model Shipwrights: 1,830 posts
Posted: Friday, August 07, 2020 - 12:47 PM UTC

Quoted Text

The deck boats were removed before heading out into the Atlantic. Would the mounts and davits have been removed as well or kept in place?


Russ, numerous photos of Bismarck in the Grimstadfjord, Norway on the morning of 21 May 1941 show the boats still in place; my guess is that the Germans hurriedly removed them but planned to remount them after the sortie, so the non-flammable davits and mounts would likely have been retained aboard.
TimReynaga
Staff MemberAssociate Editor
MODEL SHIPWRIGHTS
Visit this Community
California, United States
Joined: May 03, 2006
KitMaker: 2,500 posts
Model Shipwrights: 1,830 posts
Posted: Friday, August 07, 2020 - 12:50 PM UTC
By the way, have you seen the Bismarck http://www.kbismarck.com/ site? Very cool info there.
russamotto
Visit this Community
Utah, United States
Joined: December 14, 2007
KitMaker: 3,389 posts
Model Shipwrights: 151 posts
Posted: Friday, August 07, 2020 - 01:14 PM UTC
Thank you for answering my question. It helps a lot to have more minds than mine involved. Tim, I have been using Kbismarck quite a bit. The other reference site I had been using, Bismarck-class.de is no longer available. I haven't had any time to work on it this week because work has been so hectic and I have been too worn out when I get home. In spite of that, I have been recommending that my co-workers take up modeling as a way to unwind and refocus their minds on something constructive.
 _GOTOTOP