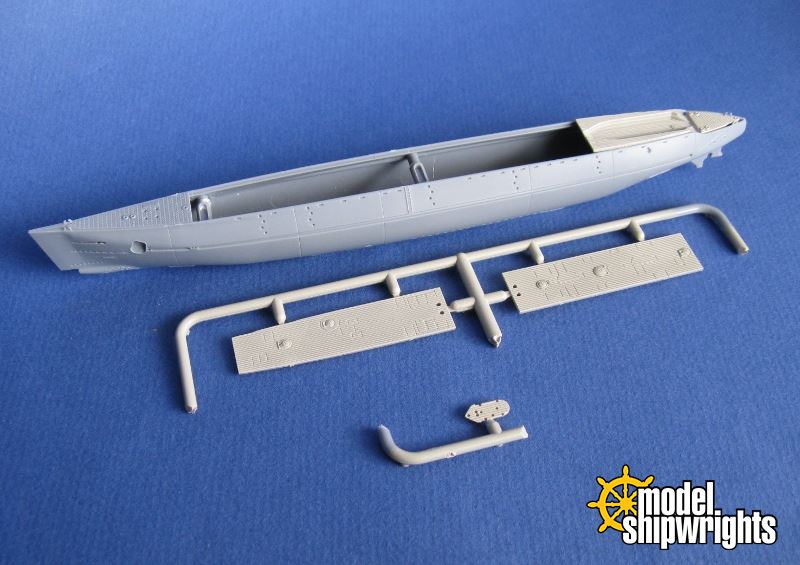
_GOTOBOTTOM
Ships by Class/Type: Submarines
Topics on submarines of all types and eras.
Building I-365
JPTRR
Staff MemberManaging Editor
RAILROAD MODELING
#051
Visit this Community
Tennessee, United States
Joined: December 21, 2002
KitMaker: 7,772 posts
Model Shipwrights: 476 posts
Posted: Thursday, February 13, 2014 - 11:04 AM UTC
Seadogs,

I have laid the keel of I-365. It is Aoshima's 1/350 IJN cargo sub. A nicely molded full hull kit with good detail and fine parts. It comes with a plastic stand.

Jumping right into it, the hull is two halves without decks. Aoshima engineered it with three spacers under the deck; two bases for the stand; an internal frame to attach the dive planes into (not seen dueto bow deck).

The bases for the stand are the square black pieces. They fit into the hull halves with tabs and are molded with hexagonal interiors for nuts, then capped with, well, caps. Aoshima forgot to show the hex nuts in the instructions. What they did show is the requirement to carve holes (or drill if the halves are joined) into the hull for the screws to enter.
JPTRR
Staff MemberManaging Editor
RAILROAD MODELING
#051
Visit this Community
Tennessee, United States
Joined: December 21, 2002
KitMaker: 7,772 posts
Model Shipwrights: 476 posts
Posted: Thursday, February 13, 2014 - 01:02 PM UTC
On the stern the hull halves are marred by sprue attachments that create a lip. Carve these off. Otherwise hull fit was good except for the middle half of the hull. I used CA to bond glue the halves and to fill gaps.

Honestly, I don't think I will even sand that excess CA away as who's going to see it?

The bow halves are very thin. They fit well and a shot of liquid glue should completely obliterate the hairline seam.


It is very cold and snowy outside so I am using liquid glue sparingly because I don't want to smell it. The top of the bow left a noticeable gap.

I think that is because the dive planes mount may need trimming. Regardless, I believe if liquid glue was used, it would have melded shut. I am not concerned that filling it will be a problem.

You can barely see the dive plane slot in this view.


I also attached the bow deck. This is a fit problem. Aoshima molded these parts thin and they molded a slight lip inside the gunwales, but where the lips come together at the bow, they rise. I achieved a flush fit after carving away the plastic under the tip of the deck.


This is where I left assembly today: hull is joined and bow deck inserted; wooden deck segments painted tan.

Note the interesting aft deck piece with a bay to carry a dihatsu, the ubiquitous barge. It is molded with both wooden and steel decking.


Examining the instructions I note that there is relatively few other sub-components to assemble. The main one is the conning tower which has two halves, a deck, and many scopes and vertical goodies to insert. Otherwise, the majority of assembly will be attaching numerous posts and masts and antennas, deck fittings, and guns. These will require drilling out locating dimples under the deck sections. (Such a minor effort but one that I despise! )


More to come!
TimReynaga
Staff MemberAssociate Editor
MODEL SHIPWRIGHTS
Visit this Community
California, United States
Joined: May 03, 2006
KitMaker: 2,500 posts
Model Shipwrights: 1,830 posts
Posted: Thursday, February 13, 2014 - 04:18 PM UTC
Cool, I'm glad to see someone taking this one on. I have the sister I-370 (with Kaiten) in my stash and on my to-do list, so I'll be watching your build with interest!
http://www.1999.co.jp/eng/image/10242464p/10/1

Gremlin56
Joined: October 30, 2005
KitMaker: 3,897 posts
Model Shipwrights: 3,301 posts
Posted: Thursday, February 13, 2014 - 05:32 PM UTC
It is a very unusual subject Frederick, it will be interesting to follow your progress,
surfsup
Visit this Community
Queensland, Australia
Joined: May 20, 2010
KitMaker: 1,230 posts
Model Shipwrights: 1,212 posts
Posted: Thursday, February 13, 2014 - 06:43 PM UTC
Nice and interesting. Watching with interest.....Cheers mrk
RedDuster
Visit this Community
England - South East, United Kingdom
Joined: March 01, 2010
KitMaker: 7,078 posts
Model Shipwrights: 6,649 posts
Posted: Sunday, February 16, 2014 - 09:12 AM UTC
Very interesting looking beast Frederick, good progress so far, following with interest.

Si
JPTRR
Staff MemberManaging Editor
RAILROAD MODELING
#051
Visit this Community
Tennessee, United States
Joined: December 21, 2002
KitMaker: 7,772 posts
Model Shipwrights: 476 posts
Posted: Thursday, February 27, 2014 - 04:18 PM UTC
Ahoy!

Hey, two weeks have passed, so I must have installed a complete scratchbuilt interior, right?

Too much pondering and too little ventilation. However, here's the conning tower sans scopes and antennas. Also, filling the bow seam. The most complex part are the propulsion shafts. Separate stern tube bearing fairings with tiny tabs which fit into shallow slots on a round hull; fine tabs and slots for the strut supports, and separate shafts. Tricky, even with CA.


The dual 'horn' mount on the conning tower is a Mark 2 Model 2 surface search radar.


The dihatsu is a tricky little rascal. A deck, separate sides and stern and bow, and a lower hull. Very thin retaining tabs. I think my liquid glue is bad because the plastic is not welding like it should. Regardless, plenty of clamps will have it "Bristol rigged"!

JPTRR
Staff MemberManaging Editor
RAILROAD MODELING
#051
Visit this Community
Tennessee, United States
Joined: December 21, 2002
KitMaker: 7,772 posts
Model Shipwrights: 476 posts
Posted: Sunday, March 02, 2014 - 03:40 PM UTC
Paint time!

Tonight I airbrushed the sub with a few grays. Then as they cured, I wetted it up and sprayed on a few more. I want it to look blotchy. While still wet, I mixed up several variations of rusty wash, and 'flick brushed' it on. Looks like I'll need more rust and perhaps another round of grays, flicked on, of course.
Just hope I can make the non-fouling red look as ratty.


Hope to have the decks and various pipes and masts and scopes on tomorrow!
Grauwolf
#084
Visit this Community
Quebec, Canada
Joined: September 14, 2005
KitMaker: 2,485 posts
Model Shipwrights: 1,157 posts
Posted: Sunday, March 02, 2014 - 03:56 PM UTC
Looking good!

Cheers,
Joe
JPTRR
Staff MemberManaging Editor
RAILROAD MODELING
#051
Visit this Community
Tennessee, United States
Joined: December 21, 2002
KitMaker: 7,772 posts
Model Shipwrights: 476 posts
Posted: Monday, March 03, 2014 - 12:42 AM UTC
I'll paint the anti-fouling today and have a question.

I presume that the red primer used below the waterline was a particularly corrosion resistant paint.

If so, to what degree would it weather (chip, strip, discolor) compared to paint used above the boot? Then, I would presume that the entire sub would be so primed, then the gray camouflage applied. Thus, if so, then I should have some red primer showing under the gray - I didn't think of that last night.

That said, the WW2 color photos I've seen of USN ships do not seem to show anything behind/through the grays, blues and blacks other than good old rust.

Comments?
JPTRR
Staff MemberManaging Editor
RAILROAD MODELING
#051
Visit this Community
Tennessee, United States
Joined: December 21, 2002
KitMaker: 7,772 posts
Model Shipwrights: 476 posts
Posted: Tuesday, March 04, 2014 - 07:18 PM UTC
Ahoy!

OK, so I mixed up the paint. Charged the air tank. Hooked up the airbrush hose. On the tellie The Blacklist went to commercial and I scooted out the door with the airbrush, paint, thinner, and prepped model components.

It was 20°F but I quickly mixed the paint with the thinner (kept warm in my hoodie pocket) and started spraying. First a very thin coat to seal the edge of the tape. Move everything back in as the commercials end. Let dry. Next commercial and let loose the dogs of modeling! It was challenging in the cold; I had to keep bumping up the psi as the paint - more like a wash - cooled. Yet five or six coats later...


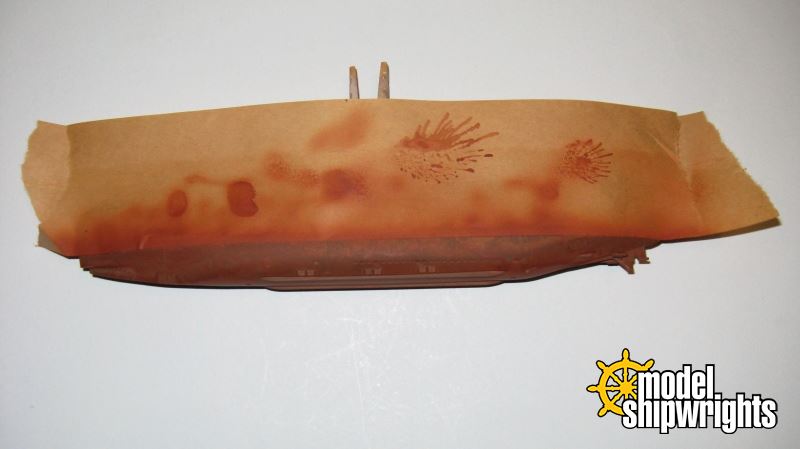
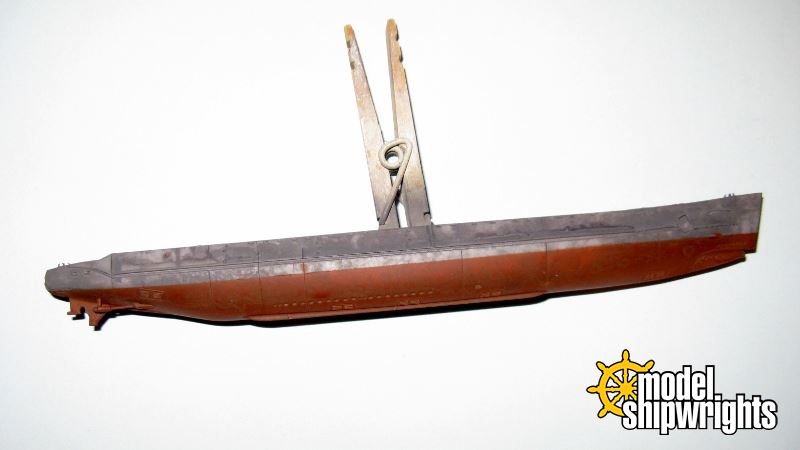
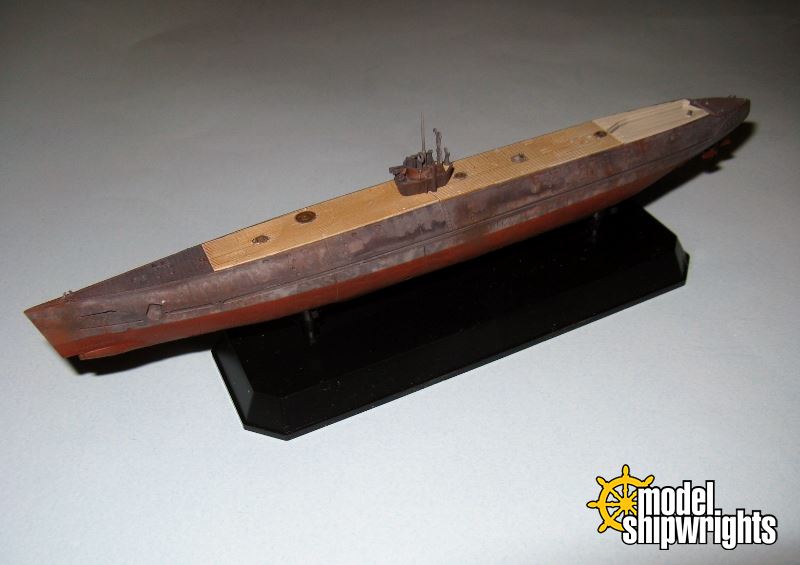
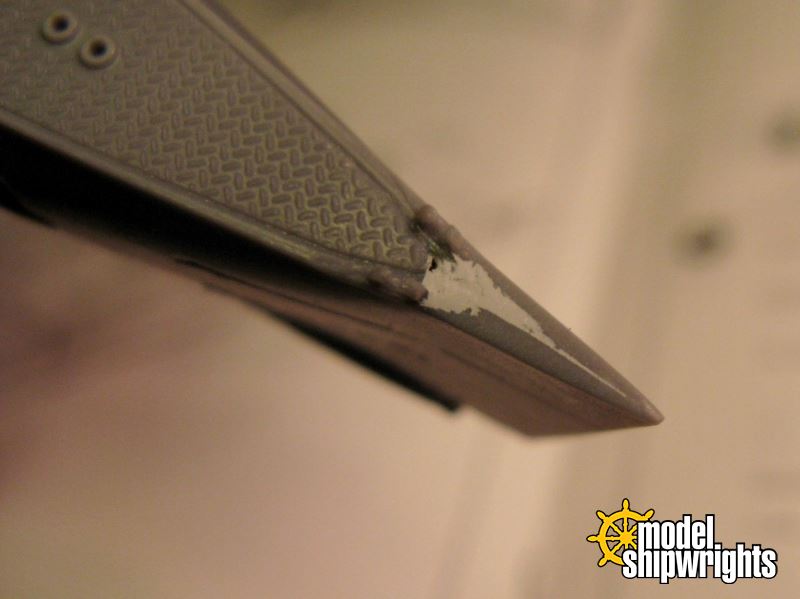
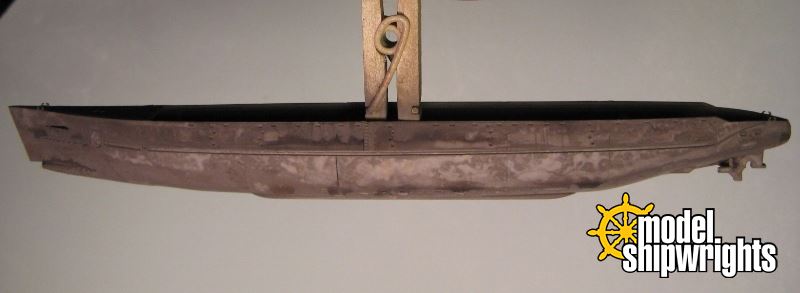
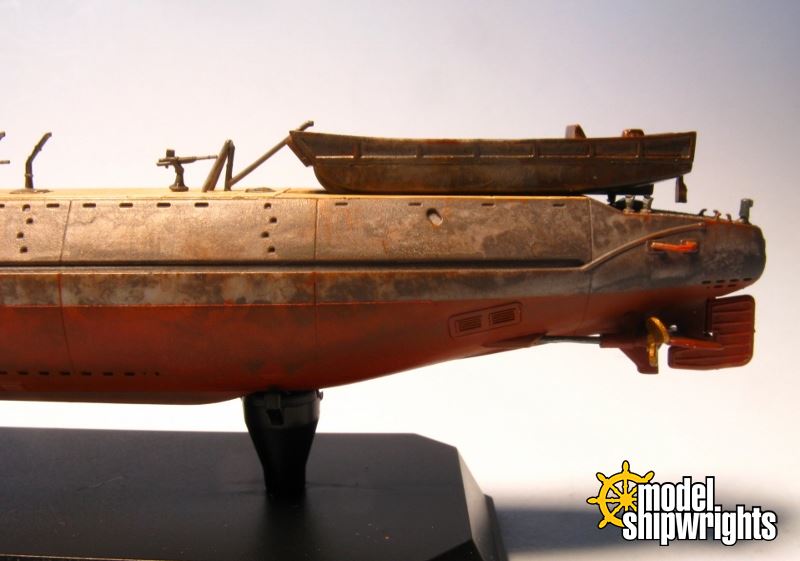
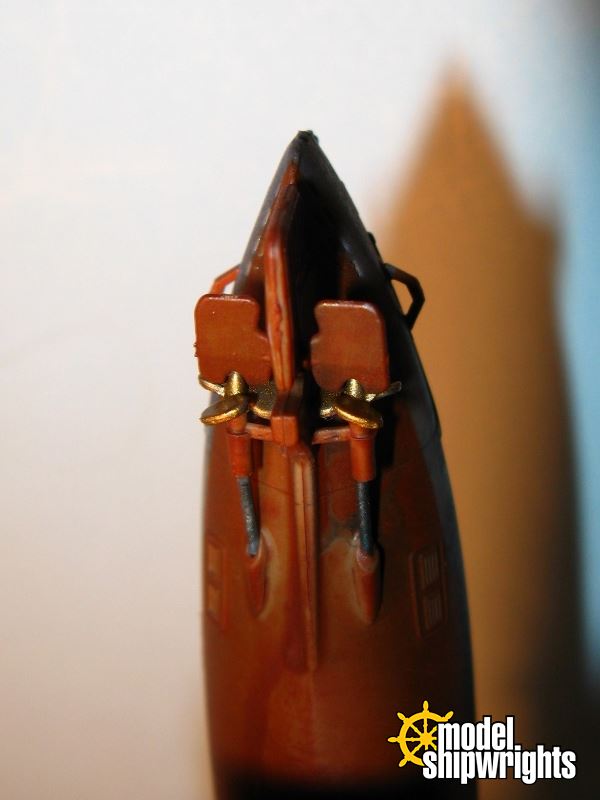
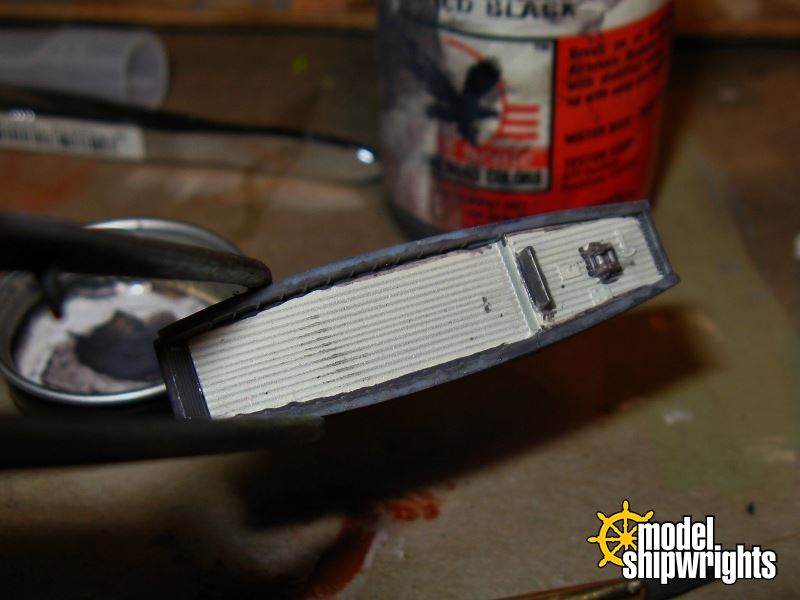
I have mixed feelings on my technique. I planned for the gray splotchy underpaint to slightly discolor the anti-fouling red, thus I did not prime below the waterline and used many thin coats. Overall I think it looks satisfying.

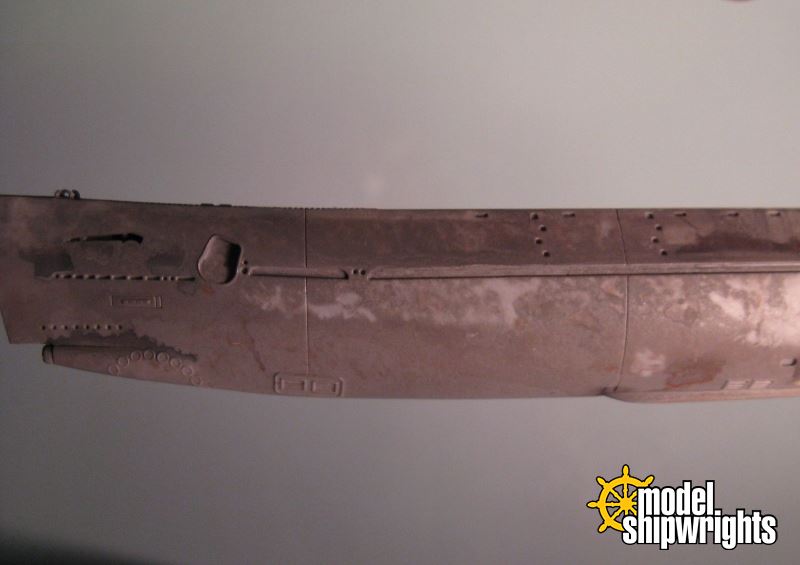
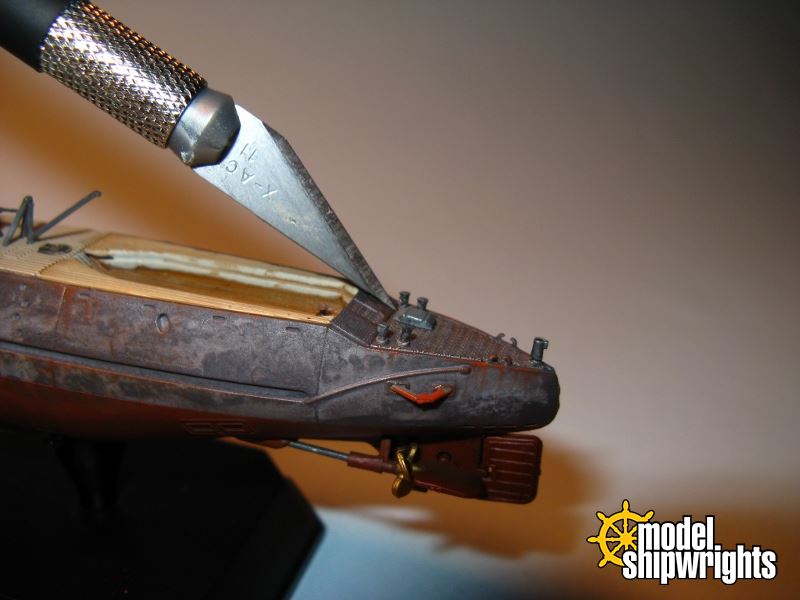
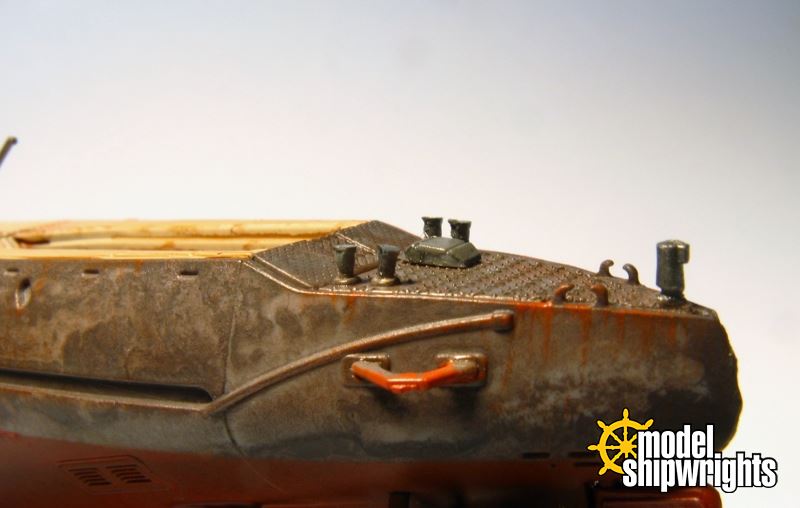
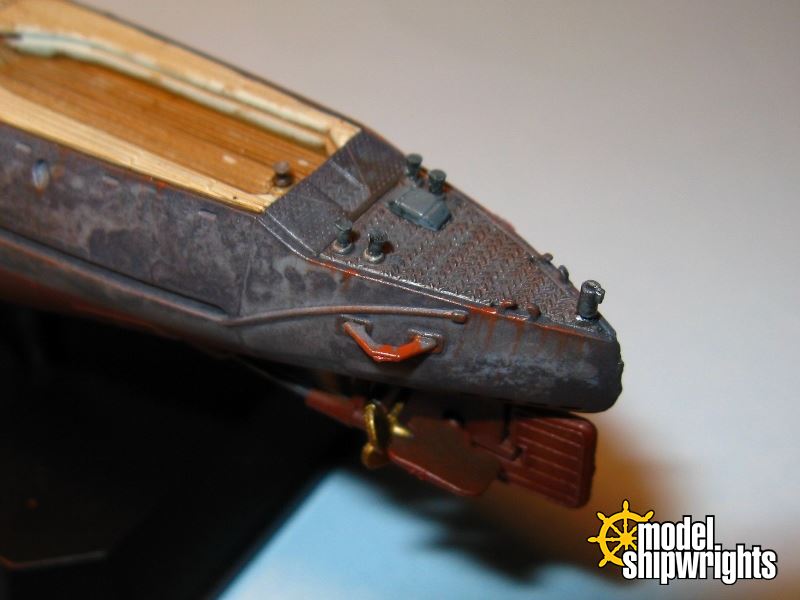
The tape removed it is time to start rusting the ol' shark up. I mixed up my very thin wash for 'spatter brushing':


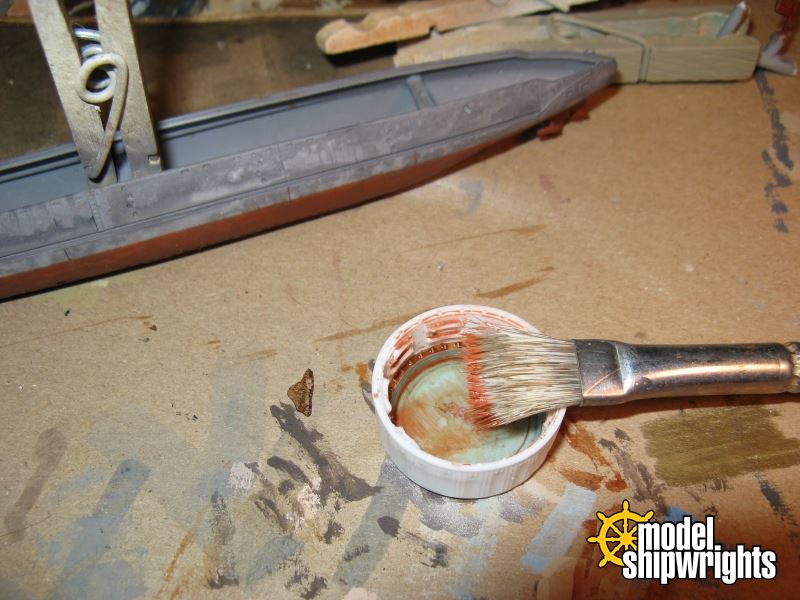
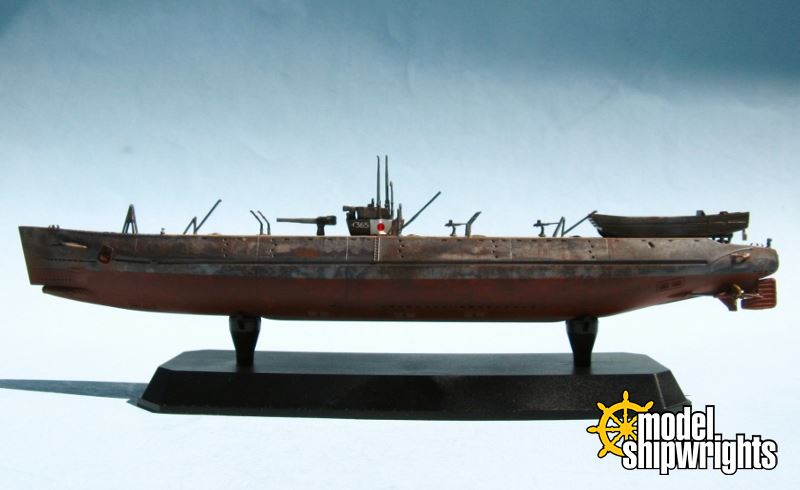
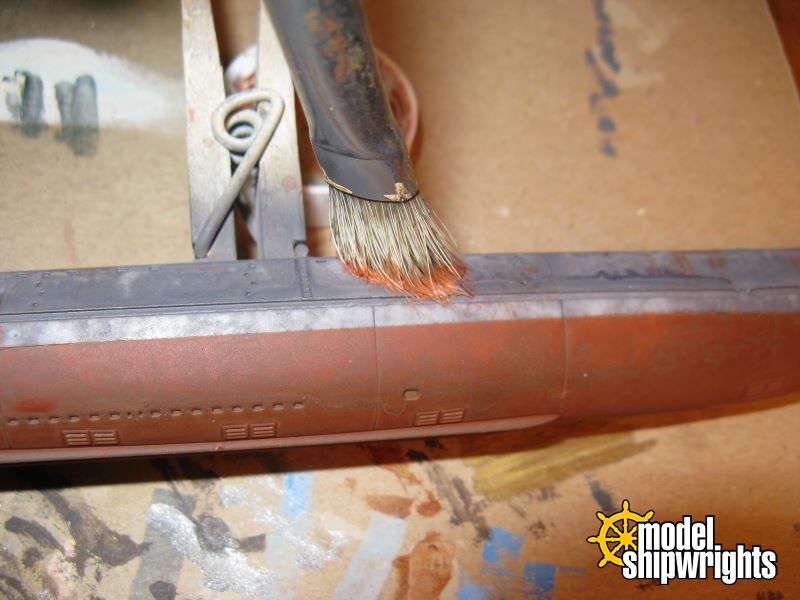
...followed by using various rusty colors straight from the bottles and pots. I kept them thick to stipple and grind them into the hull, even streaking a bit here and there:


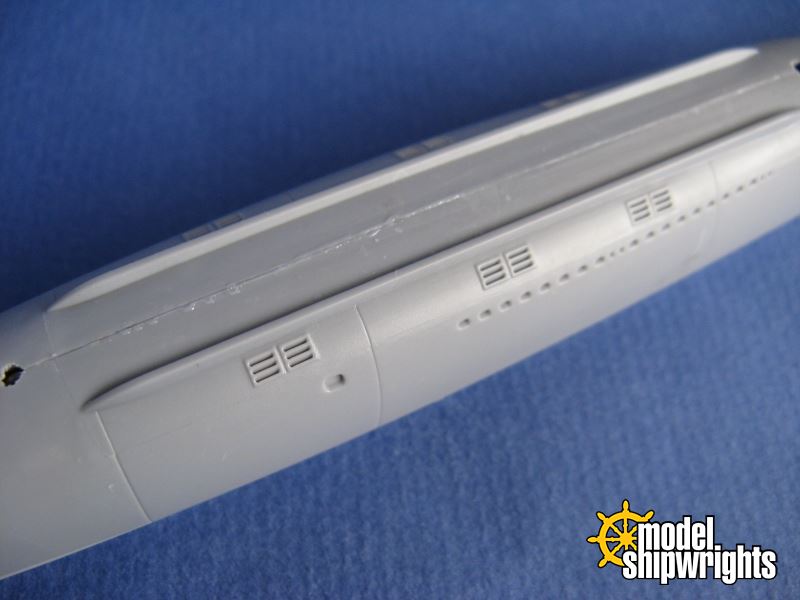
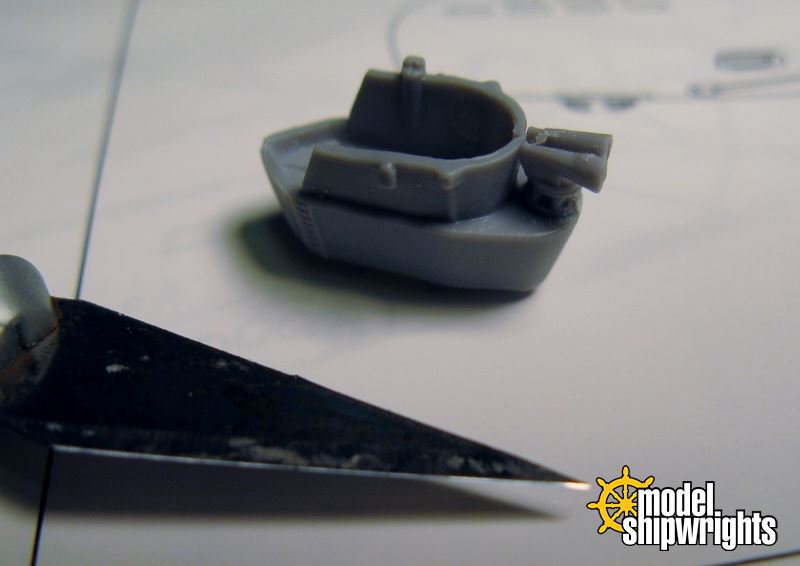
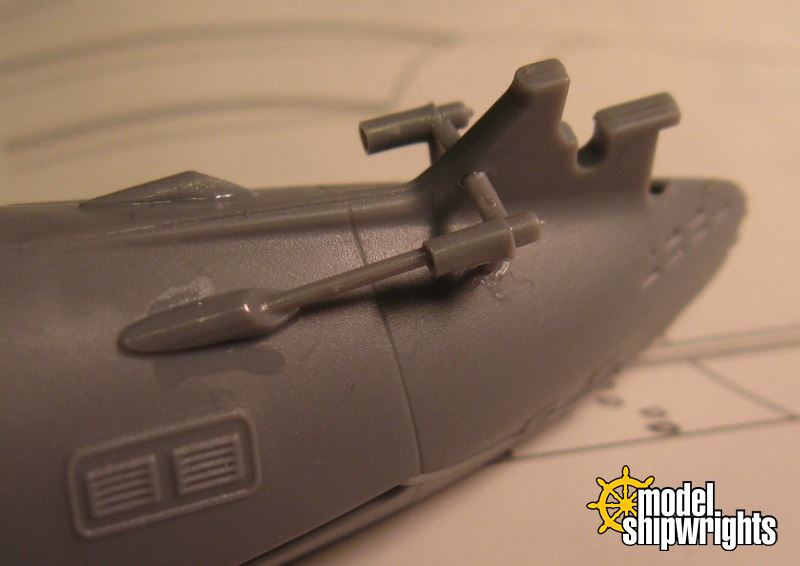
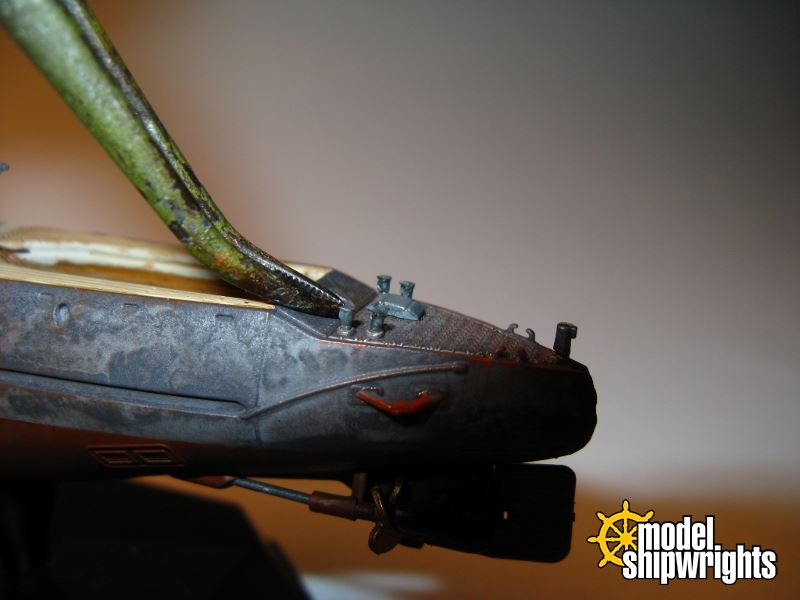
While it dried and the paint cured, I assembled the conning tower. This little rascal is small, but not as small as several of the periscopes and other equipment mounted on the weather deck. Inside the con are the only visible ejector circles I found. Perhaps the (kelp?) forest of plastic will obscure them?


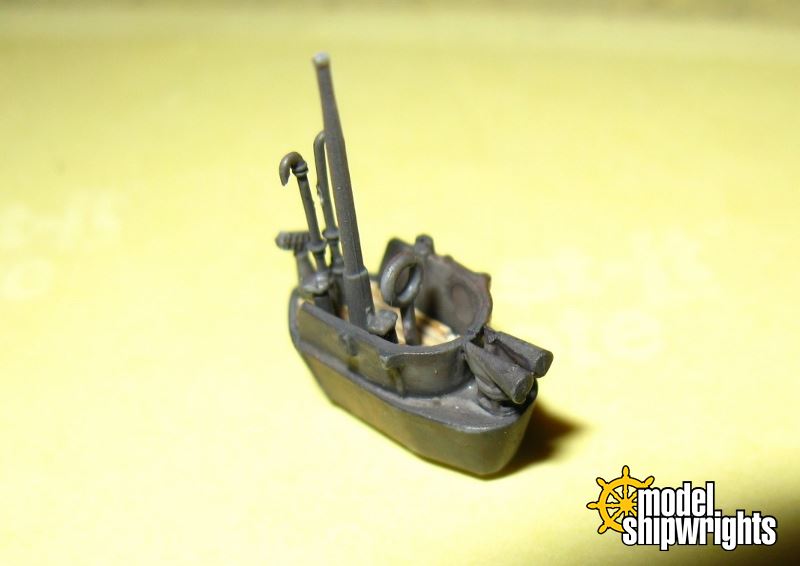
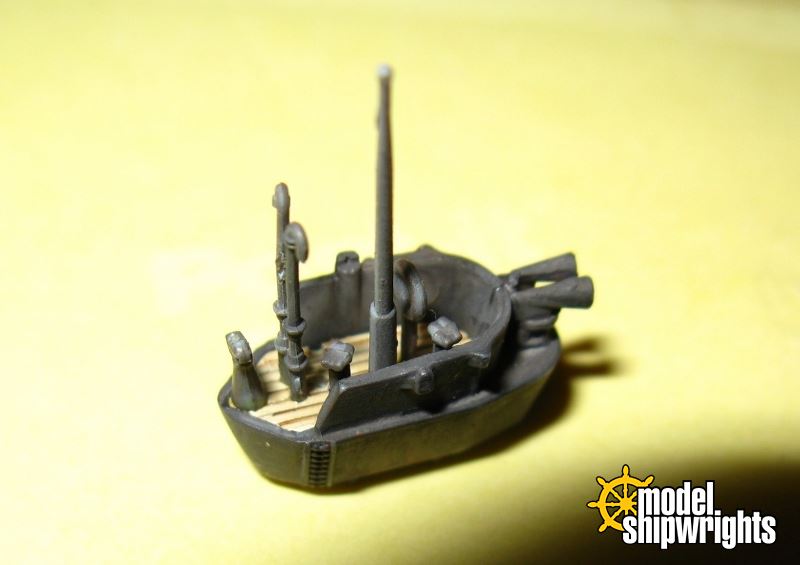
The diagonal apparatus held on the pedestal at the rear of the con deck is the passive radar.

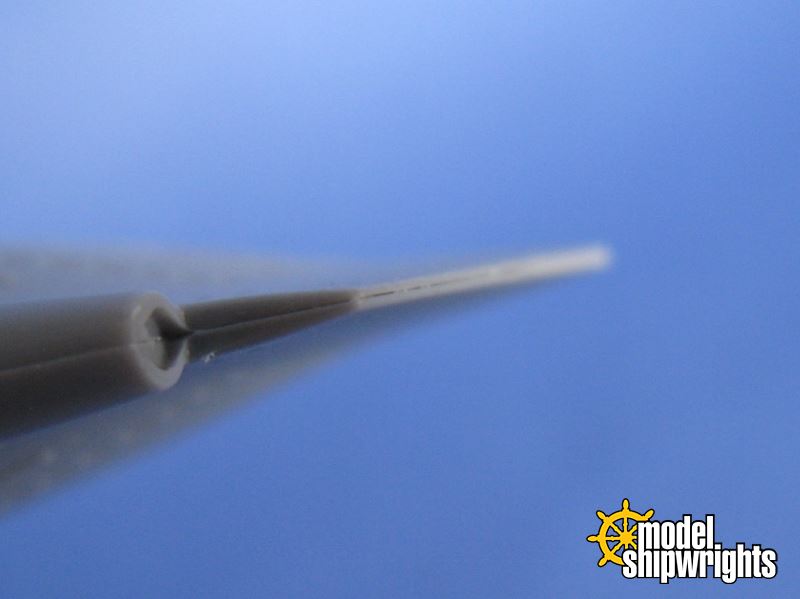
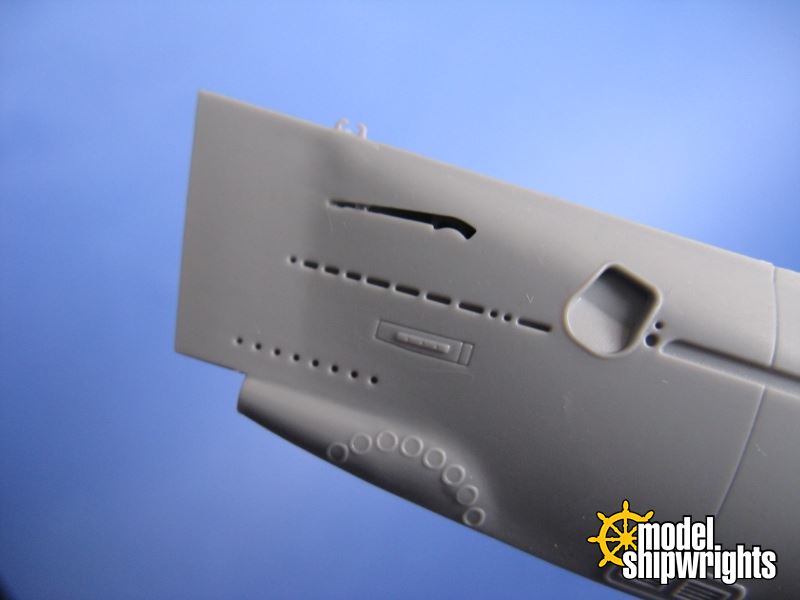
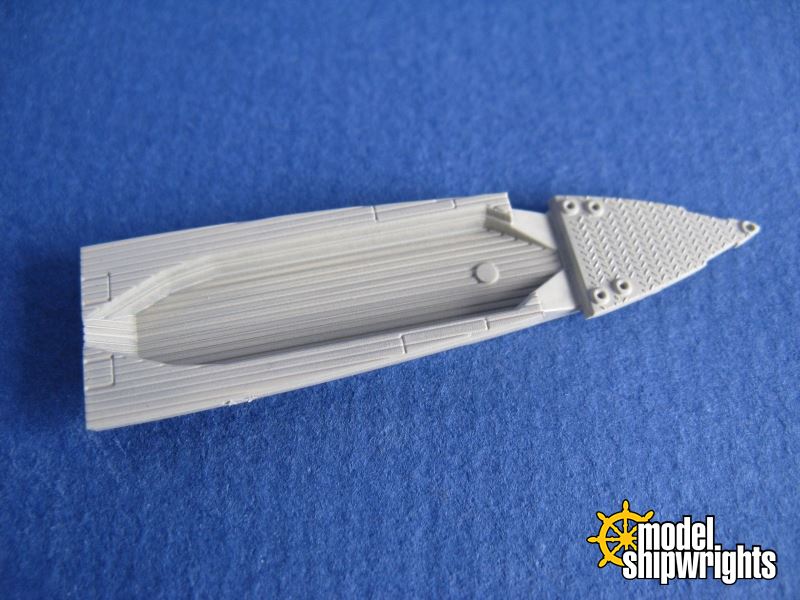
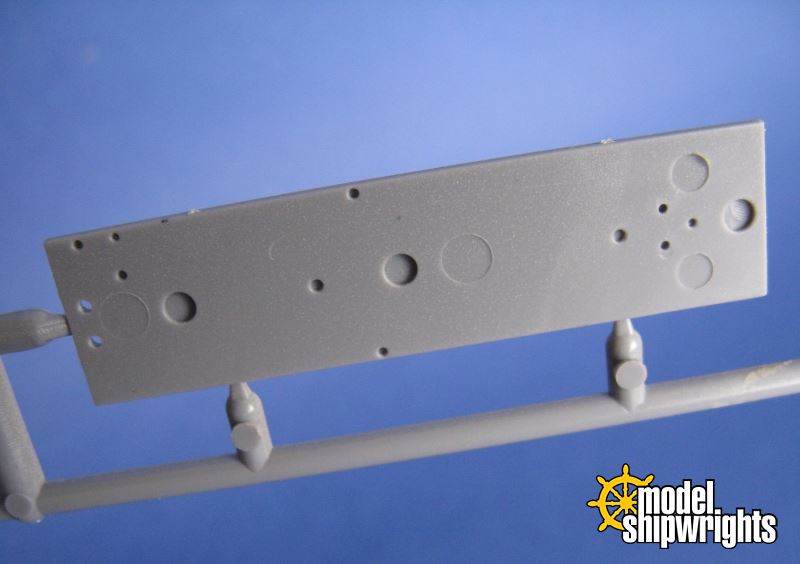
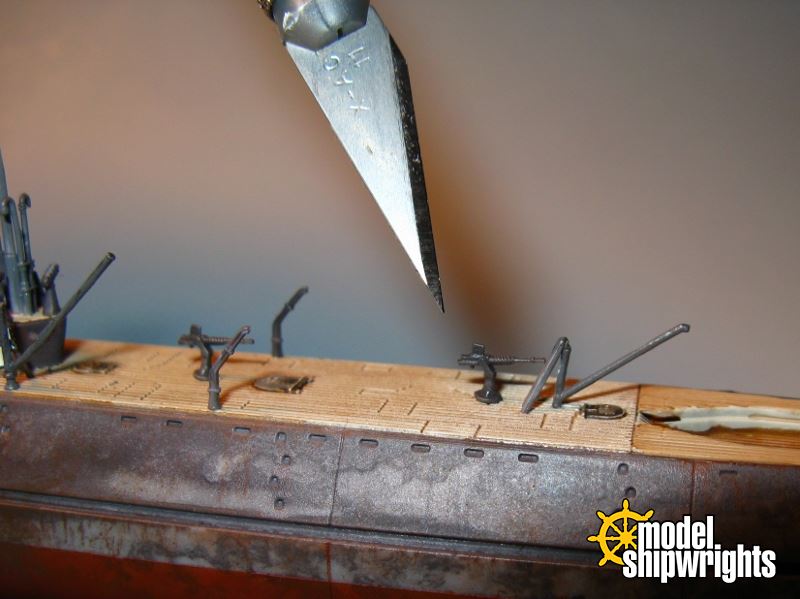
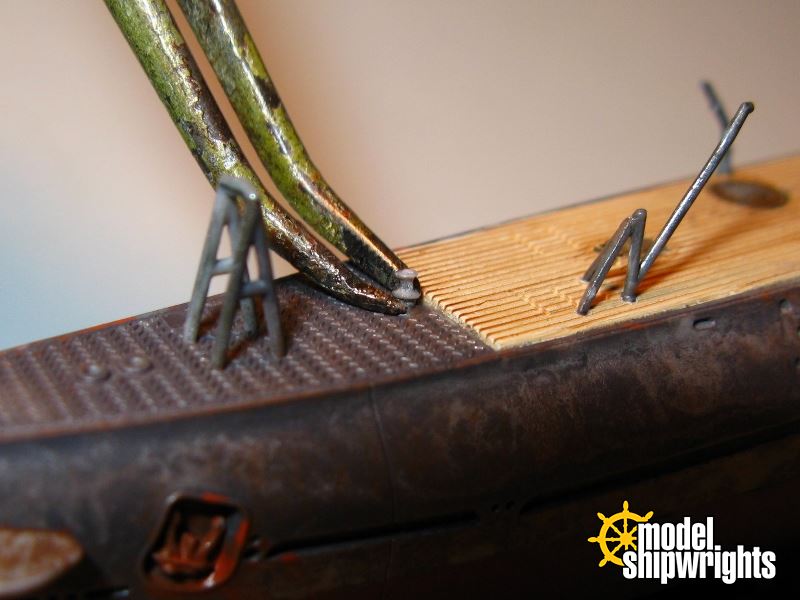
While those dried, I (hesitantly - I really like my clean bright decks) stained the decks with a mixture of umber artist ink mixed with diluted Vallejo Matt Finish. I also drilled out the many .4mm holes required to insert the .4mm masts and fittings.


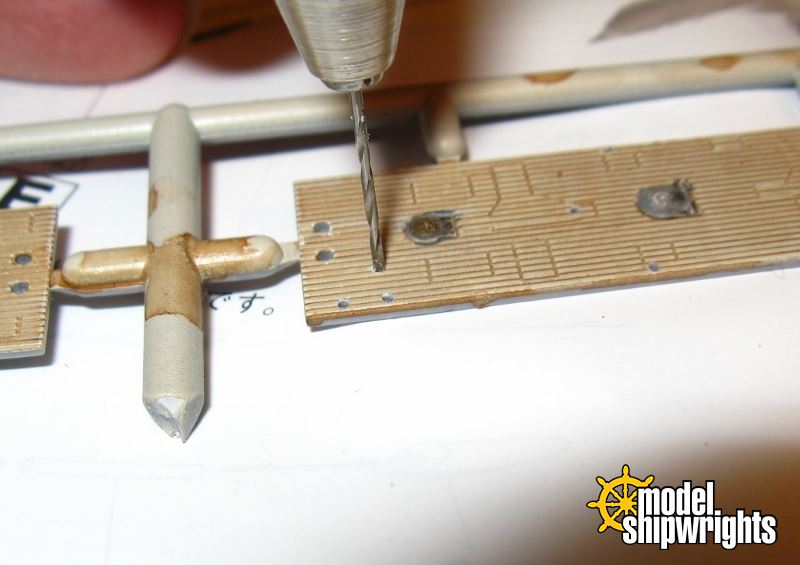
The wash also helped obfuscate the slight paint slops I made yet could not clean up when I painted the deck hatches. The aft deck is not (yet) stained. Ain't that pretty - see why I didn't want to do it?

(Think I could get way with saying the crew loves to holystone the deck around the daihatsu?)

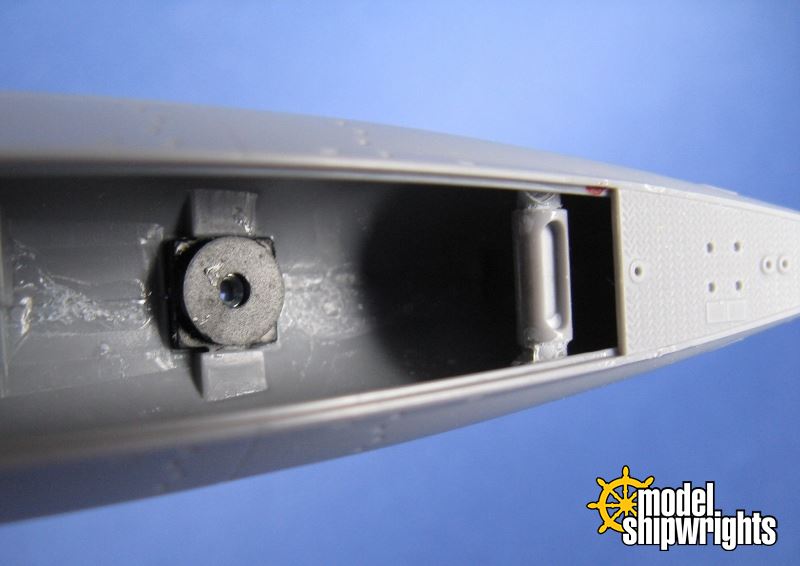
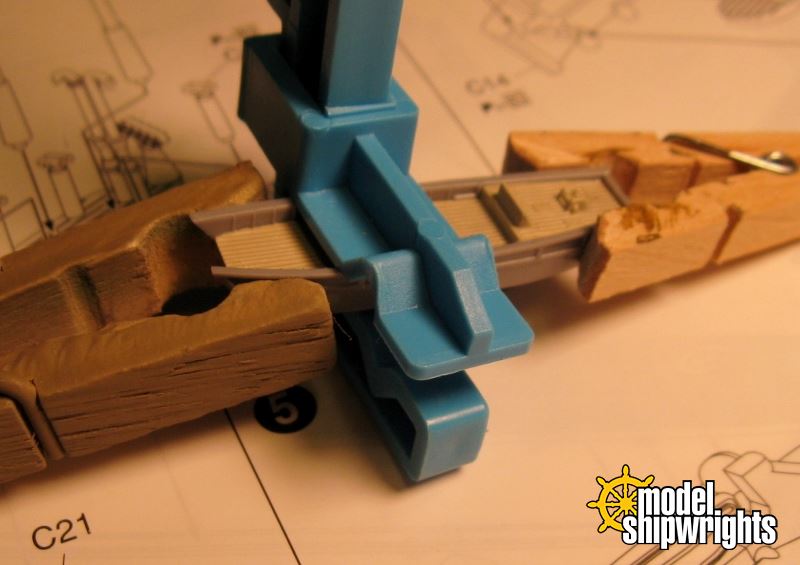
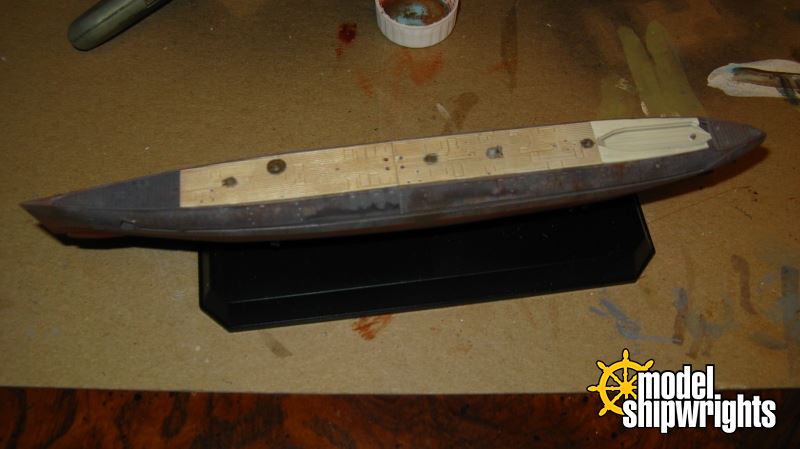
In the meantime I decided to assemble the stand. CA does not bind that plastic well for some reason. Fortunately the screws mated to the nuts inside the hull and held everything tight. I did this because it will make mitigate my fingerprints and clumsiness when working with the model.

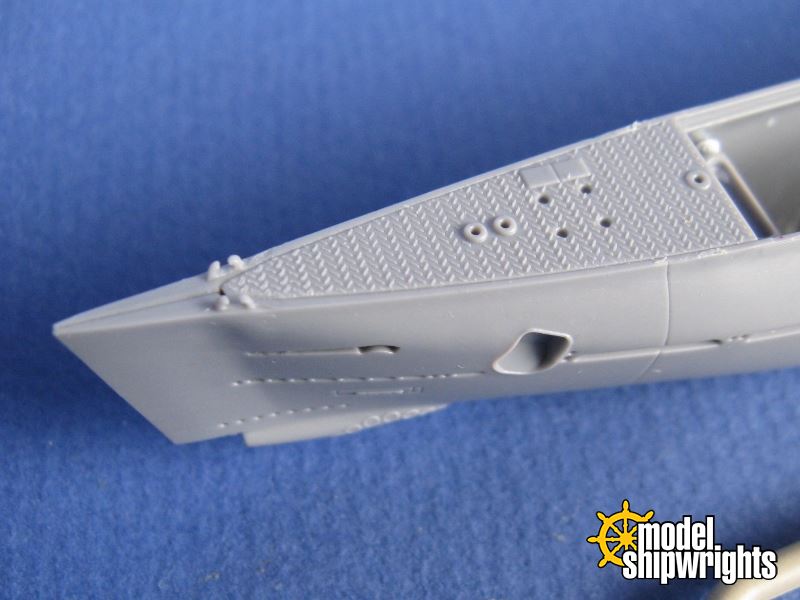
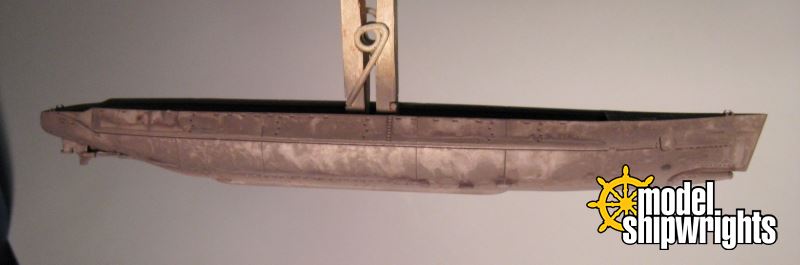
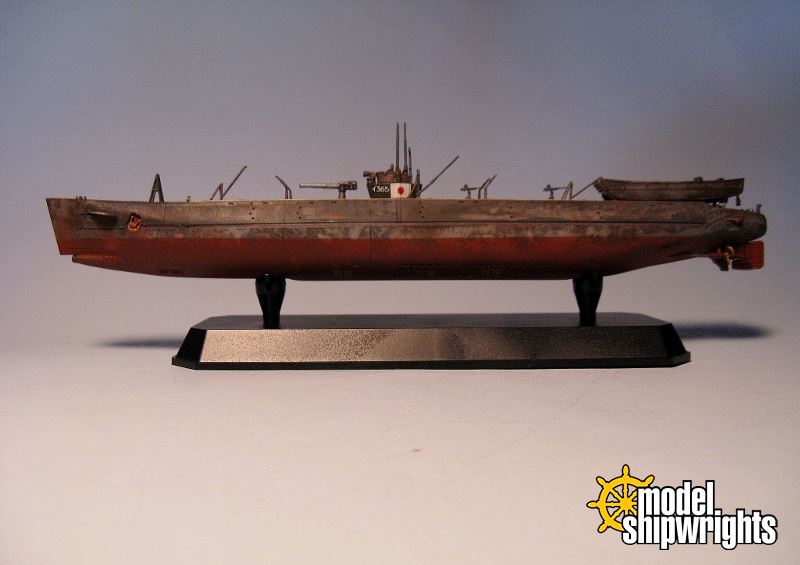
I set the decks in to test-fit. I even added the incomplete conning tower. It will be about a week until I can return to I-365, until then I leave you with this view to whet your appetite!

JPTRR
Staff MemberManaging Editor
RAILROAD MODELING
#051
Visit this Community
Tennessee, United States
Joined: December 21, 2002
KitMaker: 7,772 posts
Model Shipwrights: 476 posts
Posted: Monday, March 10, 2014 - 11:38 AM UTC
OK, I'm back from about 2 weeks on the road! Back to work on my Sensuikan.

When I left I test-fit the decks. I was bothered by not being able to get the decks flush with the gunwales. I popped them out and carefully reseated the rear piece, inspecting how it set on the retaining lip inside the hull. (Tight and snug.) Then I noticed something - the decks are molded with a very slight overlap along their edges.


While I can't find any photographic evidence, I believe the ship was constructed with the deck planking above the gunwales. Whether this was prototype or Aoshima, I'll defer to the rest of you. With that I decided to cement the decks down.

However, I noticed the front amidships deck left too much gap between it and the rear amidships part. Another inspection revealed a slight burr where I nipped the part from the sprue.


I shaved that away and the deck parts mated up nicely. But the front lip was noticeable higher than the foredeck. It was too noticeable for me so I made a very light pass with sandpaper along the bottom edge of the front half. It settled to a much more acceptable step between the decking and the foredeck.

Now for a nap while the Tamiya Extra Thin dries outdoors in a warm breeze.
JPTRR
Staff MemberManaging Editor
RAILROAD MODELING
#051
Visit this Community
Tennessee, United States
Joined: December 21, 2002
KitMaker: 7,772 posts
Model Shipwrights: 476 posts
Posted: Thursday, March 13, 2014 - 09:53 AM UTC
Back at it! A flurry or late evening work. Tiny tweezers; fresh knives; magnifiers. What did that produce?

First, maybe it was a problem converting millimeter decimals into number-size bits? Regardless, the drill size indicated in the instructions did not open the holes in the deck enough to accept the mounting pegs for some parts. The Type 95 AAA guns needed to have their pegs cut off to attach flush to the deck.


Some of these parts are tiny! Look at this capstan.


One problem is revealed here. See the two little holes fore of the foremast? The instructions show these to be mounts for two capstans, labeled part C-30. C-30 is an entirely different part; sprue C is now bare. I searched sprue B but can find nothing that will go here. I wonder what Aoshima intended here?

These parts show that a very slight difference in molding can make assembly difficult. These little rascals are challenging to hold, let alone mount. Note these four stands on the stern;


These demonstrate a molding problem with the kit. Tiny as these four parts are, Aoshima chose to hold them to the sprue from the side. They are so small that even a thin attachment took up most of their side, resulting in blunting about a quarter of them, causing distortion.


Here's how they look attached.


With the daihatsu on them it is hard to notice.


What about that daihatsu? Check back soon!
JPTRR
Staff MemberManaging Editor
RAILROAD MODELING
#051
Visit this Community
Tennessee, United States
Joined: December 21, 2002
KitMaker: 7,772 posts
Model Shipwrights: 476 posts
Posted: Thursday, March 13, 2014 - 12:20 PM UTC
I meant to show some detail. The assemble of the propulsion system and fitting the screws into the aft dive planes is tricky, with tight clearances.


Ack! I see some burrs I didn't completely clean.
JPTRR
Staff MemberManaging Editor
RAILROAD MODELING
#051
Visit this Community
Tennessee, United States
Joined: December 21, 2002
KitMaker: 7,772 posts
Model Shipwrights: 476 posts
Posted: Thursday, March 13, 2014 - 12:46 PM UTC
Plenty of booms and masts and jibs on the deck. This gives an overview of what populates the deck.


You saw this image above; included again to show the size of the parts. I did indeed break one removing it from the sprue (But I ain't gonna tell which one!) and spliced it with another rod.


Keep in mind that the cranes are each 2-part assemblies. The foremast is also two pieces.

For those of you who tackle this model, figure out a way to capture these little parts. Also, don't built this over dark gray plush carpet like I did - have something to contrast any dropped parts.

These small parts are not brittle yet they require finesse to remove from the sprues. Pieces like the capstans require careful handling to even hold and place. Try to remove them from the sprue as cleanly as possible so that you have minimum cleanup. Work with a lot of light so you can see to poke those pegs into the tiny holes. I assembled this model with CA - only one shot each.

Another issue presented itself after these steps. Aoshima does not give any indication of how to orient the booms. In the assembly instructions they appear to attach aligned fore-to-aft. In the planform and profile illustrations, they are shown to overhang the hull 90-degrees and reach over the water. Not that it makes that much difference to me but it is odd.
JPTRR
Staff MemberManaging Editor
RAILROAD MODELING
#051
Visit this Community
Tennessee, United States
Joined: December 21, 2002
KitMaker: 7,772 posts
Model Shipwrights: 476 posts
Posted: Thursday, March 13, 2014 - 12:56 PM UTC
Daihatsu! Here it is in its christening glory.


So I've read where these were nocturnal critters. I read that Japanes crews would darken the decks with sooth and oil or paint so reduce visibility from night stalking Allies. I figure a daihatsu had a hard life so I rusted and stained the deck.
JPTRR
Staff MemberManaging Editor
RAILROAD MODELING
#051
Visit this Community
Tennessee, United States
Joined: December 21, 2002
KitMaker: 7,772 posts
Model Shipwrights: 476 posts
Posted: Thursday, March 13, 2014 - 05:46 PM UTC
I-365 is complete!


To see more images of the finished sub, please visit the review: IJN I-365

Thanks for looking!
JPTRR
Staff MemberManaging Editor
RAILROAD MODELING
#051
Visit this Community
Tennessee, United States
Joined: December 21, 2002
KitMaker: 7,772 posts
Model Shipwrights: 476 posts
Posted: Tuesday, March 18, 2014 - 04:44 AM UTC
BTW: all those unused parts? Here is what your spare parts box can inherit!
RedDuster
Visit this Community
England - South East, United Kingdom
Joined: March 01, 2010
KitMaker: 7,078 posts
Model Shipwrights: 6,649 posts
Posted: Tuesday, March 18, 2014 - 08:58 AM UTC
Cracking job Frederick!.

The weathering is splendid, adds real depth and character.

Si
 _GOTOTOP