_GOTOBOTTOM
Ships by Class/Type: Military Small Craft
For topics on PT boats, landing craft, Vietnam riverine, etc.
SOC-R
Mario_HR
Visit this Community
Croatia Hrvatska
Joined: June 28, 2006
KitMaker: 376 posts
Model Shipwrights: 19 posts
Posted: Tuesday, December 18, 2012 - 02:53 AM UTC
Well I jumped into something I never tried before. Scratchbuild something with limited references. Any of you that tried, know that this little battleship deserves more plasn, pics etc than what's available out there... So here's my little sneak preview:


Removed by original poster on 12/18/12 - 16:29:21 (GMT).
jccraemer
Visit this Community
North Carolina, United States
Joined: December 24, 2007
KitMaker: 462 posts
Model Shipwrights: 29 posts
Posted: Tuesday, December 18, 2012 - 04:28 AM UTC
Mario, nice work so far. Ive been wanting to build one for years. can't wait to see how it comes along.
can't draw up plans and so Ive been waiting for a kit to come out.
dioman13
Visit this Community
Indiana, United States
Joined: August 19, 2007
KitMaker: 2,184 posts
Model Shipwrights: 204 posts
Posted: Tuesday, December 18, 2012 - 05:18 AM UTC
Nice build from what I can see. Was confused until I read the other post. Will be watching this one for sure.
Mario_HR
Visit this Community
Croatia Hrvatska
Joined: June 28, 2006
KitMaker: 376 posts
Model Shipwrights: 19 posts
Posted: Tuesday, December 18, 2012 - 05:47 AM UTC
Thanks guys, I'd appreciate any input along the way. I'm posting there as well as some folks that could be interested are only looking over there, hence the double post.

Here's a couple more (sorry about the pics I took them as I finished)

I've built the center line spar or rib or what it's called to provide rigidity and give basis to the bow. I will have to build it from bottom up since I haven't got any decent pics or references unfortunately...


Trisaw
Visit this Community
California, United States
Joined: December 24, 2002
KitMaker: 4,105 posts
Model Shipwrights: 7 posts
Posted: Tuesday, December 18, 2012 - 06:17 AM UTC
Hey, if this could become a 1/35 kit, that'd be great!
Mario_HR
Visit this Community
Croatia Hrvatska
Joined: June 28, 2006
KitMaker: 376 posts
Model Shipwrights: 19 posts
Posted: Thursday, December 20, 2012 - 02:10 AM UTC
Here is how I did a bit of work today. The main thing I had to go over again was making the top edge. I did this out of 1mm thick styrene sheet, but learned something the hard way. I cut out the shape with and then proceed to cut out the lifting points. doing this was in this order was wrong as the strain in the plastic broke the thinnest connecting points. So I had to start over:

1. Here's what I started with


2. Plans cut from paper


3. First cut out the lifting points and drill out the ladder receptacles. Now when everything's cut you can start cutting out the inside shape


4. Starting to look like a boat now...


TAFFY3
Visit this Community
New York, United States
Joined: January 21, 2008
KitMaker: 2,531 posts
Model Shipwrights: 1,244 posts
Posted: Thursday, December 20, 2012 - 03:44 AM UTC
Way Cool! Great build so far, I can't wait to see more. Al
Trisaw
Visit this Community
California, United States
Joined: December 24, 2002
KitMaker: 4,105 posts
Model Shipwrights: 7 posts
Posted: Thursday, December 20, 2012 - 07:01 AM UTC
Should be a lot easier too now that resin companies make awesome 1/35 weapons for the SOC-R. You don't need to scratchbuild the weapons.
Mario_HR
Visit this Community
Croatia Hrvatska
Joined: June 28, 2006
KitMaker: 376 posts
Model Shipwrights: 19 posts
Posted: Thursday, December 20, 2012 - 08:29 AM UTC
Thanks, yes am weapons will greatly help. I'm just wondering about the m99 dual m240 mount...
amagno
Visit this Community
Sao Paulo, Brazil
Joined: November 26, 2005
KitMaker: 6 posts
Model Shipwrights: 1 posts
Posted: Saturday, December 22, 2012 - 01:34 PM UTC
Outstanding build !!!
Mario_HR
Visit this Community
Croatia Hrvatska
Joined: June 28, 2006
KitMaker: 376 posts
Model Shipwrights: 19 posts
Posted: Saturday, December 22, 2012 - 06:47 PM UTC
I'm a bit stuck due to lack of references... So far I've figured out there are a couple of different mast setups. The Furuno radar dome is constant, the difference is the antenna base and the FLIR dome.

Here's what I'm talking about-the pics are cropped images I found on the Navy website:


Of course I chose the more complex one since I like to torture myself. I scaled the Riverine Assault Boat plans from USMI to get a top down view as I figured that the plan is the same as for the SOC-R


And this is what I ended up with:


Somethins feels off but I'm not sure what. I'm in scale according to plans but perhaps the FLIR base is wrong?
jccraemer
Visit this Community
North Carolina, United States
Joined: December 24, 2007
KitMaker: 462 posts
Model Shipwrights: 29 posts
Posted: Saturday, December 22, 2012 - 09:56 PM UTC
Mario, the smaller one looks little bit bigger then it suppose to be. but it does look good by the way.
Removed by original poster on 12/29/12 - 09:46:25 (GMT).
Mario_HR
Visit this Community
Croatia Hrvatska
Joined: June 28, 2006
KitMaker: 376 posts
Model Shipwrights: 19 posts
Posted: Friday, December 28, 2012 - 09:55 PM UTC
Here's a small upate:

1. A failed attempt - offered blood sacrifice to the gods - check!


2.Obtain proper teletubby shape from several attempts - check!


Anyway I'm fairy happy with the outcome, I laminated everything (8,5mm) and sanding the he out of it, instead of trying to connect 2 offsetting surfaces with a center strip which proved to be way too much hassle. I also resized the FLIR mount with the input from you guys. Looks much better, thanks!

Now I could use help for the 2 brackets in front of the two antenna bases on the top surface. Anyone got any idea on the shape or what's on it?
TAFFY3
Visit this Community
New York, United States
Joined: January 21, 2008
KitMaker: 2,531 posts
Model Shipwrights: 1,244 posts
Posted: Saturday, December 29, 2012 - 02:05 AM UTC
Who says model building isn't a blood sport! I've shed blood over a project several times myself, as well as copious amounts of sweat and tears. It does seem to have appeased the modeling-gods though, it's really coming along nicely. Al
Mario_HR
Visit this Community
Croatia Hrvatska
Joined: June 28, 2006
KitMaker: 376 posts
Model Shipwrights: 19 posts
Posted: Friday, January 04, 2013 - 07:41 PM UTC
Sorry for the slow update, I guess too much food and drink during the holidays took its toll I wish everyone the best in the New Year and hopefully everyone got something plastic under the tree?

Anyway - milestones:
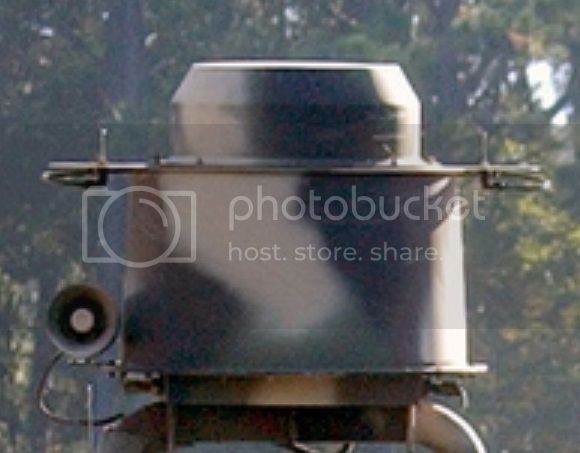
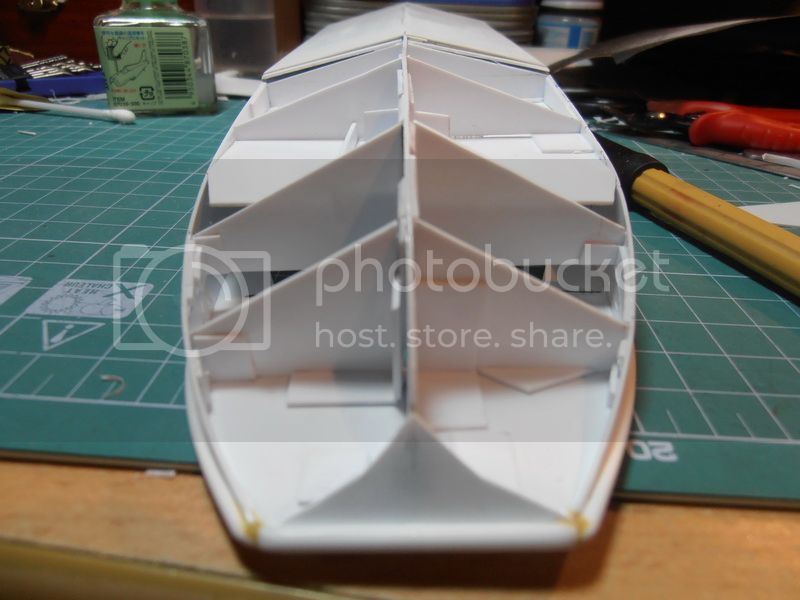
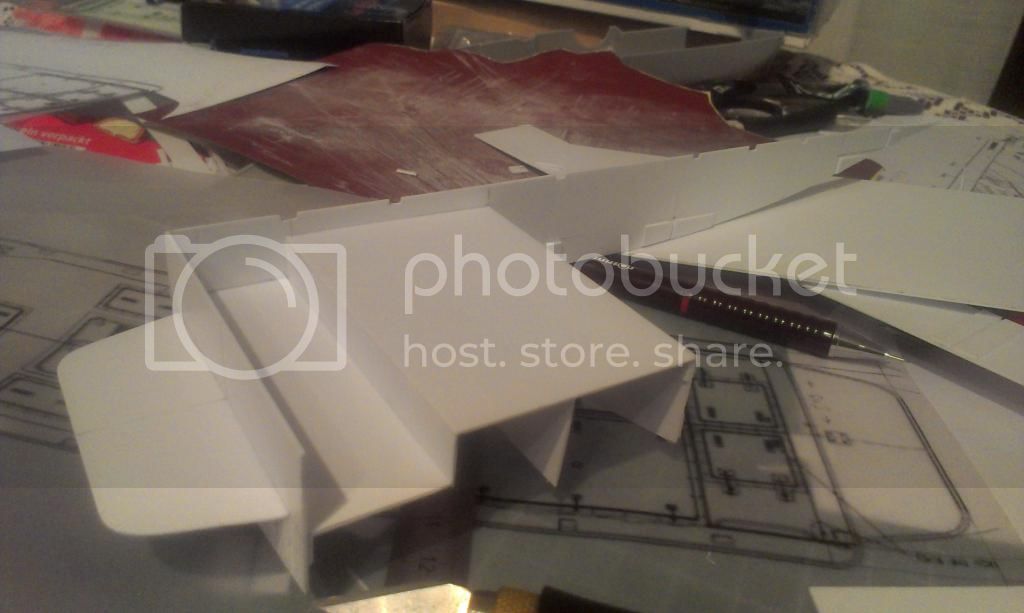
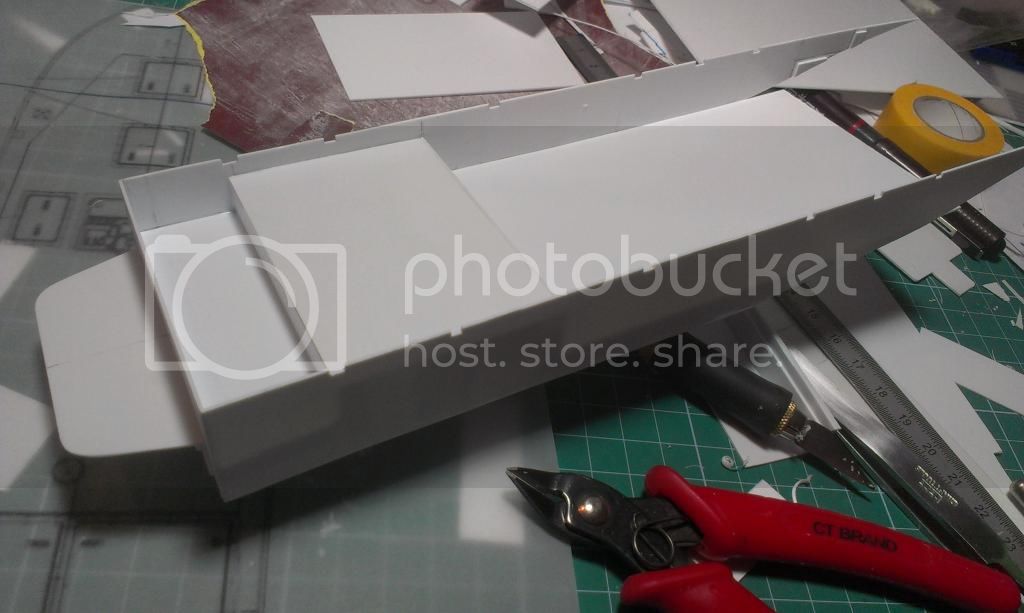
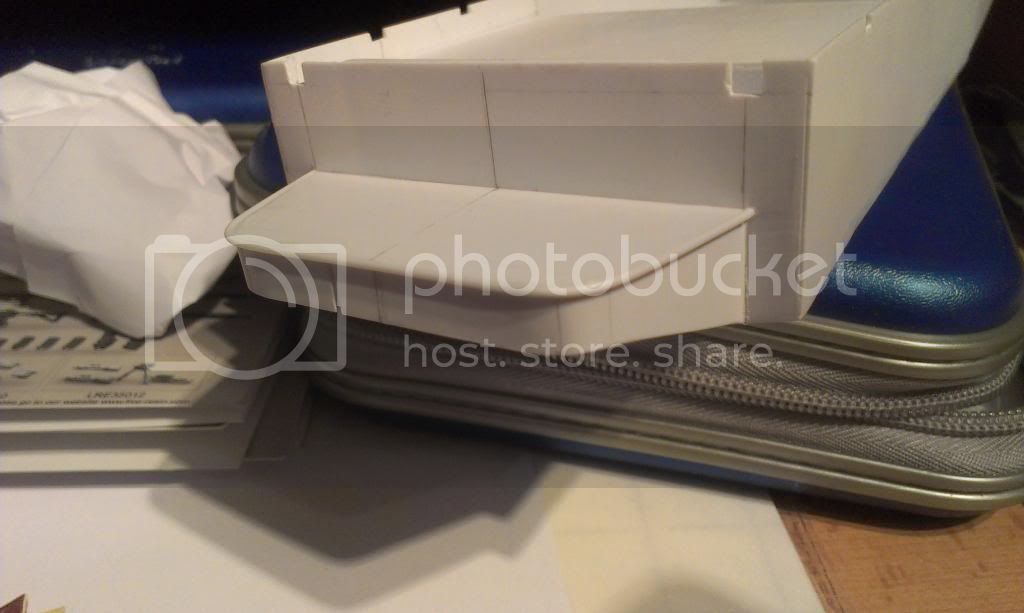
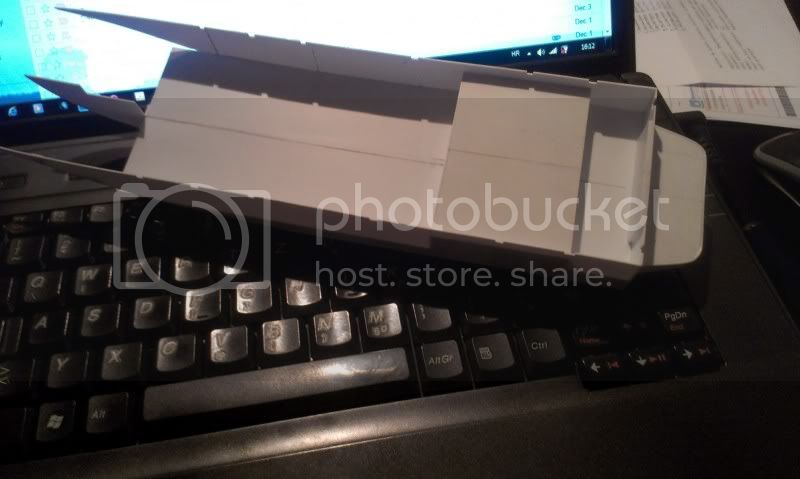
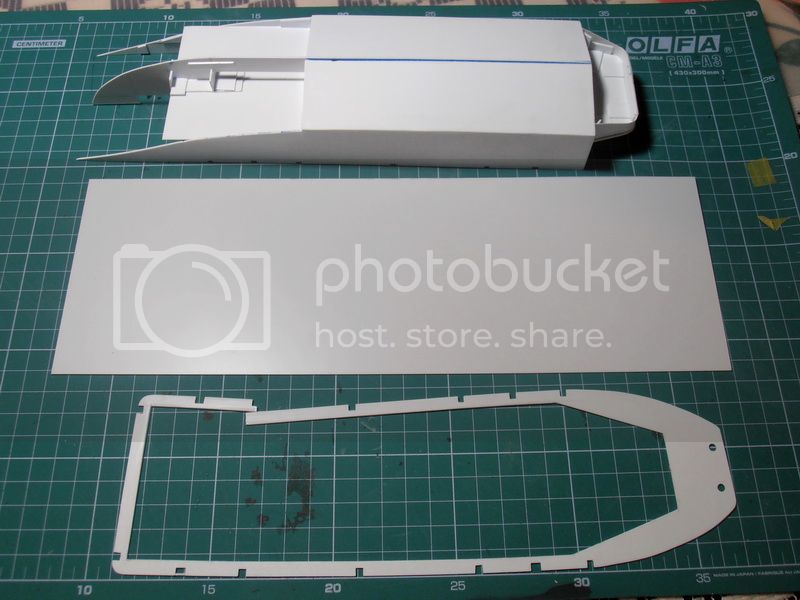
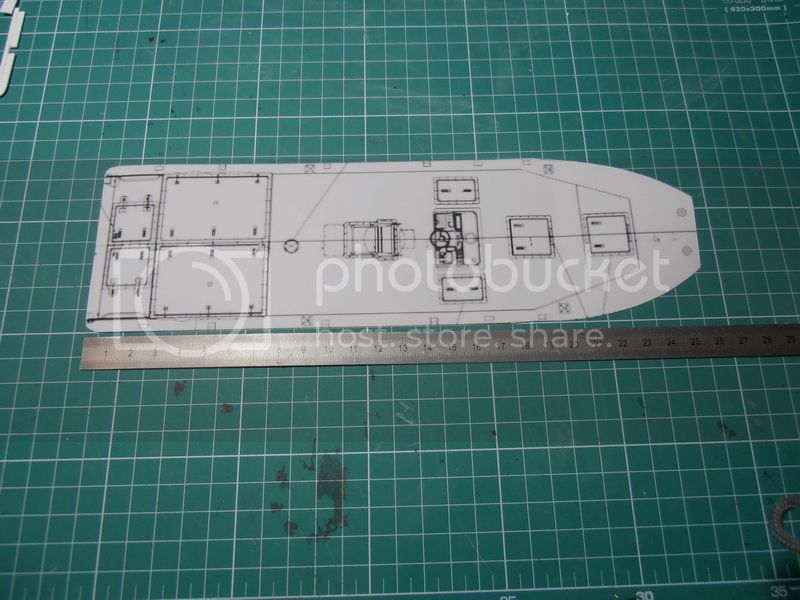
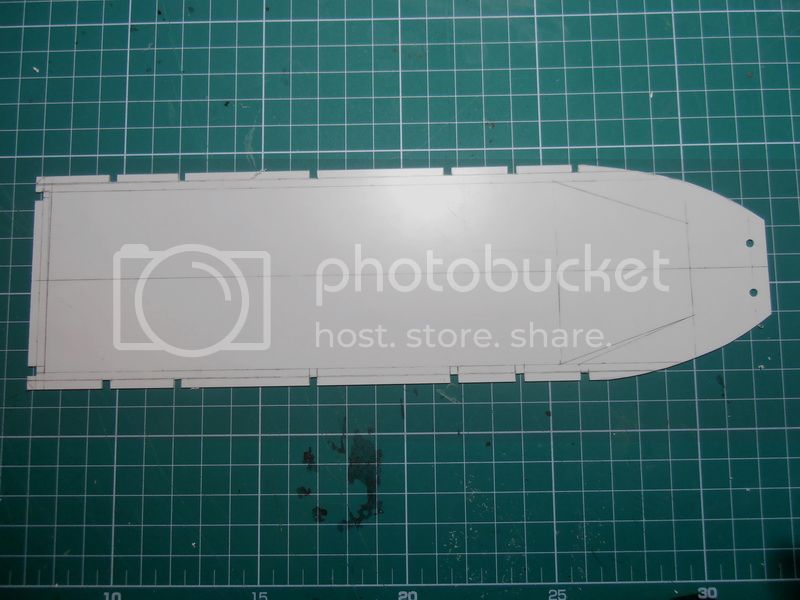
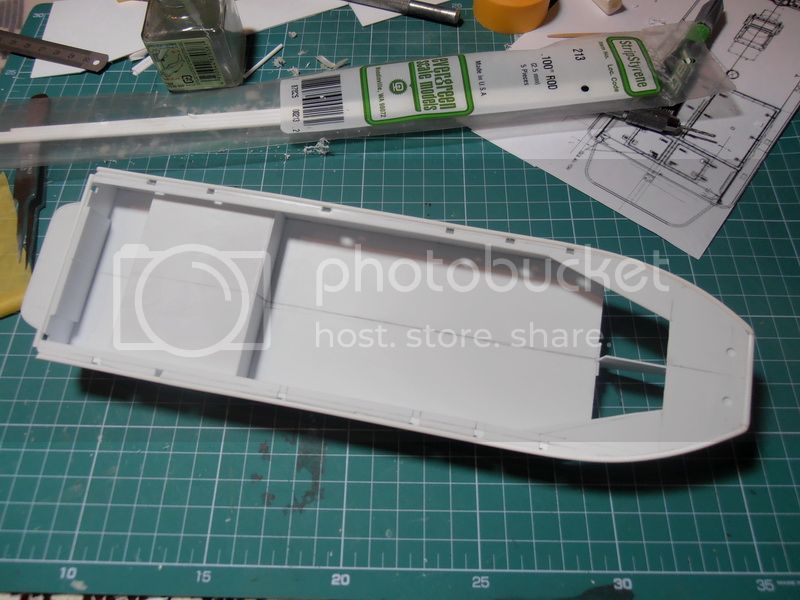
I managed to finish the bulkheads, although they are not pretty. Also the first prat of the bow covering is done, only to sort out the middle. I used 0.5mm thick sheet as it's firm enough and still pliable. Anything thinner and you get sagging between the bulkheads, and thicker just won't bend.


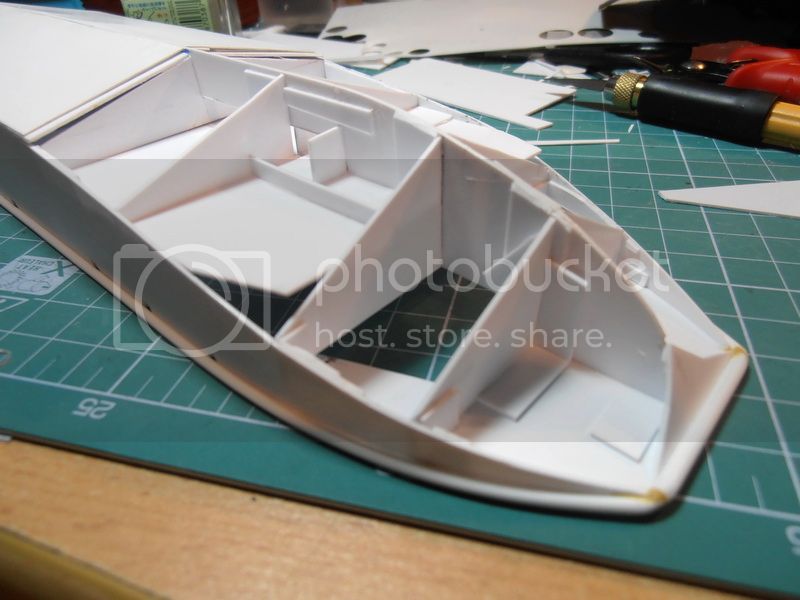
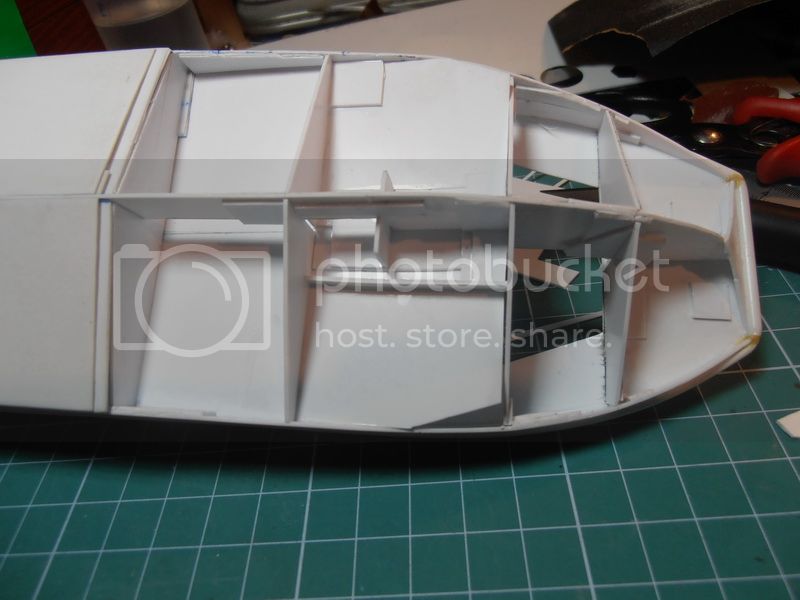
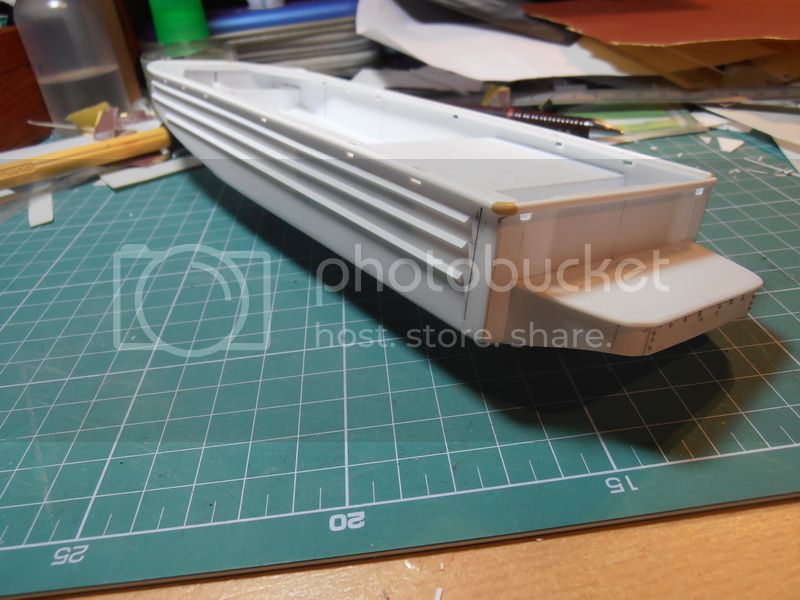
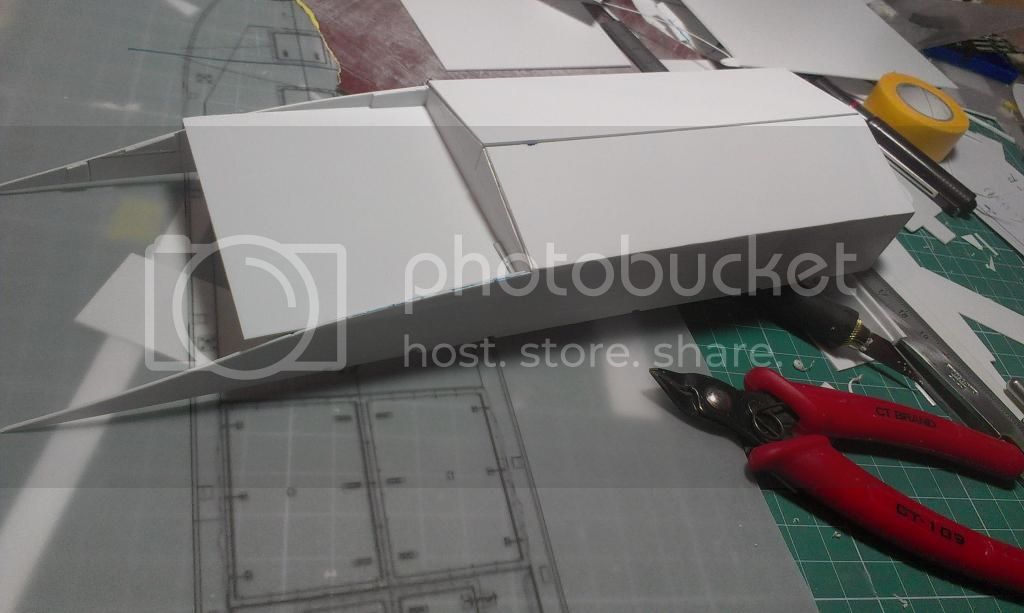
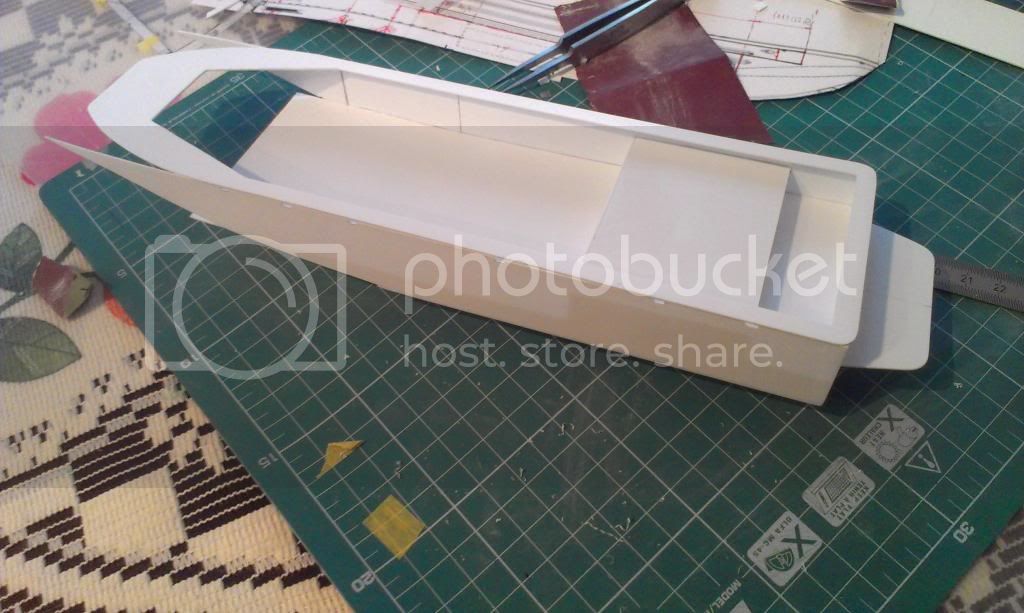
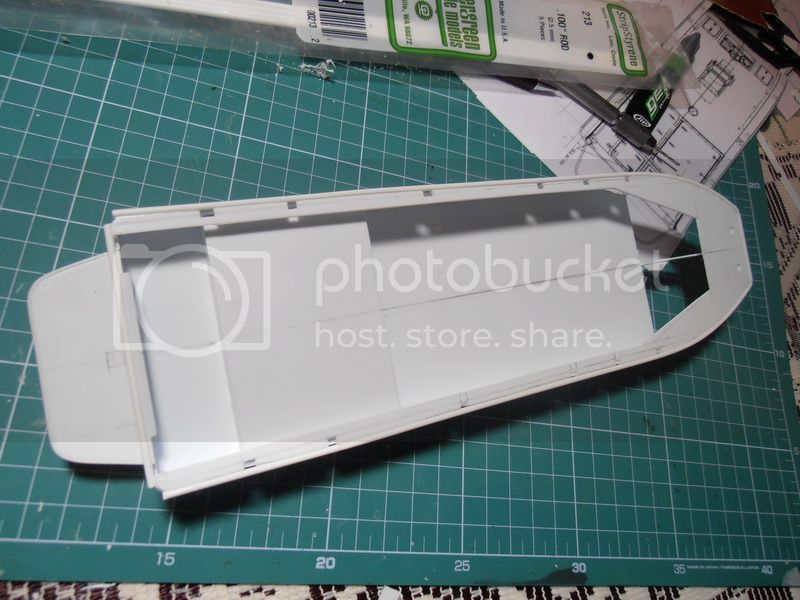
Also I waited a lot for the L profiles to finish up the sides. Now some more detailing awaits. They are not finished as I will be using epoxy to finish off the endings as they are not straigth


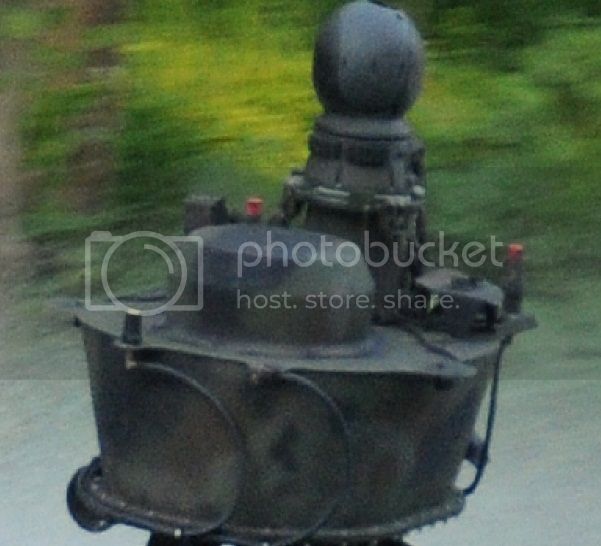
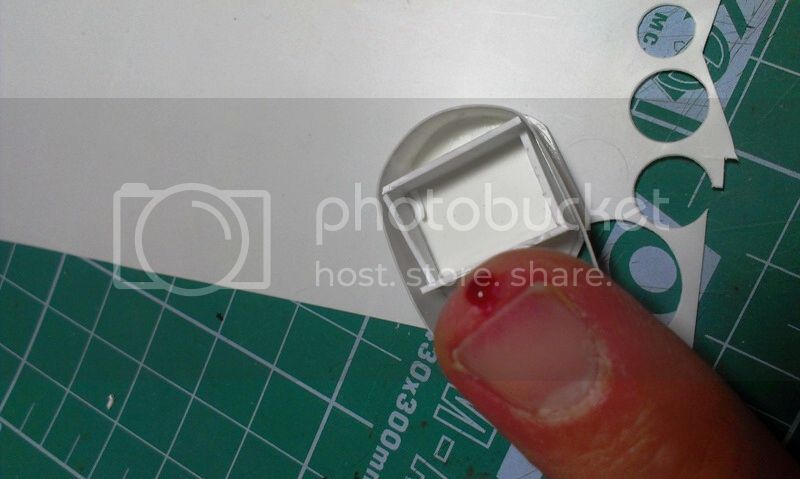
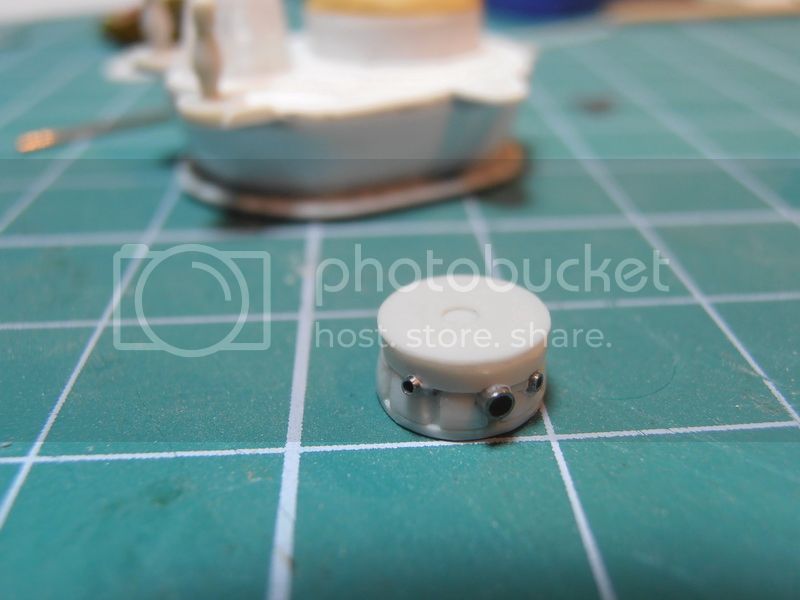
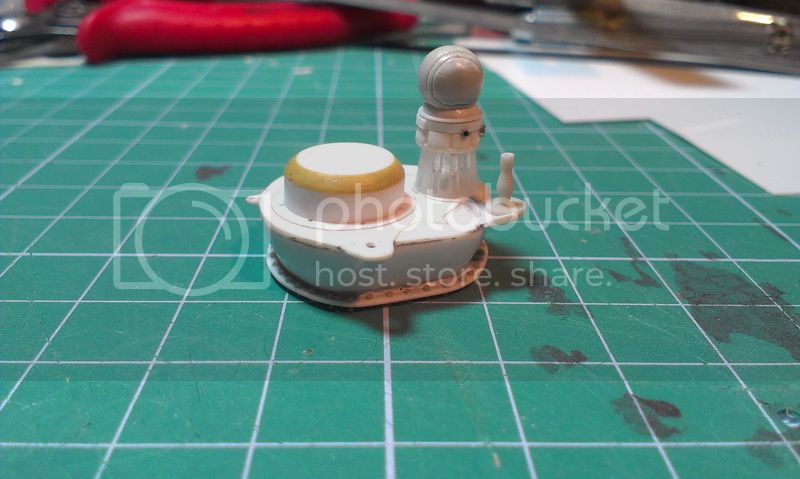
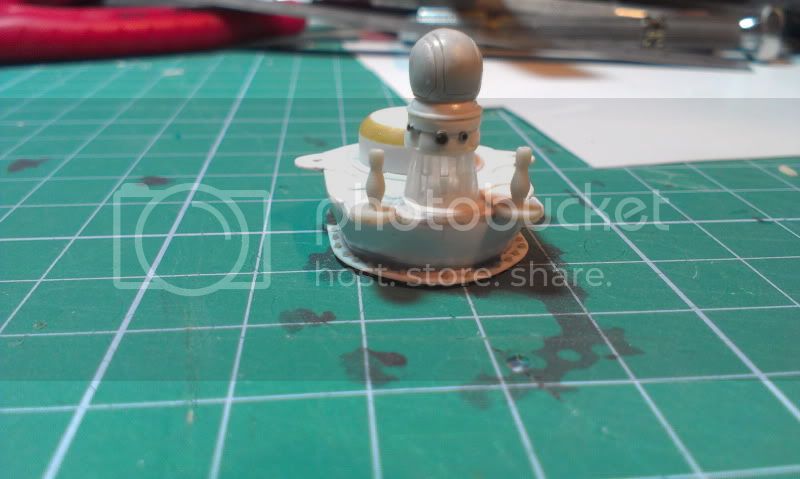
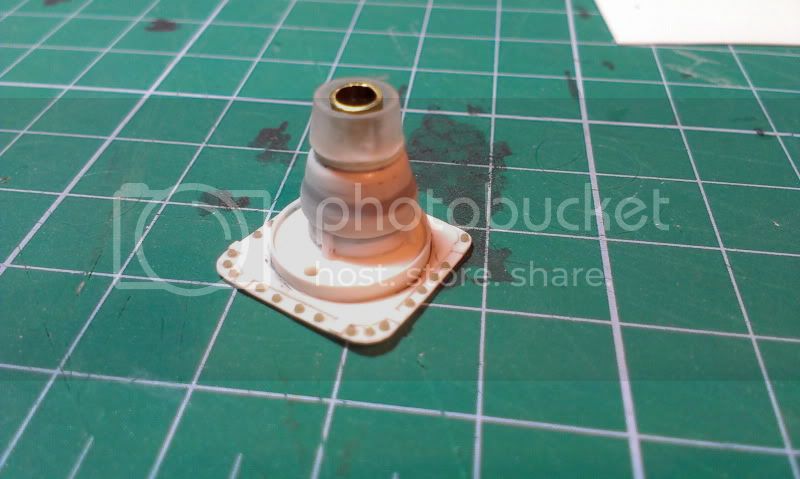
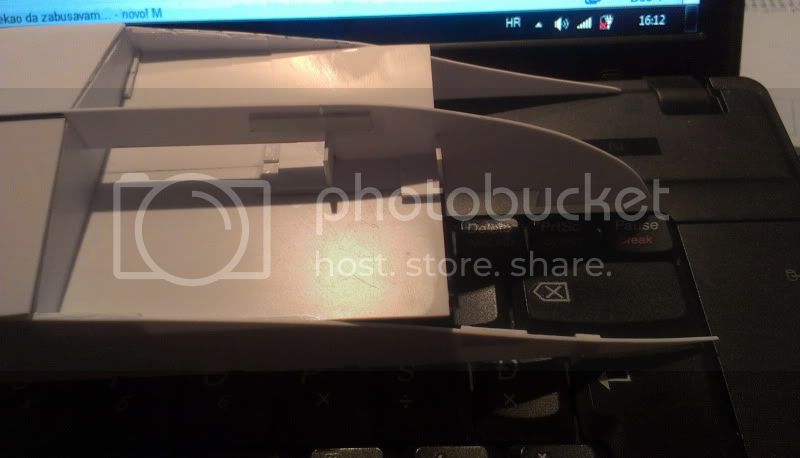
Also played a bit with some bolts. Mario Matijasic was the victim of a grand bolt robbery as I cleaned out his entire stash of Masterclub bolts. These are 0.5mm in diameter, so the drill bit kinda veered a bit while drilling but it's hard to see the not-so-perfect lineup while not in macro mode...


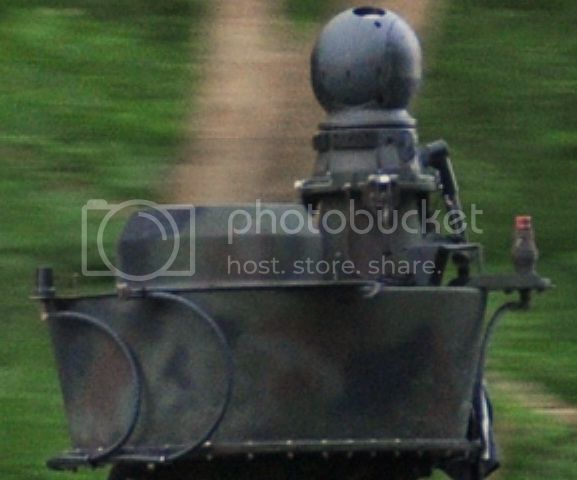
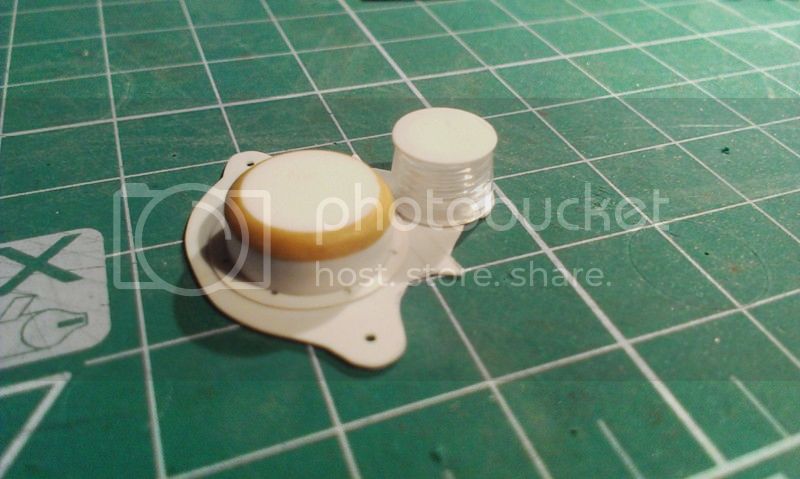
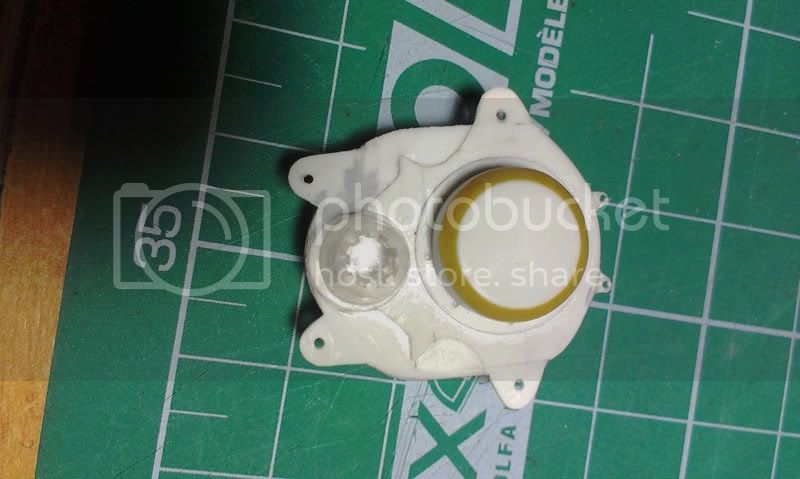
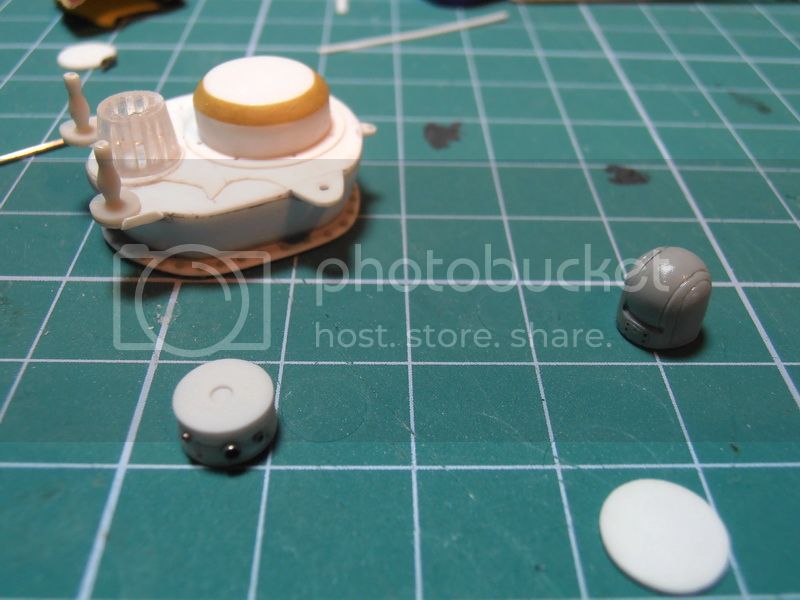
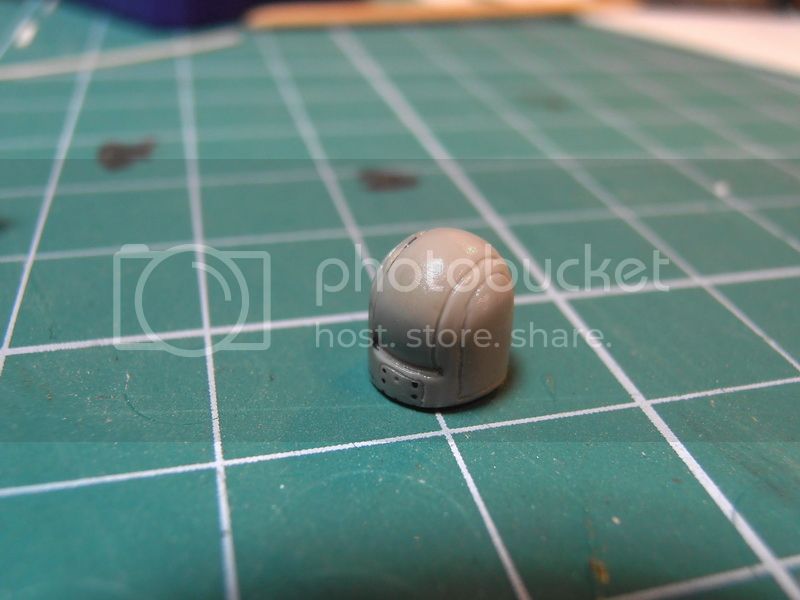
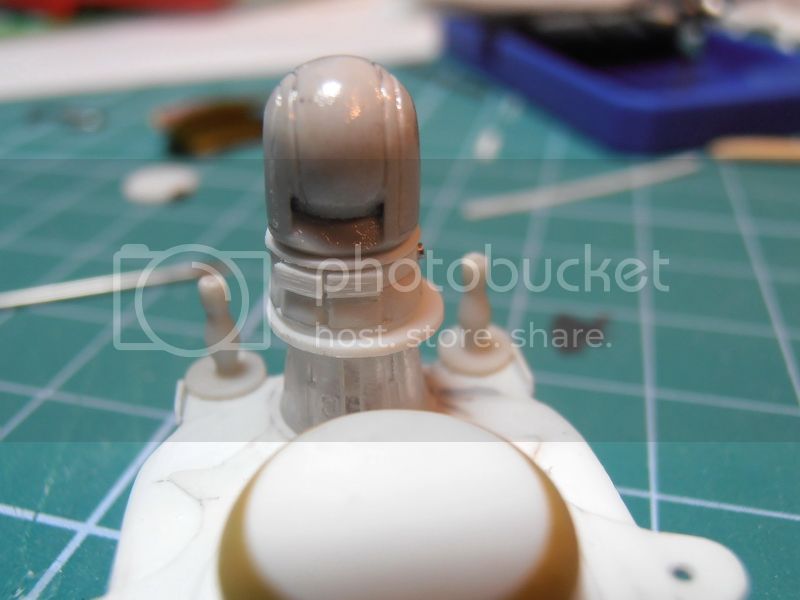
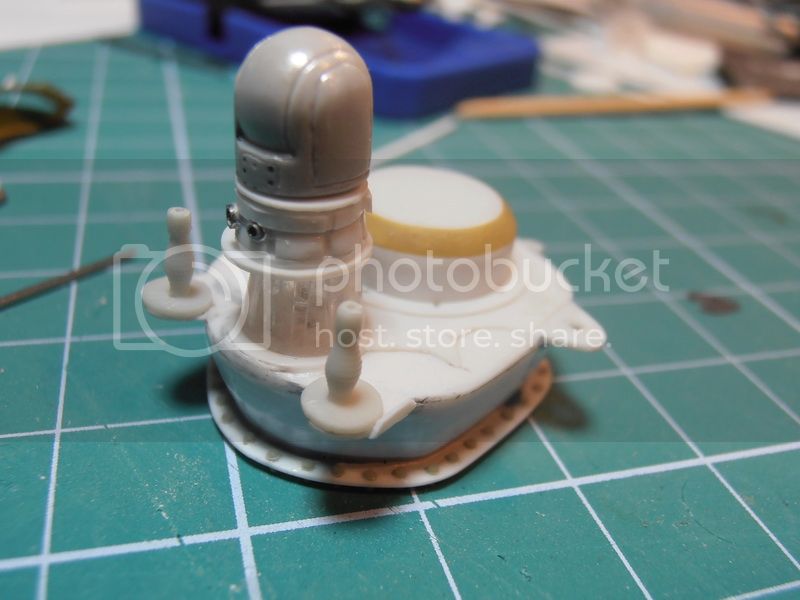
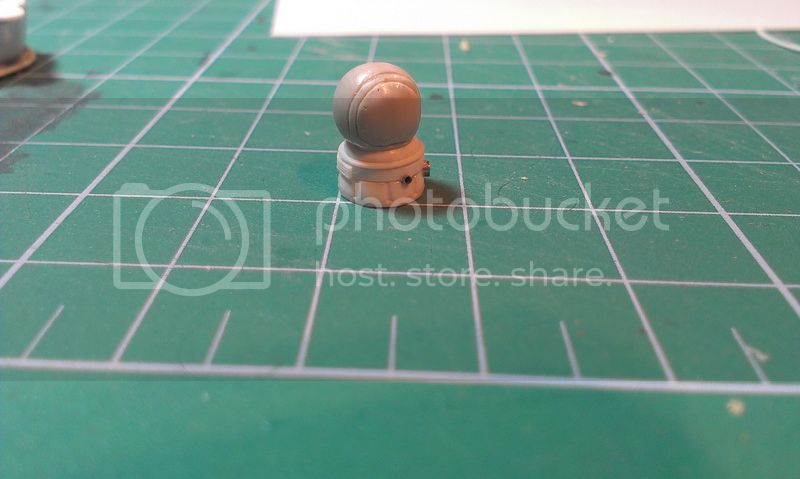
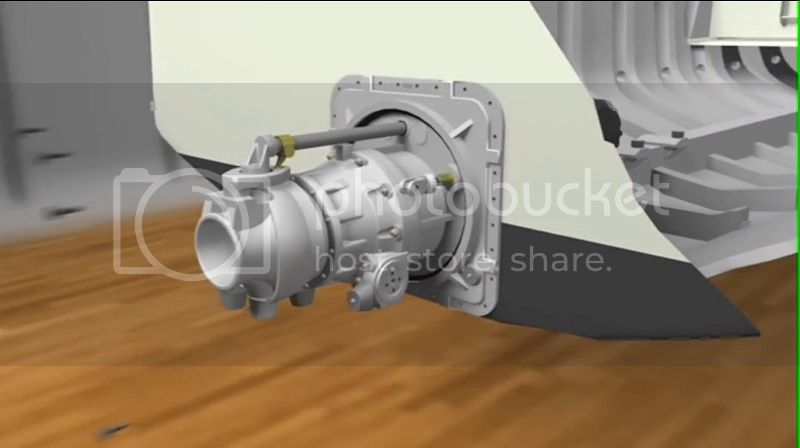
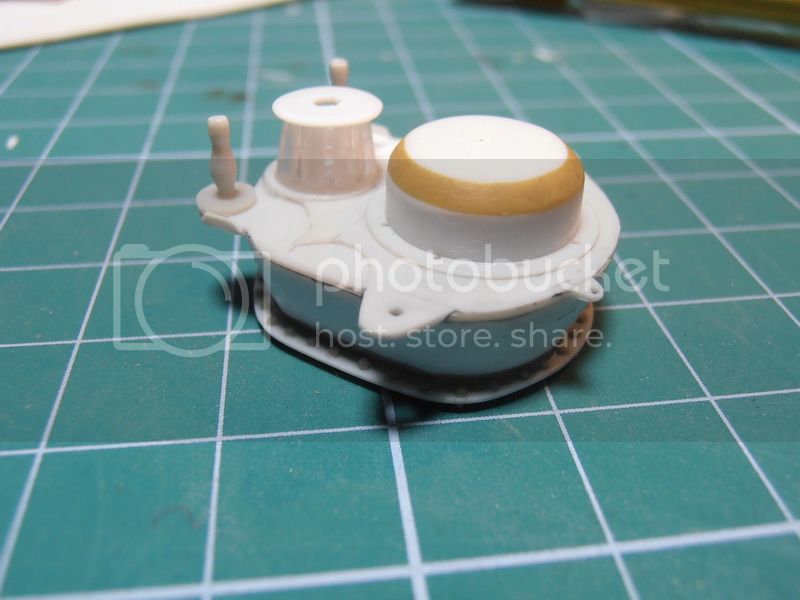
Also the teletubby got some more details. I'm finding out that perhaps this was a bad idea to do the top surface from styrene. I'm thinking in the ways of PE but I will have to see about that with a friend that makes his own about this. I used Djiti's resin antennae, but they suffer a bit from mold defects and are not that sharp, but they have the correct shape & size


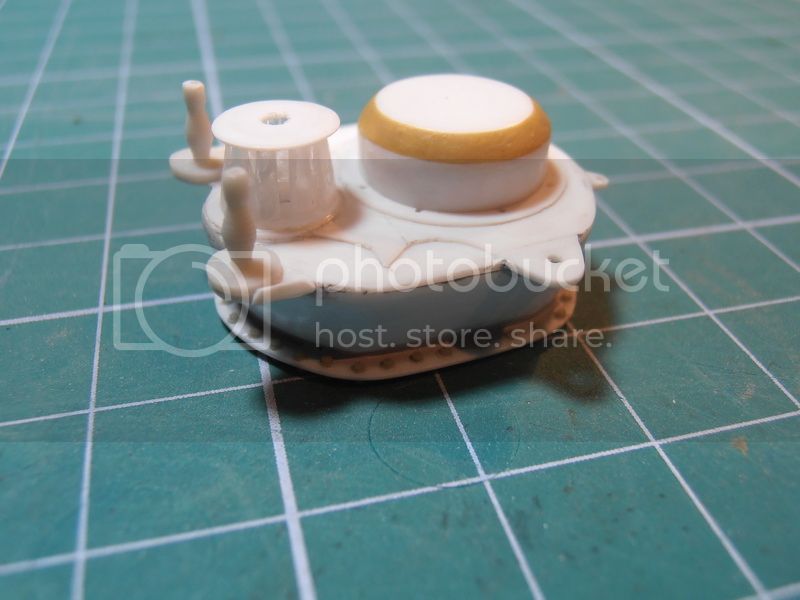
Also check out the bolts - All of them are placed in pre-drilled holes, then cut down to appropriate size on the bottom. More to come soon and thanks for watching...
jccraemer
Visit this Community
North Carolina, United States
Joined: December 24, 2007
KitMaker: 462 posts
Model Shipwrights: 29 posts
Posted: Friday, January 04, 2013 - 10:51 PM UTC
wow
DanielMoscatelli
Visit this Community
Montevideo, Uruguay
Joined: August 22, 2011
KitMaker: 998 posts
Model Shipwrights: 941 posts
Posted: Saturday, January 05, 2013 - 03:30 AM UTC
Excellent friend Mario!!
I see that Blood takes Sweat and Tears to you .... jejeejej very good work!!
Im becoming convinced that some day that Evergreen stirene to buy.
I follow you....
Regards Daniel
Mario_HR
Visit this Community
Croatia Hrvatska
Joined: June 28, 2006
KitMaker: 376 posts
Model Shipwrights: 19 posts
Posted: Thursday, January 10, 2013 - 01:12 AM UTC
Dealing with the FLIR is turning out really hard, as I couldn't find any aftermarket set for the SeaFLIR III or the TALON series out there: this is what I'm talking about -


I thought it would be easy to scratchbuild but I overestimated my abilities so this is what I got; it's a rough approximate of the real deal as far as I could get:


the isolation collar, mounting plate disc and the gimbal assembly are shown here. The collar itself is really small and it's what I came up with again as a rough estimate.

and the main parts:


The FLIR ball is actually from a 1/48 super hornet AN/ASQ-228 LITENING pod chopped up a bit. I know it's not the same as the one I need but I figured it could be close enough for the ball in stowed position.

Here's how everything looks like just thrown together without glue...


Now I'd appreciate some honest input about this, am I going the right way with this or do I scrape it and start again?

TAFFY3
Visit this Community
New York, United States
Joined: January 21, 2008
KitMaker: 2,531 posts
Model Shipwrights: 1,244 posts
Posted: Thursday, January 10, 2013 - 05:04 AM UTC
"Now I'd appreciate some honest input about this, am I going the right way with this or do I scrape it and start again?" [Quoted text]

Hello Mario, It really looks good to me. The question is, how does it look to you. It comes down to how good is good enough. I think every modeler has to decide that for himself (or herself). What is good enough for one may not be satisfactory to another. I think you're doing a great job, and I wouldn't scrap it just yet.
Al
Gremlin56
Joined: October 30, 2005
KitMaker: 3,897 posts
Model Shipwrights: 3,301 posts
Posted: Thursday, January 10, 2013 - 06:42 AM UTC
Absolutely magic work mate, no need to have doubts about what you are doing. Really fantastic,
Julian
Mario_HR
Visit this Community
Croatia Hrvatska
Joined: June 28, 2006
KitMaker: 376 posts
Model Shipwrights: 19 posts
Posted: Sunday, January 13, 2013 - 02:16 AM UTC
Thanks for the replies guys it's very valuable to hear your opinions! Anyway... I chopped off the FLIR base. A little rescribing and I think I've captured the proper look (anyway better than before). I still need to drill out the lens openings and 3 small notches but I think I can move on from here...


nothing is glued and can be modified still if there's something I missed?


And here's something I've been building yesterday... Any ideas what this is?


And I appreciate all the input from you guys it really helps out
Cheers!
jccraemer
Visit this Community
North Carolina, United States
Joined: December 24, 2007
KitMaker: 462 posts
Model Shipwrights: 29 posts
Posted: Sunday, January 13, 2013 - 07:56 AM UTC
Mario, the assembly looks great. by the way what is the last thing your building.

I've decided what i'm going to build my hull out of. I going to use its hull and scratch and kit bash deck.
Mario_HR
Visit this Community
Croatia Hrvatska
Joined: June 28, 2006
KitMaker: 376 posts
Model Shipwrights: 19 posts
Posted: Sunday, January 13, 2013 - 08:51 AM UTC
Thanks John, I hope this is what it will eventually look like...


Anyway I'm still trying to find out what the actual hamilton hj292 waterjet looks like. The US and the NZ websites give different pics to what it looks like.

And if anyone has pics of the underside of the swimmers platfomr looks like I'd really appreciate. I'm taking a lot of liberties with this one going mainly on the Hamilton general design notes (i.e. the transom plate which can but doesn't have to go on)so I'd like to confirm few issues...
 _GOTOTOP