

Go to modelshipwrights.com for the current dynamic site!


1⁄700Building the French Pre-Dreadnought Battleship Massena

Having changed the shapes, extended and widened decks, cut away all the cast lumps, and being dissatisfied with the barbette positioning and arrangements I decided to re-deck the ship, this being achieved by first paring down the existing deck to maintain the correct aspect ratio, filling the holes and covering with evergreen car siding.
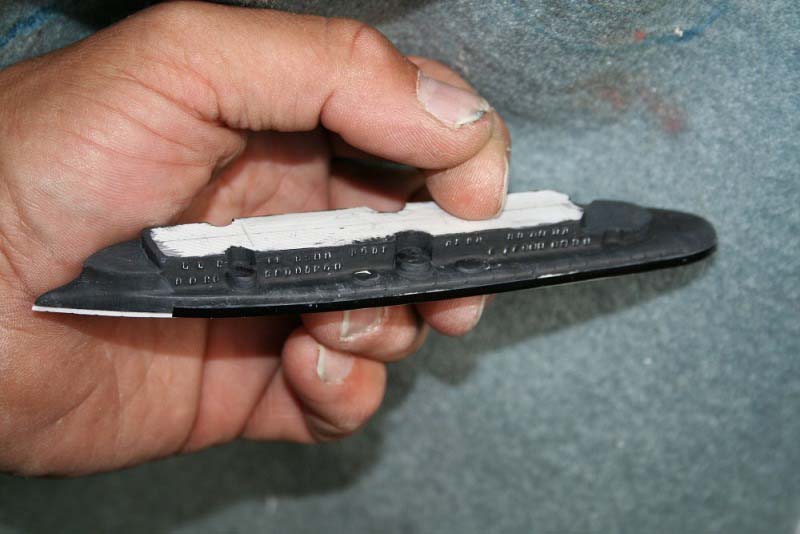
I wanted to portray her at speed making the characteristic wave formation of short blunt ships of that era. I therefore needed to add an extension made of thick styrene sheet so as to be able to have some underwater hull showing in between the bow and stern wave. The armour belting was added using Cammett vinyl tape. The various stairwell apertures were cut in and boxed in. Photoetched stairways were inserted and divisions added of paper. Examination of the plans showed the 12in and 10in turrets to be not round as supplied but more of teardrop shape. This meant that the rears of the turrets had extensions of sanded styrene added. I also fitted all the lower rings and turret doors made of Vinyl tape before painting. Further, the turrets all had slightly round, convex, domed upper surfaces rather than the flat (and dished!) castings supplied; these would have been rather difficult to modify had I not had previous good experience of the self-leveling meniscus properties of white glue . All gun barrels were brass, I used a combination of 2 x Steve Nuttall, 2 x BKM, 10 x Schatton and some tiny Japanese unidentified none of these were specifically French, but some were lengthened using brass rod at the inboard ends. The next challenge I was faced with was making the 12in slant sided barbettes. I achieved the desired shape by cutting the appropriate diameter disc of thick styrene sheet, sanding the edges with the solid centre of the disc giving strength and then cutting out the centres to allow the turret to sit within the glacis. At this stage I also added lower military masts and made all new deck levels of styrene and brass to include the conning towers and upper bridge wheelhouse, with windows being made of selected PE ladder-stock to give the correct number of window apertures. The masts and decks being still removable at this stage. I felt it was important to maintain as thin a deck as possible for the upper platforms on the masts, to this end I cut the from brass PE scrap, and wrapped the railing AROUND the outer edge, this platform was later given supporting struts of stretched sprue. Platform walls were made of paper. Test sitting the turrets onto their respective barbettes showed these to be undersized in diameter I cured this by wrapping the Cammett vinyl tape around to increase the diameters, then fairing in the juncture to the hull with more white glue. Around this stage after examining numerous photos of the ship underway at speed I concluded that I had to show the hatches open, the inner sidewalls of the openings were painted white - and much retouching later I was ready to add the hinged lids, in some cases upper and lower - made of paper tacked on with matte varnish before infusing with CA glue for a more permanent bond. Massena was festooned with ventilators of a wide variety of sizes and shapes. The kit supplied cowl vents were fundamentally of the correct outlinebut needed extensive hollowing and thinning of the walls. The dual uptake cowl vent aft of the bridge was missing altogether-and was scratch-built using copper tube and a cowl vent from the scrap-box. The distinctively French tapered inverted cone ventilators were all turned from resin tubular stock using a bench clamped Motorized mini drill and a handheld Stanley blade as a cutting tool, I made dozens of differing sizes until I had sufficient stock from which to choose identical pairs. Other small cowl vents were made using flux-cored solder wire, the core being drilled and a blunt coned faring tool being inserted to create the bell-mouthed ends. A tall vent aft had a square trunk atop of which sat a tubular cowl . Another square vent was made of rectangular stock, furnished with a PE grille and topped off with a paper lid domed with white glue. The ship was now beginning to get dressed with smaller details, some made of PE, others being made of tiny bits of styrene, wood and brass for fairleads, mooring bits etc. My new-found enthusiasm for turning small pieces from resin stock extended to making the hemispherical sighting hoods for the turrets and tall anchor windlass on the aft deck. Having up to this point handled the ship via a strong spring clamp grabbing two self-tapping screws in the underside I decided that the model would be more securely handled once mounted on her sea-base. . First the green underwater, made of green vinyl tape, and the white boot-top, made of white stretched sprue had to be applied. The base was liberally covered in Auto body filler paste - which sets very quickly and the aperture carved out with a sharp blade. Various test fittings of the hull followed after which the ship was set in, the intersection of water edge and hull filled with more white glue. Once the model was completed I painted the sea surface with thinned white glue, thereafter with enamels and added 3 brushed layers of Future, topped off with Humbrol Glosskote. The overall effect of the ship traveling at speed was in my view captured quite satisfactorily. The 3.9in turrets were actually positioned on sponsored platforms on the main deck level, these were effected using thin brass shim washers with the tapered cone sponsons being formed using the infilling properties of white glue. Midships ventilator boxes were made of styrene square strip section fitted with PE grille detail from the scrap box. Overboard discharge pipes were made of pre-bent nickel-silverwire inserted into pre-drilled holes. The cast resin funnels were hollowed out with a drill and motortool, the slight wasting being pared square with a blade, the draught control flaps undercut was created with some deft blade-work, a suggestion of panels was cut in with a blade and the upper funnel rims made of nickel-silver wire and the various steam-pipes fitted to the fore and aft faces made of wire. Massena in her early years has movable cowls to close off the funnels and adjust the draught, these were controlled by a pulley system via blocks at the fwd face of the funnel, the pulleys were made of WEM aircraft wheels (!) with the cowls being CA infused paper. The two fighting tops were made of brass PE (Combrig Henri IV). The guns were adapted WEM items. The fighting tops had the struts to support the canvas made of brass PE handrail longitudinal, bent and glued, connected via a stretched sprue frame over the gun apertures to give the thinned white glue that I used to simulate the roof canvas a limit for the film to spread. The bridge wings were furnished with the gun supports made of scrap funnel grilles, Navigation lamps made of snippets of brass wire as well as dodgers on the railings made of white glue. The wooden capping rail was painted brown. All the ships boats were replaced with items from WEM, Combrig and WSW, of which the large pulling boat and a cover made of .white glue! Because of her unusual hull shape Massena had very long cranked davits of a complex design. These were made of box section girder with pierced sides, capable of being rotated as well as swung outboard, thereby clearing the hull when in use. I made the pierced girder using some small ladder-stock PE, which had every alternate square, filled with white glue. When set I cut the tops of, thereby creating the taper. After bending to the chosen shape I laid a piece of stretched sprue over the top. After a thick coat of paint the remaining open squares had their extreme corners filled to give the impression of an oval aperture Perhaps, in retrospect, I should commissioned these davits as a custom PE fret and ignored the expense...!! The companionway construction was interesting as there were numerous levels. The photo illustrates also the modified WEM Askold pierced davits as well as the 3.9in guns with their protective canvas covers made of white glue draped across the shield. The large admiralty pattern anchors were scratch-built of thick brass strip and PE; the flukes being made of scrap PE fret surround. The anchor handling cranes were also made up of pierced girder and various PE pulley wheels. The hawse pipe apertures were made of circular wire rings lightly squashed to a more oval shape, and afterwards in-filled with white glue. At last the ship was starting to look like the real thing . The anchor handling punts were made of a paper-cut pattern, shaped up, infused with CA glue and sanded to shape. Massena along with other French ships had a method of indicating the direction of travel consisting of large globes upon poles, mounted midships of the wheelhouse and the extreme ends of the bridge wings. I mad these globes of globules of white glue. The tri-colour naval ensign was made using some thin vellum paper, with a piece of tape masking the white, the red and blue being made using artists watercolour pencils. Once dry I taped the paper to a window and repeated the process on the reverse side. When completed it was sprayed with hairspray to act as a fixative and was then sandwiched in tissue paper and extensively crumpled using fine tweezers, the tissue paper preventing any colours smearing. Masts were all metal, with metal platform bases, Range clocks x 4 were spares from WEM Iron Duke set, painted white and given a rub over with a pencil. The ship was rigged using stretched sprue throughout, black for standing rigging and running wire, tan sprue for halyards etc. Figures were a mixture of GMM and Eduard The hull was painted with Revell black, superstructure Humbrol 28
About the Author


Copyright ©2021 by Jim Baumann. _OPINIONS Model Shipwrights, KitMaker Network, or Silver Star Enterrpises. Images also by copyright holder unless otherwise noted. Opinions expressed are those of the author(s) and not necessarily those of Model Shipwrights. All rights reserved. Originally published on: 2008-03-22 00:00:00. Unique Reads: 9551

WEB HOSTING BY


Copyright ©2021 Model Shipwrights and Kitmaker Network, a subsidiary of Silver Star Enterprises
All Rights Reserved. Please read our Conditions of Use and Privacy Policy.
All Rights Reserved. Please read our Conditions of Use and Privacy Policy.