

Go to modelshipwrights.com for the current dynamic site!


1⁄700Building Hasegawa's IJN Nachi
24
Comments
"MSW crew-mate Dade Bell sends in a beauty of a build story, centering on Hasegawa Models 1/700 scale, IJN Nachi!
The Nachi was sunk in Manilla Bay, November 5, 1944, by three waves of aircraft from the USS Lexington and USS Ticonderoga. She was hit at least nine times by torpedoes and rockets. Two large explosions broke her in two and she sunk in the middle of a large oil slick. 807 of her crew, including her captain were lost, with 220 surviving.
The Nachi's loss turned out to play a larger strategic role in the American war effort, as USN divers later found a large set of code documents in the wreckage. These documents were all the more important because the Nachi had been the flagship of the Second Striking Force...
With all of the other projects hanging over my head, I decided to keep this build as OOB as possible, with the exception of the always wonderful Fukuya Works barrels and of course, tippet line for the rigging. The flags are from Tauro.
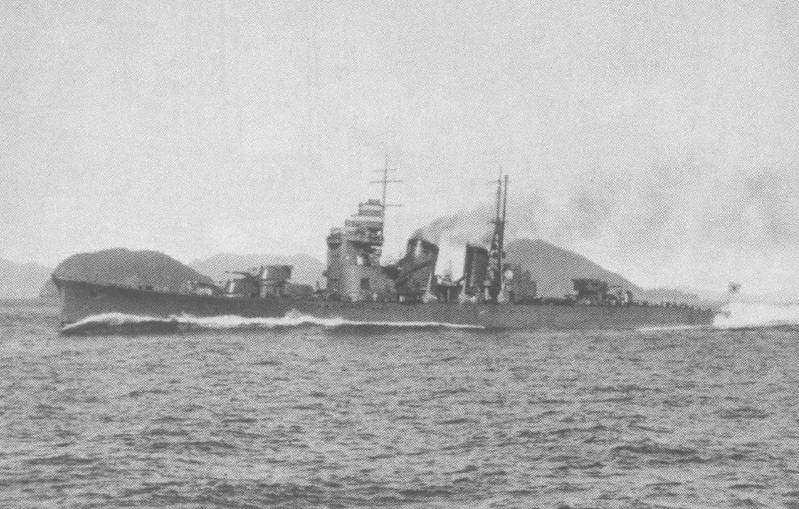
History:
The IJN Nachi was the second Myoko class heavy cruiser. As with her three sisters, she had an excellent combination of speed (36 knots), range (8,000 nm at 14kn), and a devastating main armament of ten 8" guns. She was commissioned in November 26, 1928, with her career in World War II starting in 1942 in the Dutch East Indies. She was a key member of the Battle of The Java Sea, and in March was involved in the sinking of HMS Encounter and HMS Exeter. She was damaged in 1943 at the battle of the Komandorski Islands, and was involved in action at Kiska. At the Battle of Surigao Strait in 1944, she was damaged again.The Nachi was sunk in Manilla Bay, November 5, 1944, by three waves of aircraft from the USS Lexington and USS Ticonderoga. She was hit at least nine times by torpedoes and rockets. Two large explosions broke her in two and she sunk in the middle of a large oil slick. 807 of her crew, including her captain were lost, with 220 surviving.
The Nachi's loss turned out to play a larger strategic role in the American war effort, as USN divers later found a large set of code documents in the wreckage. These documents were all the more important because the Nachi had been the flagship of the Second Striking Force...
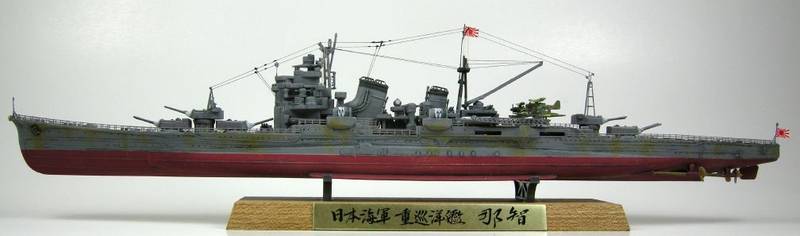
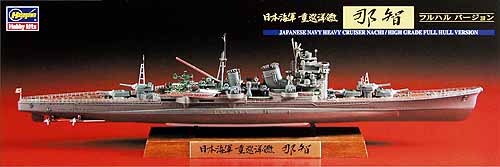
The Model:
This is the Hasegawa 1/700 IJN Nachi with full hull and photo etch. I had this kit hanging around for a while and when the Cruisers of The 20th Century campaign came along, I decided I'd dust it off and build it.
With all of the other projects hanging over my head, I decided to keep this build as OOB as possible, with the exception of the always wonderful Fukuya Works barrels and of course, tippet line for the rigging. The flags are from Tauro.
About the Author


FROM: MARYLAND, UNITED STATES
I'm a third generation modeler who builds a little of everything (mostly Japanese)- all while being a 45 year old hermit who lives a happy, simple life, with my fiancée (author Jaclyn Dolamore) and three cats. My father was an MM3 aboard the USS Saratoga (CVA-60), my grandfather was in one of the...
Comments

Howdy Grant, thanks!
For the rigging, I'm gonna be lazy and quote my Mikasa article (although I should put this in each of my builds from now on)...
I use fly fishing tippet which is a type of resin coated thread that will hold its shape and is very strong (lures are made out of this stuff). Now comes the voodoo. For my support rigging (funnels and masts) I use 6/0, which is .005 mm. For standard rigging, I use 8/0 which is .003 mm. Did you catch that? The higher number tippet corresponds to the SMALLER diameter. The stuff I use is called UNI-Thread. It's available in many colors (I have black, brown, and tan) and sizes and comes in 200 yards, which is more than enough.
To expand on this, I unravel a large amount of tippet from the spool so I won't have any issues with the spool colliding with the kit. I put a small spot of CA glue where the rigging will start (use a toothpick). After the CA has dried, I start to run the rigging to where it next needs to go (say, the top of a mast), put a dot of glue there to secure it, and so on. The nice thing about tippet is that thanks to the thin resin coat, it can be "shaped". So if your rigging has to hang loose and bow along a curve, just run your finger along to shape it before anchoring to the second point.
For items like the small insulators seen near the rigging connections, that's just a small dab of white glue that will congeal into a blob naturally and works pretty well. Then paint it when dry.
I hope this helps!
FEB 06, 2009 - 04:59 AM

Dade
Yes - that helps alot. Seems easy enough. Thanks for the assistance!
Grant
FEB 06, 2009 - 05:15 AM

Hi Dade!
Excellent build article, even if you said that you keep it simpler, it will be a good reference for my own Nachi (same model)
I really appreciated the tip of using the tape - have to try it one of these days, and perhaps not on my Nachi.
Congratulations on another great model in your collection
Rui
PS: Sorry for the long overdue comment
FEB 06, 2009 - 06:14 AM
Hi Rui, thank you very much for the very kind words! And please don't think your comments were overdue. I am very happy to receive encouraging words no matter what the time frame.
FEB 06, 2009 - 06:42 PM

Another beautiful build.... great pics and blog. again, thanks for taking the time to document and taking so many high quality pictures. I picked up that kit, was on sale last month half-price from Squadron,(dont tell my wife I broke my New Year's resolution of no more kits!). Will use your blog as my "instructions assistant". Cheers
FEB 07, 2009 - 12:12 PM

Thanks guys and glad I can help! James, at the time I got mine, it was 40% off, but to see it later at 50% off...
FEB 07, 2009 - 06:51 PM
Great looking ship! I like the hull plate tape trick, very cool.
FEB 16, 2009 - 06:40 AM

Great build, Dade, that ship must stand in a proud place in your living room.
Cheers,
Peter F
FEB 16, 2009 - 07:59 PM
Copyright ©2021 by Dade W. Bell. _OPINIONS Model Shipwrights, KitMaker Network, or Silver Star Enterrpises. Images also by copyright holder unless otherwise noted. Opinions expressed are those of the author(s) and not necessarily those of Model Shipwrights. All rights reserved. Originally published on: 2009-02-04 00:00:00. Unique Reads: 19593

WEB HOSTING BY


Copyright ©2021 Model Shipwrights and Kitmaker Network, a subsidiary of Silver Star Enterprises
All Rights Reserved. Please read our Conditions of Use and Privacy Policy.
All Rights Reserved. Please read our Conditions of Use and Privacy Policy.