_GOTOBOTTOM
Campaigns
Want to be part of a group build? This is where to start, plan, and meet about them.
MSW Build Contest - Zuikaku 1:700 Full Build
Nanond
Visit this Community
Thailand / ไทย
Joined: May 03, 2008
KitMaker: 16 posts
Model Shipwrights: 13 posts
Posted: Wednesday, June 04, 2008 - 04:16 PM UTC
Here we go!

I am a bit late begining my blog, I guess...It's gonna be fun.

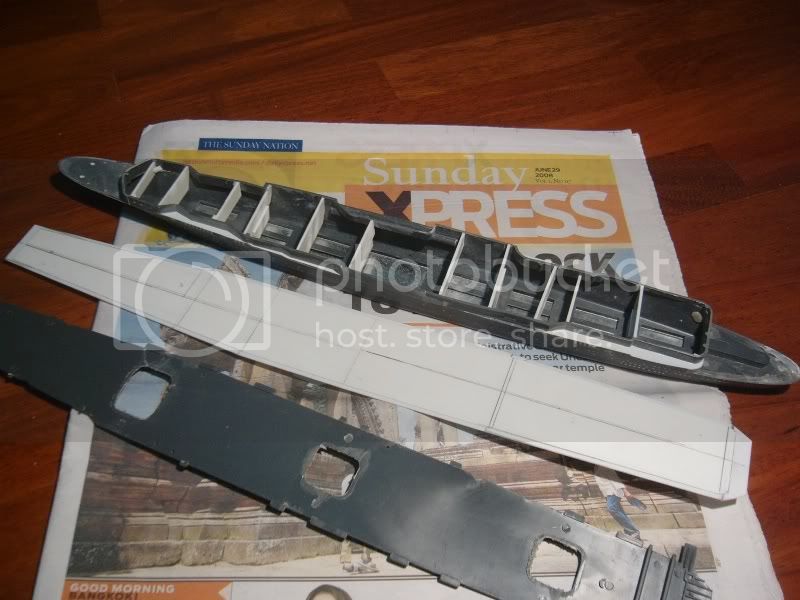
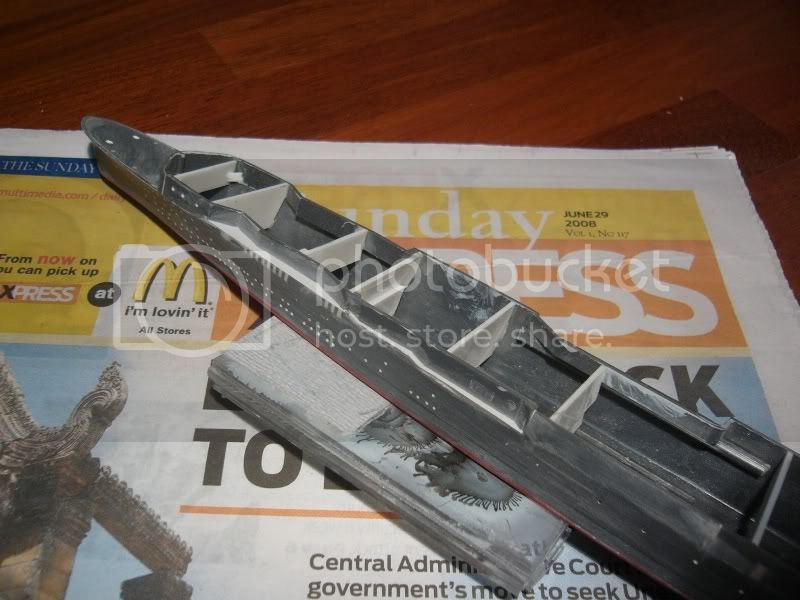
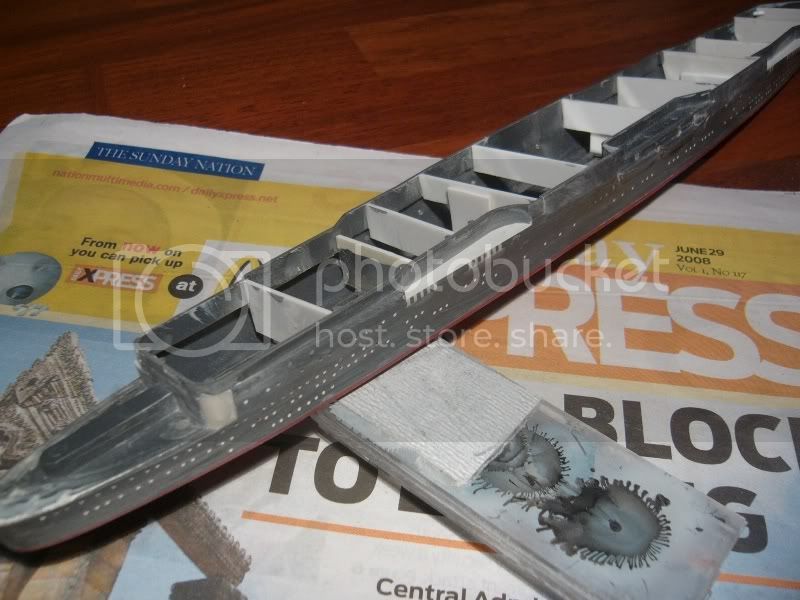
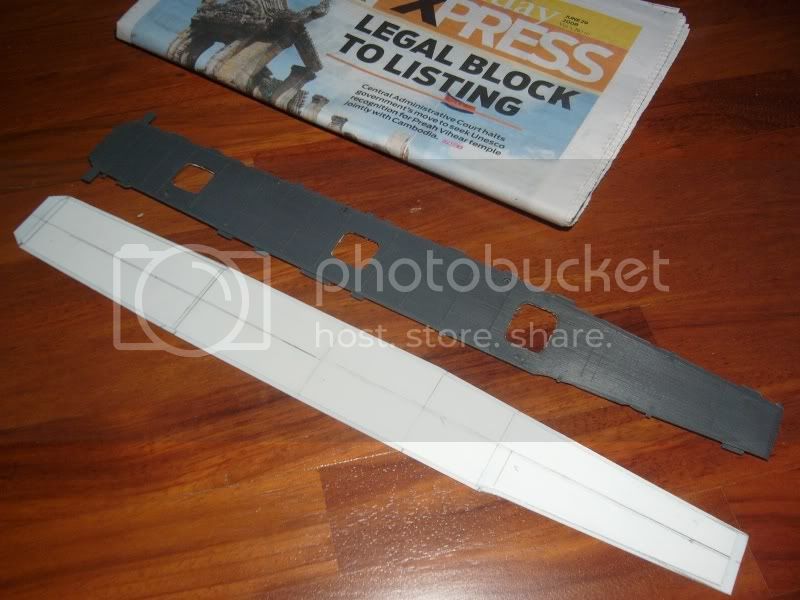
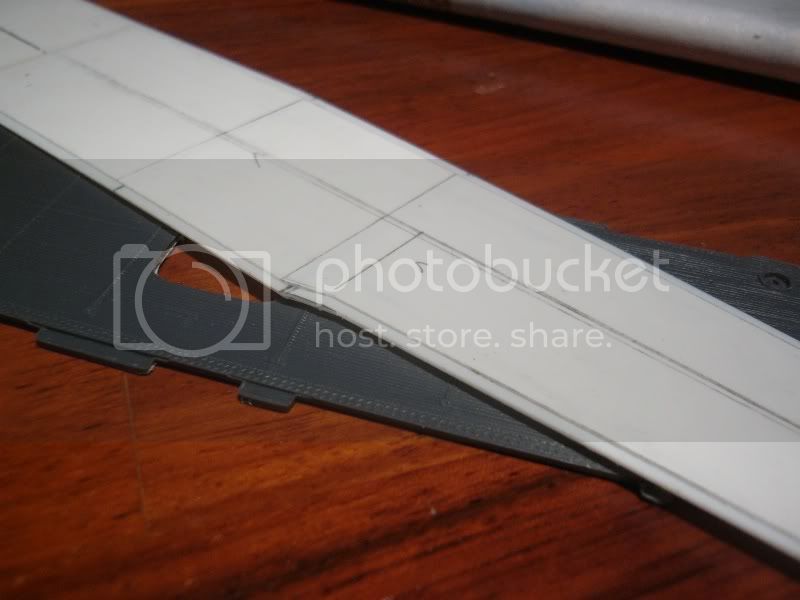
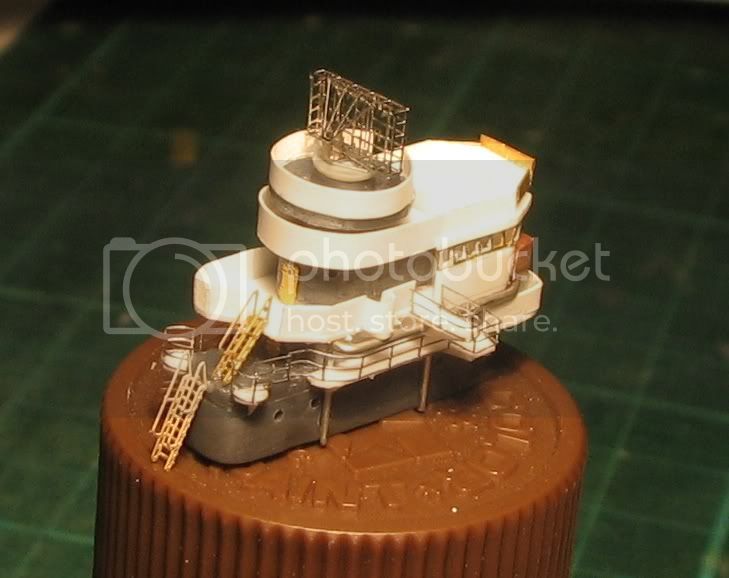
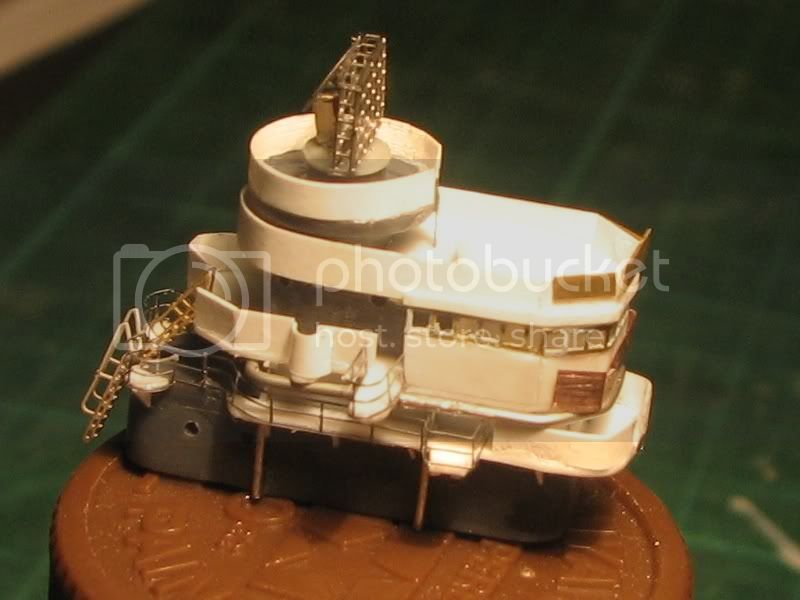
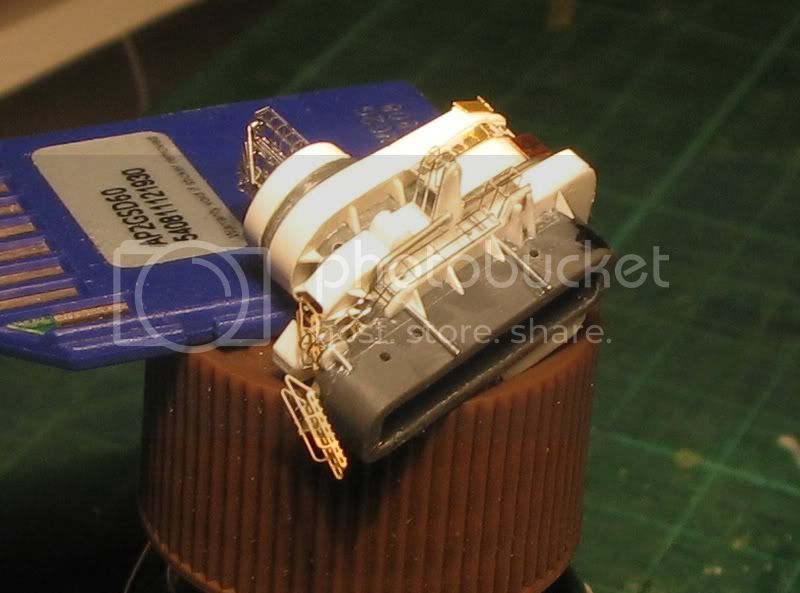
Here is my IJN CV Zuikaku. The last survivor of the six CVs that launched the attack on Pearl Harbor. I'm going to modify her as fit in her last mission in October 1944. Yes, with that well known camo'ed deck.
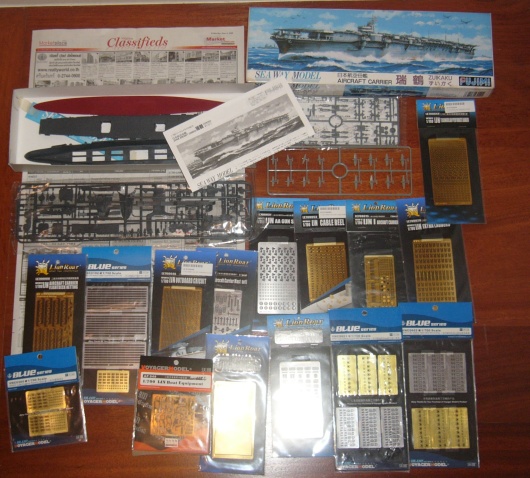
Model kit
Manufacturer : Fujimi
Scale : 1/700
Name : IJN Zuikaku
Category: Full build

PE stuffs were from Lion roar

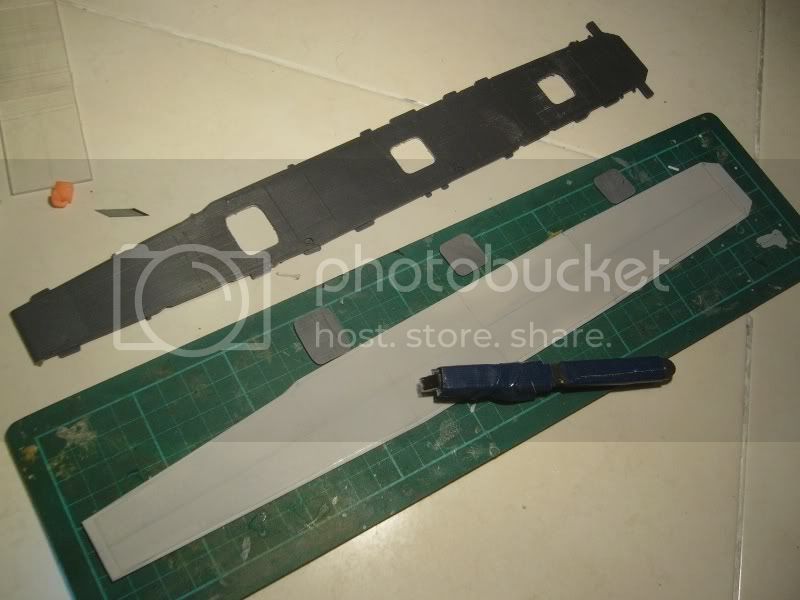
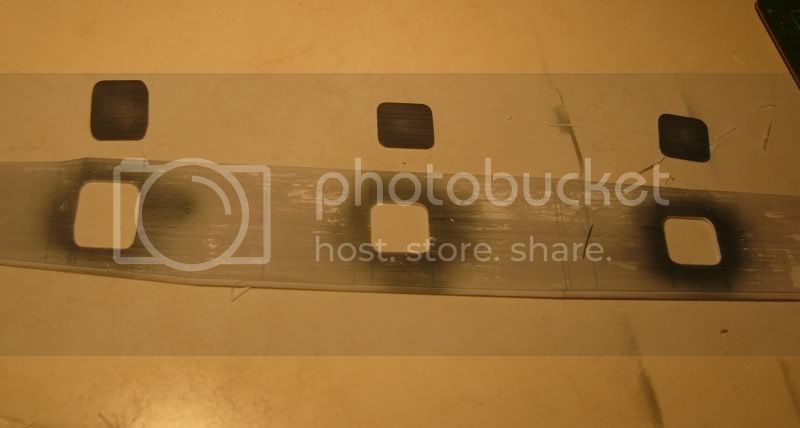
1. Flight deck netting
2. perforated triangle support
3. CV mast set
4. IJN 13mm AA gun
5. IJN ladder set
6. IJN carrier set (the wind break)
7. IJN type 21 radar set
8. IJN carrier aircraft fitting

and Voyager.

1. IJN ship railing
2. IJN 25mm triple mount
3. IJN 25mm twin mount
4. IJN cable reel set


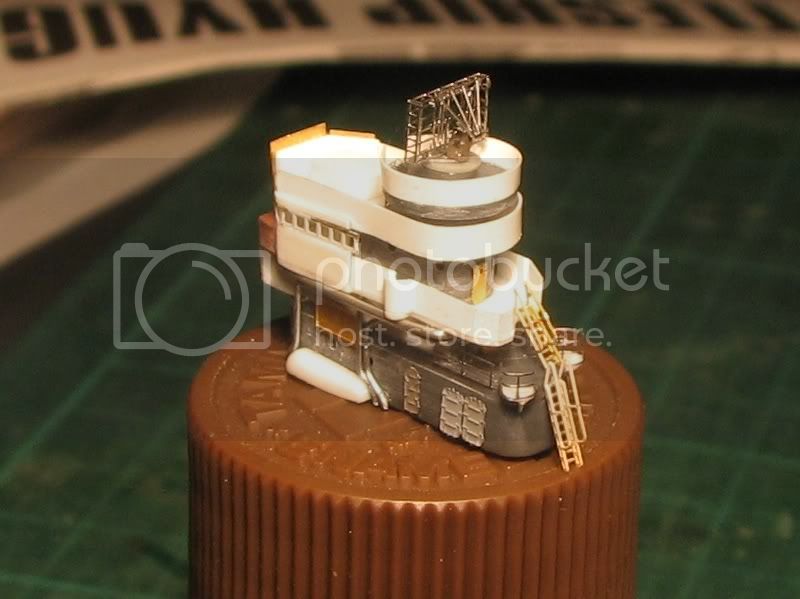
Hope you can see thw Wednesday, June 4th, 2008. I will try to find more eyes-friendly newspaper next time. I promise

Nanond
Gunny
Visit this Community
Pennsylvania, United States
Joined: July 13, 2004
KitMaker: 6,705 posts
Model Shipwrights: 4,704 posts
Posted: Wednesday, June 04, 2008 - 09:26 PM UTC
Welcome aboard, Nanond, glad to see you made it!
Looking forward to watching the progress, mate.........
redneck
Visit this Community
Pennsylvania, United States
Joined: June 06, 2005
KitMaker: 1,602 posts
Model Shipwrights: 665 posts
Posted: Thursday, June 05, 2008 - 01:31 AM UTC
Nanond I built that kit. It has a few accuracy issues but the PE sets should fix it all up.

Gator has a great paintmask for the deck of this one.

Best of luck in the contest.
goldenpony
Visit this Community
Zimbabwe
Joined: July 03, 2007
KitMaker: 3,529 posts
Model Shipwrights: 2,419 posts
Posted: Thursday, June 05, 2008 - 02:33 AM UTC
Looks like a very interesting build you have on your hands.

Looking forward to it!

#027
Visit this Community
Louisiana, United States
Joined: April 13, 2005
KitMaker: 5,422 posts
Model Shipwrights: 5,079 posts
Posted: Thursday, June 05, 2008 - 07:08 AM UTC
She should be a real beauty.

Kenny
skipper
Visit this Community
Lisboa, Portugal
Joined: February 28, 2002
KitMaker: 5,182 posts
Model Shipwrights: 4,070 posts
Posted: Tuesday, June 17, 2008 - 05:39 AM UTC
Hi Nanond!

Welcome to MSW and I will follow your built with interest.
Please keep us posted


Rui
Nanond
Visit this Community
Thailand / ไทย
Joined: May 03, 2008
KitMaker: 16 posts
Model Shipwrights: 13 posts
Posted: Sunday, June 29, 2008 - 04:30 PM UTC
The first month has gone by. Here is my progress for June.

These was no detailed work yet. I tried to make a solid ground for further detailing.
1. All the walls were fit and holes pluged with plastic sheet and epoxy putty.
2. Strengthening ribs were addes along the hull.
3. All the AA platform supports were shaven off.


Next thing was a new deck. Since the original deck has quite a few usable details plus a thickness of armored flight deck, I made a new one from a layer of 0.5mm sheet plus a 0.3mm sheet for wooden section. The steel sidwalk will be added with PE ribbed plate.
The lift openning holes are yet to be cut open. Though I planed to position it close.
(I based deck's dimension on the kit's one so not to modify the hull.)


I guess this is pretty much done for this month. Let's see what July will bring.

Nanond N.

Clanky44
Visit this Community
Ontario, Canada
Joined: September 15, 2005
KitMaker: 1,901 posts
Model Shipwrights: 934 posts
Posted: Monday, June 30, 2008 - 01:23 AM UTC
Hi Nanond,

Great start with your Zuikaku, You've done well to clean up that old Fujimi hull. The scratch built flight deck is a great idea.

well done,

Frank
#027
Visit this Community
Louisiana, United States
Joined: April 13, 2005
KitMaker: 5,422 posts
Model Shipwrights: 5,079 posts
Posted: Monday, June 30, 2008 - 05:29 AM UTC
Very nice work there.

Kenny
redneck
Visit this Community
Pennsylvania, United States
Joined: June 06, 2005
KitMaker: 1,602 posts
Model Shipwrights: 665 posts
Posted: Monday, June 30, 2008 - 10:32 AM UTC
Fantastic start Nanond.
I remember those walls along the top were a real pain to get in place on mine.
peterf
Visit this Community
England - South East, United Kingdom
Joined: November 23, 2007
KitMaker: 426 posts
Model Shipwrights: 424 posts
Posted: Monday, June 30, 2008 - 08:37 PM UTC
This all looks very professional, Nanond, and some nice photos to explain the process, very interesting thread which I shall follow keanly.

Peter F
Gunny
Visit this Community
Pennsylvania, United States
Joined: July 13, 2004
KitMaker: 6,705 posts
Model Shipwrights: 4,704 posts
Posted: Monday, June 30, 2008 - 10:02 PM UTC
First Build Session Closed-Keep Modeling!
Nanond
Visit this Community
Thailand / ไทย
Joined: May 03, 2008
KitMaker: 16 posts
Model Shipwrights: 13 posts
Posted: Monday, July 28, 2008 - 11:19 PM UTC
Hello!

People out there are working so fast. Many ships got into shape already. This made me look at my work and think that a snail could even work faster...

Ok, so what's on this month? It's wood decking and opening the holes for lifts.


The tool for deck scribing was made from a bundle of cutter blades. I used some 16 of them. I also learnt that just 6-8 blade would be enough.
There is nothing new here. I have seen this on the internet.


Held them to a stick.


I tried to hold both the deck and ruler firmly but the it was ways better to hold the ruler by my hand, in the end.


Finished deck


Next to be done was the lifts. I used kit's original, sanded down the detail and rescribed the wood paneling. Did they put wood on the lift anyway??? I'll find that out later. If they didn't, I will sand them flat again.


Hols for lifts were opened.


That's it today.

Nanond N.
beefy66
Visit this Community
England - North East, United Kingdom
Joined: October 22, 2007
KitMaker: 971 posts
Model Shipwrights: 645 posts
Posted: Tuesday, July 29, 2008 - 12:04 AM UTC
Your deck scribing job makes mine look pitifull it is always good to follow the master and i,ll be following your tips very close thanks for sharing your wisdom
DrDull
Visit this Community
Illinois, United States
Joined: February 23, 2006
KitMaker: 133 posts
Model Shipwrights: 128 posts
Posted: Tuesday, July 29, 2008 - 10:17 AM UTC
Nanond- beautiful craftsmanship - I'd never seen that method of scribing before and the results look great. This is going to be a wonderful model. Barry
Tailor
Visit this Community
Nordrhein-Westfalen, Germany
Joined: May 26, 2008
KitMaker: 1,168 posts
Model Shipwrights: 676 posts
Posted: Tuesday, July 29, 2008 - 04:38 PM UTC
Great idea using a "multiblade": You should sell that as a regular product!
Very innovative thinking prompting very good results!
redneck
Visit this Community
Pennsylvania, United States
Joined: June 06, 2005
KitMaker: 1,602 posts
Model Shipwrights: 665 posts
Posted: Wednesday, July 30, 2008 - 04:56 AM UTC
Looks great.

Have you dry fit those lifts yet? I seem to remember them not fitting too well.
Karybdis
Visit this Community
Maryland, United States
Joined: December 27, 2006
KitMaker: 846 posts
Model Shipwrights: 740 posts
Posted: Wednesday, July 30, 2008 - 06:42 AM UTC

Quoted Text

This made me look at my work and think that a snail could even work faster...


Nah, the "honor" of slowest contestant goes to me so far. If I sat still, I couldn't be any slower...
Clanky44
Visit this Community
Ontario, Canada
Joined: September 15, 2005
KitMaker: 1,901 posts
Model Shipwrights: 934 posts
Posted: Wednesday, July 30, 2008 - 03:11 PM UTC
Well done Nanond, interesting and very effective technique with the scribing tool.

Frank
Nanond
Visit this Community
Thailand / ไทย
Joined: May 03, 2008
KitMaker: 16 posts
Model Shipwrights: 13 posts
Posted: Wednesday, July 30, 2008 - 04:40 PM UTC
Hi !

Thank you for comments, Barry, Keith, Frank. When it comes to serious marketing, I'll go to you first Guido....How many do you need to trade for a resin light cruiser??

Hi jacob! Yes indeed. The fit is just bad, especiallt the front lift. Partially because I sanded too much off the kit's lift and I also opened a quite too large hole on the deck. In the end, I tried to get the opening right, fit the lift and fill the gap with epoxy putty.

Here I started a bit of detail work. Since all other points are quite a big task, I just bagan with the bridge.

Though the box art shows what seems to be an early config Zuikaku, The bridge looks more like the late war one.


I detailed it with plastic sheets of various thickness, 1/350 ladder for bridge's window and some PE frame for armor plating. it was some 50% completed.


Just like Jacob said. The lift's fitting is not so well.
This is dry fit......They couldn't launch an attack with trap holes on the deck like this


This is after filling.


See you next month!

Nanond N.
Gunny
Visit this Community
Pennsylvania, United States
Joined: July 13, 2004
KitMaker: 6,705 posts
Model Shipwrights: 4,704 posts
Posted: Thursday, July 31, 2008 - 09:48 PM UTC
Second Build Session Closed-Keep Modeling!
JMartine
Visit this Community
New Jersey, United States
Joined: October 18, 2007
KitMaker: 1,698 posts
Model Shipwrights: 1,514 posts
Posted: Monday, August 04, 2008 - 12:53 PM UTC
great craftmanship! cheers
peterf
Visit this Community
England - South East, United Kingdom
Joined: November 23, 2007
KitMaker: 426 posts
Model Shipwrights: 424 posts
Posted: Thursday, August 21, 2008 - 08:21 PM UTC
I agree, wonderful work Nanond, pure artistry.

Peter F
Gunny
Visit this Community
Pennsylvania, United States
Joined: July 13, 2004
KitMaker: 6,705 posts
Model Shipwrights: 4,704 posts
Posted: Sunday, August 31, 2008 - 11:42 PM UTC
"Build Session 3 closed~Keep Modeling!"
Nanond
Visit this Community
Thailand / ไทย
Joined: May 03, 2008
KitMaker: 16 posts
Model Shipwrights: 13 posts
Posted: Monday, September 01, 2008 - 06:40 AM UTC
Oh! NOOooooo. I missed the train, I guess.

That's fine. I did quite a little work in August anyway. I'll keep this for September.


Cheers!
Nanond
 _GOTOTOP