_GOTOBOTTOM
General Ship Modeling
Discuss modeling techniques, experiences, and ship modeling in general.
Working on Technique
treadhead1952
Visit this Community
Nevada, United States
Joined: June 12, 2008
KitMaker: 552 posts
Model Shipwrights: 493 posts
Posted: Sunday, June 22, 2008 - 09:54 AM UTC
Ahoy Shipmates,

As the title suggests, working on your technique that you use to build up ship models covers a lot of territory, from the basics of washing the sprues down prior to actually working on them, clipping parts off the sprues, clean up of the parts once free from the sprues. Detailing them out a bit with what ever extras you chose whether they be the latest and greatest from the aftermarket (Photoetch, Resin, better injection molded parts than what comes in the kit) to scratching and bashing things to work from styrene sheet or shapes or what ever media you may chose. Right down to gluing stuff together and then painting them up. Even chosing to display things on a dry dock type base or in a more natural environment made from whatever water type replica you may use.

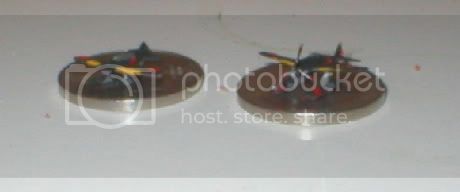
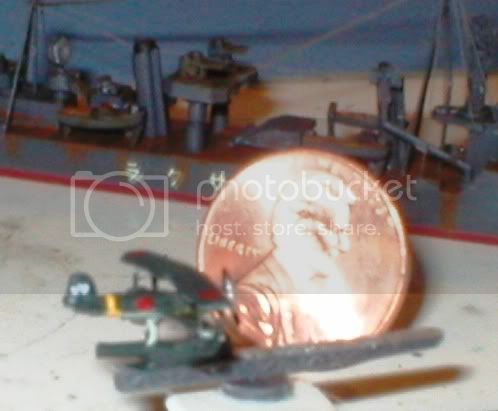
In between building up a large project I like to keep a few odd little kits about, things like Tamiyas' or Aoshimas' Tugger sets, the smaller ship sets like the Japanese Navy Auxilliary Vessels, or the Transports Set. These little sets don't break the bank running from $6 to $12, offer more than one subject to work on, and while they are pretty basic if you should chose to just add kit supplied parts and paint them up, they are by no means not capable of being added to. I am sure that you probably have a bit of PE left over from other builds, if you do this detailing enough, you will soon find that you will have a pretty fair selection of left overs. But even a supply of sprues left over from other kits can offer a supply of easily converted material to make cables, masts, rigging and whatever else your imagination can come up with.

While most of us use the 'Net to come up with research materials for larger builds and since the advent of surfin' the web, er doing research is handy, there is always the time honored method of looking at the boxart supplied with the kits to help you out as well. In the case of the Tugger set, there really isn't a great deal of information out there on the three different Tugs that are offered. Looking at the boxart shows a lot of areas for improvement in the basic stuff in the box from the padded bow sections to the added items on the little boats such as hoists, davits, and other nautical gear.


Stretching your repetoire of techniques comes in handy sometimes when you are working on larger projects and the small kits are excellent places for you to practice your chops.

The little Tugger set not only includes three different types of tugboats but several other craft that were commonly found serviceing the ships in port from fuel oil vessels to torpedo transports to maintenance boats and right down to the little boats that were used to transport personnel. That also makes it a handy source to improve some of the less expensive kits that don't quite make the cut as far as offering enough small boats.


If you are putting a ship in a harbor environment instead of out on the high seas some of the little boats are right handy to add in there for a bit of interest. While in harbor, things like maintenance, fueling, loading of supplies and ordinance are commonplace and the little set gives you lots of them to tinker with and use your imagination.


Then, of course, there are the tugboats. These can be improved with some simple adjustments like rigging, bumpers, tires, braces and other things that are shown on the boxart.


Just some idle thoughts from an idle mind.
wildspear
Visit this Community
Michigan, United States
Joined: April 03, 2007
KitMaker: 960 posts
Model Shipwrights: 901 posts
Posted: Sunday, June 22, 2008 - 10:40 AM UTC
Some great looking builds and great reading also. We always have a big build that were working on , finishing up on or planning for but its always good to keep kits like that around just to give you a break. I have a couple set of 1/35 ww2 weapon kits that I bought by mistake(some reason I thought the box said 1/72 scale) but instead of returning them I keep them for a future build or just to build on there own. The kit doesnt have to be very involved with lots of parts and detail. Fun is where we find it.
Gunny
Visit this Community
Pennsylvania, United States
Joined: July 13, 2004
KitMaker: 6,705 posts
Model Shipwrights: 4,704 posts
Posted: Sunday, June 22, 2008 - 10:54 AM UTC
So very true, Jay, so very true...personally, I love the smaller tugs, cutters, barges, and the like to fill in between the large projects, as well, mate...I also like them AS my larger projects too!
goldenpony
Visit this Community
Zimbabwe
Joined: July 03, 2007
KitMaker: 3,529 posts
Model Shipwrights: 2,419 posts
Posted: Sunday, June 22, 2008 - 11:10 AM UTC
It can be a great way to fill in between and to give your ship dio another layer.

Thanks for the thoughts!

treadhead1952
Visit this Community
Nevada, United States
Joined: June 12, 2008
KitMaker: 552 posts
Model Shipwrights: 493 posts
Posted: Monday, June 23, 2008 - 01:10 PM UTC
Thanks Guys,

Working on small projects gives you a chance to experiment a little that you really hesitate to do with a larger more expensive kit. I have been tinkering on 1/700 scale aircraft for the cruiser and battleship builds that I have been doing waiting for my techniques to improve before I tackle any of the carriers that I have in the stash. When it comes time to work on whole squadrons to populate a flight deck, especially when you have PE sets from Gold Medal Models to add struts, props, landing gear and all the other little bits that Loren gives you, practice is about the only way to hope to get to a point where the sucess rate in completion goes into double digits on the upper end of the scale.

When you are talking dozens of aircraft like this, it takes a lot of patience.


And I am still not happy with the results.

But never say die, and just keep on practicing. Looking over some of the builds on here and other sites helps to offer up ideas and inspiration so that eventually I will get where I want to be.

A lot of times when I am working on an inexpensive kit from Fujimi or Aoshima, I will find aircraft that are actually unusable do to being older items produced when the molds were first introduced back in the 60's. These will get replaced with items from either Aoshima, Tamiya or Sky Wave Extra Equipment sets and the older ones get relagated to a box that I keep on hand for such rejects. When I am at a stopping point waiting on glue, paint or inspiration to strike, I will break one out and figure out what I can make out of the old mini bird. Sometimes a Corsair will come from what had intended to be an IJN aircraft of some indescript sort with bent wings and a little putty. So don't toss anything out, it will all have a use one day. Spoken like the true packrat that I am.
blaster76
Visit this Community
Texas, United States
Joined: September 15, 2002
KitMaker: 8,985 posts
Model Shipwrights: 3,509 posts
Posted: Wednesday, June 25, 2008 - 01:23 AM UTC
Some fine work there on thoe aircraft. I like the detail of the Trumpeter 350 scale aircraft which are in so many parts that one really needs only to assemble and paint them well. There are PE parts, but I really haven't had a lot of desire to use them, though replacing helicopter blades is one area that does improve them.
JMartine
Visit this Community
New Jersey, United States
Joined: October 18, 2007
KitMaker: 1,698 posts
Model Shipwrights: 1,514 posts
Posted: Wednesday, June 25, 2008 - 11:13 AM UTC
Great thread, thanks for sharing!
barbacanosa
Visit this Community
Baleares, Spain / España
Joined: August 09, 2005
KitMaker: 296 posts
Model Shipwrights: 45 posts
Posted: Thursday, June 26, 2008 - 05:56 AM UTC
Congratulations on such a good job
is incredible detail in the ships and planes to so small scale

I am a model Dioramas 1 / 35 but I liked both this site that I buy Akagi to 1 / 450 of Hasegawa, and we will see that I am capable of doing

with your permission and help you ask
Do you know the model? Do you have that opinion?

Regards
Domi
rokket2001
Visit this Community
South Australia, Australia
Joined: March 28, 2005
KitMaker: 353 posts
Model Shipwrights: 331 posts
Posted: Saturday, June 28, 2008 - 08:47 PM UTC
That's either one GIANT penny, or atom-sized planes. Very nice!
treadhead1952
Visit this Community
Nevada, United States
Joined: June 12, 2008
KitMaker: 552 posts
Model Shipwrights: 493 posts
Posted: Sunday, June 29, 2008 - 01:18 AM UTC
Thanks Mates,

Domi, most of the ship models that I have done are in either 1/72 or 1/700. Hasegawa makes some very nice stuff and I have built several of their aircraft models and a couple of ships in the smaller scale but no experience with a 1/450. I am currrently trying my hand at the Mirage 1/400 ORP Wicher and working in the larger scale does offer numerous other opportunities to better detail things. Looking at your Miale thread makes me think that you should have no problems with working over Hasegawas' Akagi.

Wink, no giant penny, although I have been acused of that before. I am trying my hand at working on the small scale planes since I have about 8 IJN Aircraft Carriers waiting my attentions in the stash. I have discovered Gold Medal Models marvelous Photoetched sets which include lots of detailing parts for aircraft so that means I won't have to resort to stretched sprue for things like struts for the biplanes anymore.

While not exactly ships all the time, I do occassionally make up small scenes using water as a theme.


jba
Visit this Community
Rhone, France
Joined: November 04, 2005
KitMaker: 1,845 posts
Model Shipwrights: 502 posts
Posted: Sunday, June 29, 2008 - 02:09 AM UTC
Jay you are a pretty good modeler from what i see, this small plane of yours above, wow, now that's some detailing! You seem to have some very nice looking dios on your last post -indeed the water looks brillaintly executes -any otrher biogger pictures of that sub IJN dio at the top + that sea boat on the bottom?
Anyw, my sincere congratulations on a very fine job
JB
treadhead1952
Visit this Community
Nevada, United States
Joined: June 12, 2008
KitMaker: 552 posts
Model Shipwrights: 493 posts
Posted: Sunday, June 29, 2008 - 02:19 PM UTC
Thanks Jean-Bernard,

Appreciate the nice comments. As to the sub diorama, it is the I-1 and I-6 from Aoshima. It is also available from Tamiya, same kit, either one are reboxings of an original Sky Wave kit. As these are 1/700 scale, they are both juxt over 5 inches long, not really large. Not wanting to have to handle them often, I decided to place them in some sort of scene so I could deal with their small sizes a lot easier that way.

Being a cheap old goat, I used Plaster of Paris as my medium for the base. It is easy to cast, while still slightly damp, the models can be sunk into the scene using a knife blade or even a nail to gouge out a place for them to sit in the plaster and once hardened up it accepts paint. In some cases a little too well, I use poster paints for the base coats and save the more expensive enamels and acrylics for the actual models. The water surface is built up layers of a product called Modge Podge which is an acrylic medium used to make decoupage art works, prints, pictures, posters, even leaves and flower petals trapped in layers of clear acrylic. It is sort of like thickened Elmers' White Glue, as it comes out of the jar it is white but dries crystal clear and stays that way over time.

Casting the base up was a matter of using a plastic storage box lid wrapped around its' circumference with duct tape to form a dam to hold the liquid plaster mixture while it hardens. Once it has gotten mostly solid, unwrap the tape and the base pops right out. I have also used the round plastic coffee can lids as molds, that is what the scene with the two pilots and their native boatmen is made with. One cautionary note, do not use anything that you will later use to make food with to mix or mold the plaster in. It is impossible to completely clean plastic surfaces and tiny microscopic bits of plaster will come off in the food, not something you want to ingest at all. I usually use a coffee can to mix the stuff in and toss it out afterwards.

Here is a shot of the unpainted base with the various models posed to figure out how I wanted to situate everything.


Here is one with the infamous oversized Penny that I have been accused of owning.


The tiny Hydroplane SPL model from A Model caught my attention after reading about it in an article on experimental seaplanes. It caught my interest because the entire plane was to be housed in a steel tube mounted on the deck of a submarine. It too is a very tiny model and as such I didn't want to have to handle it too often, Placing it in its' natural environment with the shipping tube on a section of what appears to be a submarine was easy enough to cobble up using sheet and shapes of styrene available from Evergreen or Plastruct. The base is from that same plastic storage box lid (still have it and use it).

Once the base was made, scaling the submarine section and shipping tube was easy enough. I will admit it is a bit of Imagineering more than actual fact, but it does show how the plane was to be handled. I was fortunate in that Revell brought out their 1/72 scale German Sailors set to man the S Boats and Submarines that were coming out at the time. A little judicous trimming and painting turned them into Soviet sailors. The pilot figures were left over from a generous stash of extra parts that I have accumulated over the years.

The scene is from a back water in the Black Sea someplace, one of the problems was that calm water was required for the little plane, one of the reasons it was not a great sucess out on the open ocean.


jba
Visit this Community
Rhone, France
Joined: November 04, 2005
KitMaker: 1,845 posts
Model Shipwrights: 502 posts
Posted: Monday, June 30, 2008 - 06:36 AM UTC
I keep on what i said -and without typing mistakes this time -you're a pretty good modeler, not to mention imaginative as well, thanks for the pictures and explanations!
being an unconditional of acrylic gels, I will check the one you use called Modge Podge -if it can embed some somewhat deeper layers the "usual" one, then it's a very interesting product indeed.
Anyway, both are cleverly orgalized and done diorams, all my congratulatuions and thanks for sharing!

then
Quoted Text

Being a cheap old goat


me too!
JB
treadhead1952
Visit this Community
Nevada, United States
Joined: June 12, 2008
KitMaker: 552 posts
Model Shipwrights: 493 posts
Posted: Tuesday, July 01, 2008 - 12:48 PM UTC
Thanks again Jean-Bernard,

I have also used Acrylic Gesso, the stuff artists use to texture and prepare canvas for painting. While it doesn't dry clear like the Modge Podge, it does offer some nice texturing abilities.

I suppose you know about using cut up bits of styrene embedded in what ever texturing agent you are using to form up splashes and directional waves like from the bow of ships and torpedo launches and such. It is an old trick but well worth repeating. I have even seen aircraft models suspended over a just launched torpedo using a wire armature to keep everything lined up. The whole thing being camouflaged with appropriate splashes and waves.
 _GOTOTOP