_GOTOBOTTOM
Ships by Class/Type: Destroyers
This forum covers all types of destroyers from all eras.
Waterline 350th Isokaze
Clanky44
Visit this Community
Ontario, Canada
Joined: September 15, 2005
KitMaker: 1,901 posts
Model Shipwrights: 934 posts
Posted: Monday, January 05, 2009 - 04:26 PM UTC
As most of you are keenly aware of by now... I am a tediously slow builder! ... the snails pace of my ship modelling is further exacerbated by my work, which keeps me away from the comforts of home most of the time... excuses,... excuses you say,... well yes, but with that said, I've made it my (modelling) new years resolution to shake the doldrums away,... and here's how...

First off, build smaller models!!! It seems that I'm attracted by big shiny (expensive) models, unfortunately, these same big models take forever to complete.

Secondly, do away with all reference, if these Japanese models of Japanese ships researched and designed by Japanese engineers are flawed, then how the heck is this land-lubber westerner supposed to make out?!?

Thirdly, BUILD moron!... put aside the X-box controller and pick up the airbrush!... I cannot begin to count the days waisted in front of the TV with a controller in hand,.... very sad.

Fourth, take the models with me on the work stints, what else am I going to do in northern Ontario in the middle of winter!

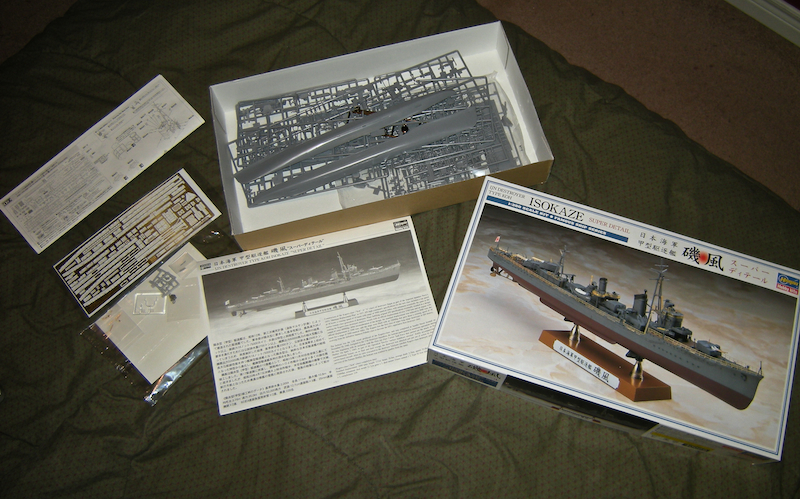
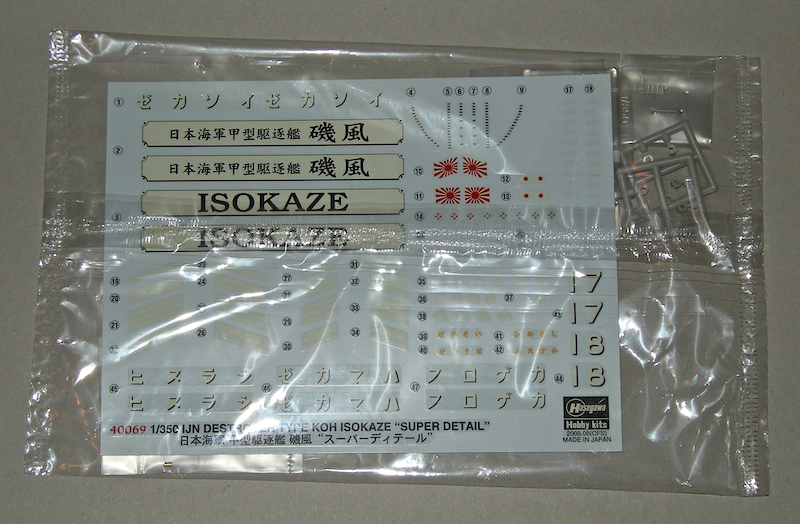
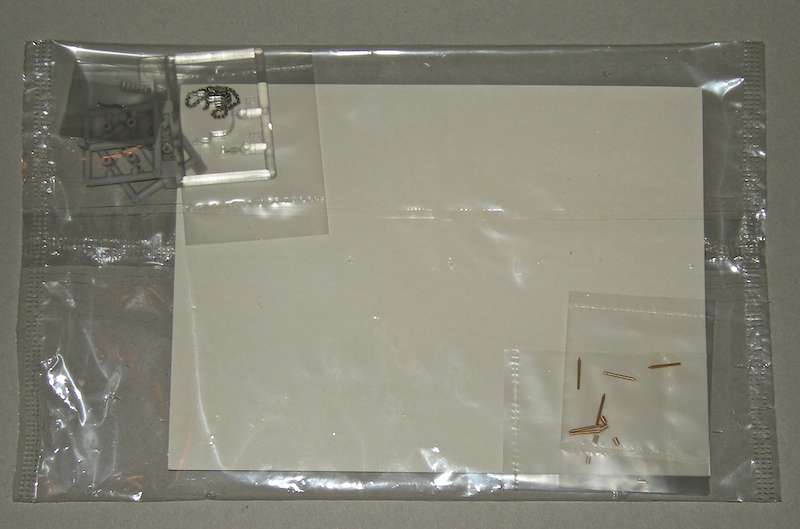
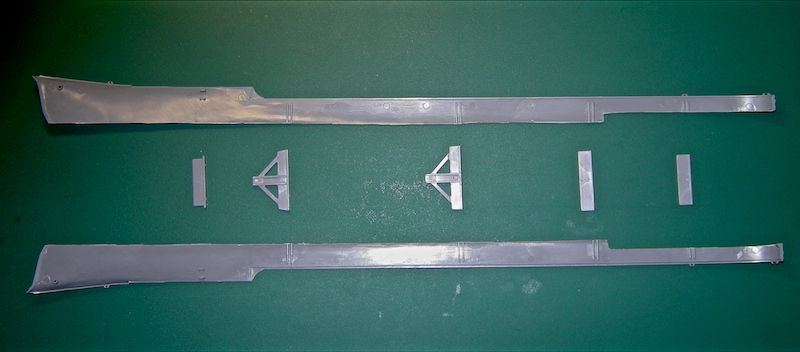
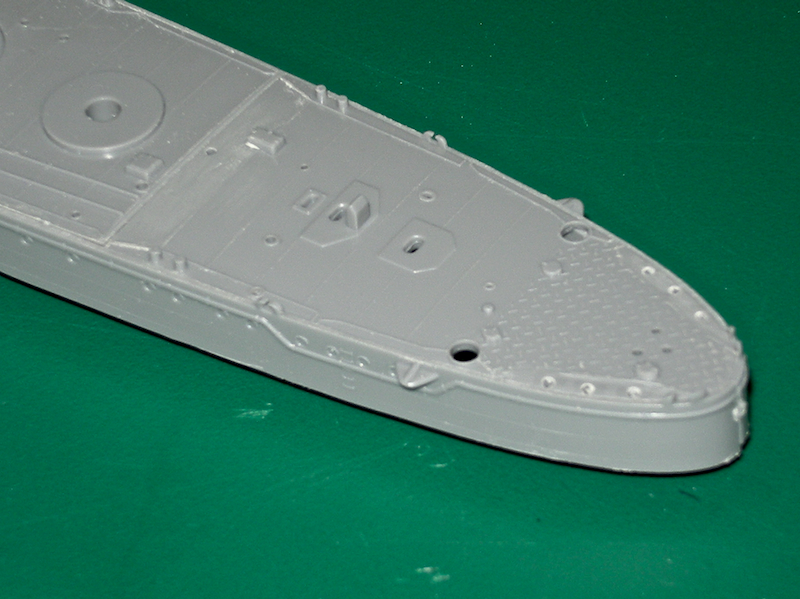
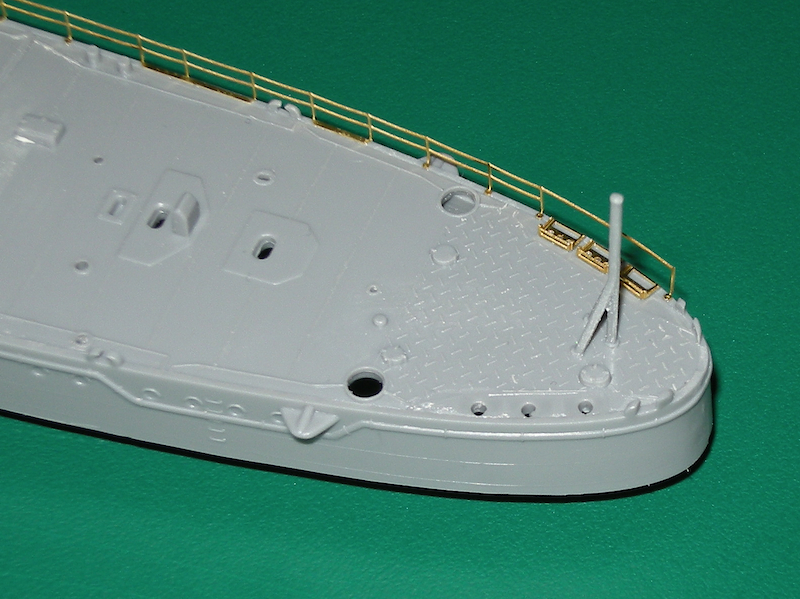
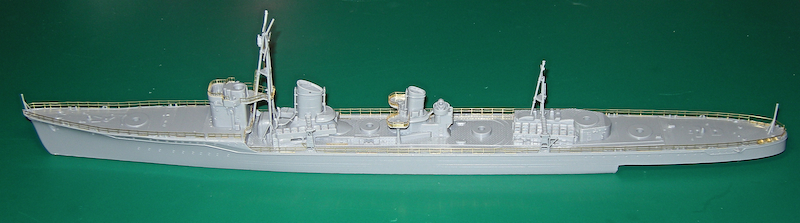
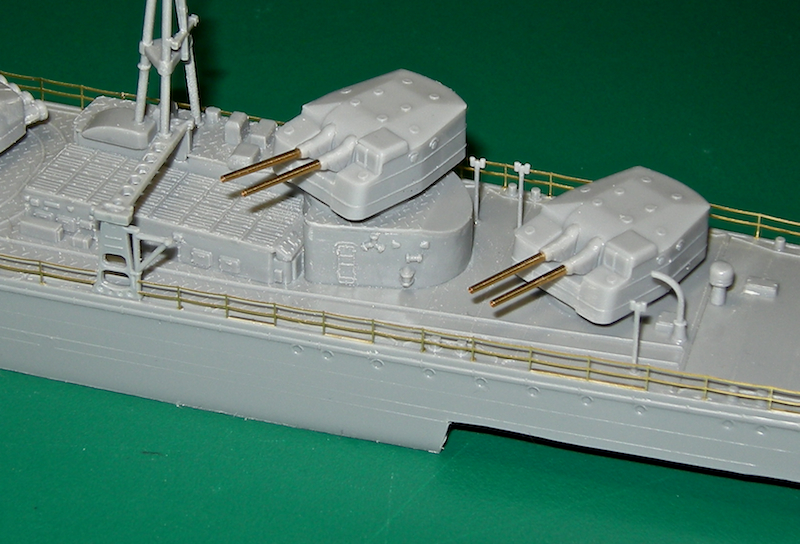
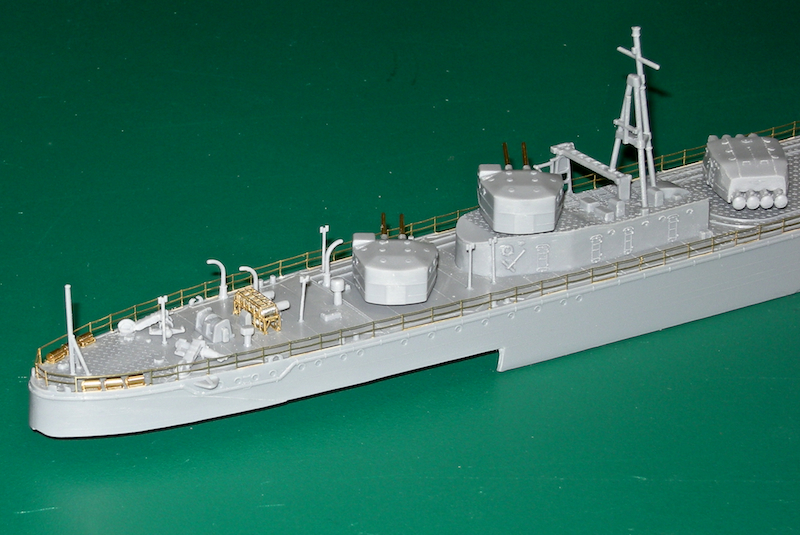
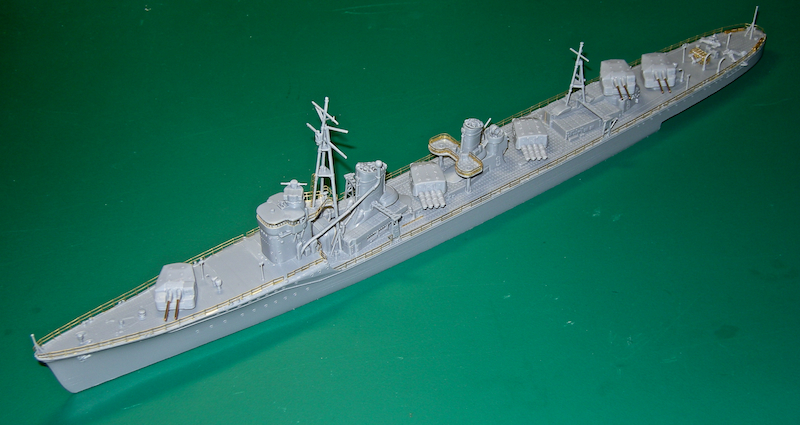
... so with my rant over, I bring you the first of (hopefully) many smaller kits which I plan on completing this year... my good friend Steve bought me this model for my birthday recently, and being a multi-media kit, has pretty well everything I need in the box to make a great looking (and easy) model. The kit comes with a dedicated, comprehensive fret of PE, chains, turned barrels and brass depth charges


Clanky44
Visit this Community
Ontario, Canada
Joined: September 15, 2005
KitMaker: 1,901 posts
Model Shipwrights: 934 posts
Posted: Monday, January 05, 2009 - 04:59 PM UTC
Before I get the build blog started, keep in mind that all of this is being built and photographed at my office/motel in a very small town 400km north of Toronto. (with horrid internet service!) The trusty Nikon D200, flash units, tripod and backgrounds have all been left at home. This is all documented with a point and shoot, hand held, so please pardon the quality of some of these entries.

The Blog,

As with all my ships (make that all 5, I've ever completed), this one will be waterlined. In my opinion, ships look so much better in water, something quite unnatural about a massively heavy ship suspended in mid air.

I started with the hull, marking the waterline with a thin strip of tape.


I then added another (3mm) strip of tape beneath the waterline, in order to partially expose the lower hull as I plan on displaying the destroyer in rough seas.


Not having my dremel tool with me, I used the back of a fresh knife blade to cut the hull along the tape edge.


The stepped waterline cut will conform to the rough waters, the front of the hull will be cresting a wave, the mid ship will be high out of the water and the aft portion will be almost level with another cresting wave.

The hull assembly is completed with the hull bracing, S5 and S6 are cut down to waterline prior to attaching, C14 (aft brace) was not used as the rudder will obviously not be needed.


At this point, I've got to decide which of the three versions I'm going to build. The options are the 1940 version with the three turrets. The 1943 version with the three turrets and added AA mounts, or the 1945 (Operation TEN-GO) version with a removed turret and added AA mounts.

Here's what the deck options look like,

1940 - 1943


1945


all comments welcomed

Frank
Karybdis
Visit this Community
Maryland, United States
Joined: December 27, 2006
KitMaker: 846 posts
Model Shipwrights: 740 posts
Posted: Monday, January 05, 2009 - 07:01 PM UTC
Replace "X-Box" with "Nintendo DS" and "Various MMORPGs" and you have pretty much my resolutions as well (with the addition of "try to see some friends and family once in a while").

I'm looking forward to seeing what you do with this nifty little kit. It's looking great so far!

And hey, we full hull guys don't have our ships "suspended in mid air"... they're sitting on a bunch of rods and cradles that would make those heavy ships break in real life!
KrokoHunter
Visit this Community
Fyn, Denmark
Joined: May 15, 2006
KitMaker: 179 posts
Model Shipwrights: 92 posts
Posted: Monday, January 05, 2009 - 10:00 PM UTC
Hey Frank

Oh another exiting project on your (portable) workbench. I really look forward to following this one, as I've recently ordered the kit myself, as a training-model, before I try to tackle the Akagi, or any other of the larger ships of the Kido Butai ... the Kirishima really tempts me
#027
Visit this Community
Louisiana, United States
Joined: April 13, 2005
KitMaker: 5,422 posts
Model Shipwrights: 5,079 posts
Posted: Tuesday, January 06, 2009 - 02:56 AM UTC
Hey Frank, I like the choice in models. I vote for the 1943 version.

Kenny
goldenpony
Visit this Community
Zimbabwe
Joined: July 03, 2007
KitMaker: 3,529 posts
Model Shipwrights: 2,419 posts
Posted: Tuesday, January 06, 2009 - 03:29 AM UTC
I have had my eye on that kit for a while. Looking forward to your build and the rough water!

Quincy
Visit this Community
Oklahoma, United States
Joined: October 29, 2008
KitMaker: 99 posts
Model Shipwrights: 97 posts
Posted: Tuesday, January 06, 2009 - 03:57 AM UTC
An early war version is my choice. The later war versions made the Japanese destroyers odd looking.

Bob Pink.
CaptSonghouse
Visit this Community
California, United States
Joined: August 08, 2008
KitMaker: 1,274 posts
Model Shipwrights: 1,236 posts
Posted: Tuesday, January 06, 2009 - 08:50 AM UTC
That looks like a truly first-rate kit.

The early-war variant would be my preference, the ship's looked better and it was a glorious time for the IJN destroyer force.

--Karl
treadhead1952
Visit this Community
Nevada, United States
Joined: June 12, 2008
KitMaker: 552 posts
Model Shipwrights: 493 posts
Posted: Tuesday, January 06, 2009 - 03:20 PM UTC
Go Frank Go!

Looks like you are off to running start. Have to agree with you on the "floating in air" bit, waterline versions look much better to my eye as well.
blaster76
Visit this Community
Texas, United States
Joined: September 15, 2002
KitMaker: 8,985 posts
Model Shipwrights: 3,509 posts
Posted: Wednesday, January 07, 2009 - 07:28 AM UTC
Looks great, but It is just anothr Kagero class (same as Yukikaze) Is there another 350 scale DD from a different class made. Tamiya released their version of this class and I guess the Hasegawa did the Yukikaze (late and early) a few years back
Clanky44
Visit this Community
Ontario, Canada
Joined: September 15, 2005
KitMaker: 1,901 posts
Model Shipwrights: 934 posts
Posted: Wednesday, January 07, 2009 - 03:49 PM UTC
A small update on the Isokaze, I've decided to build her in her initial1940-1943 configuration. This might pay off as I may be able to salvage the late war PE on the soon to be released Trumpeter IJN DD Suzutsuki (1945), which I've ordered from
HLJ as well as Model Art #30, which coincidently has part 3 of the IJN DD series (Isokaze included)

Looking at the deck, there are a few moulded on details which I wanted to replace, the cable reels, which will be replaced with Lion Roar PE and the DC launchers, which will be replaced by the kit supplied PE and turned brass DCs. The other moulded on parts are the inclined ladders on either side of the bridge, which will also be replaced with Lion Roar PE.


I then started the basic subassemblies, the two funnels, the bridge and the fore and aft torpedo storage cabins.


all comments welcomed,

Frank
Quincy
Visit this Community
Oklahoma, United States
Joined: October 29, 2008
KitMaker: 99 posts
Model Shipwrights: 97 posts
Posted: Thursday, January 08, 2009 - 03:52 AM UTC
Well done Frank! The photoetch replacements will look fantastic.


Bob Pink.
goldenpony
Visit this Community
Zimbabwe
Joined: July 03, 2007
KitMaker: 3,529 posts
Model Shipwrights: 2,419 posts
Posted: Thursday, January 08, 2009 - 04:38 AM UTC
That is sure a nice looking kit. The molded on ladder and doors really look nice. Any plans on replacing those with PE as well?

#027
Visit this Community
Louisiana, United States
Joined: April 13, 2005
KitMaker: 5,422 posts
Model Shipwrights: 5,079 posts
Posted: Thursday, January 08, 2009 - 05:10 AM UTC
Looking good Frank.

Kenny
Clanky44
Visit this Community
Ontario, Canada
Joined: September 15, 2005
KitMaker: 1,901 posts
Model Shipwrights: 934 posts
Posted: Thursday, January 08, 2009 - 04:42 PM UTC
Thanks for the comments guys.

Jim, there are two type of moulded on doors on this kit, the type that you made mention of makes up the majority of the ship doors (see blue arrows in attached photo) and is detailed enough to keep. The other type has no detail what so ever, and will be sanded off and replaced with PE (see red arrows in attached photos). The kit supplies you with two replacement PE doors, which is a shame, considering there are at least 5 of these types that I'll need to change.


Frank
goldenpony
Visit this Community
Zimbabwe
Joined: July 03, 2007
KitMaker: 3,529 posts
Model Shipwrights: 2,419 posts
Posted: Friday, January 09, 2009 - 12:47 AM UTC
That is strange they have the different styles, but that’s what makes things fun and exciting.

I would have hated to have been on that foc’sole. The rounded edges just do not look all that safe to a person. But then again being on a warship in a war isn’t all that safe either.

CaptSonghouse
Visit this Community
California, United States
Joined: August 08, 2008
KitMaker: 1,274 posts
Model Shipwrights: 1,236 posts
Posted: Friday, January 09, 2009 - 05:19 AM UTC
HI Frank!

Beautiful, and careful, work so far. It looks like the flying bridge bulwarks and bridge wings are too thick as well...

--Karl
JMartine
Visit this Community
New Jersey, United States
Joined: October 18, 2007
KitMaker: 1,698 posts
Model Shipwrights: 1,514 posts
Posted: Friday, January 09, 2009 - 06:20 AM UTC
Oh computer games... I could have a second PhD with all the time I have spent wargaming and playing Civilization in all its flavors...

Great work Frank! I think your pics came out fine, eventhe close up ones... lots of good detail, look forward to yoru PE application..cheers!
Clanky44
Visit this Community
Ontario, Canada
Joined: September 15, 2005
KitMaker: 1,901 posts
Model Shipwrights: 934 posts
Posted: Friday, January 09, 2009 - 05:00 PM UTC
Another small update,.. a bit of bridge work, some mast work and a tad of PE. To avoid damaging the photo-etch as it's being placed, I'm attaching it in order from inside to outside, with the bridge/mast sections first and eventually, railings last. The railings around the aft portion of the bridge are the most challenging in the set, a mix of curved and angled railings with upper railing portions bent at 90˚ and sections directly below bent at 30˚.


Frank
Clanky44
Visit this Community
Ontario, Canada
Joined: September 15, 2005
KitMaker: 1,901 posts
Model Shipwrights: 934 posts
Posted: Monday, January 12, 2009 - 09:28 AM UTC
Managed to get my railings completed, most went smoothly, with the odd exception.

The long aft sections of railings (MA70 & MA71), or to be more specific, the vertical attachment points come into contact with deck details. The original deck detailing is highlighted by the blue arrow and the repositioned part, once it was carefully removed with a sharp blade and reattached, is highlighted by the red arrow.


Another sour spot in the railings are MA56 & MA57, these two sections like the rest should be placed with the vertical attachment points (foot) facing inwards, allowing the railing to be flush with the hull. In this section it makes more sense to reverse it and have the 'foot' facing out, this would keep the railing level with the attachment points on either end. I left mine on as the instructions state, and have an unnatural bend to the attachment points.


I was going to fill in the large holes left over from the removal of the moulded on aft DCs, but noted that the PE roll off racks with the turned brass DCs attached will hide these holes.


a few overall photos of the kit so far...


Thanks for looking, all comments welcome.
Frank
Clanky44
Visit this Community
Ontario, Canada
Joined: September 15, 2005
KitMaker: 1,901 posts
Model Shipwrights: 934 posts
Posted: Saturday, January 24, 2009 - 12:21 PM UTC
Another small update, managed to get the majority of the details in place. The weapon mounts are not very good, they appear to me like the're downscaled from 700th. The overall poor look of the mounts though is slightly offset by the brass turned barrels.


The detailed depth charge rack and roll off racks are a highlight of the model, well done and easy to assemble.


The torpedo mounts suffer from the same lack of detail as the turrets, the torpedos are separate from the shields which should facilitate painting.


a few more overall photos...


thanks for looking,

Frank
Karybdis
Visit this Community
Maryland, United States
Joined: December 27, 2006
KitMaker: 846 posts
Model Shipwrights: 740 posts
Posted: Saturday, January 24, 2009 - 01:00 PM UTC
Geez, this build is moving pretty quick (so much for being slow!) and looking great!
DMcGillavry
Visit this Community
Istanbul, Turkey / Türkçe
Joined: July 15, 2006
KitMaker: 104 posts
Model Shipwrights: 102 posts
Posted: Saturday, January 24, 2009 - 08:35 PM UTC
Hi Frank,

I have this lovely kit and Lion Roar set . While erasing down raised degaussing cable details on hull, I a lso damaged some porthole details on bow sides . Do you know if there is a set contains 1/350 IJN portholes on market?

Not a big job I know but, I do not want to scratch them.

Regards,

Serhan
Clanky44
Visit this Community
Ontario, Canada
Joined: September 15, 2005
KitMaker: 1,901 posts
Model Shipwrights: 934 posts
Posted: Sunday, January 25, 2009 - 12:00 AM UTC
Thanks for the comments,

Dade, I'm really trying to work at completing one model every two months this year, if successful, that would give me,.... what,... six more completed models over last year!

Serhan, Sorry, I haven't come across any PE porthole eyelids, Lion Roar do make a set of porthole covers in 350th. Have a look at Guido Hopp's (Tailor) Leipzig build, he just did a whole ship's worth of eyelids.

https://modelshipwrights.kitmaker.net/forums/119817&page=4

thanks,
Frank
DMcGillavry
Visit this Community
Istanbul, Turkey / Türkçe
Joined: July 15, 2006
KitMaker: 104 posts
Model Shipwrights: 102 posts
Posted: Sunday, January 25, 2009 - 01:52 AM UTC
Thank you for info Frank.

Isokaze looks perfect by the way

Regards

Serhan
 _GOTOTOP