today I am starting a little project hat has been around for almost a decade, but has not received the merits it well deserves.
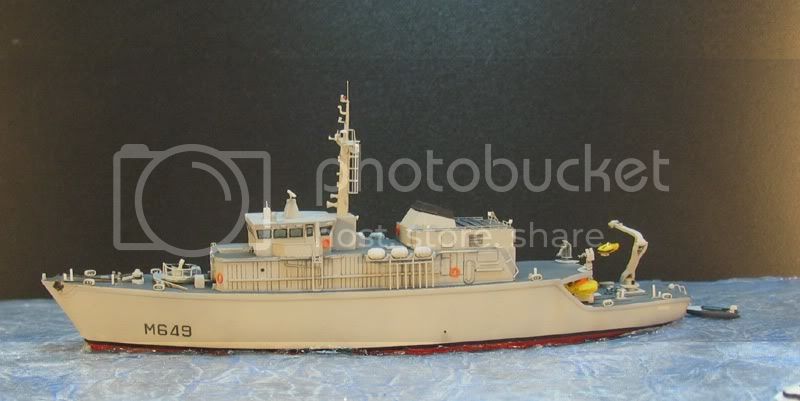
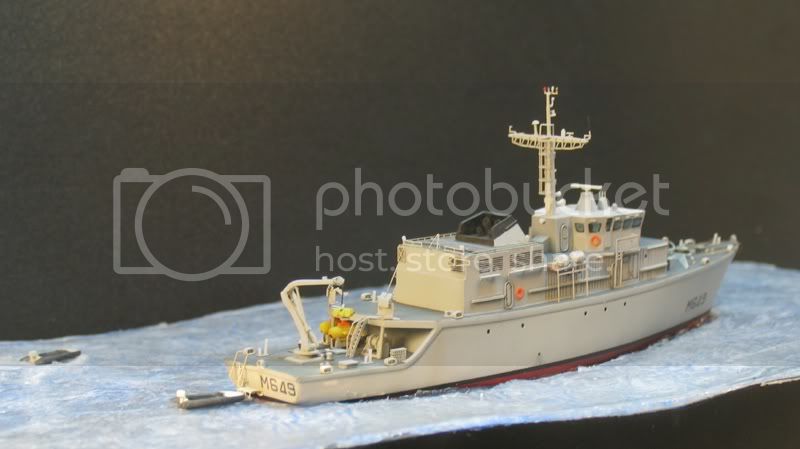
The subject is the TRIPARTITE- Class mine sweeper in 1/350 produced by LArsenal.
The TRIPARTITE (threepart) co-operation program of Belgium, The Netherlands and France set out in the mid 70ties calling for a new class of mine sweeper. While the actual ship building was carried out in each countrys facilities the sweeping equipment for all was provided by France, the electronics were developed and supplied by Belgium, while the propulsion system were out of Dutch production. The building program ran through the 1980ies, in which 25 vessels were completed. Within almost 30 years of service the ships ran through a number of upgrading programs to meet new challenges and incorporate new facilities.
Most of the ships are still on active duty today serving in the navies of Belgium, France, The Netherlands, Indonesia, Bulgaria, Latvia and Pakistan. The latter did actually build one boat under license.
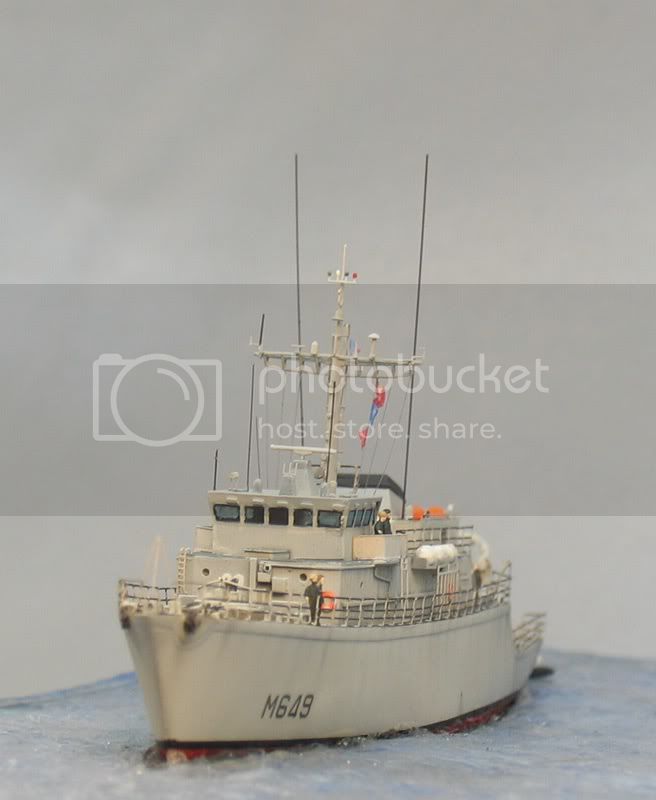
TRIPARTITE class mine sweepers displace a mere 605 metric tons at a length of 51.5 meters, 8.9meters beam, and 3.8 meters of standard draught. Such light weight is a result of a Polyester compound hull necessary to avoid the threat of magnetic mines.
Powered by a V-12 Diesel plant providing 1370kW the ships are designed for a top speed of 15 knots and may travel 3000 miles at 12 knots. To keep position the ships are equipped with 2 active rudders, both carrying a propulsion gondola which may be steered individually.
The complement varies in between navies from 34 to 47 officers and men.
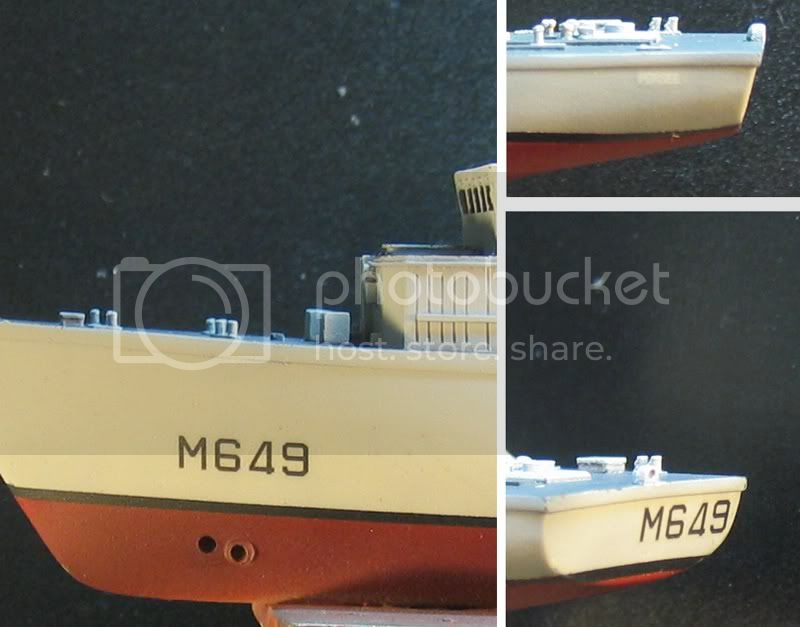
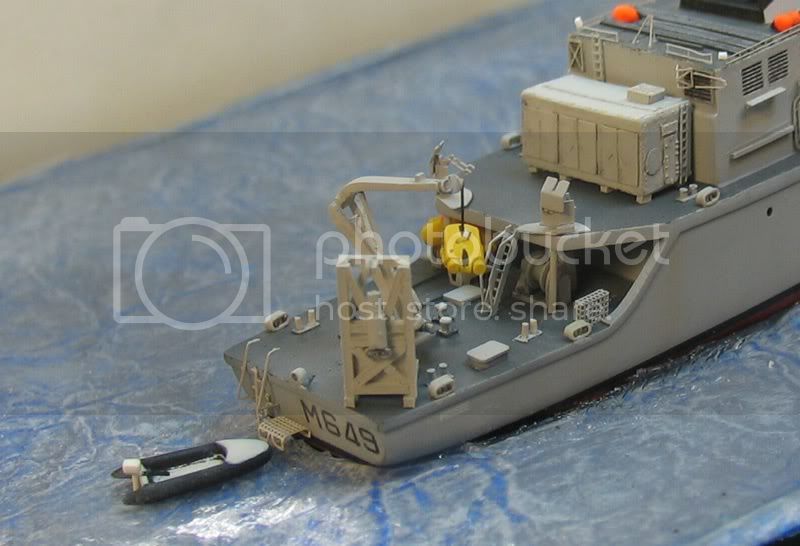
All ships are fitted with a French 20mm Giat F2 canon on the focsle. Furthermore 2 to 3 .50cal machine guns are carried to set off mines afloat and provide close-in protection against asymmetrical threats.
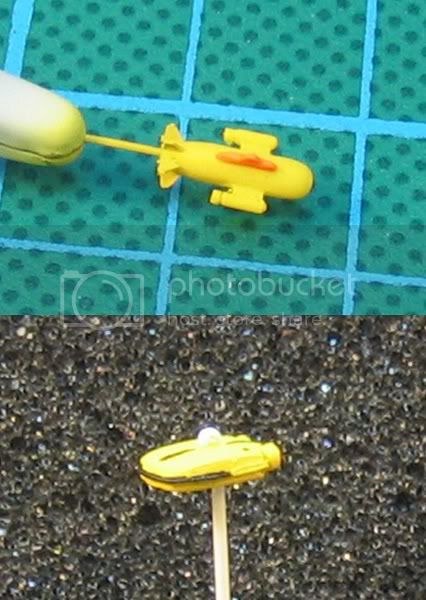
The standard equipment for mine sweeping is two PAP-104 B cable guided diving vehicles equipped with active detection gear designed to carry an up to 100 kg mine disposal charge.
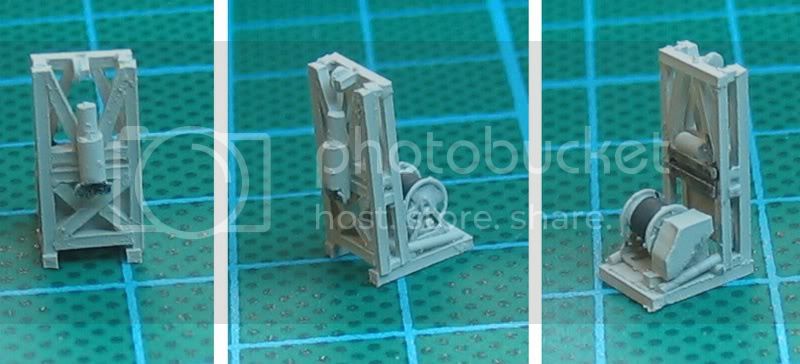
On an open platform abaft of the funnel housing provides space for a standard 20 sea container that may carry special equipment such as additional/alternate sweeping gear or a decompression chamber for divers.
Latest addition to the set of tools is the Double eagle MkII and III ROV and SAROV.
(http://www.seaeye.com/doubleeagle.html)
The kit of LArsenal come to you in clean white, sturdy box showing a line drawing of the TRIPARTITE mine sweeper.
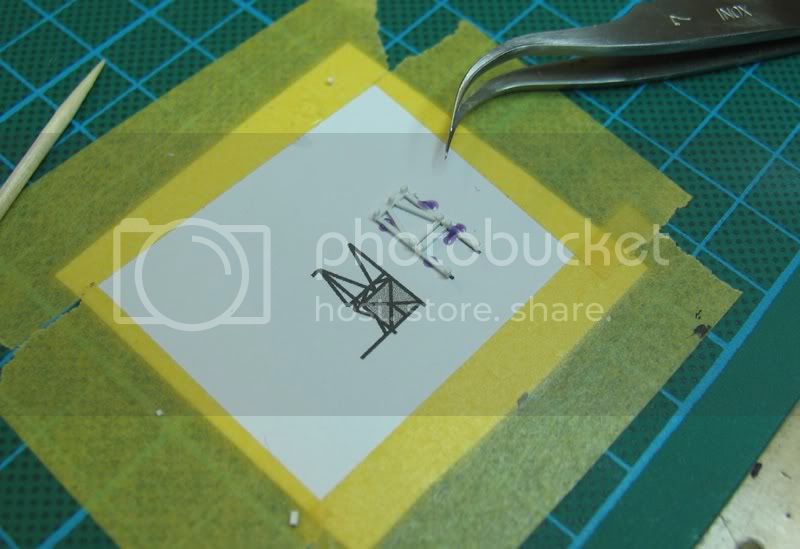
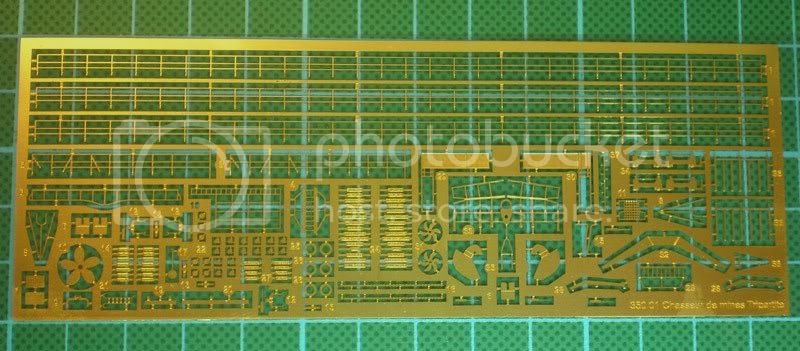
Firmly rolled up in bubble wrap you'll find a resin cast hull and a number of small bags holding various pouring stubs with the kits parts. Furthermore a decal sheet for hull numbers are supplied along with a photo etch fret.

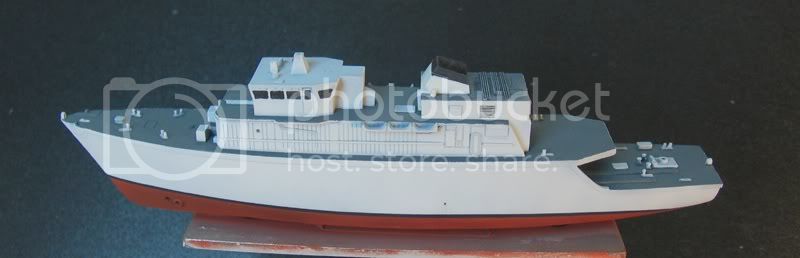
The decals sheet provides all marking options for Dutch, French, and Belgian ships.
The PE is relief etched and very fine. The material is somewhere between the sturdiness of GMM and the softness of WEM and should be a treat to work with.

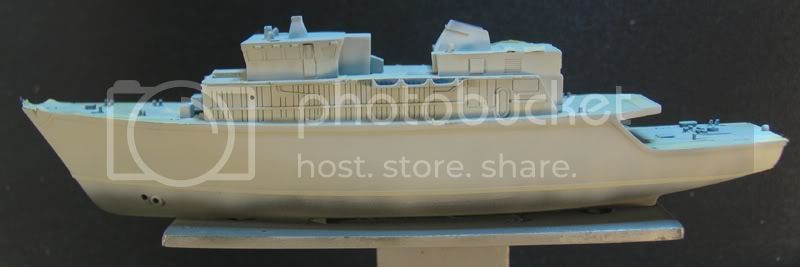
The kits parts are finely cast and show no bubbles or incomplete casting. There is a bit of flesh to be removed, but it wont hurt. The casting stubs are quite fine resulting in a minimum of clean up. Unfortunately I seem to have lost one of the anchors upon unpacking. Otherwise the parts count is complete. The hull and superstructure are cast in one piece covered with detail over and over. A small casting stub at the bottom of the hull shouldnt be much of a challenge to remove. The overall casting is widely flawless with only a handful of tiny pin holes on deck. Fortunately Ill stick to building ships in seascapes, so I wont be irritated by the come-off starboard bilge keels. The port bilges keels are complete, but I will remove them first thing in construction.


From what I can see, the kit provides all option for the early TRIPARTITE. Some of the later equipment and fittings will not be hard to scratch build. Besides paint and glue everything is there and delivered in satisfactory quality. If you have previously dealt with Jacques Druel - owner and mastermind of LArsenal youll know that he will replace the hull without any hesitation, if asked to so due to the damage to the bilge keels. Excellent service policy is one of Jacques foremost marks of trade.
The only real concern I have is that my French sucks big time. In best tradition of the Le Grande Nation the multi-page instruction is fully laid out in French, which will prove to be a challenge. I would have wished for an English version, but then this kit would have proven to be no challenge at all. So Ill take it a good sport. I am glad that I can fall back on Jacque with all my dumb questions, which may make him consider to issue future LArsenal instruction sheets in English.
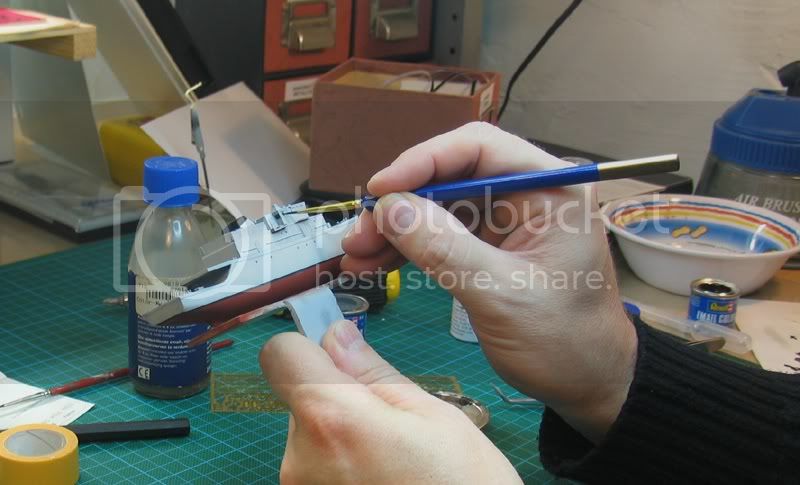
Ill start right away and keep you updated with progress news as I go along.
Cheers,
Guido