_GOTOBOTTOM
Research & Resources
Discuss on research, history, and issues dealing with reference materials.
IJN Notoro
bigal07
Visit this Community
England - East Anglia, United Kingdom
Joined: January 07, 2009
KitMaker: 887 posts
Model Shipwrights: 575 posts
Posted: Saturday, February 06, 2010 - 12:29 AM UTC
Making a slow and steady start to this weird and wonderful looking ship, I soon realised the instruction sheet is for the oiler and not both ships that the Notoro can be converted into, so a little decision making here and there comes in handy, the sad thing, this kit comes with 2 only aircraft, 1 of which I destroyed, so what to do ?
Providing I can build this 2nd aircraft I shall 'try' and finish this with other types of floatplanes, none to sure what types these are, they generally come as extras with most Tamiya 1-700 kits which is the reason for this very cheeky thread.
Okay - some people are good and photoetch, some are good at fine painting details, logic tells me someone must be good at building 1-700 aircraft, those darn floats have had throw them across the room so many times, there just has to be a way to instantly grab and firimly hold these in place, I tried supergule, gell, PVA you name I feel I've tried it, I glue the float into place and leave a full 24 hours, pick it up, turn the aircraft round to apply a decal or a splash of paint, a float falls off ! I couldn't care less about major things, its the little annoying things that drives me crazy.
So if anyone can tell me a tried and tested method of apply the floats to these seaplanes, please let me know.
treadhead1952
Visit this Community
Nevada, United States
Joined: June 12, 2008
KitMaker: 552 posts
Model Shipwrights: 493 posts
Posted: Saturday, February 06, 2010 - 01:46 AM UTC
Hi Alec,

Yeah, those little floats can be a right royal pain all right. In some cases they offer a small nub to fit into a dimple on the wing. From experience, usually the nub is either too big or the dimple is just that, too small to actually fit the projection. I take a sanding stick and flatten the top of the float attachment point then use liquid styrene cement to join float and wing. That brings up another problem, the angle of the wing makes the float want to wander off at the wrong angle when placed upside down to do the deed.

A small bit of modeling clay helps, actually two small bits. One is to hold the plane upside down to allow you to join the floats to the wings. The other is trimmed to the width you need to hold the floats at the proper angle while the glue dries. You can use the plane as a guide to form a trough in the clay bits before you start the gluing to hold the fuselage, just press it in place first. It will also let you trim the second bit to the proper width.

After gluing and getting the plane right side up on the properly sized clay bit to hold the floats at their proper angle, let it sit overnight to completely harden before you work on painting or decaling. The two bits also offer a place to hold the plane as you apply the decals that guarantees you won't be stressing the floats while handling the little buggers. I get wa-ay too into some of these, adding stretched sprue wing supports to the biplane types as well as PE props. They can be made into some fairly decent tiny models if you take your time and work at them a bit.


Gunny
Visit this Community
Pennsylvania, United States
Joined: July 13, 2004
KitMaker: 6,705 posts
Model Shipwrights: 4,704 posts
Posted: Saturday, February 06, 2010 - 02:06 AM UTC
Ohh, the dreaded non-stick gremlin hath graced your bench, mate!

Personally, Al, I haven't encountered this particular issue, BUT, all of us modelers have experienced a similar problem in adhesion, I'm sure.

Basically, you must look at this situation scientifically, and bonding two or more surfaces can be a challenging task at times...first, the substrate that you're dealing with is a "low surface energy" (LSE) material, which means that the adhesive is having a hard time holding to the surface because of the lack of porosity of the substrate...most plastic formulations are all low surface energy materials...think of it like water running off of your freshly waxed hood of your car, as a good example.

Any adhesive needs a surface to bond to, and the more porous the material, the better the bond, as the adhesive can "wet out" onto the surface (spread out and into) and as the adhesive cures, the bond is a strong one...so matching the adhesive to the bond substrate is an important factor...there are many other factors that come into play as well, but in your particular situation, these won't matter much.

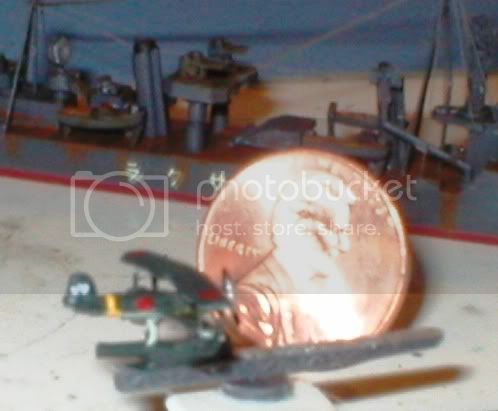
Bonding area is the second factor that you are dealing with, and unfortunately, us modelers are constantly dealing with a small surface area when we are working...in your case, an extremely small area with the floats on the plane, which I'm guessing that you're trying to adhere a tiny nub of a landing gear into the mating hole of the float, (without seeing the bond in person)...so in a nutshell, you have two strikes against you, low surface energy, and a small bonding surface.

Instant adhesives, "super glue", bond by sealing out all air gaps, so if you have any air gaps in the bond, you wont get a very strong one...by formulation, Cy is a strong bond, albeit not a very stable one, as the formulation does not take shock well, and the bond will break under minor impacts most of the time, so parts that are going to be handled alot will be an issue.

There are adhesive formulas specifically formulated for LSE substrates, acrylic, urethane, and epoxy based, but these would probably be an overkill for such a small bond that you're trying to make.

A few points that are crucial in any bond, is fresh adhesive (most only have a six month true shelf life before they begin to lose properties), clean substrates free of all dirt and oils (yes, even skin oils), and the proper curing time and temperature before handling.

SO, with all the mumbo-jumbo out of the way, what the he** are you going to use to solve your problem?...personally, I would try two things; one, get a new bottle of Good Cy adhesive in a thin formula, clean the two substrates completely, (isopropyl alcohol does a great job of removing all oils), make the bond, and set it aside for a full cure...or, my second choice for this bond, good old Testors model cement, or a thin solvent cement, (which are not true cement, as they actually break the integrity of the plastic involved by solvent), and make the bond...hope this helps you out some, my friend!

Cheers,
~Gunny
blaster76
Visit this Community
Texas, United States
Joined: September 15, 2002
KitMaker: 8,985 posts
Model Shipwrights: 3,509 posts
Posted: Saturday, February 06, 2010 - 05:16 AM UTC
I have built tons of these things. My preference. Testors tube glue. It has tack and it holds pretty darn good when it dries. Sure I knock the balsted things off from time to time, but I usually prepaint that way I only have a little touch up to do.
bigal07
Visit this Community
England - East Anglia, United Kingdom
Joined: January 07, 2009
KitMaker: 887 posts
Model Shipwrights: 575 posts
Posted: Saturday, February 06, 2010 - 11:48 AM UTC
Jay, great looking aircraft, if mine turn out half as good I'll be happy, Gunny, superglue is great but to hard, I can actually relate to that, and wet/wetting out, quite often melting the plastic you're trying to bond, some great advise there, Steve, not being funny, but now armed with a lot more info then I had before, I'll follow you, paint, apply decal and assemble watching out for Gunny's tips.
Thank you all
 _GOTOTOP