USS Oregon
Glencoe, 1/225
Tom's Modelworks PE; Vallejo Model Colors; Golden Fluid Acrylics; Iwata Com-Art Weathering
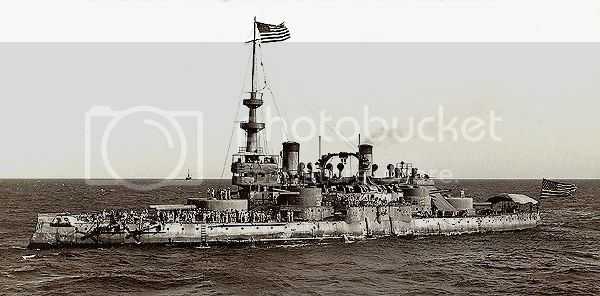
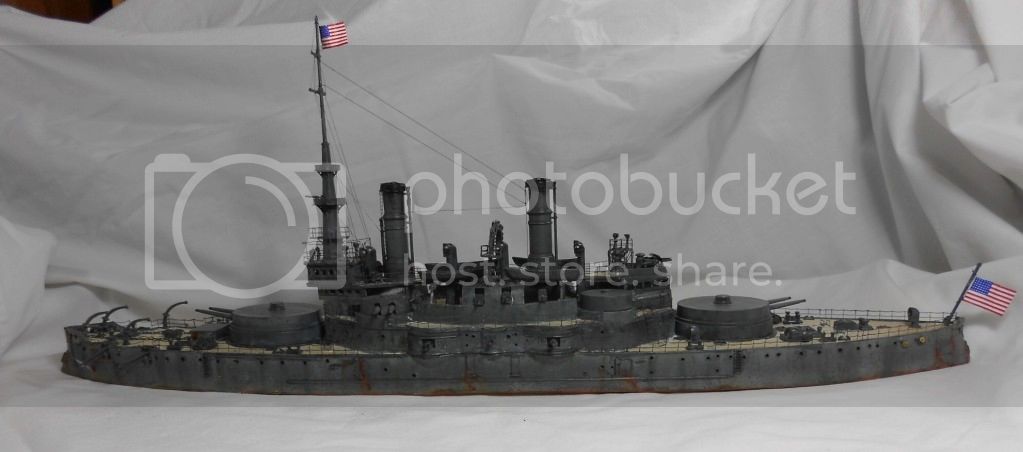
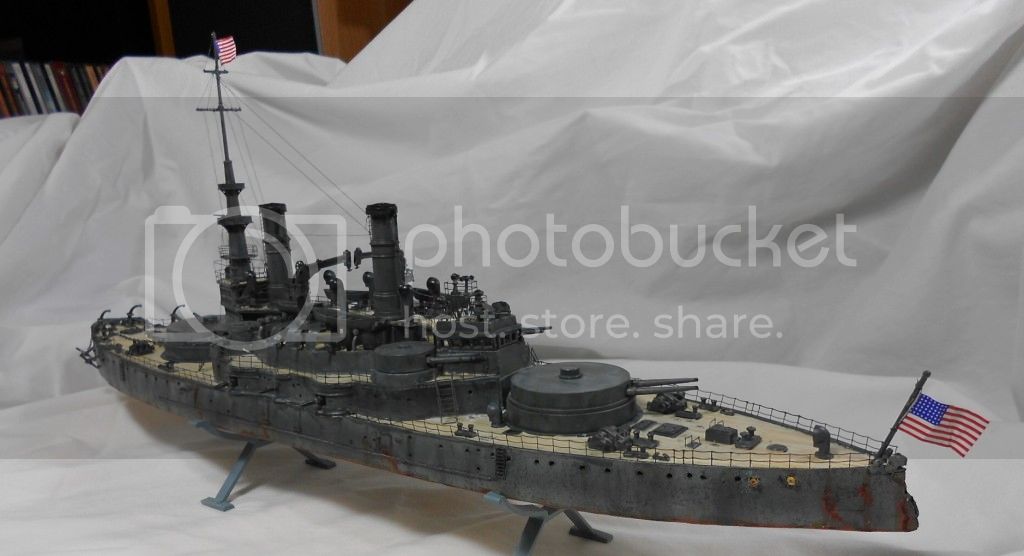
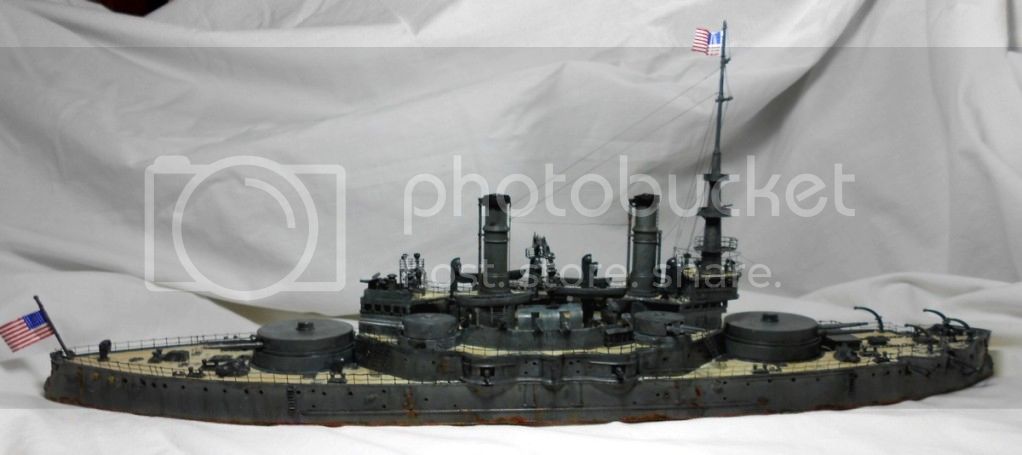
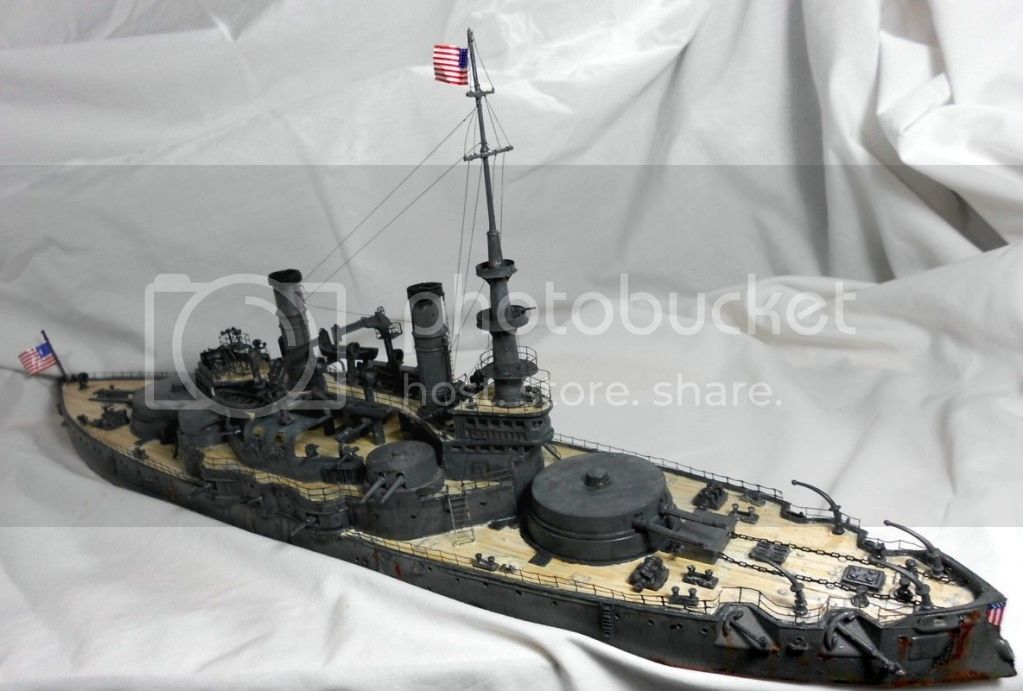
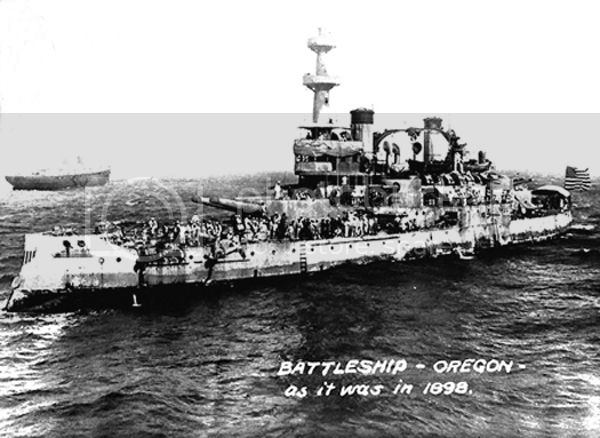
Above are photos of USS Oregon immediately after the Battle of Santiago and my attempt to emulate the vessel at that moment using Glencoe's 1/225 ancient kit and Tom's Model Works Photo Etch. I've been working on this since April and things did not go as planned.
I've been a history teacher my adult life and military history rather than maritime influences my choice of ship models. So when I bought Oregon a year back I figured it's an old kit, but the part count is low and with some decent PE we'll get a rendition of a ship that played a central role at the Battle of Santiago which, at the time, was history in capital letters. And even if a bit aged, it couldn't be more likely to cause ulcers than the Ukrainian model of a German Dreadnought I had done a while back which was my first serious ship model.
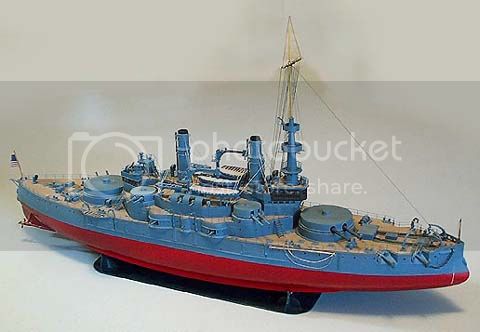
Hopes of an easy battleship build, if that exists, disappeared quickly. First, it was obvious from first look inside the box that a full hull version of this large ship was going to look tubby, almost monitor like. I don't know if the original designers did their home work or not, but a 1/96 model of Oregon at the San Francisco Maritime Museum looked much more the warship. Below is a picture from another board of a nicely done Oregon done with full hull and PE:
That meant making the ship waterline. I'm not a tool person, but I got a Dremel clone and cut the thing in half having no idea how that would work. (I figured if calamity took place I could sell the PE on eBay. Unfortunately, things went better than I should have hoped.) My second clue should have come from the very long instructions included in Tom's PE which advised I stock up on six types of styrene rods etc. Did I mention I'm not a scratch builder either?
Tom was right, no error. I had no warning on this matter (I later found some mentions of it on our board) but it turns out that when designed the manufacturer decided it was easier to model the superstructure by giving Oregon a major deck that it did not have. The was illustrated nicely in a terrific build log on Armorama in 2008 by Marcos Serra (panzerserra). Marcos has far greater skill with graphic software than I do and presents a diagram of what was wrong and what was needed to fix it.
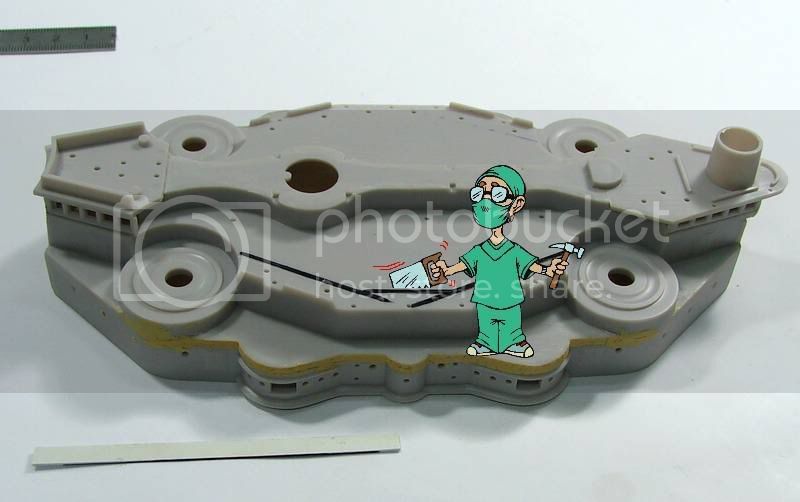
I am not a purist. Many fine modelers ignored the extra deck as Tom expected his customers to do. The error, however, was too great for me to bear and I did more or less what Marcos suggested. This would have been surgery for an experienced modeler it was rash for an intern like myself. So much was removed that it required four or five times the scratch building on that single section than I've done in my life including a new deck. (Tom had called for it so I had it.) This meant rearranging the entire superstructure and if one bit was a little off something else would also be off which you'd find out in a week or two. Cutting the ship in two and rebuilding the superstructure tripled the build time. Part of the problem were some intrusions from the real world. But I admit that as I got in deeper my morale suffered and it was very easy to find an excuse to read, watch movies or play solitaire. It didn't help that I had to move the project three times and managed to lose some major parts requiring more scratch building. It passed my mind to write off the project.
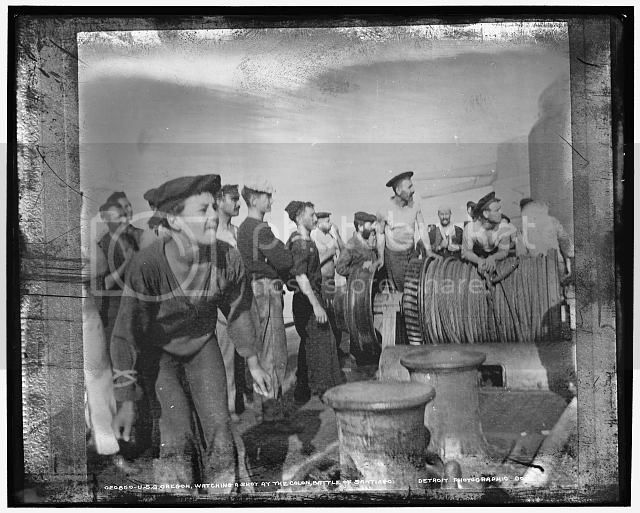
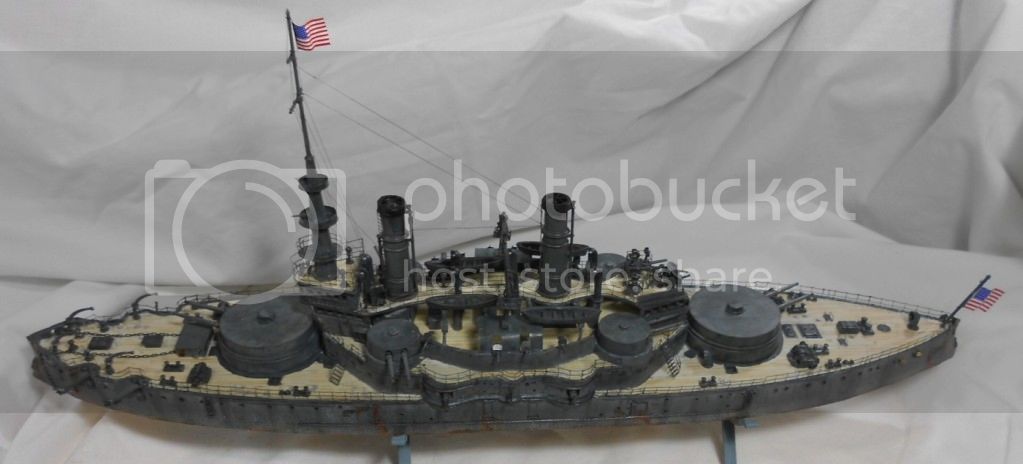
But I didn't. If nothing else, I was going to try some Spanish School armor weathering on a ship. No doubt many wise heads will disagree with my decision but let me give the case for the defense. Oregon left San Francisco on March 19, 1898 still in her white paint. She sailed 14,000 miles and arrived in Florida on May 24. She took coal at Key West and joined the squadron for the blockade for another six weeks. She capped off her expedition with a full-bore race with the Cristobal Colon leading to the Spanish vessel's demise. I would very much like to know when Oregon went from white to gray warpaint. As speed was of the essence, I'd think the ship was painted during the voyage itself. I've looked hundreds of warship photos (the best of the WWII color films are invaluable) since I've started modeling and it's very clear to a ship during wartime is in much rougher shape than would be the standard in peacetime. Ships under intense wartime pressure like many US warships after mid-1944, or Atlantic convoy escorts show very serious weathering. I also drive by an oil refinery at Richmond CA every few days and there are always ships there. The tankers which are unloaded normally show significant oxidation and organic matter below the waterline. Unless a ship is new, streaking to some degree is the norm. Warships do travel through salt water and if not, as is usually the case in peace or war, normally in harbor they can show significant wear. In armor circles lately when referring to a vehicle that's been rusted, covered with mud, dented etc the term is distressed. I submit that the photo above and the one below (also taken within a few hours of the battle if you note the gun orientation I think it's clear they are not the same photo) show a distressed ship.
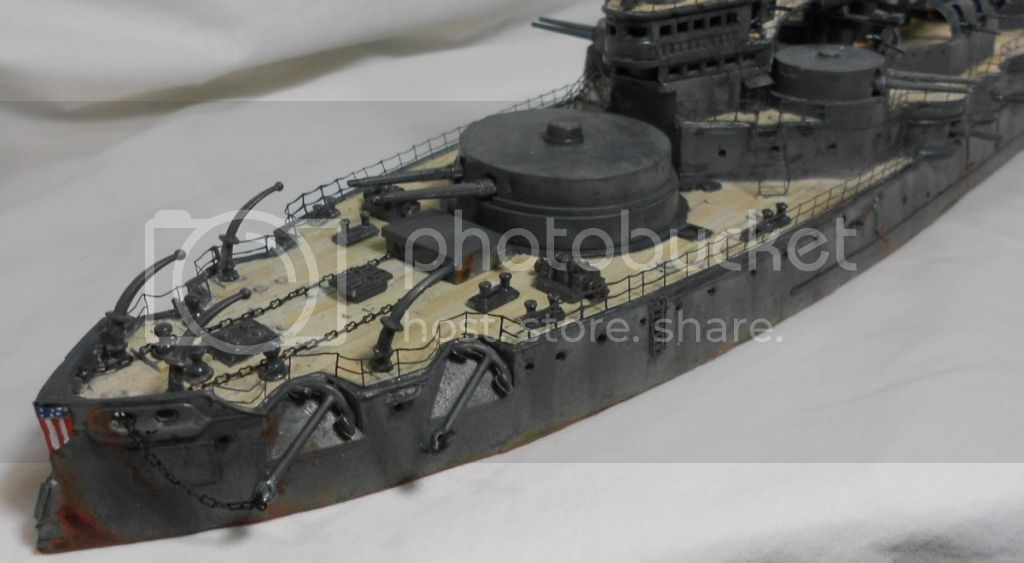
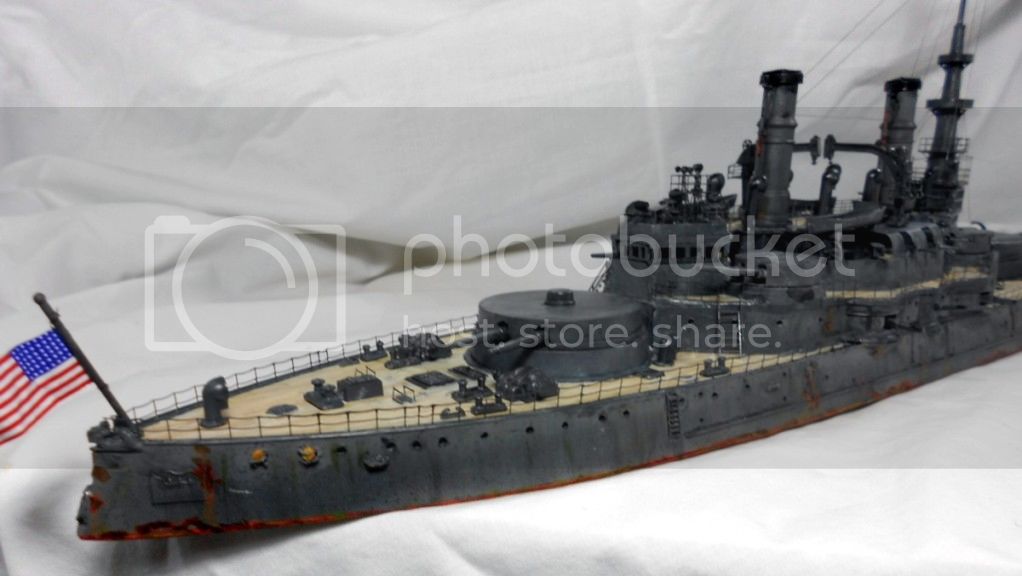
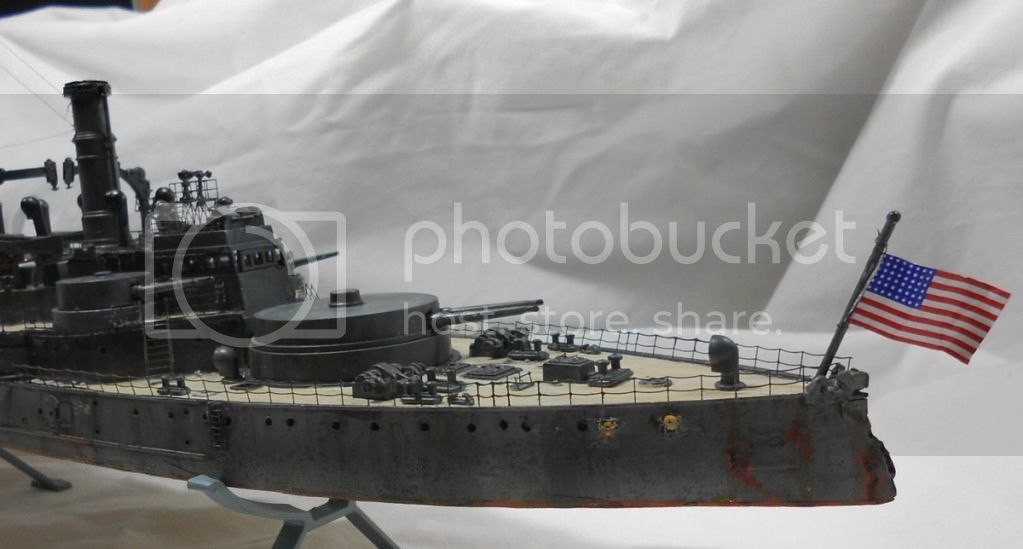
I used WEM Slate as a color sample. Using a combination of Vallejo Model Color black gray, reflective green and lightened with gray green for scale I came up with a very good copy. The hull and superstructure got three progressively lighter coats interspersed with salt fading. Although the ship looks pretty dark, it's substantially lighter than it would be in straight slate. I used Golden Fluid unbleached white, buff and buff/ocher to paint the deck. Later I gave it a fading with a very interesting paint made by Iwata called Com Art. It's odd stuff: a cross between a pigment mixed with fluids and an acrylic. (I'll play more with this stuff on tanks. It's made for an airbrush on a well primed surface but I used a brush on the deck. I had used a pencil on the raised panels and the Com Art did a very nice job of lessening the contrast of the three deck colors as well as fading it a bit.) I used Tamiya panel wash enamels for pinwashes and it's very good, just the right consistency. I followed Mr. Griffin's oil streaking technique but strongly favor artist grade mineral spirits like Gamsol to turpentine because it leaves so little of its own signature. I gave it some extra streaking with AK streaking grime and washes both made for panzer gray. There is a little band of green streaking grime along the waterline. Perhaps there is too much rust. I don't think so. But even if I'm wrong, I'm in agreement with the very fine armor modeler (and heavy weather guru) Karl Logan who often writes for Finescale. He argues that it's a rare day when you have the perfect photo, especially if black and white, and if you want to show a heavily weathered Tiger fighting off the Red Hordes near Budapest it's perfectly correct to evoke the grind of the battle with some proper weathering. Anyway, to achieve the desired effect I did everything possible to break up any uniformity of color and make the eye work a little.
I did follow the photo above to the extent possible. Do note that there are only a few boats aboard. Someone here suggested that the large boats were helping the army with supplies (I believe that) and that the others were towed during battle. If Oregon has davits showing I can't see them. This also explains why the rigging is pretty spare. Actually, even when in full peacetime regalia 1898 Oregon doesn't have an inordinate amount of rigging. I suppose with sails out and wireless not installed they wouldn't have needed the elaborate schemes that appear just a few years later. I put on flags for the first time. I find it difficult enough to make a small plastic object look like a big metal one: making a gloss decal look like cloth isn't usually worth it. But America was in a flag mood in 1898 and Oregon wore whopping big flags. I got the decals between aluminum foil and think they look okay.
I did learning something very valuable. No matter what the instructions say, don't put on PE until you need to. Tom's PE was pretty robust at this scale and I have no quibbles. But I don't yet have the caution to prevent mishandling the model. I had almost no problem with applying the PE but did damage some of through mishandling.
Some very fine modelers gave me help on this project and I appreciate it greatly. Many small questions were answered on the board and that came in handy. It would be very helpful to know something about what one models, but I simply don't understand the nuts and bolts of a warship.
I do admit that I was suffering from a serious case of project fatigue in the last month or so. There were several places where I could have done a better job to get more detail or a make a cleaner build. But often my hand would not go where my brain told it. And toward the end it was simply time to finish.
Pics below (I snuck in one of the Oregon's crew watching their rounds closing on Cristabol Colon)