_GOTOBOTTOM
Ships by Class/Type: Battleships
Topics from the Dreadnaught era to modern day.
Hosted by Steve Joyce
Building Flyhawk's Derfflinger
JPTRR
Staff MemberManaging Editor
RAILROAD MODELING
#051
Visit this Community
Tennessee, United States
Joined: December 21, 2002
KitMaker: 7,772 posts
Model Shipwrights: 476 posts
Posted: Friday, May 30, 2014 - 05:30 PM UTC
Ahoy Gang!

A while ago ModelShipWrights received this new model from Flyhawk. It was introduced to us via video: Unboxing Flyhawk's SMS Derfflinger .

Your Derfflinger modeler will present a static review soon (48 photos!) to link to this blog.

The time has come for me to progress this fine model.


It is well engineered with smartly made components.


Lots of detail:


Flyhawk molded both stacks as individual full parts, including open exhaust outlets:


The stacks are detailed with amazingly fine parts:


Speaking of small parts, notice this cabin assembled with four separate bulkheads:


Time to break out the Optivisor! Check back soon for more modeling!
JPTRR
Staff MemberManaging Editor
RAILROAD MODELING
#051
Visit this Community
Tennessee, United States
Joined: December 21, 2002
KitMaker: 7,772 posts
Model Shipwrights: 476 posts
Posted: Monday, April 20, 2015 - 06:42 AM UTC
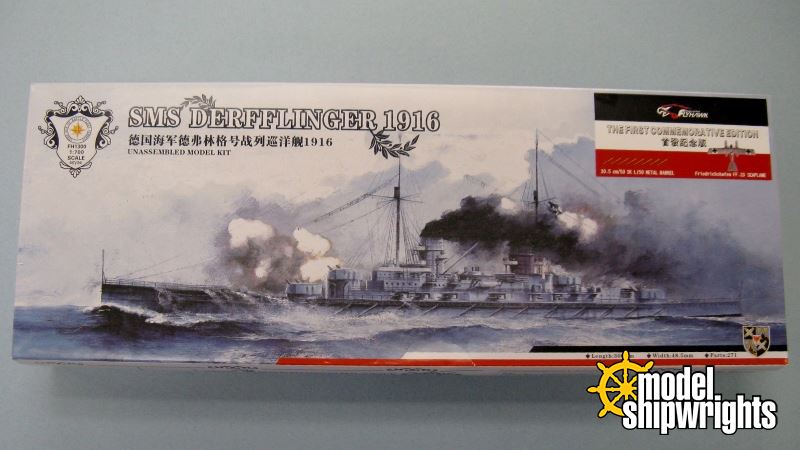
Yes, Derfflinger and I still exist! Not much to show for the past 11 months but here's an update.

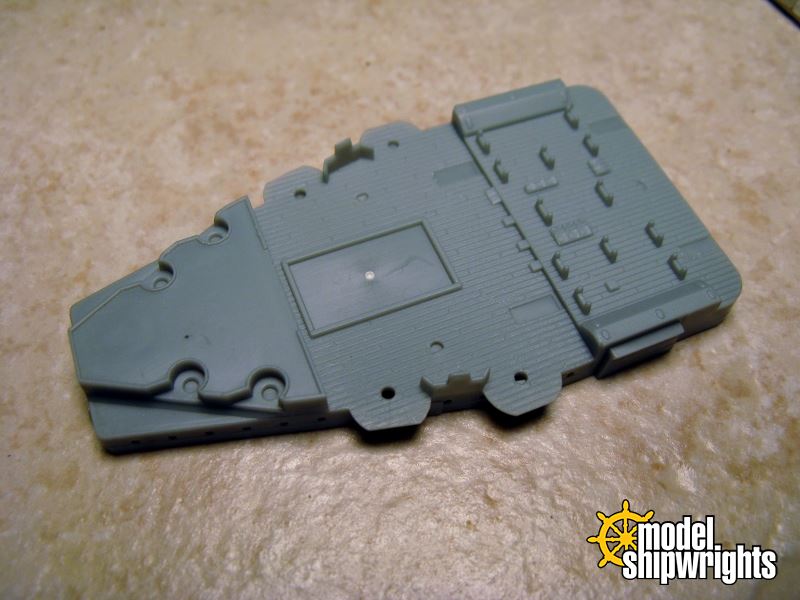
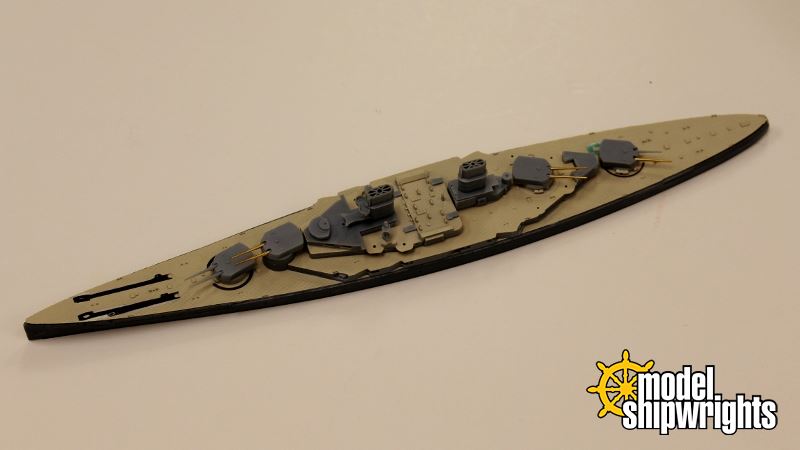
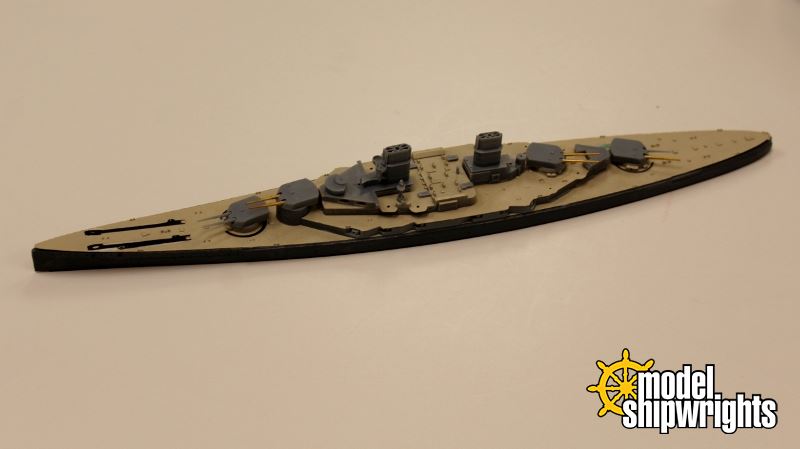
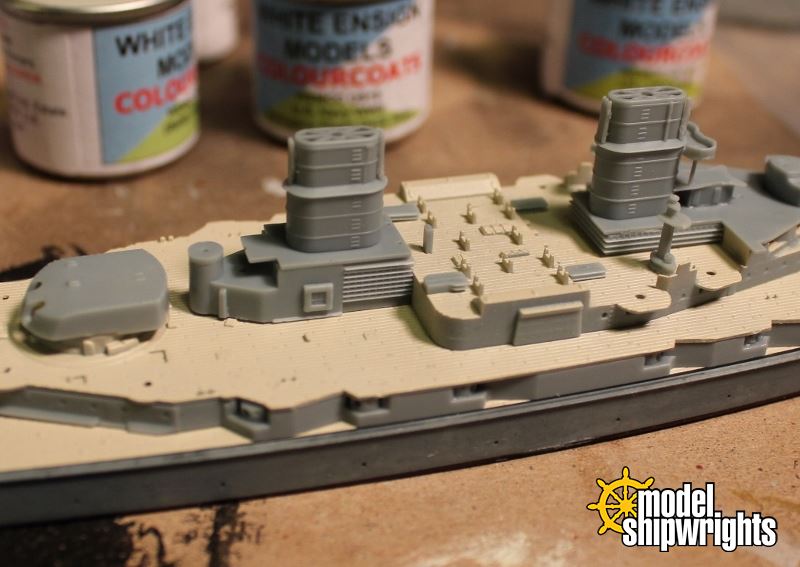
Assembly of Derfflinger is straightforward and smartly engineered. Decks and superstructures mate with remarkable precision. Yet the very small pieces require very pointy tweezers and the touch of a watchsmith.


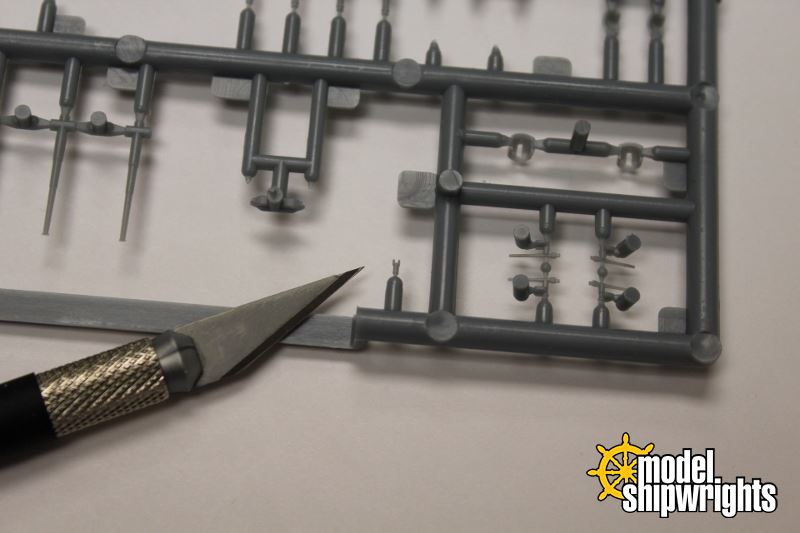
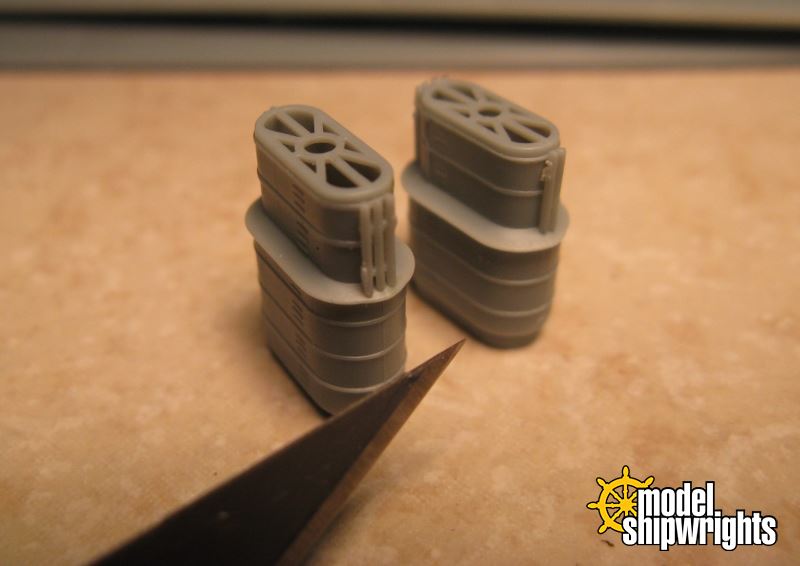
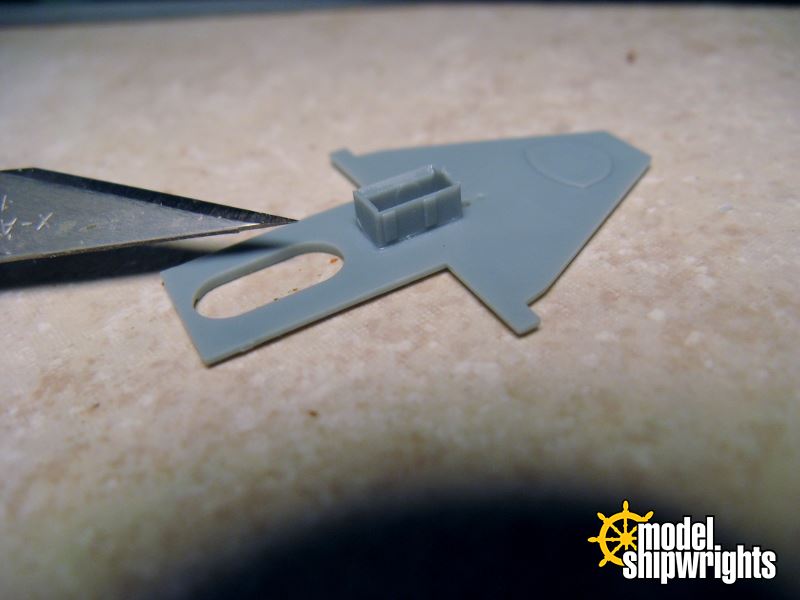
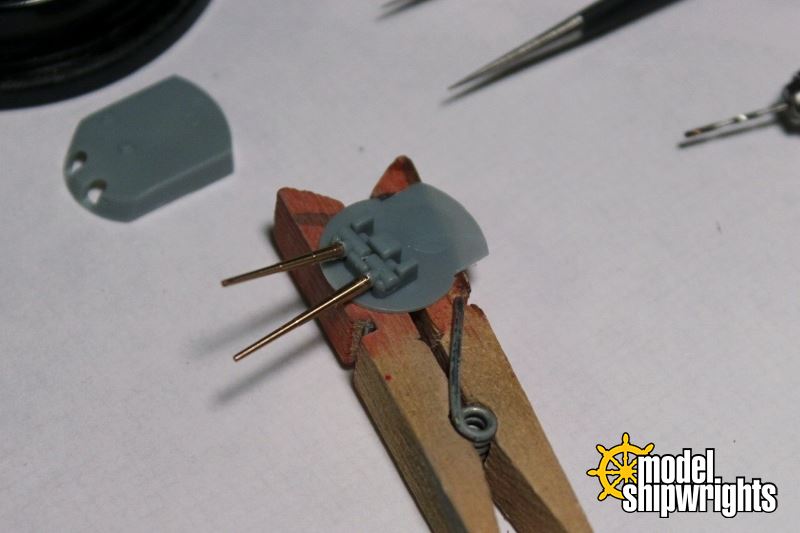
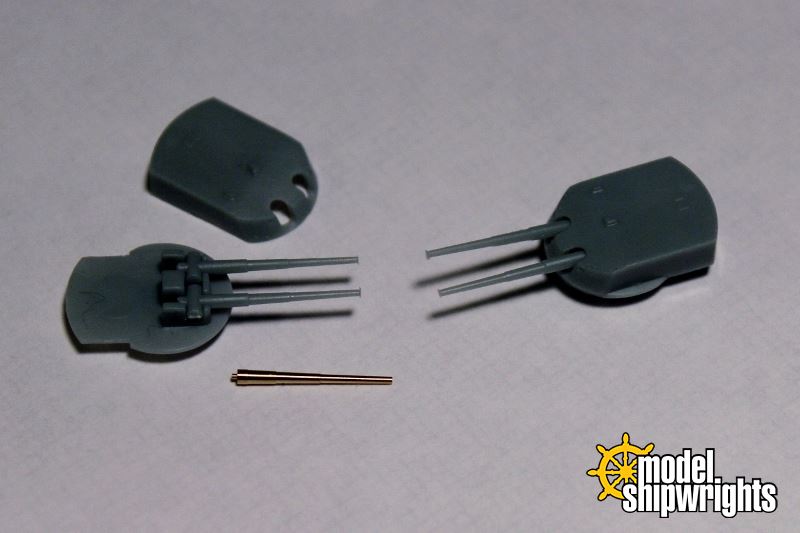
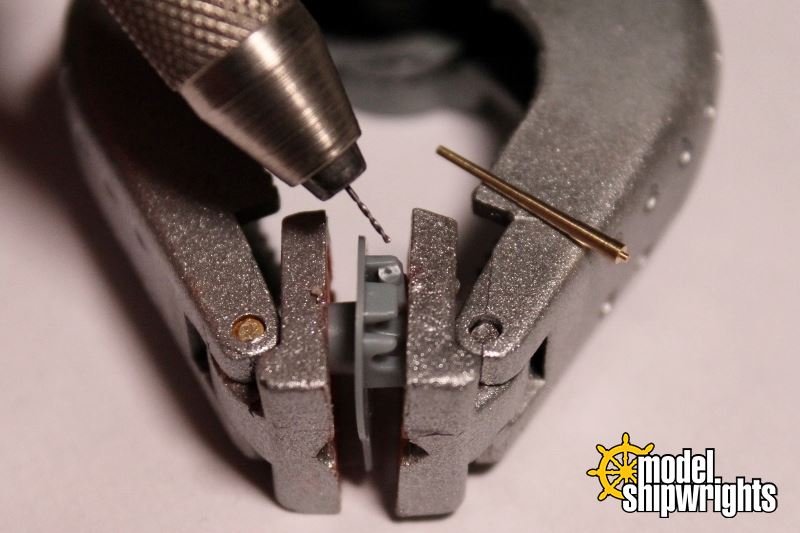
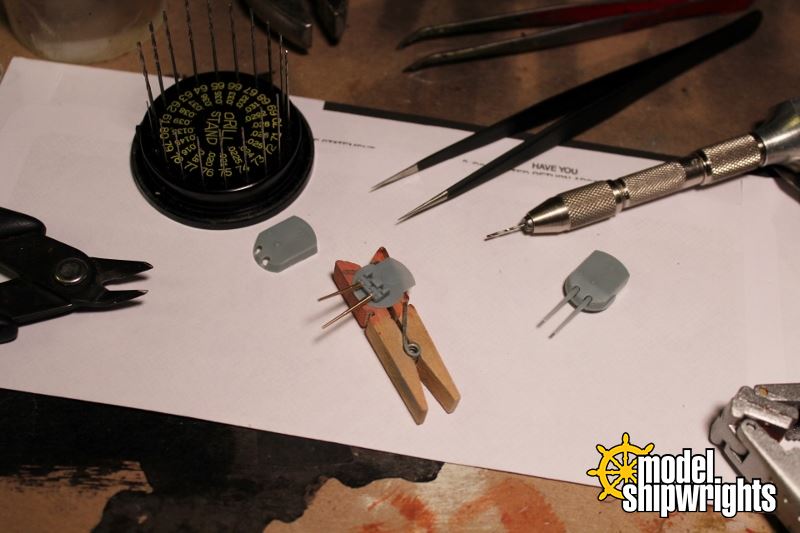
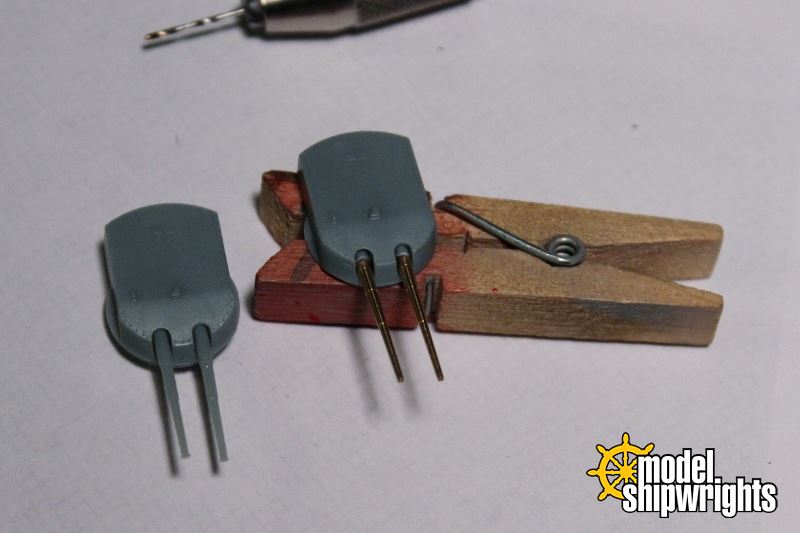
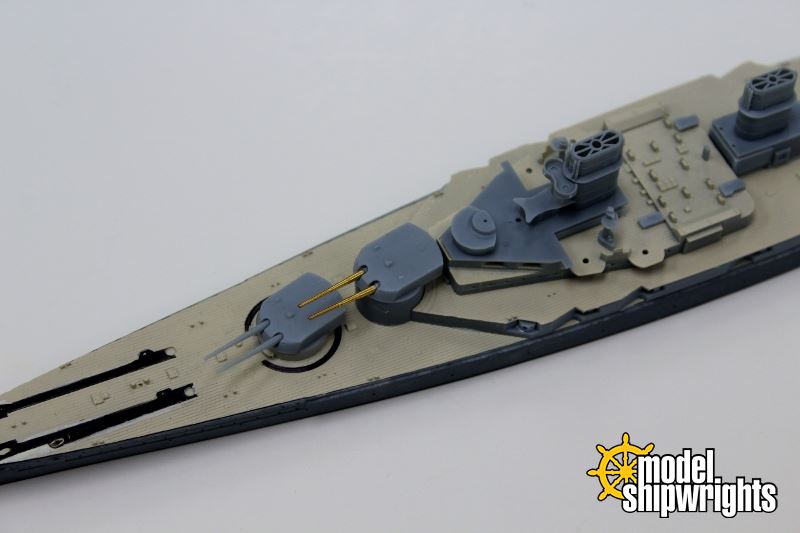
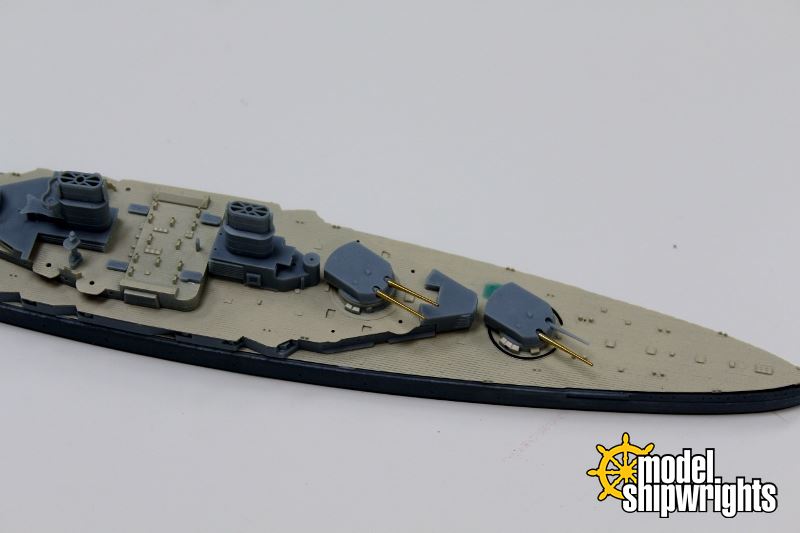
I had to use my stiletto-tipped tweezers by Wilder to hold some of them. For instance, the casement guns are two-piece assemblies: casements and barrels. The casements are held to the sprue by what seems to be robust connectors, yet as my sprue nipper clipped them, some parts would fly away. These tiny parts are prime candidates to loose in the carpet. However, the parts fit easily into the deck and hull.
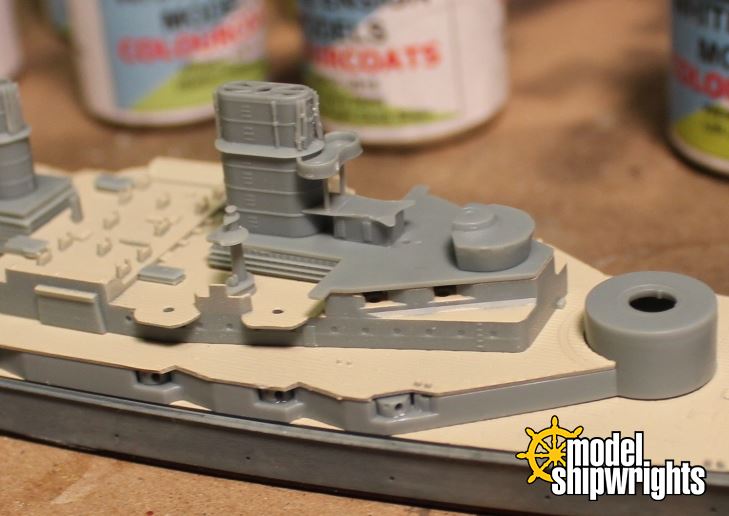
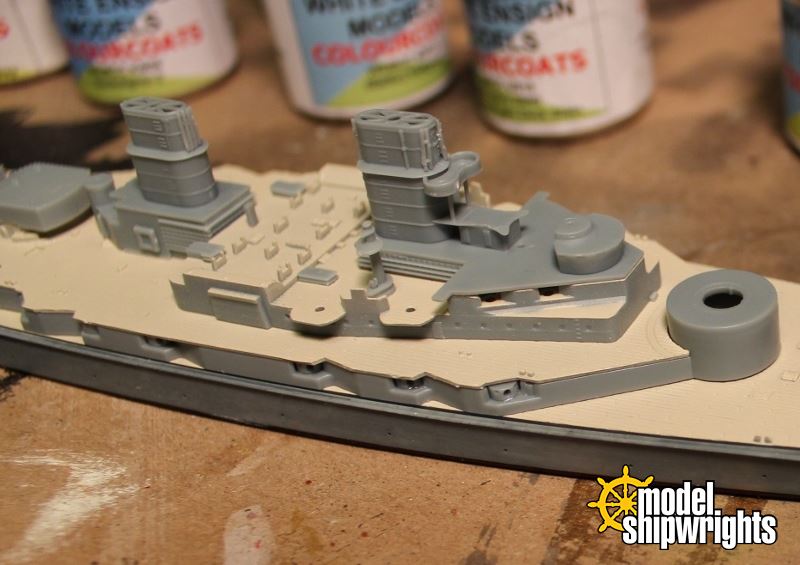
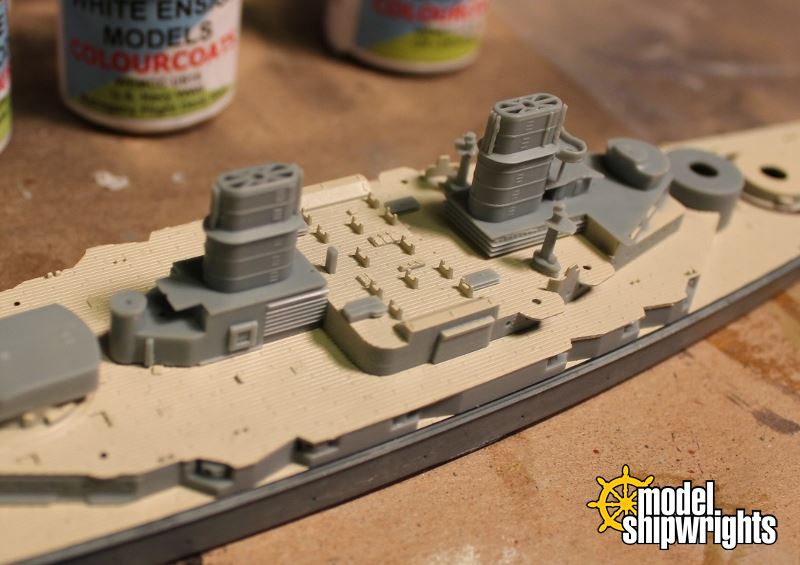
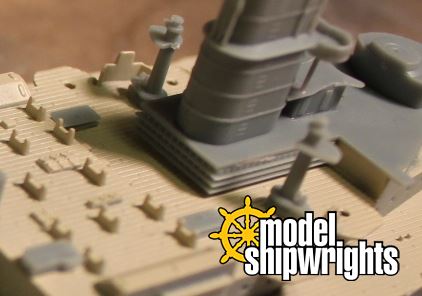


Flyhawk’s instruction sheet is beautifully printed with clean and clear illustration. However, they mislabeled parts B37, upper casement guns, as part B31. Part B31 and B32 are structures (louvered vents?) on the boat deck. Part H1 is also illustrated with a raised or depressed area for the stack to attach to, but the piece was not molded with that feature.

Both stacks have signal/searchlight platforms on the fore and aft sides. Several very well molded searchlights are provided for these. They are properly labled with the correct part number (B33) yet they are not shown in the instructions until near the end of the assembly sequence, and they are illustrated from the top. The graphics look more like a box. Fortunately, Flyhawk color-coded these and a bit of study makes it clear where these are to be mounted.

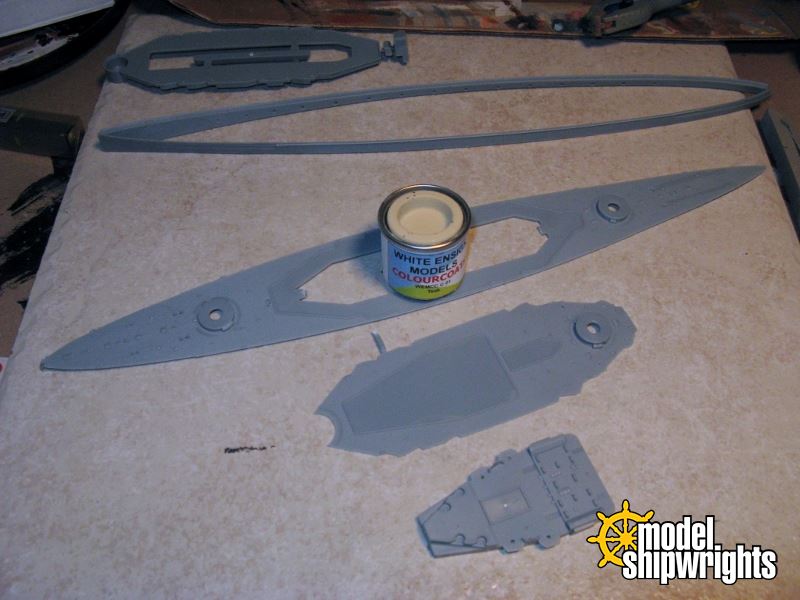
I plan to complete this model with little more paint than what you see now. However, I will use a few of White Ensign Models' Colourcoats, generously provided by a US distributor MidTenn Hobbies, located in Nashville, Tennessee.


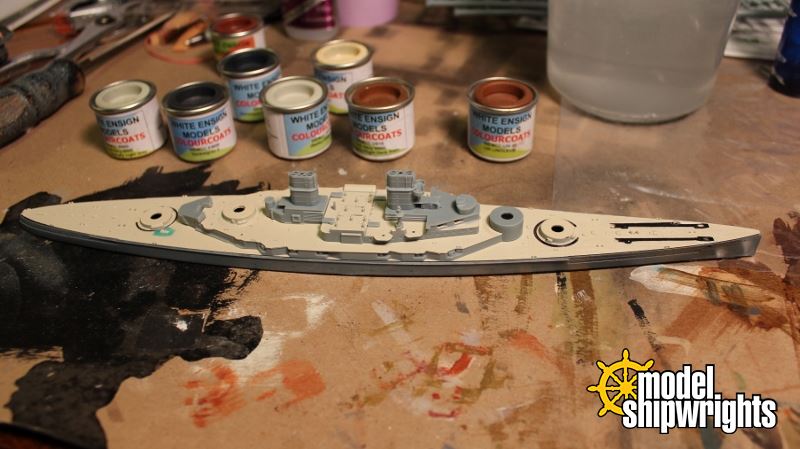
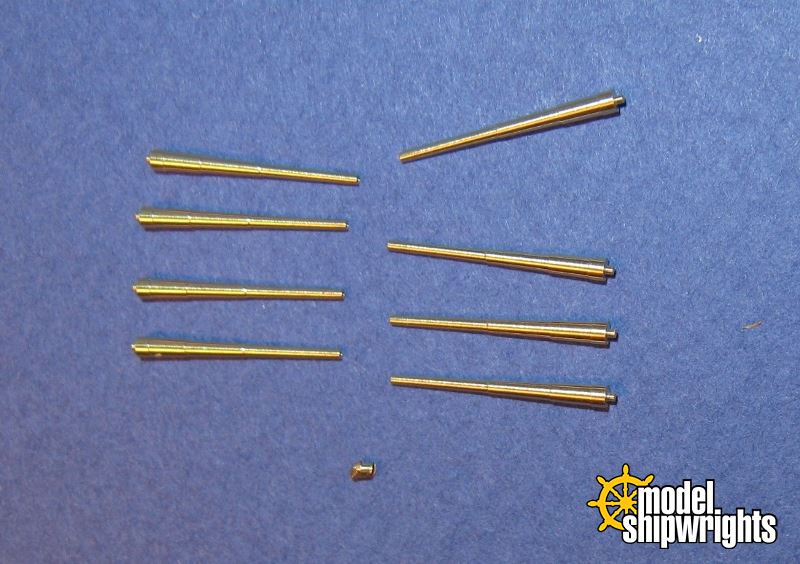
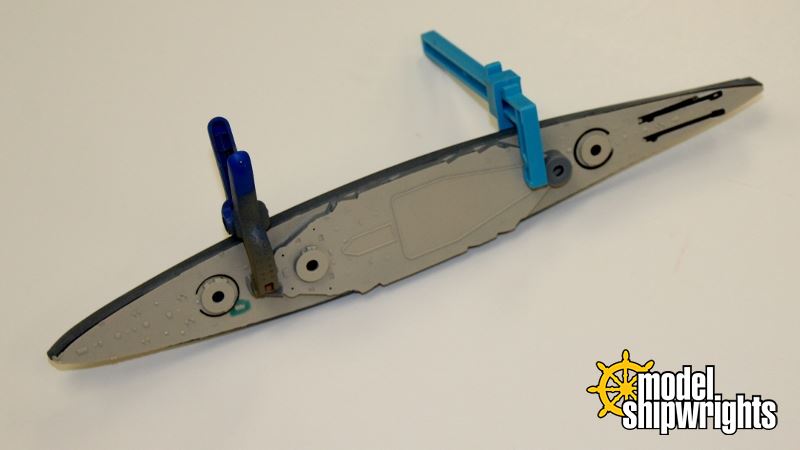
The hull halves have been joined to the bottom, the weight installed, and most is complete except for fiddly parts and P/E. However, the brass gun barrels will be used. While Flyhawk was great in making these, they are not easy to use. I will have to cut away the barrels where they mount into the turret, drill a miniscule hole, and attach the brass into the holes.

My Optivisor is getting a workout!

Check back soon!
TRM5150
Visit this Community
Massachusetts, United States
Joined: January 03, 2010
KitMaker: 2,159 posts
Model Shipwrights: 1,400 posts
Posted: Monday, April 20, 2015 - 07:09 AM UTC
Great to see this one again Fred!! She is a pretty one too! Flyhawk is certainly heading in the right direction when it comes to details on their kits! Looks like you have made some decent progression! Looking forward to seeing you push this around the bench a little more soon!!
JPTRR
Staff MemberManaging Editor
RAILROAD MODELING
#051
Visit this Community
Tennessee, United States
Joined: December 21, 2002
KitMaker: 7,772 posts
Model Shipwrights: 476 posts
Posted: Monday, April 20, 2015 - 04:46 PM UTC
Todd,

Yes, Flyhawk is certainly heading in the right direction when it comes to details on their kits! I showed it to a ship modeler who was astounded as to the engineering and thought that went into it (P/E railing ends terminating at a stanchion!).

This is a relatively simple model with relatively few parts. Some are just tiny! I meant to mention that of the sub-assemblies above, most are not glued together yet, if that gives one an impression of how well they fit. Each minor part and sub-assembly is complete, yet they are held by good ol' gravity.

Due to their diminutive thickness, I plan to leave the secondary cannon barrels off until the last minute. Probably even after the photo-etch.
RedDuster
Visit this Community
England - South East, United Kingdom
Joined: March 01, 2010
KitMaker: 7,078 posts
Model Shipwrights: 6,649 posts
Posted: Tuesday, April 21, 2015 - 03:01 AM UTC
Looks a great kit of an interesting ship, good to see the build under way again.

Si
berndm
Visit this Community
Niedersachsen, Germany
Joined: March 26, 2014
KitMaker: 844 posts
Model Shipwrights: 151 posts
Posted: Monday, May 18, 2015 - 02:15 PM UTC
Thats looking great so far. Great detail work !
Flyhawk made a good decision to kit this interesting ship,i hope more ships of the Hochseeflotte will be released in the future.

Maybe i am the only one who builds ships in 1/700 with a "full hull" Its a bit sad thats only a waterline ship.And Flyhawk didn t plan a version of that.

Beside that i am very inerested in your build and will follow this. Happy modelling !
JPTRR
Staff MemberManaging Editor
RAILROAD MODELING
#051
Visit this Community
Tennessee, United States
Joined: December 21, 2002
KitMaker: 7,772 posts
Model Shipwrights: 476 posts
Posted: Sunday, May 24, 2015 - 10:51 PM UTC
Bernd, Simon & Todd,

Thanks for looking! Here's the latest installment.

Flyhawk issued my sample as a special edition with p/e and turned brass barrels:


Yet Flyhawk molded this model with great finesse. The main battery barrels are exceptional in and of themselves.


Therefore I will present a face-off between the brass barrels and the injection molded ones.


To use the brass gun tubes one assembles the turret normally. Then one nips the gun at the base (I'll call this the breech for fun.) where it seats into its mount. Now, the brass piece has a miniscule stem to fit into the breech. One must drill it out. I used a No. 72 bit.


I have pondered if it would not be easier and quicker to simply fill the mounts with epoxy or CA and set the guns directly through the gun ports. But I am stubborn and want them to be able to elevate.


Enjoy this side-by-side comparison.


I'll be back soon with another installment!
Aurora-7
#360
Visit this Community
Connecticut, United States
Joined: June 18, 2003
KitMaker: 1,020 posts
Model Shipwrights: 630 posts
Posted: Monday, May 25, 2015 - 12:16 AM UTC
The brass barrels really sharpen up the detail in 1/700 kits.

I've been really tempted but what I've seen with Flyhawk's USS Ward kit.
berndm
Visit this Community
Niedersachsen, Germany
Joined: March 26, 2014
KitMaker: 844 posts
Model Shipwrights: 151 posts
Posted: Monday, May 25, 2015 - 03:54 PM UTC
The metal barrels are a major improvement, looking very nice. Especially in such a small scale, this will be rewarded with a sharp looking build.
Well done,will looking for your next steps. The WWI warships are interesting subjects and i hope for some new kits in the future

Cheers
Bernd
TRM5150
Visit this Community
Massachusetts, United States
Joined: January 03, 2010
KitMaker: 2,159 posts
Model Shipwrights: 1,400 posts
Posted: Monday, May 25, 2015 - 04:16 PM UTC
Nice work on the big guns there Fred! Although the kit parts look pretty the upgrade is a decent addition! Keep up the good work!!
RedDuster
Visit this Community
England - South East, United Kingdom
Joined: March 01, 2010
KitMaker: 7,078 posts
Model Shipwrights: 6,649 posts
Posted: Monday, May 25, 2015 - 11:12 PM UTC
Brass barrels look excellent Fred,

Build looking excellent so far, wouldn't mind that lady in 1/350.

Cheers.

Si
JPTRR
Staff MemberManaging Editor
RAILROAD MODELING
#051
Visit this Community
Tennessee, United States
Joined: December 21, 2002
KitMaker: 7,772 posts
Model Shipwrights: 476 posts
Posted: Thursday, February 04, 2016 - 07:53 AM UTC
Ahoy,

Well, constant bombing and shelling has kept the dry dock gang under cover, but now there is progress. I have started fitting the superstructure.

One turret still needs the plastic barrel nipped off and the brass one mounted. I kept one turret with the injection-molded barrels for comparison.

Here she is:


TRM5150
Visit this Community
Massachusetts, United States
Joined: January 03, 2010
KitMaker: 2,159 posts
Model Shipwrights: 1,400 posts
Posted: Thursday, February 04, 2016 - 08:39 AM UTC
Looking good Fred! Nice to see this coming together! The barrels are making big difference! Gotta love these FH kits! Great details!
GazzaS
#424
Visit this Community
Queensland, Australia
Joined: April 23, 2015
KitMaker: 4,648 posts
Model Shipwrights: 249 posts
Posted: Thursday, February 04, 2016 - 11:06 AM UTC
Hi Fred,
I just found this thread today. Nice work so far! I agree, those brass barrels really sharpen it up.

Gary
JJ1973
#345
Visit this Community
Niedersachsen, Germany
Joined: August 22, 2011
KitMaker: 1,835 posts
Model Shipwrights: 1,832 posts
Posted: Sunday, February 14, 2016 - 10:22 AM UTC
Hi,

I almost missed the resumed work going on here! Looks great! That's a very nice and seldom seen model, really looking forward th see her grow!

Cheers,
Jan
berndm
Visit this Community
Niedersachsen, Germany
Joined: March 26, 2014
KitMaker: 844 posts
Model Shipwrights: 151 posts
Posted: Monday, February 15, 2016 - 02:06 AM UTC
Very nice work, if that kit has a full hull it would be mine.
 _GOTOTOP