


Go to modelshipwrights.com for the current dynamic site!
Hosted by Jim Starkweather
Trumpeter 1/350 HMS Westminster

RussellE

#306

Joined: June 27, 2010
KitMaker: 3,959 posts
Model Shipwrights: 2,777 posts

Posted: Sunday, February 08, 2015 - 01:28 PM UTC
Very nice Toby


toby2282

Joined: July 15, 2005
KitMaker: 195 posts
Model Shipwrights: 50 posts

Posted: Sunday, February 08, 2015 - 08:56 PM UTC
Thanks for the comments. I've managed to resolve the stand issue withe the use of some plastic are, some steel tube, stones and a glue gun. The is some trimming needed to the end of the top piece of plasticard, but it fits the ship beautifully, and the stones weigh the stand down and make it a lot more stable. This will make weathering a lot easier, as well as the final fitting of the remaining rails and netting. I need to finish of the stand and spray the tubes brass and that will be that problem sorted.

toby2282
Joined: July 15, 2005
KitMaker: 195 posts
Model Shipwrights: 50 posts
Posted: Sunday, February 08, 2015 - 11:20 PM UTC
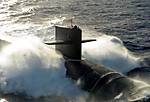
After going back through my photos, this is the look I'm going to try and achieve after the weathering.


TRM5150

Joined: January 03, 2010
KitMaker: 2,159 posts
Model Shipwrights: 1,400 posts

Posted: Sunday, February 08, 2015 - 11:27 PM UTC
Looking good Toby!! Nice to see the little lady sitting on her thrown! Nice weathering shot!! Shows the starch contrasts with the clean ship and the rusted bow! Looking forward to seeing you have at it!
Side note....I fixed the last too pics for you. I am thinking you copied the Direct Link from Photobucket and pasted in the posting editor? You need to place the [IMG] brackets around the link for it to show up. Otherwise it shows as just a link.
I put a little help guide in the open discussion on adding pictures to the site - http://modelshipwrights.kitmaker.net/forums/231450&page=1#1951981
Any questions, please let me know!
toby2282
Joined: July 15, 2005
KitMaker: 195 posts
Model Shipwrights: 50 posts
Posted: Sunday, February 08, 2015 - 11:33 PM UTC
Thanks Todd. I did wonder how initially they showed up as a link then as if by magic they appeared as a photo!! That explains it. If you look at the ship in the photo (HMS Lancaster) you will see how rusty it actually is, but it's subtle and not literally falling apart rusty!!
TRM5150
Joined: January 03, 2010
KitMaker: 2,159 posts
Model Shipwrights: 1,400 posts
Posted: Sunday, February 08, 2015 - 11:42 PM UTC
No Problem! 
The bright colors are whats catching for me. I like the subtlety throughout too. Should make for a great finish!!
The bright colors are whats catching for me. I like the subtlety throughout too. Should make for a great finish!!
toby2282
Joined: July 15, 2005
KitMaker: 195 posts
Model Shipwrights: 50 posts
Posted: Tuesday, April 07, 2015 - 01:28 AM UTC
Well, I'm on the finishing straight now, although I do have a number of amendments I want to make before I'm happy that she's all done.
Firstly the remaining railings went on, but not as well as all the others. Despite using slow cure superglue and activator spray the front railings just didn't want to go on properly!! It was mainly due to their long length and the need to ensure that they were secured at each end. Glue one end on and the other flails about.....Glue that end on and the other end pings off and flails about!! This went on for some time until I glued the entire length down in now go, and eventually managed to make it stick.
If I had to redo the ship again, I'd seriously consider putting the railings on first as it would allow me to correct any glue marks. At this stage all I could do was to make it look like part of the hull had gone rusty. On this note I spoke to a Navy pilot regarding the amount of rust etc that the ship should realistically exhibit. Unfortunately, my patience got the better of me and I added too much. Apparently there will be a small amount of rust around the anchor, but the rest is continually painted, so that there would only be minimal weathering. You live and learn. I'll do better on the next one!!
Once all the weathering was done with various rust coloured oils and AK Interactive's naval oils I sealed everything in with a matt varnish. I had already touched up the boot stripe where I'd applied too much gloss and levelling thinner, resulting in a small paint run. I don't think it's that noticeable, and it just looks a bit like weathering.......
One thing I did notice afterwards was the fact that I'd completely missed a line of light grey oil paint on the funnel. This will need repainting and slightly weathering with smoke, as will the rear mast which is aft of the funnel.
In being tidy and throwing the kit box out I managed too also throw out the name plate!!! Payday will result in the purchase of a new nameplate!!
Things left to do;
1. Paint crew figures and glue to ship
2. Add miniguns and GMPG's
3. Repaint top of funnel and weather
4. Add smoke pigments to rear of funnel
5. Detach ship from mount, resand and repaint
6. Add new wider counting lugs sprayed brass
The last one I've had to do because I'm not happy with the thin silver ones as they are not parallel. By adding a larger diameter plastic tube I can hide these. The ship can be impaled on them and sit nicely on the new wider lugs.
I managed to drop one of my lights just before I took the photos, so consequently they are too dark. The next update will have new daylight halogen bulbs and a fully completed ship. Shouldn't take too long as it's only minor details.....


TRM5150
Joined: January 03, 2010
KitMaker: 2,159 posts
Model Shipwrights: 1,400 posts
Posted: Tuesday, April 07, 2015 - 02:05 AM UTC
Nice going so far Toby! She is a beauty! Despite the fight you put up with on the railings, things seems to look pretty good from what I see. And the subtle weathering looks great! Looking forward to seeing the figs get placed! Best of luck on the final stages!

Cosimodo
#335

Joined: September 03, 2013
KitMaker: 1,808 posts
Model Shipwrights: 871 posts

Posted: Tuesday, April 07, 2015 - 05:32 AM UTC
Hi Toby,
Despite your issues you have come up with a great build. The weathering looks pretty good to me, nice and subtle.
cheers
Michael
Despite your issues you have come up with a great build. The weathering looks pretty good to me, nice and subtle.
cheers
Michael
RussellE
#306
Joined: June 27, 2010
KitMaker: 3,959 posts
Model Shipwrights: 2,777 posts
Posted: Sunday, April 12, 2015 - 04:33 PM UTC
A great build Toby! 
Definitely something to be proud of!
And it's great to see something modern here on MSW.
Looking forward to see what you build next.
Russ
Definitely something to be proud of!
And it's great to see something modern here on MSW.
Looking forward to see what you build next.
Russ
toby2282
Joined: July 15, 2005
KitMaker: 195 posts
Model Shipwrights: 50 posts
Posted: Tuesday, April 14, 2015 - 12:36 AM UTC
Thanks for the comments guys. It's not quite done, and I hope to present it better when it is. My next ship build Russell will be the Bronco 1:350 USS Fort Worth.
RussellE
#306
Joined: June 27, 2010
KitMaker: 3,959 posts
Model Shipwrights: 2,777 posts
Posted: Tuesday, April 14, 2015 - 02:31 AM UTC
Build log please

JJ1973
#345

Joined: August 22, 2011
KitMaker: 1,835 posts
Model Shipwrights: 1,832 posts
Posted: Tuesday, April 14, 2015 - 08:55 AM UTC
Toby,
great build, I only can second what was said!!
And for your weathering - to me it looks not only very nice on your model, but even more pretty much spot on, despite the comments of your Navy pilot friend, there is rust and stain on those ships. Yes, painting is going on all the time, but there are many areas that you simply can't paint while underway, and then there are weather conditions when you can't paint at all - not talking storms here, simply fog, rain, wet weather in general. You need dry weather to paint, otherwise your paint comes off faster than you can re-paint...so yes, there are times where modern warships look quite worn, seen plenty of that!!
So again, great job on your Westminster and good luck for your final steps, looking forward to your pictures!!
Cheers
Jan

Blespooky

Joined: June 03, 2014
KitMaker: 277 posts
Model Shipwrights: 171 posts

Posted: Tuesday, April 14, 2015 - 11:35 PM UTC
I have to second what Jan said. Great build of a great looking ship. Your use of a single photo to tie together your approach to weathering delivered a believable final product. Great to see more modern ships on the forums.
Great build, thanks for sharing and inspiring, your experience here (not always positive but you persevered) really helps me be positive about my modern ship building.
Thanks,
Bryan
Great build, thanks for sharing and inspiring, your experience here (not always positive but you persevered) really helps me be positive about my modern ship building.
Thanks,
Bryan

RedDuster

Joined: March 01, 2010
KitMaker: 7,078 posts
Model Shipwrights: 6,649 posts

Posted: Wednesday, April 15, 2015 - 12:15 AM UTC
Great job Toby,
looks superb, very neat build indeed.
Si
looks superb, very neat build indeed.
Si
toby2282
Joined: July 15, 2005
KitMaker: 195 posts
Model Shipwrights: 50 posts
Posted: Thursday, April 16, 2015 - 01:05 AM UTC
Thanks again guys. I want to get this one finished in the next week (work permitting - which it isn't at present) before I use the lessons I've learnt on this build (fingerprints!!!) and start this one......


Battleship_Al
Joined: October 25, 2009
KitMaker: 133 posts
Model Shipwrights: 14 posts

Posted: Tuesday, April 28, 2015 - 09:57 PM UTC
Outstanding job Toby. Your weathering is great.

warreni
Joined: August 14, 2007
KitMaker: 5,926 posts
Model Shipwrights: 2,624 posts

Posted: Wednesday, April 29, 2015 - 01:18 PM UTC
Looking great Toby. Very well done indeed.
I know what you mean about burn-out. I got a bit of that with the Akagi.
I will be reading through your blog start to finish before I start any of my three Type 23s.
Cheers mate
Warren
I know what you mean about burn-out. I got a bit of that with the Akagi.
I will be reading through your blog start to finish before I start any of my three Type 23s.
Cheers mate
Warren
toby2282
Joined: July 15, 2005
KitMaker: 195 posts
Model Shipwrights: 50 posts
Posted: Friday, June 12, 2015 - 03:38 PM UTC
Hi,
Well she is now completely finished and photographed with my camera rather than my iPhone. This was a great build, although it took place amidst a house move, my girlfriends mum being diagnosed with cancer and an exceptionally busy 12 months at work. I really enjoyed the build, with my only recommendation being to get the WEM etch update set. The kit etch will just fall apart in your hands. On that subject be mindful that the only problem I encountered with WEM's set was the lengthy foc'sle railings. They just wanted to thrash about and not go where I wanted them to go!! Other than that it all went to gather really nicely. The only other addition that I didn't go for is the Krypton gun turret, which is not included in the kit.
Reference wise, there are lots of photos about on the internet, and all you need to do is work out which period of refit you intend to cover. Once you know what was changed during that specific refit, then its simply a case of finding the right photos.
I've enjoyed building this one so much that I'm going to get this beast painted next....

Then I want to do another Trumpeter ship alongside the LCS-3. Got it for a bargain, so I'm now saving up for the etch sets....

Anyway, less of my prattling on!!! Here are the proper photos taken of the completed HMS Westminster
Hope you enjoy it. All comments welcome.


TRM5150
Joined: January 03, 2010
KitMaker: 2,159 posts
Model Shipwrights: 1,400 posts
Posted: Friday, June 12, 2015 - 04:36 PM UTC
Congrats on getting this one to the finish line! She's a pretty one! Well done Toby!
toby2282
Joined: July 15, 2005
KitMaker: 195 posts
Model Shipwrights: 50 posts
Posted: Friday, June 12, 2015 - 06:42 PM UTC
Thanks Todd. It's been a bit of a slog, but definitely worthwhile
RussellE
#306
Joined: June 27, 2010
KitMaker: 3,959 posts
Model Shipwrights: 2,777 posts
Posted: Tuesday, June 16, 2015 - 02:49 PM UTC
A most excellent rendition Toby 
Great work!
Russ
Great work!
Russ
toby2282
Joined: July 15, 2005
KitMaker: 195 posts
Model Shipwrights: 50 posts
Posted: Tuesday, June 16, 2015 - 02:58 PM UTC
Thanks Russ. Much appreciated
toby2282
Joined: July 15, 2005
KitMaker: 195 posts
Model Shipwrights: 50 posts
Posted: Sunday, June 21, 2015 - 01:30 AM UTC
I've had a change of mind over the display of the Type 23. Instead of leaving her on the stand that I'm not wholly happy with, I've made the decision to place her in water. Here is the start of it. The box structure is built within the photo frame and you can see that she fills it quite nicely.


I've ordered some polystyrene sheets with which to create the water with. This will have oat bran sprinkled on it and then covered in 2" squares of paper towel. Once this has dried it will be sanded smooth and any holes filled before having a coat of paint added to it. Once the paint is dry it will have numerous coats of high gloss varnish sprayed on it before I add the white surf using cotton balls
That's the plan, just hope that it works......
TRM5150
Joined: January 03, 2010
KitMaker: 2,159 posts
Model Shipwrights: 1,400 posts
Posted: Sunday, June 21, 2015 - 01:46 AM UTC
Sounds like a great plan Toby!! Off to an awesome start!!
 |

WEB HOSTING BY


Copyright ©2021 Model Shipwrights and Kitmaker Network, a subsidiary of Silver Star Enterprises
All Rights Reserved. Please read our Conditions of Use and Privacy Policy.
All Rights Reserved. Please read our Conditions of Use and Privacy Policy.