Ships by Class/Type: Battleships
Topics from the Dreadnaught era to modern day.
Hosted by Steve Joyce
Trumpeter 1/350 HMS Dreadnought 1907
wbill76
Visit this Community
Texas, United States
Joined: May 02, 2006
KitMaker: 5,425 posts
Model Shipwrights: 95 posts
Posted: Saturday, August 09, 2014 - 02:36 AM UTC

Quoted Text


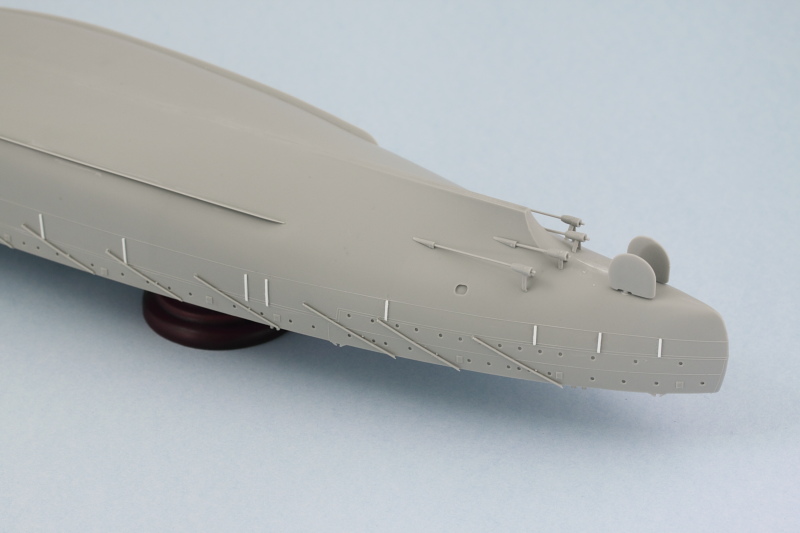
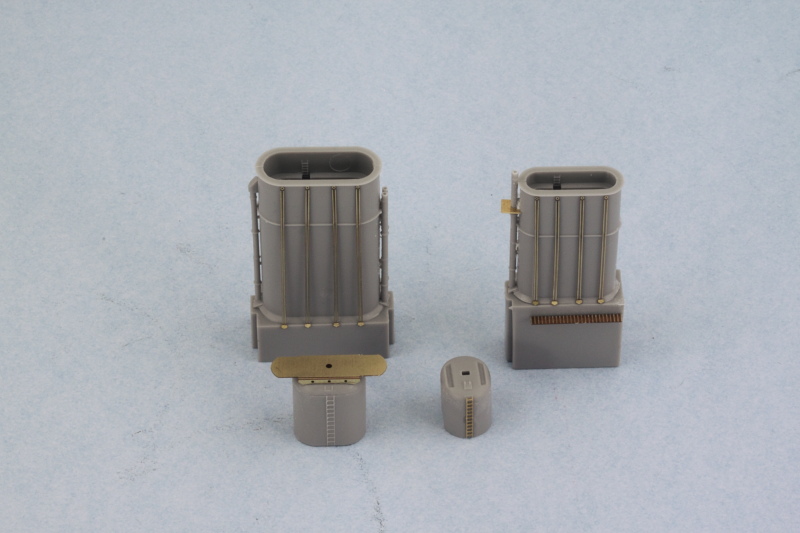
good work on the 12 pdrs, it was a good job I didn't need all of mine! messed a couple up.

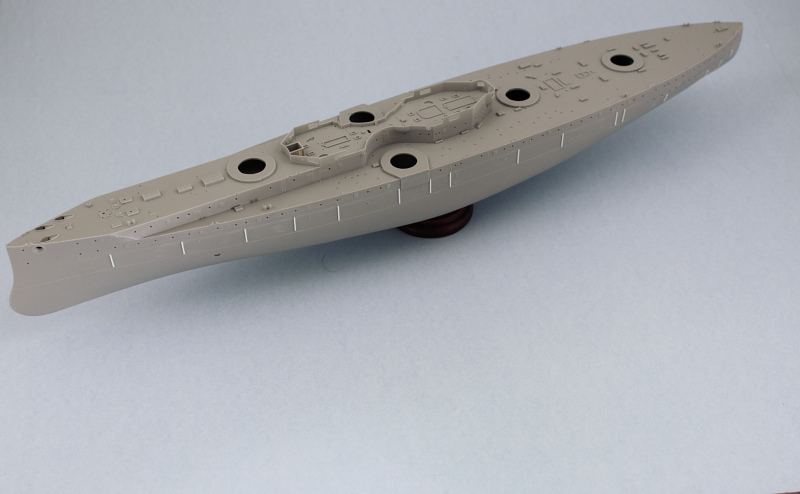
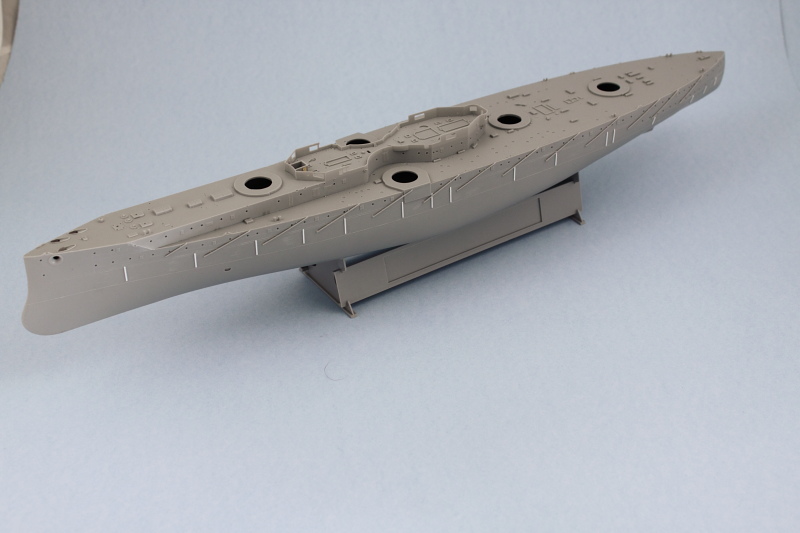
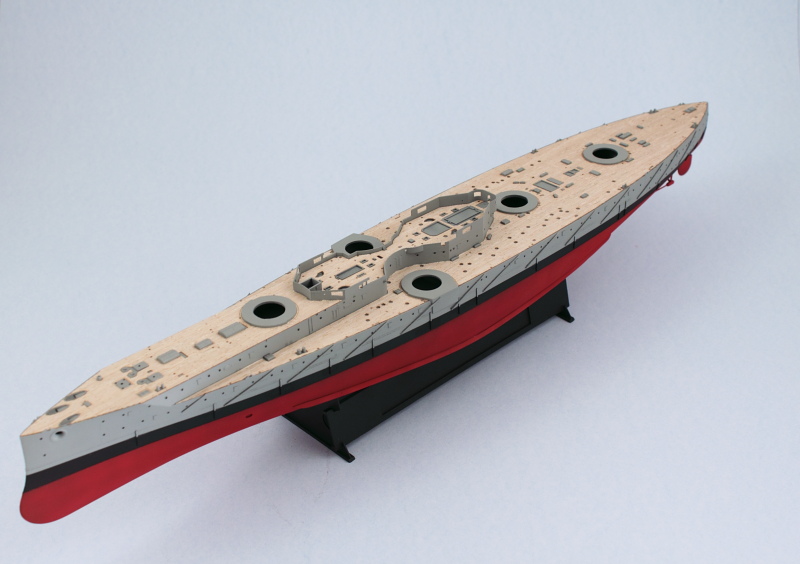
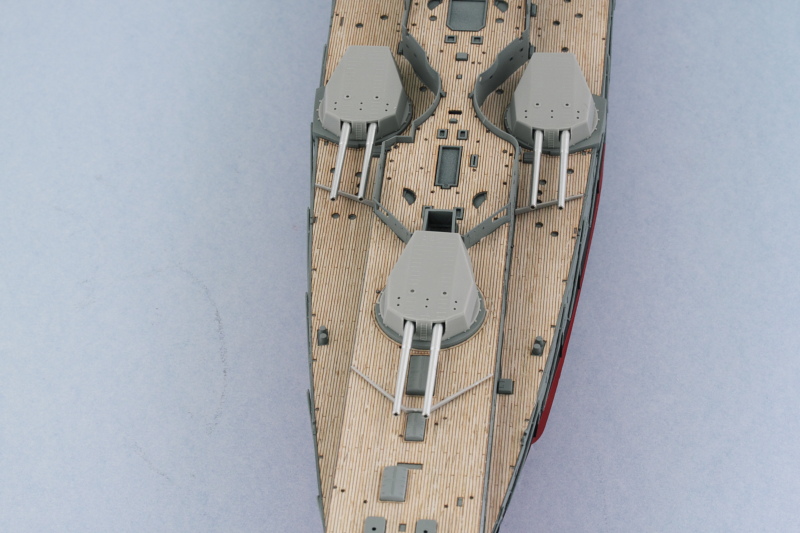
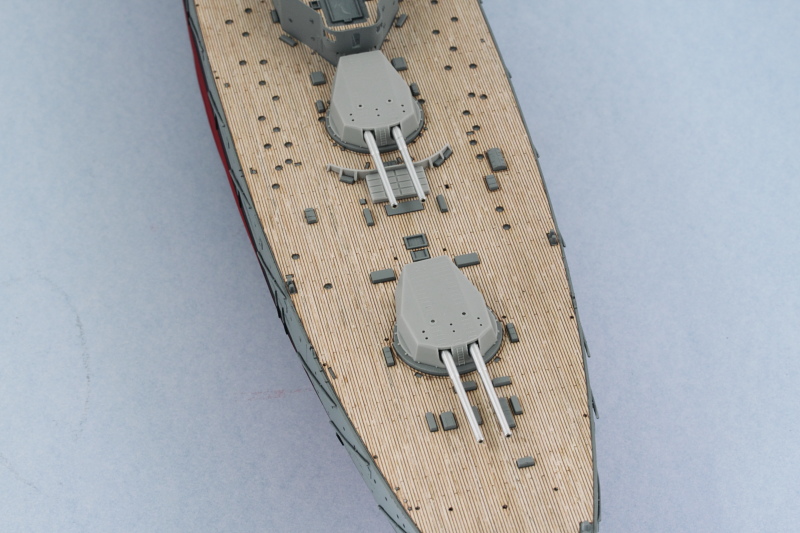
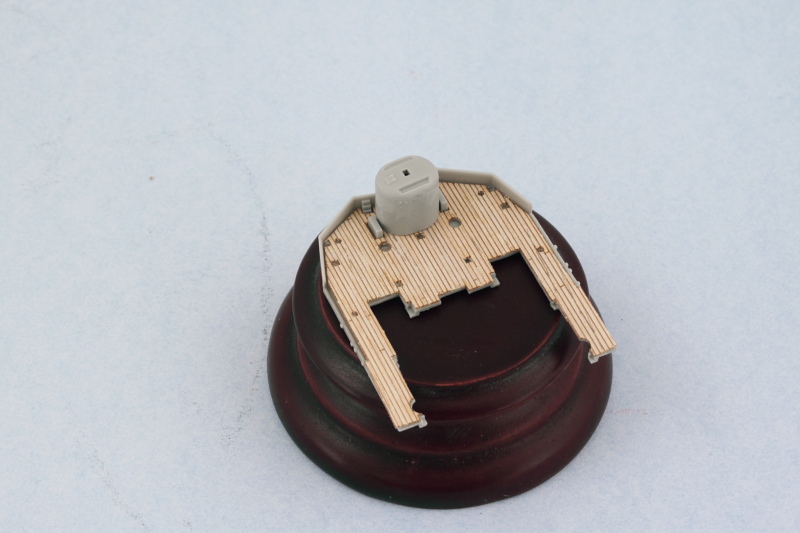
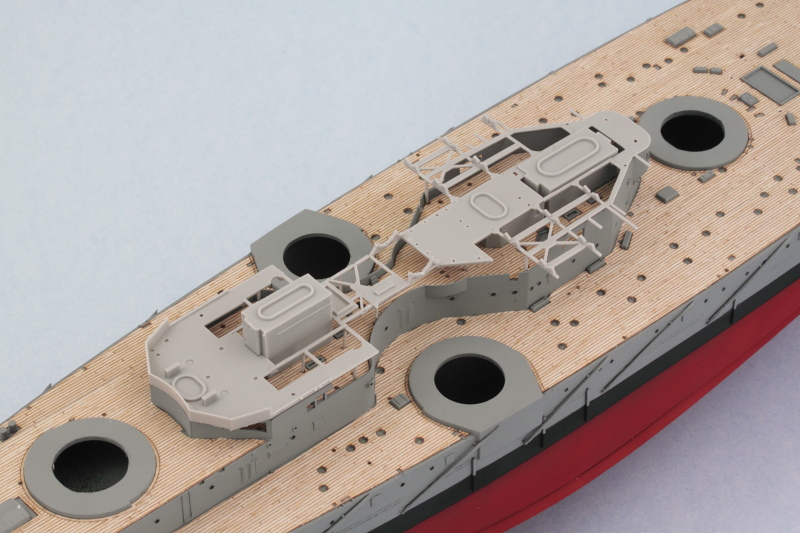
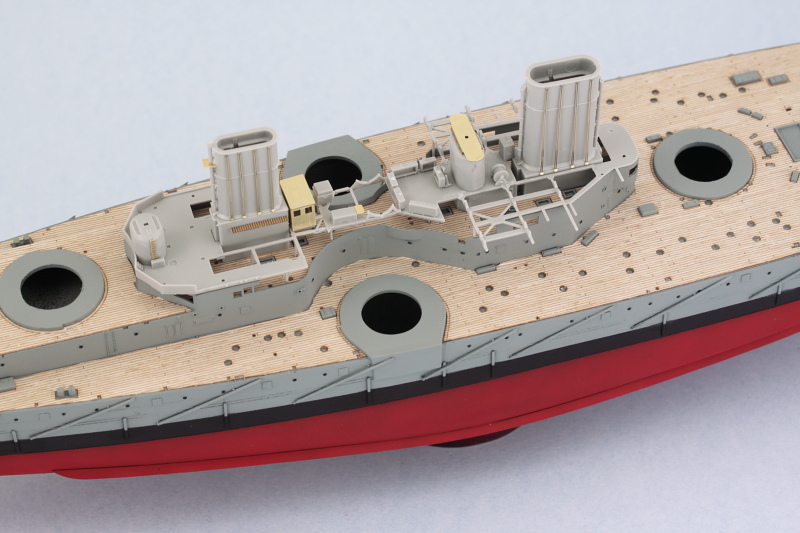
The wood deck looks a good fit. It will really lift the build, the colour looks better than the Pontos deck I used.

Great stuff


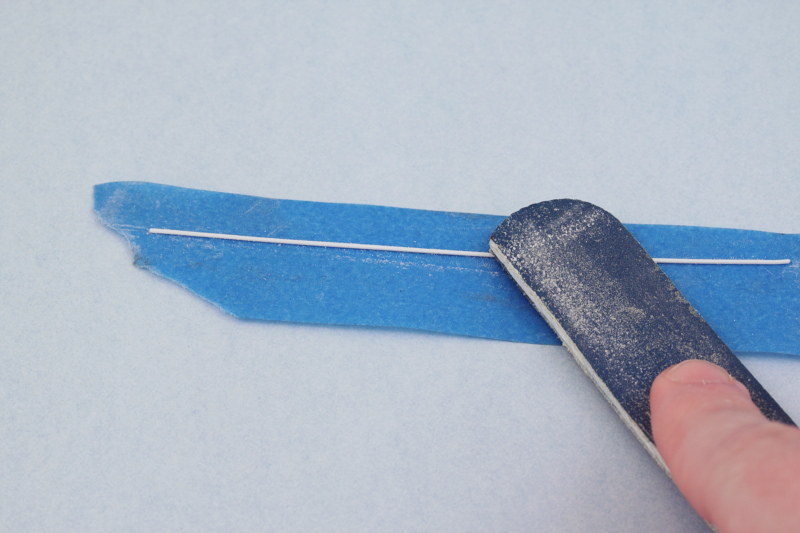
Thanks Si! I had a couple of the 12pdrs that didn't quite drill out the way I needed them to either, always nice to have some spares! Plus they will be given up as a 'sacrifice' to provide the empty base plates for the 2 port bow guns that were never mounted, so all for a good cause. I agree with you about the wood deck, I'm really happy with how it looks given how much 'real estate' is involved with it.


Quoted Text


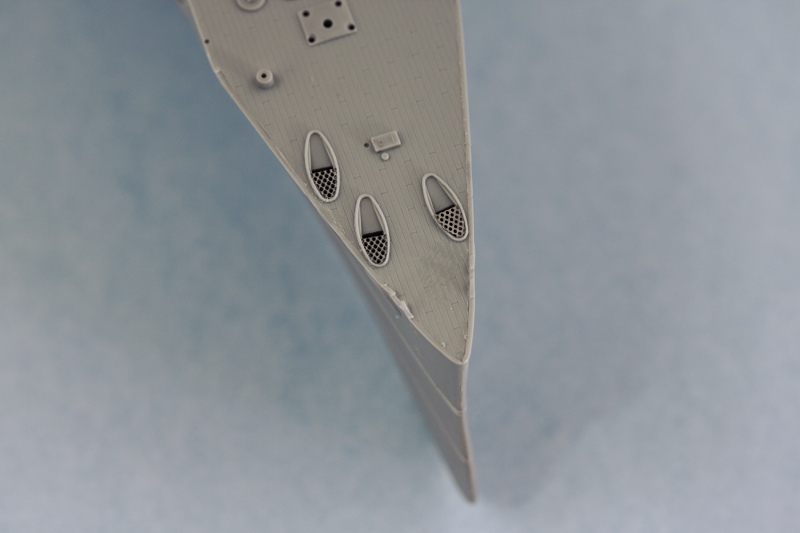
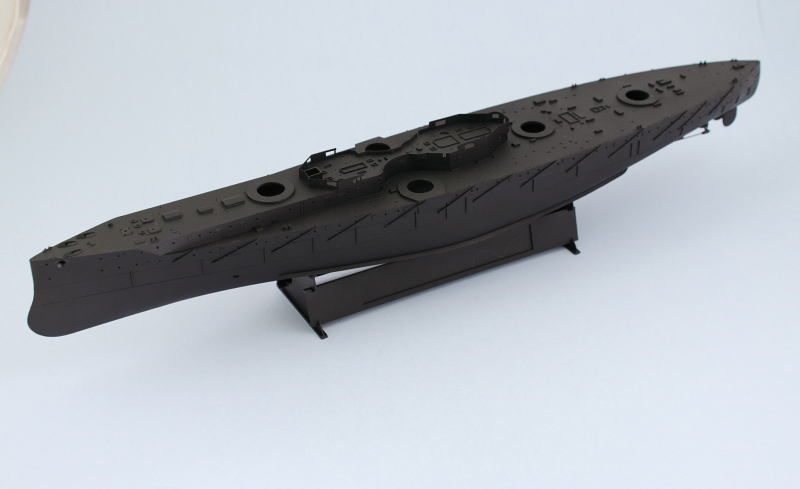
The deck is looking good. I haven't heard of Wood Hunter before, I will have to check them out. I didn't notice the "look through" on the hawse holes till to late but once you run chains through them it's not too noticeable.


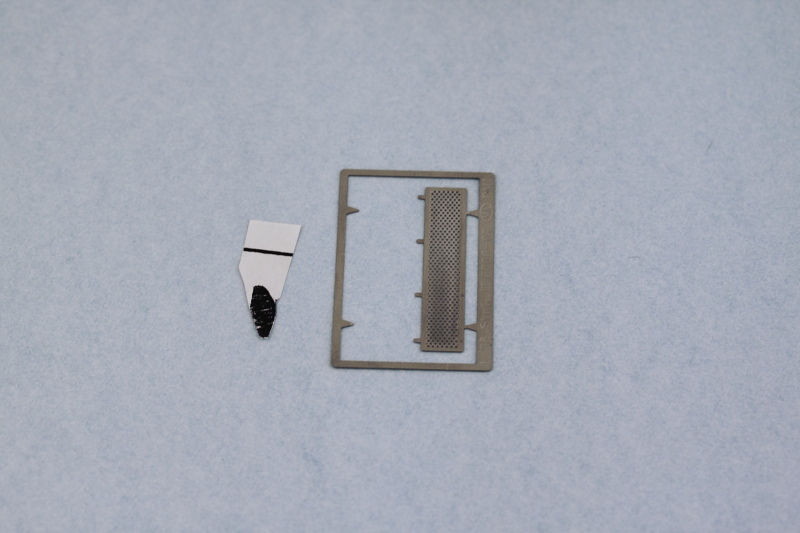
Thanks as well Michael! Wood Hunter was new to me as well and when I researched their products the views in various places were favorable and rated them comparable to Artwox...and since I couldn't locate an Artwox set in-stock at any of the places I shopped at, I decided to give the Wood Hunter set a try. In addition to the wood decks it also includes some added goodies like a PE fret with the coal scuttles and cable reels, some copper anchor chain (although the Trumpeter chain is superior IMHO) as well as wood inserts for all the ship boats, so it's a good value for the price IMHO.
Fordboy
Visit this Community
Auckland, New Zealand
Joined: July 13, 2004
KitMaker: 2,169 posts
Model Shipwrights: 1,597 posts
Posted: Saturday, August 09, 2014 - 03:08 PM UTC
Ahoy Bill

Nice work & great subject thus far an enjoyable build to follow.

I enjoyed your recent build article in Fine Scale Modeller so I am very interested to see how you progress.

Welcome to the world of ship modelling.

Hope you are enjoying it?


Cheers


Sean
wbill76
Visit this Community
Texas, United States
Joined: May 02, 2006
KitMaker: 5,425 posts
Model Shipwrights: 95 posts
Posted: Sunday, August 10, 2014 - 03:30 AM UTC

Quoted Text

Ahoy Bill

Nice work & great subject thus far an enjoyable build to follow.

I enjoyed your recent build article in Fine Scale Modeller so I am very interested to see how you progress.

Welcome to the world of ship modelling.

Hope you are enjoying it?


Cheers


Sean


Thanks Sean! I'm having a blast with this build so far. Lots of history behind this one in the larger scheme of things to keep it interesting. Glad to have you along for the ride!
wbill76
Visit this Community
Texas, United States
Joined: May 02, 2006
KitMaker: 5,425 posts
Model Shipwrights: 95 posts
Posted: Sunday, August 10, 2014 - 08:03 AM UTC
Continuing on with the efforts aimed at the hull details and getting it ready for the first round of painting, I decided to add the screen covers to the front part of the anchor chain guide holes, a missing detail that isn't covered in either the Eduard PE sets or the kit. I tried several different ways of scratch-building this item including using sheet styrene and drilling out holes by hand and using some nylon mesh screen material but neither of these produced the desired result. After scrounging around in my spares bin, I found some old photo-etched steel Pzkpfw III intake screens that had what I wanted.

The challenge was to cut them to the right shape...so I created a pattern by taking a pencil and doing a rubbing with a piece of white paper over the hole's opening on the super deck to get the outline. This was cut out and then photocopied onto another sheet and only the front half trimmed out. Using some sharp sturdy scissors, I cut the mesh into the desired shape and then fine tuned it with Tamiya sprue cutters where needed until I had three suitably sized screens. The screens were glued in place with liquid glue and gently pressed down with a wooden toothpick into the desired position.


The next little detail that I needed to add were the 16 'ribs' that were welded over the waterline belt armor plate join seams on each side of the hull but which Trumpeter neglected. These can be clearly seen on the plans and in reference photos as having some thickness out from the hull vs. being just flat strips, so I settled on using some 0.6mm diameter styrene rod to do the job. They had the right width but needed to be flattened, so I secured the rod with a length of masking tape and used a sanding stick to flatten one side, then turned the rod over and flattened the other side.


The Kagero 3D scale plans were invaluable in determining their height and placement around the hull and it was through this process that I realized that Trumpeter 'mirrored' some of the hull details in terms of number/placement of portholes and hatches so in those cases my 'fall back' landmarks of choice were the torpedo net booms.


Speaking of the booms, those came next. In some spots where the booms needed to pass over the ribs, some additional sanding/flattening was needed but otherwise everything mostly played nice with each other. The kit parts only give you the option of having the booms in the stowed position and of course there's no torpedo net provided for but I'm not worried about that for my purposes.


Next were the keels. Both of mine had some warping to different degrees and in different spots on their respective parts, so some careful work with liquid glue and positioning in terms of starting at the front and working my way along in small sections was necessary to get them both in place and lined up properly.


Rounding out this stage of activity, the propeller shafts, support struts, and rudders were installed.


Tomorrow will likely see the first round of painting depending!
wbill76
Visit this Community
Texas, United States
Joined: May 02, 2006
KitMaker: 5,425 posts
Model Shipwrights: 95 posts
Posted: Monday, August 11, 2014 - 11:10 AM UTC
First step in the hull painting process, an overall primer coat of Model Master enamel Flat Black by airbrush. This will serve 3 purposes, the 'usual' primer purpose to ensure no bare plastic is left laying around, serve as the 'boot stripe' color for easier masking on the hull, and offer the option of pre-shading for some slight variations when the hull red and gray are applied in the next rounds.


This will get the chance to set up overnight before the masking is done for the hull red to come next.
Littorio
Visit this Community
England - South East, United Kingdom
Joined: September 15, 2004
KitMaker: 4,728 posts
Model Shipwrights: 1,080 posts
Posted: Monday, August 11, 2014 - 11:25 AM UTC
Bill, good spot with the portholes, welds and screens, notes taken, now get on with it
wbill76
Visit this Community
Texas, United States
Joined: May 02, 2006
KitMaker: 5,425 posts
Model Shipwrights: 95 posts
Posted: Monday, August 11, 2014 - 11:58 AM UTC

Quoted Text

Bill, good spot with the portholes, welds and screens, notes taken, now get on with it


Ha ha! Doing my best Luciano, one step at a time!
Longshanks8
Visit this Community
England - South West, United Kingdom
Joined: July 04, 2013
KitMaker: 430 posts
Model Shipwrights: 390 posts
Posted: Monday, August 11, 2014 - 06:36 PM UTC
I Bill,

Love your attention to detail!

Watching your build with interest

Kev
wbill76
Visit this Community
Texas, United States
Joined: May 02, 2006
KitMaker: 5,425 posts
Model Shipwrights: 95 posts
Posted: Tuesday, August 12, 2014 - 03:10 AM UTC
Thanks Kev! Glad to have you along for this little voyage across the sea.
RedDuster
Visit this Community
England - South East, United Kingdom
Joined: March 01, 2010
KitMaker: 7,078 posts
Model Shipwrights: 6,649 posts
Posted: Tuesday, August 12, 2014 - 07:52 AM UTC
Looking good Bill,

Nice added detail, she looks quite sinister in black.

Following with interest.

Si
wbill76
Visit this Community
Texas, United States
Joined: May 02, 2006
KitMaker: 5,425 posts
Model Shipwrights: 95 posts
Posted: Tuesday, August 12, 2014 - 12:57 PM UTC

Quoted Text

Looking good Bill,

Nice added detail, she looks quite sinister in black.

Following with interest.

Si


I hear you there Si, almost tempted to leaver her in full 'stealth' mode but sadly that's not to be.

Second step in the hull painting process is complete. Careful masking over the black coat from yesterday and some MM Insignia Red produces the hull red portion.


After the bandages are removed, the patient seems to be doing just fine.


This will get the chance to sit overnight and then the fun begins with the gray top portions.
wbill76
Visit this Community
Texas, United States
Joined: May 02, 2006
KitMaker: 5,425 posts
Model Shipwrights: 95 posts
Posted: Wednesday, August 13, 2014 - 10:24 AM UTC
Last step in the hull painting gone done today. Applied a custom mix of roughly 70/30 Model Master Panzer Gray and Light Gray over the primer coat while leaving the boot stripe and hull red portions masked with blue painter's tape.


After that had dried, the tape came off and there were a couple spots that needed some touch-ups around some of the 'ribs' on the waterline, so I re-masked carefully with short strips where needed and either sprayed more gray or more of the Flat Black as the case required to tighten up the boot stripe.


The sharp eyed will notice that one of the rudders is missing in the last photo...it came off during the painting session and has since been reattached. Now I have to decide whether to go ahead and permanently attach the wood decks or wait until later...decisions, decisions!
wbill76
Visit this Community
Texas, United States
Joined: May 02, 2006
KitMaker: 5,425 posts
Model Shipwrights: 95 posts
Posted: Saturday, August 16, 2014 - 11:07 AM UTC
I've been busy the last few days but have been getting in some progress here and there to keep the Dreadnought steaming ahead! I wanted to be sure that the wood decking wouldn't have any adverse reactions to either Future or my preferred flat lacquer, Testors Lusterless Flat, so I rigged up a simple test using the turret cut-out pieces from the Wood Hunter deck and sprayed one with Future only, one with the Lusterless Flat only, and a third with both to see if anything negative would occur. After letting it sit for 24 hours, all three test subjects appeared perfectly normal and fully functional so I went ahead and attached the decks permanently in place for the main deck and super deck areas.

The Wood Hunter deck is self-adhesive backed with a very thin plastic film that needs to be removed for the adhesive to be exposed. I found the best way to do that was to use a strip of masking tape to 'lift' the film at the start and then peel it back as needed. Occasionally the backing film would leave a section behind or not peel completely and in those cases the masking tape trick worked perfectly to lift those sections away quickly and easily. I used some wooden toothpicks and a paint brush handle in different spots to ensure the deck laid down evenly and experienced no bubbles or buckling in the process.


After the decks were on, one thing I needed to validate was that the breakwaters would sit at the right height and not interfere with the turret gun elevations. So a quick dry-fit was in order and I also took the opportunity to fit the breakwater along with the rectangular piece it relates to on the X turret so that I could paint and work with it as a single piece vs. two separate pieces. The breakwaters will be painted a bit later along with the turrets to take advantage of having the AB out.


That left me free to continue working on the turrets so I could start their paint work in the next phases. First up though I needed to remove the molded on detail on the turret top in order for the Eduard PE replacement parts to fit and sit level. I used a square micro chisel to do that quickly and relatively pain-free.


Each turret received its three sight scope housings and kit-supplied PE top covers. The Eduard overlays are dry-fit only at this point as they will be painted separately in a darker gray before they get permanently attached and it's much easier to do that with them off the turrets vs on.

TimReynaga
Staff MemberAssociate Editor
MODEL SHIPWRIGHTS
Visit this Community
California, United States
Joined: May 03, 2006
KitMaker: 2,500 posts
Model Shipwrights: 1,830 posts
Posted: Saturday, August 16, 2014 - 11:23 AM UTC
Bill,
Your Dreadnought is coming along nicely. That wood deck really looks the part! Those photoetch turret tops are interesting as well. I'll be interested to see how they look once together and painted up with the vents and all.
wbill76
Visit this Community
Texas, United States
Joined: May 02, 2006
KitMaker: 5,425 posts
Model Shipwrights: 95 posts
Posted: Saturday, August 16, 2014 - 11:41 AM UTC
Thanks Tim! The Eduard tops provide better detail/relief on the turret surfaces vs. the Trumpeter molded-on detail and have the added bonus of being a single piece with the 'wings' that stand up from the turret sides. Trumpeter has you add those as separate pieces to each side and it doesn't quite look as good IMHO...but the paint will be the ultimate test in the end for sure.
wbill76
Visit this Community
Texas, United States
Joined: May 02, 2006
KitMaker: 5,425 posts
Model Shipwrights: 95 posts
Posted: Monday, August 18, 2014 - 12:08 PM UTC
Made some progress today in the area of the superstructure decks. I started in on the boat deck level and the first order of business was checking the fit/placement of the wood deck panel for this area. Did a quick test along with the conning tower to make sure everything would play nice and no major issues to report...so the deck will go on later after some paint for the deck components.


Then the real fun began, the actual construction for the boat deck. This involves about 25-30 different parts depending on how you attack it. I decided the best bet was to start at the ends and work toward the middle, especially since all the support posts/rods are separate pieces and they all need some time to dry while still keeping their alignment. Since there are a lot of pieces that fit to these, I opted to leave the middle connection unglued for the time being. The bases of the funnels are only dry fit and not permanently secured yet.


Everything in this area is a tight fit and fragile, so I suppose it's a good thing that Trumpeter didn't try to mold them all as integrated pieces. More effort will be spent on this area tomorrow to add the relevant details like the signal flag bins and such.
Cosimodo
#335
Visit this Community
Auckland, New Zealand
Joined: September 03, 2013
KitMaker: 1,808 posts
Model Shipwrights: 871 posts
Posted: Monday, August 18, 2014 - 12:44 PM UTC
Hi Bill,
It's looking very good.
I found the boat deck the most frustrating part of the build. It was quite fragile and as you layer up the superstructure, especially the admirals walk and mast, it was prone to breaking.

And just a thought, if you have fixed the front and rear of the boat deck, how are you going slide the 12pdrs onto the gun deck?

cheers
Michael
wbill76
Visit this Community
Texas, United States
Joined: May 02, 2006
KitMaker: 5,425 posts
Model Shipwrights: 95 posts
Posted: Monday, August 18, 2014 - 01:04 PM UTC

Quoted Text

Hi Bill,
It's looking very good.
I found the boat deck the most frustrating part of the build. It was quite fragile and as you layer up the superstructure, especially the admirals walk and mast, it was prone to breaking.

And just a thought, if you have fixed the front and rear of the boat deck, how are you going slide the 12pdrs onto the gun deck?

cheers
Michael


Thanks Michael! I can definitely see where it's going to be fun adding the walk and masts to this...not exactly a lot of room to work with and lots of things that can snag or come apart if not careful. Sorry for any confusion, but I haven't fixed the front and rear parts of the boat deck in place...they are only dry-fit for now and are still removable for the very reasons you mention...there's still a lot of stuff that has to go under/inside that super deck area first. I only placed them to help assist with the lining up of the components and support posts so that everything would correlate the way it needs to front to back.
RedDuster
Visit this Community
England - South East, United Kingdom
Joined: March 01, 2010
KitMaker: 7,078 posts
Model Shipwrights: 6,649 posts
Posted: Tuesday, August 19, 2014 - 07:37 AM UTC
Hi Bill,

Looking really excellent, very tidy paint job indeed and the deck looks excellent.

Si
Tojo72
Visit this Community
North Carolina, United States
Joined: June 06, 2006
KitMaker: 4,691 posts
Model Shipwrights: 258 posts
Posted: Tuesday, August 19, 2014 - 08:36 AM UTC
Good to see your work anywhere Bill
wbill76
Visit this Community
Texas, United States
Joined: May 02, 2006
KitMaker: 5,425 posts
Model Shipwrights: 95 posts
Posted: Tuesday, August 19, 2014 - 10:53 AM UTC
Thanks Si, have to say I'm really impressed with the Wood Hunter deck and how it contrasts nicely with the rest of the hull colors.

Anthony, good to see you here as well and thanks for the comments!
wbill76
Visit this Community
Texas, United States
Joined: May 02, 2006
KitMaker: 5,425 posts
Model Shipwrights: 95 posts
Posted: Tuesday, August 19, 2014 - 11:08 AM UTC
Carrying on from yesterday, I spent some more time on the boat deck. I installed all the signal flag lockers and some other odds and ends that populate this area. The admiral's day cabin was replaced courtesy of the Eduard set. Both halves of the boat deck will be left in this condition until after painting to make it easier to handle them and do the installation later on once the super deck has all its stuff added.


I also devoted some attention to the funnels and the conning towers. The Eduard set provided the cable stays and I used a #78 finger drill to open up the vent pipe tops on the funnels for a little added detail. It's worth pointing out that the Trumpeter instructions call for a pair of PE ladders, PE16B, be added to the base of the aft funnel but the fit is so tight for it as it slides in with the boat deck that I left them off. I might be able to figure out a way to still add them later...but not sure.

The Eduard set also provides a replacement for the range-finder platform on the aft conning tower but has you bend it up into a weird configuration that resembles a baby cradle. The Trumpeter part, F14, has the wrong type of base, so I opted for a hybrid solution. I kept the base portion of the Eduard piece but removed the railings and will add those later using either some of the Eduard or Trumpeter rails that are duplicates of each other.


Just to make sure everything is still playing nice before we commit to paint, I did a test fit of all the components.


This is as far as I'm going to take things before doing some painting and working on the super deck interior as the boat deck pieces are too fragile to leave laying around for long.
Fordboy
Visit this Community
Auckland, New Zealand
Joined: July 13, 2004
KitMaker: 2,169 posts
Model Shipwrights: 1,597 posts
Posted: Tuesday, August 19, 2014 - 10:31 PM UTC
Ahoy Bill

Real nice tidy work I love the black preshade.


Cheers


Sean
wbill76
Visit this Community
Texas, United States
Joined: May 02, 2006
KitMaker: 5,425 posts
Model Shipwrights: 95 posts
Posted: Wednesday, August 20, 2014 - 02:46 AM UTC
Ahoy yourself there Sean! Thanks for dropping by and appreciate the comments.
mgrummitt
Visit this Community
California, United States
Joined: January 07, 2014
KitMaker: 133 posts
Model Shipwrights: 105 posts
Posted: Wednesday, August 20, 2014 - 08:43 AM UTC
Hi Bill,

This is looking great!! Looking forward to following this thread!

Mike