_GOTOBOTTOM
Ships by Class/Type: Submarines
Topics on submarines of all types and eras.
Typ IIA U-3 during UNTERNEHMEN WESERÜBUNG
Black_sheep
Visit this Community
Bayern, Germany
Joined: December 11, 2009
KitMaker: 823 posts
Model Shipwrights: 551 posts
Posted: Wednesday, December 24, 2014 - 10:35 PM UTC
Horridoo!

I usually build these dirty and loud thinks which crawl over the surface but getting tired of glueing single link tracks and 120 mm smoothbore guns I wanted to do something completely new for me. As I was able to aquire the Special Naval 1:72 Typ IIA Submarine together with that awsome Accurate Model Parts set for it I took the chance and start my first ship/submarine since ages and hope I dont make a fool out of me so be gentle with your comments . Lets see what whe have there in the beginning:


and
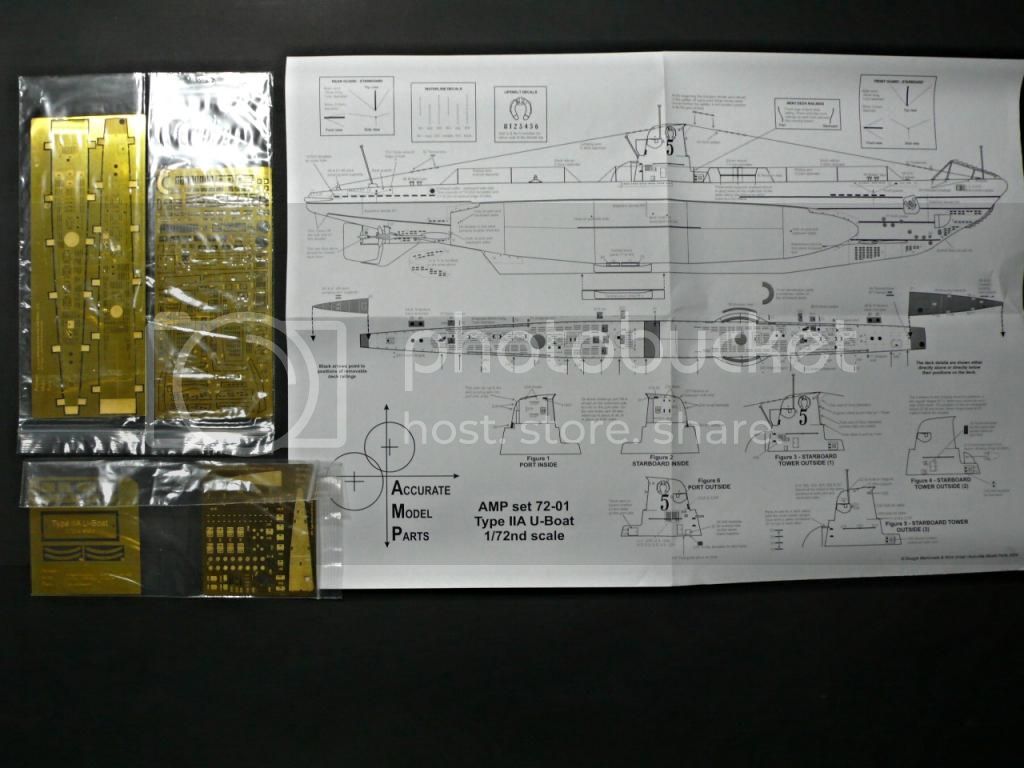


and this for some support


and my "shipyard" waiting for the build
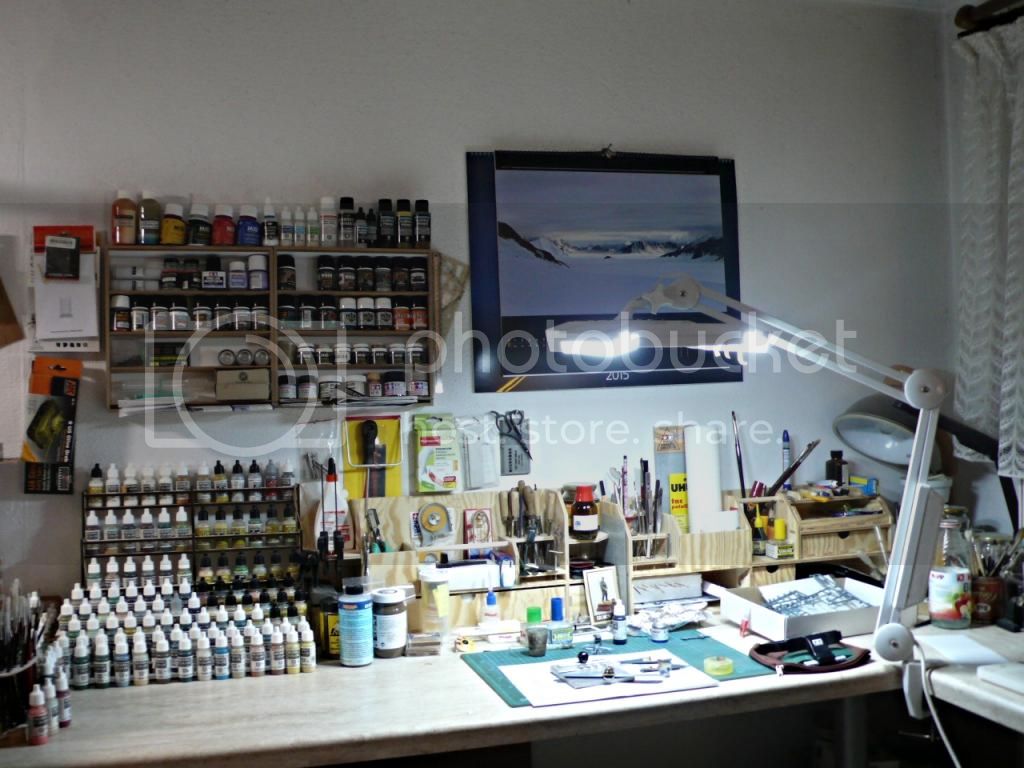


I decided to depict U-3 during her active service at Unternehmen WESERÜBUNG off the Norwegian coast near Egersund/Lindesnes. The boat was successfull in sinking two steamers and struggling with british submarines during her five active tours as a Frontboot. After WESERÜBUNG the Boat was transferred to the Baltic Sea at 21. Schulflotille in Pillau and served there extensively as a schoolboat. The Boat was decomissioned in 1. August 1944 in Gotenhafen, but her job was not yet finished...

In March 1945 the Boat made his last journey fully laden with german civilian refugees from the russian onslaught which where brought by U-3 from Gotenhafen to Swinemünde. The refugees continued their dangerous journey westernward with the steamer EUROPA but U-3 met his final fate when it was found by the British Army at 3. May 1945 in Neustadt in Holstein in a sorry state and was soon afterwards scrapped.
Aurora-7
#360
Visit this Community
Connecticut, United States
Joined: June 18, 2003
KitMaker: 1,020 posts
Model Shipwrights: 630 posts
Posted: Thursday, December 25, 2014 - 01:07 AM UTC
Sounds like a great project, especially after hearing about the boat's history.

Look forward to seeing images of your progress, Thomas.
Cosimodo
#335
Visit this Community
Auckland, New Zealand
Joined: September 03, 2013
KitMaker: 1,808 posts
Model Shipwrights: 871 posts
Posted: Thursday, December 25, 2014 - 02:32 AM UTC
Hi Thomas
Interesting looking kit and a build I will be watching with interest!

Cheers
Michael
MrMox
Visit this Community
Aarhus, Denmark
Joined: July 18, 2003
KitMaker: 3,377 posts
Model Shipwrights: 985 posts
Posted: Thursday, December 25, 2014 - 03:08 AM UTC
Have fun, its a nice kit and it will turn in to a fine model - some omissions to look for, as the kit mostly represents the CV707 Vesikko and not strictly a U 1-6 - I have built it here http://modelshipwrights.kitmaker.net/forums/126676&page=1

You might find it useful.

Cheers
Black_sheep
Visit this Community
Bayern, Germany
Joined: December 11, 2009
KitMaker: 823 posts
Model Shipwrights: 551 posts
Posted: Sunday, January 04, 2015 - 12:49 AM UTC
Welcome aboard everyone and sorry because it took so long for my first update for this one. I didn´t expected so much friends are visiting me during and after the christmas days and therefore time was much less than expected. But nevertheless here are the first pictures:

As Jan stated the ship is a hybrid from the finnish vessel Vesikko and an German Klasse IIa U-Boot. Therefore a lot change has to be made to this ship. I have to say the AMP aftermarket set for it is really superb both in his high quality parts as well as the very detailed and logical manual for it. Actually its an A4 booklet with 18 Assembly stages and every stage hast a lot substages, so it is "quite a mouth full" as an Aussie would say I believe :-).

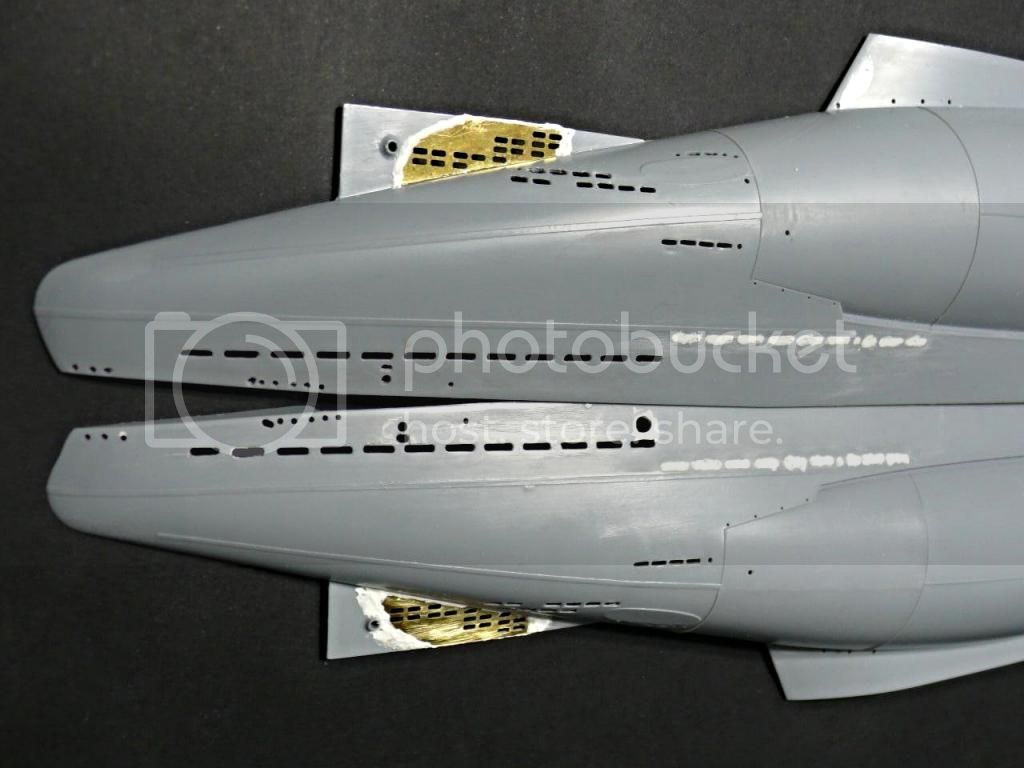
First there is the tiresome work of shaving out all the flood vents wich are molded closed. Here the first extraordinary incident happened. As I used my scalpel for scribing out the flood vents somehow in the late evening I slipped off and cut my finger even if there was no vent...


But after one day of recovery for the worker the High Command ordered him back to work in order to finish the important project.

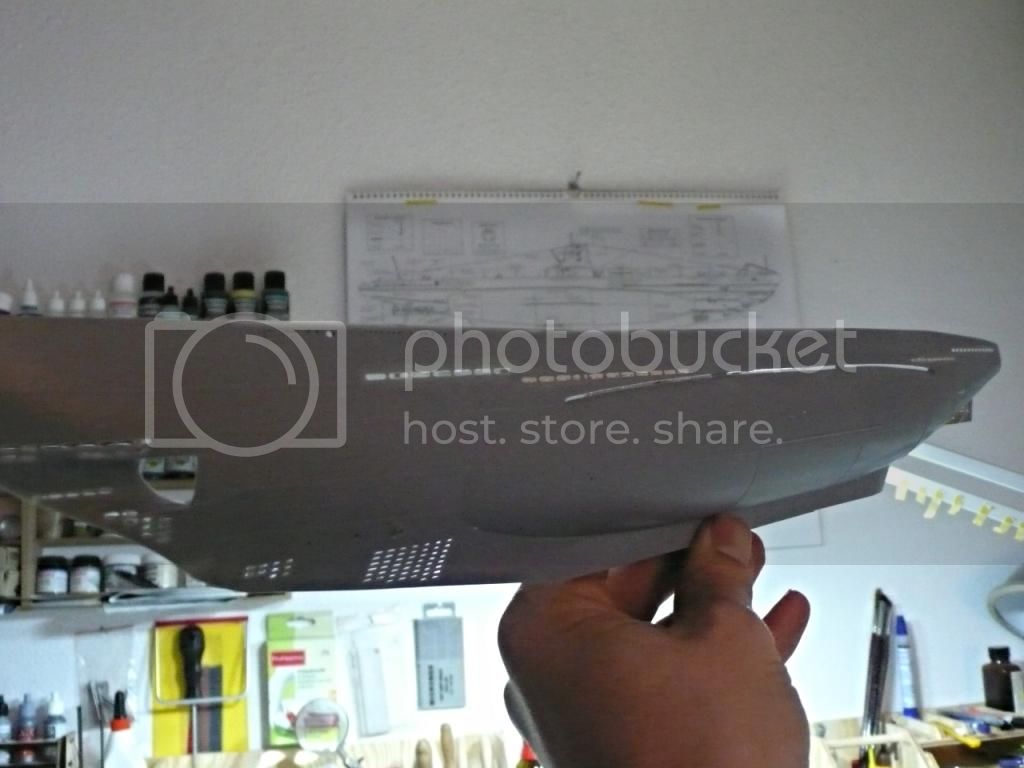
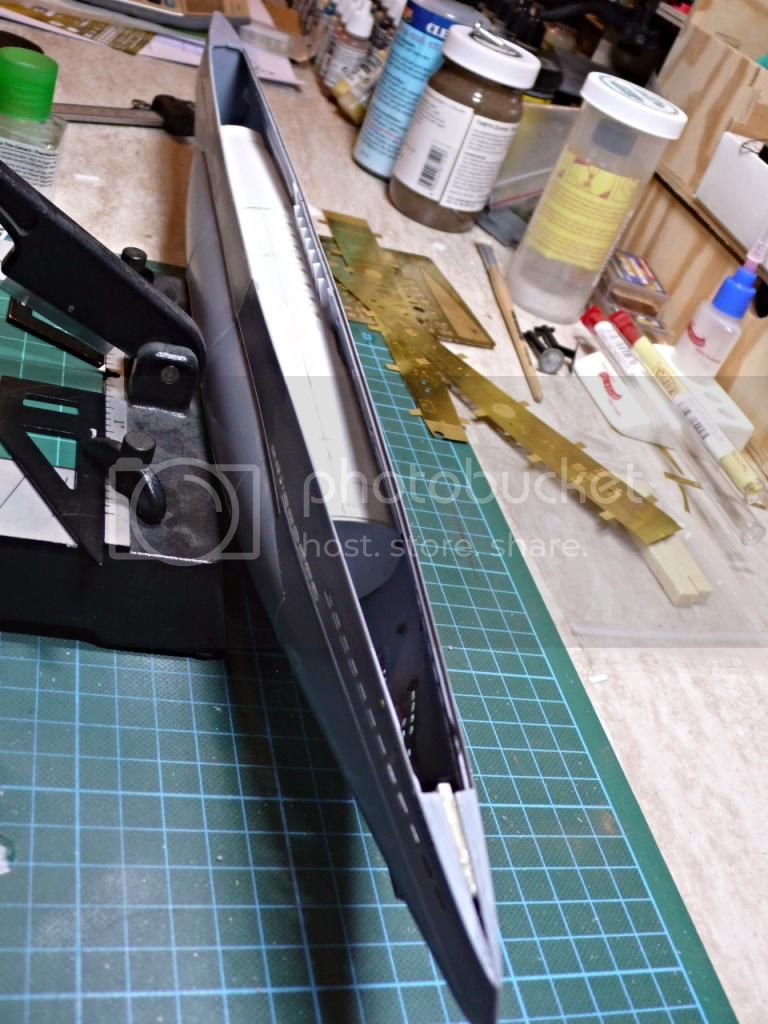
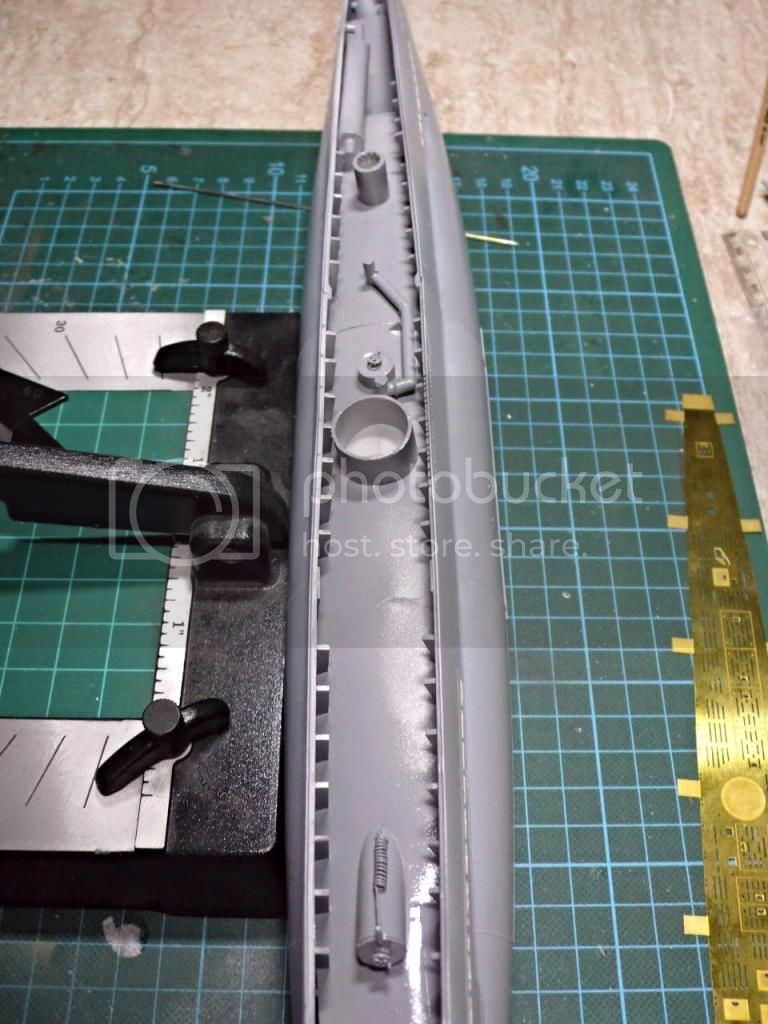
Now I reached the stage where every drilling and scribing should be done and I was able to testfitting the two halves in order to get an impression as how the boat will look later. I think opening the whole vents, add the missing one and close the one which belong to Vesikko is well worth the work as it looks much more better than out of the box:

This are the bow parts


and these the stern parts


both bow parts together to get an impression of the open flood vents. Even if you can not see it clearly in this picture there is a good way to see the inside of the hull which make it look very nice. I will try to make some better pics during the build


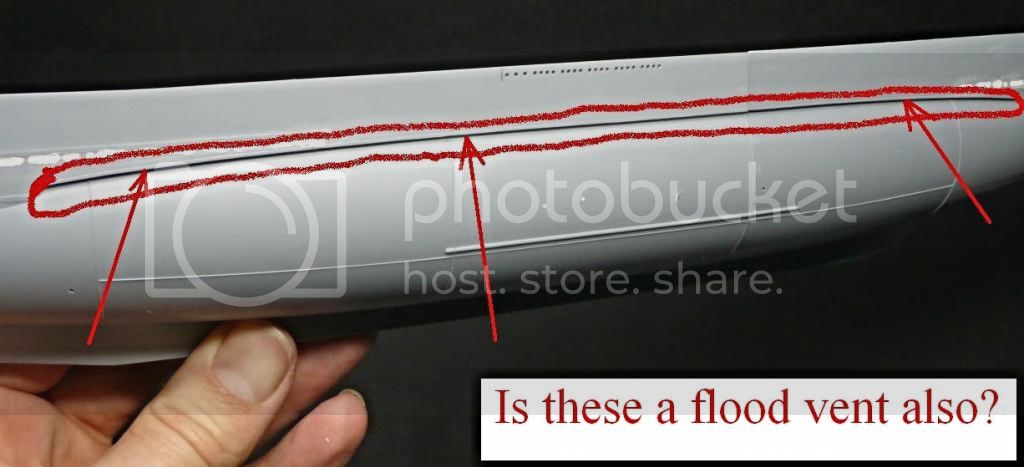
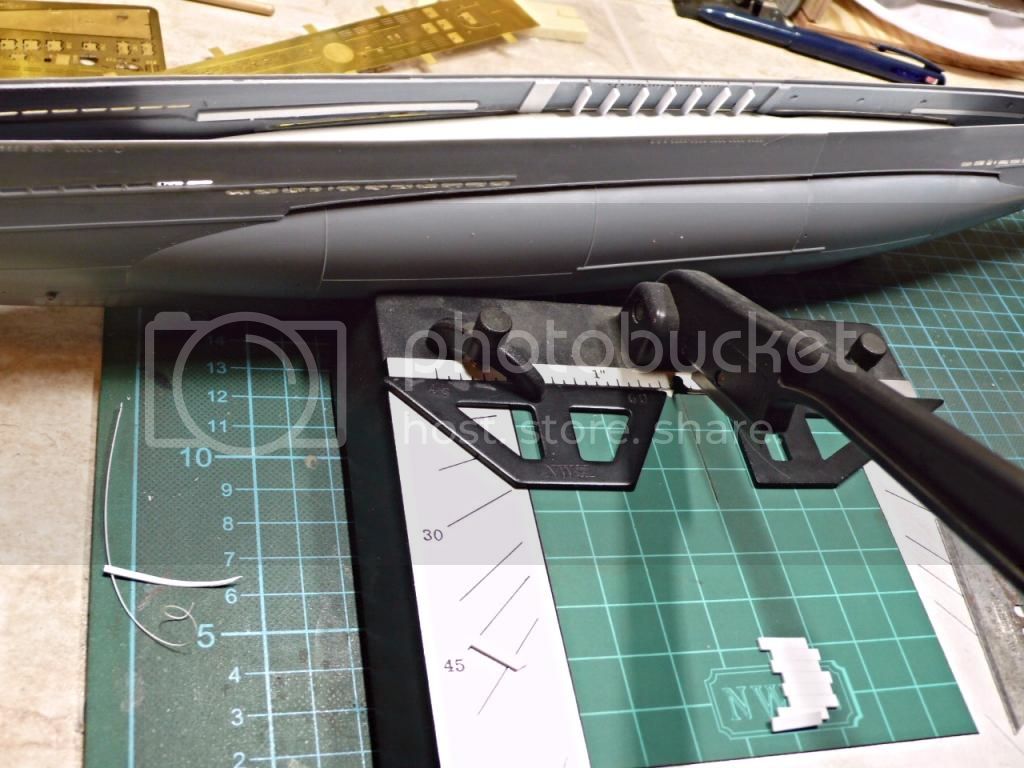
And now there is the first question for the Visitors out there: I´m not sure if the slot over the saddle tanks should be also open or not?! In Jan´s build blog it looks like its open but I cant say it clearly. Is it open at the whole length? The book I have don´t give me informations about this (please dont tell me I need to use my PROXXON drill again )


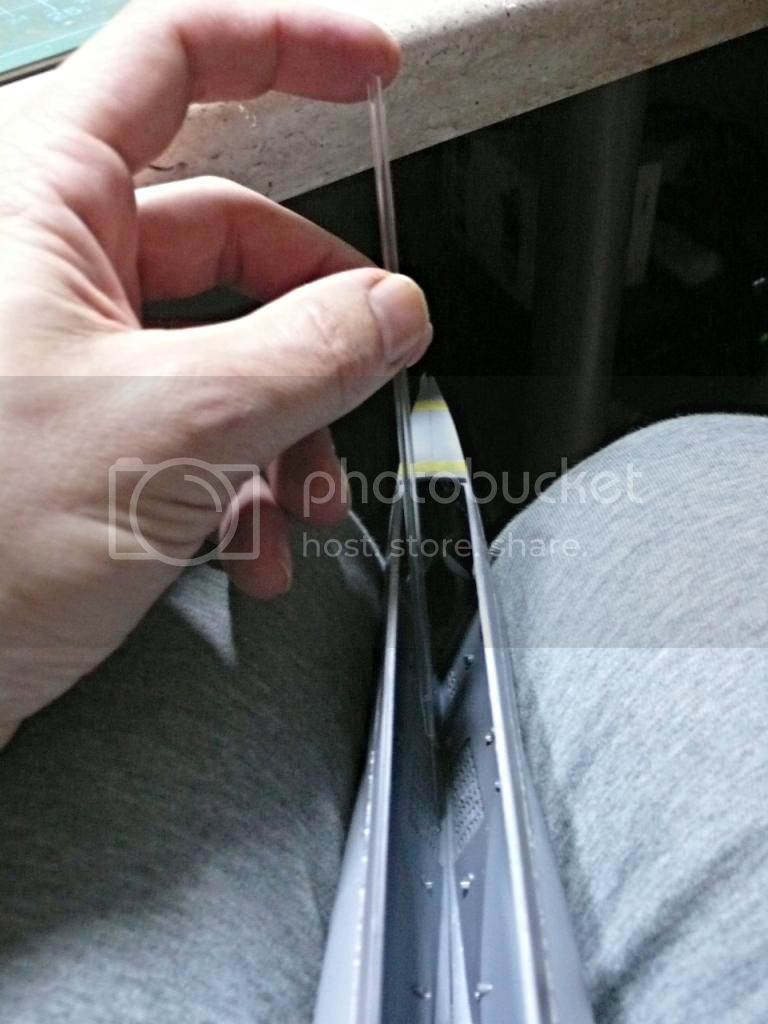
As I will later start to glue together the two halves of the boat I will try a new glue which should be an excellent choice for this project: I recently bought that FILL-N-CLEAN liquid glue. On the bottle they wrote it is harmful (cancerogen) but the Naval High Command ordered that every measure should be taken to finish the boat in the appropriate timescale so I dont have any choice as to use it. Fun aside, this glue is applied by a small glas cylinder with a very fine needle at the bottom. Due to capilary action the glue will goes inside between the two seams and will weld together the plastic. As there is inside very less space for an "ordinary" glue I will try this. Have a look:


Best Regards

Thomas
Black_sheep
Visit this Community
Bayern, Germany
Joined: December 11, 2009
KitMaker: 823 posts
Model Shipwrights: 551 posts
Posted: Sunday, January 04, 2015 - 12:52 AM UTC
Hello Jan,

glad you also watch my blog. Actually it was your blog who brought my attention to this boat. I hope I can count on you when it comes to questions ok?

Best Regards

Thomas
RedDuster
Visit this Community
England - South East, United Kingdom
Joined: March 01, 2010
KitMaker: 7,078 posts
Model Shipwrights: 6,649 posts
Posted: Sunday, January 04, 2015 - 02:18 AM UTC
Hi Thomas,

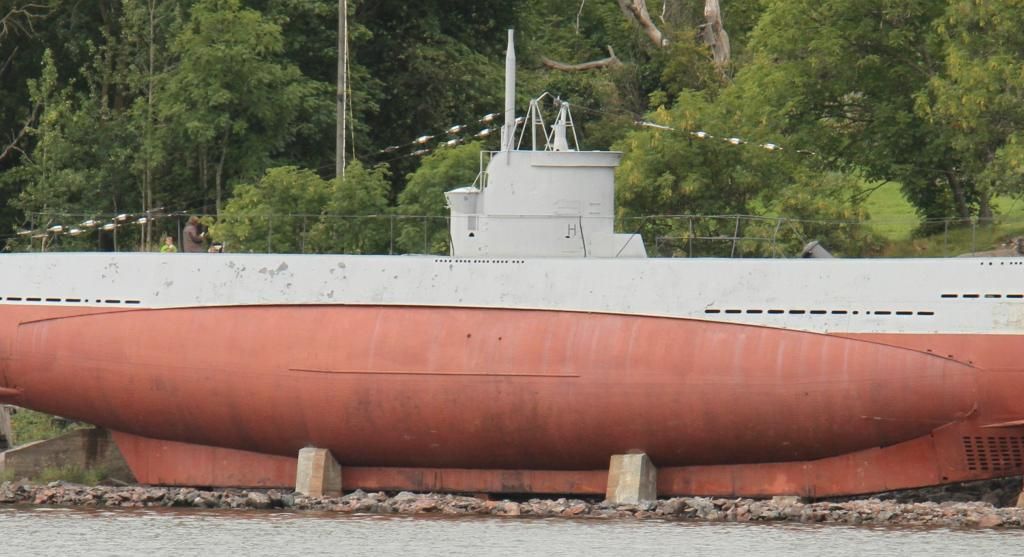
Very interesting build, ref your question above, hope this picture helps, it is of type II on display in Helsinki, unfortunately I did not get any closer that this & I don't think the pic will take much more enlarging.


Si
Black_sheep
Visit this Community
Bayern, Germany
Joined: December 11, 2009
KitMaker: 823 posts
Model Shipwrights: 551 posts
Posted: Sunday, January 04, 2015 - 02:02 PM UTC
Hello Simon,

thanks for your input and the picture. Actually I also had seen similar pictures from my book. Its the Vesikko boat in Helsinki, that one is only similar to the later build German Typ II although the slot I was talking about looks like the same. But also from this picture I´m not sure if it should be opened or not.

Best Regards Mate

Thomas
MrMox
Visit this Community
Aarhus, Denmark
Joined: July 18, 2003
KitMaker: 3,377 posts
Model Shipwrights: 985 posts
Posted: Sunday, January 04, 2015 - 02:21 PM UTC
Hi Thomas,

Its a flood went all right - you can see how I did mine on this picture:


Its relatively easy to cut the opening using a sharp knife - no need to thin it on the backside, since the thickness of the material won't be visible.

Cheers/Jan
Black_sheep
Visit this Community
Bayern, Germany
Joined: December 11, 2009
KitMaker: 823 posts
Model Shipwrights: 551 posts
Posted: Monday, January 05, 2015 - 09:24 PM UTC
Status Report Herr KaLeu! Main flood vents on both sides finally opened Herr KaLeu! Good job Bootsmann, have a break now, dismissed

MrMox
Visit this Community
Aarhus, Denmark
Joined: July 18, 2003
KitMaker: 3,377 posts
Model Shipwrights: 985 posts
Posted: Monday, January 05, 2015 - 09:53 PM UTC
Aber doch! gutes arbeit ,
Black_sheep
Visit this Community
Bayern, Germany
Joined: December 11, 2009
KitMaker: 823 posts
Model Shipwrights: 551 posts
Posted: Friday, January 09, 2015 - 02:01 AM UTC
Achtung! Käptn on bridge again!

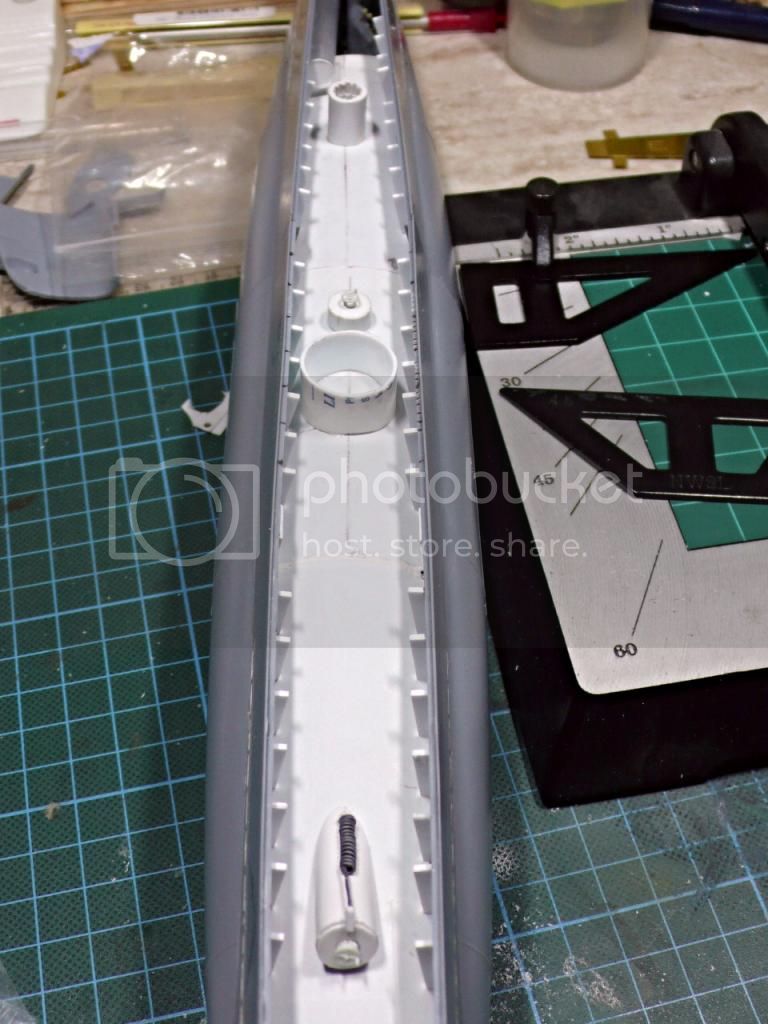
I did glue the frontal torpedo section and the two halves of the submarine together (the frontal section which is visible through the slots was primed in Vallejo Schwarzgrau primer before). With the friendly support of my wife (holding tightly the two sides together) I glued the two boats halfes together with the (for me new) liquid Flex-I-File glue in the needle and I have to say it worked perfectly. Especially in narrow spaces like here it was a real advantage as you can reach the seams everywhere and it fixed them very fast.

After this I scratchbuild some internal bulkheads as a support for the visible part of the pressure hull above. I did it similar like Jan Klaerebek did it in his blog before. No its time to make all the side frames and details between the pressure hull and the deck. Lets see the progress so far:


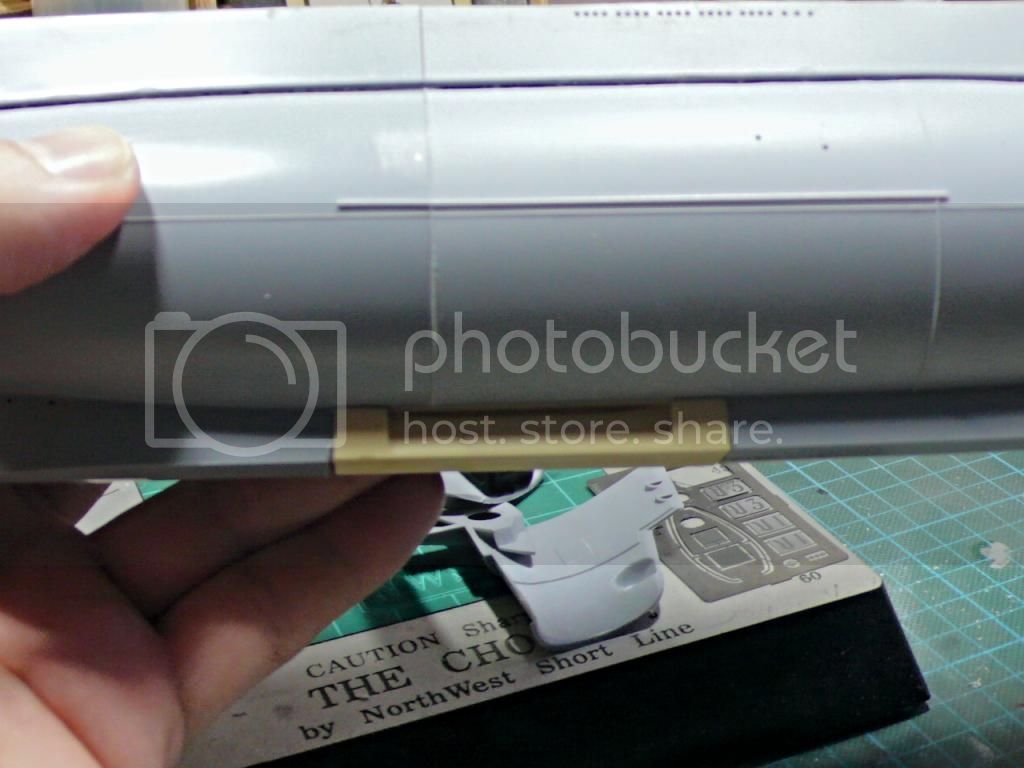
Of course I also did forget something after I did glueing the two halves together. As everything was dry I found in the instruction the story about that wedge in the stern of the boat again... The stern of the boat is, according to AMP too narrow and this can be fixed with their included resin wedge. So this way the boss had to grab the grinder again and separated the two upper halves of the stern and finally correctly fixed the wedge in order to get the right width. The responsible shipyard worker was reported and punished with half ration for the weekend:


RedDuster
Visit this Community
England - South East, United Kingdom
Joined: March 01, 2010
KitMaker: 7,078 posts
Model Shipwrights: 6,649 posts
Posted: Friday, January 09, 2015 - 03:51 PM UTC
Hi Thomas,

No problem, sorry the picture wasn't of more help.

Great work on the build, following with interest.

Si
Black_sheep
Visit this Community
Bayern, Germany
Joined: December 11, 2009
KitMaker: 823 posts
Model Shipwrights: 551 posts
Posted: Saturday, January 10, 2015 - 12:52 AM UTC
Thanks for the flowers Simon, I will keep on give my best.

In the end of the day a small update picture about what I did today (finished the interior behind the flood vents exept of the exhaust and fresh air piping - this I will do tomorrow). Because the AMP Photoetched deck is photoetched and therefore the slots are all open I have the hope you can still see some of the interior after the installation of the deck


and now for a beer; I deserved it really
Black_sheep
Visit this Community
Bayern, Germany
Joined: December 11, 2009
KitMaker: 823 posts
Model Shipwrights: 551 posts
Posted: Saturday, January 10, 2015 - 05:47 PM UTC
The area between pressure hull and deck is finally finished. The Muffler and air in- and outlet pipes were finished and after this I precoated them with Grey Vallejo Surface primer and another coat of Hobby Color FS36270 which is very similar. I will not to any weathering inside as this will not be seen from above and the side. Its just that you can see that "something" ist underneath the decking. What is the audience thinking?


Now we can progress with the GHG plates, torpedo doors and finally the main ventral area near the keel, which is also missing at the original kit but provided as a resin piece from AMP, before we can move to the installation of the photoetched deck.
MrMox
Visit this Community
Aarhus, Denmark
Joined: July 18, 2003
KitMaker: 3,377 posts
Model Shipwrights: 985 posts
Posted: Saturday, January 10, 2015 - 09:35 PM UTC
Pretty neat'o mr. sheep - welll done!
JJ1973
#345
Visit this Community
Niedersachsen, Germany
Joined: August 22, 2011
KitMaker: 1,835 posts
Model Shipwrights: 1,832 posts
Posted: Sunday, January 11, 2015 - 12:30 AM UTC
Thomas,

apologies for joining so late - a gear build so far!! I've been watching from the beginning and I will follow with interest.

Great job you did on the interior - as for the weathering, I'm not sure, I would check what actually can be seen once the deck is in place. Certainly a full blown weathering is not required, but I could imagine that it should not be too shiny...

Again, great build!

Jan
Black_sheep
Visit this Community
Bayern, Germany
Joined: December 11, 2009
KitMaker: 823 posts
Model Shipwrights: 551 posts
Posted: Sunday, January 11, 2015 - 09:28 PM UTC
Funny, I have two Jans now following my build blog very nice!

@ Mr. Mox: Thanks for your kind words, I have to admit I used your inside work as an idol for me how to do it.

@ Jan Janssen: Wilkommen an Bord! Its nice to have a German following my works. Actually although you can see through the photoetched deck you can not see too much details. I will paint the handwheels of the two domecovers in red, do some slight oilwash and faded rust and cover it with a matt laquer. I think thats enough for it.
Fordboy
Visit this Community
Auckland, New Zealand
Joined: July 13, 2004
KitMaker: 2,169 posts
Model Shipwrights: 1,597 posts
Posted: Monday, January 12, 2015 - 12:14 AM UTC
Ahoy Thomas

Really enjoying this build thus far.

You can add one "Sean" as a follower of your blog.

Cheers


Sean
Black_sheep
Visit this Community
Bayern, Germany
Joined: December 11, 2009
KitMaker: 823 posts
Model Shipwrights: 551 posts
Posted: Saturday, January 17, 2015 - 02:02 PM UTC
Ahoi and Willkommen an Bord Sean! Its nice to see that also New Zealand is watching my work here

As I did started to work last week there was not too much I did but some important work was finished I want to share with you:

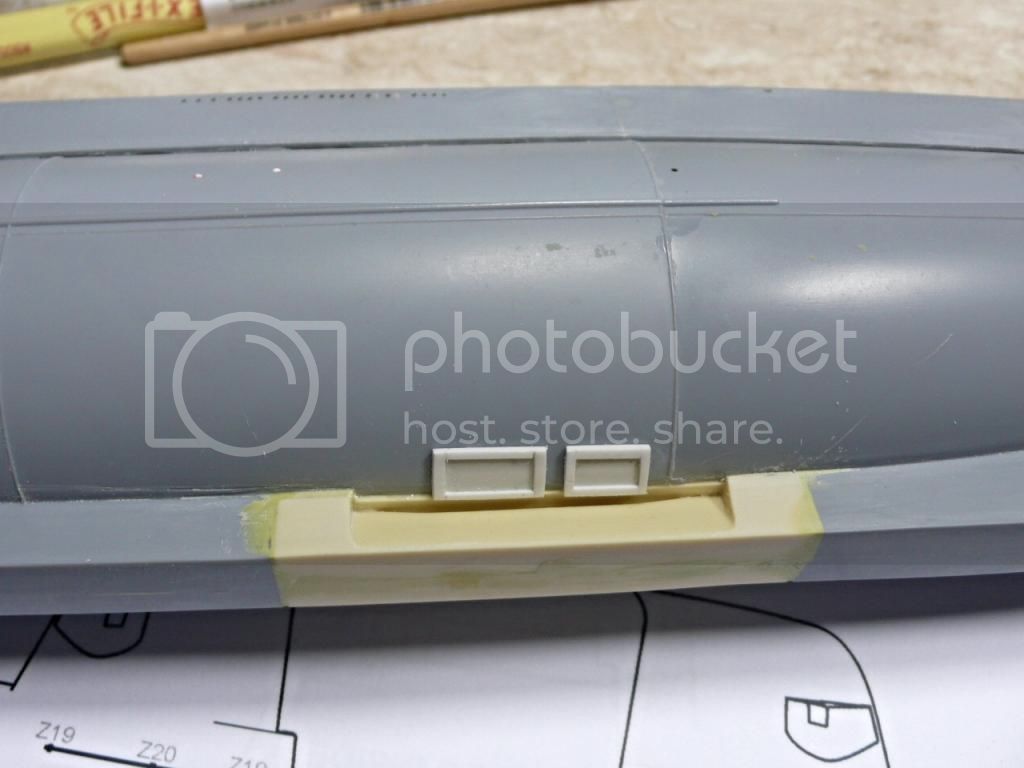
I did cut out the keel bottom and installed the main ventral piece from AMP. Thanks to my beloved OLFA Cutter this worked very comfortably. I just have to fill the seams now with Miliput plastic putty


After this I installed the Gruppenhorchgerät plates on both sides of the bow of the boat


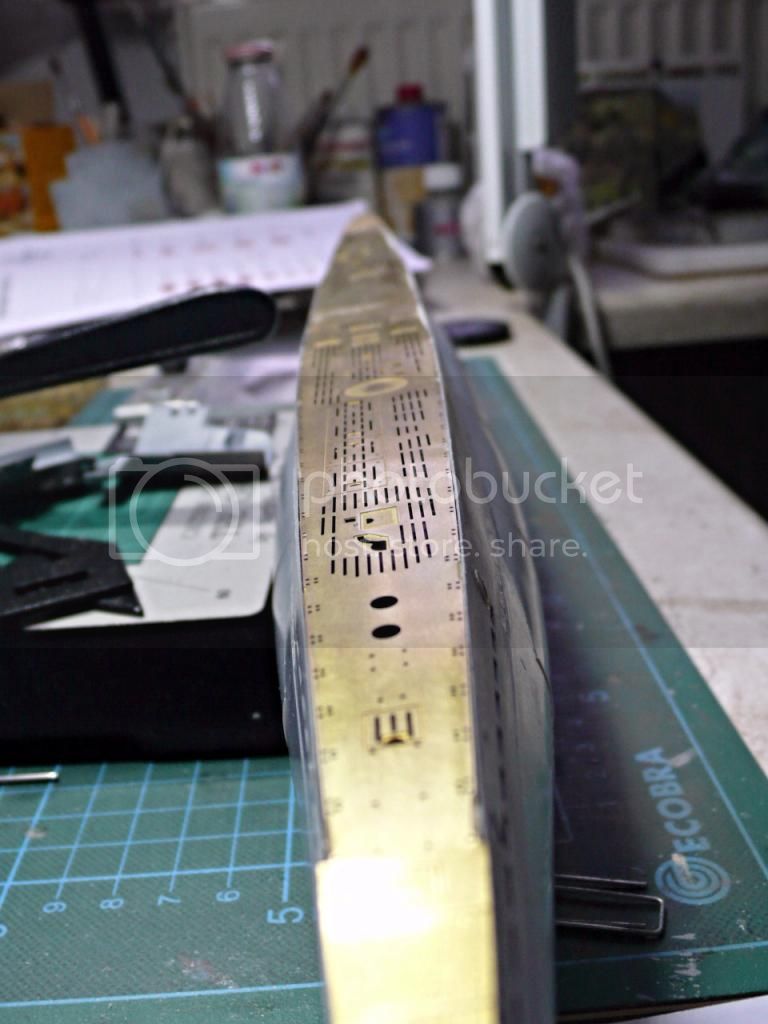
Now it was time to glue the photoetched deck onto the boat. I discovered that the hull sides were seriously too narrow for the PE-deck and even with the AMP resin spacer it didnt fit over the complete length. It was necessary to use a welding cord, snipped to the appropriate length in order to spread the boats width to let the deck fit snugly in the end. After about 10 minutes and my fingers clogged with superglue I did managed to install the deck. What can I say? It is, of course a huge improvement instead of the plastic deck out of the box. There just have to fill some seams on the edges between the deck and the hull sides with putty. Have a look:


Now we can start our work on the conning tower; AMP give us a lot work for improvement here!


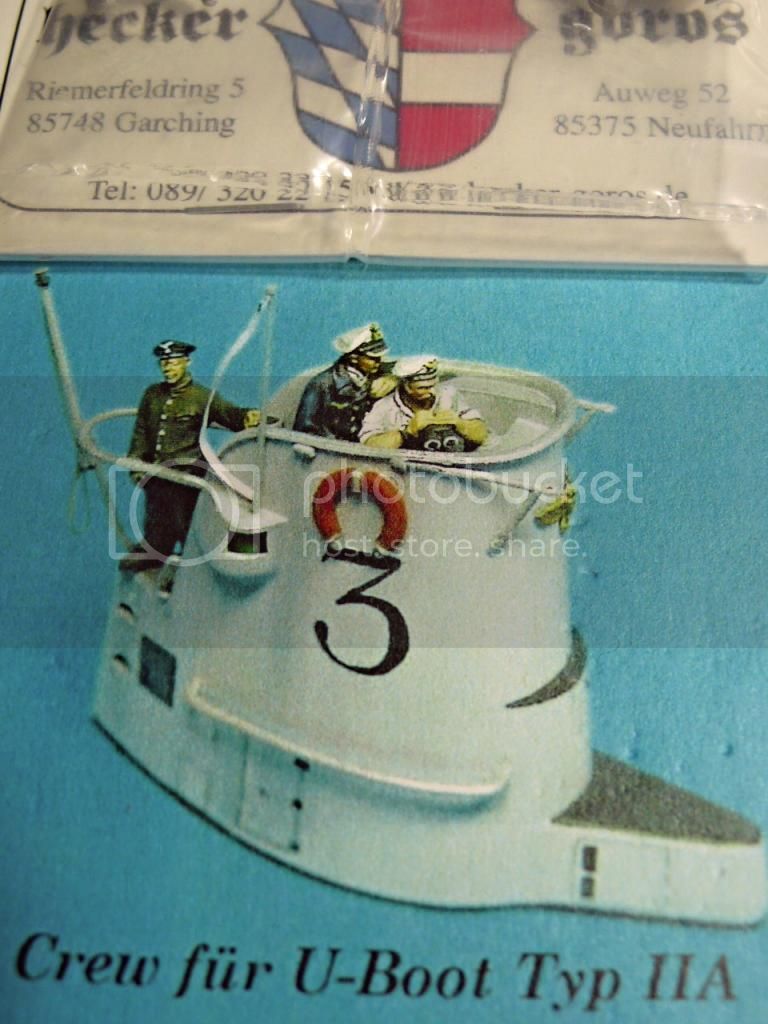
In the meantime the crew also did arrive. I was looking for the figures the company Hecker & Goros did made especially for this kind of boat but I discovered that it is very difficult to find them at the usual internet hobby shops. Therefore I decided to contact Hecker & Goros directly and after a friendly contact two weeks later I got the wished set from the postman


Black_sheep
Visit this Community
Bayern, Germany
Joined: December 11, 2009
KitMaker: 823 posts
Model Shipwrights: 551 posts
Posted: Sunday, January 25, 2015 - 01:01 AM UTC
Good news mates! One of our blockade runners arrived last friday with the much needed Milliput. As I found out the plastic putty from Vallejo is not bat but its shrinking and crumbles away when you scrub too hard - thats why we need to use that english stuff.

I was able to rework all the seams and the bottom main vent piece at the keel and make them smooth. The boat is now looking much nicer:


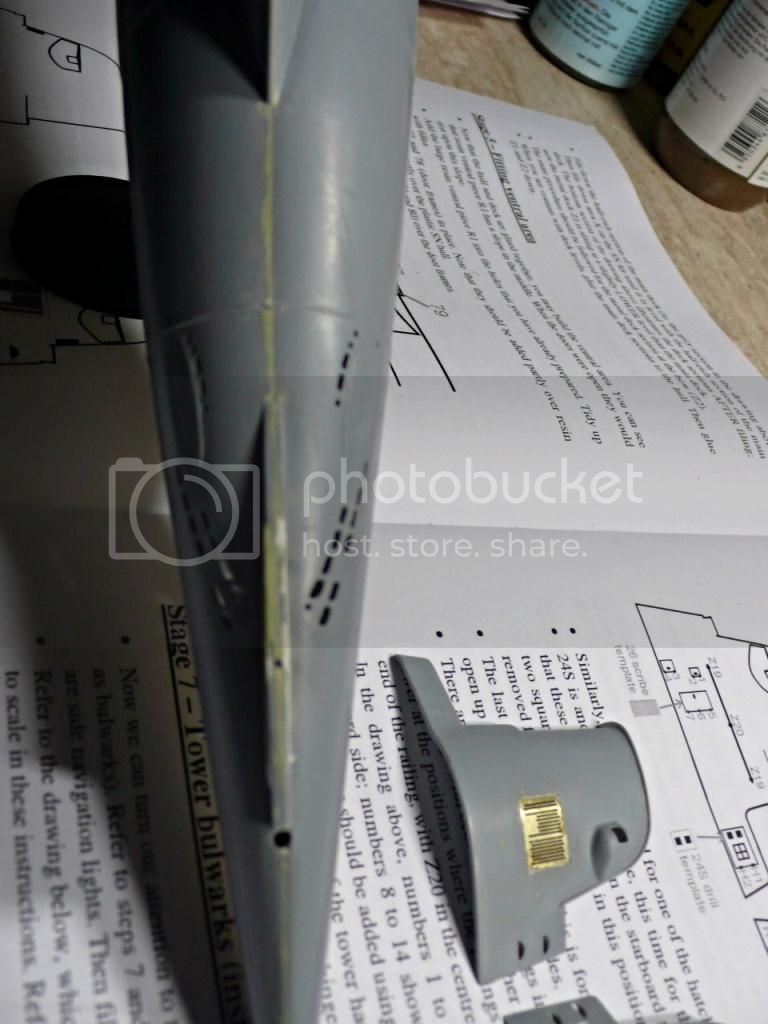
I was also able to start at the turret outside details. Regrettably these are also wrong with the Special Navy kit. The door lockers are much too big in sice and a little bit too high. I was filling them with Milliput in order to rescribe them with a sharp needle and the template from AMP. The corrected vent holes at both turret sides were also carefully fitted in:


In the meantime during waiting for the Milliput I was doing the main keel vent doors. I have to say the parts and the instruction from AMP did confused me here as some didnt fit with the vent... therefore I decided to do them the same style as Jan did in his blog before. The book I have was also of no help because there is no clear photo from this area of the boat inside:


So lets scribe those tiny locker doors without hurting myself
TRM5150
Visit this Community
Massachusetts, United States
Joined: January 03, 2010
KitMaker: 2,159 posts
Model Shipwrights: 1,400 posts
Posted: Sunday, January 25, 2015 - 01:20 AM UTC
Nice bit of work on this one Thomas! Love the pressure hull! Keep it coming!!
Black_sheep
Visit this Community
Bayern, Germany
Joined: December 11, 2009
KitMaker: 823 posts
Model Shipwrights: 551 posts
Posted: Sunday, January 25, 2015 - 05:33 PM UTC
Thank you for your positive feedback mate. I will continue to do my best

ONE QUESTION TO THE AUDIENCE: Is there any producer who offers a turned aluminium barrel for the 2 cm Flak C/30 in 1:72? I want to replace the plastic one from the kit but, until now, was not successful in finding one...
TimReynaga
Staff MemberAssociate Editor
MODEL SHIPWRIGHTS
Visit this Community
California, United States
Joined: May 03, 2006
KitMaker: 2,500 posts
Model Shipwrights: 1,830 posts
Posted: Sunday, January 25, 2015 - 07:09 PM UTC

Quoted Text

...ONE QUESTION TO THE AUDIENCE: Is there any producer who offers a turned aluminium barrel for the 2 cm Flak C/30 in 1:72? I want to replace the plastic one from the kit but, until now, was not successful in finding one...


Thomas,

My compliments on what is becomming a beautiful build! In answer to your question, Schatton Modellbau makes 2cm Flak 38 (KwK 38) Barrels which might work: http://www.onthewaymodels.com/reviews/Schatton/Flak38barrelsprev.htm

Your build is inspiring! I built a much more modest 1/400 scale Einbaume a few years ago:


regards,
Tim
Grauwolf
#084
Visit this Community
Quebec, Canada
Joined: September 14, 2005
KitMaker: 2,485 posts
Model Shipwrights: 1,157 posts
Posted: Sunday, January 25, 2015 - 09:12 PM UTC
Hello Thomas,

Aber,Schatton,RB etc. all make 2cm C/38 barrels, in 1:72 scale.

I have not had any luck finding the earlier C/30.

Cheers,
Joe
 _GOTOTOP