_GOTOBOTTOM
Ships by Class/Type: Sailing Vessels
This forum is for sailing ships both civilian and military of any era.
Pyro Niña build
TimReynaga
Staff MemberAssociate Editor
MODEL SHIPWRIGHTS
Visit this Community
California, United States
Joined: May 03, 2006
KitMaker: 2,500 posts
Model Shipwrights: 1,830 posts
Posted: Thursday, January 22, 2015 - 07:25 AM UTC
Hi all!

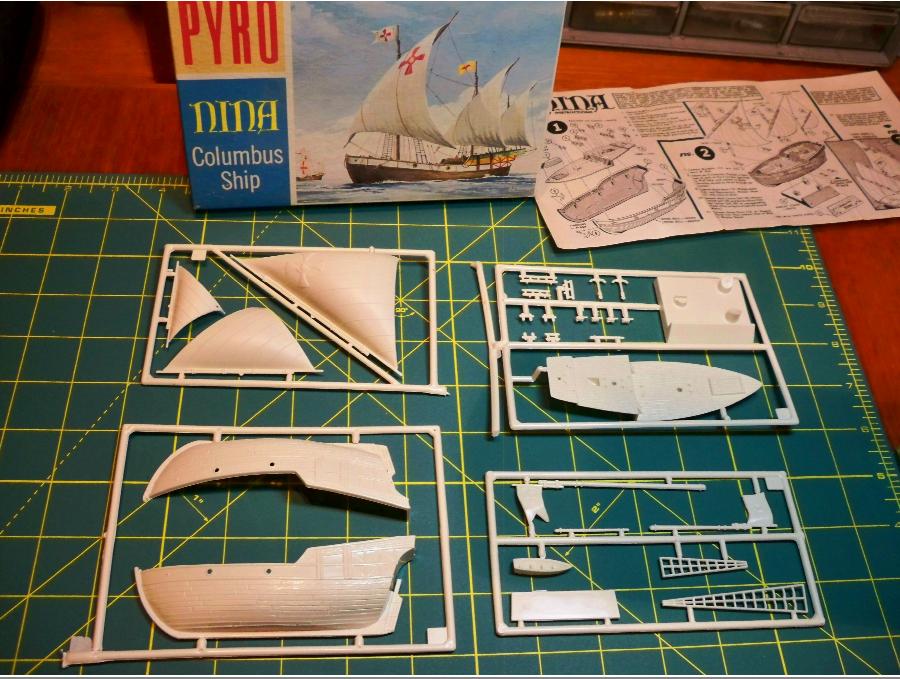
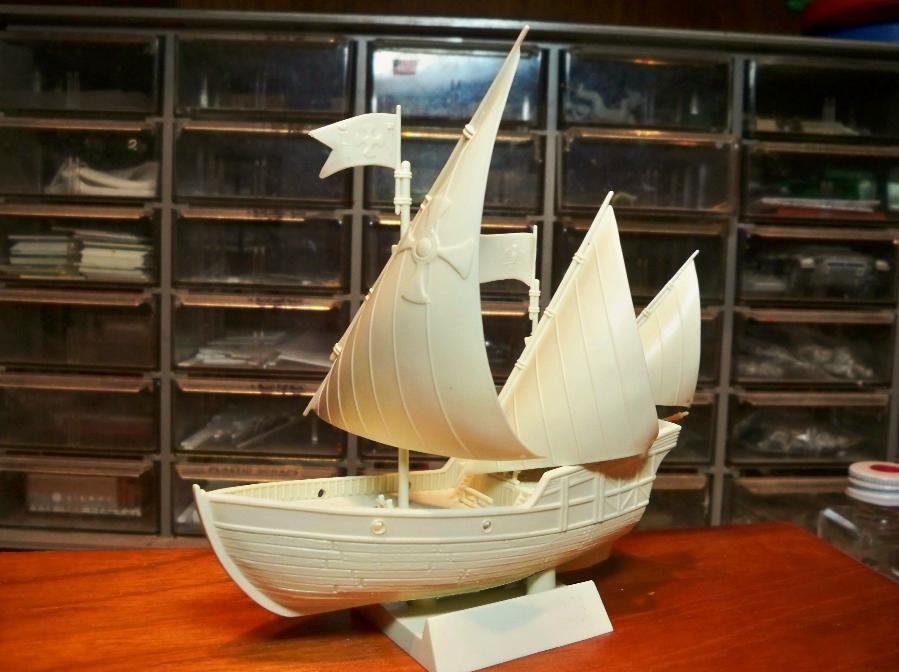
Sometimes it is fun to work on something a little different from the steel navy ships I usually build...
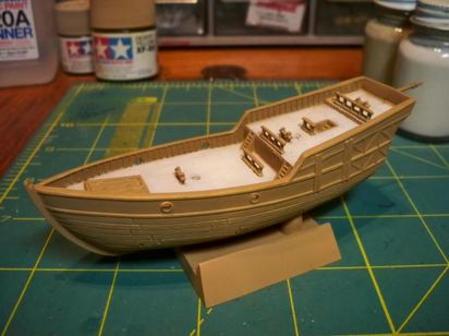
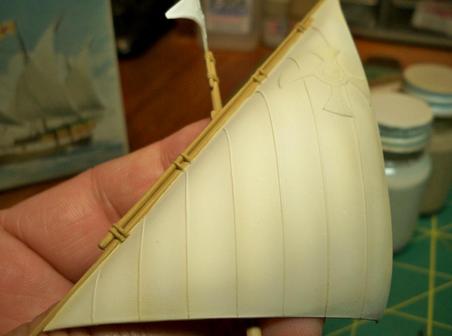
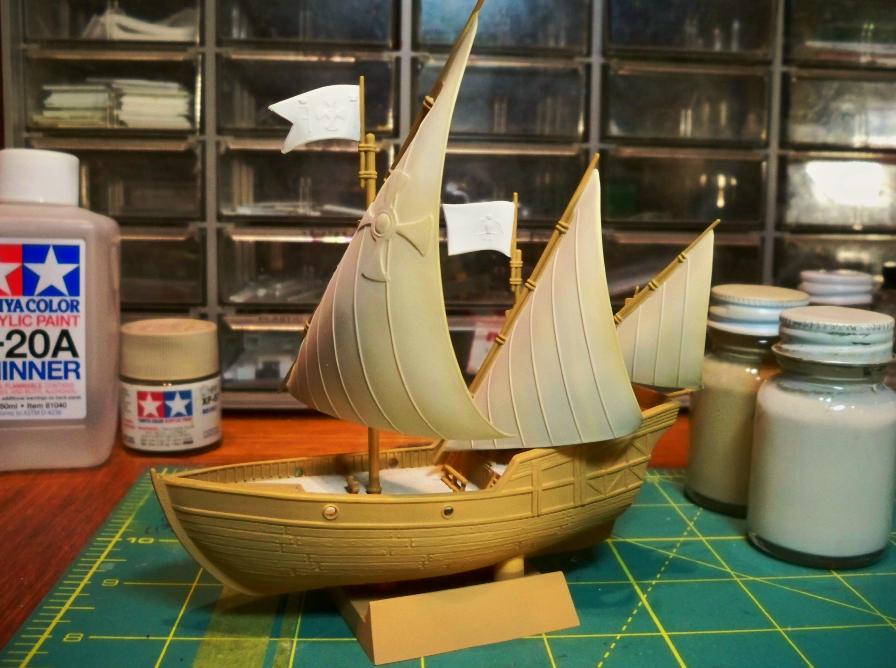
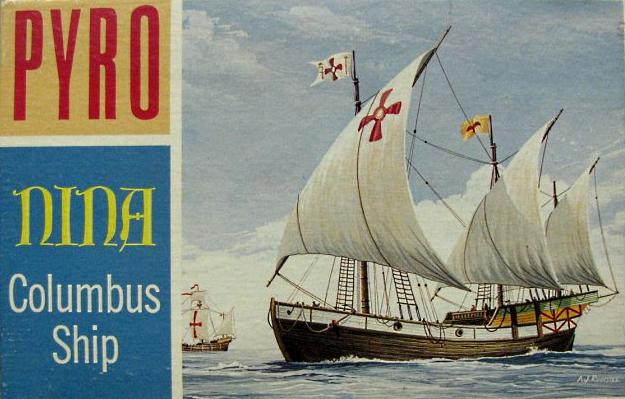
I’d picked up Pyro’s old Christopher Columbus’ Niña on the cheap years ago. At the time I wasn’t particularly impressed with the heavy detailing and generally toy-like appearance of the parts, so it had gone straight to the back of my stash. Casting about recently for a quick project, I decided to give it a go.


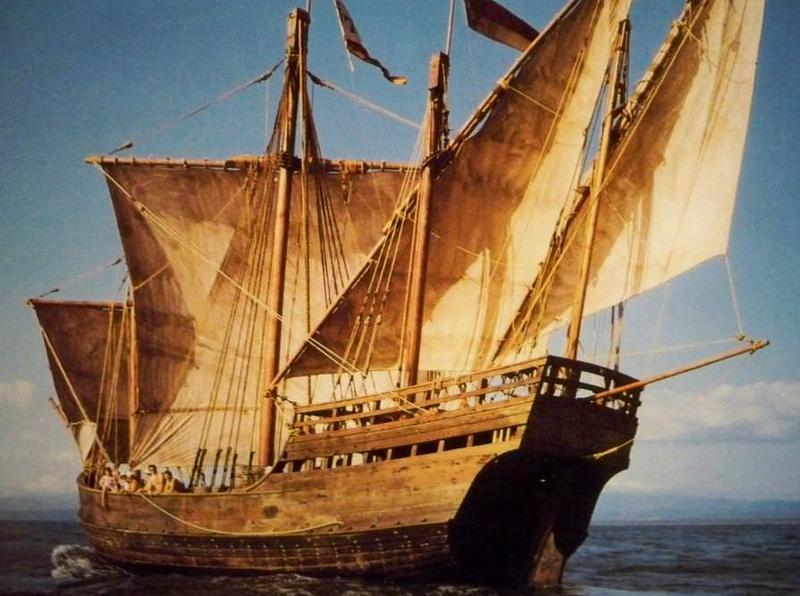
Actually named the Santa Clara, the ship was owned by Juan Niño de Moguer, from which the ship’s nickname Niña (little girl) was derived. Though the smallest among the three ships on Columbus’ first voyage of discovery, the Niña was his favorite, and he sailed aboard her on the way home. In fact, the ship eventually logged over 25,000 miles under Columbus' command. She must have been a handy little vessel; in 1493 she survived a storm off the Azores that so nearly capsized the ship that Columbus and the crew swore to perform religious pilgrimages upon their safe return to Spain. During the second voyage, the Niña was Columbus’ flagship on an exploratory side trip to Cuba, and she was the only vessel in the West Indies (of a fleet of 17) to survive the hurricane of 1495. The next year she brought Columbus and 120 passengers back to Spain – which must have been a miserably crowded passage. I visited aboard a replica of the Niña a while back; I remember thinking at the time that at only about 60 feet in length, the 24 man crew would have been packed pretty closely. One can only imagine what it must have been like crossing the Atlantic with an additional 120 people aboard! In 1497, while engaged in a cargo run from Cadiz to Rome, the ship was captured off Sardinia by pirates - and then recaptured by her captain and some of the crew who had escaped, stolen a boat, and re-boarded the ship. Niña sailed again for the New World the next year as part of Columbus' third voyage, during which Columbus’s men became the first Europeans to set foot on the South American continent. The last record of the Niña is of a 1501 trading voyage to the Pearl Coast of Venezuela, after which she disappears from history...


Fordboy
Visit this Community
Auckland, New Zealand
Joined: July 13, 2004
KitMaker: 2,169 posts
Model Shipwrights: 1,597 posts
Posted: Thursday, January 22, 2015 - 07:57 AM UTC
Ahoy Tim

Great to see you blogging another build and as a bonus its something totally different.

Personally I learn something from everyone of your builds.

I will be following along with real interest.

Cheers

Sean
Aurora-7
#360
Visit this Community
Connecticut, United States
Joined: June 18, 2003
KitMaker: 1,020 posts
Model Shipwrights: 630 posts
Posted: Thursday, January 22, 2015 - 08:23 PM UTC

Quoted Text

Ahoy Tim

Great to see you blogging another build and as a bonus its something totally different.

Personally I learn something from everyone of your builds.

I will be following along with real interest.

Cheers

Sean


Ditto.

She has a big of name in naval history (if not bigger) then any other vessel clad in iron or made of steel.
CaptSonghouse
Visit this Community
California, United States
Joined: August 08, 2008
KitMaker: 1,274 posts
Model Shipwrights: 1,236 posts
Posted: Thursday, January 22, 2015 - 10:44 PM UTC
Hi Tim!

Will this an out-of-the-box build or will you super-detail it?

--Karl
TimReynaga
Staff MemberAssociate Editor
MODEL SHIPWRIGHTS
Visit this Community
California, United States
Joined: May 03, 2006
KitMaker: 2,500 posts
Model Shipwrights: 1,830 posts
Posted: Friday, January 23, 2015 - 10:39 AM UTC
Thanks guys! Tempting as it is to do my usual go-nuts–with–detailing-and-take-forever-to-finish thing, this one will be a simple out of the box relaxation build. I usually find this impossible, but the old Pyro kit may be just the thing for it. This little Niña was part of Pyro’s “Antique Ships” series of simplified sailing ship models from the 1960s. Designed with younger modelers in mind, these models featured basic, fast construction and a minimum of parts. They were later marketed by Life-Like in the ‘70s, and some of them (including the Niña) have been issued again more recently by Lindberg. The copy I have is one of the original Pyro moldings which, according to the instruction sheet, was issued in 1966 and retailed for the princely sum of 60 cents!


Despite its simplicity, the model appears generally to match what little is known about 15th Century caravels. The bow at the foredeck should probably rake upwards a little more, and I’d bet the hatch on the foredeck should be located more centrally, but it isn't too far off published sources (‘The Ships of Christopher Columbus’ from the Anatomy of the Ship series). Niña is depicted as lateen rigged rather than square rigged as she appeared when she reached the New World under Columbus, but the rig is correct for the beginning of the expedition and earlier. The billowing sails, molded integrally with the spars, look surprisingly good. Some smaller parts such as the launch, anchors, and guns are decently done as well, although the Lombard cannon shouldn't be wheeled. This "box scale” ship (i.e., sized to fit the standardized kit boxes in the series rather than to any standard scale) comes to about 1/150. Surface detailing is very heavy, especially the raised wood grain, but everything fits well and it builds up quickly.


I started with the hull, which was simplicity itself – just two hull halves and the deck! Clean up was minimal, and I had it completely assembled in a matter of minutes.
TimReynaga
Staff MemberAssociate Editor
MODEL SHIPWRIGHTS
Visit this Community
California, United States
Joined: May 03, 2006
KitMaker: 2,500 posts
Model Shipwrights: 1,830 posts
Posted: Saturday, January 24, 2015 - 09:14 PM UTC
Masts and sails are next. The masts are heavily done but not bad (although I’m not at all sure about those goofy molded-on flags), and the sails have some nice stitching represented by raised lines.

The injection molded sails came pre shaped and attached to the yards – which sounds terrible – but they actually look reasonably good in this small scale. I certainly like them better than those vacuform things that usually come with plastic model sailing ships. The only problems were some knockout pin marks on the inner surfaces which I scraped off with a curved x-acto blade and smoothed with steel wool. I also filled in the small holes for attaching rigging.

Attached to the masts and test fitted, the wind filled sails bring the little vessel to life. Yeah, the detail is pretty heavy and the flags are ridiculously thick, but I’ll see if I can make things look better with paint.

JClapp
#259
Visit this Community
Massachusetts, United States
Joined: October 23, 2011
KitMaker: 2,265 posts
Model Shipwrights: 104 posts
Posted: Saturday, January 24, 2015 - 11:55 PM UTC
That's really charming. I have a fondness for those ancient Pyro kits.

The sails do look good. The hull shape is quite lovely also.

With a fresh breeze over her quarter she's charging along at about 3.5 knots!
TimReynaga
Staff MemberAssociate Editor
MODEL SHIPWRIGHTS
Visit this Community
California, United States
Joined: May 03, 2006
KitMaker: 2,500 posts
Model Shipwrights: 1,830 posts
Posted: Sunday, January 25, 2015 - 01:58 AM UTC

Quoted Text

That's really charming. ...
With a fresh breeze over her quarter she's charging along at about 3.5 knots!


Speedy Niña was even faster than that; one of the crew of the replica I visited bragged that she could make over 5 knots!

Aurora-7
#360
Visit this Community
Connecticut, United States
Joined: June 18, 2003
KitMaker: 1,020 posts
Model Shipwrights: 630 posts
Posted: Sunday, January 25, 2015 - 07:15 AM UTC
She certainly had a much more extensive history than I knew about. Where's the replica's home port?

Seeing her assembled, she seems like such a small boat for trans-Atlantic voyages, let alone having to carry 120 passengers!
TimReynaga
Staff MemberAssociate Editor
MODEL SHIPWRIGHTS
Visit this Community
California, United States
Joined: May 03, 2006
KitMaker: 2,500 posts
Model Shipwrights: 1,830 posts
Posted: Sunday, January 25, 2015 - 09:08 AM UTC
Not sure what the current Niña's homeport is, but she's run by the Columbus Foundation in the British Virgin Islands. The ship goes all over as a touring maritime museum; I actually went aboard her when she sailed up the river and visited here at Sacramento, California. They have a website at http://www.thenina.com/building_thereplica.html - and even the Niña ship's cell at (787) 672-2152!

JJ1973
#345
Visit this Community
Niedersachsen, Germany
Joined: August 22, 2011
KitMaker: 1,835 posts
Model Shipwrights: 1,832 posts
Posted: Sunday, January 25, 2015 - 11:47 PM UTC
Hi Tim,

that's something for a change...bur a very nice build nevertheless! I didn't even know a company 'Pyro' ever existed before I saw your build. Really looks like fun!

Cheers,
Jan
JClapp
#259
Visit this Community
Massachusetts, United States
Joined: October 23, 2011
KitMaker: 2,265 posts
Model Shipwrights: 104 posts
Posted: Monday, January 26, 2015 - 12:07 AM UTC
Its amazing to think how far we have come. in the sixteenth century crossing the Atlantic was a desparate undertaking with no certain outcome.

Nowadays people race 22 foot sailboats singlehanded across the Atlantic for fun,

and can average 25 knots over the distance.
TimReynaga
Staff MemberAssociate Editor
MODEL SHIPWRIGHTS
Visit this Community
California, United States
Joined: May 03, 2006
KitMaker: 2,500 posts
Model Shipwrights: 1,830 posts
Posted: Monday, January 26, 2015 - 07:50 AM UTC
After a lightning fast construction period of hours rather than my usual weeks or months, the little girl was ready for paint. Gotta love these quick builds!

One of the benefits of having such a small investment up to this point is that I can bring myself to try out new (at least for me) techniques. In this case, I resolved to overcome my fear and loathing of acrylic paints! I’ve built models for many years, but I’ve always shied away from acrylics. I mean, if it isn’t a messy, highly toxic, slow drying petroleum based ecohazard – it can’t be trusted, right?

Still, I have almost no experience depicting wood effects and had heard that acrylics could be very effective. So I bit the bullet and bought some Tamiya paints.


The hull got a coat of Tamiya Desert Yellow XF-59 with a light tan (XF-57 Buff and XF-59 White mix) deck.


After brush painting the masts and spars with the Desert Yellow, the sails got an airbrushed coat of the same light tan as the deck. I also shot a darker version of the same color along the vertical raised “seams”. The contrast is subtle (you can see the two colors on the bottles in the background in the picture), but it does give the sails a little more depth.


The results look good so far. The water based acrylics were disconcertingly easy to use, covered well, and dried almost immediately. Hmmmm.


TRM5150
Visit this Community
Massachusetts, United States
Joined: January 03, 2010
KitMaker: 2,159 posts
Model Shipwrights: 1,400 posts
Posted: Monday, January 26, 2015 - 10:02 AM UTC
Nice looking base coat Tim! These little breaks from the usual can big great fun!!
TimReynaga
Staff MemberAssociate Editor
MODEL SHIPWRIGHTS
Visit this Community
California, United States
Joined: May 03, 2006
KitMaker: 2,500 posts
Model Shipwrights: 1,830 posts
Posted: Monday, January 26, 2015 - 09:29 PM UTC
Now for the scary part! I hadn’t tried this before, a World War One aircraft builder in my model club told me he had achieved some great natural wood effects on plastic using artist’s oil colors over Tamiya acrylics; it seems that one of the advantages of these water based paints over my usual enamels is their resistance to oil based thinners... so I put his method it to the test by slathering Grumbacher Raw Umber all over that neatly painted hull.


...and it looked absolutely awful!

Just as advertised, though, the oil paint covered but didn’t attack the acrylic base colors. When I took a thinner-dampened towel and wiped the oil paint away, it left dark brown shadows in the recessed areas and a nice brownish filter over the rest of the “wood” of both the hull sides and the lighter decks. I was delighted!


I did the same thing on the base, nameplate, masts, and yards. It was super easy! And even though my technique is still a little ham fisted, it worked well on the heavy-ish detail on the kit. Now to wait for it to dry. My friend told me to be patient, as artist’s oils can take up to a week...
TRM5150
Visit this Community
Massachusetts, United States
Joined: January 03, 2010
KitMaker: 2,159 posts
Model Shipwrights: 1,400 posts
Posted: Monday, January 26, 2015 - 09:47 PM UTC
Great effect! Oiks do work very nice for creating the wood effect! As you said, they will take some time to dry...could be a few days to a week. You can speed this up sometimes if you wick out the oil on a piece of card board before application. But there would still be a couple days before you can clear coat.

Keep up the great work!!
Aurora-7
#360
Visit this Community
Connecticut, United States
Joined: June 18, 2003
KitMaker: 1,020 posts
Model Shipwrights: 630 posts
Posted: Monday, January 26, 2015 - 11:25 PM UTC
Nice effect.
Fordboy
Visit this Community
Auckland, New Zealand
Joined: July 13, 2004
KitMaker: 2,169 posts
Model Shipwrights: 1,597 posts
Posted: Monday, January 26, 2015 - 11:38 PM UTC
Ahoy Tim

Nice job and a great tip.

Cheers


Sean
JClapp
#259
Visit this Community
Massachusetts, United States
Joined: October 23, 2011
KitMaker: 2,265 posts
Model Shipwrights: 104 posts
Posted: Monday, January 26, 2015 - 11:51 PM UTC
That's just beautiful!
A very interesting combination of media, will store that away for future use.

As for taking a week to cure, so does Model Master enamel spray paint
JJ1973
#345
Visit this Community
Niedersachsen, Germany
Joined: August 22, 2011
KitMaker: 1,835 posts
Model Shipwrights: 1,832 posts
Posted: Monday, January 26, 2015 - 11:59 PM UTC
Really beautiful!

If ever before a Pyro Nina kit has been build with such a craftsmanship and love to detail???

Cheers,
Jan
TimReynaga
Staff MemberAssociate Editor
MODEL SHIPWRIGHTS
Visit this Community
California, United States
Joined: May 03, 2006
KitMaker: 2,500 posts
Model Shipwrights: 1,830 posts
Posted: Friday, January 30, 2015 - 09:27 AM UTC
Thanks guys, I appreciate the comments!

Ok... I know I’m supposed to be patient and leave things alone until the artist’s oil paint dries, but I couldn’t resist doing a little more during the wait. Even though the stain on the attached yards is still tacky, the sails are dry, so I figured I could safely handle them while painting the flags.

I’d considered replacing these clunky, over thick banners, but in the spirit of the out of the box quick build I just left them as they were and set to painting them. I painted the aft one yellow with the bird in red following the boxtop illustration. I have no idea if this was authentic or not, couldn’t find documentation of it anywhere. Perhaps it was the personal ensign of the Niña’s captain? It was probably just from the Pyro boxtop artist’s imagination... but it still looks cool!


I followed the boxtop in painting the Expeditionary Banner too. The “I” is for Ysabel, the “F” for Fernando (Queen Isabella and King Ferdinand). After I painted the flags, I found out that the artist got it wrong, though: The “I” should be a “Y”, and the letters and cross should be in green. And would the reverse of the flag really have had a backwards “F”...? Oh well. I may change it later, but it looks good for now. At least everyone seems to agree that the crosses on the sail were red!

Meanwhile, the hull and other ”wood” parts are still not dry to the touch...
Removed by original poster on 01/31/15 - 13:27:44 (GMT).
s4usea
Visit this Community
United States
Joined: December 08, 2011
KitMaker: 46 posts
Model Shipwrights: 45 posts
Posted: Friday, January 30, 2015 - 06:35 PM UTC
"Meanwhile, the hull and other ”wood” parts are still not dry to the touch..."

You can speed up the drying time by placing it near a low heat source as you're waiting for the oil to evaporate off, leaving the pigment behind.

Here on the East Coast of the US I have heating radiators in the house, so I place what I'm working on on them to dry in the Winter, (I only model in the Winter) but I also know guys in my club that use desk lamps and space heaters on low-temp.
JPTRR
Staff MemberManaging Editor
RAILROAD MODELING
#051
Visit this Community
Tennessee, United States
Joined: December 21, 2002
KitMaker: 7,772 posts
Model Shipwrights: 476 posts
Posted: Friday, January 30, 2015 - 07:02 PM UTC
Tim,

That's great! I love the Pyro models, toy-like though they may be. Their 1/48 airplanes are actually very good.

Your oil stain really is effective and looks authentic. Getting it to dry...

Artists use Cobalt drier that speeds curing of oils. It is a deep purple but it never changed my paints. It is very toxic, though. There may be other products now but I have no idea how it might work with model paints.

You may like this: The Kits of Pyro Plastic Company - An Illustrated Guide

TimReynaga
Staff MemberAssociate Editor
MODEL SHIPWRIGHTS
Visit this Community
California, United States
Joined: May 03, 2006
KitMaker: 2,500 posts
Model Shipwrights: 1,830 posts
Posted: Saturday, January 31, 2015 - 07:25 AM UTC
Thanks guys, I appreciate the suggestions. Although more slowly than I’d like, the parts are definitely drying out. I have them in a warm spot in the house near the heat vent, but given the nearly 50 year old kit plastic and my inexperience with whatever styrene/acrylic/artist’s oil chemical interaction might be going on, I hesitate to do anything more! Things do look to be drying as they should – I’ll just have to be patient.

Frederick, thanks for the The Kits of Pyro Plastic Company - An Illustrated Guide link. The history of Pyro Plastics is fascinating!
I was especially taken with:

“Pyro is unique in plastic models because the subjects for kits were not selected by popularity. Pyro was a very successful company without model kits. Since the production of molds was subsidized by other profit centers, Pyro did not feel the extreme financial pressure that Revell and Monogram did. The later had to produce kits that would sell immediately and in quantity so they could make loan payments and recoup their tooling expenses... [Pyro] subjects were chosen based on historical significance and not sales potential. That is why Pyro kit subjects are so unique and in so many cases are the only kit very made (or even envisioned) of such a subject”.

I always loved that about Pyro!
 _GOTOTOP