_GOTOBOTTOM
Ships by Class/Type: Destroyers
This forum covers all types of destroyers from all eras.
1/350 DD-484 Buchannan Build
d6mst0
#453
Visit this Community
Texas, United States
Joined: August 28, 2016
KitMaker: 1,925 posts
Model Shipwrights: 1,298 posts
Posted: Monday, May 28, 2018 - 11:11 PM UTC
Joseph,

Getting the paint masks was a great idea. The results are awesome!

Mark
RussellE
#306
Visit this Community
Victoria, Australia
Joined: June 27, 2010
KitMaker: 3,959 posts
Model Shipwrights: 2,777 posts
Posted: Tuesday, May 29, 2018 - 03:28 AM UTC
Holey Moley Joseph!

Whoever designed that camo/disruptive pattern must've had a bet going as to how crazy and random they could make it!

With a little help from Gator Masks you've done a great job!

JJ1973
#345
Visit this Community
Niedersachsen, Germany
Joined: August 22, 2011
KitMaker: 1,835 posts
Model Shipwrights: 1,832 posts
Posted: Tuesday, May 29, 2018 - 02:02 PM UTC
Joseph,

excellent work, your PE as well as your paint job.
In fact, your painting is simply astonishing, such a paint scheme on such a small vessel - that's just amazing!!

I'm in again after your break and following with interest, looks really fine so far!!

Cheers,
Jan
BravoTwoZero
Visit this Community
California, United States
Joined: June 11, 2009
KitMaker: 461 posts
Model Shipwrights: 80 posts
Posted: Wednesday, May 30, 2018 - 12:21 AM UTC
Fellow modelers Mark, Russell and Jan, I really appreciate all your comments. What is even more fascinating is how international/global the interaction is. Thanks very much. It provides me with the drive to trudge along with this project.

I was able to make progress last night. Before anything else, just in case someone is curious, here are the masking tapes that I used: Scotch 3M Fine Line Tape and Gold Crepe Masking Tape.


I bought these from CoastAirbrush. I believe they are used in the automotive industry for applying pin stripes. I first applied the Fine Line tape above the water line. This tape was very easy to maneuver. Once I am satisfied with the position, I then apply the Gold Crepe tape which is basically a full size version of the Tamiya tape. Please note that I keep these tapes in bags so that their sides won't pick up any dusts.


I then applied Vallejo black paint.


When the black paint has dried, I started masking the actual boot. I was not able to take pictures but I'll try to explain how I got the width. Using the color guide (which I thought was the same scale as the model) and a calipher, I was able to get the width. I used the calipher's lower jaw to take measurement and then, I locked it. I transferred the measurement anchoring the top jaw to the top of the boot and then pressing lightly the bottom jaw to make "dimples". I created dimples along the bottom half of the boot. I applied the fine line tape following the dimples. The dimples are so small that I had to use an optivisor.


Once I am satisfied with the positioning of the fine line tape, I then covered the rest with the Gold Crepe tape. It is now ready for the hull red.


I used the Hull Red paint from AK Interactive's WWII US NAVY Camouflages Vol.2 Acrylic Paint Set. Here are the resulting pictures.


Thanks,

Joseph
RussellE
#306
Visit this Community
Victoria, Australia
Joined: June 27, 2010
KitMaker: 3,959 posts
Model Shipwrights: 2,777 posts
Posted: Wednesday, May 30, 2018 - 02:19 AM UTC
She looks great with the hull all painted up Joseph. Very nice.

Yup, MSW sure is an "international" community
RedDuster
Visit this Community
England - South East, United Kingdom
Joined: March 01, 2010
KitMaker: 7,078 posts
Model Shipwrights: 6,649 posts
Posted: Thursday, May 31, 2018 - 07:04 AM UTC
Very nice job on the Camo Joseph

looks the business.

Cheers

Si
BravoTwoZero
Visit this Community
California, United States
Joined: June 11, 2009
KitMaker: 461 posts
Model Shipwrights: 80 posts
Posted: Friday, June 01, 2018 - 04:19 AM UTC
As always, thanks very much Russell. I was browsing the other threads and just realized the "The King" build thread is yours! I'll have to check that out in detail. Looks like this has been an epic build.

@Si, always a pleasure to hear from you. Especially from a prolific builder like yourself. Thanks very much.

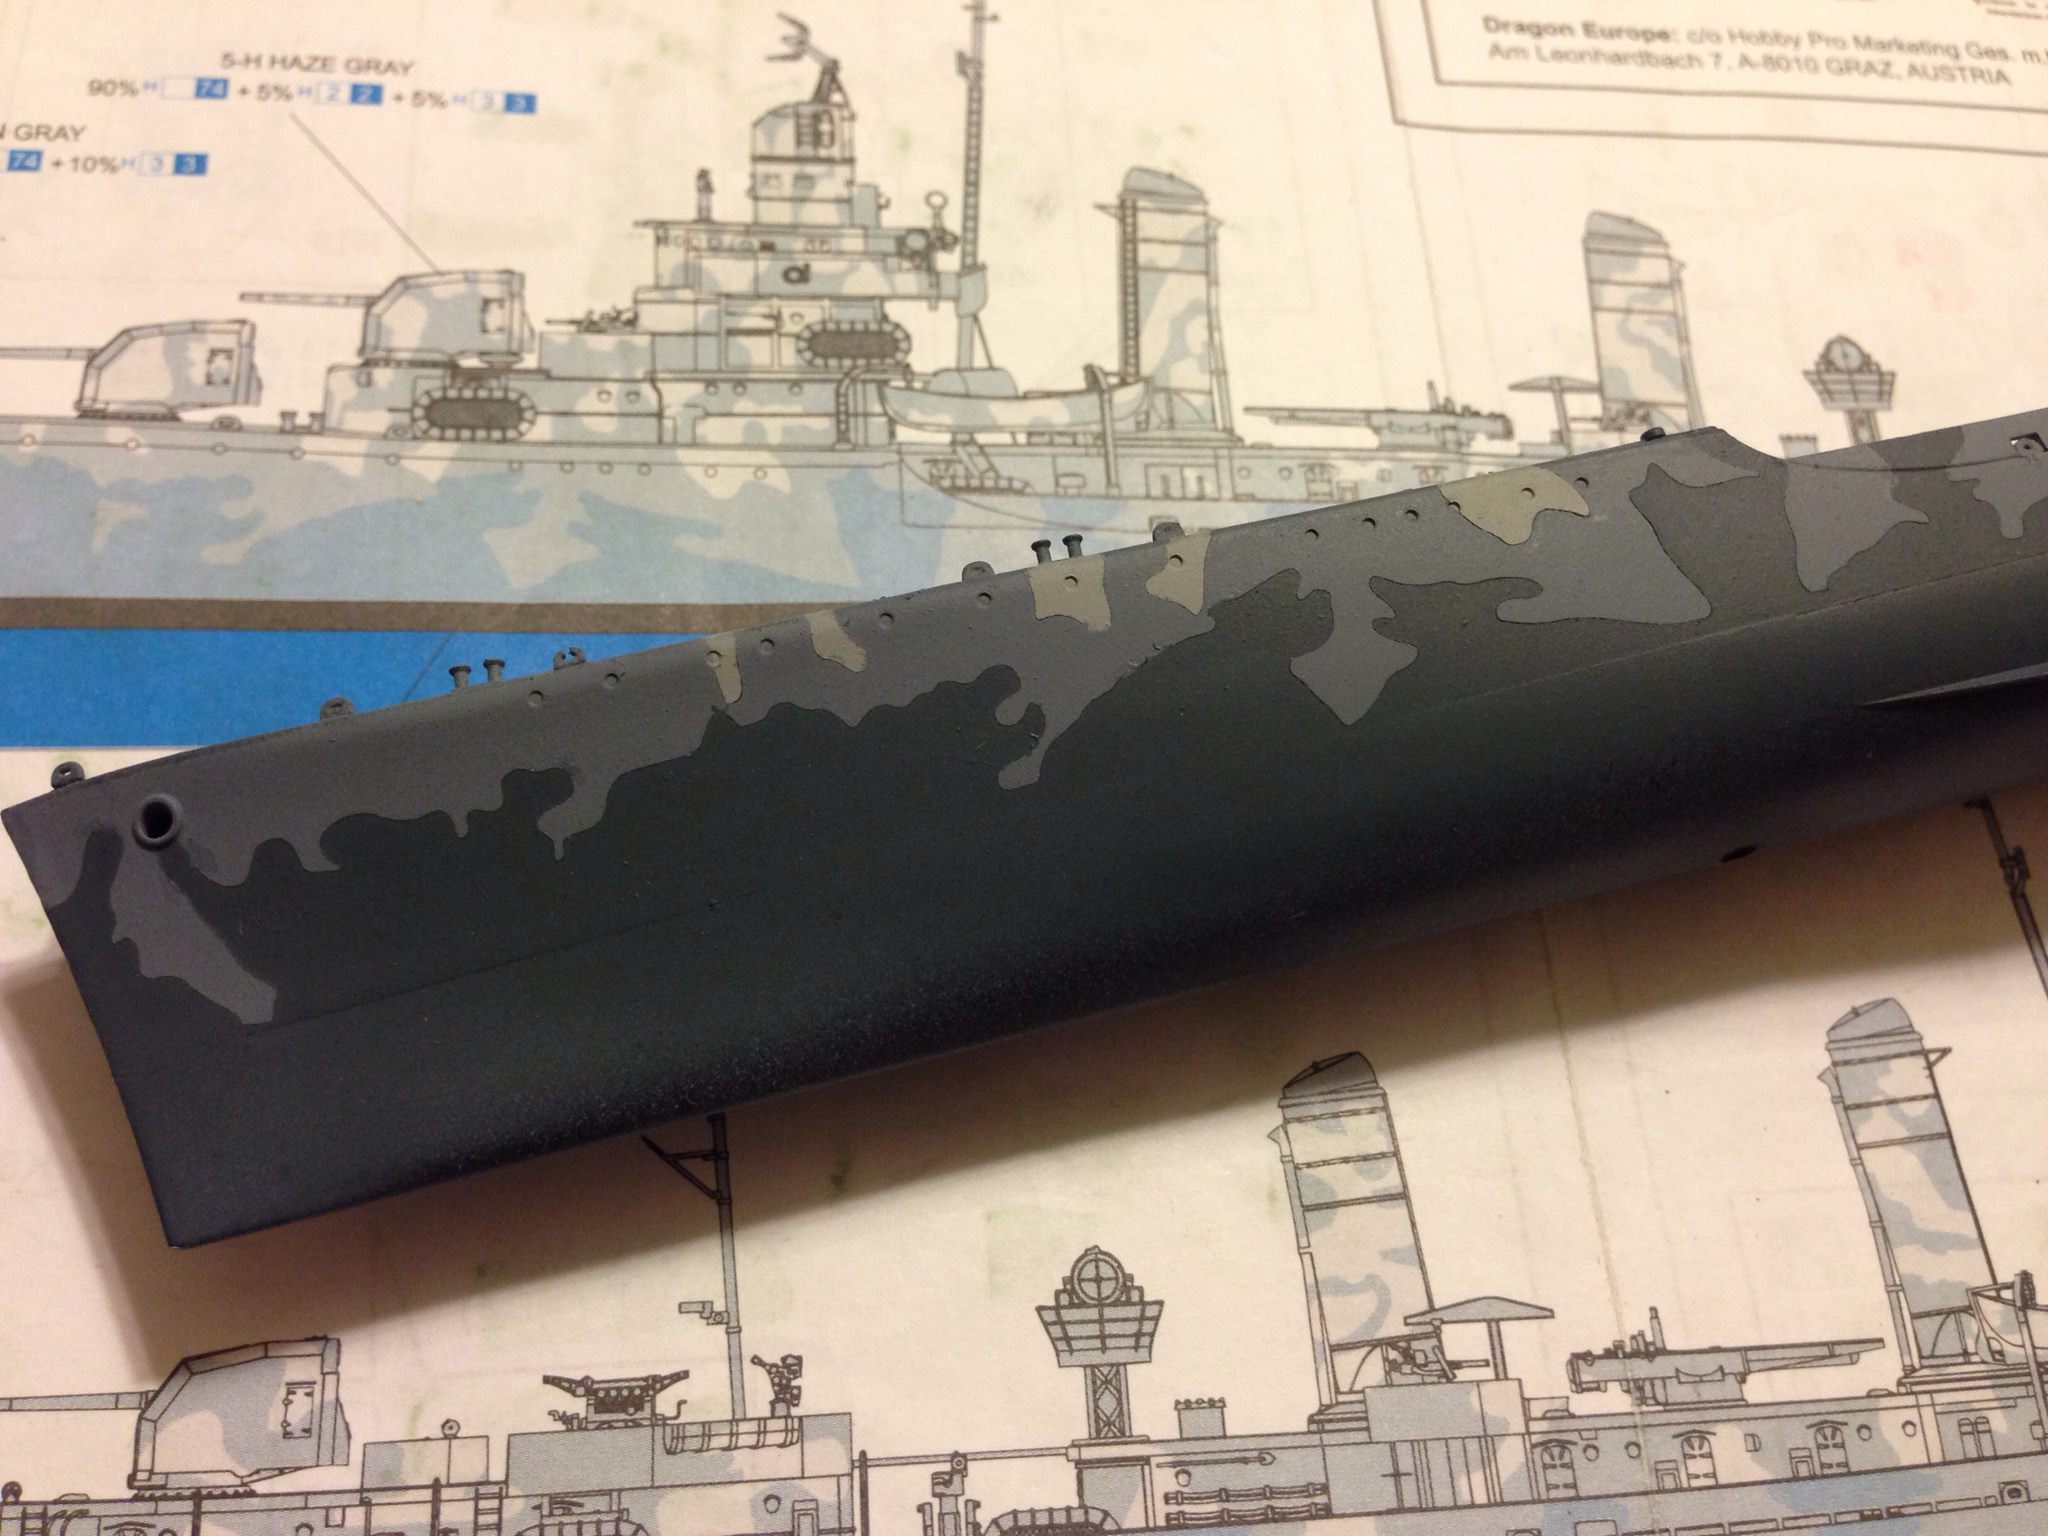
Here is a brief update. As I have mentioned before, I have missed two camouflage splotches. I'm sure it will hardly be noticeable but it screams at me. I just decided to mask and airbrush it rather than brush paint it. Here is the original.


I applied the masks and airbrushed it.


And I am satisfied with the result.


Now, I can move on. I think the next steps are either to install the "non-slip" decals on the deck or paint camo on the structures.

P.S. Looking at the last photo, I have a better appreciation of the boot. The lines look crisp thanks to the fine line masking tape.

Thanks everyone,

-Joseph
RussellE
#306
Visit this Community
Victoria, Australia
Joined: June 27, 2010
KitMaker: 3,959 posts
Model Shipwrights: 2,777 posts
Posted: Sunday, June 03, 2018 - 09:43 AM UTC

Quoted Text

As always, thanks very much Russell. I was browsing the other threads and just realized the "The King" build thread is yours! I'll have to check that out in detail. Looks like this has been an epic build.


Hi Joseph!

Wow, that camo pattern has turned out superb! Well done!

Yes, the King and I have a long history: This is the 3rd time I've built a model of her, and yet, she's still my favorite.
BravoTwoZero
Visit this Community
California, United States
Joined: June 11, 2009
KitMaker: 461 posts
Model Shipwrights: 80 posts
Posted: Monday, June 11, 2018 - 10:48 AM UTC

Quoted Text

Hi Joseph!

Wow, that camo pattern has turned out superb! Well done!

Yes, the King and I have a long history: This is the 3rd time I've built a model of her, and yet, she's still my favorite.


You've certainly put a lot of work on your current King. Looks great!

There are masks available for the structures but it won't work because of all the photo etch details that have been installed. I ended up hand painting the camouflage patterns. Here are the results.


The tough parts are the front views. I'd have to hunt for pictures of other completed Buchannans and see how they tackled it.

Thanks,

Joseph
RussellE
#306
Visit this Community
Victoria, Australia
Joined: June 27, 2010
KitMaker: 3,959 posts
Model Shipwrights: 2,777 posts
Posted: Tuesday, June 12, 2018 - 09:21 AM UTC
That's some mighty fine work with the 'hairy stick' Joseph
warreni
Visit this Community
South Australia, Australia
Joined: August 14, 2007
KitMaker: 5,926 posts
Model Shipwrights: 2,624 posts
Posted: Tuesday, June 12, 2018 - 03:31 PM UTC
Hi Joseph.

I built this one a few years ago and it now sits in a museum in Qld where all my ships went when I moved to Adelaide from Brisbane.

IIRC I used the masks as well but I would have to go back to my archives to check.

Keep up the good work.

Warren
d6mst0
#453
Visit this Community
Texas, United States
Joined: August 28, 2016
KitMaker: 1,925 posts
Model Shipwrights: 1,298 posts
Posted: Wednesday, June 13, 2018 - 02:48 AM UTC
Joseph,

Amazing paint work, it flows together so well. You must have the patience of a saint along with a steady hand.

Again, very nice camo work.

Mark
JJ1973
#345
Visit this Community
Niedersachsen, Germany
Joined: August 22, 2011
KitMaker: 1,835 posts
Model Shipwrights: 1,832 posts
Posted: Sunday, July 01, 2018 - 05:57 AM UTC
Joseph,

I could not agree more with all that was already said - your paintwork is truly awesome!! Keep up the fantastic job you are doing!!

Cheers,
Jan
 _GOTOTOP