_GOTOBOTTOM
Ships by Class/Type: Sailing Vessels
This forum is for sailing ships both civilian and military of any era.
USS Constitution build
Fright
Visit this Community
Georgia, United States
Joined: December 26, 2015
KitMaker: 200 posts
Model Shipwrights: 186 posts
Posted: Tuesday, January 17, 2017 - 02:51 AM UTC
After building a submarine, a liberty ship and a pirate ship, I decide to try my hand at Revell's 1:96 scale Constitution kit. I always thought about trying to build a wooden ship, but I decided to go with a plastic model due to my inexperience and total lack of rigging a ship. I started this build in mid-March of 2016. After opening the box, I sat down to read through the instructions and realized - holy cow, this is a good sized model! I also started to research online photos of the original ship and then started to take a look at some model builds of her. My wife bought me 'Anatomy of a Ship: USS Constitution' and our daughter bought me 'Rigging Period Ships' books as a helpful reference. After washing the parts in mild soapy water and drying, I started in. I want to THANK the model sites and modelers for all of their skills and input for my project to help me along!
March 2016:
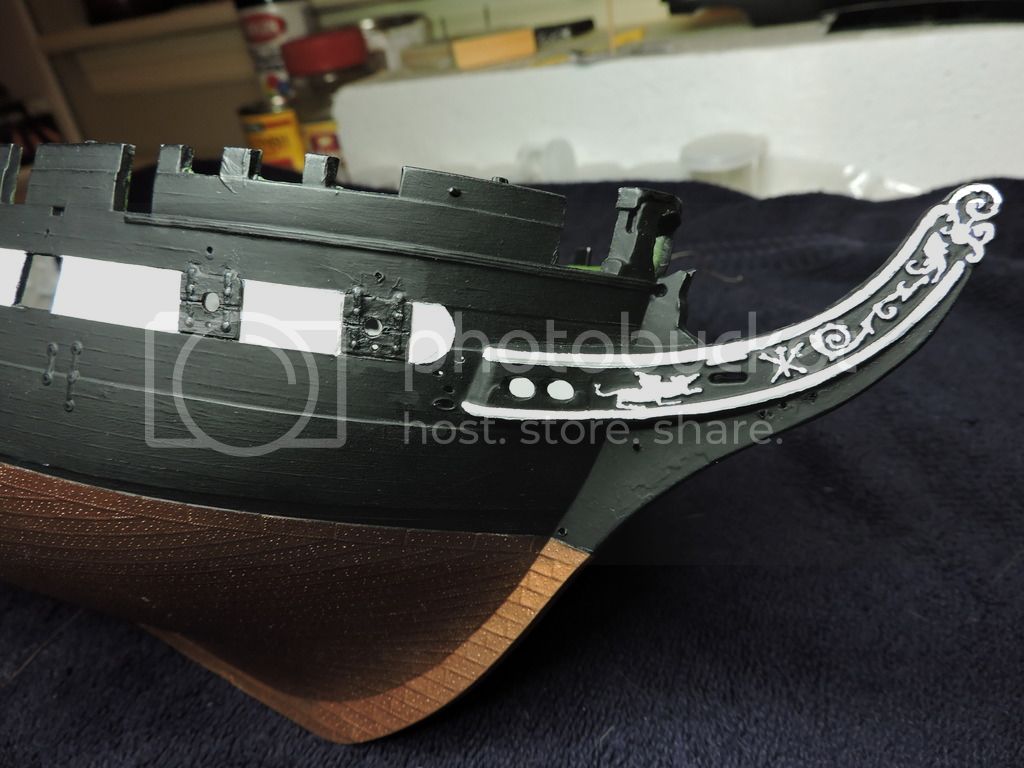
Cut and sanded any flash from two hull halves. Glued together using CA glue and clamped together. Ran a heavy bead of CA glue along the entire keel on inside of ship to strengthen the connection. Used gray primer inside and out on hull. Sprayed Flat White on inside hull and along gun ports. Taped lower part of ship and spayed upper portion with Gloss Black. Finally, after drying, I taped off upper portion of hull and spray painted lower hull with Copper.


I had seen a base online that someone had and I went with that design. Purchased my base at Michael's Crafts and 1/4" and 1/2" square wood strips at Lowes. Sanded and stained base with Cabot's Autumn Glow and cut 1/4" into 4&1/4" lengths and stained with Testors CreateFX Flat Black wash. Cut 1/2" strip into two 20" lengths and stainded with the Cabot's. Drilled holes through base and hull of ship. Routed a path in base to conceal wiring for interior lights and covered with green felt. Used two bolts with washers and nuts to attach ship hull to base. A 3rd hull was drilled through the hull for my LED wiring and would then be hidden with the 1/2" runners on base. Lighting has a dimmer switch and will plug into wall. I also painted the bulwarks green by mixing Model Master Green Zinc Oxide with Dark Green and a little Testors Flat Green.
Fright
Visit this Community
Georgia, United States
Joined: December 26, 2015
KitMaker: 200 posts
Model Shipwrights: 186 posts
Posted: Tuesday, January 17, 2017 - 02:52 AM UTC
Fright
Visit this Community
Georgia, United States
Joined: December 26, 2015
KitMaker: 200 posts
Model Shipwrights: 186 posts
Posted: Tuesday, January 17, 2017 - 02:53 AM UTC
Forgot to mention I assembled rudder and taped and painted with Copper and hinges a Flat Black. I've been using Tamiya's tape along the paint line but Painters tape for larger areas that need to be covered. I use a lot of tape!
The hull seemed too bright, so after everything was painted, I sprayed the entire hull with Dullcoat. I then used some weathering powders from Bragdon Enterprises (FF-162) to give some of the copper a weathered look. After using dry-brushing their Green Grunge and Used Brick colors, I sprayed again with Dullcoat to seal. I'm amazed at how many accessories and items are out there for model builders to use in their projects!


russamotto
Visit this Community
Utah, United States
Joined: December 14, 2007
KitMaker: 3,389 posts
Model Shipwrights: 151 posts
Posted: Tuesday, January 17, 2017 - 03:30 AM UTC
Looks really nice. It also makes me want to give the Constitution another try. It is the only ship left in the US Navy that has ever sunk another ship in combat.
Fright
Visit this Community
Georgia, United States
Joined: December 26, 2015
KitMaker: 200 posts
Model Shipwrights: 186 posts
Posted: Tuesday, January 17, 2017 - 07:19 AM UTC
APRIL 2016:
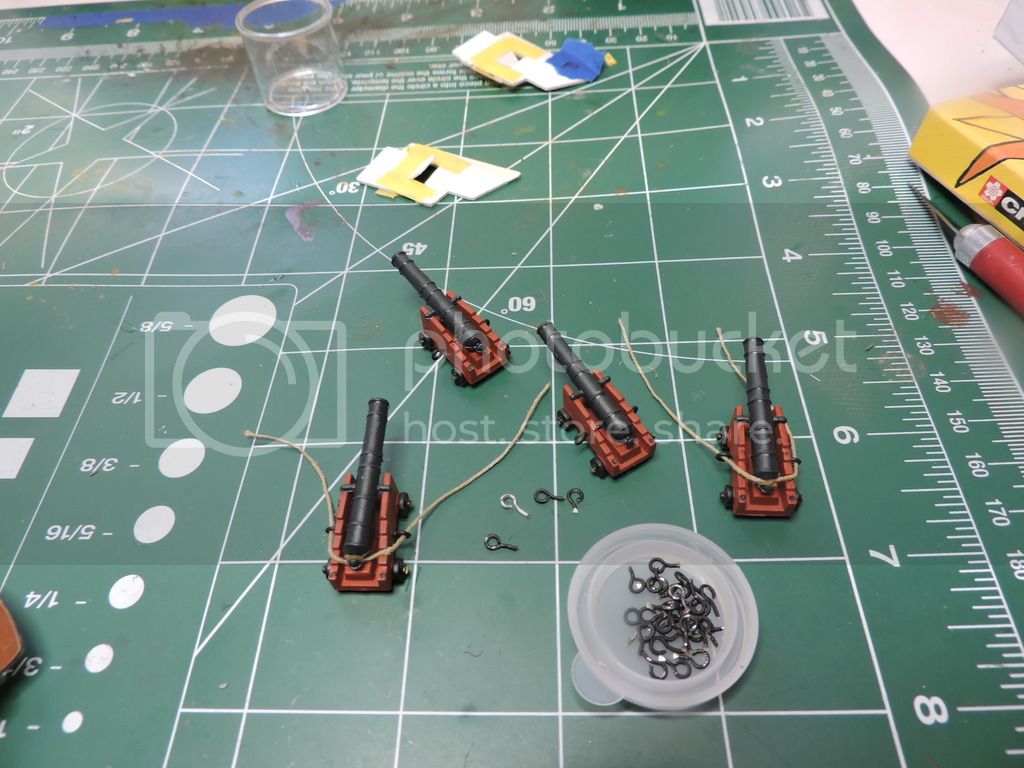
I started working on the guns/carriages by spray painting with gray primer while still on sprue. After cutting them off and trimming away any flashing, I glued the gun barrels together and, after drying, cleaned up gun barrels with a small drill and painted them Gun Metal. Used toothpicks to hold them while drying.
I mixed Flat Red with Flat Brown to create a salmon color for the gun carriages. I used Flat Black on the wheels. I then glued barrels to the carriages. I wanted to go a step further and try add gun tackle, so I ordered some 2mm/3mm blocks and different cordage from Cottage Industry to detail the guns that would be seen through the hull.


I drilled two holes on each side of gun carriage and used 2mm black eye pins cut down to hold the recoil line and gun tackle line. Recoil line wrapped around breech of barrel, then through one ring on each side that will go to bulwark. I used 28mm wire to wrap around blocks and bent ends into a hooks. I then ran line through the through the hole in block through the other block, making a loop. A simplified version, but as close as my skills will take me! FIGURES - photobucket keeps locking up on me so I cannot post completed pictures. I'll try later or tomorrow.
Photoguy1
Visit this Community
United States
Joined: September 29, 2016
KitMaker: 77 posts
Model Shipwrights: 5 posts
Posted: Tuesday, January 17, 2017 - 07:27 AM UTC
She's a beautiful ship and while this is an ancient kit, with a little love and tenderness it builds up very well. You're certainly off to a good start.
Fright
Visit this Community
Georgia, United States
Joined: December 26, 2015
KitMaker: 200 posts
Model Shipwrights: 186 posts
Posted: Tuesday, January 17, 2017 - 07:44 AM UTC
Thanks John! I'll be a happy camper when I get the gun deck installed. I've added a stove (not sure if it will be visible), completed the officers quarters (just need to be glued down once deck is in)and cut open the main gun deck hatch and created a 3rd deck with weathered crates and barrels for interest( even though 3rd deck is berth deck). I plan on trying to add rolled hammocks in netting on upper decks. Cheers and thanks for taking a look.
Fright
Visit this Community
Georgia, United States
Joined: December 26, 2015
KitMaker: 200 posts
Model Shipwrights: 186 posts
Posted: Tuesday, January 17, 2017 - 09:13 PM UTC
OK - here's a pic of guns showing my eye pins and breech lines attached to the cannon.
Fright
Visit this Community
Georgia, United States
Joined: December 26, 2015
KitMaker: 200 posts
Model Shipwrights: 186 posts
Posted: Tuesday, January 17, 2017 - 09:58 PM UTC
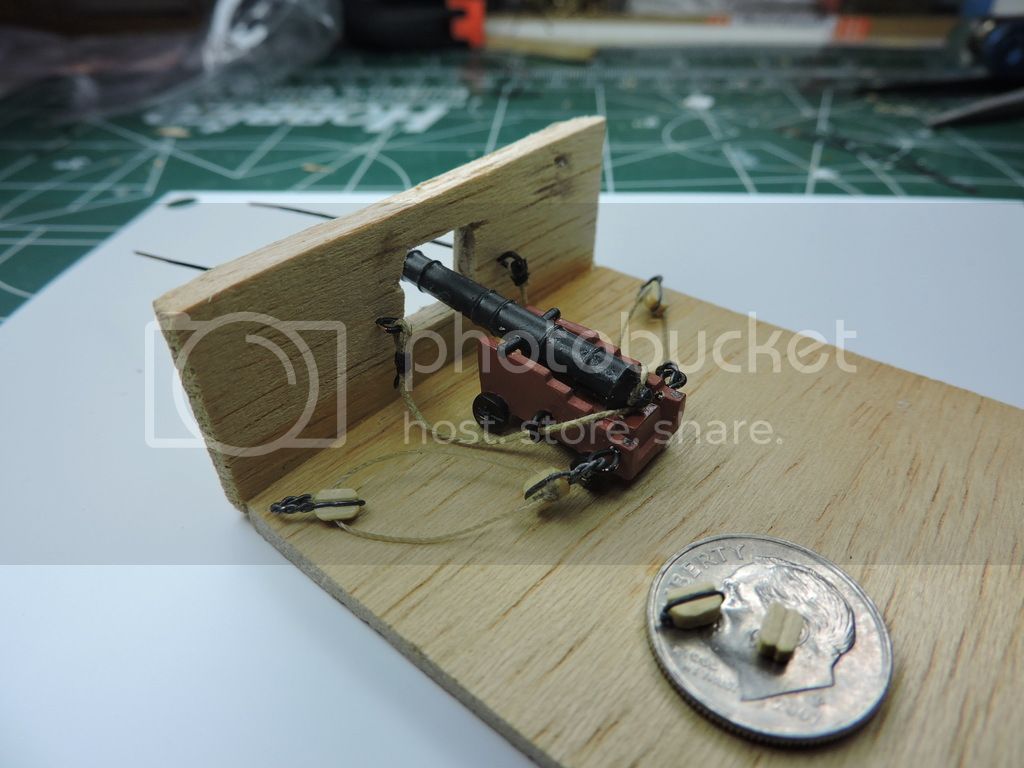
So here is my completed set up for my long guns. I made this rig from some balsa wood for spacing my lines and cannon. I have breech line running from cannon, through eye pin on gun to a seized hook which will attach to bulwark. The gun tackle has 2mm single block with line running between them. This is as far as I could go with my skill level. I'm amazed at modelers who actually achieve 'working' rigging at this scale! Hats off to them
Photoguy1
Visit this Community
United States
Joined: September 29, 2016
KitMaker: 77 posts
Model Shipwrights: 5 posts
Posted: Wednesday, January 18, 2017 - 03:00 AM UTC
Again, WOW! Are those eyepins from the kit? I don't recognize them but then again I haven't built this kit this century (and then it was destroyed in a move). I definitely want to do it again, not sure if I could go the same level of detail as yours though. What I want to do is add enough of a crew to make it interesting (the kit IIRC gives you around 20 but a wargaming company named Thoroughbred makes gun crews, officers, sailors and Marines in 15mm which is, at around 1/100, probably close enough to the 1/96th of the kit to work.
CaptSonghouse
Visit this Community
California, United States
Joined: August 08, 2008
KitMaker: 1,274 posts
Model Shipwrights: 1,236 posts
Posted: Wednesday, January 18, 2017 - 04:45 AM UTC
What a grand old lady of a kit, and you are really doing her justice, Robert.

Since the kit is relatively affordable for her size, I have found it's feasible to tweak her lines a bit to create other sailing warships. My forum signature line states I am working (more off than on these days) on a USS Congress conversion. With choice cutting, even the gun ports can be shifted in their spacing and I was able to reproduce the Congress' rounded stern from her Civil War days.

The only drawback is the volume of space this kit takes when the masts and rigging are installed, but it makes in an eye-catching model, whichever frigate one chooses to model.

--Karl
Fright
Visit this Community
Georgia, United States
Joined: December 26, 2015
KitMaker: 200 posts
Model Shipwrights: 186 posts
Posted: Wednesday, January 18, 2017 - 06:40 AM UTC
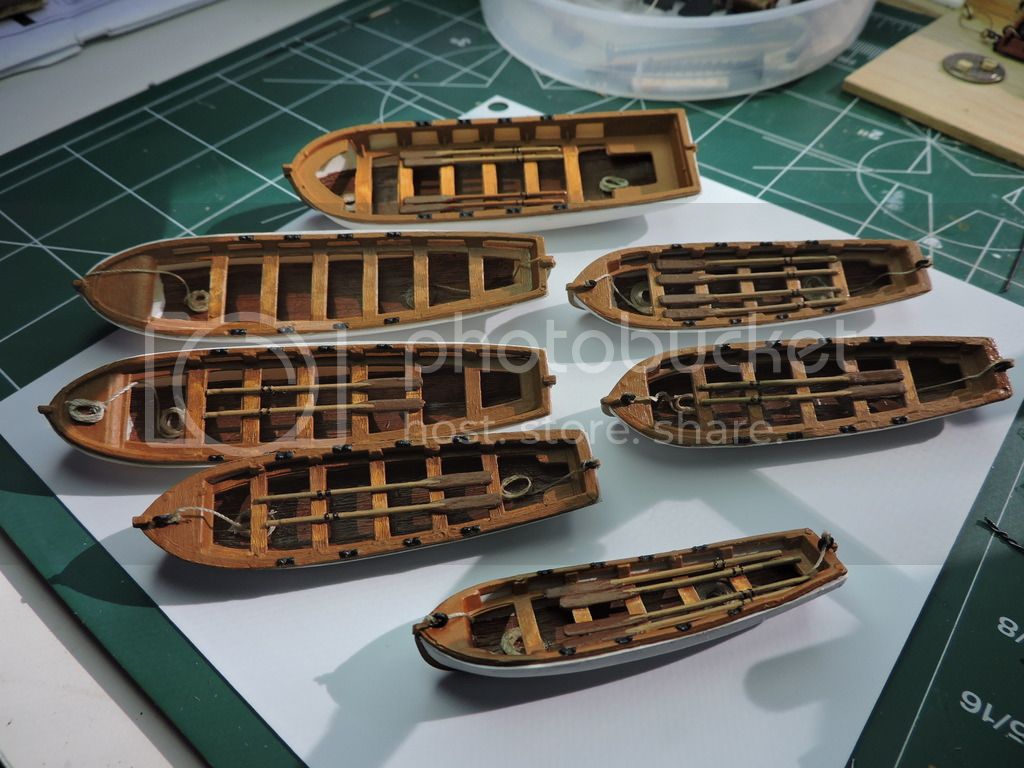
I apologize for not taking more photos when putting together the ships's boats. This was early on and I got side tracked. Sprayed all parts Flat White primer. Taped off hulls and painted keels with Flat Brown. Floor of boats were painted Leather. Boat insert seats were painted Flat Brown and, when dry, taped off and painted the oar locks Flat Black. Glued in the eyebolts on bow and sterns and ran line from eyebolts to floor and glued. I then made rope coils to place down over line on floor and glued down. Added oars - painted Light Brown and Leather paddle.


Here is my rig I used to keep my rope coils flat while winding my 50/50 white glue/water soaked line around the nail. Waited until almost dry and then slipped off base with the help of my Xacto.

CaptSonghouse
Visit this Community
California, United States
Joined: August 08, 2008
KitMaker: 1,274 posts
Model Shipwrights: 1,236 posts
Posted: Wednesday, January 18, 2017 - 10:11 PM UTC
That's fine work, Robert. You will have a magnificent model in the end.

--Karl
Fright
Visit this Community
Georgia, United States
Joined: December 26, 2015
KitMaker: 200 posts
Model Shipwrights: 186 posts
Posted: Wednesday, January 18, 2017 - 11:40 PM UTC
June 2016:
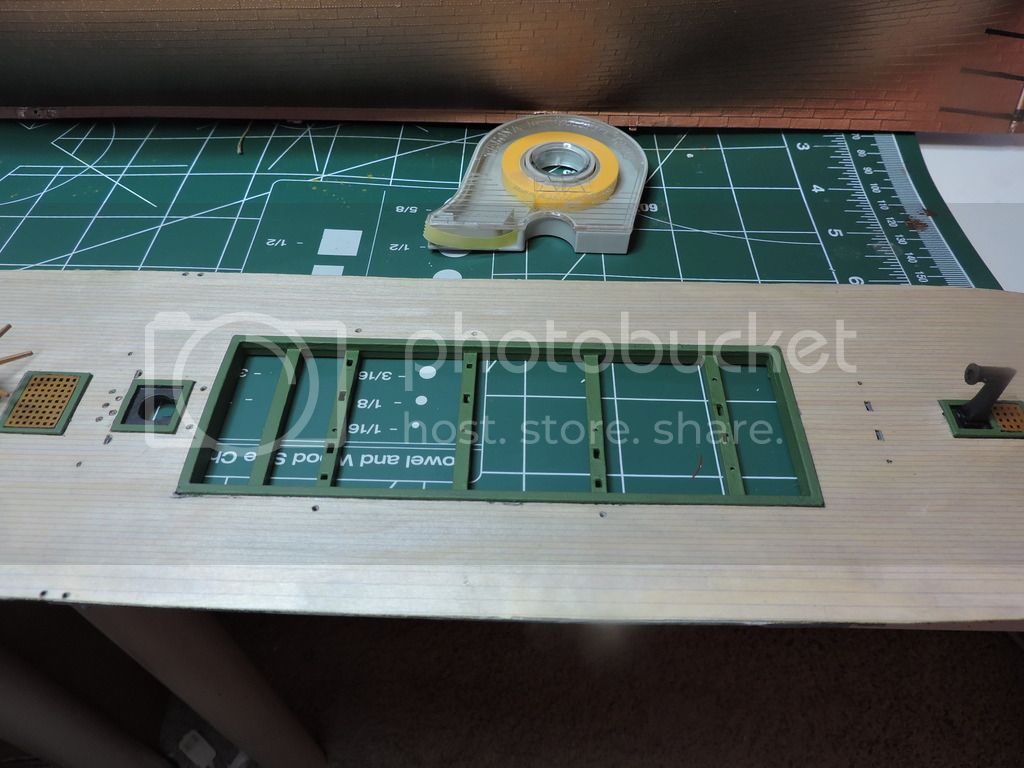
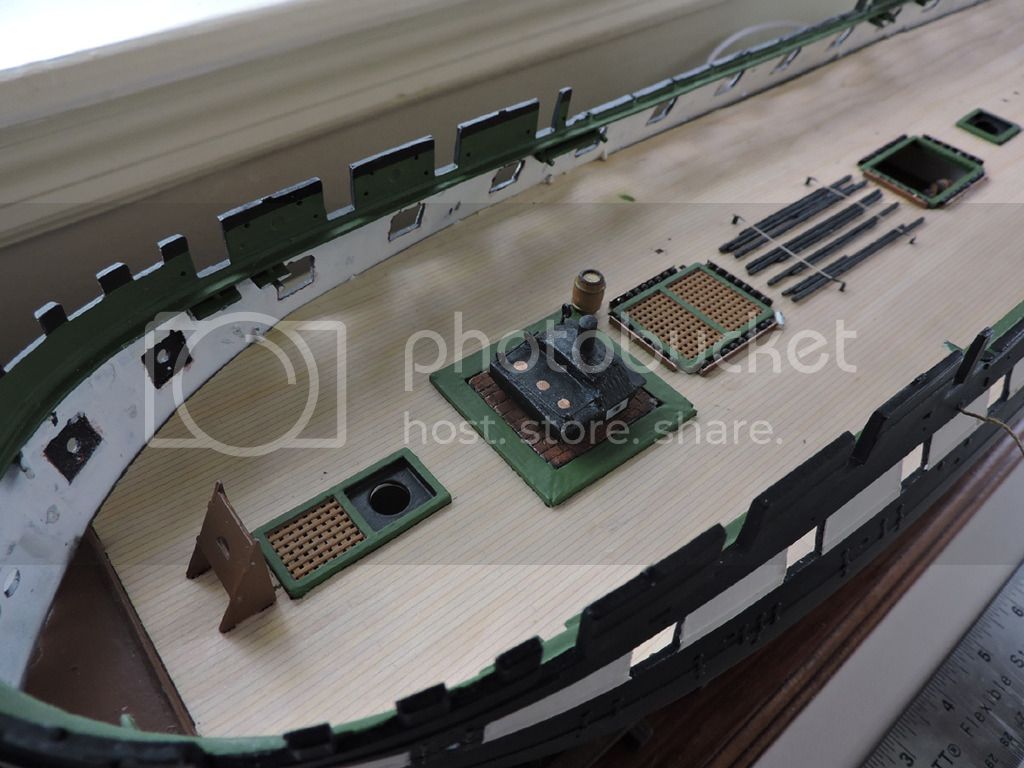
I glued together the 3-piece gun deck and reinforced the seams by gluing some wood strips over the seams to help strengthen and give support (Prior to me investing in 'styrene' sheets and strips). I attempted to paint the deck and weather it but it came out looking horrible. Also, I couldn't putty up the seams without losing the wood detail if I sanded, so I went online and found a wooden deck being sold by ScaleDecks. What a difference! I resprayed the deck primer grey and it covered up the seams.

I then added the studding sail yards (painted flat black)to the deck and used the plastic eyebolts from the kit to glue them down. Originally, I painted the hatch coamings Leather and then changed to Flat Black. After looking at photos and reading some articles, I finally used a mixed green to match up to the bulwarks on hull. Hatch gratings were painted Flat Brown.

I had looked at a build by Force9 and I copied his idea of adding the camboose to my model. I showed a 'hand drawn' picture I had made to my wife and she made me one out of Sculpy, complete with a brick floor. Lack of accuracy is due to my drawing and not her modeling skills! LOL I added a funnel, made from a wood dowel, and eye pins that held my railing guard. I placed a barrel (from ModelCentral) next to the camboose for added detail.

I then worked on making some cannon shot holders to go around hatch coaming. I used cut L-shaped styrene strips (painted Leather) to hold my painted flat black 2.5mm ball bearings (picked up on Ebay) in place.


Fright
Visit this Community
Georgia, United States
Joined: December 26, 2015
KitMaker: 200 posts
Model Shipwrights: 186 posts
Posted: Thursday, January 19, 2017 - 12:36 AM UTC
July 2016:

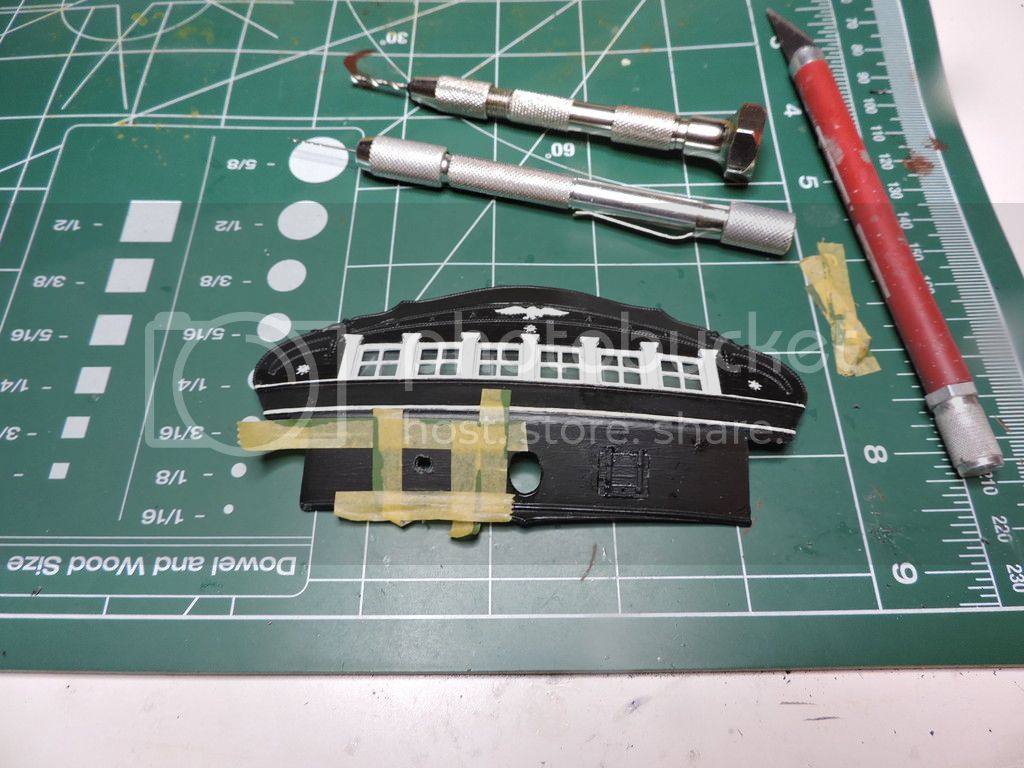
In trying to keep my model as close to the 1812 version that I can with my skills, I read and looked at some pictures of the crew's model (for Captain) and they did not contain the Constitution written on hull. It also showed two hatch openings on each side of the rudder.
I scraped off the name and some of the detail work along the top with an Xacto chisel cutter. Using a gun port cover as a guide, I then taped where the the hatches would go and 1st, drilled a few holes, and then cut any remaining plastic out with blade and sanded smooth. I then glued into place two of my covers. Stern was painted Gloss Black (to match hull) and then windows and trim detail was taped and painted Flat White. Much of the trim was done with a sewing pin, sharpened toothpick or ultra fine brush dipped in paint. Finished by spraying stern with Dullcoat.


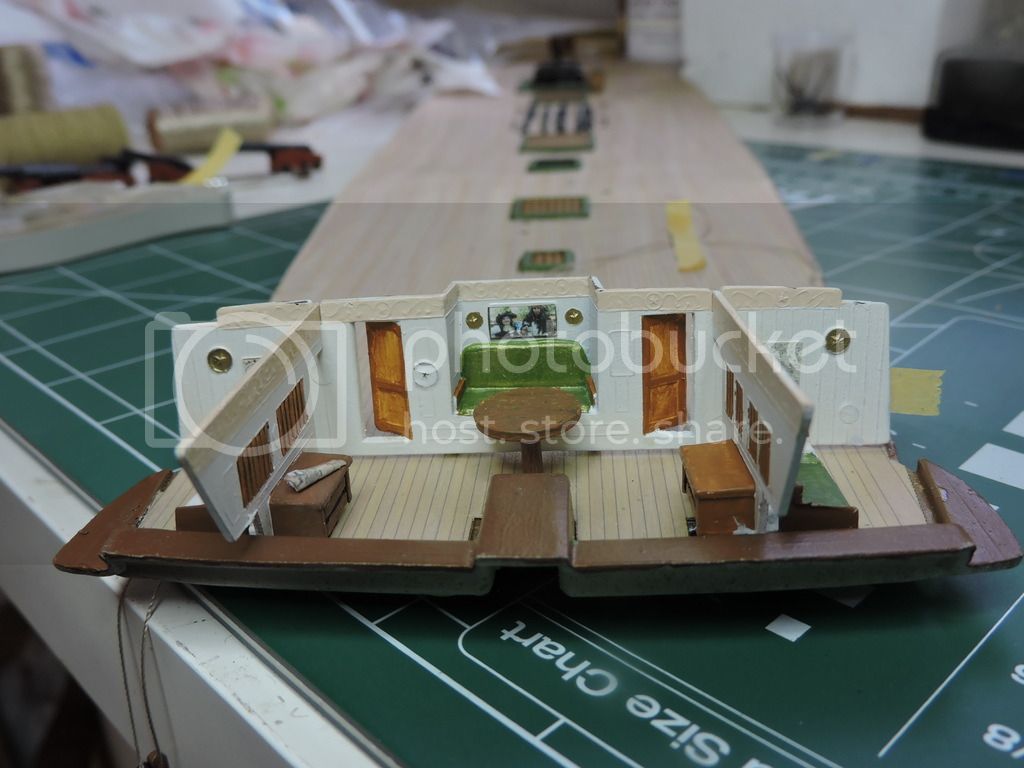
At the same time, I started to paint the officers quarters compartments and furniture. Everything primed with Flat White. The top cream was a fluke. I went to touch up a white area and the brush still had some red left in it. It came out that color so I just made a little batch to use for crown molding!
I wanted to add a personal touch, so I asked my wife if she could reduce me some photos of maps and pictures for the walls. Again, she excelled in her skill! She did 2 old world maps and a picture of her and I in our Ren Faire Pirate outfits to go over the sofa/bed. Approx. 3 to 5/16" in size.

I completed painting and used Flat Brown on door inserts and window openings. Leather color was used on table, which I weathered with oil pastels. I added rolled up charts by drawing on some paper with colored pencils, then cutting out and rolling them up and brushing with thinned down white glue to keep them in shape. I then used a light brown wash to 'age' the look of them and glued them on table and desk. I used a Gold Marker for wall plaques and then added two figures to give some realism to the cabin. *They will be the only crew I plan to use on the kit. Nothing is glued down, just a test to see what it would look like.

Looking into the Captain's quarters through the stern windows.

Lastly, the actual size photo of my wife and I that appears above the sofa with table.

Fright
Visit this Community
Georgia, United States
Joined: December 26, 2015
KitMaker: 200 posts
Model Shipwrights: 186 posts
Posted: Saturday, January 21, 2017 - 04:14 AM UTC
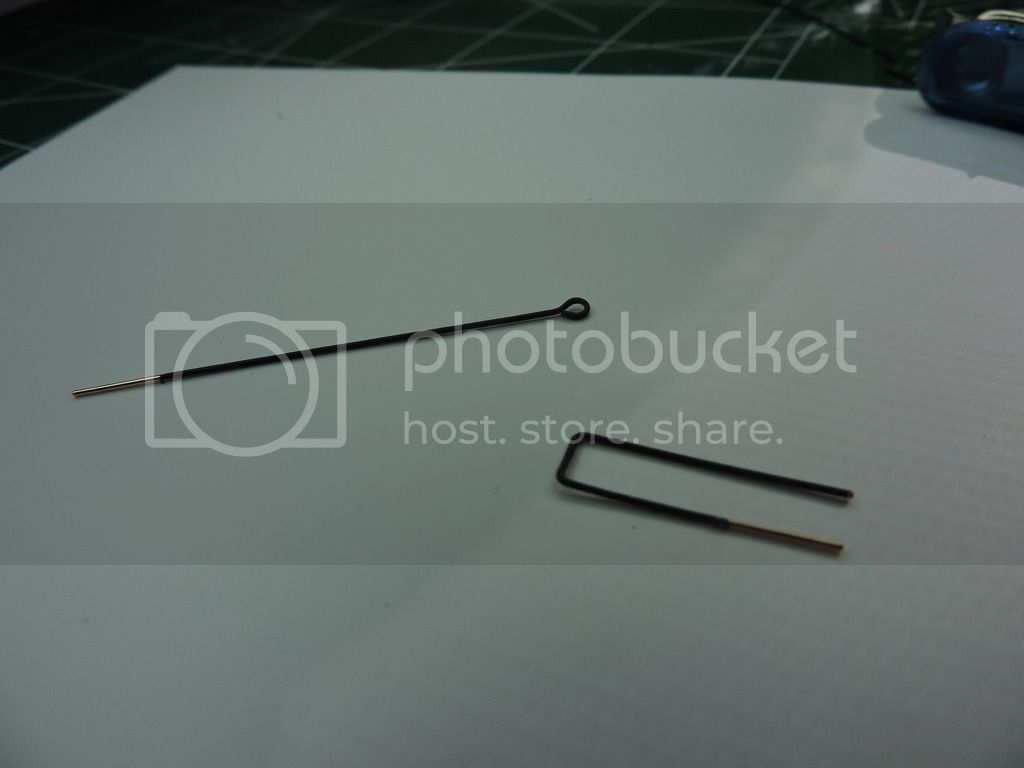
I originally put together the galley funnel as instructions but once again, after referring to AOS diagram of galley funnel,I added more detail.
I bent a piece of wire into a U-shape and painted flat black. I used a hole punch to punch out a circle from a sheet of styrene. I glued the end of u-shape to the plastic circle, then glued each straight end of wire to the funnel near top.
I drilled 3 holes at base of funnel and inserted eye pins on funnel base for allowing crew to turn it on spar deck. Everything is painted flat black.


Fright
Visit this Community
Georgia, United States
Joined: December 26, 2015
KitMaker: 200 posts
Model Shipwrights: 186 posts
Posted: Saturday, January 21, 2017 - 04:38 AM UTC
Originally I planned to mount the gun port covers on this kit. I started reading some posts and articles about use of single or split covers and were they on or off. Many articles stated they were stored below unless in heavy seas, and that usually the first two covers at bow of ship were kept on to prevent spray from bow of ship.
I mounted gun ports on 1st two openings and went with split-covers. I used my Xacto to scribe a line through them halfway.

Just to use some of the unused covers, I made stacks by gluing 4 covers per stack; each cover was scribed to create a split-cover effect, and then I drilled through the center to create gun barrel openings. Covers were painted flat black and hinges gun metal. I will have a couple stacks on gun deck which will be visible through spar deck hatch. I know they would have been kept down below and out of sight, but it will give viewers a chance to see them for added interest.


Photoguy1
Visit this Community
United States
Joined: September 29, 2016
KitMaker: 77 posts
Model Shipwrights: 5 posts
Posted: Saturday, January 21, 2017 - 06:36 AM UTC
Just two quick things, while she currently has the split covers she probably did not have them in 1812. Also they should be painted white, not black. And the foremost "Bridle port" was probably added in her 1814 refit and shouldn't have a gun mounted there. She should carry 30 long 24 pounders on her gun deck, 15 a side.
russamotto
Visit this Community
Utah, United States
Joined: December 14, 2007
KitMaker: 3,389 posts
Model Shipwrights: 151 posts
Posted: Saturday, January 21, 2017 - 09:08 AM UTC
I really appreciate you showing how you are making everything and love the personal details you have added, especially your picture.
Fright
Visit this Community
Georgia, United States
Joined: December 26, 2015
KitMaker: 200 posts
Model Shipwrights: 186 posts
Posted: Saturday, January 21, 2017 - 10:32 AM UTC
John - you may be right in one way on solid covers. The forward most cover was a single unhinged cover. According to some of the historians, many state they were split covers. I should have used singles up front on mine. Here are a couple of good articles I read early on in my build:
http://cs.finescale.com/fsm/modeling_subjects/f/7/t/60364.aspx
http://cs.finescale.com/fsm/modeling_subjects/f/7/t/15507.aspx

I went with Ray Morton's Study of colors and it stated that gun port covers were painted lampblack on all six sided. Whether that's right or not, I went with that choice. I also chose to go with a white gun stripe instead of a yellow ochre. One thing's for sure - there's a lot of variations out there on this ship! LOL

I'm going to give some thought as to whether I'll change my up-front covers. Thank you so much for giving me some food for thought for checking in on my build.
Fright
Visit this Community
Georgia, United States
Joined: December 26, 2015
KitMaker: 200 posts
Model Shipwrights: 186 posts
Posted: Saturday, January 21, 2017 - 10:37 AM UTC
Hello Russ - thanks and I'm trying to keep up with the photos as my work progresses. I'm terrible at getting too involved and forgetting to document what I did. It helps me and I hope it can help someone else. I sure have picked up some things from seeing another modeler's build!
As far as that picture, that was us on Pirate's Day at the Ren Faire. We have about 4 other 'outfits' that we use. My wife did a fantastic job of shrinking that pic for the ship.
Once again, thank you so much for following along!
RussellE
#306
Visit this Community
Victoria, Australia
Joined: June 27, 2010
KitMaker: 3,959 posts
Model Shipwrights: 2,777 posts
Posted: Saturday, January 21, 2017 - 04:55 PM UTC
Great build so far Robert!

I'm following along too
Fright
Visit this Community
Georgia, United States
Joined: December 26, 2015
KitMaker: 200 posts
Model Shipwrights: 186 posts
Posted: Saturday, January 21, 2017 - 07:58 PM UTC
Russell E - Cheers and thanks for taking a look at this model. I think this plastic kit is well worth the money if one wants to put together a quality sailing ship. Seeing I'm from the USA,I decided to go with the Connie as a way to learn a piece of US history. I also had debated on buying the Black Swan pirate ship.

I took a look at your FB page - your rigging on the Jeremiah Liberty is great!!! Right now, that is my weak spot on my building skills and I'm hoping the Connie will help me improve in this area. At least it is a larger scale for me to work with.
Fright
Visit this Community
Georgia, United States
Joined: December 26, 2015
KitMaker: 200 posts
Model Shipwrights: 186 posts
Posted: Sunday, January 22, 2017 - 02:19 AM UTC
Thanks to my wife, Chris, we got the gun deck mounted into ship without snapping anything! I need to fill a few gaps, but now I can start working on installing the long guns and attaching the gun tackle to the bulwarks. Yeah...progress is good!

Removed by original poster on 01/22/17 - 21:43:34 (GMT).
 _GOTOTOP