_GOTOBOTTOM
Ships by Class/Type: Battleships
Topics from the Dreadnaught era to modern day.
Hosted by Steve Joyce
Imperial chinese Ironclad Dingyuen
Black_sheep
Visit this Community
Bayern, Germany
Joined: December 11, 2009
KitMaker: 823 posts
Model Shipwrights: 551 posts
Posted: Saturday, November 11, 2017 - 06:09 PM UTC
Ahoy,

time for me for a new shipbuild - this time it is the Imperial chinese flagship Dingyuen (or 定远 for our chinese native speakers). The ship was ordered to and built by german VULKAN shipyard because England refused to build for the chineses in these times. The ship and her sister ship Zhenyuen of the same class were regarded as one of the most modern battleship of their time - at least even compared to german and english ships of this class. However during the governments loss of interest in its Navy (outstanding payments, no Money for exercises, scarce and wet ammunition) and growing corruption the morale of the branch dropped accordingly. Therefore the Chinese Navy had a dramatic defeat during its Engagement with the Imperial Japanese Navy at the battle of Yalu river. The Dingyuen was hit more then 200 times and was able to escape for a time but was later hit again by a torpedo and was scuttled by its own crew. So far the historical background.

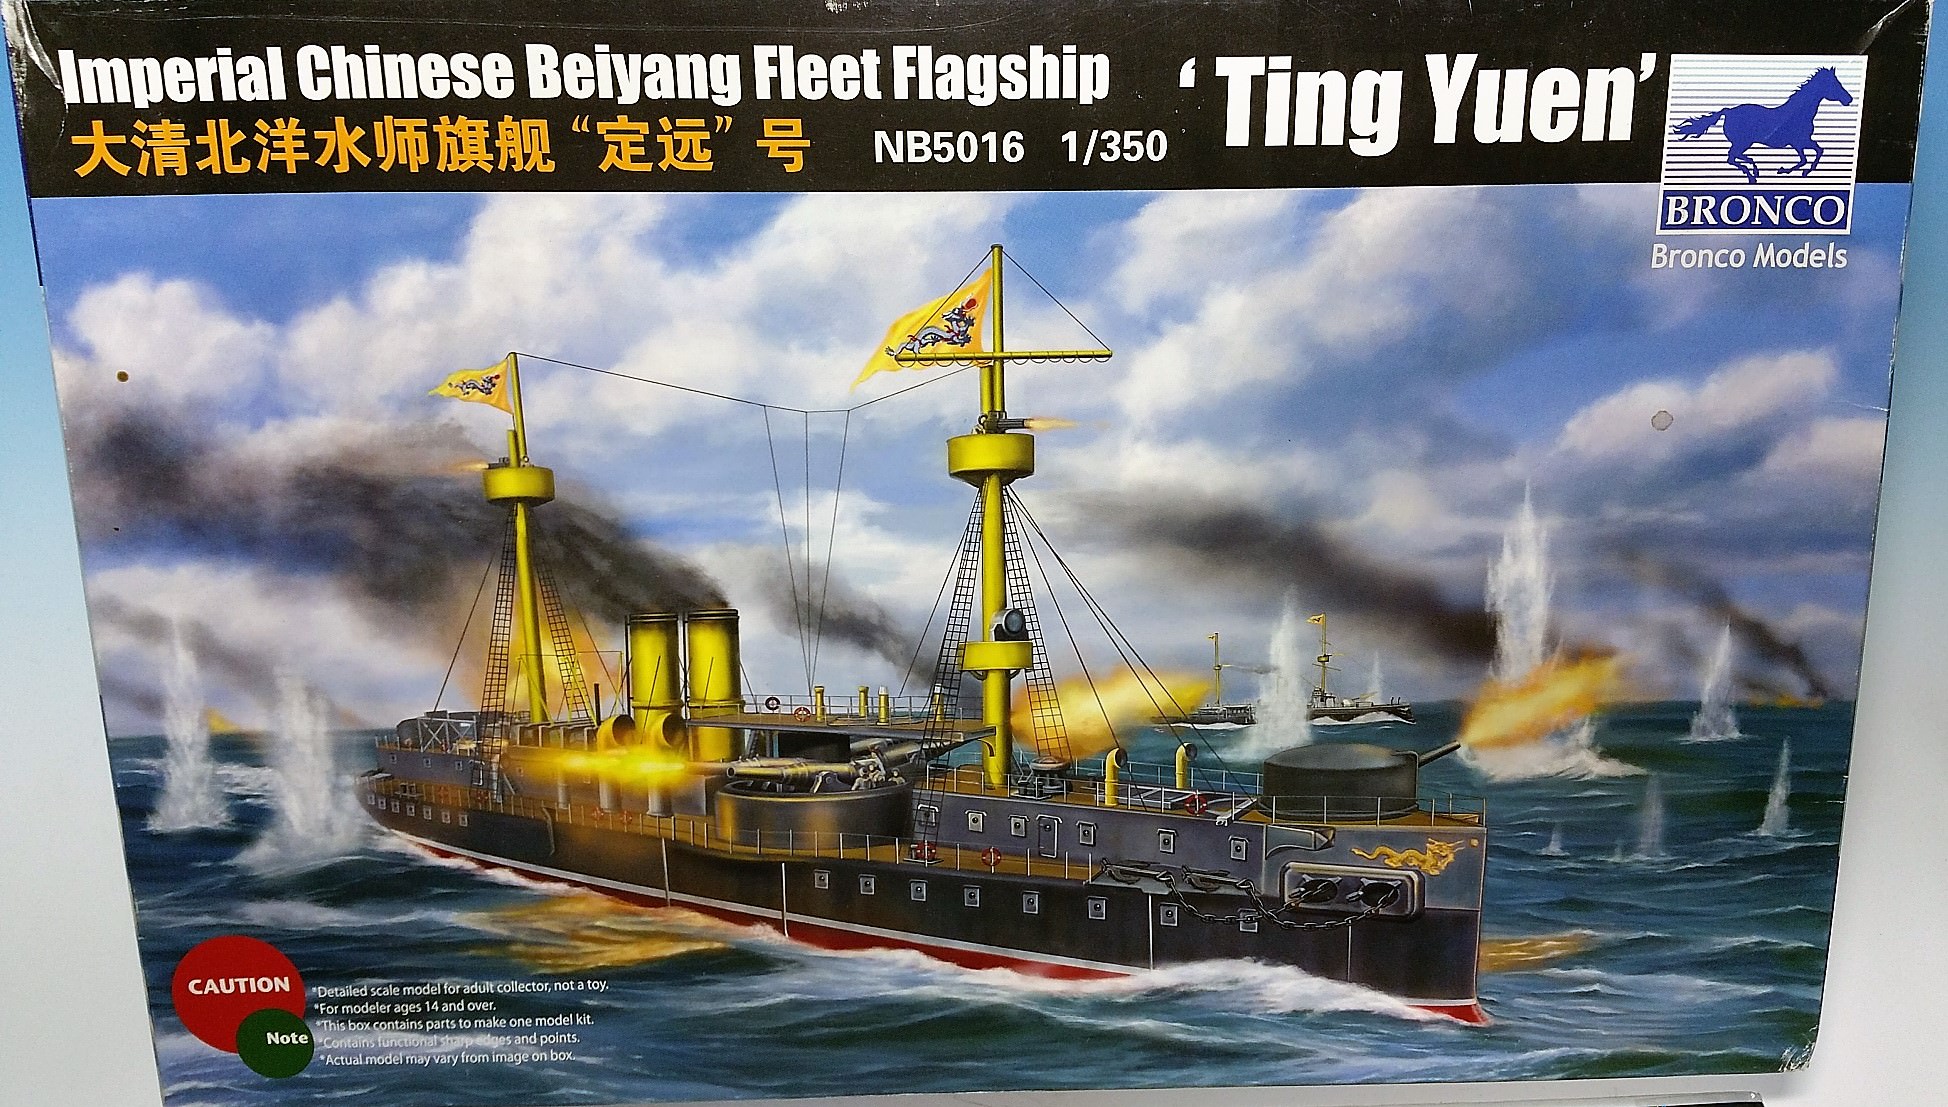
I do have Bronco´s kit in 1:350 scale which do look very nice. There is even a small PE-set within for the railings and some stairs and a decal set with two different Imperial Chinese flags.

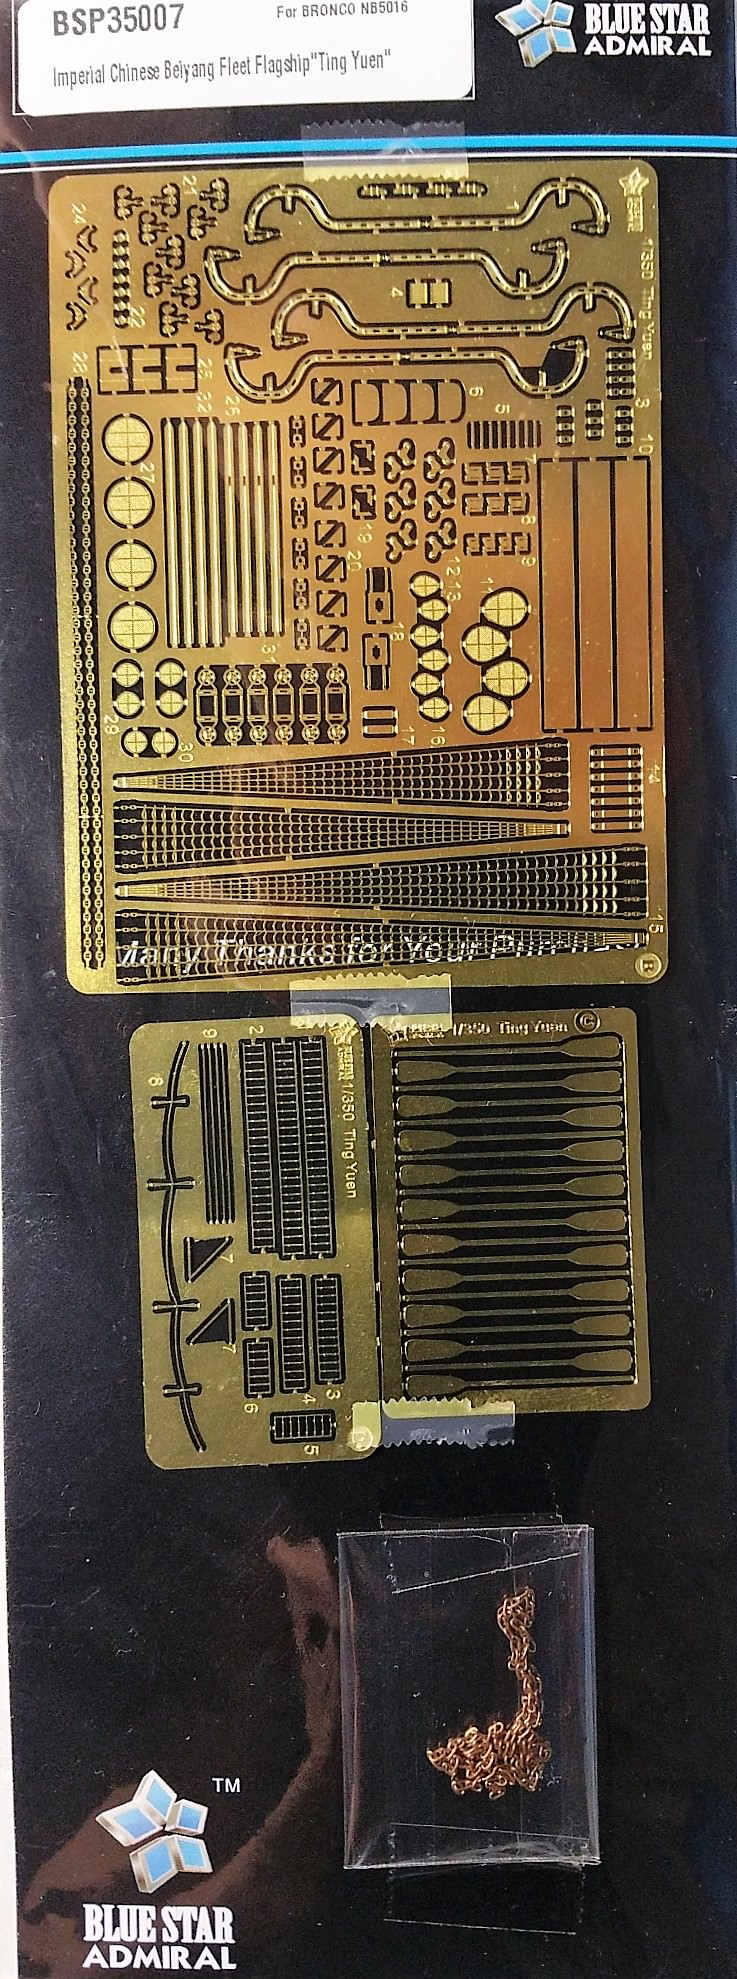
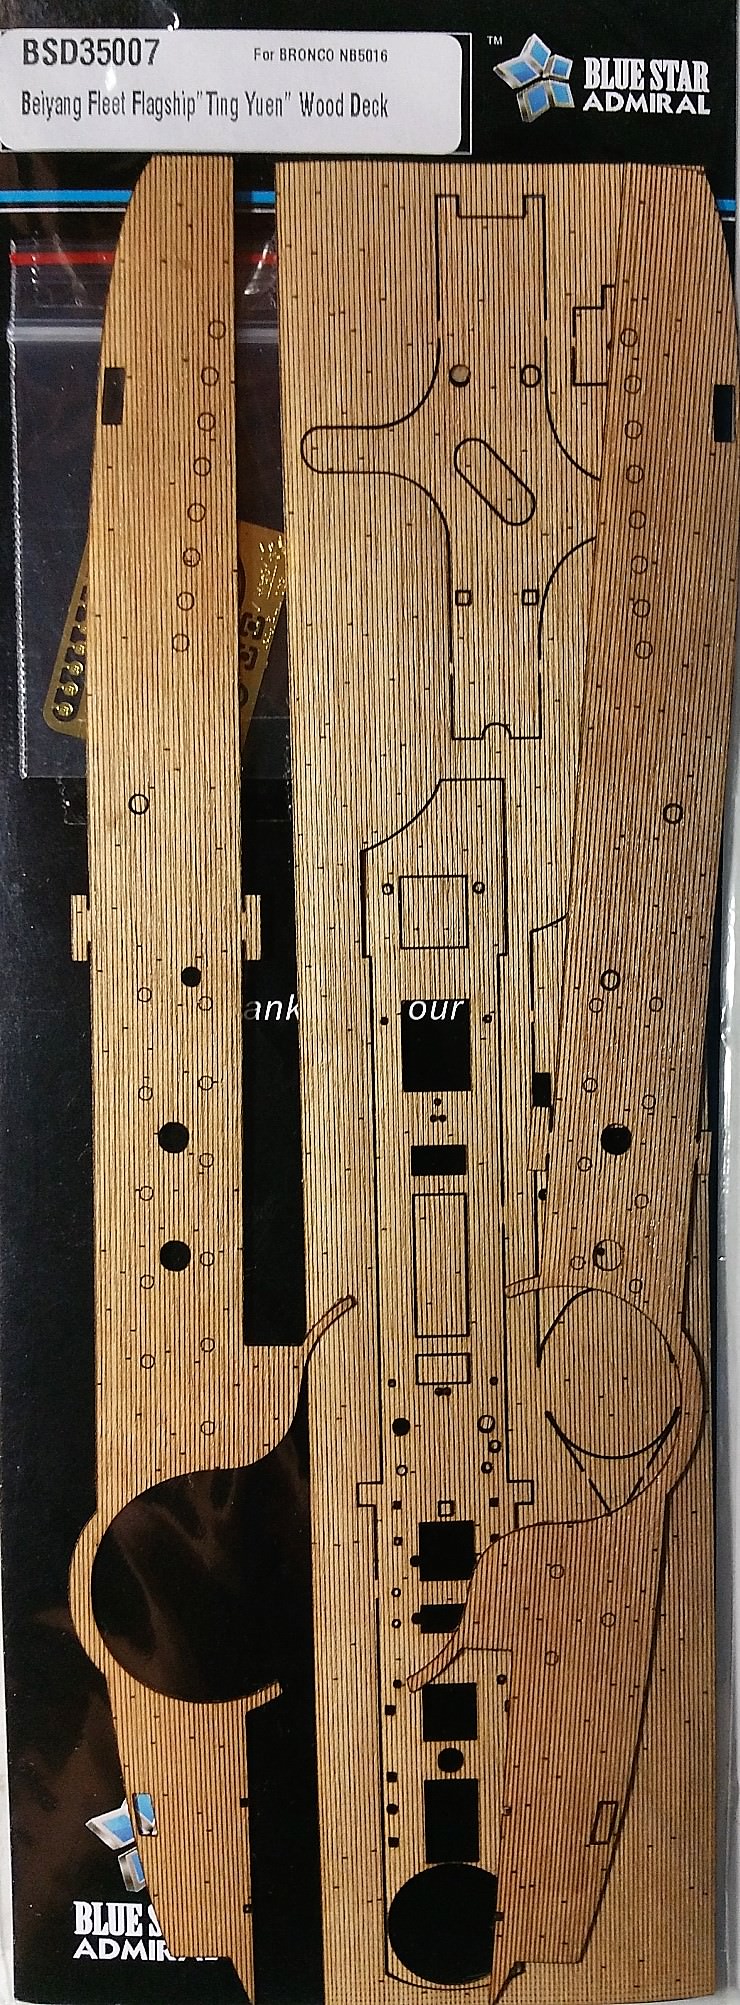
Additionally I do have a photoetched set and very nice (but expensive) wooden deck set by Blue Star and a turned barrel set by Orange Hobby.
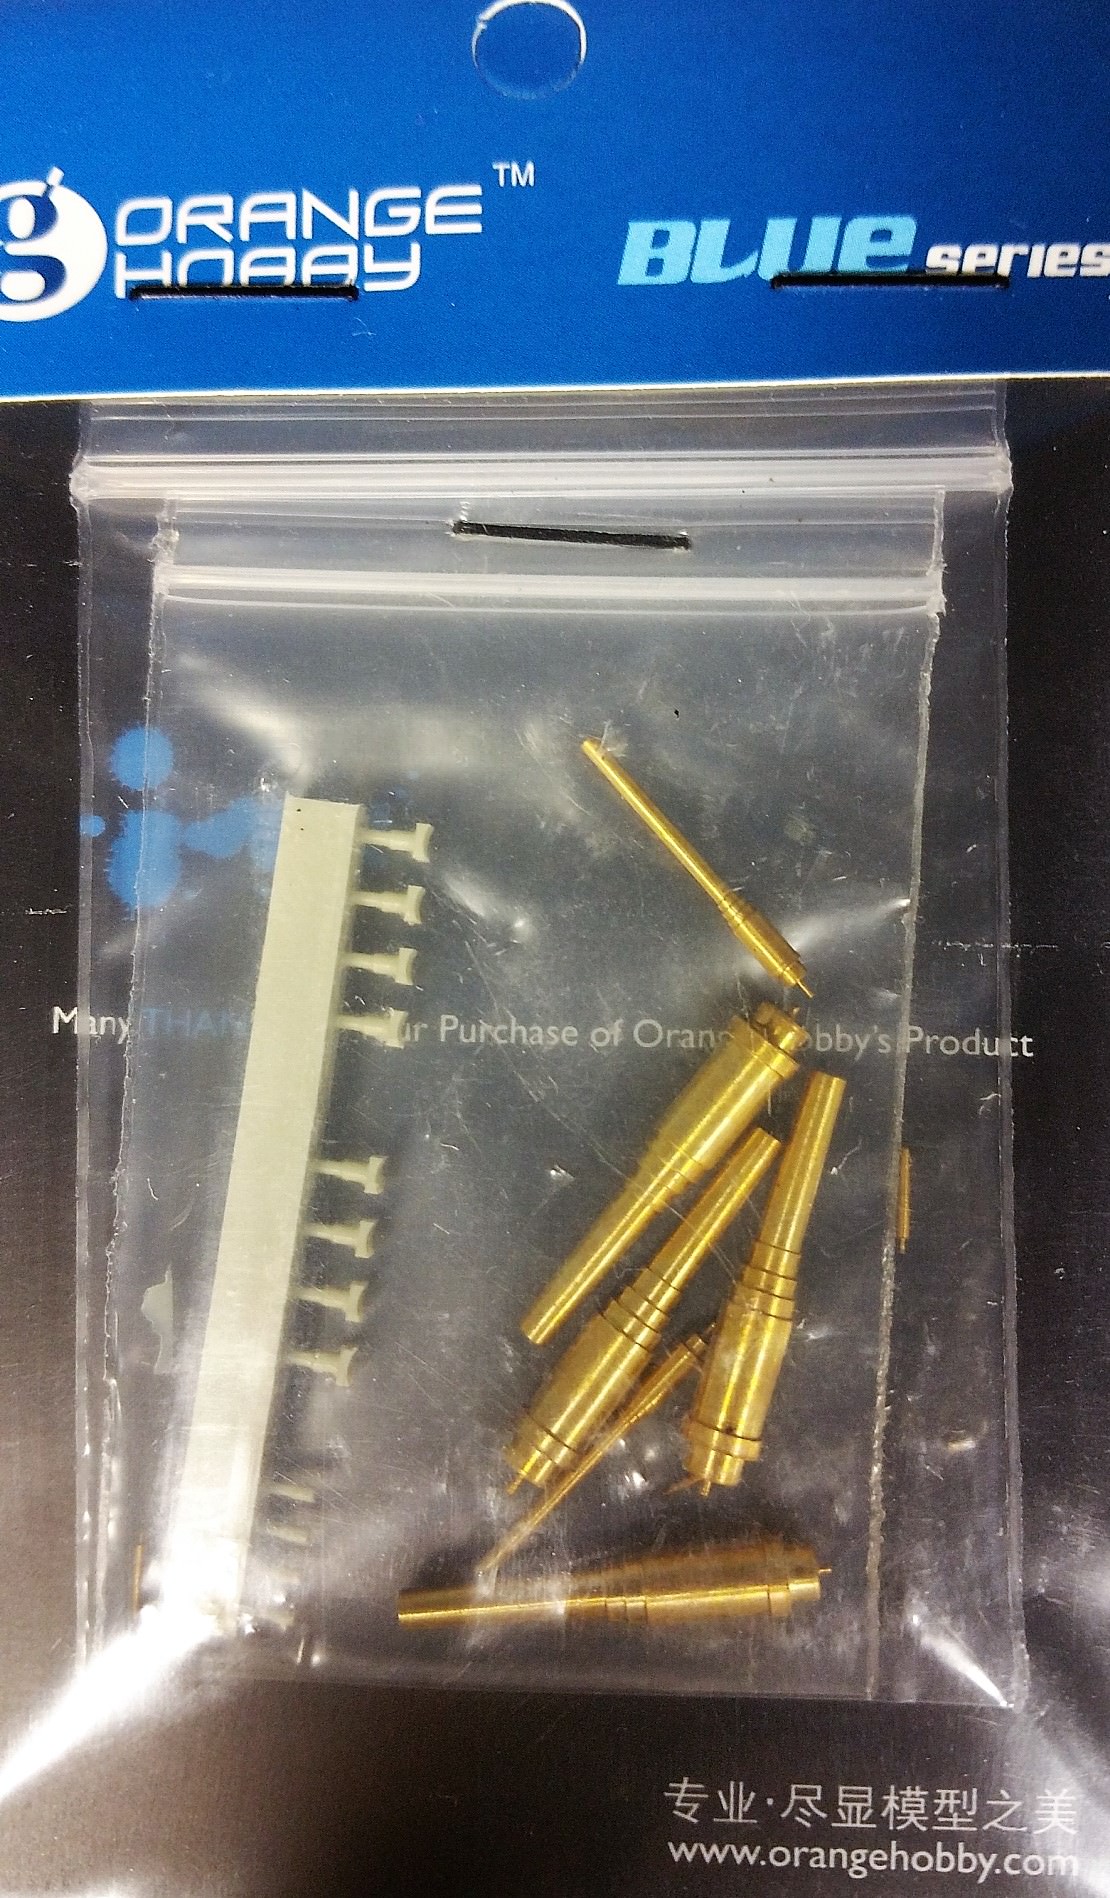

Well thats it - let it begin
Black_sheep
Visit this Community
Bayern, Germany
Joined: December 11, 2009
KitMaker: 823 posts
Model Shipwrights: 551 posts
Posted: Saturday, November 11, 2017 - 06:29 PM UTC
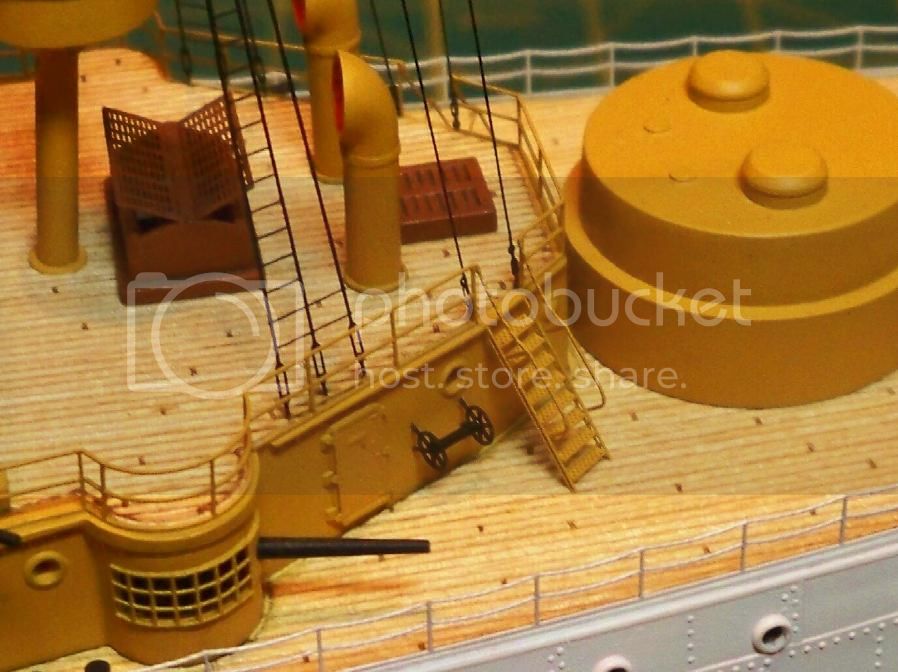
I took a look at different western and chinese websites and found the ship in different outfits: for example the gun barbettes are shown in white, black, Grey or yellow. The masts are also shown in different type of construction, sometimes with longer upper masts and more yardarms.
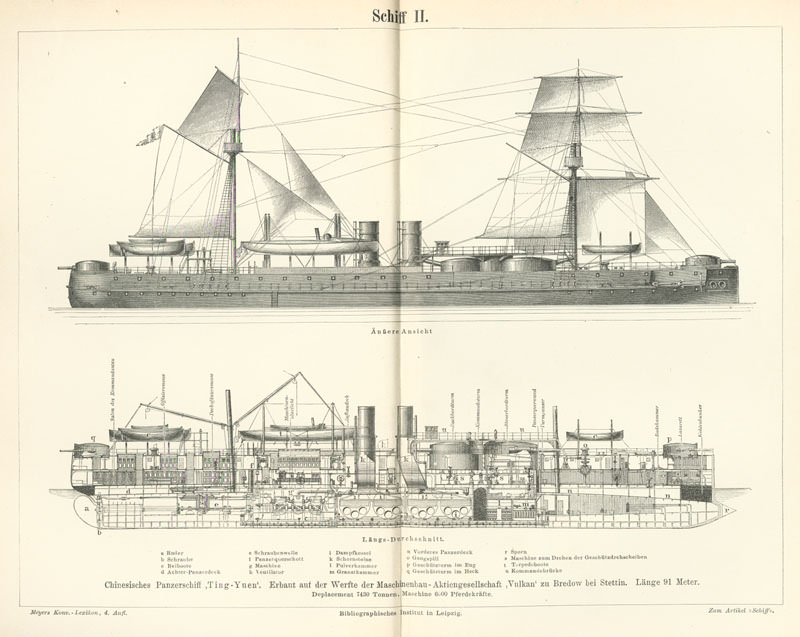
The height of the masts seems to have been indeed more higher than at the model itself. Here is a drawing of the ship from a contemporary library´s encyclopedia:


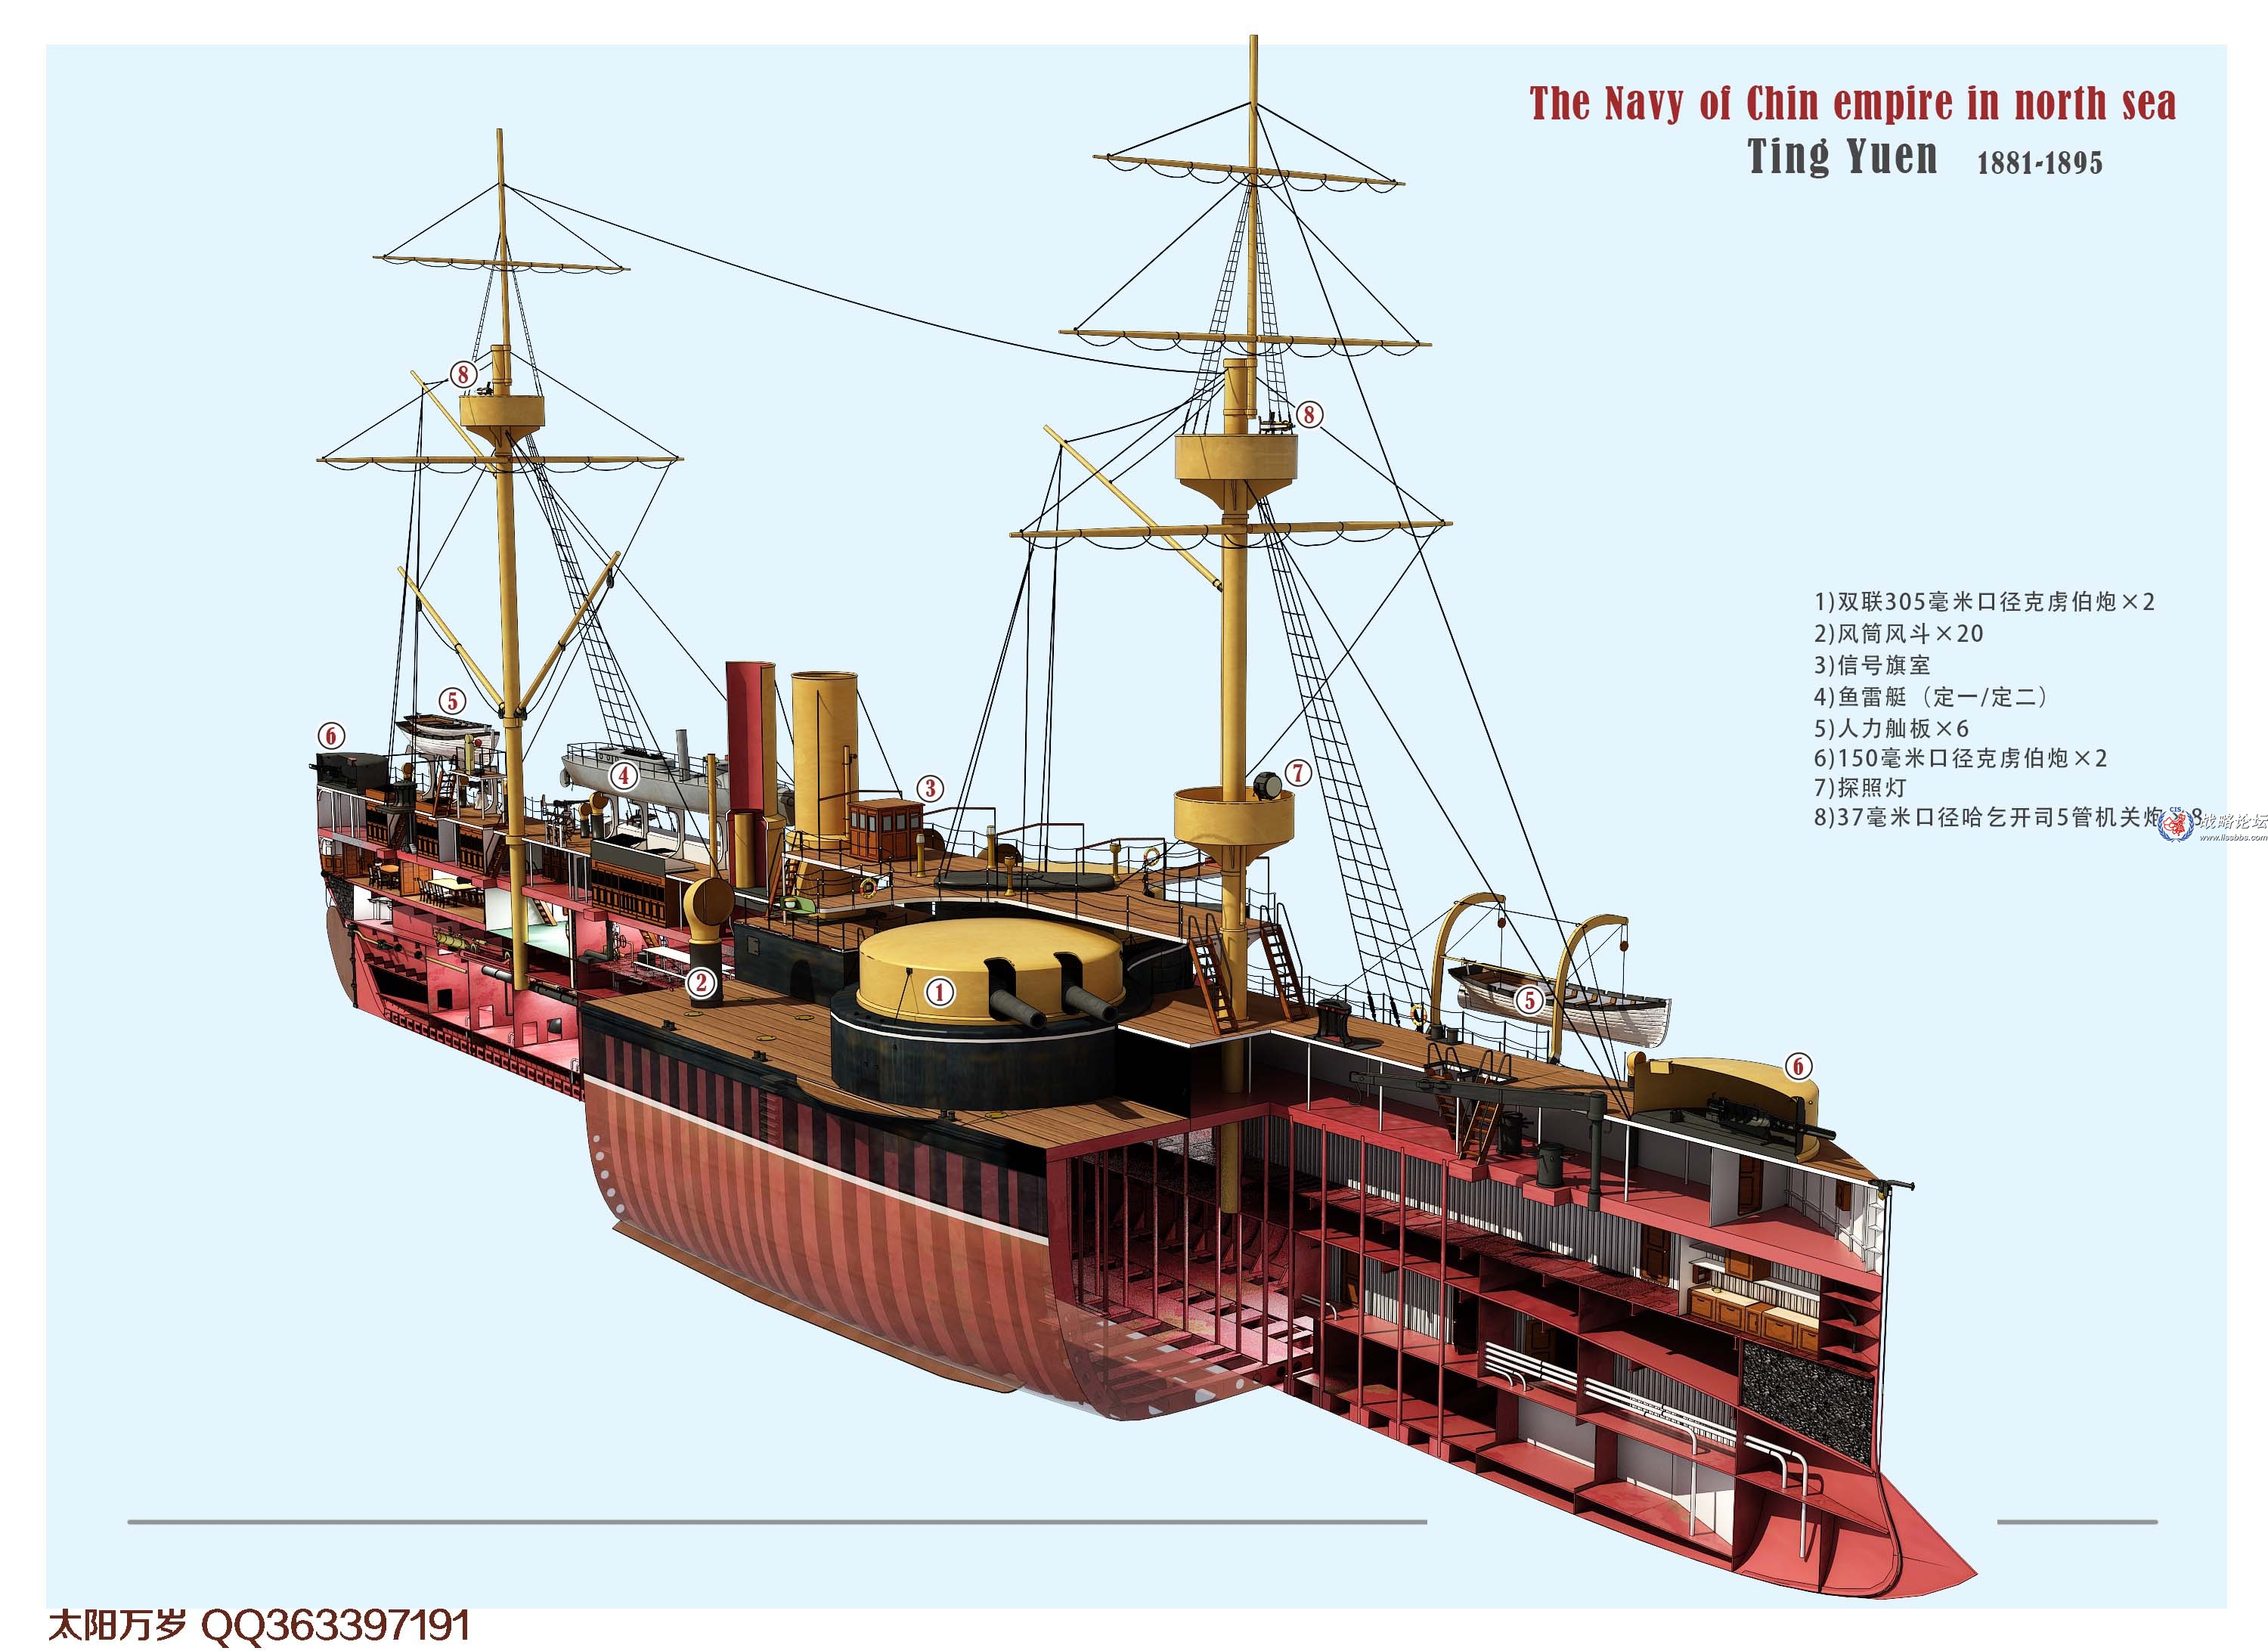
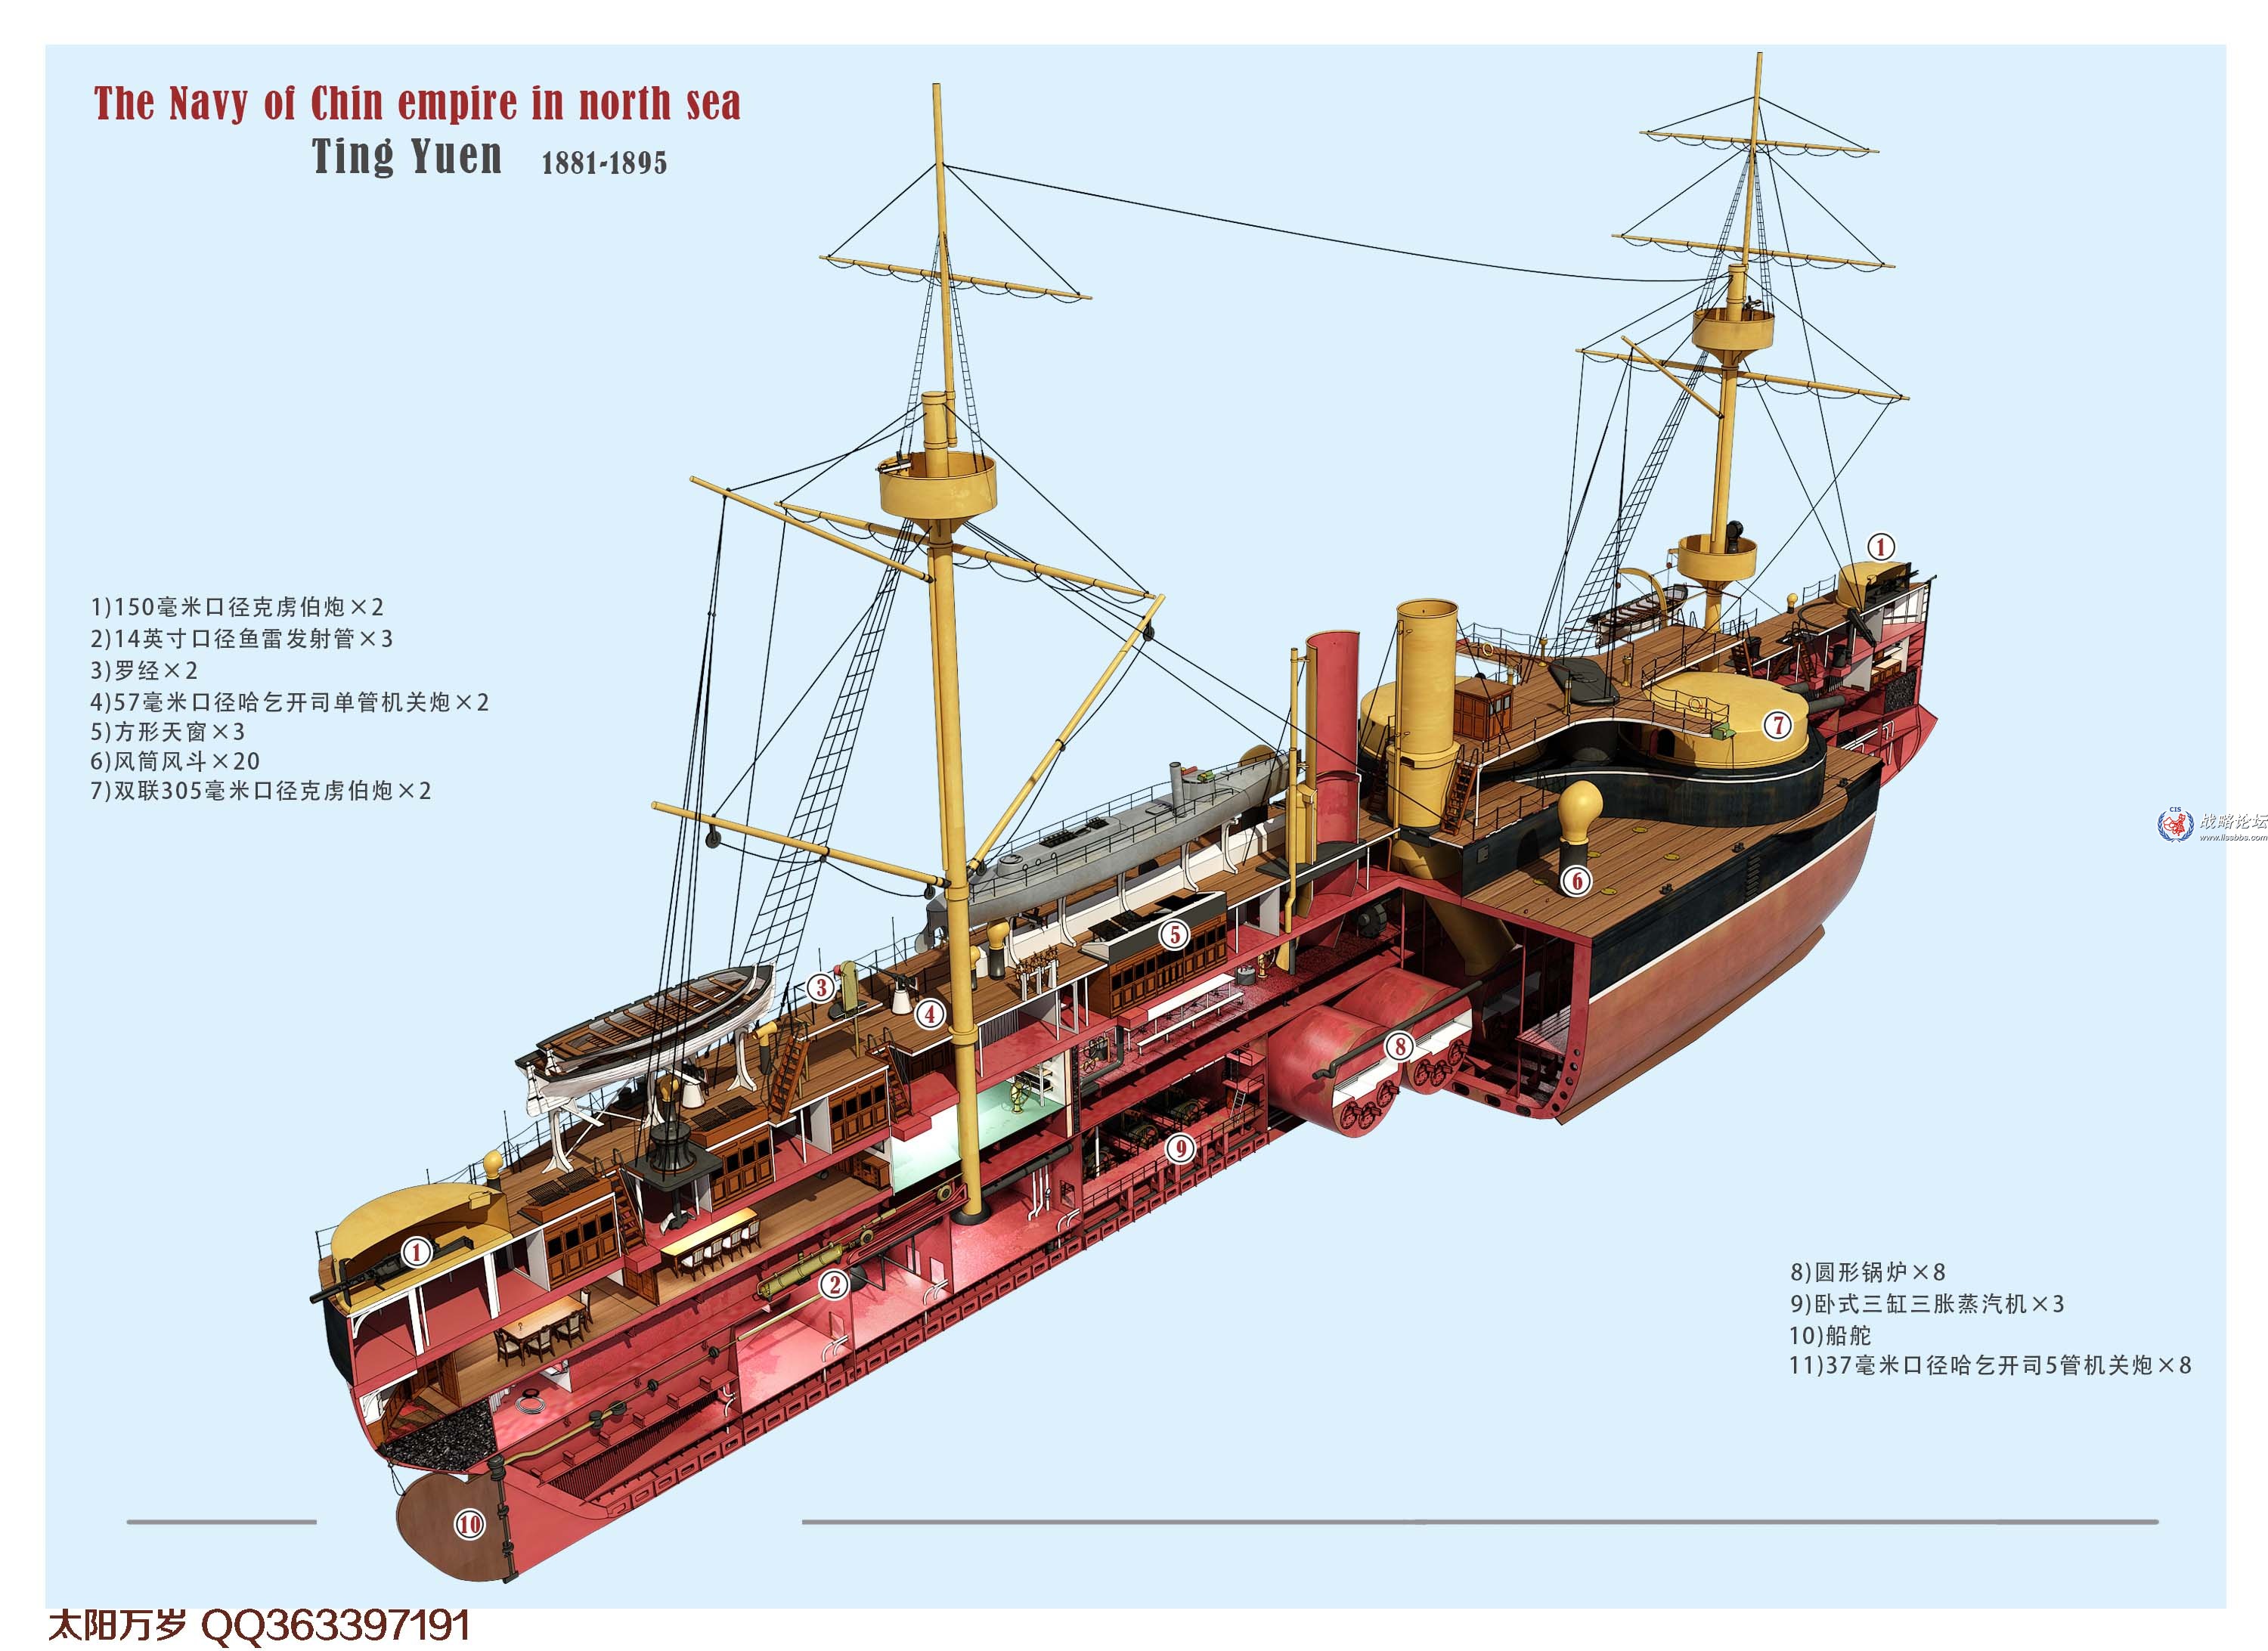
These pictures from chinese websites are also looking promising and will be helpful also with the rigging as bronco don´t give you any adequate rigging plan as Hasegawa is doing:


I will keep my efforts closely with these chinese illustrations as they seem to be most spot on with the real ship. There is also a book "the Chinese steam Navy" which I will buy eventually for my project. We will see.

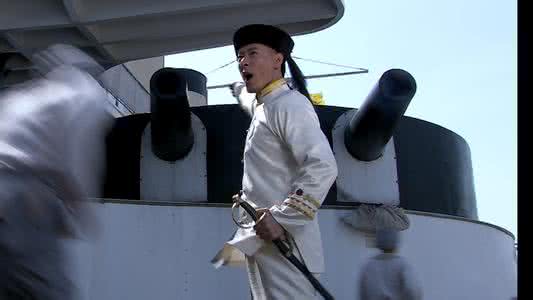
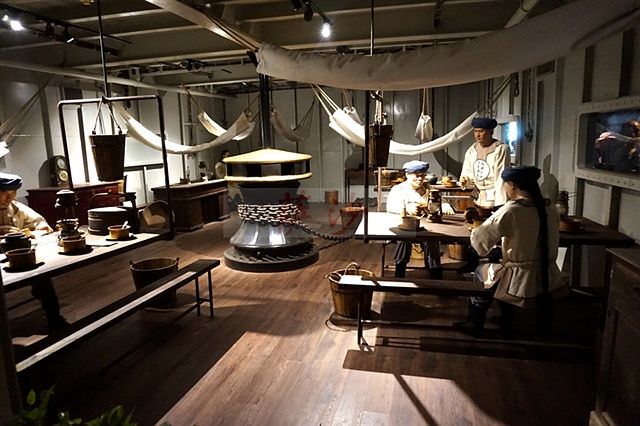
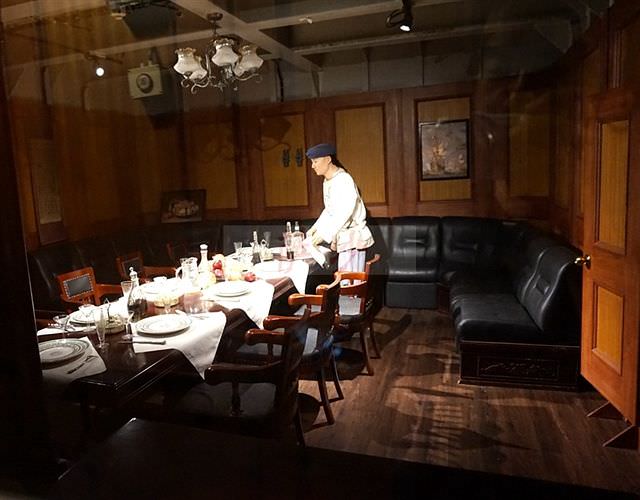
I was also happy to catch some pictures of the sailor´s uniforms for this time, this took me some time. Here are some officers:


lower ranks:


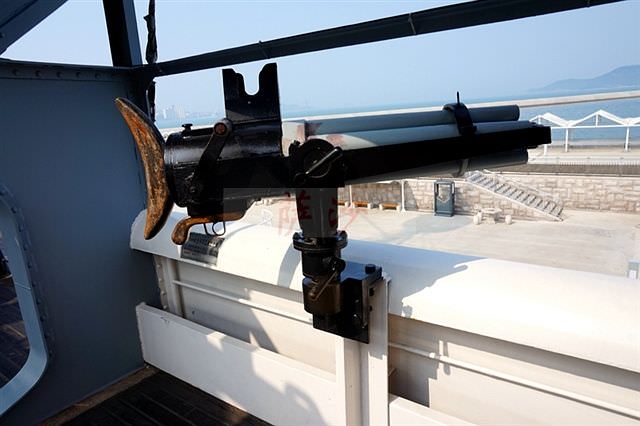
and the Hotchkiss 37 mm cannon revolver:


these are my building guidelines so far. If some of you could contribute some facts for this ships you are welcome.
TimReynaga
Staff MemberAssociate Editor
MODEL SHIPWRIGHTS
Visit this Community
California, United States
Joined: May 03, 2006
KitMaker: 2,500 posts
Model Shipwrights: 1,830 posts
Posted: Saturday, November 11, 2017 - 07:09 PM UTC
Thomas,

This looks to be a fun and unusual project, I look forward to watching you progress with it. Those are some great crew pictures in your post - they are apparently from a movie?
Black_sheep
Visit this Community
Bayern, Germany
Joined: December 11, 2009
KitMaker: 823 posts
Model Shipwrights: 551 posts
Posted: Saturday, November 11, 2017 - 07:19 PM UTC
Hello Tim,

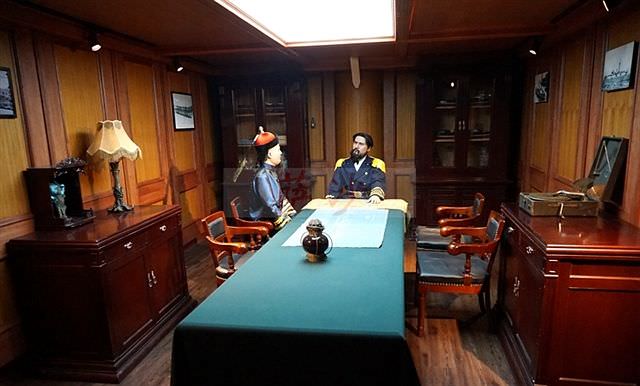
yes I think the first three pictures come from a chinese movie but the last two are from the rebuilt museum ship. I do have another picture presumably of the chinese admiral together with its (british?) advisor in the captains cabin:
RedDuster
Visit this Community
England - South East, United Kingdom
Joined: March 01, 2010
KitMaker: 7,078 posts
Model Shipwrights: 6,649 posts
Posted: Monday, November 13, 2017 - 02:54 AM UTC
Very interesting build Thomas,

Will be along for the ride, really love ships of this period.

Cheers

Si
TRM5150
Visit this Community
Massachusetts, United States
Joined: January 03, 2010
KitMaker: 2,159 posts
Model Shipwrights: 1,400 posts
Posted: Monday, November 13, 2017 - 04:24 AM UTC
Looks like a great project...looking forward to following along while you build!
Cosimodo
#335
Visit this Community
Auckland, New Zealand
Joined: September 03, 2013
KitMaker: 1,808 posts
Model Shipwrights: 871 posts
Posted: Monday, November 13, 2017 - 11:39 AM UTC
Certainly going to follow this build Thomas.

Changing layouts is a problem I have found in the past when researching ships, they modified quite often, sometimes to dramatic effect, so good luck with your choice of period.

cheers

Michael
RussellE
#306
Visit this Community
Victoria, Australia
Joined: June 27, 2010
KitMaker: 3,959 posts
Model Shipwrights: 2,777 posts
Posted: Monday, November 13, 2017 - 02:12 PM UTC
following along with interest, Thomas
Black_sheep
Visit this Community
Bayern, Germany
Joined: December 11, 2009
KitMaker: 823 posts
Model Shipwrights: 551 posts
Posted: Thursday, November 16, 2017 - 01:47 AM UTC
Thank you gentlemen for your interest - always nice to know there are some spectators for your work

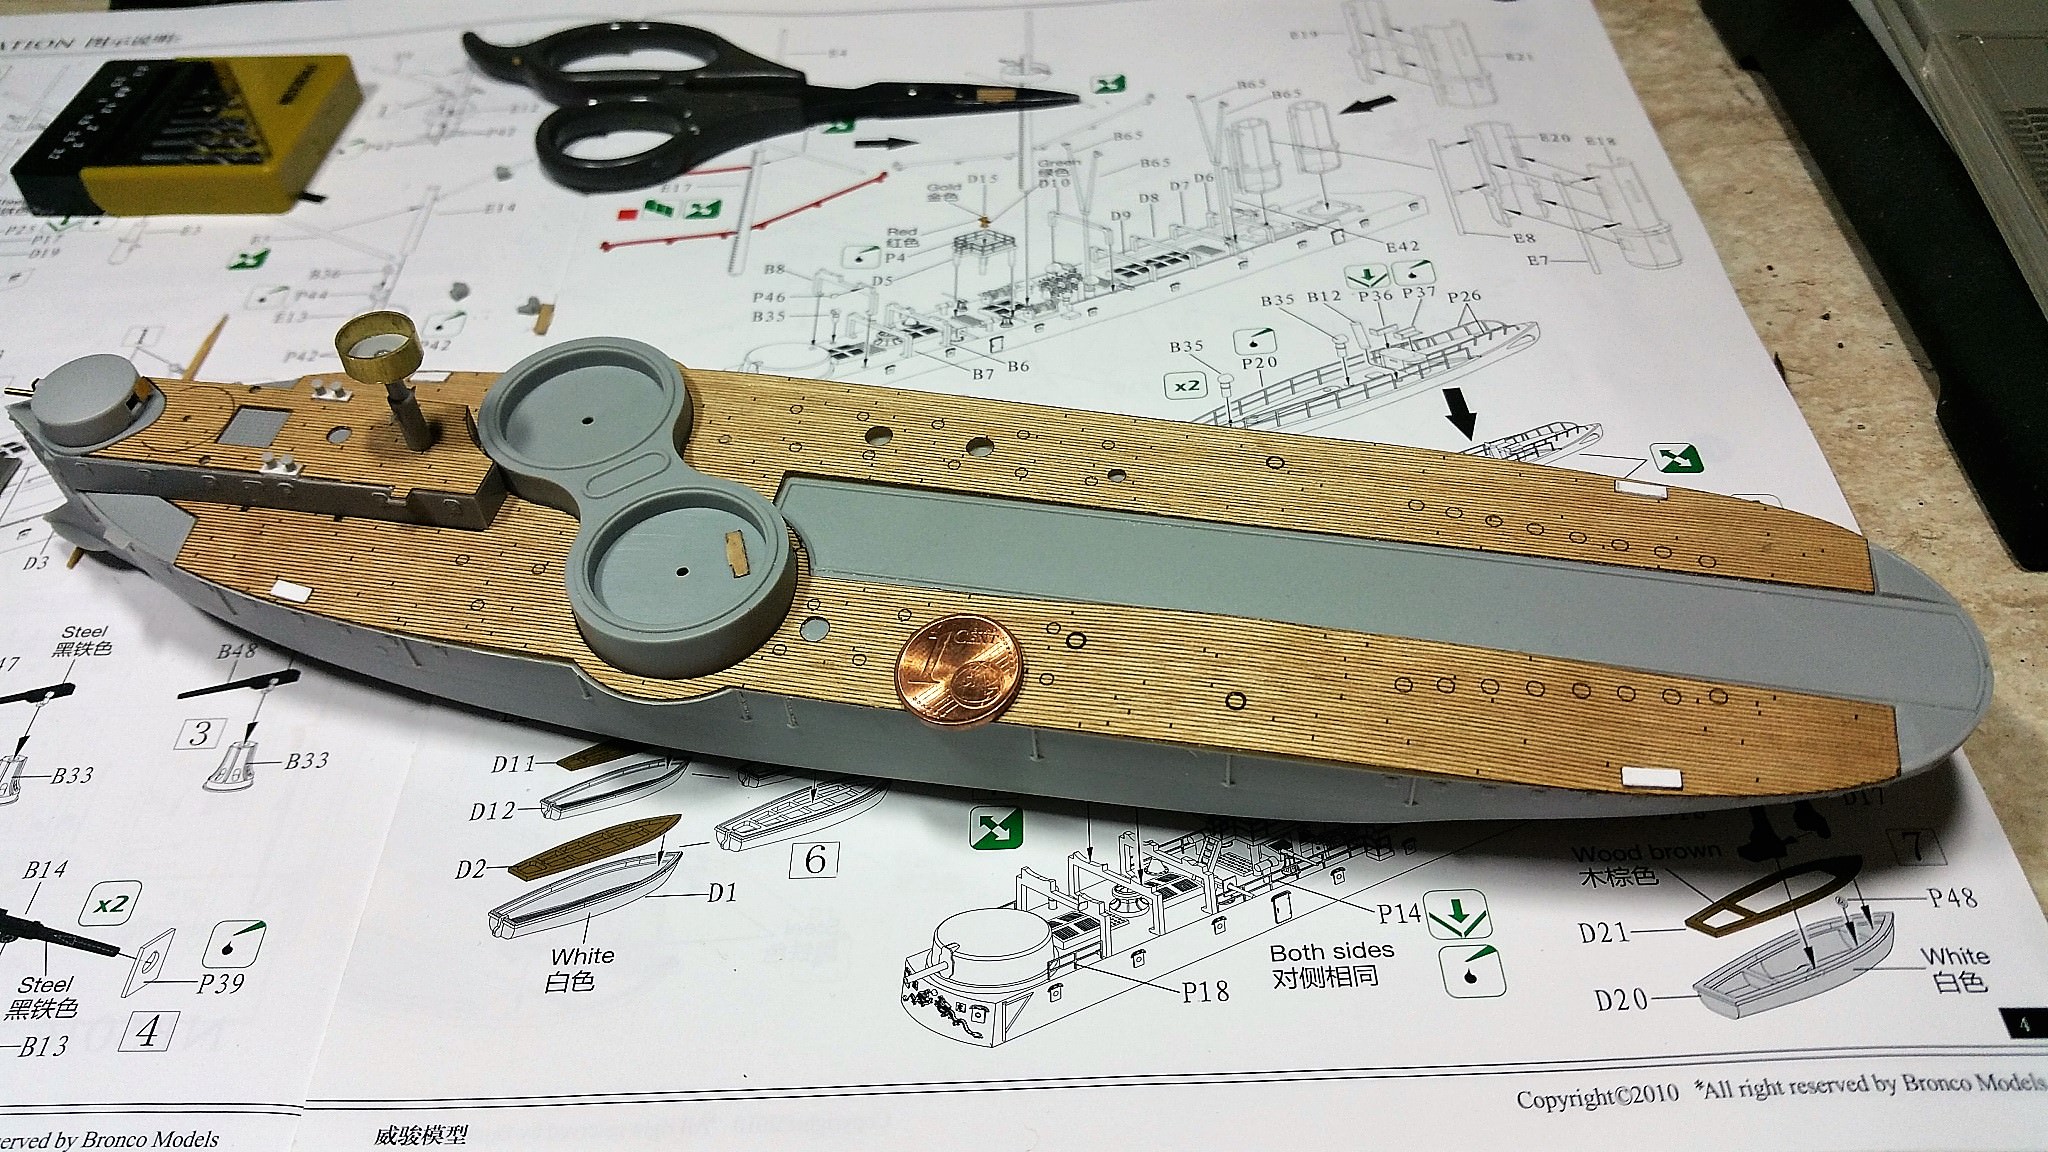
Today I have a first update. I mated the two hull halves and the deck together. After this the deck was shaved even with the hull edges for a better fit for the later to apply wooden deck. This is how it Looks so far:


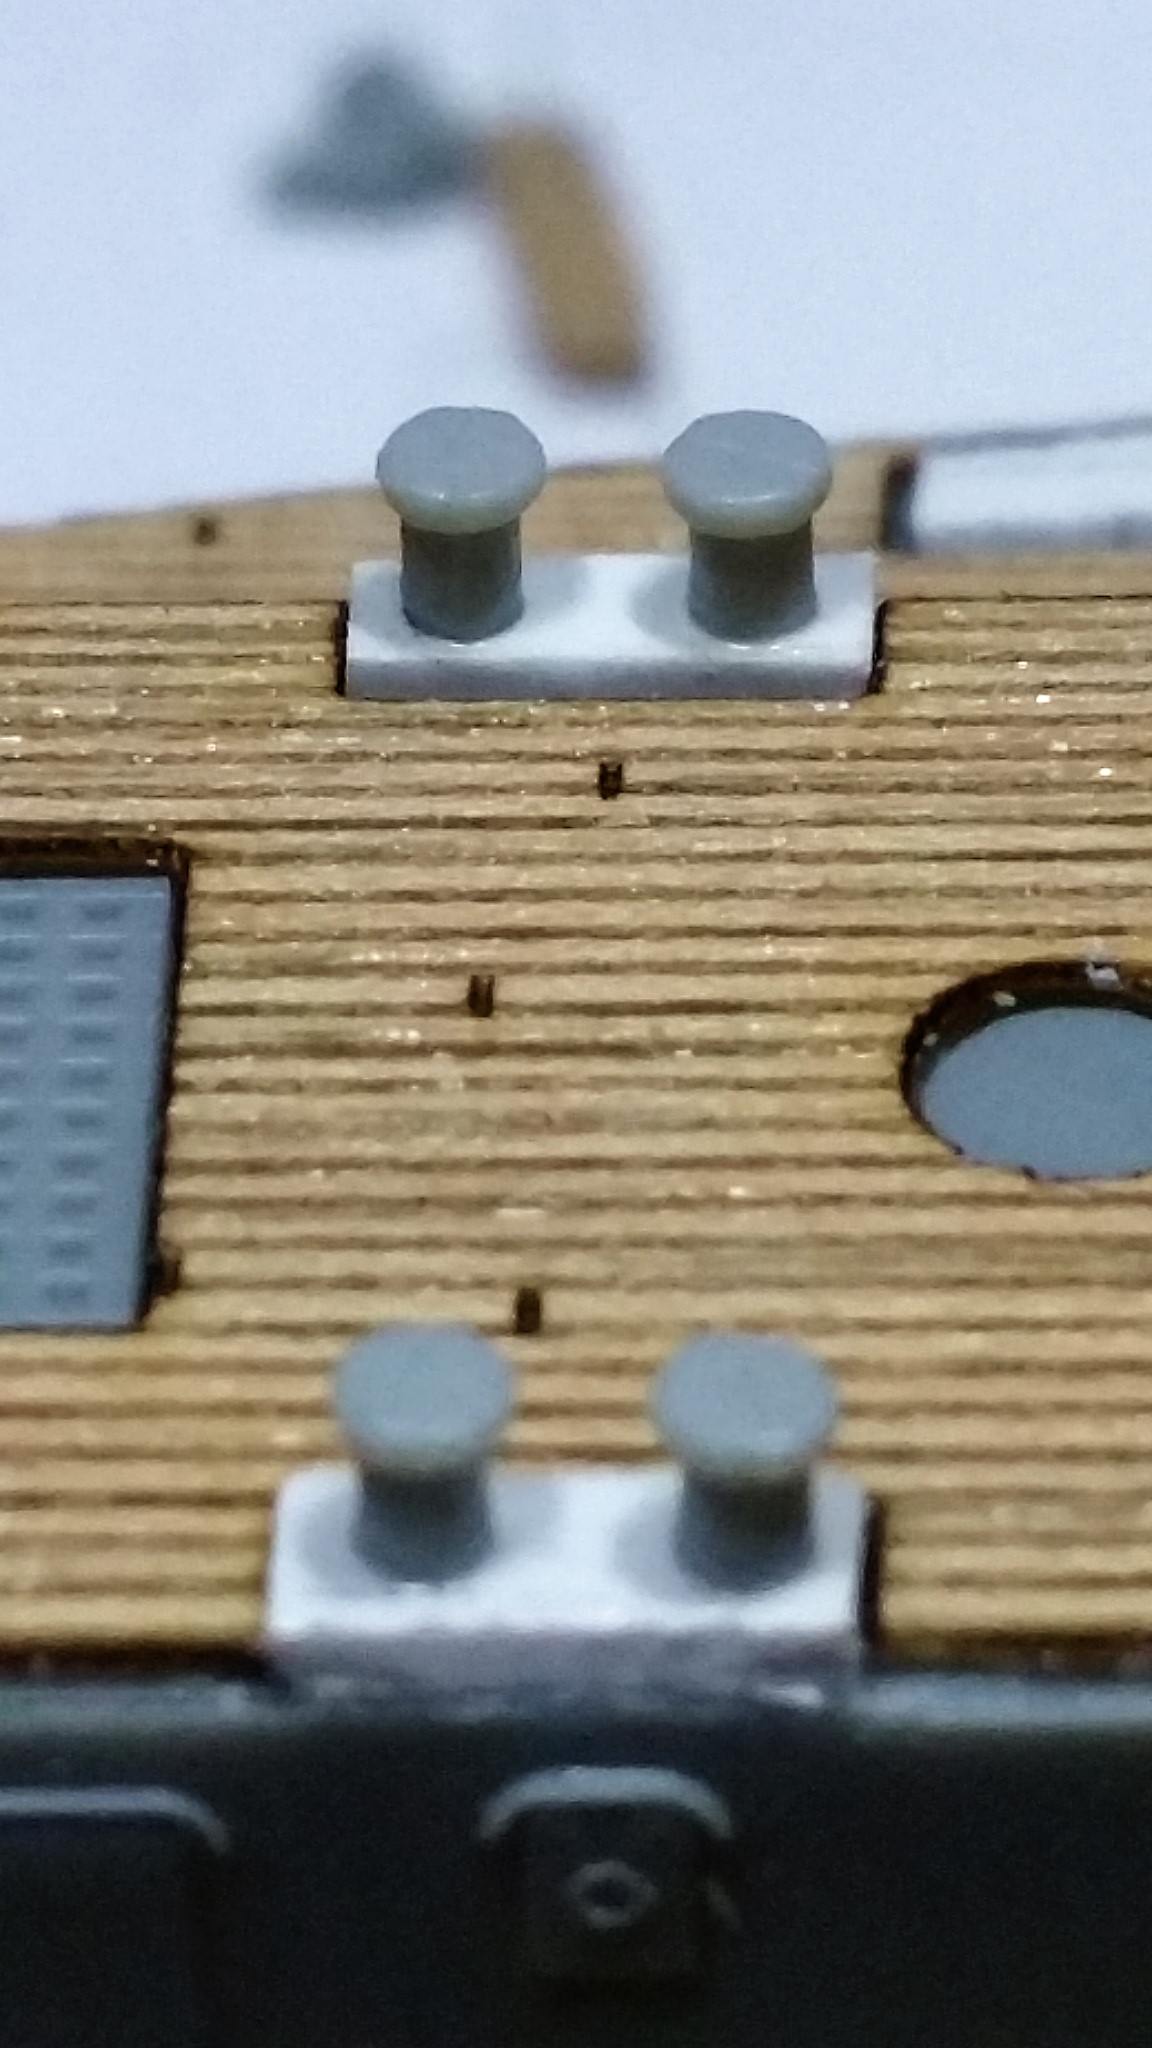
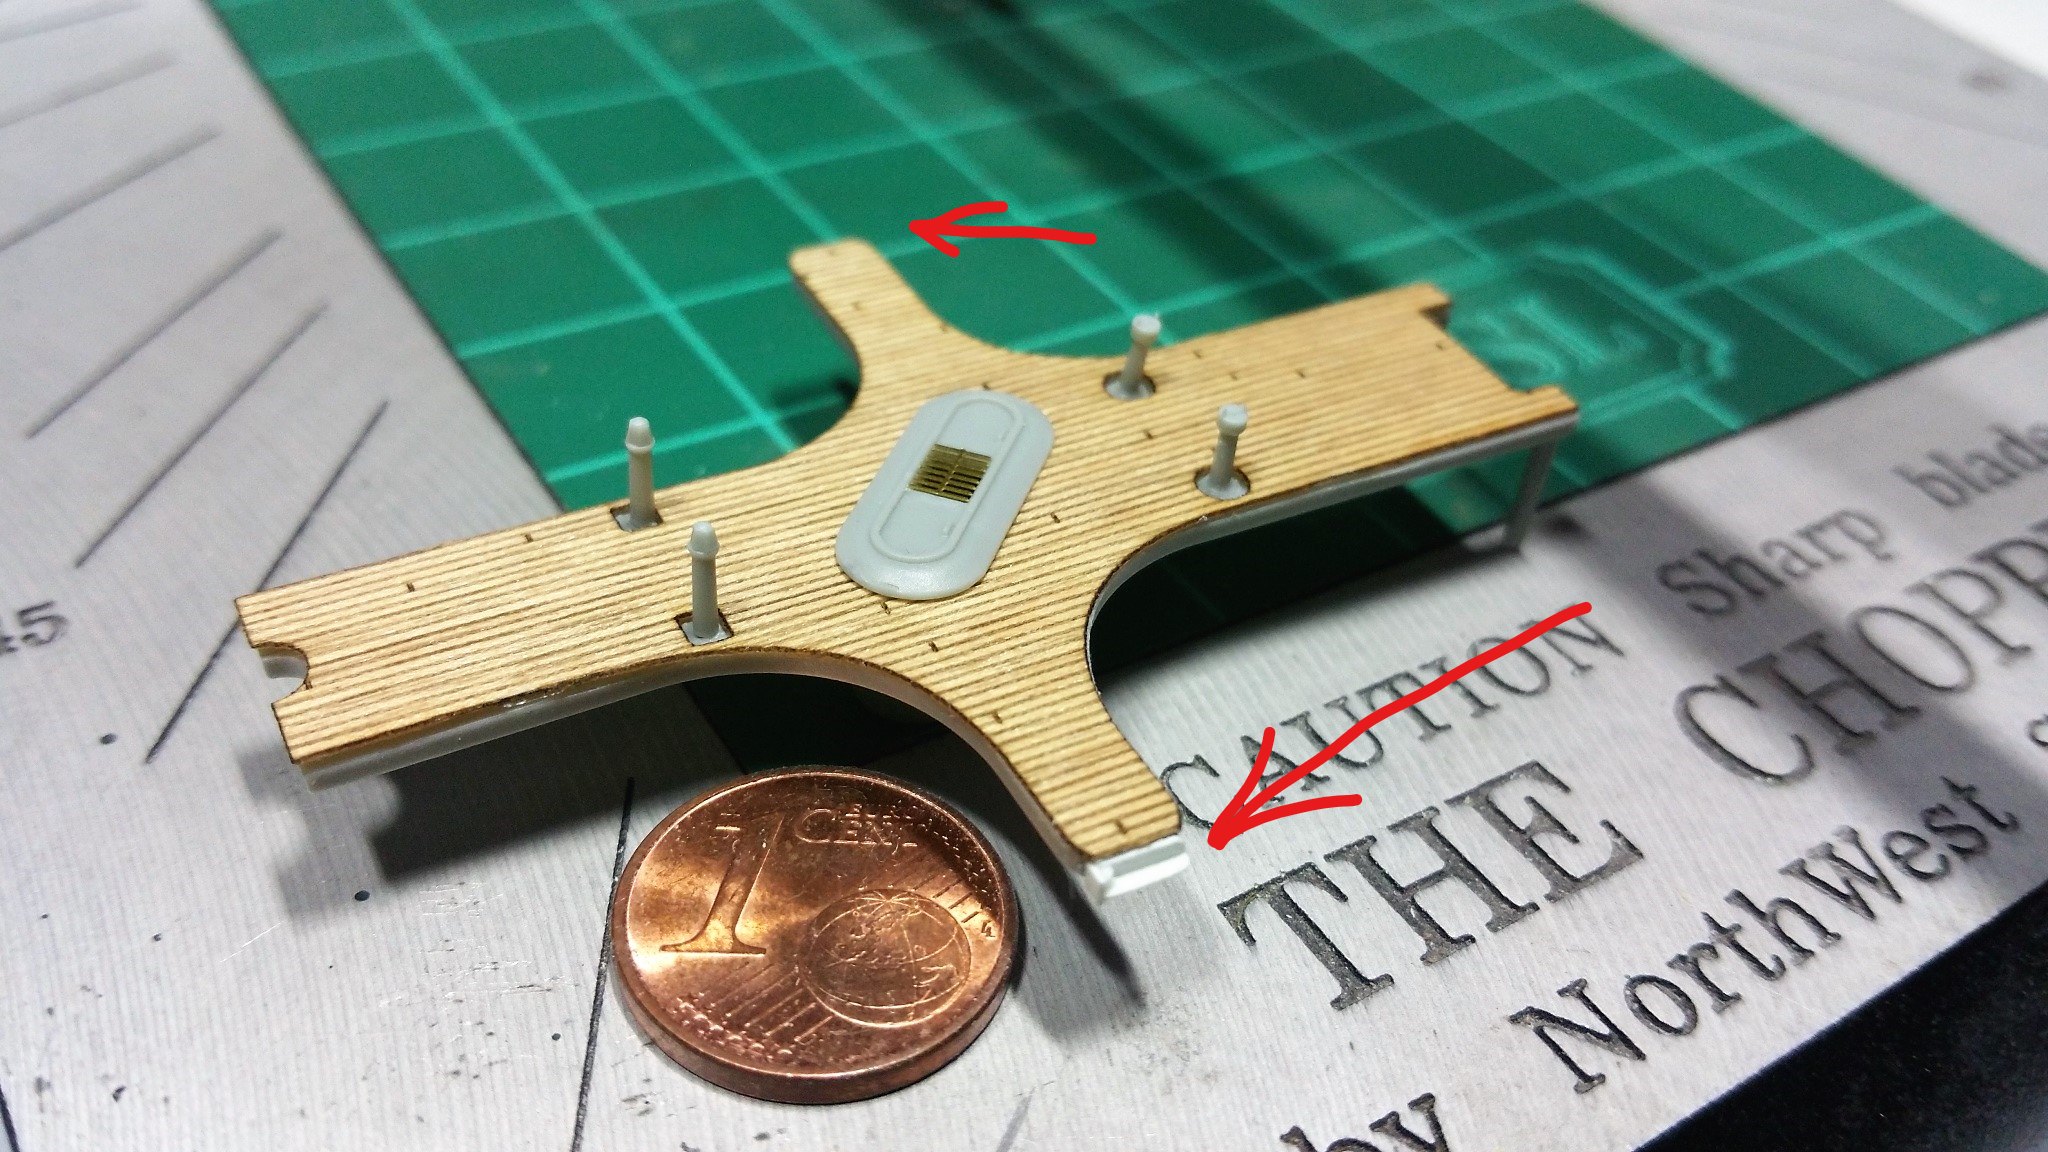
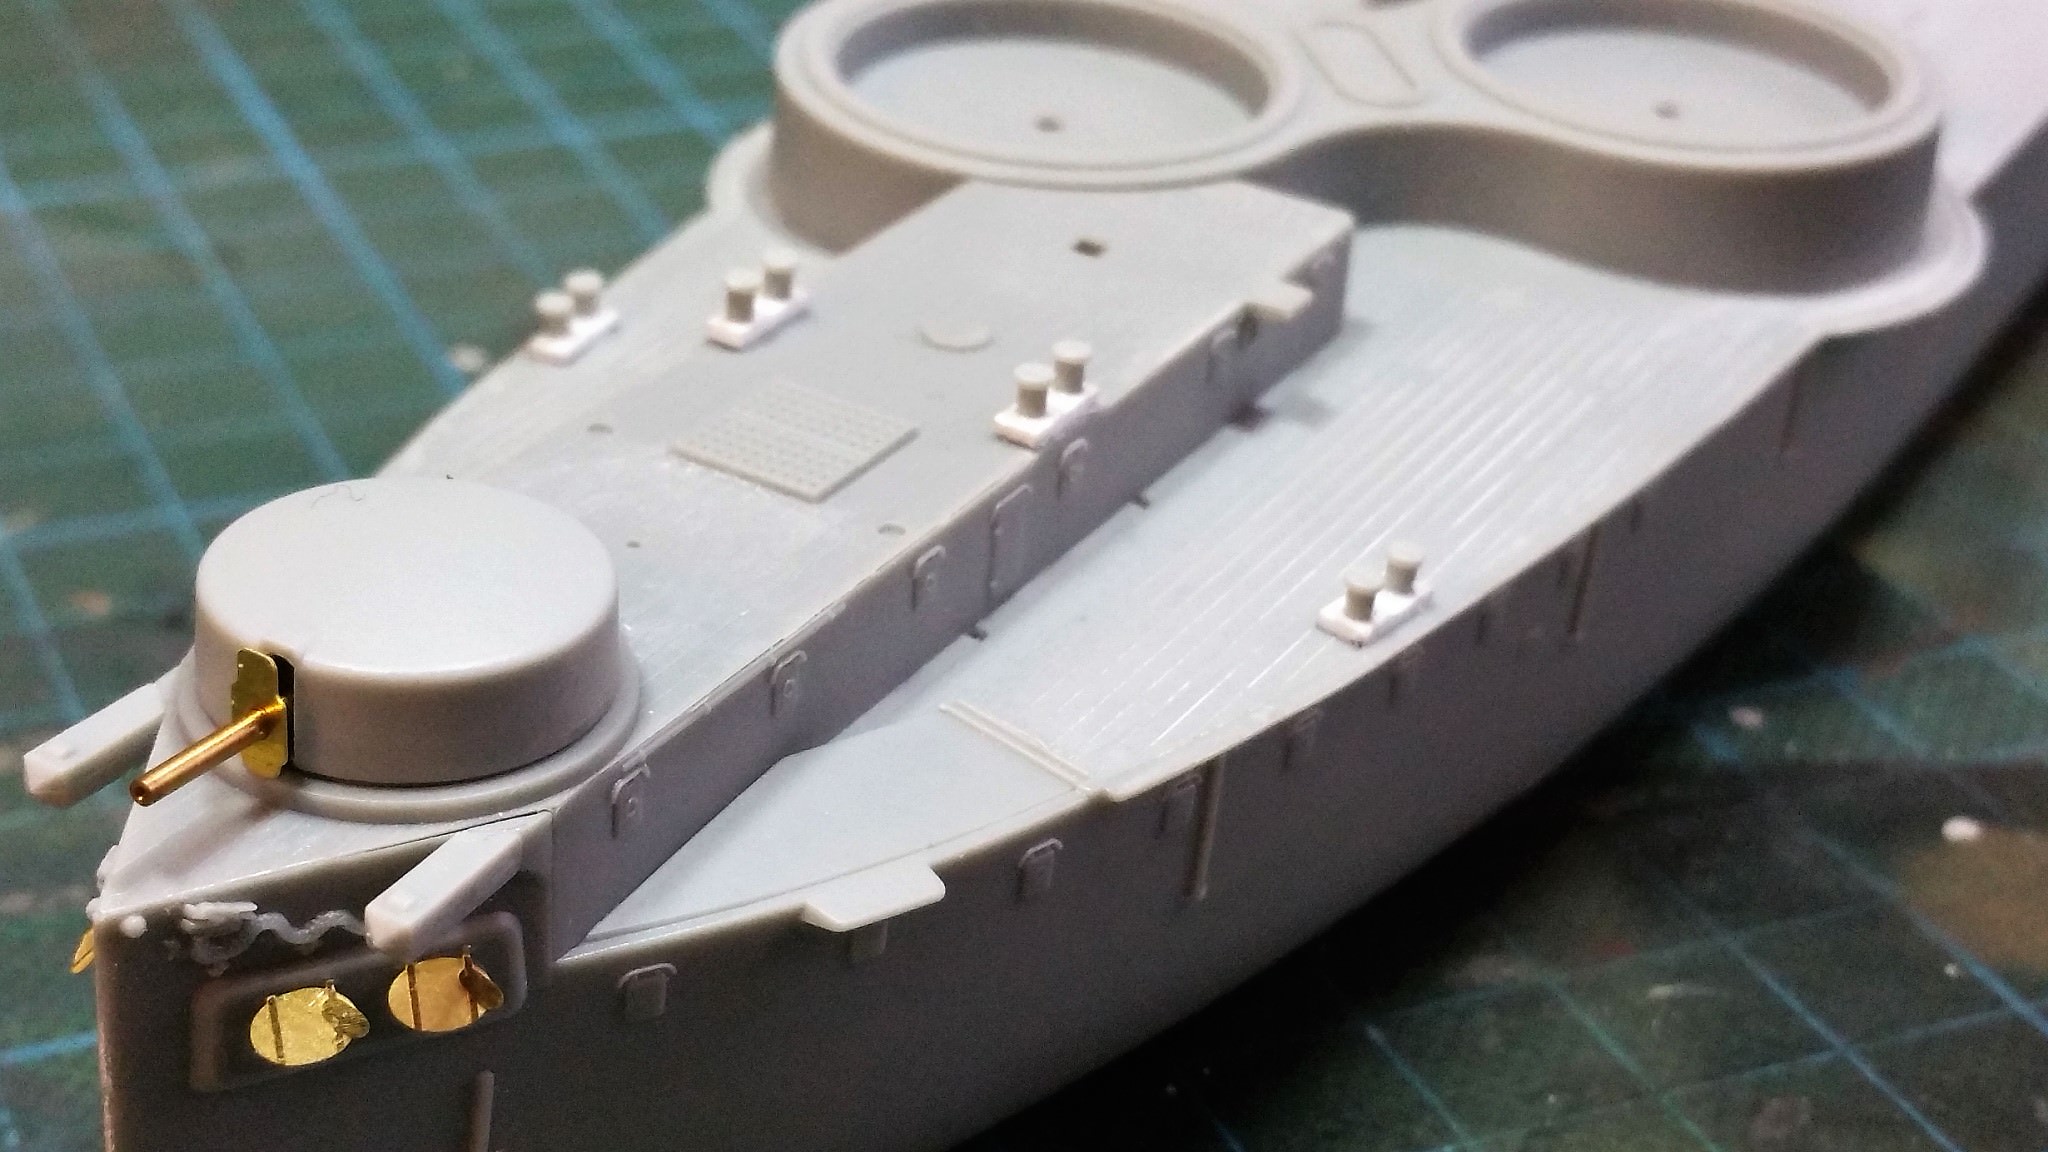
As I dry-fitted the wooden deck I discovered that the sockets for the bollards (is this the right designation?) are flatter than the new wooden deck surface level - the biggest disadvantage of prefinished wooden decks. Therefore I decided to shave off the original sockets and make new, slightly higher ones to better fit the new Surface and give a better appereance. This is the result:


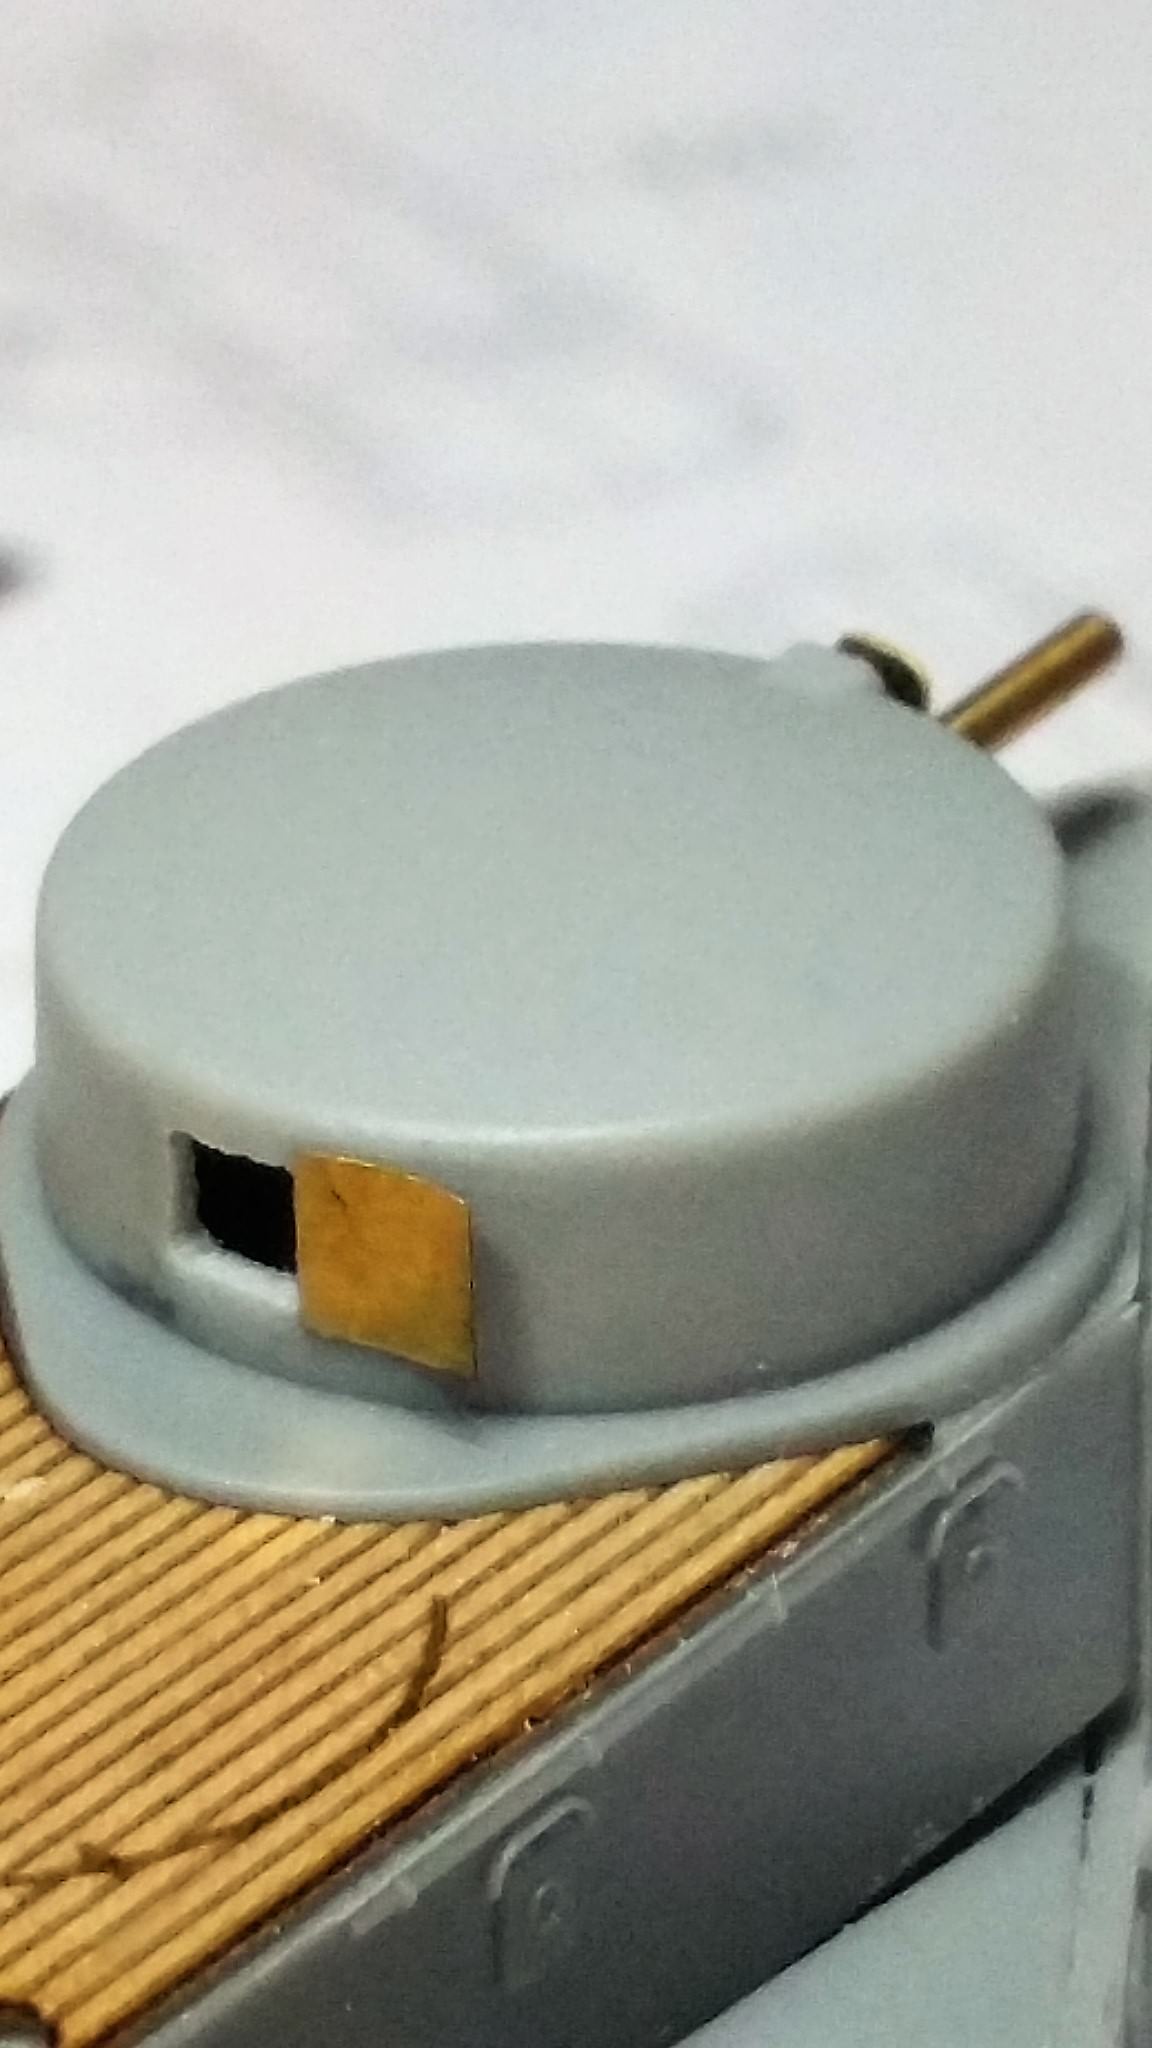
For the frontal gun barbette I do have an etched access hatch. I didn´t wanted to just glue it on top of the barbette so I carefully made an opening for it and slightly thinned the barbette wall around the entrance for a better scale thickness:


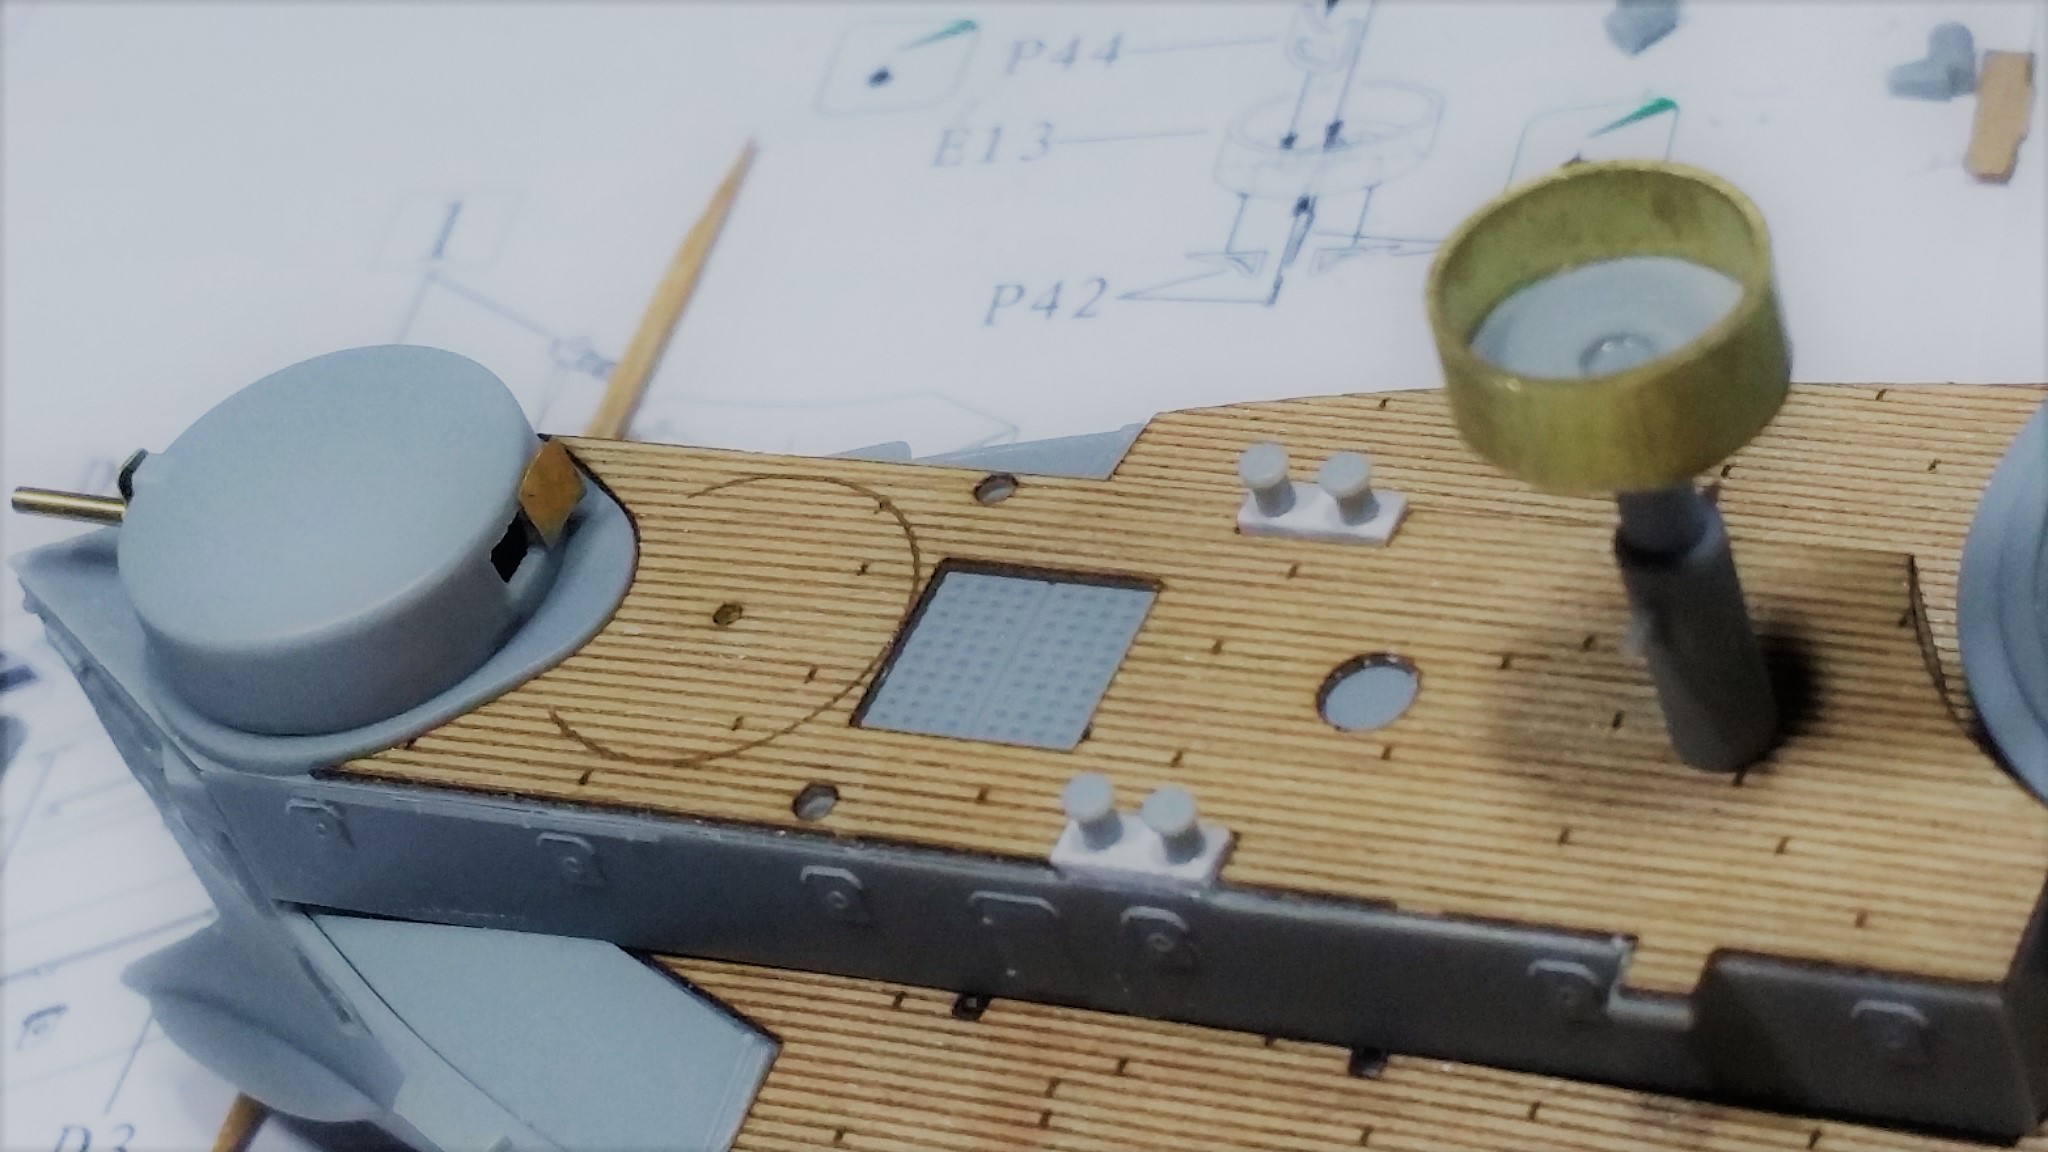
Tonight I replaced the frontal mast searchlight post (is this the right designation?!) with an brass ring from albion alloys, cutted in the correct length - I think this looks much better then the thicker plastic ones from the kit:


Thats it for tonight!

Cheers
d6mst0
#453
Visit this Community
Texas, United States
Joined: August 28, 2016
KitMaker: 1,925 posts
Model Shipwrights: 1,298 posts
Posted: Thursday, November 16, 2017 - 01:56 AM UTC
Nice work, she is shaping up nicely.

The one thing I hate about those wooden deck add-ons is how their thickness affects items that go on the deck and can make them look un-natural.
RedDuster
Visit this Community
England - South East, United Kingdom
Joined: March 01, 2010
KitMaker: 7,078 posts
Model Shipwrights: 6,649 posts
Posted: Friday, November 17, 2017 - 01:26 AM UTC
Nice start Thomas, good job on the bits (bollards) that has set them about perfectly.

Cheers, Si
TimReynaga
Staff MemberAssociate Editor
MODEL SHIPWRIGHTS
Visit this Community
California, United States
Joined: May 03, 2006
KitMaker: 2,500 posts
Model Shipwrights: 1,830 posts
Posted: Friday, November 17, 2017 - 06:21 AM UTC

Quoted Text

Nice work, she is shaping up nicely.

The one thing I hate about those wooden deck add-ons is how their thickness affects items that go on the deck and can make them look un-natural.


I know what you mean! Those wood decks look great, but they do stand a little proud of the molded details. I usually just live with it, although sometimes I add a little plastic lip around the edges to hide the different levels, like in my Olympia build:


It is a pain, though, and once the rails are on the difference isn't that much anyway.

And Thomas, I think your Blue Star deck looks just fine as is!
Black_sheep
Visit this Community
Bayern, Germany
Joined: December 11, 2009
KitMaker: 823 posts
Model Shipwrights: 551 posts
Posted: Friday, November 17, 2017 - 10:40 PM UTC
Nice that you are all with me during the build

@Tim: Your Olympia look fantastic - I hope I can get any close with it with my ship

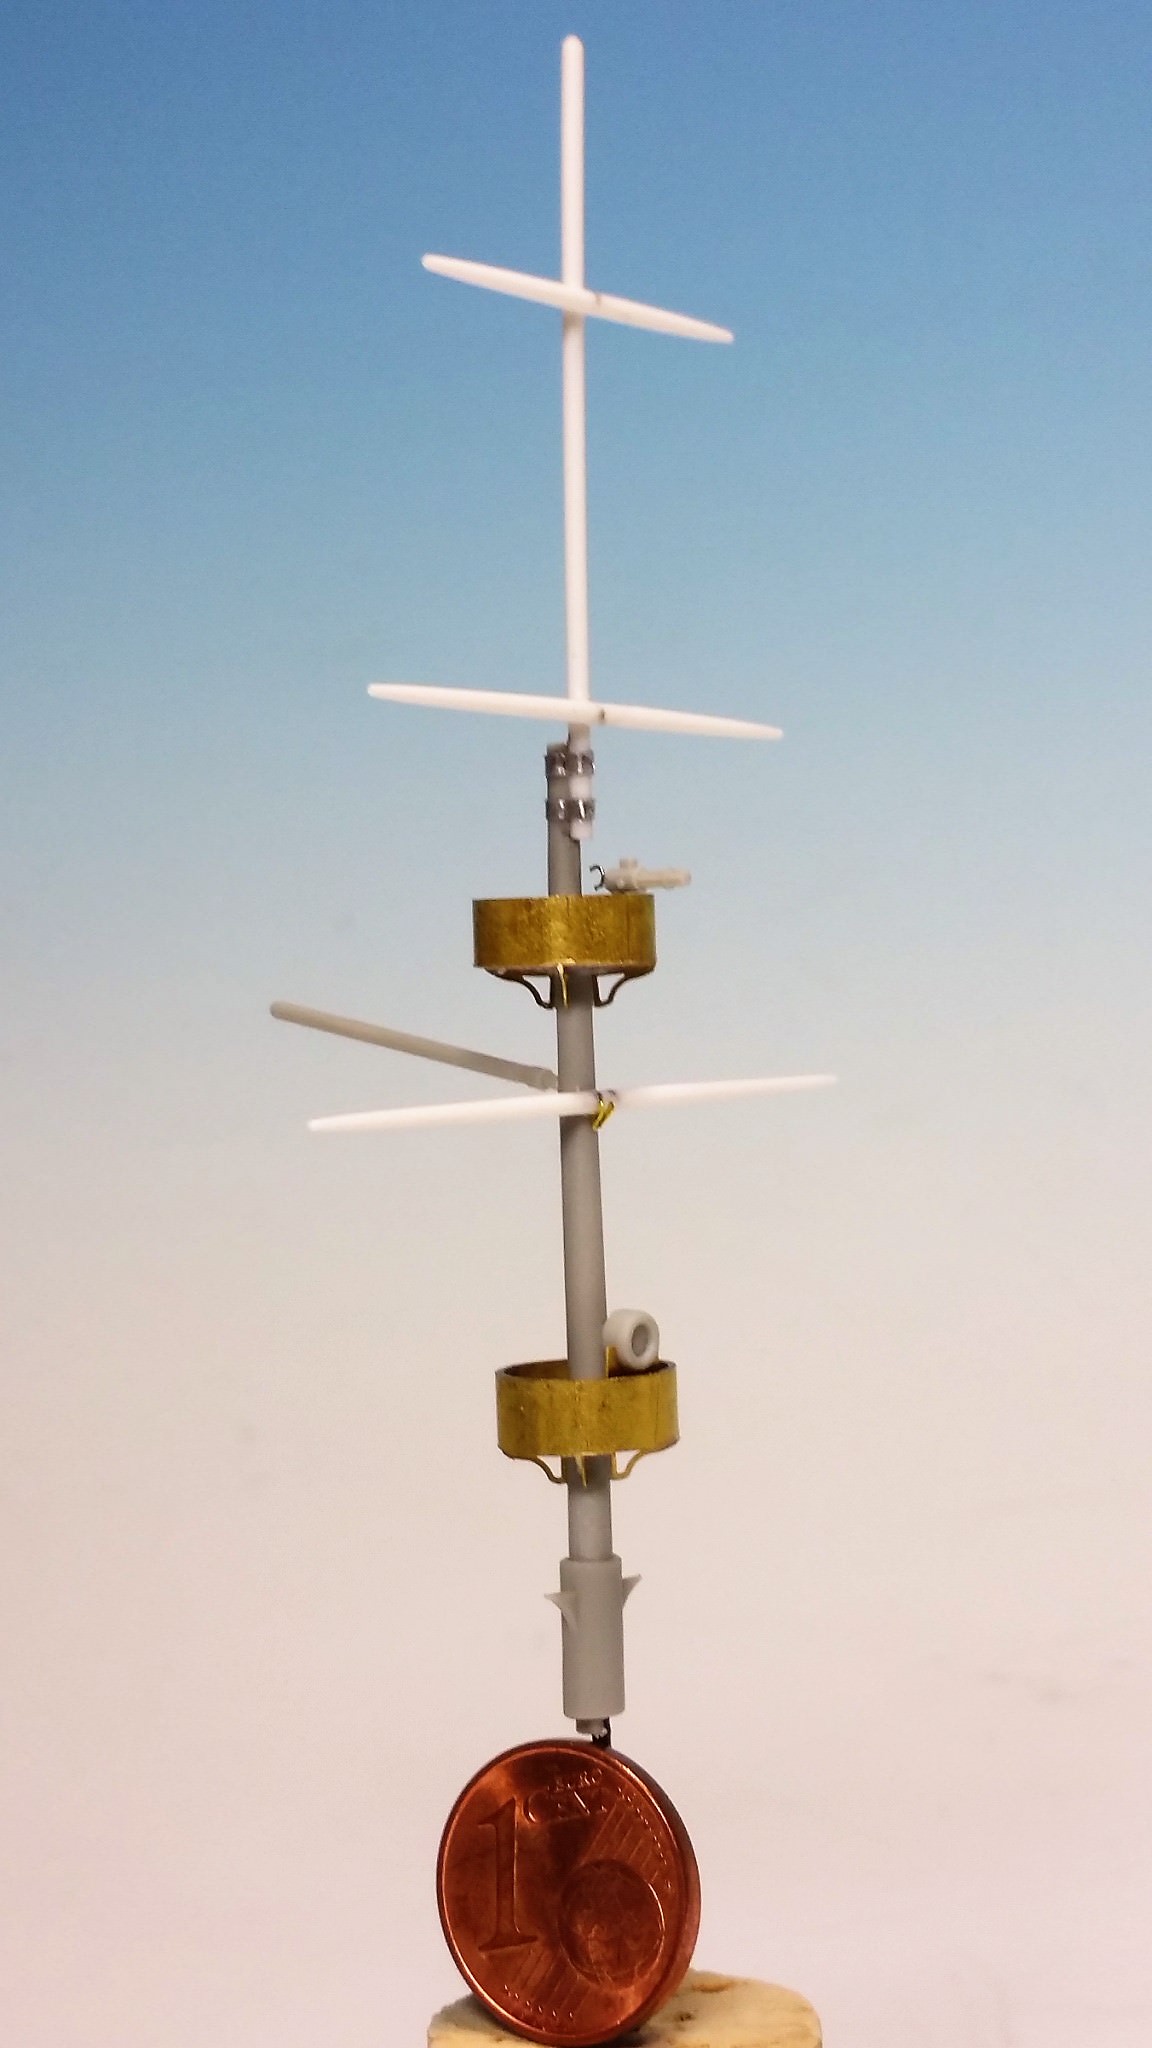
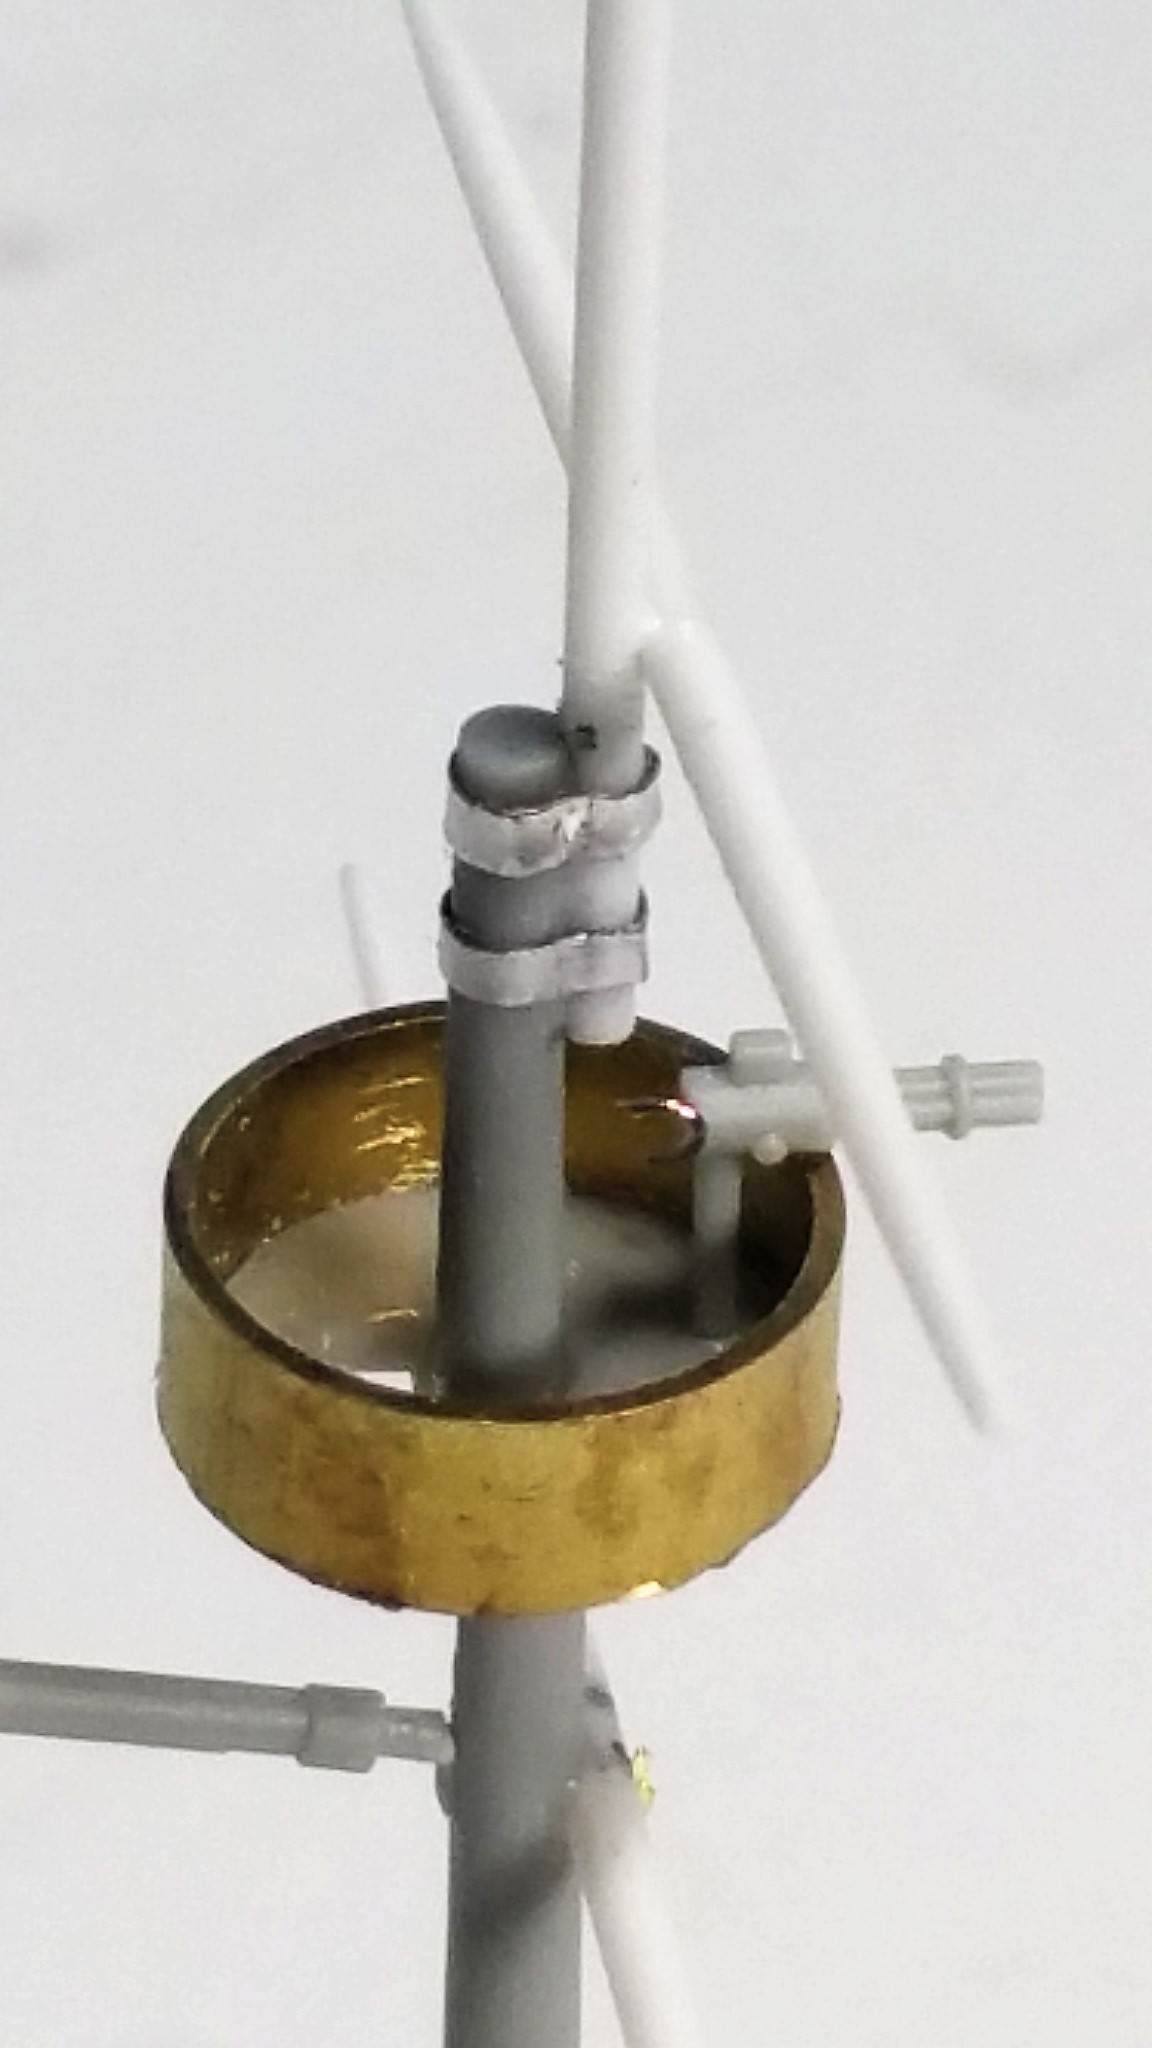
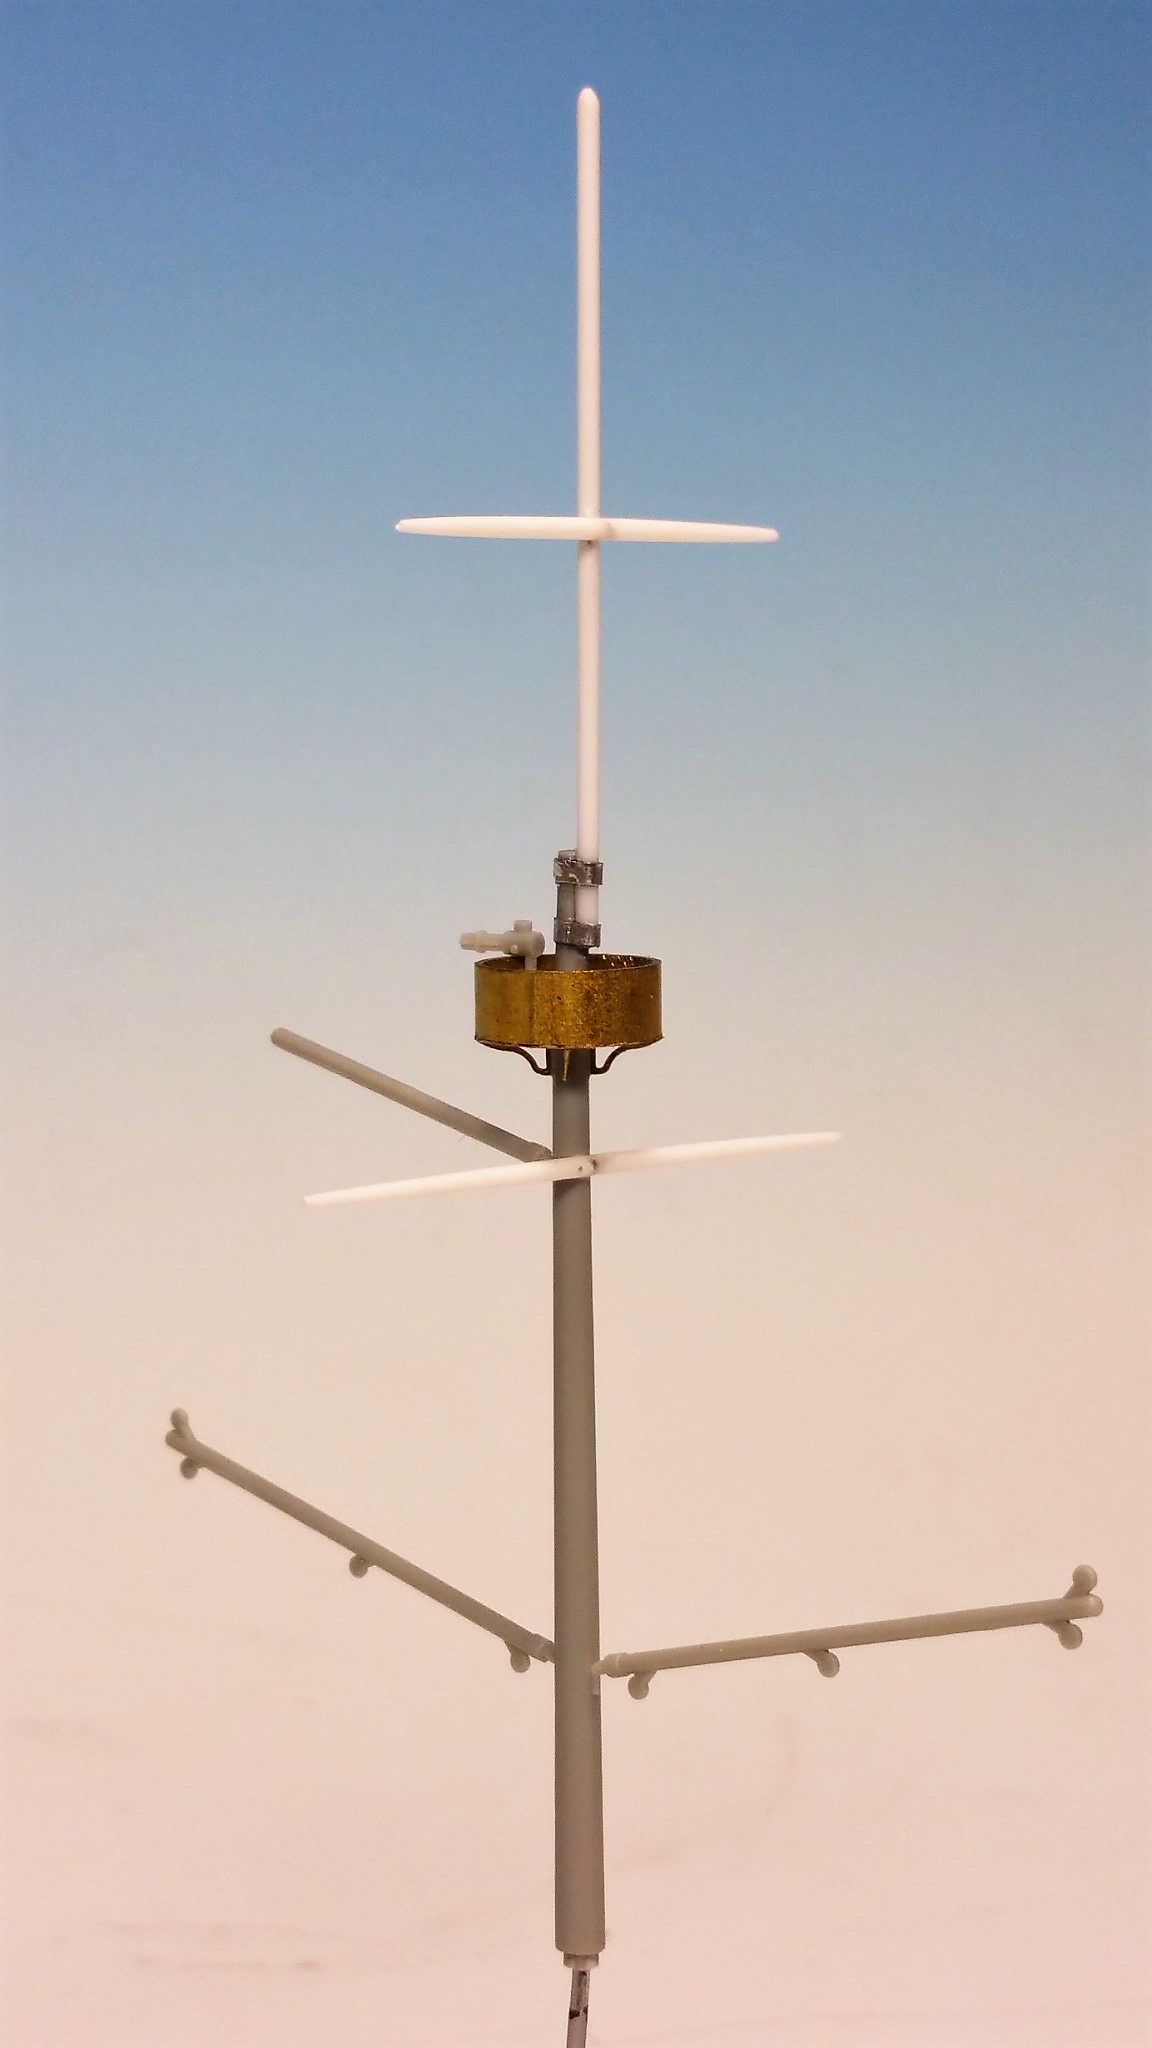
Today I spend my time converting the main mast accordint to the Interpretation of the german library picture and the chinese cross-section drawing. I made new beams with Evergreen plastic rod. The connection of the lower and upper topmast was done with thin leadfoil. The etched shoulder rest of the machine cannon gave me Problems - two of them flipped away from the microtweezers never to be seen again. After that I decided to use a solid rod bended in shape. These are the results:


Detail pic of the top Outlook section:


To be continued...
d6mst0
#453
Visit this Community
Texas, United States
Joined: August 28, 2016
KitMaker: 1,925 posts
Model Shipwrights: 1,298 posts
Posted: Friday, November 17, 2017 - 11:47 PM UTC
Nice, is that lead strips used to attached the two masts together?
RedDuster
Visit this Community
England - South East, United Kingdom
Joined: March 01, 2010
KitMaker: 7,078 posts
Model Shipwrights: 6,649 posts
Posted: Saturday, November 18, 2017 - 12:09 AM UTC
Great Work Thomas,

The lead strips look right, and the scratchbuilt upper section is a great piece work.

Cheers

Si
Black_sheep
Visit this Community
Bayern, Germany
Joined: December 11, 2009
KitMaker: 823 posts
Model Shipwrights: 551 posts
Posted: Saturday, November 18, 2017 - 12:35 AM UTC
@Mark: the flat irons purpose are indeed to mate the two masts together. The screwheads were too tiny to show them

@Simon: Thank you very much
Cosimodo
#335
Visit this Community
Auckland, New Zealand
Joined: September 03, 2013
KitMaker: 1,808 posts
Model Shipwrights: 871 posts
Posted: Saturday, November 18, 2017 - 03:39 AM UTC
Hi Thomas,
You're making good progress and the work on the mast looks great.

cheers
Michael
TimReynaga
Staff MemberAssociate Editor
MODEL SHIPWRIGHTS
Visit this Community
California, United States
Joined: May 03, 2006
KitMaker: 2,500 posts
Model Shipwrights: 1,830 posts
Posted: Saturday, November 18, 2017 - 05:33 AM UTC
Thomas,

That is some nice work on the mast. The gun on the platform looks good as well. I too have lost photoetch parts and replaced them with whatever I could! In this case, I think your curved wire shoulder rest looks even better (more three-dimensional) than the etched part would have looked anyway! Keep up the good work, I'll be following with interest.
RussellE
#306
Visit this Community
Victoria, Australia
Joined: June 27, 2010
KitMaker: 3,959 posts
Model Shipwrights: 2,777 posts
Posted: Sunday, November 19, 2017 - 03:33 PM UTC
Some great progress here Thomas
Black_sheep
Visit this Community
Bayern, Germany
Joined: December 11, 2009
KitMaker: 823 posts
Model Shipwrights: 551 posts
Posted: Saturday, December 02, 2017 - 04:23 PM UTC
First let me say sorry for my very late update - I had a lot work and less time for the bench. And the time at the bench was filled out with a lot of small parts work where you can not see too much.

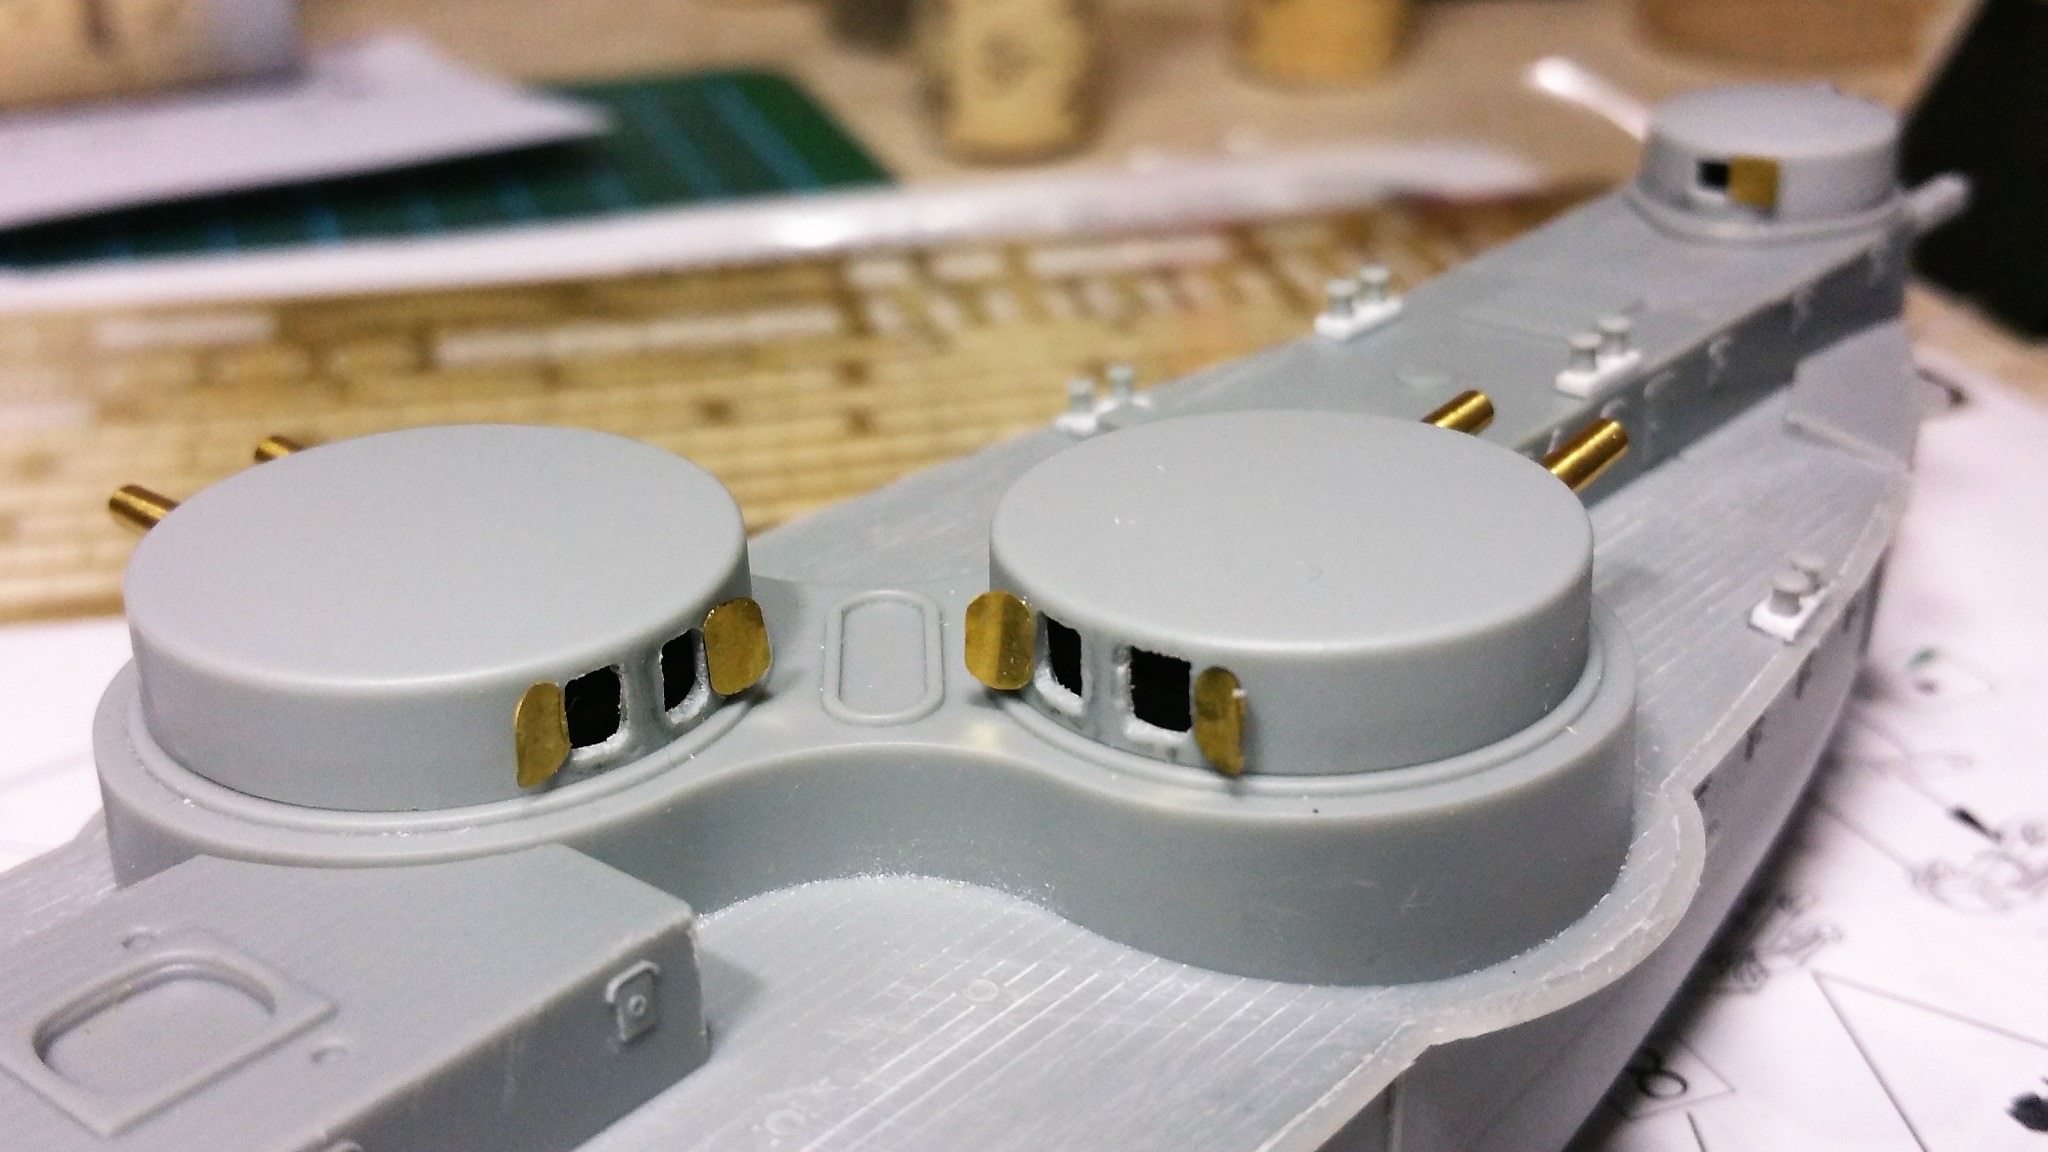
But here are some pictures of the actual build status of the ship:

First I added the missing position lights at the left and right sight of the Bridge. I did it with very fine plastic sheet and the trustable "THE CHOPPER" tool - very useful if you Need accurate cuts


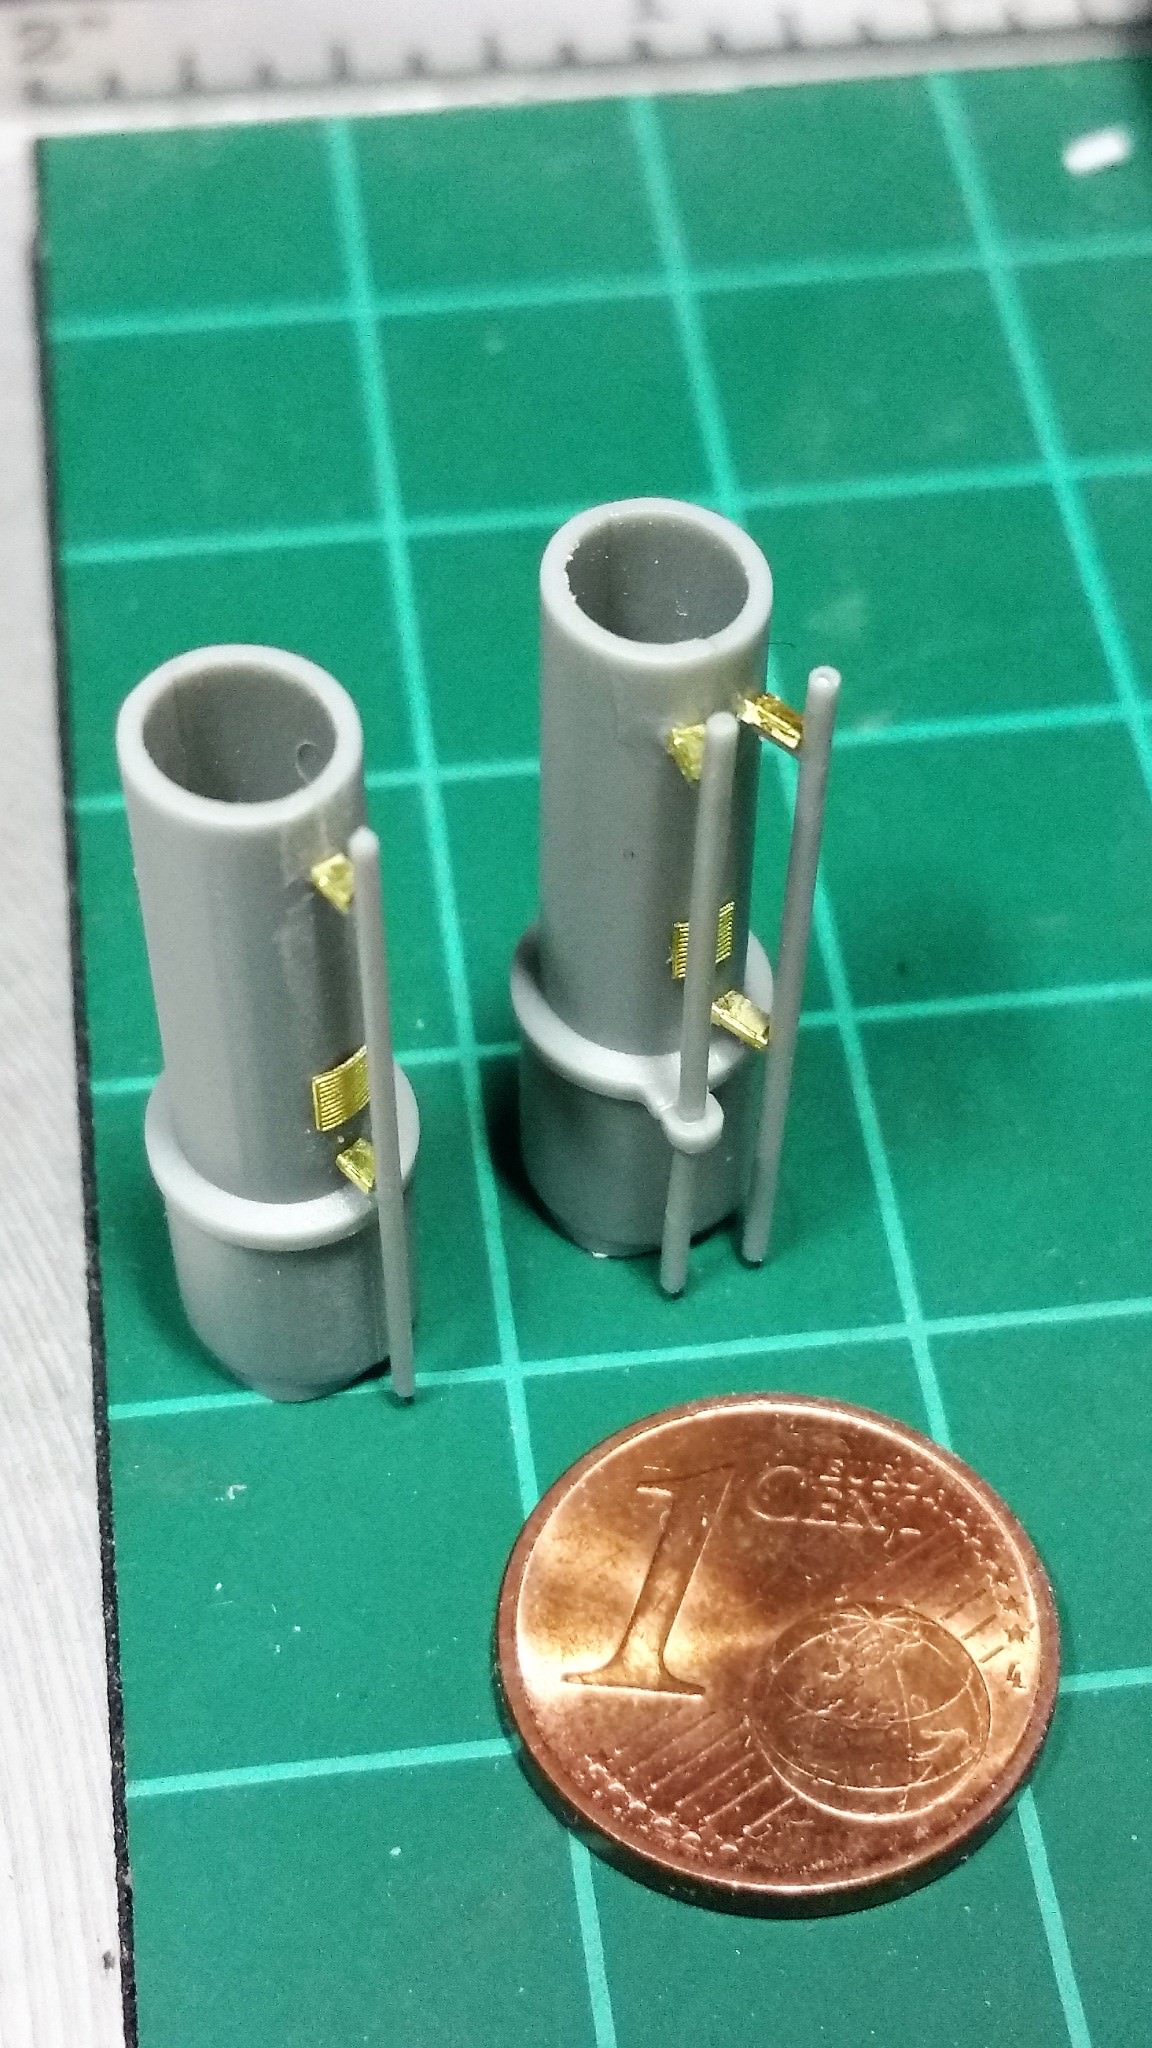
Then I improved the two funnels with the photoetched bits I had got from the Blue Star Admiral PE-set


I opened all the hatches for the two main gun barbettes


I reshaped the second mast according to the chinese drawings I do have at Hand


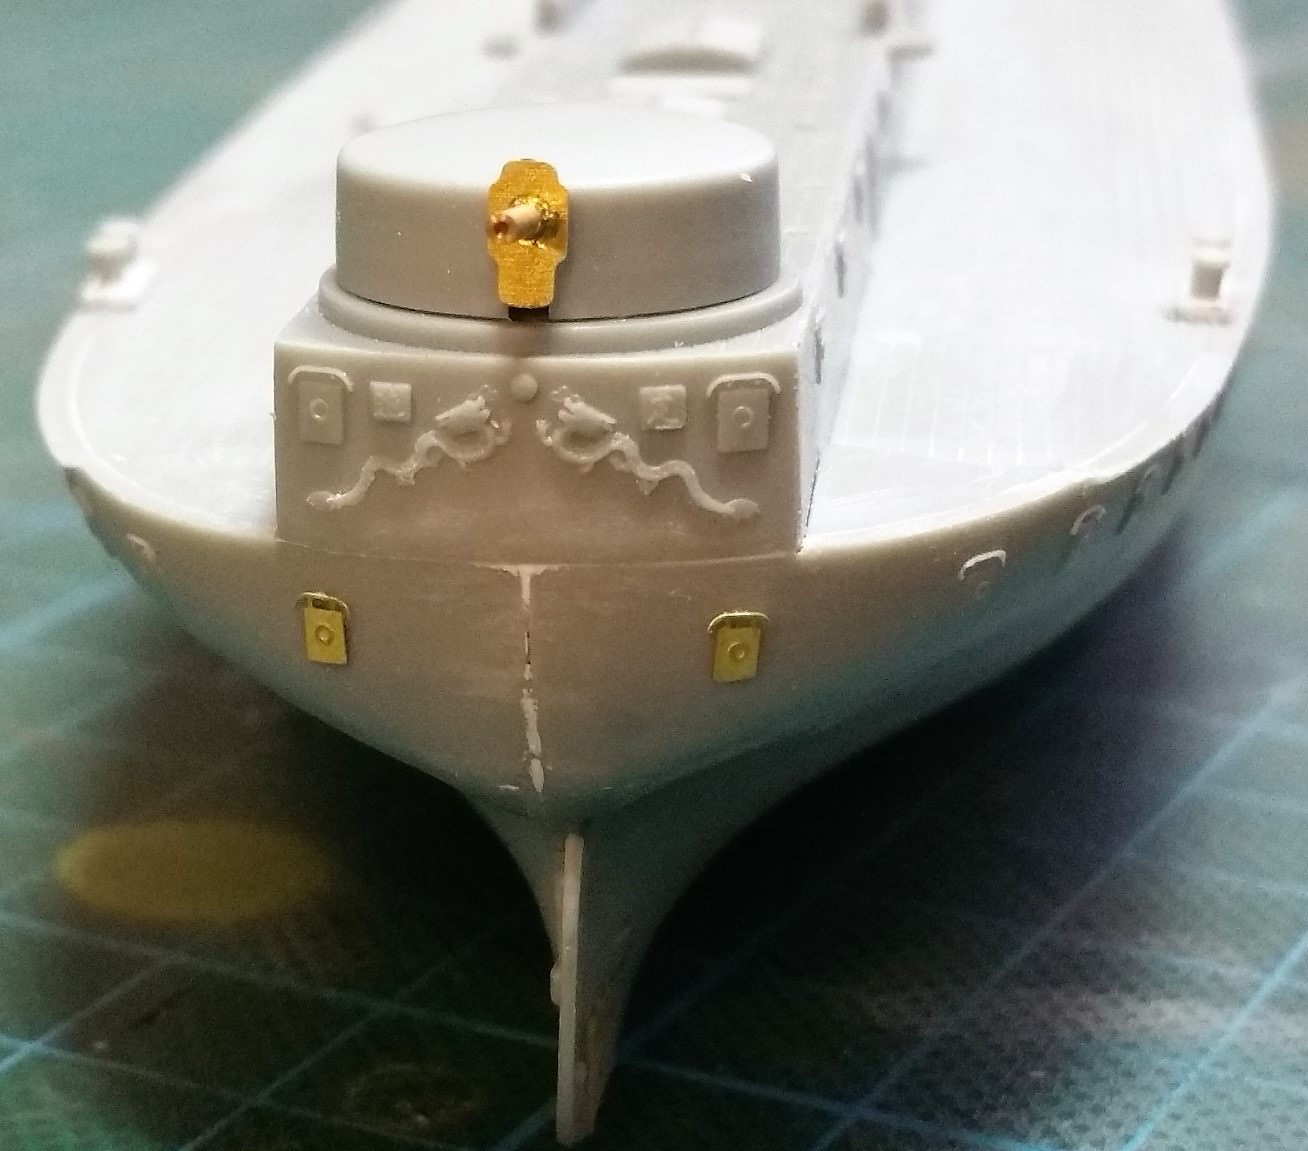
The two hull halves had a small fitting problem at the stern which was easily solved with putty and careful sanding


The etched anchor chain hatches at the bow were added and higher bollard sockets at the ships hull were scratchbuilt


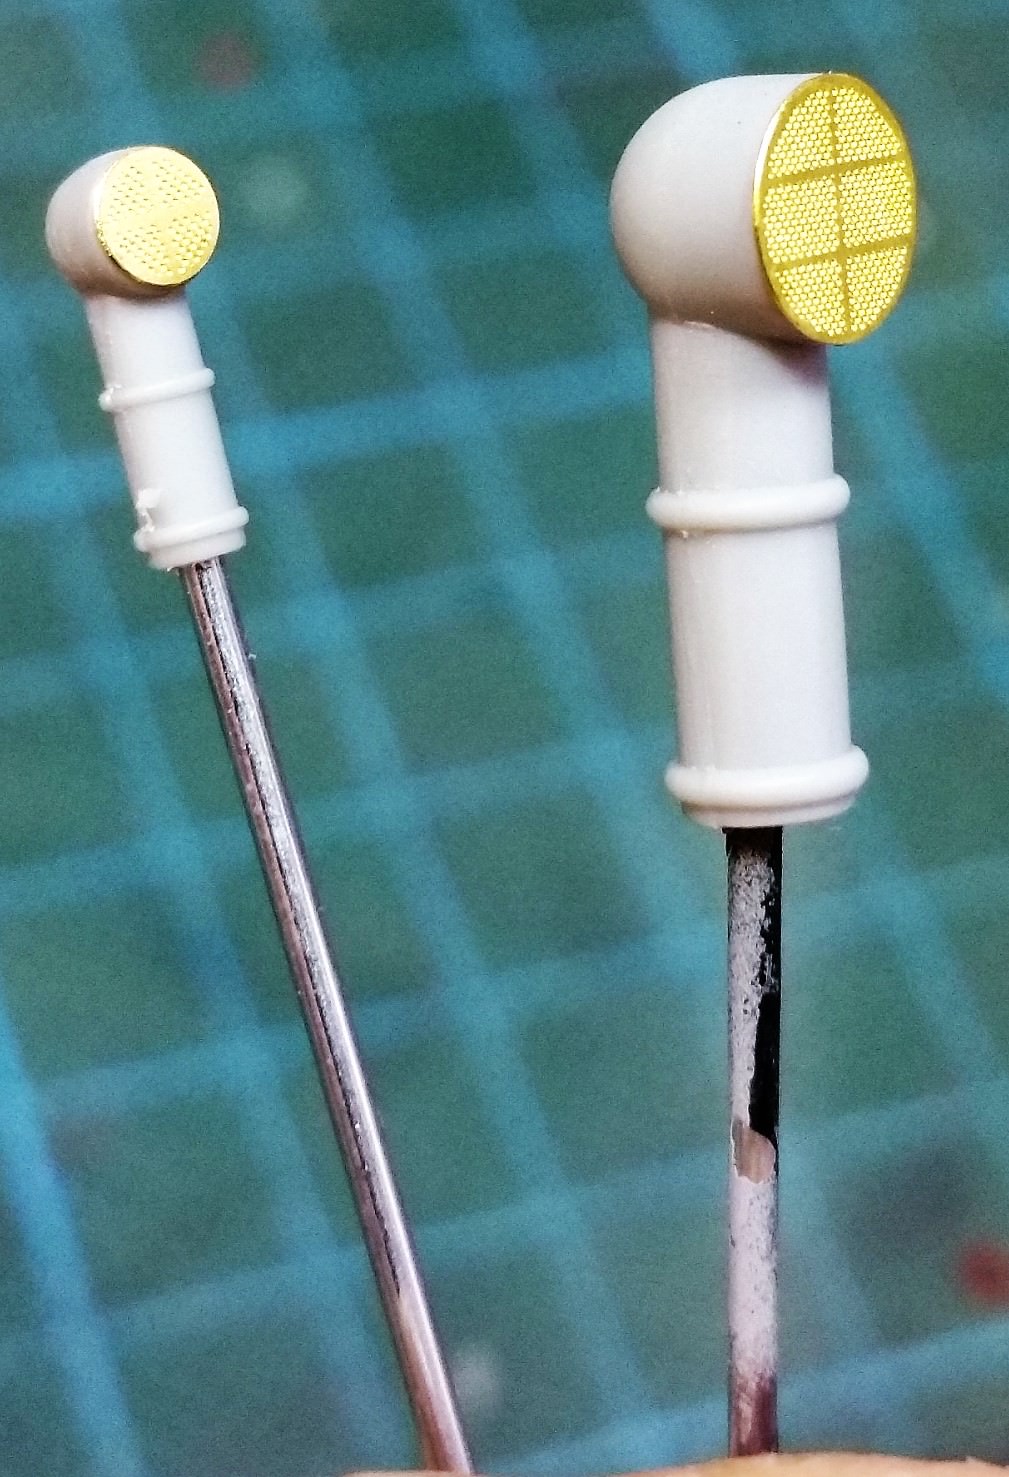
All the seams at the vents were cleaned up and the etched meshwire covers were added


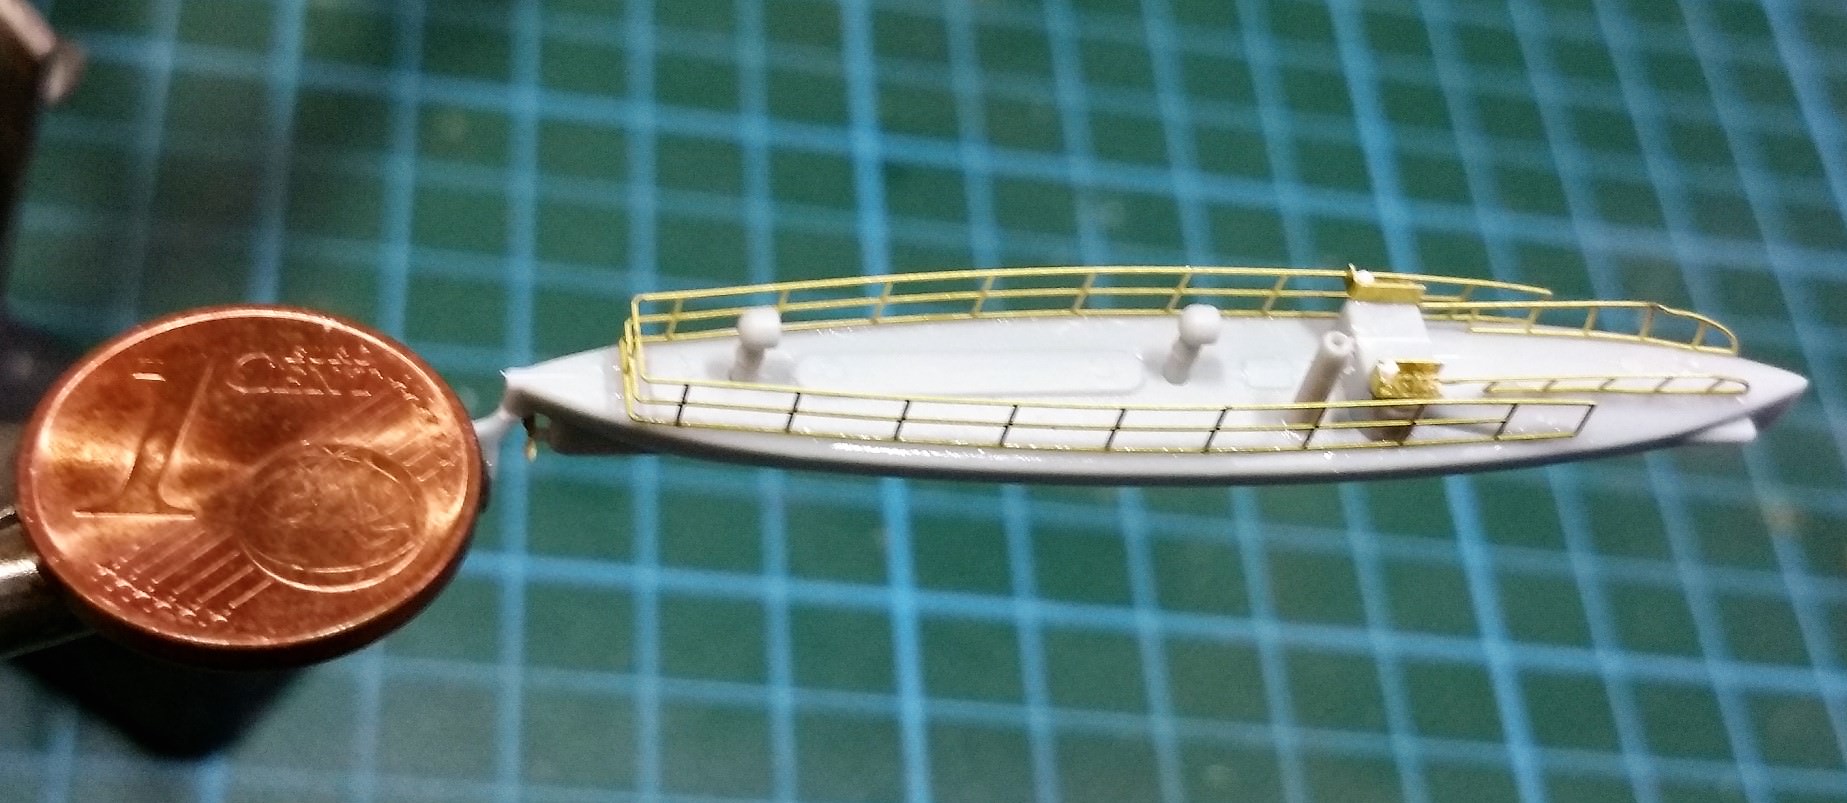
Yesterday I did finished the two small torpedoboats too - a very miniscule work here but I do think they are looking very nice now. I added the Position lamp here with very fine Evergreen plastic rod


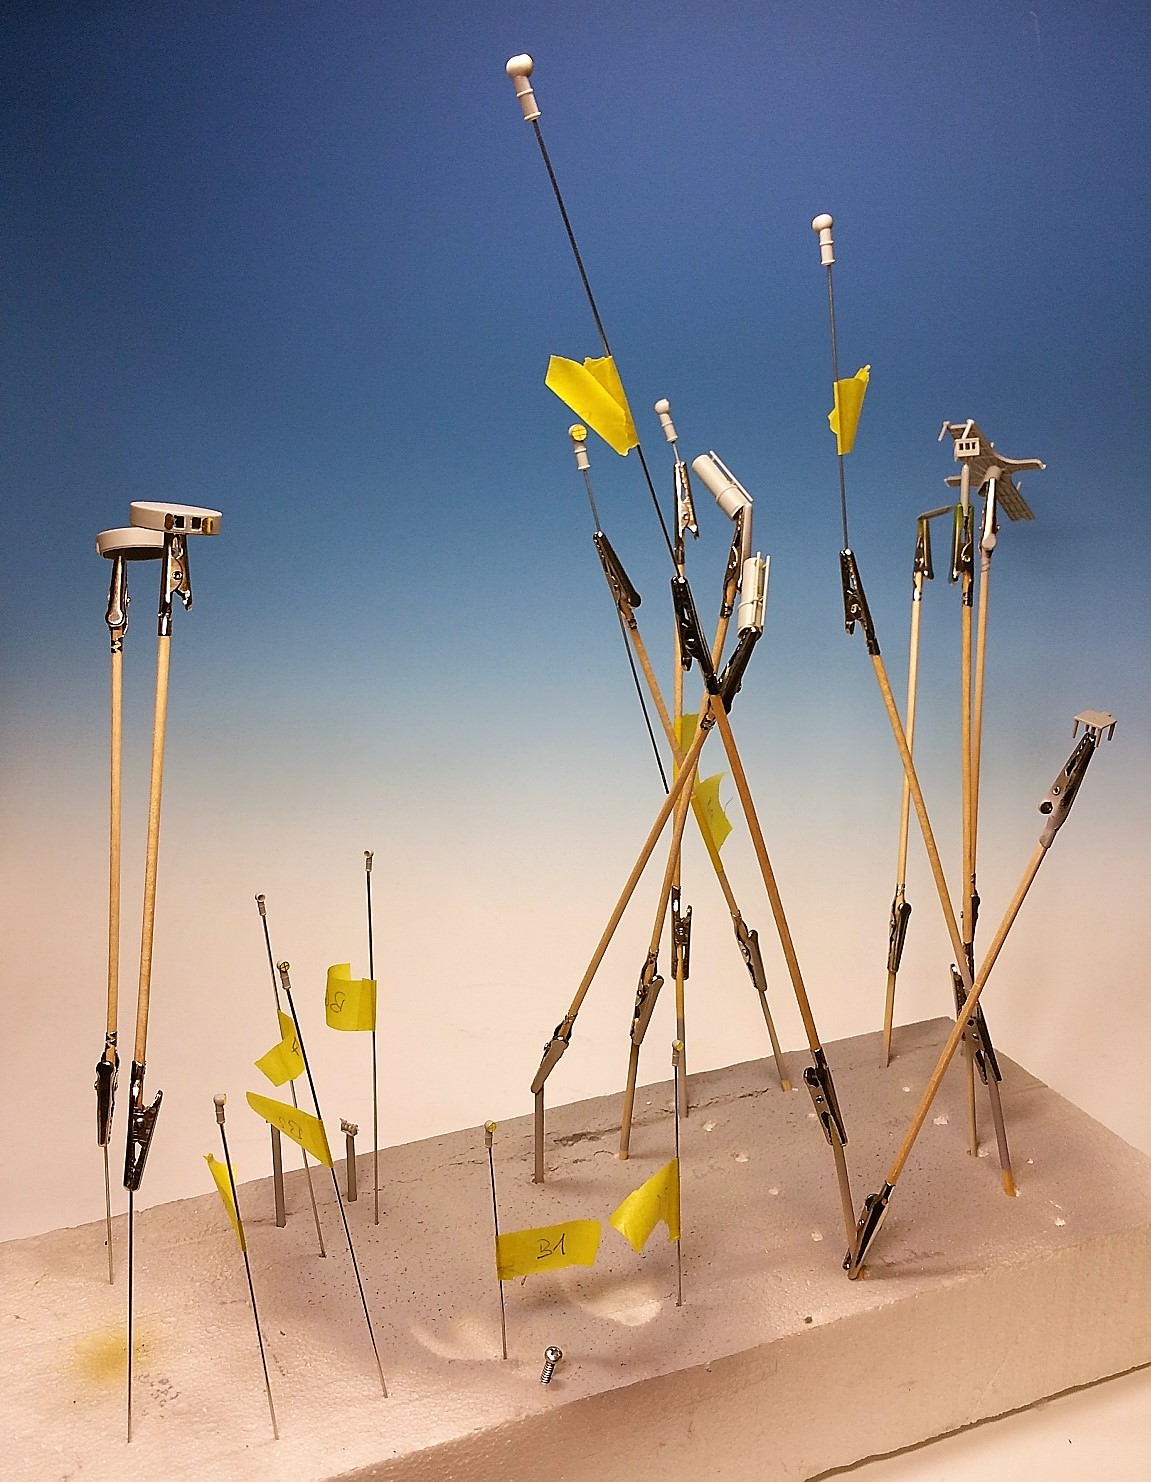
Now every small parts are spiked with wire at a styrofoam block and await to get their primer Color


Up towards the painting room

d6mst0
#453
Visit this Community
Texas, United States
Joined: August 28, 2016
KitMaker: 1,925 posts
Model Shipwrights: 1,298 posts
Posted: Saturday, December 02, 2017 - 05:02 PM UTC
Making nice progress. Your work on the masts and PE are excellent. She is really starting to take shape.
TimReynaga
Staff MemberAssociate Editor
MODEL SHIPWRIGHTS
Visit this Community
California, United States
Joined: May 03, 2006
KitMaker: 2,500 posts
Model Shipwrights: 1,830 posts
Posted: Saturday, December 02, 2017 - 08:40 PM UTC
Thomas, she's looking good! Those higher bases for the bitts on deck will pay off when you place the wood deck. I always thought it strange when bitts on models appear sunken into the wood!
RedDuster
Visit this Community
England - South East, United Kingdom
Joined: March 01, 2010
KitMaker: 7,078 posts
Model Shipwrights: 6,649 posts
Posted: Sunday, December 03, 2017 - 02:07 AM UTC
Coming on Thomas,

The rework on the masts look very good, and I like the open turret doors, they do add depth to the model.

Cheers

Si
RussellE
#306
Visit this Community
Victoria, Australia
Joined: June 27, 2010
KitMaker: 3,959 posts
Model Shipwrights: 2,777 posts
Posted: Sunday, December 03, 2017 - 02:46 PM UTC
Cracking progress Thomas
Black_sheep
Visit this Community
Bayern, Germany
Joined: December 11, 2009
KitMaker: 823 posts
Model Shipwrights: 551 posts
Posted: Friday, December 08, 2017 - 01:33 AM UTC
Thank you for your comments gentlemen,

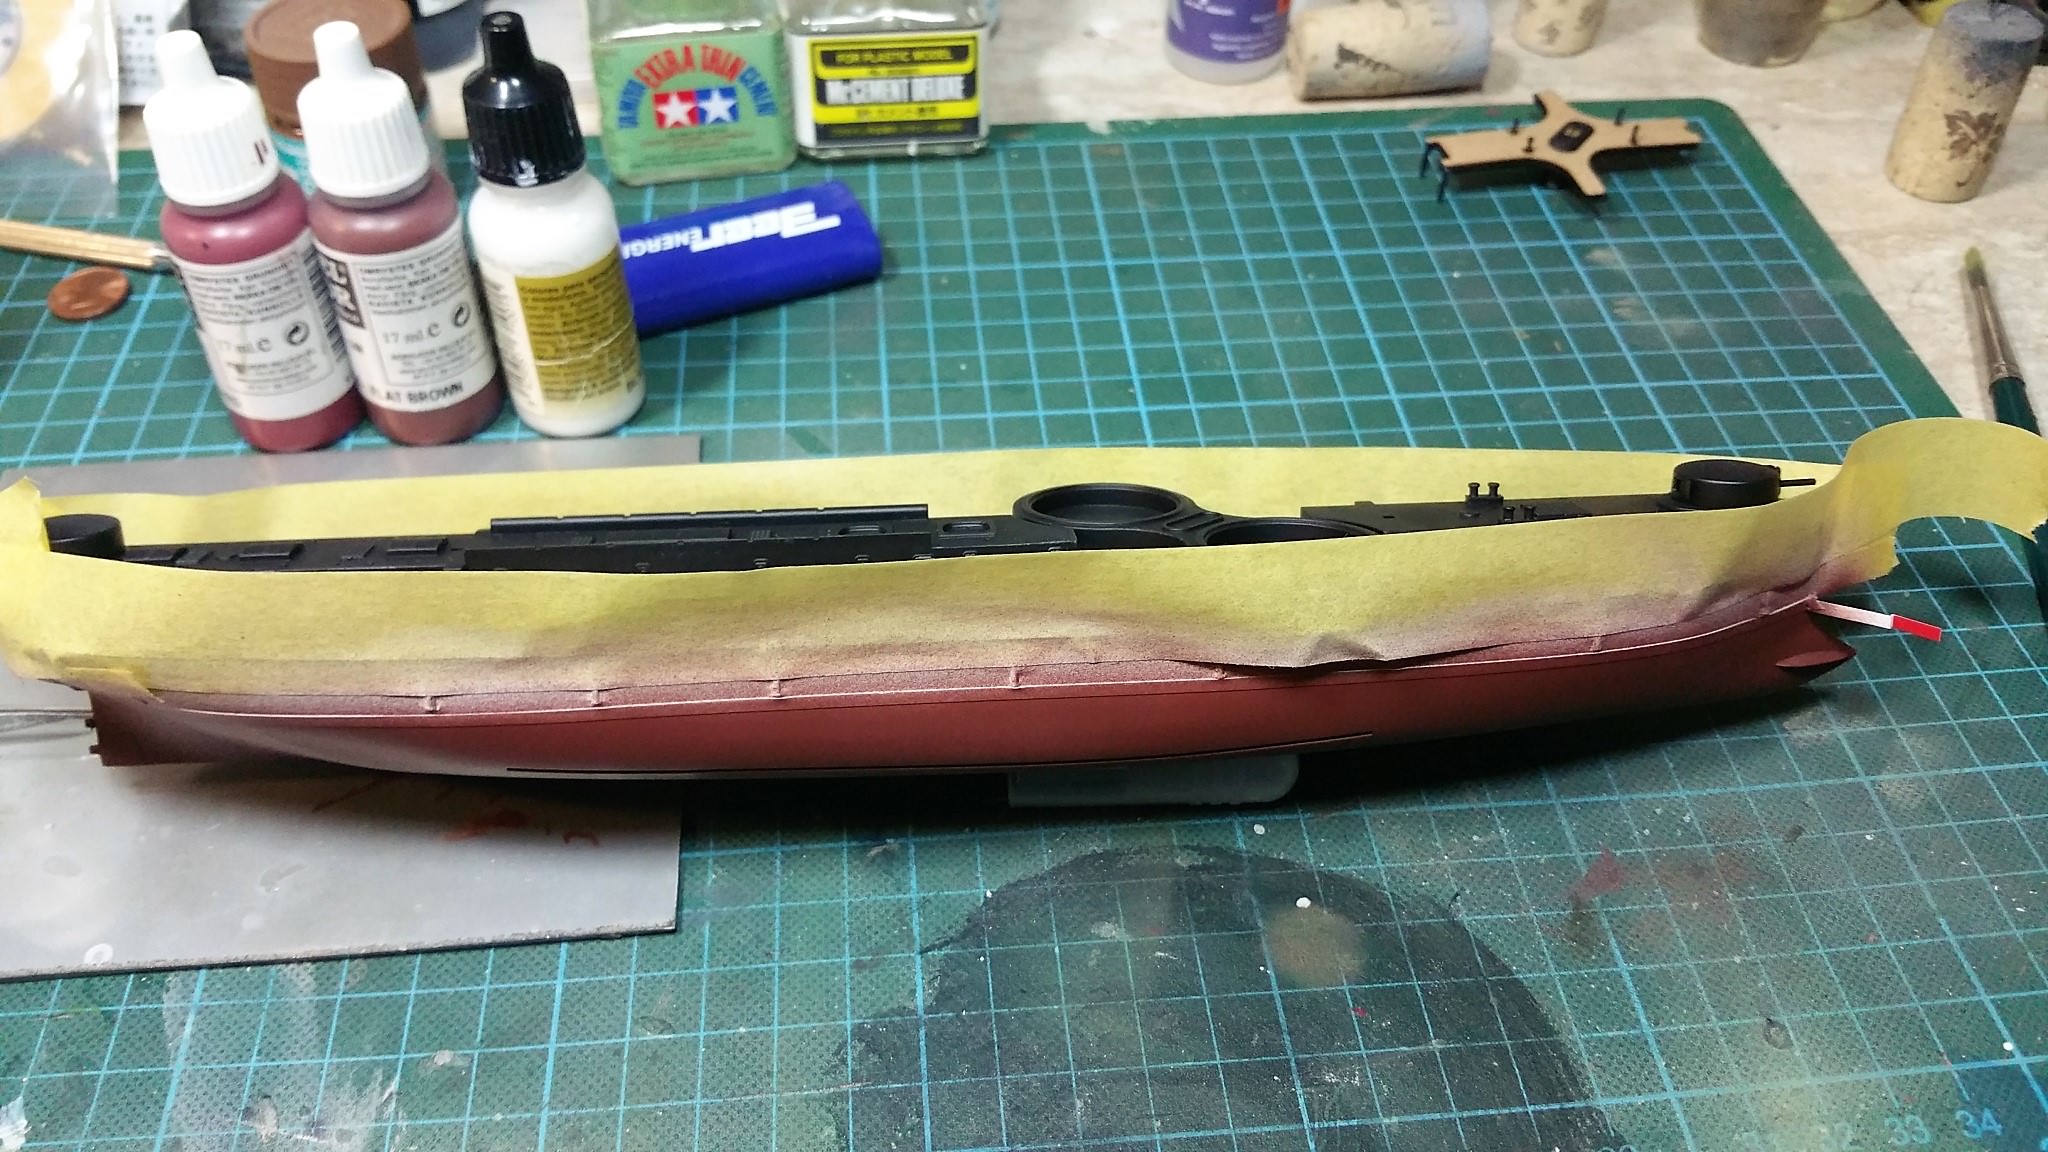
today I have a small update for my build: I did primed the whole parts with Vallejo Black Color from the rattlcan - nice stuff. After it I masked off the Areas for the White waterline and the antifouling Color which followed:


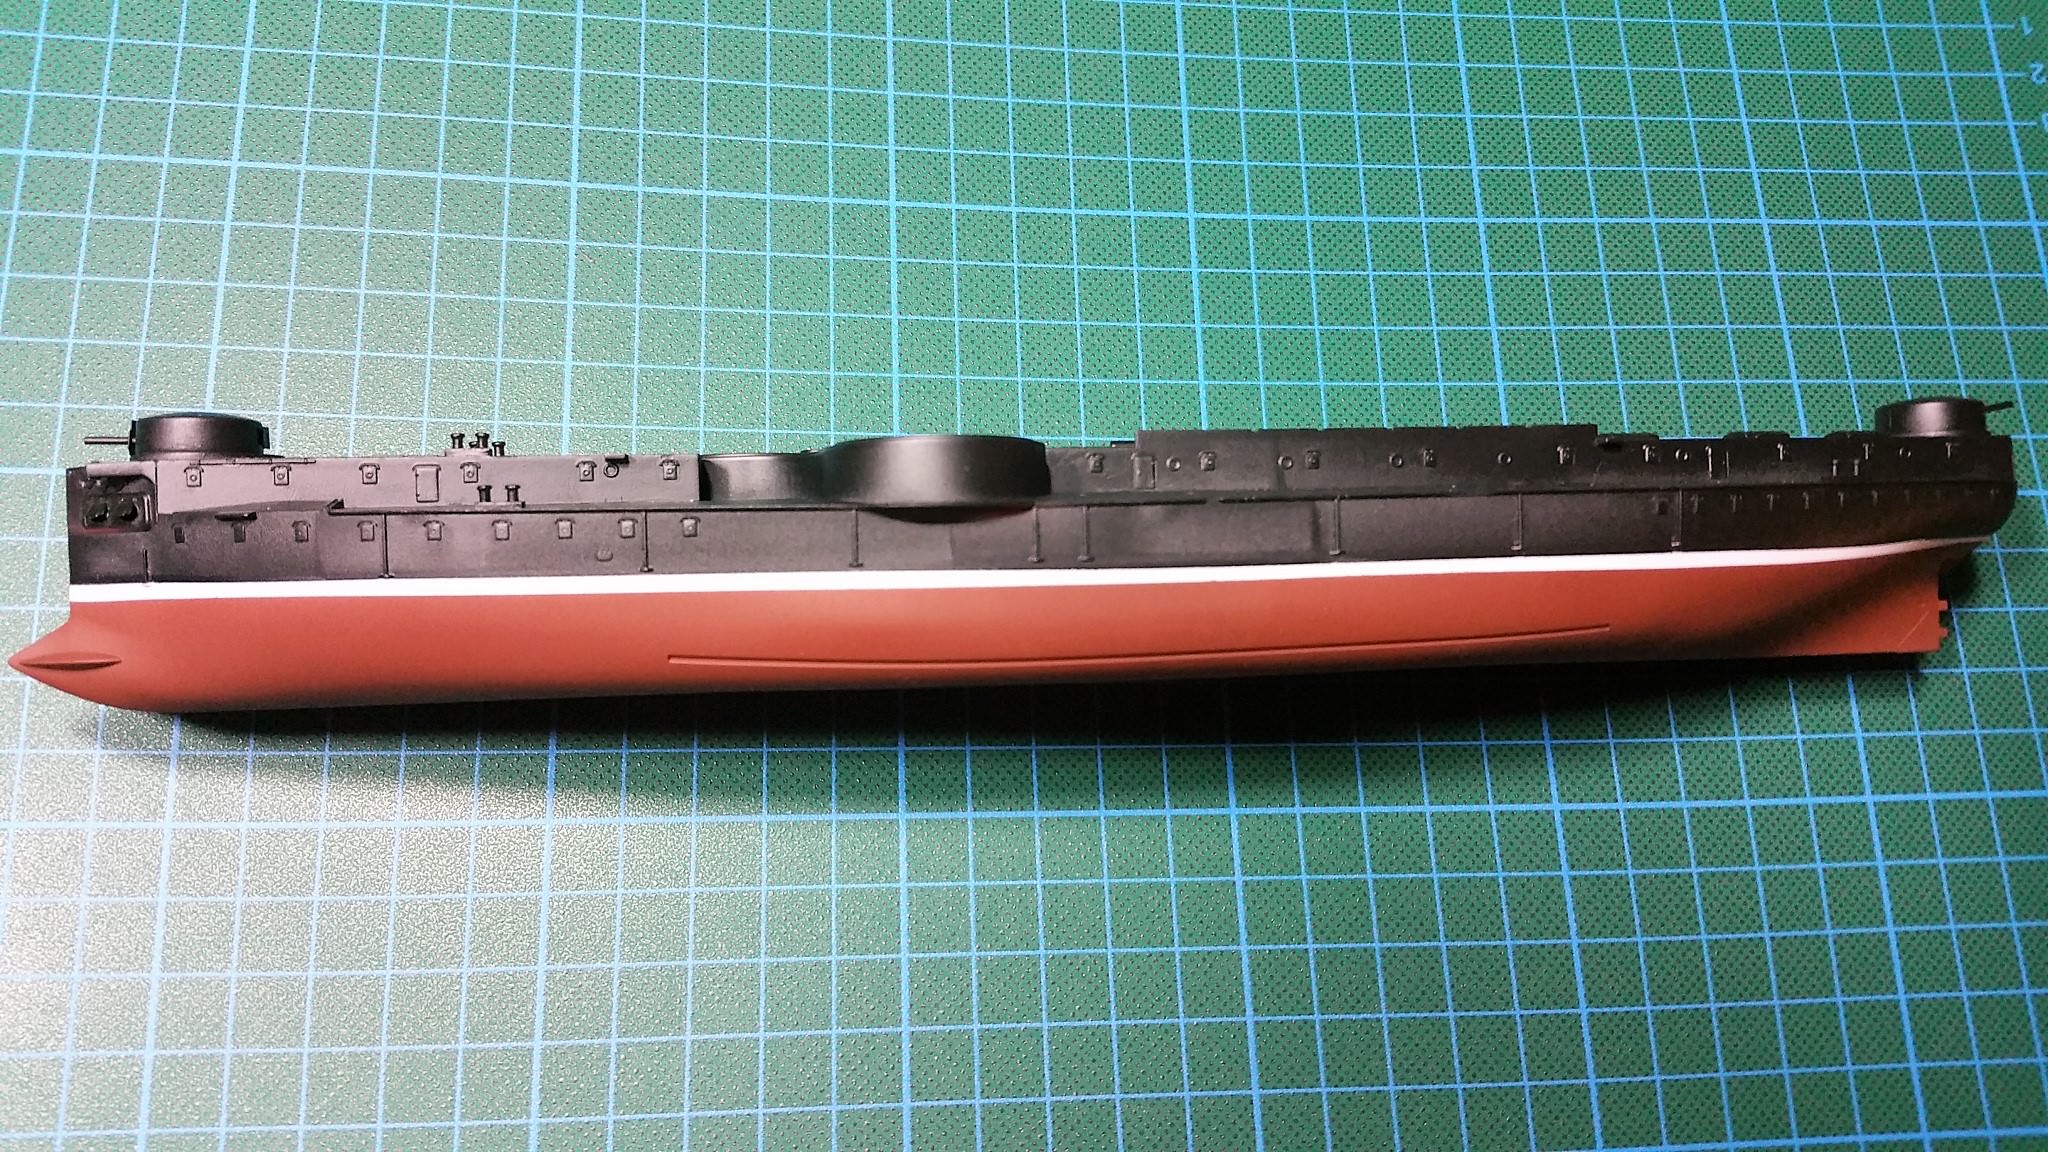
...and this is the satisfying result so far:


The lines are very crisp and clean, just a few spots at the black color which needs some corrections. Bronco asked for "Hull Red" color for the antifouling paint but showed no recommendations for specific color numbers. Vallejos Hull red Color was much more darker then the red at the instructions but looked more realistic. I lightened it up with some more Vallejo 70926 "normal" red and I think this color does look realistic now.

Next comes the yellow colors
 _GOTOTOP