_GOTOBOTTOM
Ships by Class/Type: Civilian Ships & Boats
Covers all non-sail civilian ships, craft, and boats.
Lindberg 1/16 Chris Craft 40' Sport Fisherman
awiskerke
Visit this Community
Netherlands
Joined: December 09, 2008
KitMaker: 336 posts
Model Shipwrights: 333 posts
Posted: Friday, May 04, 2018 - 03:09 PM UTC
After years of trying to find a reasonably priced vintage Lindberg kit I finally managed to obtain one last month. It's the kit that was reissued in 1984, the original kit was released in 1965 :


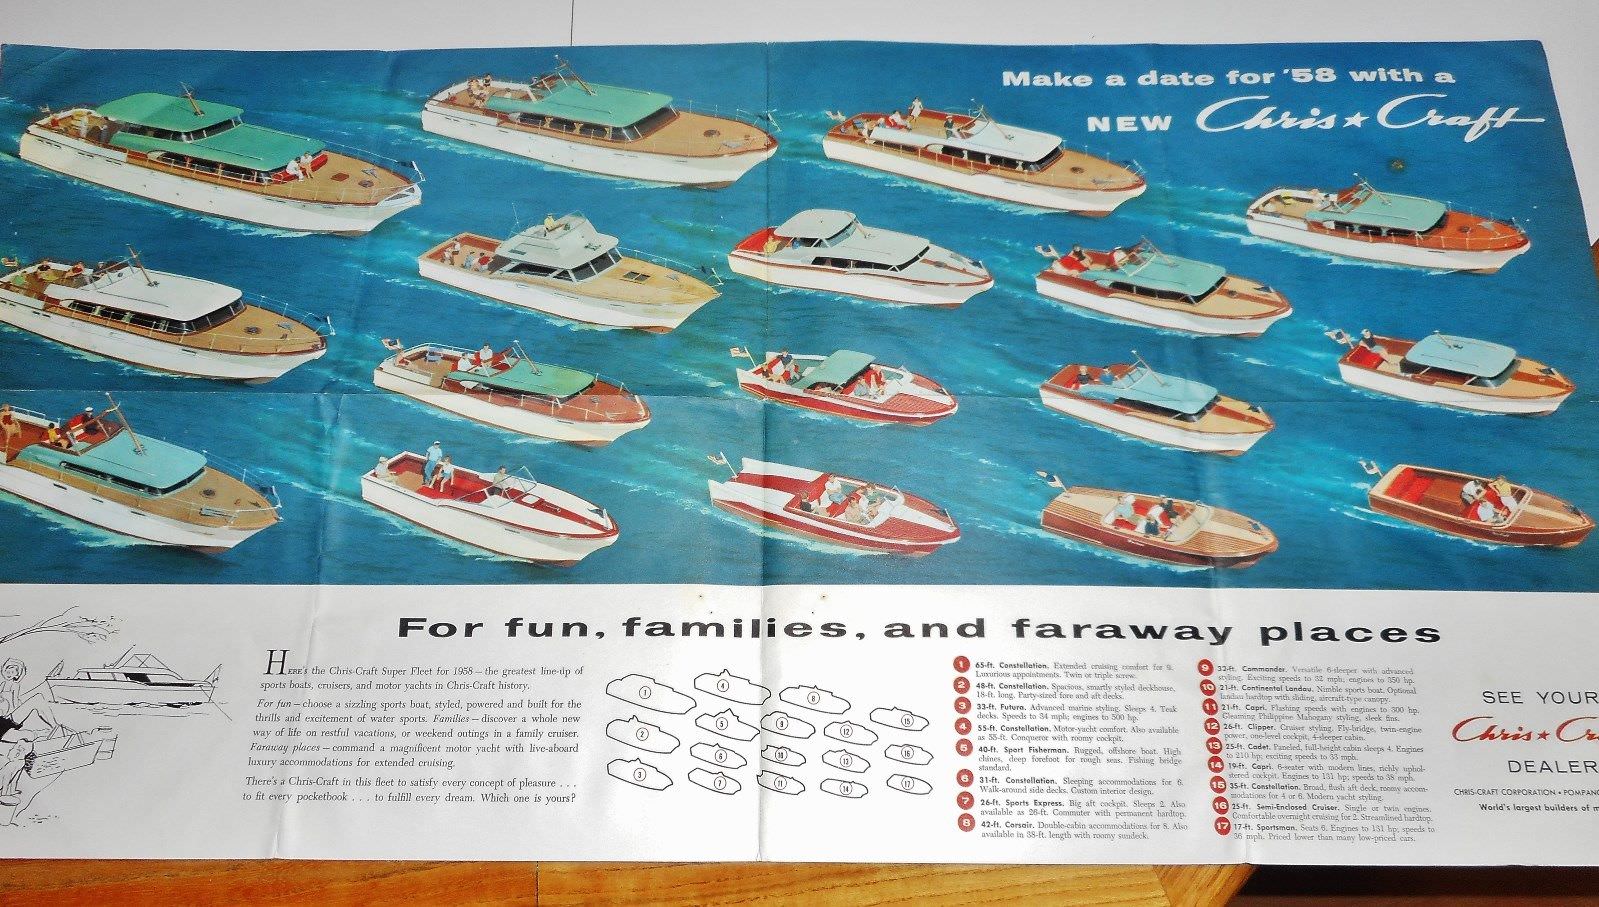
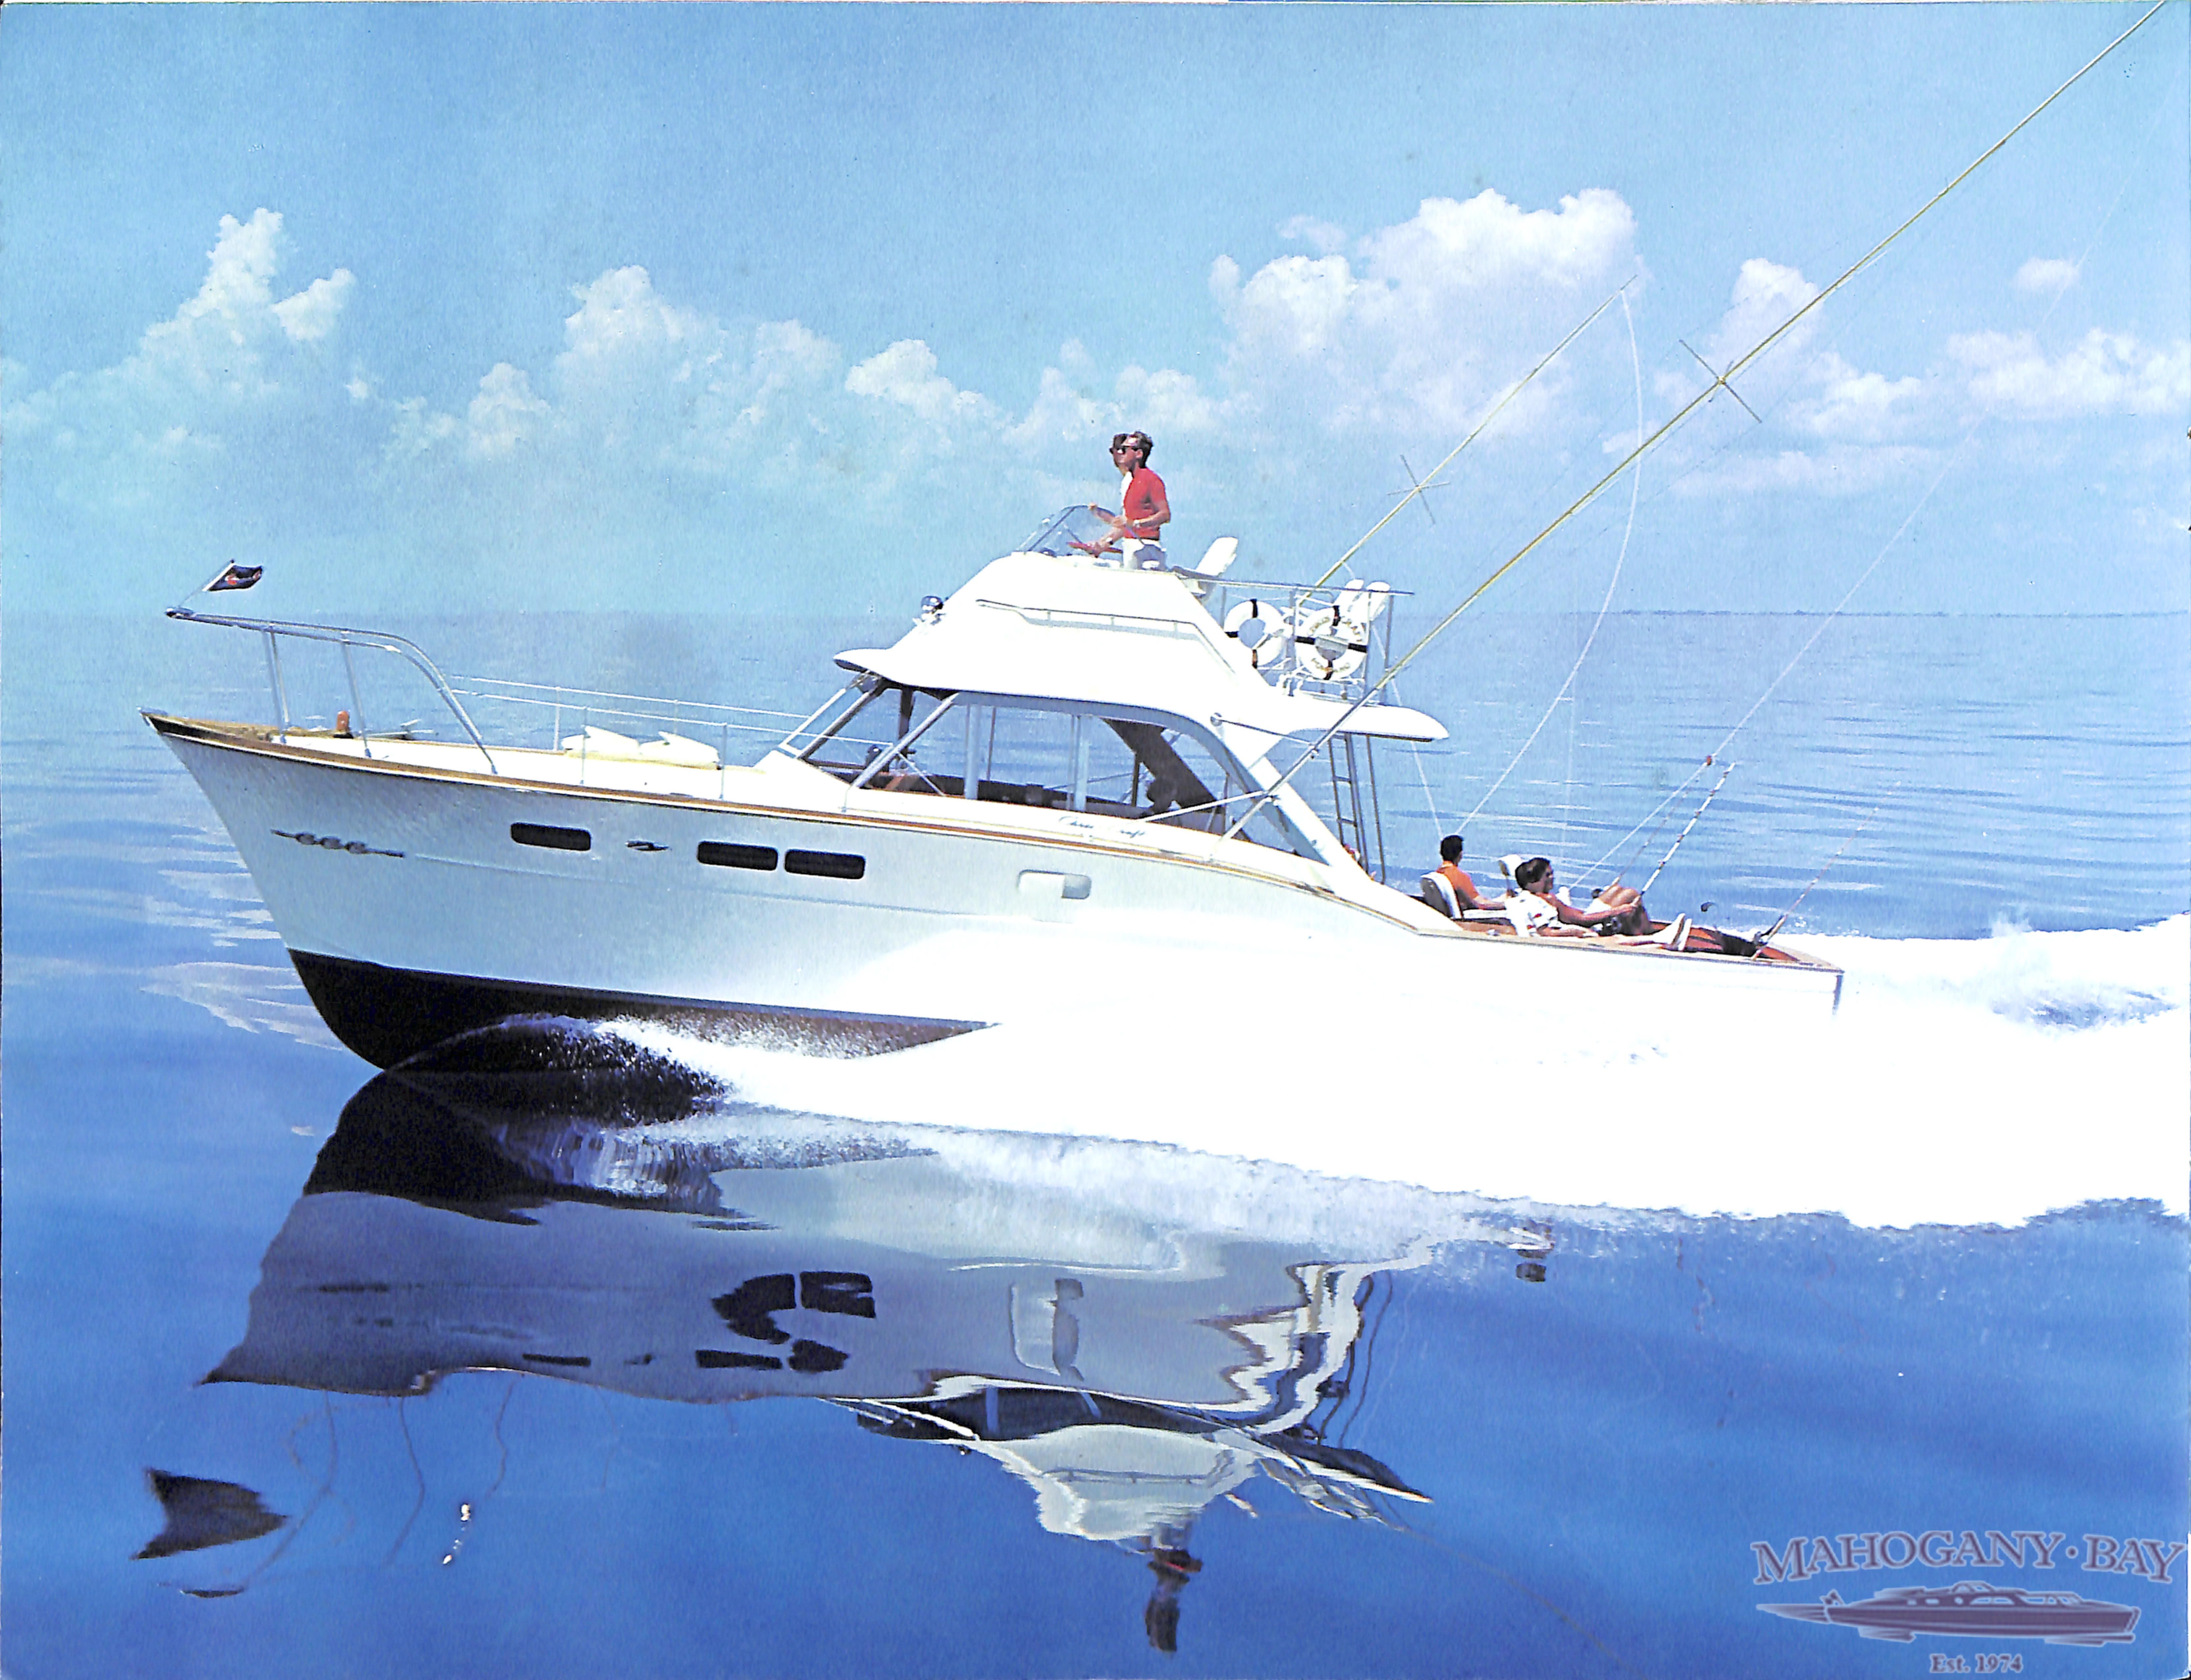
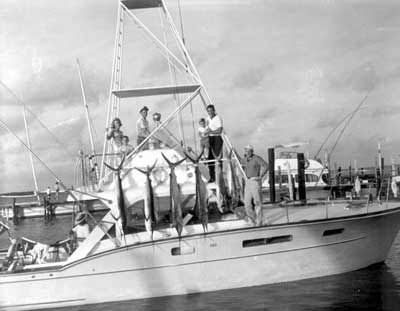
The kit is based on a 1958-1962 Chris Craft 40' Sport Fisher. These boats were entirely made of wood, glass fibre was used after 1962. Some pics from vintage CC brochures :


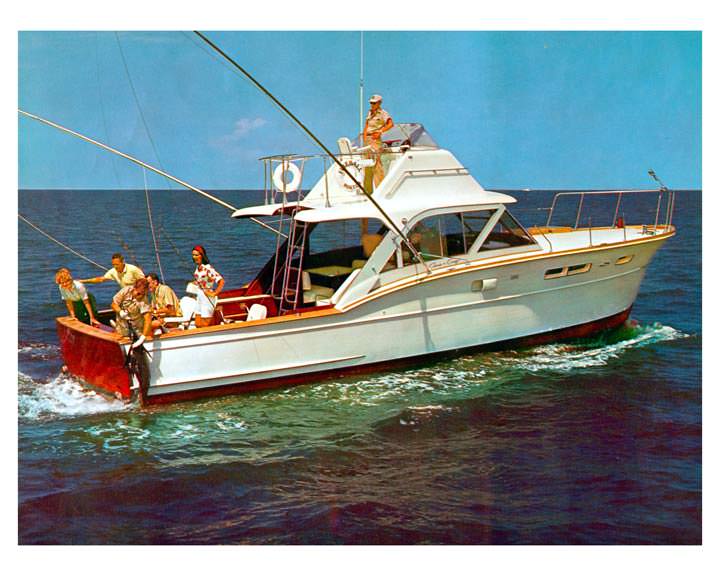
Other images are hard to find :


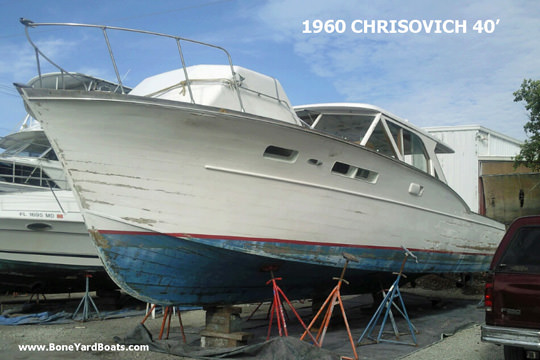
Apparently Chris Craft more or less copied a Rybovich design :

" Over the years the perfect proportions of the Rybovich boats, the originators of sportfishing boats, invited cloning. In 1956 at the Hemingway Fishing Tournament in Cuba, Bob Gill, owner of a 36 foot Rybovich, was invited to an evening event that kept him away from his boat long enough for Cuban brothers Luis and Pepin Aizorba to spirit his boat away. They hauled it, measured it, photographed it, made templates of the hull and returned it to his slip. No one knew until the next year when Johnny Rybovich returned to Havana and was taken to see the semi-completed Cuban Rybovich now known as a Cubavich. He was upset but, as a businessman, he saw an opportunity and sold them the fighting chairs and outriggers they needed to complete the boats.

Around the same time Chris Craft copied much of the design of the Rybovich, incorporating the graceful broken shear line and other features into their line of 33 foot and 40 foot sportfishing boats. A lawsuit followed and Chris Craft closed their Wisconsin operation where the boats were made and started the new line in Pompano Beach, Florida. The new line of boats looked the same on the outside but had new interiors, different from the first thirteen boats built by Chris Craft. The Chris Crafts in that series were known as Chrisovich boats."
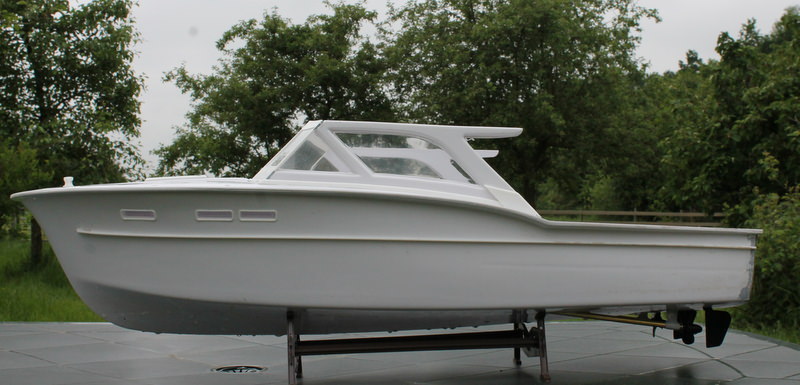
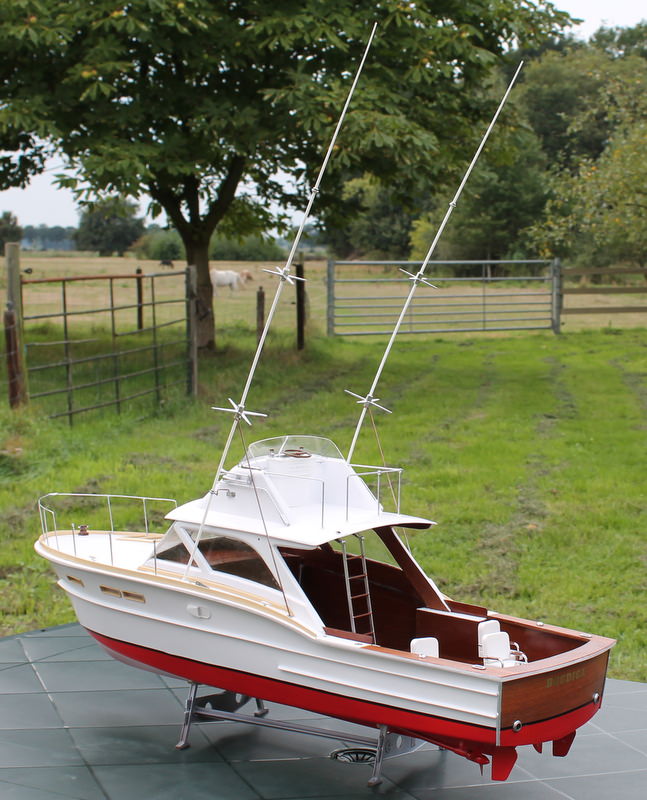
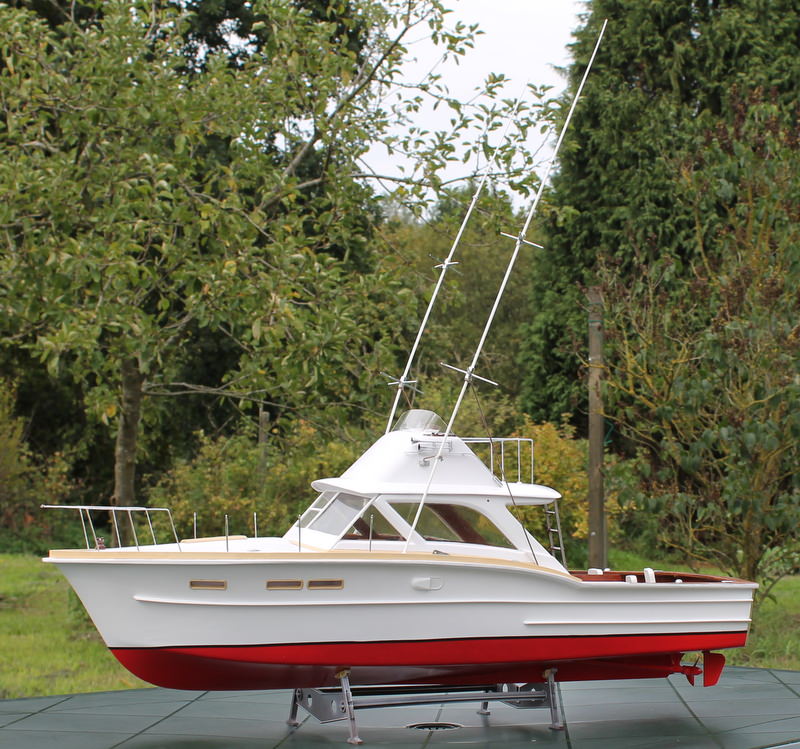
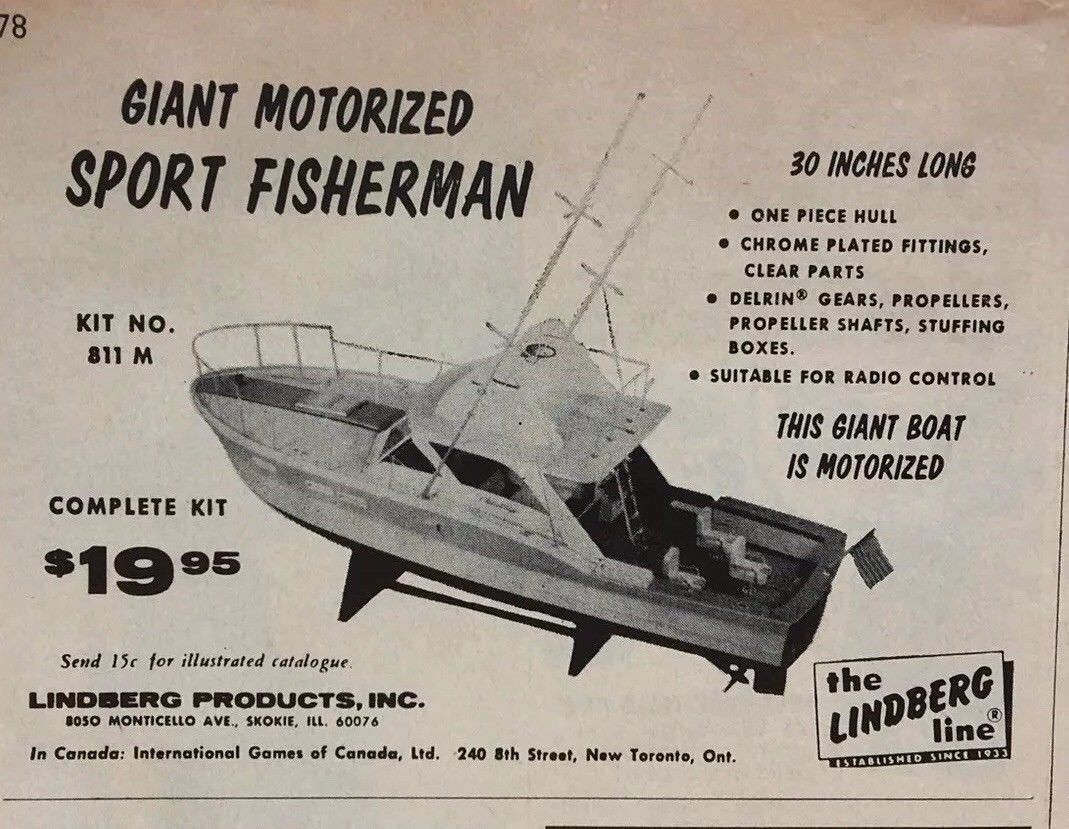

Box art of my kit :


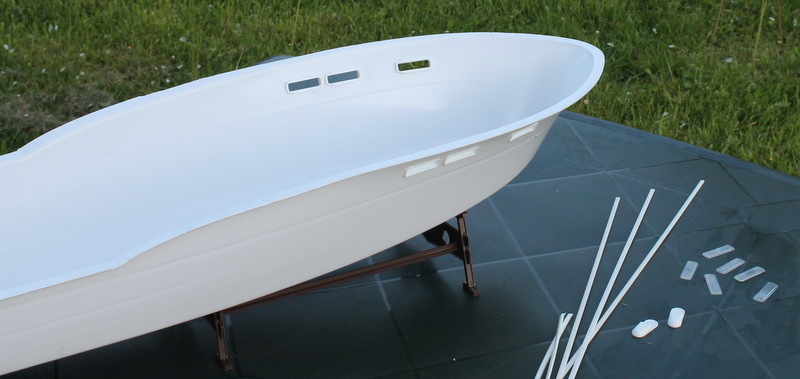
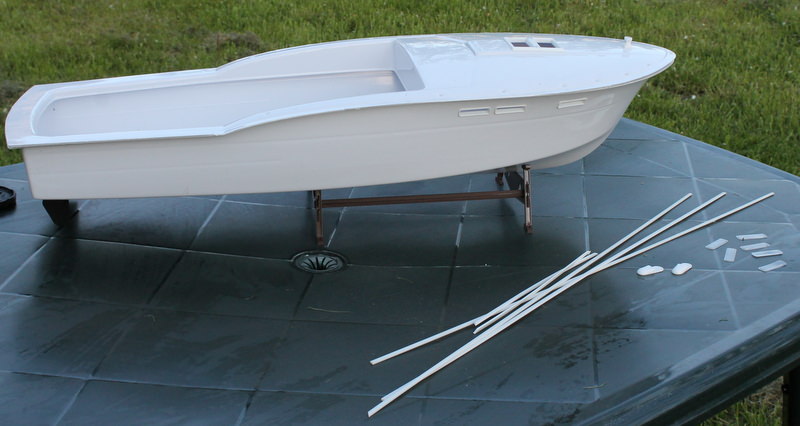
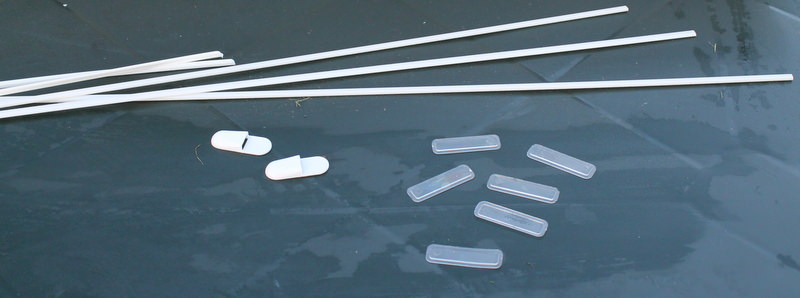
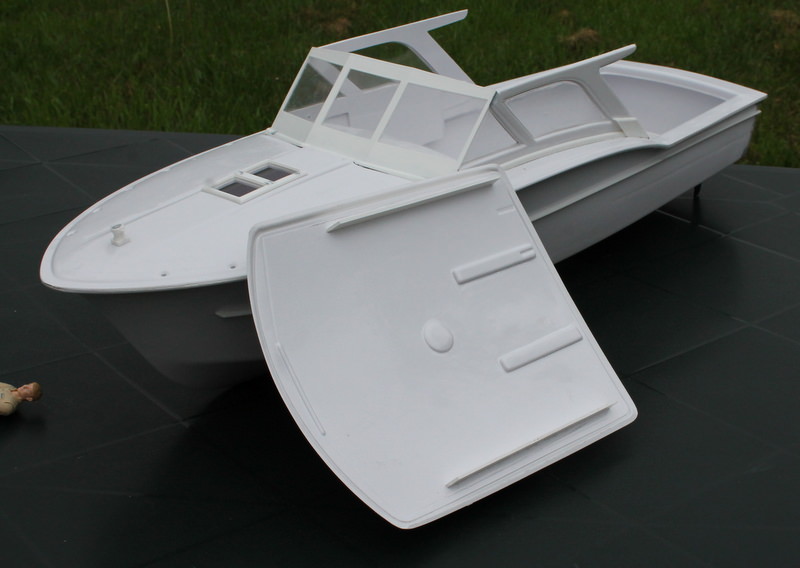
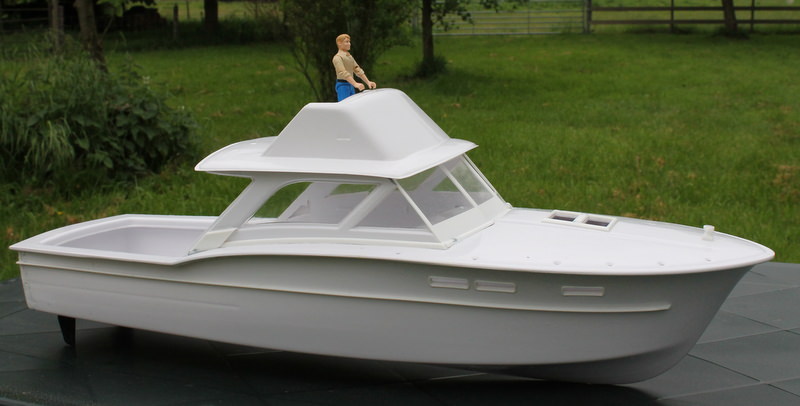
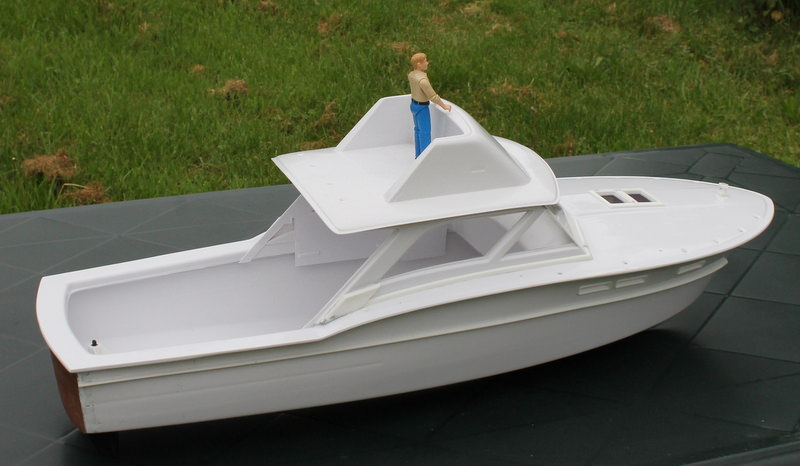
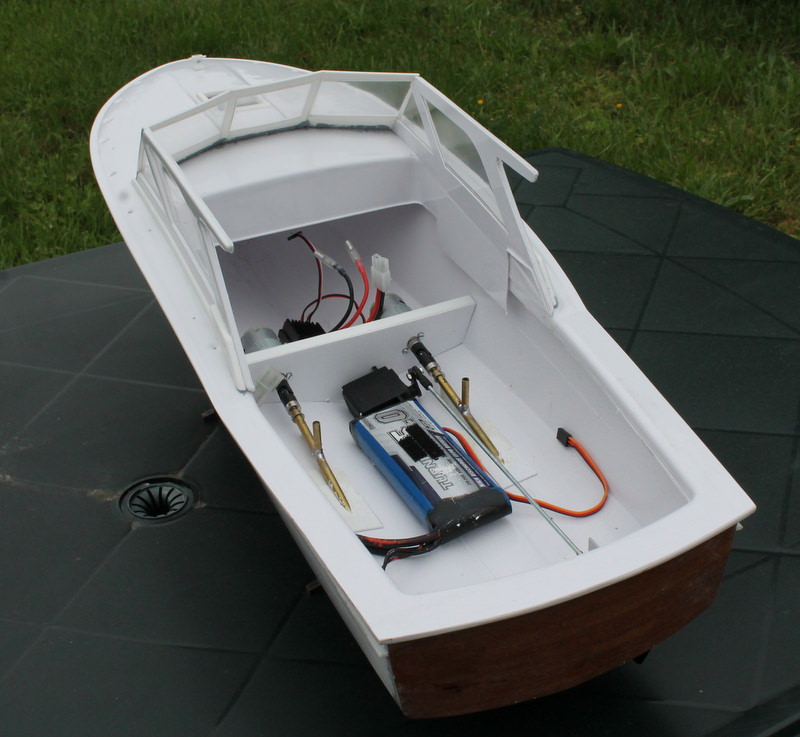
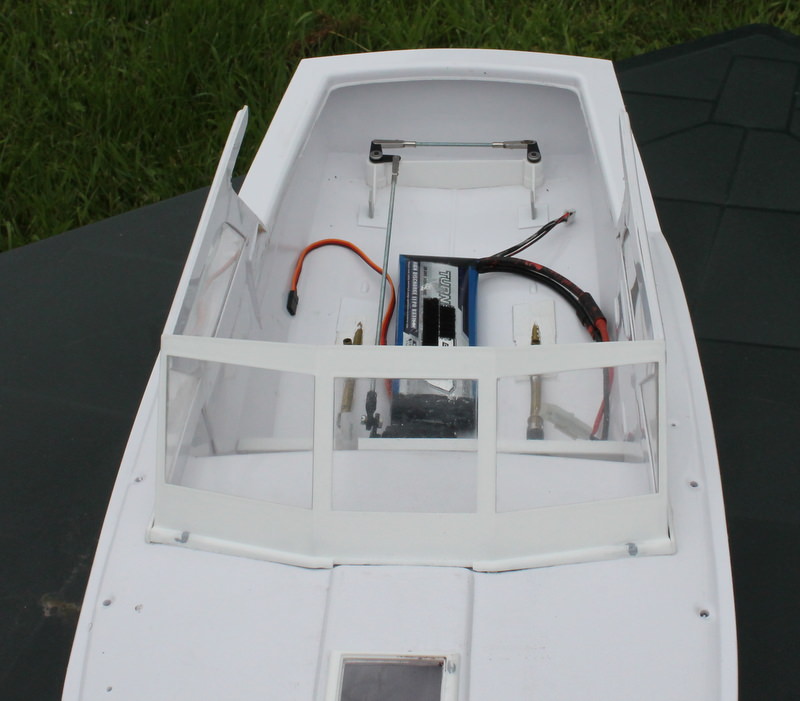
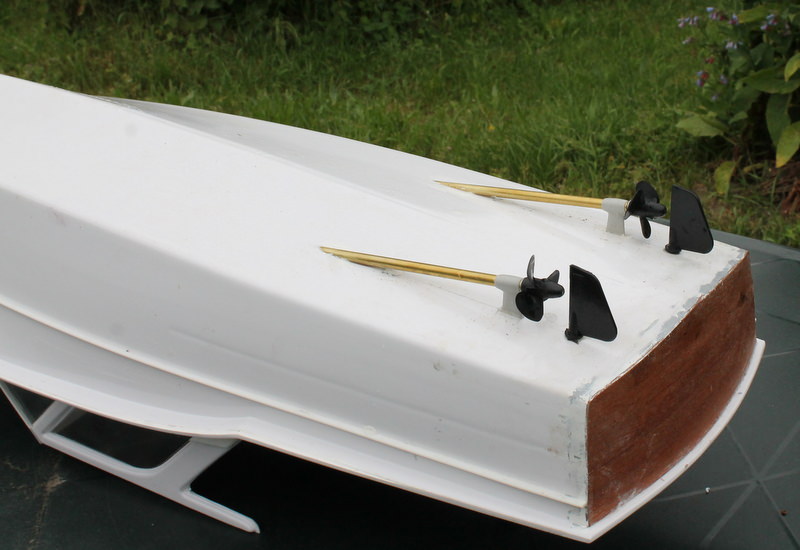
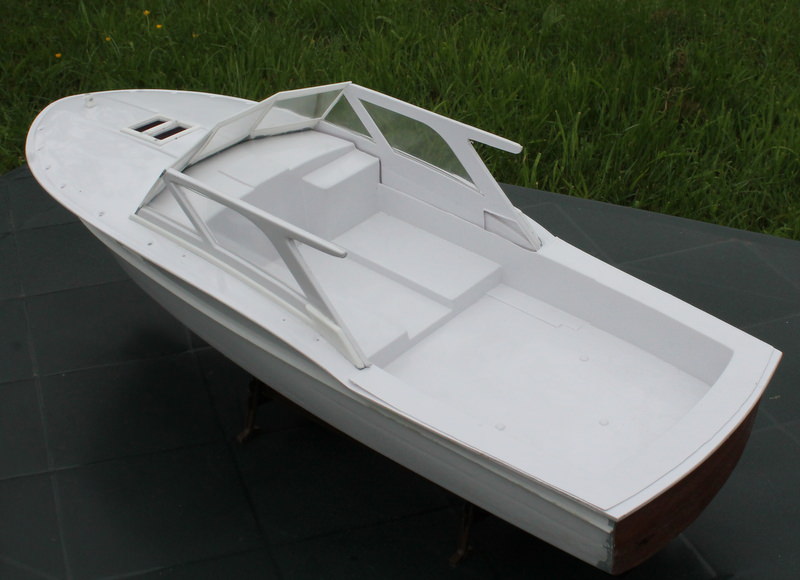
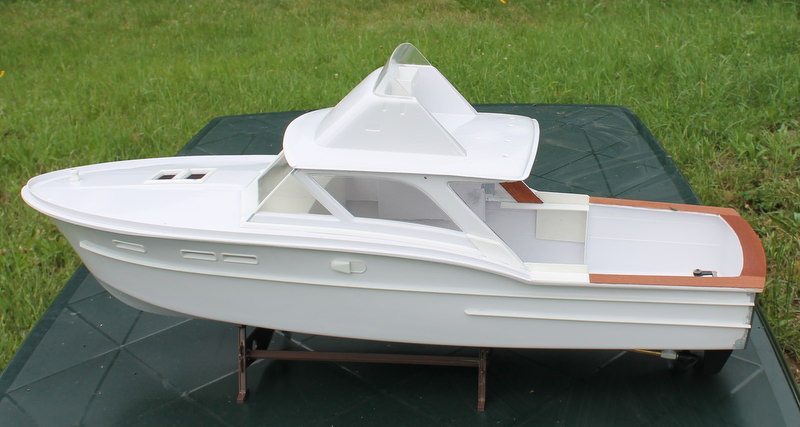
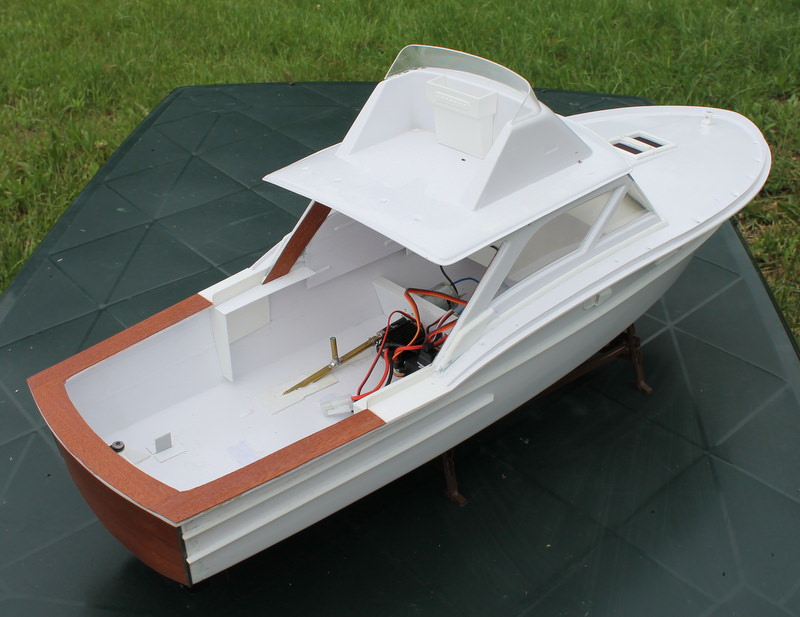
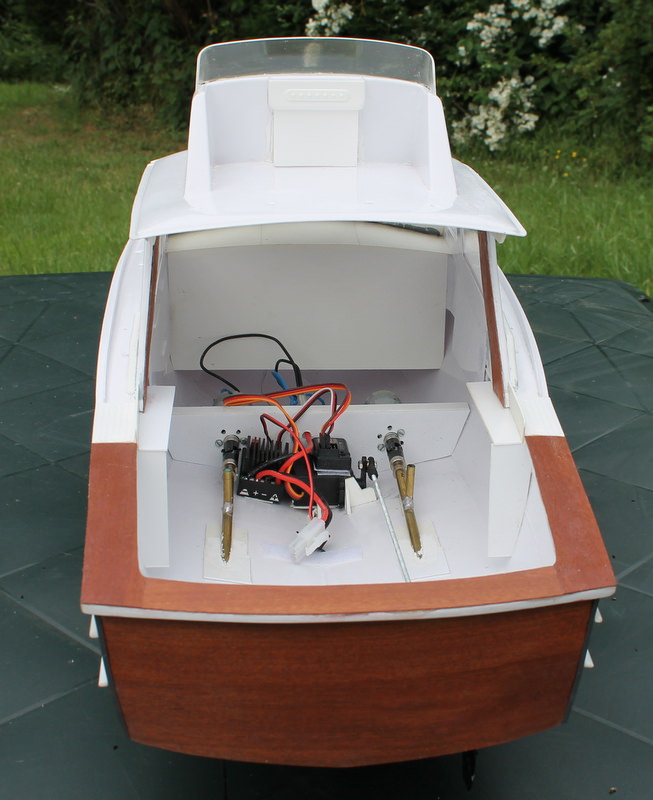
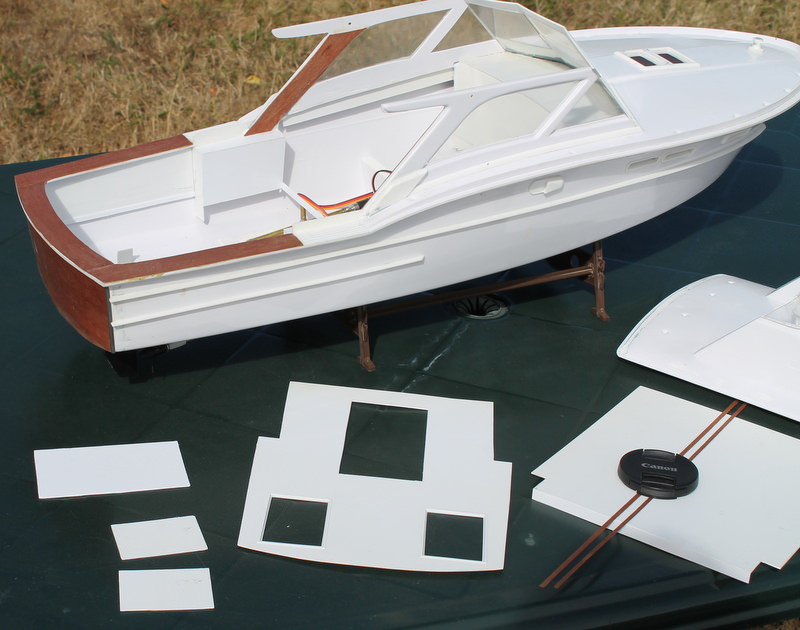
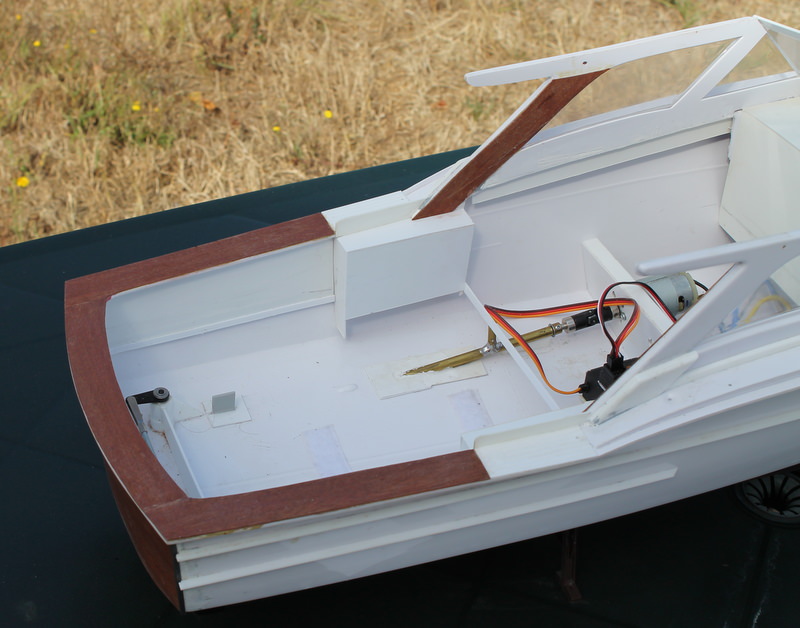
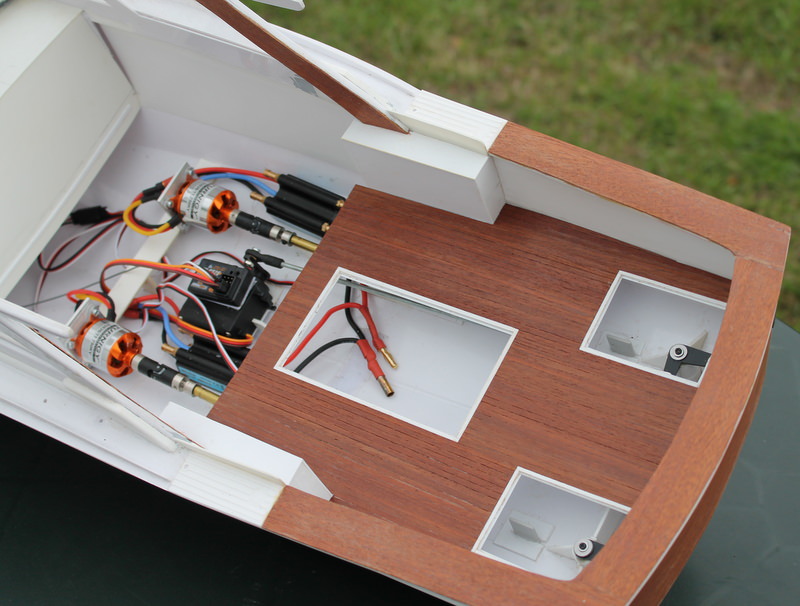
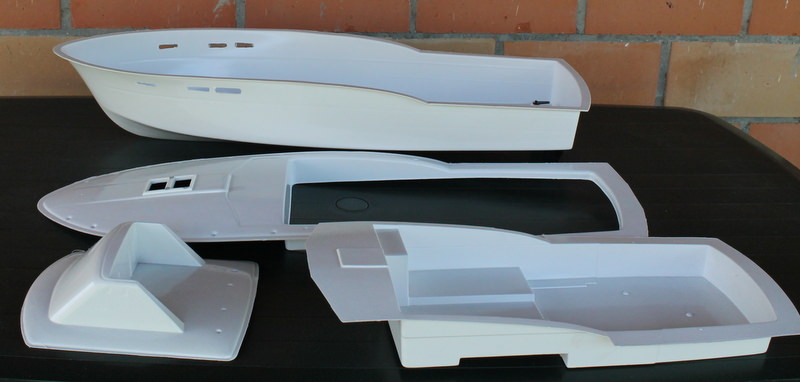
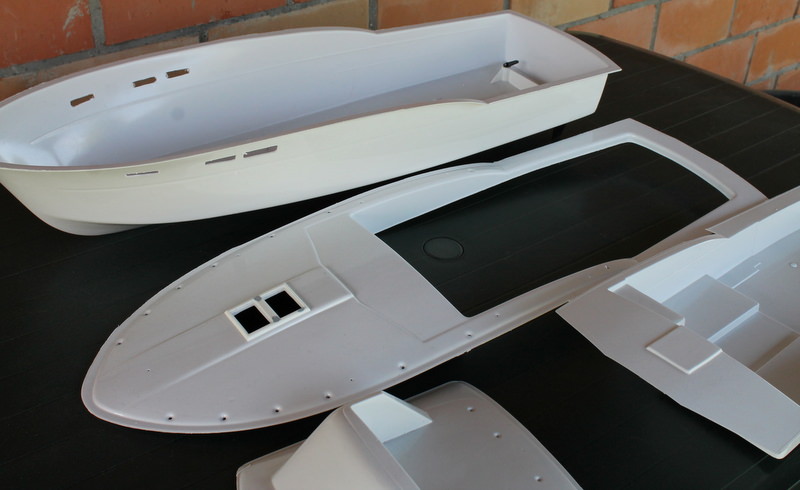
Main vac formed parts :


To be continued.


Arjan


awiskerke
Visit this Community
Netherlands
Joined: December 09, 2008
KitMaker: 336 posts
Model Shipwrights: 333 posts
Posted: Saturday, May 05, 2018 - 12:16 AM UTC
The first steps. I began by installing the rudders which is an easy affair. Then I cut two holes in the foredeck for the sky lights. The frame of the sky lights (a seperate plastic part) required some putty and so did the mooring bit. Cutting the slots into the bow for the 6 window frames was a rather tedious and laborious job.


Unfortunately the clear parts of the bow windows all have a rather conspicuous sink mark so I will probably have to use some other clear plastic :


Arjan

d6mst0
#453
Visit this Community
Texas, United States
Joined: August 28, 2016
KitMaker: 1,925 posts
Model Shipwrights: 1,298 posts
Posted: Saturday, May 05, 2018 - 03:54 AM UTC
Wow, those Chris-Crafts should does bring back the memories. They were most beautiful boats on the great lakes.

Looks like you are off to a good start with not any major fit issues that you see on a Lindberg kit.
TimReynaga
Staff MemberAssociate Editor
MODEL SHIPWRIGHTS
Visit this Community
California, United States
Joined: May 03, 2006
KitMaker: 2,500 posts
Model Shipwrights: 1,830 posts
Posted: Saturday, May 05, 2018 - 12:21 PM UTC

Quoted Text

Unfortunately the clear parts of the bow windows all have a rather conspicuous sink mark so I will probably have to use some other clear plastic


Arjan, you might be able to save these clear parts yet; I've had good luck in the past sanding windows with similar problems down past the sink marks until they were flat, then polishing them back to clarity. It is a bit of work, but it might still be less than fabricating replacement parts!
awiskerke
Visit this Community
Netherlands
Joined: December 09, 2008
KitMaker: 336 posts
Model Shipwrights: 333 posts
Posted: Saturday, May 05, 2018 - 01:32 PM UTC
Thanks for your advice Tim. Could you explain what polishing method you use after the part has been sanded flat ?

The quote in the above about the name "Chrisovich" is rather ambiguous what does "that series" refer to ? Does it refer to the first thirteen boats or the ones that came after these ? I found one pic labelled "Chrisovich". Since it concerns a boat built in 1960 I take it that "that series" refers to the later batch of boats.


Regards,

Arjan


TimReynaga
Staff MemberAssociate Editor
MODEL SHIPWRIGHTS
Visit this Community
California, United States
Joined: May 03, 2006
KitMaker: 2,500 posts
Model Shipwrights: 1,830 posts
Posted: Saturday, May 05, 2018 - 10:14 PM UTC

Quoted Text

Thanks for your advice Tim. Could you explain what polishing method you use after the part has been sanded flat?


Arjan, there's no trick, just use very fine abrasive films. I use some from Micro-Surface Finishing Products, Inc., which range from a fine at 3,600 to the finest at a ridiculous 12,000. Just these and a lot of elbow grease!
awiskerke
Visit this Community
Netherlands
Joined: December 09, 2008
KitMaker: 336 posts
Model Shipwrights: 333 posts
Posted: Saturday, May 12, 2018 - 02:02 PM UTC
Thanks Tim, I've decided to use the Lindberg clear parts as they are. I tried some sanding and polishing on one window but I felt it was just too much work. Some pics of my progress, I glued two layers of 0.6 mm mahogany sheet onto the transom :


The kit is designed in such a way that the steering house and interior constitute a removeable "tray" (with overlapping edges). In terms of practicality (access to rc parts/battery) this is a good idea but the overlapping edges do look very unrealistic. I decided, therefore, to glue the steering house straight to the deck. For reasons of accessibility the roof of the steering house should remain removeable. The problem is that the roof part was badly warped so I had to use some rather heavy styreen ribs to keep it straight. I will probably try using bicycle spokes instead (if I can get them in between the roof and roof liner parts that is ...) because the styrene ribs are definitely an eyesore.


Scalewise this 1/16 brother figure looks ok:


Regards,

Arjan
d6mst0
#453
Visit this Community
Texas, United States
Joined: August 28, 2016
KitMaker: 1,925 posts
Model Shipwrights: 1,298 posts
Posted: Saturday, May 12, 2018 - 11:51 PM UTC
Arjanm

Your Chris-Craft is really starting to take shape. She looks like she is ready for water sking.

Mark
awiskerke
Visit this Community
Netherlands
Joined: December 09, 2008
KitMaker: 336 posts
Model Shipwrights: 333 posts
Posted: Friday, May 18, 2018 - 04:23 PM UTC
Thanks Mark ! I've installed propshafts and rc hardware and I've just checked how deep she lies in the water. The weight distribution is almost perfect so I will only have to make some small adjustments and then the steering servo etc can be fixed permanently.


I mounted all the rc hardware as low as possible to keep the floors of the cabin and cockpit at the original kit level :


Regards,


Arjan


d6mst0
#453
Visit this Community
Texas, United States
Joined: August 28, 2016
KitMaker: 1,925 posts
Model Shipwrights: 1,298 posts
Posted: Saturday, May 19, 2018 - 03:55 AM UTC
Arjan,

She does look to be sitting on the water nice and level. That will make her easier to control...nice work.

Mark
awiskerke
Visit this Community
Netherlands
Joined: December 09, 2008
KitMaker: 336 posts
Model Shipwrights: 333 posts
Posted: Saturday, May 26, 2018 - 08:59 PM UTC
In the mean time I have added some parts to the hull and deck and today I've made a second test run. I fixed the roof of the cabin by two screws at the sides.


I now wish to get started on the cabin interior but I'm puzzled by a contradiction in the 1961 CC brochure. The drawing shows the door leading to the focsle dead center but in one of the pics the door is offset to the left. This makes sense because the open door then just clears the kitchen unit. Perhaps the position of the door depended on the position of the optional dual controls (cabin or cockpit) and the kitchen unit. The Lindberg kit has the dual controls in the cockpit but I think I will opt for the cabin instead. I found some pics showing the option I favour (the door is also offset to the left in these pics) :


Regards,

Arjan
awiskerke
Visit this Community
Netherlands
Joined: December 09, 2008
KitMaker: 336 posts
Model Shipwrights: 333 posts
Posted: Wednesday, June 06, 2018 - 11:30 PM UTC
Some pics of my progress, I've added some mahogany veneer and started on the construction of the interior.


I found another image of a Sport Fisherman in a 1958 CC brochure (5th image):


Arjan
d6mst0
#453
Visit this Community
Texas, United States
Joined: August 28, 2016
KitMaker: 1,925 posts
Model Shipwrights: 1,298 posts
Posted: Thursday, June 07, 2018 - 02:23 AM UTC
Arjan,

Nice touch.

Mark
Fright
Visit this Community
Georgia, United States
Joined: December 26, 2015
KitMaker: 200 posts
Model Shipwrights: 186 posts
Posted: Saturday, July 28, 2018 - 02:51 AM UTC
Arjan - nice find with this kit and will be watching your build!
awiskerke
Visit this Community
Netherlands
Joined: December 09, 2008
KitMaker: 336 posts
Model Shipwrights: 333 posts
Posted: Saturday, July 28, 2018 - 09:53 PM UTC
Thanks Mark/Robert ! Progress has been slow due to changes in the running gear and the unpleasantly high temperatures of the past two months. I constructed the inner cockpit sides from 0.5mm plastic card (I try to keep the weight down as much as I can because I hate models lying too low in the water). I glued the inner sides on 4 mm styrene spacers. I used 1mm plastic card for the cockpit floor and I cut out three hatches for access. I will cover the cockpit and wheelhouse floors with mahogany strips and the floors should remain detachable.
I still have to construct the inner sides of the wheelhouse which will also be glued on spacers.


Regards,

Arjan
TimReynaga
Staff MemberAssociate Editor
MODEL SHIPWRIGHTS
Visit this Community
California, United States
Joined: May 03, 2006
KitMaker: 2,500 posts
Model Shipwrights: 1,830 posts
Posted: Sunday, July 29, 2018 - 02:18 AM UTC
Arjan,

She's really starting to come together!

Nothing looks as much like wood as real wood. Your mahogany veneers are beautiful!
Fright
Visit this Community
Georgia, United States
Joined: December 26, 2015
KitMaker: 200 posts
Model Shipwrights: 186 posts
Posted: Thursday, August 16, 2018 - 02:54 AM UTC
Very nice work on this classic little boat!
awiskerke
Visit this Community
Netherlands
Joined: December 09, 2008
KitMaker: 336 posts
Model Shipwrights: 333 posts
Posted: Saturday, August 18, 2018 - 05:37 AM UTC
Thanks Tim/Robert ! In the mean time I have changed the brushed setup for a brushless one. I have also glued veneer slats on top of the cockpit floor.


The next step is painting the hull and deck.

Regards,

Arjan
d6mst0
#453
Visit this Community
Texas, United States
Joined: August 28, 2016
KitMaker: 1,925 posts
Model Shipwrights: 1,298 posts
Posted: Saturday, August 18, 2018 - 11:24 AM UTC
Nice work with the Veneer. She is really shaping up nicely.

Mark
awiskerke
Visit this Community
Netherlands
Joined: December 09, 2008
KitMaker: 336 posts
Model Shipwrights: 333 posts
Posted: Saturday, September 01, 2018 - 04:00 AM UTC
Thanks Mark ! Some pics of my paint work so far, I also added some fittings and constructed a pulpit from brass rod.


Regards,

Arjan
d6mst0
#453
Visit this Community
Texas, United States
Joined: August 28, 2016
KitMaker: 1,925 posts
Model Shipwrights: 1,298 posts
Posted: Saturday, September 01, 2018 - 06:22 AM UTC
Arjan,

Those chairs look sweet, did they come with the kit? Are you going to add coolers or bait containers?

Mark
awiskerke
Visit this Community
Netherlands
Joined: December 09, 2008
KitMaker: 336 posts
Model Shipwrights: 333 posts
Posted: Saturday, September 01, 2018 - 07:26 AM UTC
Hi Mark, the fighting chairs are contained in the kit. They required quite a bit of putty and I had to strip the chrome finish off the chrome plated parts. The kit has quite a few chrome plated parts but the trouble is that many of these have conspicuous mould lines and sink marks. I usually use oven cleaner to get rid of the chrome plating (works very well). To build up a new chrome finish I start with black Vallejo polyurethane primer followed by several coatings of Vallejo chrome paint. I finally use a layer of clear Vallejo Polyurethane varnish to protect the vulnerable chrome paint.

I glued bolts (2.5mm diameter) into the sockets of the chairs (using washers of the same inner diameter as the sockets).Nuts are then used to secure the chairs onto the cockpit floor, the end result is swivelling chairs.

I do intend to add a bait container at some point, the second pic of the Sportfisher from the CC brochure seems to have one fitted in the back of the cockpit.

Regards,


Arjan
TimReynaga
Staff MemberAssociate Editor
MODEL SHIPWRIGHTS
Visit this Community
California, United States
Joined: May 03, 2006
KitMaker: 2,500 posts
Model Shipwrights: 1,830 posts
Posted: Sunday, September 02, 2018 - 01:36 AM UTC
Nice work on the chairs, Arjan - makes me want to go deep sea fishing!
awiskerke
Visit this Community
Netherlands
Joined: December 09, 2008
KitMaker: 336 posts
Model Shipwrights: 333 posts
Posted: Saturday, September 08, 2018 - 02:21 AM UTC
Some pics of my progress, I'm going to take her out for a run on the water tomorrow. I think the outriggers are not very practical for running it on the water so I will probably only use these for display purposes.


Regards,

Arjan
d6mst0
#453
Visit this Community
Texas, United States
Joined: August 28, 2016
KitMaker: 1,925 posts
Model Shipwrights: 1,298 posts
Posted: Saturday, September 08, 2018 - 08:53 AM UTC
Arjan,

She really came out nice. I think those outriggers look natural and quite belonging when you have her out on the water.

You really have done a fine job with assembly and painting.

Mark
 _GOTOTOP