_GOTOBOTTOM
Ships by Class/Type: Submarines
Topics on submarines of all types and eras.
Pics of my DDD U-99
SonOfAVet
Visit this Community
Illinois, United States
Joined: January 18, 2003
KitMaker: 547 posts
Model Shipwrights: 132 posts
Posted: Wednesday, March 30, 2005 - 02:15 PM UTC
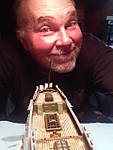
Finally, some photos!


I didnt put the rails or deck guns on, or rig it yet....gonna prime and paint and add all the little fragile stuff later!

Sean

BTW: the pics are also in my gallery, I dont know why they came out so small in the post
95bravo
Visit this Community
Kansas, United States
Joined: November 18, 2003
KitMaker: 2,242 posts
Model Shipwrights: 1,064 posts
Posted: Wednesday, March 30, 2005 - 02:48 PM UTC
Hey Sean,

I noticed you took the same route as I with the limber holes along the hull. I opened mine as well and then re-backed them with sheet styrene. Did you need to shim and fill the stern of yours?

All in all, I found it to be a nice little kit.

However I still want the 1/72nd version.

Right Martin?
SonOfAVet
Visit this Community
Illinois, United States
Joined: January 18, 2003
KitMaker: 547 posts
Model Shipwrights: 132 posts
Posted: Wednesday, March 30, 2005 - 02:57 PM UTC
Martin,
Yep, I had to do a little work on the stern, and the vents were a pain, but I think its worth the trouble. It is a nice little kit, even with all the ejector pin marks and wrapped parts :-). I do have my eyes on that 1/72 scale boat....might need 3 or 4 of them.

Sean
95bravo
Visit this Community
Kansas, United States
Joined: November 18, 2003
KitMaker: 2,242 posts
Model Shipwrights: 1,064 posts
Posted: Wednesday, March 30, 2005 - 04:38 PM UTC
*LOL* It was me...not Martin, I was just giving him a hard time about the 1/72 VIIC.

Yeah all the injector marks on the deck were a pain. I just thinned my putty with testors liquid cement and then brush the sloppy putty inot the holes. And yes, the limber holes, I think I sacrificed at least five #11 blades cutting those out.

Most of my parts were pretty true...with the exception of one of the deck sections. I re-enforced the deck sections under the tower as well. It was a little flimsy.

My top coat I did in licht grau, but I swear at times it looks almost white! Maybe after I do the dark gray it'll make the other look a little darker...I don't know.

I haven't added my rail along the back yet, I test fitted it and it seemed off...as did the rails along the deck. Did you have any problems with yours?

Yours turned out looking really nice, I look forward to seeing it when you get it painted.

Adios
skipper
Visit this Community
Lisboa, Portugal
Joined: February 28, 2002
KitMaker: 5,182 posts
Model Shipwrights: 4,070 posts
Posted: Wednesday, March 30, 2005 - 10:24 PM UTC
Hi Sean!

It looks good, realy good!
Although the pics are small, I can notice that you have put a lot of effort on it!
Congrats Mate!!
Steve, the "problem" with the LichtGrau will vanish once you apply the Dark grey - it's a kind of optical illusion

Skipper
Martinnnn
Visit this Community
Zuid-Holland, Netherlands
Joined: April 26, 2004
KitMaker: 5,435 posts
Model Shipwrights: 0 posts
Posted: Wednesday, March 30, 2005 - 11:25 PM UTC

Quoted Text


However I still want the 1/72nd version.

Right Martin?


Can't agree more. But I don't want to make you jealous or something like that by telling you how great that kit is and how cool it is to build it so I'll just shut up now....

But not before I've said I like the U-99 pics, but they are a bit small here......like tumbnails You've got bigger pics?

Martin
95bravo
Visit this Community
Kansas, United States
Joined: November 18, 2003
KitMaker: 2,242 posts
Model Shipwrights: 1,064 posts
Posted: Thursday, March 31, 2005 - 02:29 AM UTC

Quoted Text

[Can't agree more. But I don't want to make you jealous or something like that by telling you how great that kit is and how cool it is to build it so I'll just shut up now....Martin


skipper
Visit this Community
Lisboa, Portugal
Joined: February 28, 2002
KitMaker: 5,182 posts
Model Shipwrights: 4,070 posts
Posted: Thursday, March 31, 2005 - 04:06 AM UTC


Let's see if this work - for bigger pics!

Skipper

EDIT: Yep, it worked just fine!
95bravo
Visit this Community
Kansas, United States
Joined: November 18, 2003
KitMaker: 2,242 posts
Model Shipwrights: 1,064 posts
Posted: Thursday, March 31, 2005 - 05:42 AM UTC
Sean,

Have you decided on what you plan to use for the insulators (or whatever they are) located along the wires that run fore and aft of the tower? I think everything I thought of was either too big or not practical. Any suggestions?
SonOfAVet
Visit this Community
Illinois, United States
Joined: January 18, 2003
KitMaker: 547 posts
Model Shipwrights: 132 posts
Posted: Thursday, March 31, 2005 - 06:05 AM UTC
Skipper,
Thanks for the bigger pics...how did you do that...I don't know why they came out so small previously.

Steve: I have been kicking around the idea for the insulators as well..and by kicking around I mean dreading :-) Maybe just sculpt some from putty or maybe I can find some beads as a base them model something around them? I've been scratching my head on this one to say the least.

Sean
95bravo
Visit this Community
Kansas, United States
Joined: November 18, 2003
KitMaker: 2,242 posts
Model Shipwrights: 1,064 posts
Posted: Thursday, March 31, 2005 - 06:11 AM UTC

Quoted Text

..and by kicking around I mean dreading :-)


Dreading....yep that's an appropiate term...that is exactly how I feel about it.

I thought about the glass beads as well. I plan on making the wires from sprue but my concern there was if the diameter of the bead hole would be small enough. I guess the best thing to do is just experiment and see what works the best.

We can compare notes. :-)
Martinnnn
Visit this Community
Zuid-Holland, Netherlands
Joined: April 26, 2004
KitMaker: 5,435 posts
Model Shipwrights: 0 posts
Posted: Thursday, March 31, 2005 - 06:12 AM UTC
Ah bigger pics

Nice work mate. I've got the U-47 myself, basicly the same exteriour only the U-47 has a cut-away so you can see the interior. I can remember I had some fitting problems at the rear of the boat, you seem to have handled that well!

Martin
warvos
Visit this Community
West-Vlaaderen, Belgium
Joined: June 06, 2004
KitMaker: 350 posts
Model Shipwrights: 142 posts
Posted: Thursday, March 31, 2005 - 06:12 AM UTC
Sean, nice work

It's hard to tell from the pics, but I can't see any panel lines on the hull. Is this correct?

Just a question, but would it be ok to simulate panellines by preshading imaginary lines, to give the hull more depth, or would this create a rather surrealistic effect?

I'm thinking about buying one myself to create an exact copy of her big sister which is already ruling my livingroom.

looking forward to seeing pics as soon as she's painted up and ready to go!!
SonOfAVet
Visit this Community
Illinois, United States
Joined: January 18, 2003
KitMaker: 547 posts
Model Shipwrights: 132 posts
Posted: Thursday, March 31, 2005 - 07:45 AM UTC
warvos,
you are correct, there are no panel lines on the hull unfortunately, it hadn't even crossed my mind to scribe any-- anybody else add panel lines?

Sean
skipper
Visit this Community
Lisboa, Portugal
Joined: February 28, 2002
KitMaker: 5,182 posts
Model Shipwrights: 4,070 posts
Posted: Thursday, March 31, 2005 - 08:30 AM UTC
I have added panel lines on my U-47...
I used the technique mentioned here to do it: HNLMS Tonjin

Since the Revell U-99 is in plastic I would go for Tamiya liquid extra thin cement (the one with the green cap)

If you'll need references for the panels, just "call"

Skipper
95bravo
Visit this Community
Kansas, United States
Joined: November 18, 2003
KitMaker: 2,242 posts
Model Shipwrights: 1,064 posts
Posted: Thursday, March 31, 2005 - 01:02 PM UTC

Quoted Text

warvos,
you are correct, there are no panel lines on the hull unfortunately, it hadn't even crossed my mind to scribe any-- anybody else add panel lines?

Sean


I thought about it, the ballast tanks seemed too plain. However, I seem to have bad luck when it comes to scribing or re-scribing....so, they remain smooth.
rokket2001
Visit this Community
South Australia, Australia
Joined: March 28, 2005
KitMaker: 353 posts
Model Shipwrights: 331 posts
Posted: Friday, April 01, 2005 - 12:17 AM UTC
I Like warvos' idea - if I understand "preshading" - paint them in with slightly diff shades of paint ("aztecing" I think) and some pencilled lines (soft lead). Should be really col.

As for insulatirs (blocks?) I can't tell what they are - it seems too weird to have so many blocks grouped together in such an odd manner (am researching for the 1/72 Revell). There are def insulators, but some must be blocks. Yet why have 3 or 5 blocks next to each other, not rigged in a cme-along/tackle fashion? Anyway, small beads sound good. A friend of mine neded some bead sfor control switches in a spaceship, he bouht heaps and then sleected matching ones out of thousands.
95bravo
Visit this Community
Kansas, United States
Joined: November 18, 2003
KitMaker: 2,242 posts
Model Shipwrights: 1,064 posts
Posted: Friday, April 01, 2005 - 07:53 AM UTC
Sean,

To revisit the panel line issue, I thought of this, this morning. On the ballast tanks, I think there are/were raised weld lines (someone correct me if I'm wrong please) I thought about using the method that the armor dudes use, in this case, very thin stretched sprue glued in place and then softened using liquid cement and then texturing with an x-acto blade.

On the other hand, perhaps the weld lines (in scale) would be too small to notice the texture or you couldn't make the sprue thin enough.

Any way, it's a thought to bounce around.

TGIF
Tiger101
Visit this Community
Pennsylvania, United States
Joined: March 02, 2002
KitMaker: 902 posts
Model Shipwrights: 105 posts
Posted: Friday, April 01, 2005 - 01:23 PM UTC
Sean I have been off the boards for a few days. Your sub looks great! This campaign will indeed have one fine flotilla of boats
Ian2
Visit this Community
England - South West, United Kingdom
Joined: January 14, 2005
KitMaker: 97 posts
Model Shipwrights: 0 posts
Posted: Wednesday, November 23, 2005 - 03:52 AM UTC

Quoted Text

*LOL* It was me...not Martin, I was just giving him a hard time about the 1/72 VIIC.

Yeah all the injector marks on the deck were a pain. I just thinned my putty with testors liquid cement and then brush the sloppy putty inot the holes. And yes, the limber holes, I think I sacrificed at least five #11 blades cutting those out.

Most of my parts were pretty true...with the exception of one of the deck sections. I re-enforced the deck sections under the tower as well. It was a little flimsy.

My top coat I did in licht grau, but I swear at times it looks almost white! Maybe after I do the dark gray it'll make the other look a little darker...I don't know.

I haven't added my rail along the back yet, I test fitted it and it seemed off...as did the rails along the deck. Did you have any problems with yours?

Yours turned out looking really nice, I look forward to seeing it when you get it painted.

Adios


The trouble with the railings is the deck is common to both the U99 kit and the U47 cutaway. The railings in both cases are different, which may mean Revell compromised on the locating holes.

I have a U99 at home which I've had for years - slowly refurbishing it, drilling all the holes out etc. Nowhere near as nice as some I've seen on these forums but the best I can manage.
 _GOTOTOP