_GOTOBOTTOM
General Ship Modeling: Creating Ship Dioramas
Topics on building dioramas are grouped here
My grandfathers ship dio.
redneck
Visit this Community
Pennsylvania, United States
Joined: June 06, 2005
KitMaker: 1,602 posts
Model Shipwrights: 665 posts
Posted: Friday, December 08, 2006 - 03:08 AM UTC
Well as some of you already know my grandfather (who I’m very close with) served in the navy from 1944 to1945 and 1950/1951 to 1952.
He first joined at the age of 17 during WWII and was sent to a base in the Pacific where he did machine work making parts for the ships.
After the war he left the navy but was called back to service during the Korean War. He was first sent to the west coast where he once again worked on ships. He wasn’t there for long before going AWOL and coming back to the Pennsylvania. Of course it didn’t take the navy long to find him and after the court-martial and everything he was assigned to the USS Maurice J. Manuel (DE351). A butler class destroyer escort that was just being brought back into service at the time. The ship was expected to be deployed to Korea to draw out fire from North Korean shore batteries so our larger ships could knock them out.
Before leaving the West coast the ships orders were changed and the ship was transferred to the Atlantic fleet where it took part in war games and training operations in preparation for any possible navel engagements with the communist forces until the time my grandfather left the navy in 52.
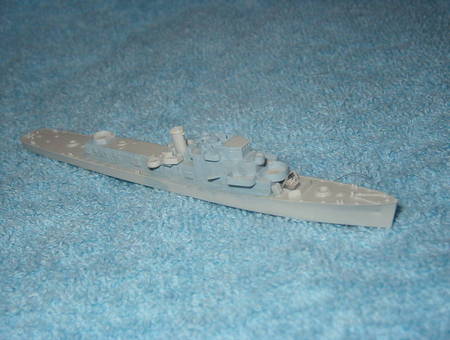
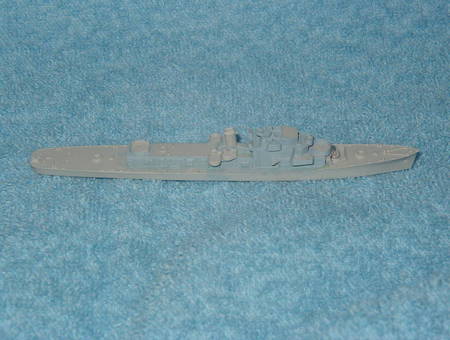
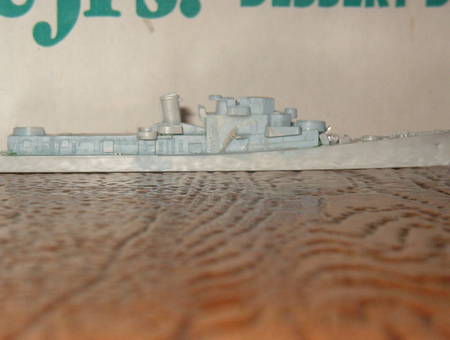
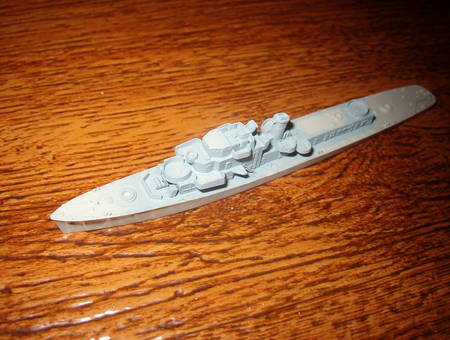
I”m now starting on a 1/700 Dio for him containing the DE351. The plane will be to have the ship along with a 2nd butler class operating in the Atlantic.

Here are the pictures of the stuff I’ve gathered for this project.


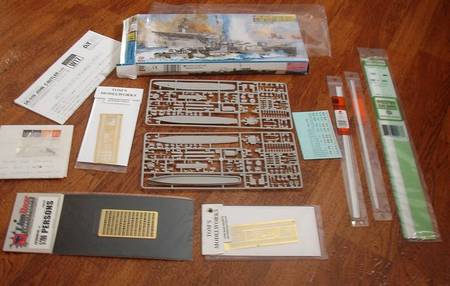
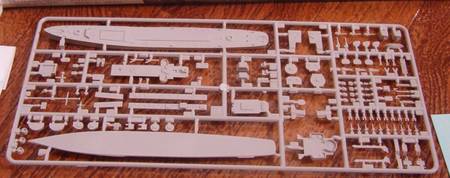
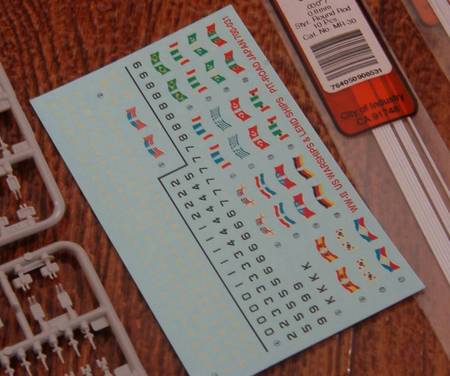
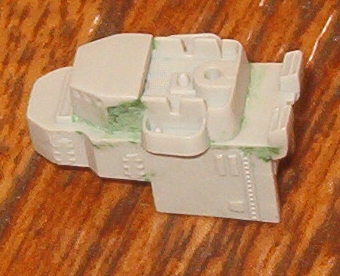
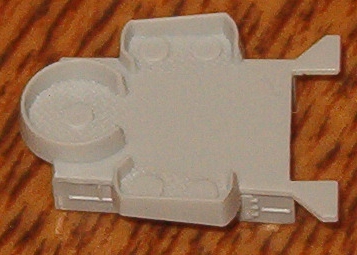
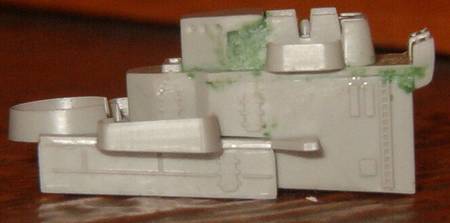
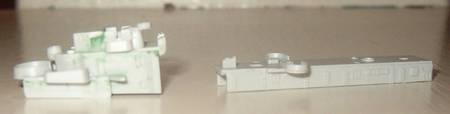
The kit is from Skywave and has the parts for 2 any 2 butler class ships from WWII (they will need some small modifications to make it a Korea era ship)
I’ve also gotten 2 PE sets (one for each ship) and a 3rd containing 1/700 scale men.
The plastic rods and strips are to scratchbuild parts of the mast and deptcharges.
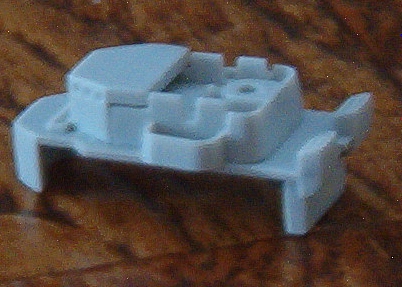
The white metal hedgehog launchers were kindly Provided by Skipper. (Thanks again.)

I’ll also be creating a wood and glass display case to for this dio.

I’ll keep you guys updated as I get under way with this project.
Gunny
Visit this Community
Pennsylvania, United States
Joined: July 13, 2004
KitMaker: 6,705 posts
Model Shipwrights: 4,704 posts
Posted: Friday, December 08, 2006 - 03:55 PM UTC
Very well, Jacob, been waiting for this day!
This will be a very interesting project, for sure. . .good luck and looking forward to the first update!
~Gunny
redneck
Visit this Community
Pennsylvania, United States
Joined: June 06, 2005
KitMaker: 1,602 posts
Model Shipwrights: 665 posts
Posted: Friday, December 08, 2006 - 06:11 PM UTC
I’ll be starting with the bridge this weekend if all goes well.
I’m thinking of leaving the ladders inplace that came with the ship and adding the stairway. (The ones in the kit are great and even have each step molded on them instead of just a diagonal line but the PE one include railings.

The kit parts have fantastic detail but the question will come down to fit. If they have poor fit this project will be taking some time. (Well more time I mean.)
AlanL
Visit this Community
England - East Anglia, United Kingdom
Joined: August 12, 2005
KitMaker: 14,499 posts
Model Shipwrights: 1,919 posts
Posted: Friday, December 08, 2006 - 07:39 PM UTC
Hi Jacob,

Cool project, good luck with the build.

Cheers

AL
#027
Visit this Community
Louisiana, United States
Joined: April 13, 2005
KitMaker: 5,422 posts
Model Shipwrights: 5,079 posts
Posted: Friday, December 08, 2006 - 11:35 PM UTC
Ahoy Jake! Can't wait to hear more of your thoughts on the Skywave kit. I've wanted to do a collection of DDs and DEs from Taffy 3.

Gator
redneck
Visit this Community
Pennsylvania, United States
Joined: June 06, 2005
KitMaker: 1,602 posts
Model Shipwrights: 665 posts
Posted: Sunday, December 10, 2006 - 05:00 AM UTC
Got some work done on the bridge of the “other ship” (still haven’t decided which ship it will be.) And should have some pictures of the bridge up in the morning.

It looks like this may be a bit harder then I thought. I’ve already managed to slice my thumb and lose a part. (Of the ship. Not my thumb.)
The little radar type thing should be able to be rebuilt from scratch I’m just not sure how I’ll go about doing it yet. I can either use the part still left for the DE351 to make a model so I can creat a resin part or I can scratch build it with plastic rod and strips. (Very small ones....)

Other wise things are looking promising and the project is underway.
redneck
Visit this Community
Pennsylvania, United States
Joined: June 06, 2005
KitMaker: 1,602 posts
Model Shipwrights: 665 posts
Posted: Sunday, December 10, 2006 - 09:44 PM UTC
Here are the first progress pictures.

Start of the bridge Saturday night.


And the 2 pieces of the bridge yesterday.


And here are both pieces together. (Not glued)


I’ve also made a new album in my gallery for pictures of this project so feel free to check it out.


As you can see some of the fitting on the top part wasn’t the greatest but the rest is going together better.
I’ve also scraped off the steps from the side of the top piece. They will be replaced by PE parts. Of course the life boat looks like it may get in the way of these pieces some. We’ll have to wait and see.

Also I’ll need to scrape off one of the nubs on each of the lower pieces side platforms which will be a real pain with the textured floor. I’m thinking of cutting it flat and then hiding the flat spot with one or 2 PE people. What do you guys think?
This isn’t due to any inaccuracy in the kit but because one of the guns there had been remover between WWII and Korea.
redneck
Visit this Community
Pennsylvania, United States
Joined: June 06, 2005
KitMaker: 1,602 posts
Model Shipwrights: 665 posts
Posted: Friday, December 15, 2006 - 12:24 AM UTC
Heres a quick update.


pictures of that end turned out blurry but I had a real pain with the real piece of the “thing behind the bridge”.

You can ether put it in the right way or upside down and the instructions don’t show the side with the details.
After spending about 45min looking over pictures showing this tiny area (always with stuff in front of it) I thing I have it on right.

I think I’m going to try hitting the sides of the bridge with a thin coat of the haze gray and see how much more puttying/sanding needs done there.


blaster76
Visit this Community
Texas, United States
Joined: September 15, 2002
KitMaker: 8,985 posts
Model Shipwrights: 3,509 posts
Posted: Friday, December 15, 2006 - 05:11 AM UTC
You said you are doing 2 ships. Are you building them "the same" or only modifying one of them? If the same, are you building them simultaneously, or will you complete one and then go back and do the other?
redneck
Visit this Community
Pennsylvania, United States
Joined: June 06, 2005
KitMaker: 1,602 posts
Model Shipwrights: 665 posts
Posted: Friday, December 15, 2006 - 05:59 AM UTC
Hey Steve.
I’ll be doing the modifications to both of them. It looks like most of these ships operating in the 50s had underwent similar modifications.

I’ll finish this one before starting the next. This ship will be towards th back of the dio where it won’t be as noticeable. Any trouble spots I run into I’ll be able to go at differently on my grandfathers ship.
#027
Visit this Community
Louisiana, United States
Joined: April 13, 2005
KitMaker: 5,422 posts
Model Shipwrights: 5,079 posts
Posted: Friday, December 15, 2006 - 06:15 AM UTC

Quoted Text

It looks like this may be a bit harder then I thought. I’ve already managed to slice my thumb and lose a part. (Of the ship. Not my thumb.)


That's my boy. You make me proud Jake. Good idea on building the other ship first. This way you can learn all the little ins and outs and make the best possible ship for your grandfather.

Gator
redneck
Visit this Community
Pennsylvania, United States
Joined: June 06, 2005
KitMaker: 1,602 posts
Model Shipwrights: 665 posts
Posted: Friday, December 15, 2006 - 06:42 AM UTC

Quoted Text

That's my boy. You make me proud Jake.


:-) :-) :-)
I do my best.
blaster76
Visit this Community
Texas, United States
Joined: September 15, 2002
KitMaker: 8,985 posts
Model Shipwrights: 3,509 posts
Posted: Sunday, December 17, 2006 - 03:26 AM UTC
I have to agree with both you and Kenny on that method. I took a similar stance on my Yamato backdate, however it went so well that I went ahead and used the Tamiya kit intead of the ModelHobbies version after I got well into the major modifiications. I am also thning about taking the other Yamato and doing a "tweener" modifiication on it now.
redneck
Visit this Community
Pennsylvania, United States
Joined: June 06, 2005
KitMaker: 1,602 posts
Model Shipwrights: 665 posts
Posted: Tuesday, December 26, 2006 - 04:07 AM UTC
Here’s an update.
Everythings glued together.


Don’t mind the poor paint job. I’ve only been using it to check how much more works needed on the seams.

I’ve also got the first aftermarket piece attacked.
The White metal hedgehog launcher sent to me by Skipper. Thanks again Rui.
skipper
Visit this Community
Lisboa, Portugal
Joined: February 28, 2002
KitMaker: 5,182 posts
Model Shipwrights: 4,070 posts
Posted: Tuesday, December 26, 2006 - 04:32 AM UTC

Quoted Text

Here’s an update.
Everythings glued together.


Don’t mind the poor paint job. I’ve only been using it to check how much more works needed on the seams.

I’ve also got the first aftermarket piece attacked.
The White metal hedgehog launcher sent to me by Skipper. Thanks again Rui.


Glad I could help Jacob!
That's what this community is all about: helping eachother and make our modeling skills better (too!)
Also... try and take the photos against a different background (for instance white?) so we can take a better look at your progress - the ship is kind of camouflaged
Keep up
Skipper
redneck
Visit this Community
Pennsylvania, United States
Joined: June 06, 2005
KitMaker: 1,602 posts
Model Shipwrights: 665 posts
Posted: Tuesday, December 26, 2006 - 05:40 AM UTC
Will do Skipper.
The colors won’t as close in real life.
#027
Visit this Community
Louisiana, United States
Joined: April 13, 2005
KitMaker: 5,422 posts
Model Shipwrights: 5,079 posts
Posted: Tuesday, December 26, 2006 - 08:39 AM UTC
Looks good so far Jake. Keep us posted.

Kenny
redneck
Visit this Community
Pennsylvania, United States
Joined: June 06, 2005
KitMaker: 1,602 posts
Model Shipwrights: 665 posts
Posted: Wednesday, December 27, 2006 - 03:44 AM UTC
We’ll I’ve added my first PE part and things didn’t really go as planed.

I added one of the stairs along side the bridge. Cutting out and folding the part was easy. The problem came with a slip up while gluing it on when the little tip on the super glue bottle broke covering the side of the bridge with glue.

Then while I tried sanding the bridge smooth again the PE part took a bit of a beating.

Luckily its all so small it shouldn’t be to noticeable when finished.


skipper
Visit this Community
Lisboa, Portugal
Joined: February 28, 2002
KitMaker: 5,182 posts
Model Shipwrights: 4,070 posts
Posted: Wednesday, December 27, 2006 - 05:09 AM UTC
Hi Jacob

Tip about using CA (cyanoacrilate glue, aka Super glue) Glue:
- never try to glue directly from the tube/bottle (as you discovered already);
- make a small pound of CA glue on a flat vitrified area (glass, tile, I use an old cigarrete box with the celo) and with a pin or a lenght of streched sprue aply it in tinny dropplets only on the needed areas - in the stair/ladder situation: two droplets on the top and two on the bottom after you have placed the ladder on the proper place.

In your current situation, try to use CA debonder (every brand has is debonder) to remove the flooding
Hope this helps,
Skipper
redneck
Visit this Community
Pennsylvania, United States
Joined: June 06, 2005
KitMaker: 1,602 posts
Model Shipwrights: 665 posts
Posted: Wednesday, December 27, 2006 - 05:46 AM UTC
Thanks skipper.

As for the glue on the ship I think I’ve gotten all of it sanded down smooth. The “bulge” in the picture is actually the contrast between the colors where the paints sanded off.

Oh and the other set of stairs went much better.
Gunny
Visit this Community
Pennsylvania, United States
Joined: July 13, 2004
KitMaker: 6,705 posts
Model Shipwrights: 4,704 posts
Posted: Wednesday, December 27, 2006 - 03:26 PM UTC
Trial and error, my friend!

Jacob, to expand a little more on Skip's suggestion, I myself use a method for placing the tiny PE parts onto the model in an easier fashion than fumbling fingers (which mine are some of the fumbliest!). . .

As Rui has said, place a small drop of CA on a smooth flat surface in front of you, and take a wooden toothpick and dip the tip ever so lightly in your glue drop.

Then touch the outer edge of your PE piece, thus grabbing the part in a much more gentle fashion. Immediately glue the PE part to your ship by manuevering into place by using your toothpick "extension", allowing a few seconds for the CA (that you have applied with your stretched sprue application tool from Rui's post!) to bond.

Then with a VERY gentle twist action, you should be able to remove the toothpick in one move, while leaving the PE part still firmly attached to your model subject.

Works great on stair, ladders, and railings, where a modeler tends to load up too much on adhesives and clog up the PE with CA, leaving leftover adhesive in places where there shouldn't be (in between railings, stairs, etc.)

Takes a little practice, mate, but it IS much easier than using yer fingers to handle those 1/700 scale PE parts! Give it a go!
~Gunny
redneck
Visit this Community
Pennsylvania, United States
Joined: June 06, 2005
KitMaker: 1,602 posts
Model Shipwrights: 665 posts
Posted: Wednesday, December 27, 2006 - 10:50 PM UTC
Thanks for the advice Mark. It gave me an idea.
Do you think instead of supperglue a very small ball of blue tac or the like would work to hold the piece to the toothpick. I’ve done that it the past to add a piece inside my Bradley after it was closed up.
Gunny
Visit this Community
Pennsylvania, United States
Joined: July 13, 2004
KitMaker: 6,705 posts
Model Shipwrights: 4,704 posts
Posted: Thursday, December 28, 2006 - 05:07 AM UTC

Quoted Text

Thanks for the advice Mark. It gave me an idea.
Do you think instead of supperglue a very small ball of blue tac or the like would work to hold the piece to the toothpick. I’ve done that it the past to add a piece inside my Bradley after it was closed up.


Hey Jacob!

Yeah, that would work too, I just find it convenient to use the CA while gluing, know what I mean?

You just have to be very careful of the delicate pieces (and when you have a small piece of railing to make a radius and attach in a usually most precarious place, you will know EXACTLY what I mean! :-) ) not to damage it while gluing. . .hey give it a shot mate, can't hurt! (Unless you glue yer fingers together!

~Gunny
redneck
Visit this Community
Pennsylvania, United States
Joined: June 06, 2005
KitMaker: 1,602 posts
Model Shipwrights: 665 posts
Posted: Tuesday, January 02, 2007 - 06:44 AM UTC
Heres an update.


Things are now sort of on hold while I work out the “deck gray situation” (I’m almost positive I got some in one of my orders but can’t find it anywhere.)

 _GOTOTOP