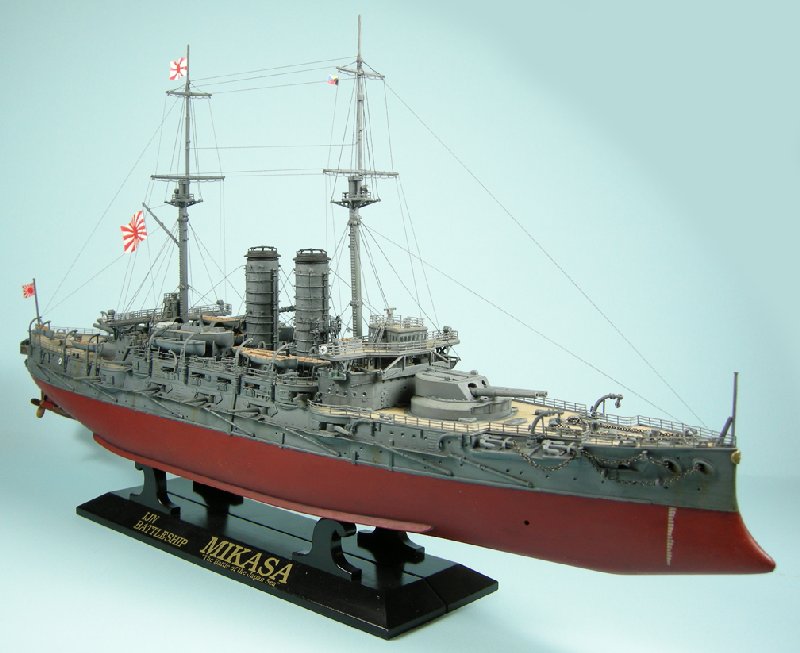
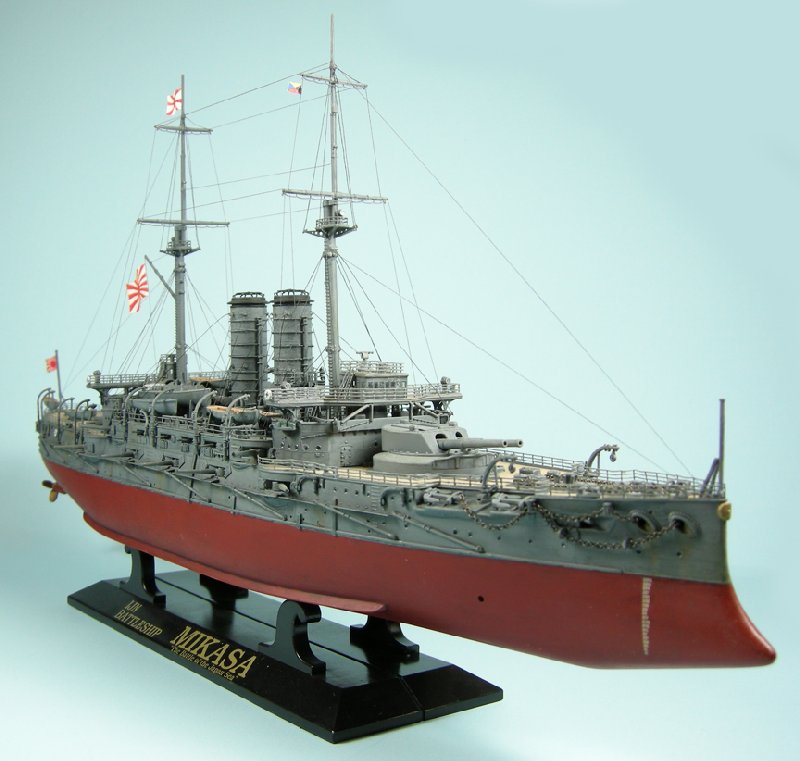
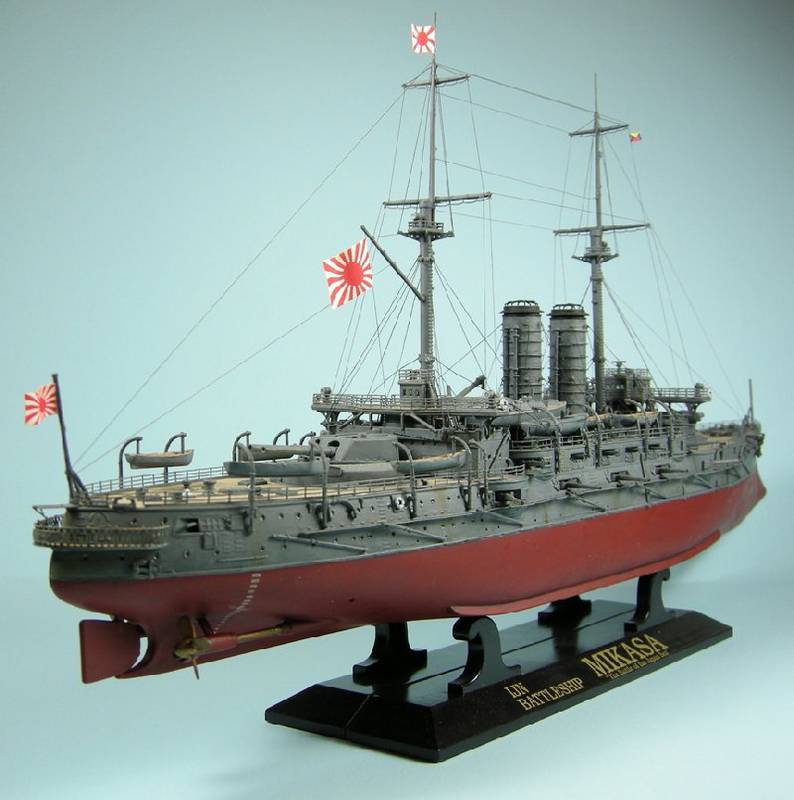
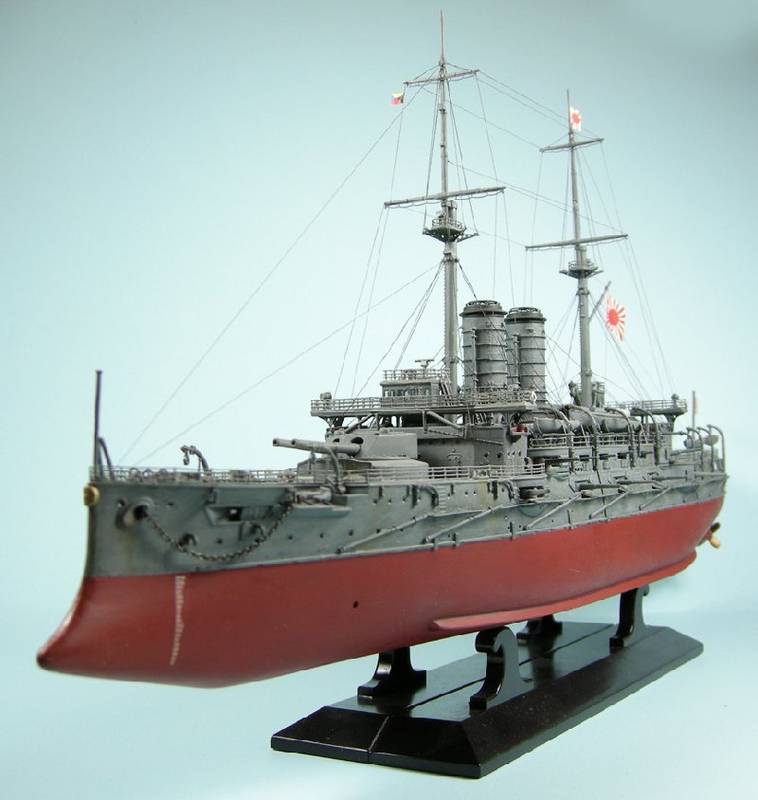
"This "Full Build" review is a comprehensive work of the Hasegawa 1/350 scale IJN Mikasa, "Battle of The Japan Sea" model kit, with Gold Medal Models, 1/350 scale, IJN Mikasa Photo Etch upgrade set."
History...
The Mikasa was built in 1902 for the IJN by Vickers, Sons & Maxim in England for the price of 880,000 pounds. She was a modification of the Royal Navy's Majestic Class, itself a development of the Royal Sovereign Class. The Mikasa outclassed her Majestic sisters with increased displacement (15,140 tons versus 14,900), a speed increase of one knot for a maximum of 18, additional armament, and high strength Krupp armor that was about 50% stronger than the Harvey armor on the Majestics (this same type of armor disadvantage would haunt the British at Jutland 14 years later against the Imperial German High Seas Fleet, also armored with Krupp steel).
With an armament of four 12" guns, fourteen 6" guns, sixteen 12 pounders, four 47 mm rapid fire guns, and four underwater 45.7 cm torpedo tubes, the Mikasa was the most powerful battleship of her time. She was the IJN's flagship during the Russo-Japanese War of 1904-1905.
In the Battle of The Yellow Sea, the Japanese fleet, under the command of Admiral Togo (among his officers was a young Isoroku Yamamoto) won a great victory over the Russian fleet by keeping the Russians holed up in Port Arthur and not allowing them to escape to Vladivostok. During this battle, the Mikasa sustained 20 hits with no major damage (these were the days when the flagship still headed the line of battle and was thus a magnet for enemy fire).
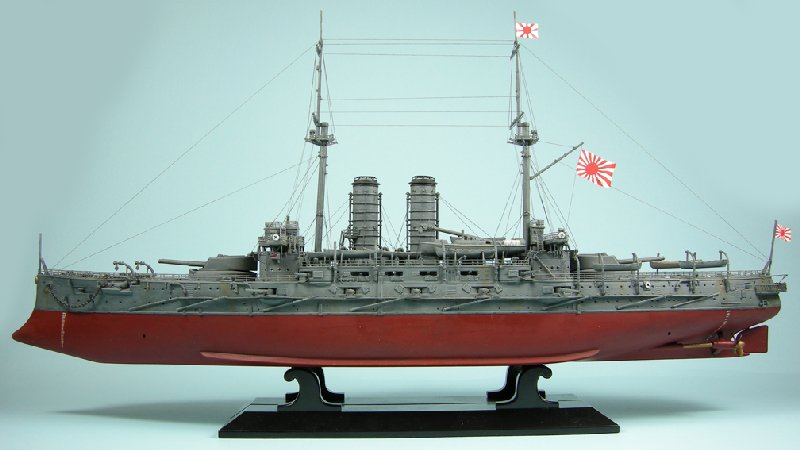
Later in the Battle of Tsushima, a leaner fit of the Mikasa with two less yardarms and more lifeboats took 30 hits with no major damage. This battle was a decisive victory that came a few months shy of the 100th anniversary of Nelson's decisive victory at Trafalgar. Despite being outnumbered, the Japanese sunk 21 Russian ships, captured 7, and disarmed 6 at a cost of only 3 torpedo boats. The Russians lost 4,380 dead to the Japanese 117.
The Mikasa was sunk in harbor during World War 2, but after the war, Admiral Chester Nimitz headed up efforts to have her raised. She is now a museum ship encased in concrete, located in Yokosuka near the Kure Arsenal and US Navy base.
The Model...
Hasegawa has produced two models of the Mikasa. One is the fit she appeared in at the Battle of The Yellow Sea. This kit includes a copy of the guidebook you receive when visiting the Mikasa museum and a set of twelve postcards. The Mikasa's masts each contain one extra yardarm and arms gallery so that gunners had a high, wide arc of cover fire during the boarding of enemy ships.
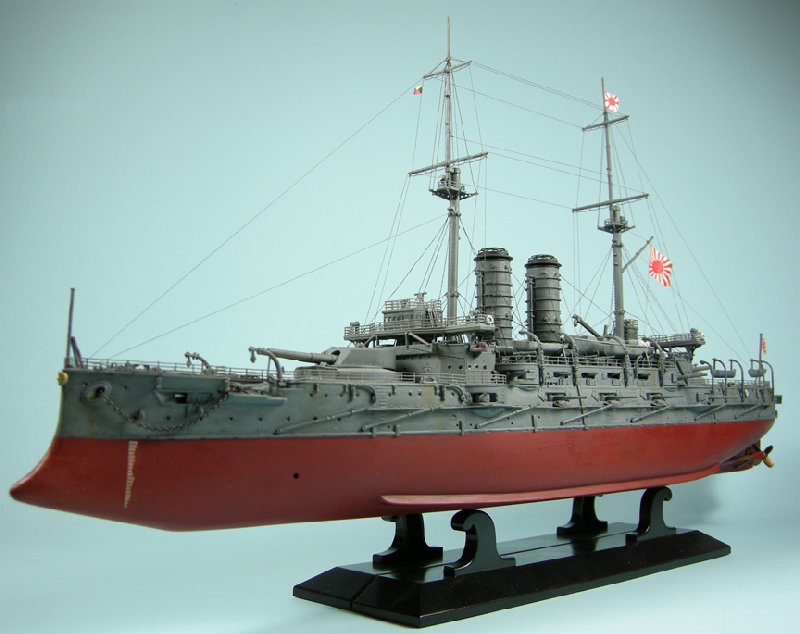
The other kit is the Mikasa at the Battle of Tsushima Strait (known to the Japanese, and labeled on the box, as The Battle of The Japan Sea). This kit contains a lithograph of Admiral Togo standing on the Mikasa's bridge during battle, a 54mm figure of Admiral Togo, and a commemorative coin in either silver or a rarer gold (mine was silver- boo-hoo). If you're a resident of Japan, you can also send in a proof of purchase and Hasegawa will send you a nice display case fitted perfectly for the Mikasa. Those of us living outside of Japan are left to stare with envy at the back of the slipcase showing the Mikasa in the display case. It is this version of the kit that I have built.
Because there is already an extensive in-box review here on MSW found
HERE I will only cover the actual construction process.
Construction...
The Hull and Deck:
To start, as with all things Hasegawa, everything goes together beautifully. The hull halves match up nicely and require minimal filler and cleanup. An immediate problem is that there is NO hull detail below the waterline. With the exception of thick bilge keels and four bilge holes, nothing. No ribs, steel plate, or torpedo doors. Considering this was the war in which Japan began its great lead in torpedo warfare, the lack of torpedo doors is really bizarre.
The builder installs a series of support braces along the top of the hull that the deck goes on top of. This keeps the deck from sagging and really makes the whole thing very strong. The deck is made in three pieces: front, center, and back. This seems scary at first until you realize that the places where the deck joins together will all be hidden and actually fits together quite nicely. No worries of trying to fill and match up planking as on some of the ship models of old.
The instructions are wonderfully laid out and very easy to follow with color callouts throughout. So, as long as you're simply gluing together everything out of box with no painting at all, the kit is a masterpiece. Of course, that's the problem. Because we ARE going to paint this model and that's when you start to realize something's wrong... For starters, the deck planking is WAY too big. And then you notice that all of that neato detail molded on to the deck is going to be a major hassle to mask off and paint. While this is standard operating procedure on most 1/700 kits, it seems odd to mold skylights, barbettes, and vents to the deck in 1/350 where the doo-dads aren't so small. Trumpeter's 1/350 North Carolina for example, while still having some molded on items like barbettes and anchor skids, has most of its small items molded separately, making the painting process much easier.
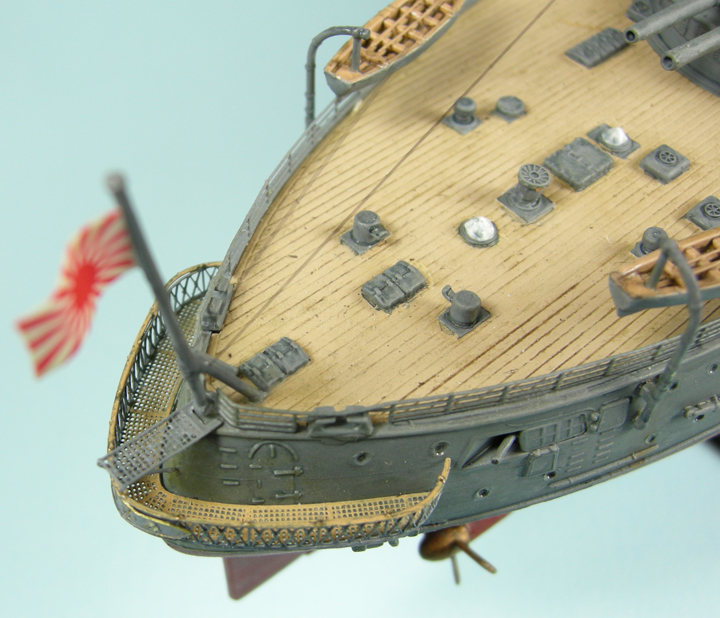
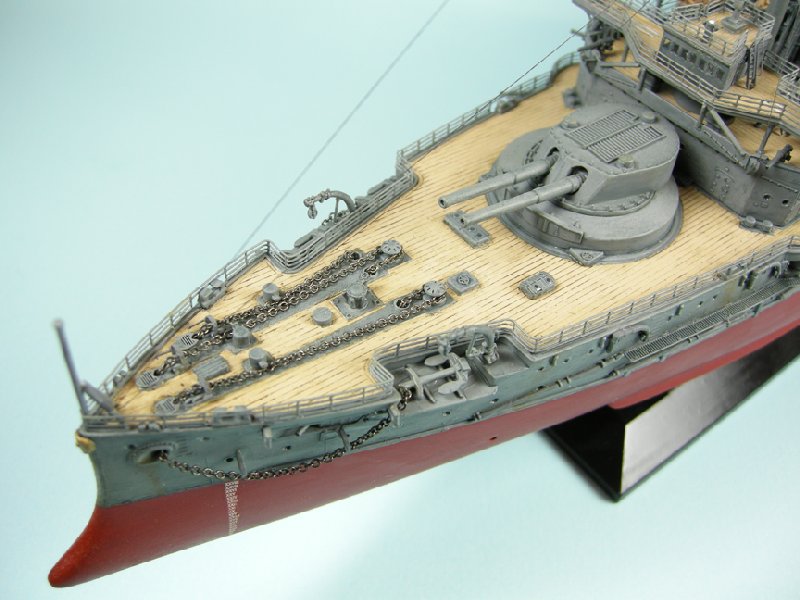
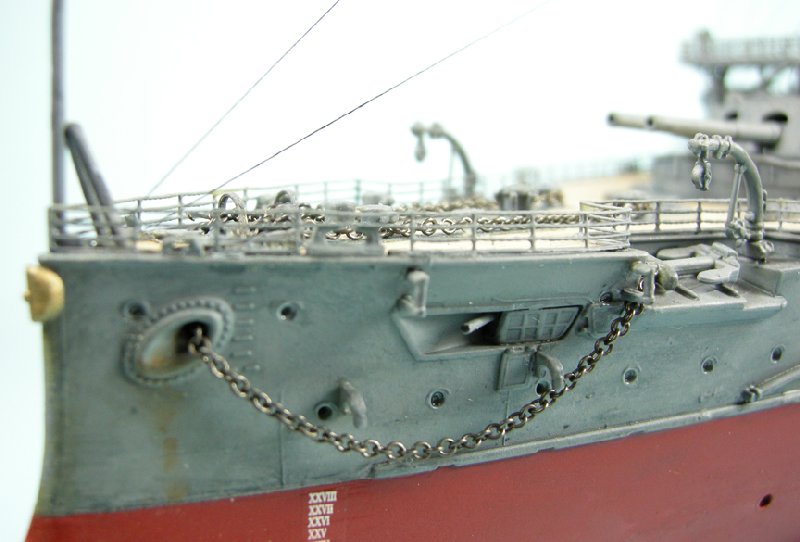
Alas, get ready to do a lot of masking. Speaking of items on deck, Hasegawa provides chain for the anchors, but the hawse pipes are solid. Hasegawa wants you to cut the chain, glue it on the top leading to the hawse, then another length running from the hawse to the anchors. If you want things to look more realistic, you must first drill out the hawse (including the molded in solid grills) on the deck, then run the anchor chain through source holes, and then the hawse on the hull sides. One wonders why Hasegawa didn't simply mold the deck and hull with the hawse cut out instead of the modeler having to cut the individual lengths as shown in the instructions.
There are skylights depicted on the deck, but these are solid. You must drill out the skylights if you want them to look realistic. There is no supplemental detail on this kit. No rails, funnel rings, solid portholes, solid skylights, solid gun barrels, solid ladders, little plastic nubs molded on the lifeboats instead of actual cradles, and the bridge is a solid window affair.
Photo Etch Details and Paint:
There are no funnel caps and grills- instead the funnel tops are clunky solid hunks of plastic that screams "toy" rather than "this costs $85 on the street"! Ah, but Hasegawa DOES make this stuff... But it'll cost you another $100 street for their own TWO detail sets. While Dragon and Trumpeter have been upping the ante with great multimedia kits including plenty of PE for low prices, Hasegawa seems to think that PE is an arcane science reserved for only those with the best connections and the biggest wallets. This business model is apparently working nicely because Hasegawa's since all of their subsequent 1/350 releases do the same thing (witness the three extra sets for the Nagato).
Having read great things about Gold Medal Models' (GMM) PE set, I decided to go that route and not buy into Hasegawa's pyramid scheme. I also saved about $60. Now to be fair, for the price, Hasegawa also gives you turned metal gun barrels for the main guns, resin lifeboat covers, and metal screws. But then again, for about $60, I could buy Lion Roar's set that includes the four main barrels, plus 14 secondary battery barrels. I usually feel that you get what you pay for and price is no object for a professional finish, but we're talking over $150 in detail sets alone to have everything.
Anyway, I can drill out the main barrels and the other guns are so small, a dot of black paint will do the trick, so GMM it is! When the GMM set arrived, I happily got down to business. First, shave off all of the solid skylight detail and hollow out the enclosures (drill out the portholes while you're at it). Glue on GMM's skylight enclosures. Replace the weird solid hawse grill that was drilled while opening up the hawse with GMM's hawse grills. Things are already looking up!
Well, not quite. You still have all of that masking to do. It took me a total of four hours to do all of the deck masking (two movies came on TV in the background during this time). The deck was painted deck tan and the rest was painted Kure Arsenal Gray. Kure Arsenal Gray is available from Tamiya in both acrylic (XF-75 IJN Gray) and spray lacquer.
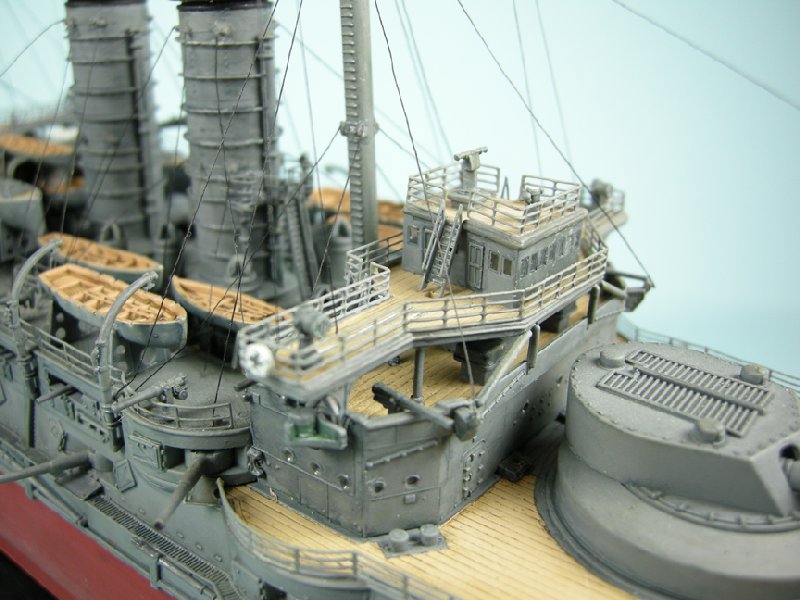
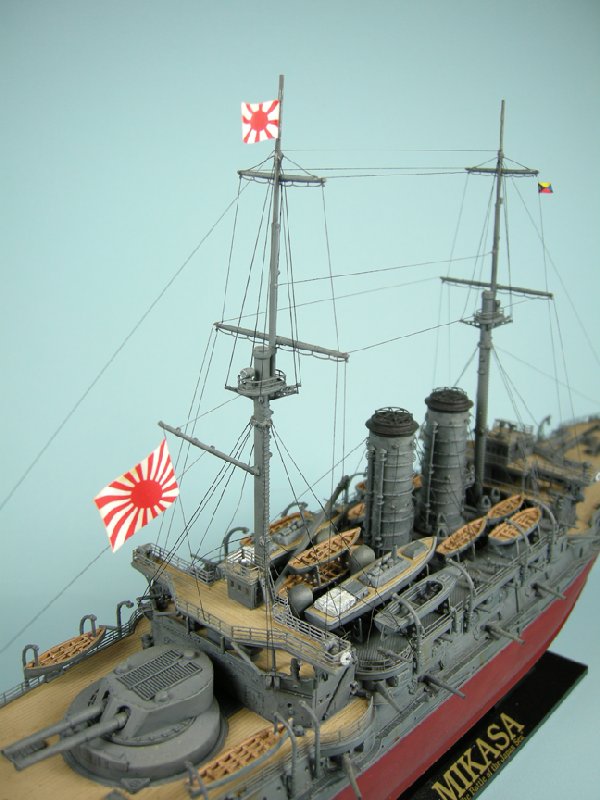
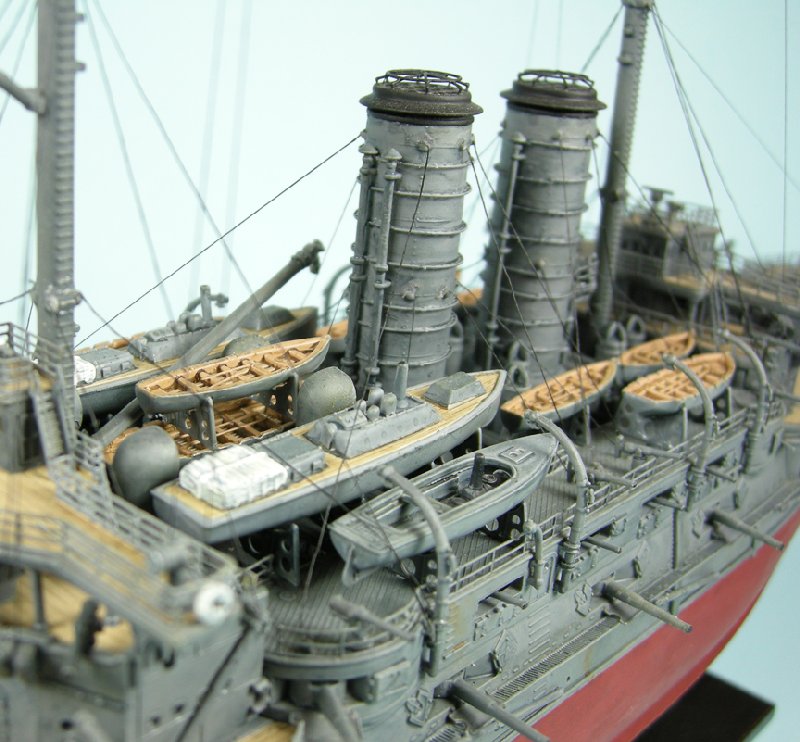
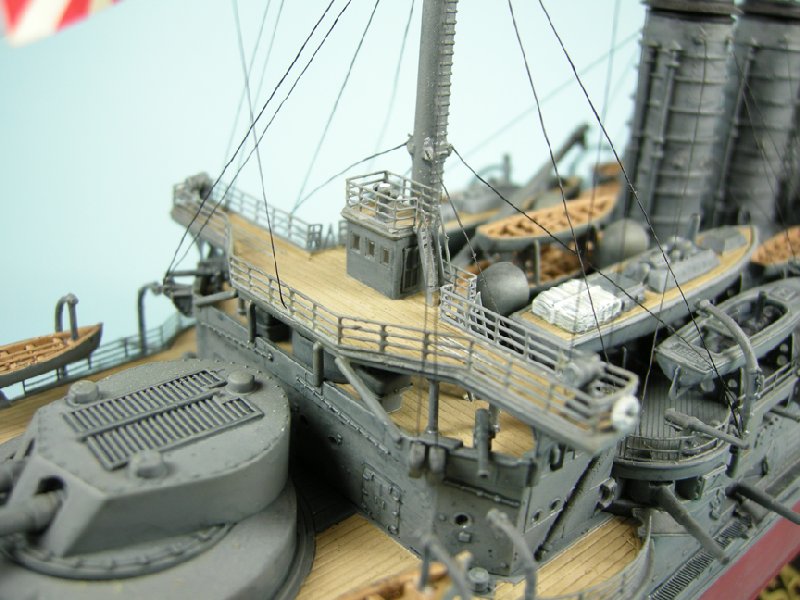
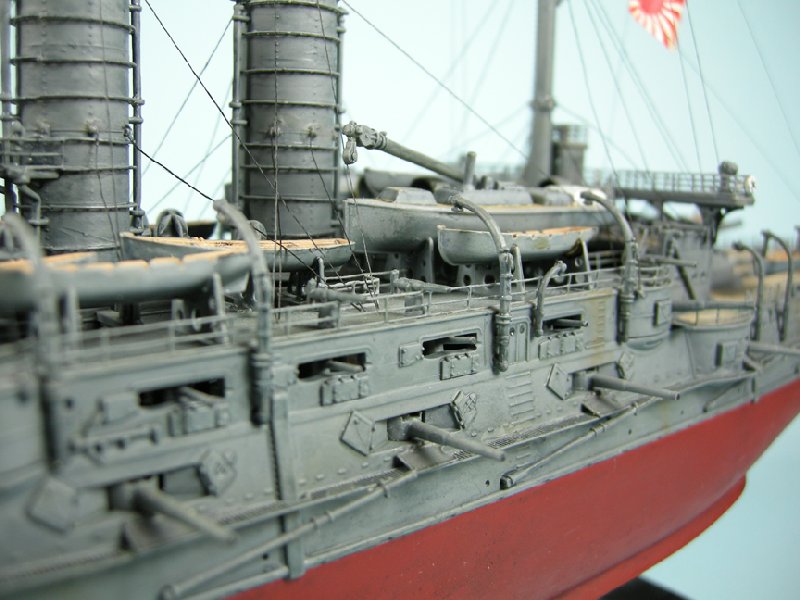
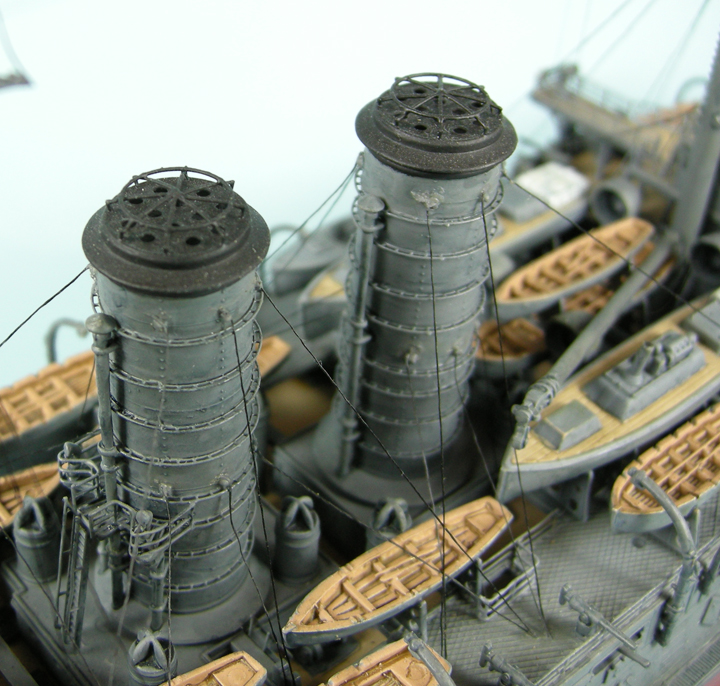
The deck gets painted with the gray as is the hull above the waterline. I start work on the funnels, using GMM's included nifty little jig to make sure the funnel rings are aligned. The funnel cap goes on, followed by the grills, the stock ladders replaced by the GMM PE parts and rails are added to the forward funnel to make the funnels have twice as many parts as they would stock. The funnels alone are a great advertisement for GMM. They're gorgeous and true works of art. It's a shame to paint them, but paint them I must.
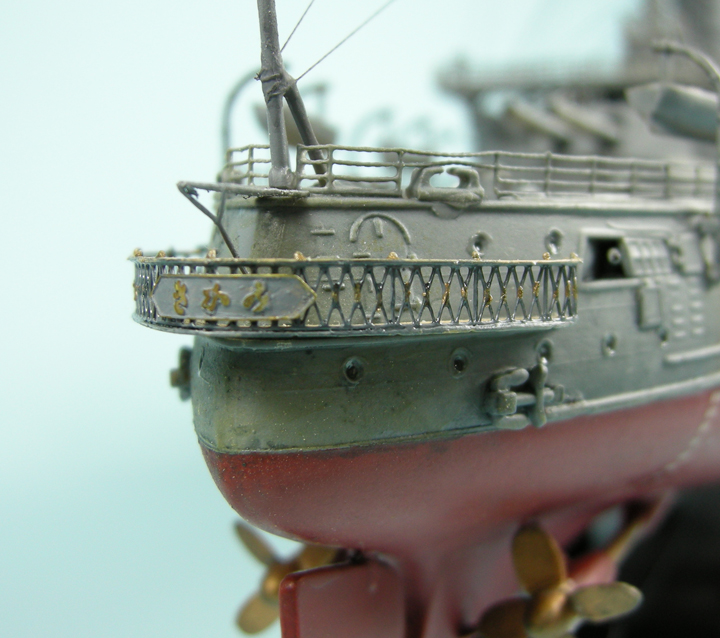
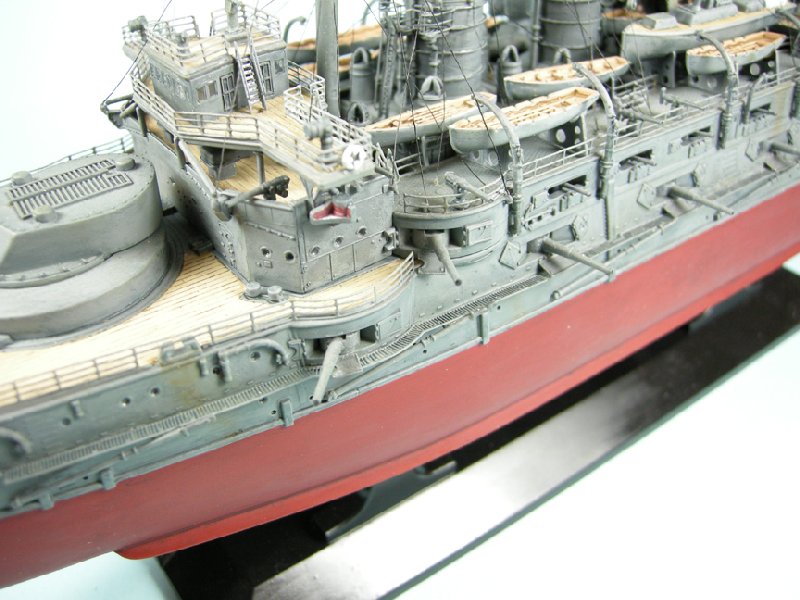
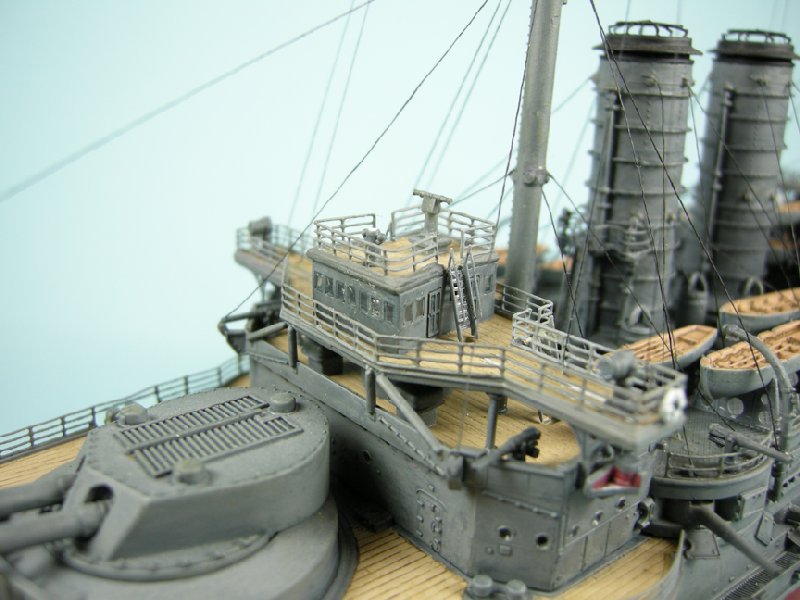
All of the solid kit ladders are ditched for the PE ones. The forward and rear bridges are also replaced with PE assemblies with actual open windows and separate doors! The main bridge even has a PE ships' wheel and throttle to go inside. The solid captain's walk is also thrown out in favor of GMM's jewel-like assembly with separate railing top and separate name plate (an extra is included in case the first gets lost in the carpet).
Rails and Boats:
Hasegawa doesn't give you any main deck or lifeboat deck rails. They give you "canvas covered" rails for the upper bridge areas and spotlight platforms, but these are pretty bad (Hasegawa's own detail set has replacements for these!). So, out they go! GMM gives you rails cut to length for each position. They also give you a choice of canvas covered rails for the upper areas with double-sided etching showing canvas on one side and the rails on the inside. I chose to go with the standard rails simply because they're so intricate. In areas where there are chain lengths, individual chain links can actually be seen on GMM's parts! A word on GMM's brass. It's thicker than White Ensign's or Tom's. If you're used to gluing down WEM's foil-like rails as you go, you have to throw that idea out with GMM. In their excellent instructions, GMM tells you to pre-bend the rails to shape, paint them and then mount them on to your painted kit. There's nothing wrong with this per se- it's just that you may have to work differently than you're used to.
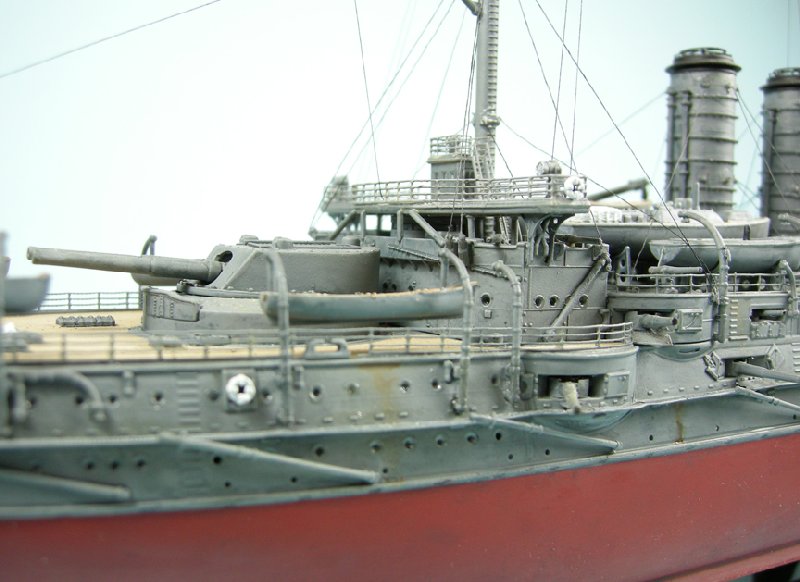
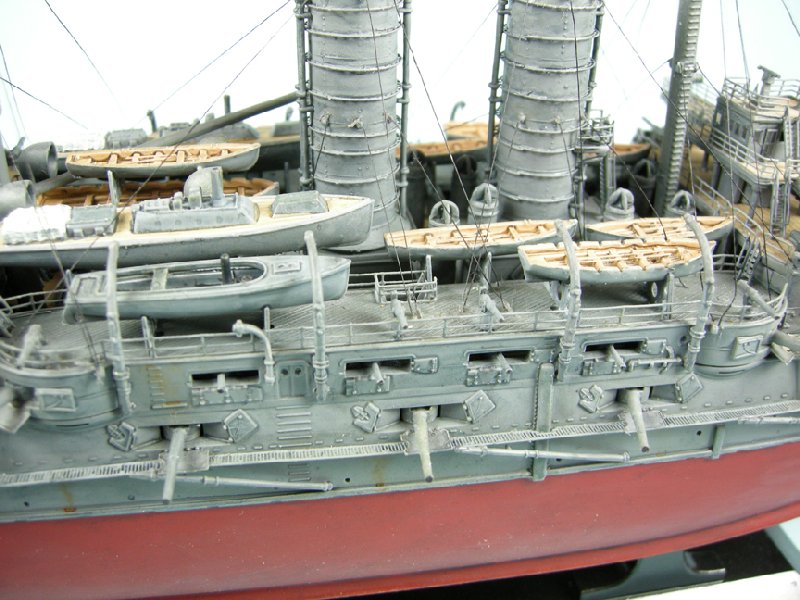
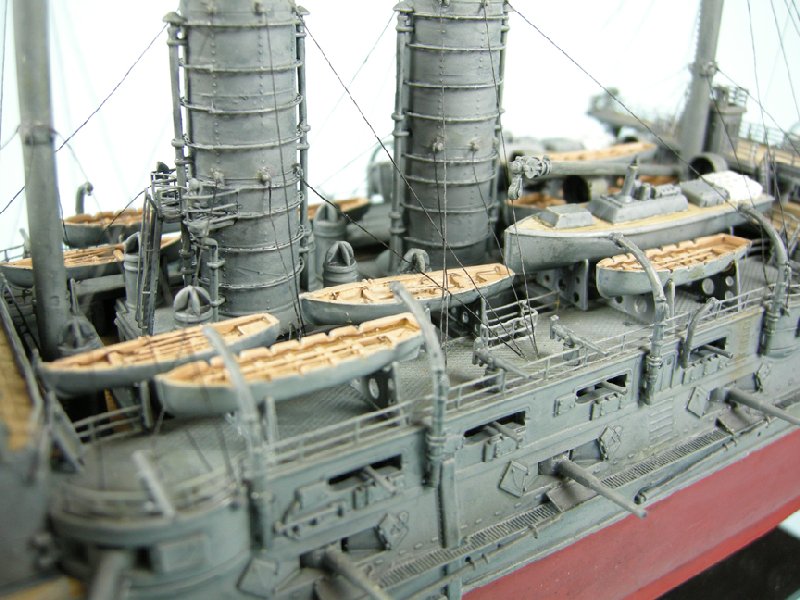
A major travesty on Hasegawa's parts is the torpedo net walkway. It's solid. To compound matters, the six inch guns aim just above the walkway with their center gun doors resting on the walkway. Hasegawa actually molds the gun doors to the walkway itself! What the...? So, the kit walkways get the heave-ho and GMM's parts go on instead followed by GMM's SEPARATE gun doors. Muuuuch better!
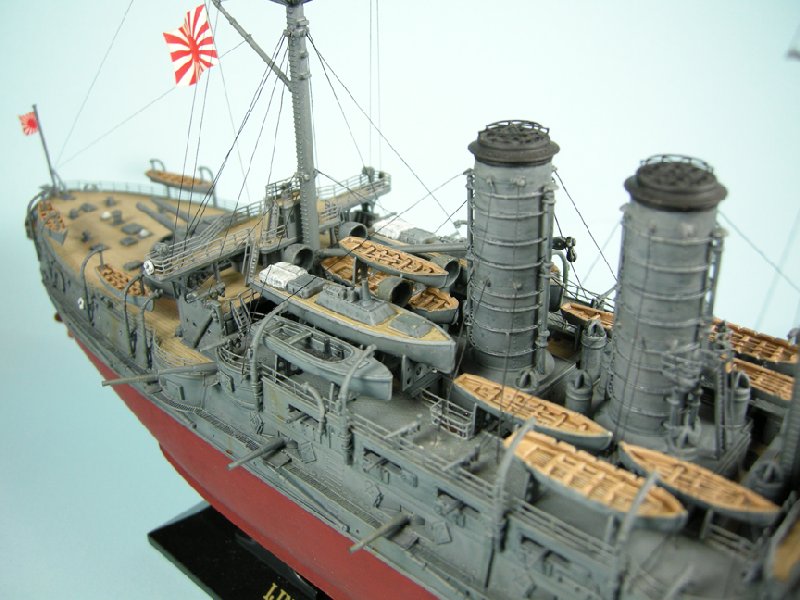
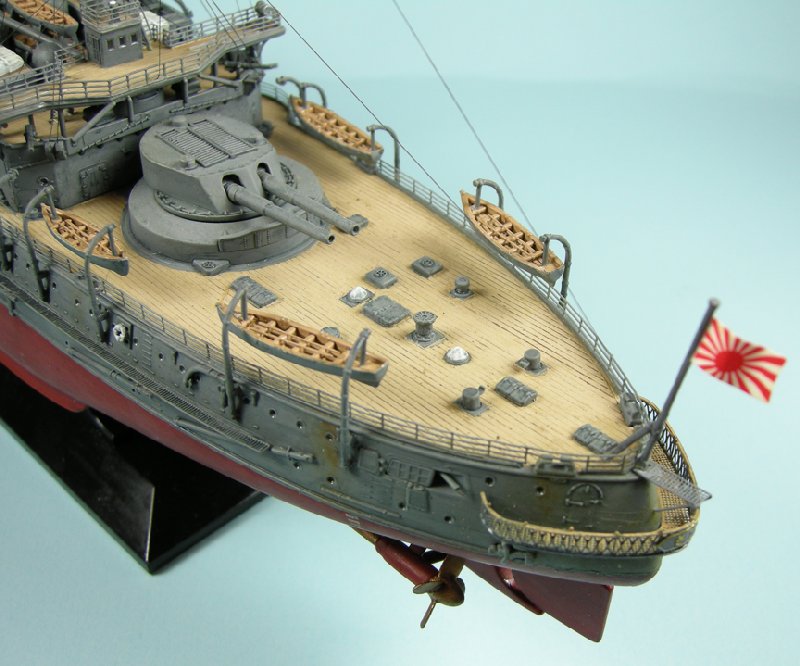
Now it's time to start working on the fleet of lifeboats. Each lifeboat comes with its boat cradles molded on to the bottom in a goofy lump of plastic with no detail at all. These weird things have to be sawed off each boat and replaced with GMM's boat cradles which are an order of magnitude better. GMM also provides rudders for the large launches and the smaller steam launch. But now there's trouble in paradise. First, the boat cradles don't fit very well and a lot of filing has to be done to the boat hulls to make them fit. Then, when dry fitting, you see that those rudders will actually collide with the rear casemate and not fit. So the rudders have to be taken off. Let's try fitting the boats now... Disaster! The boat cradles are actually so wide that they collide with GMM's own rails on the inside edges of the lifeboat gallery.
It's really strange to see such a boneheaded thing happen to an otherwise excellent set of PE. After a lot of head scratching, cursing, and some more head scratching, I decided to bite the bullet and clip the rails where the boat cradles intruded. Thankfully, the array of lifeboats mostly hides this unless you really look close, but it's there nonetheless.
Final Assembly:
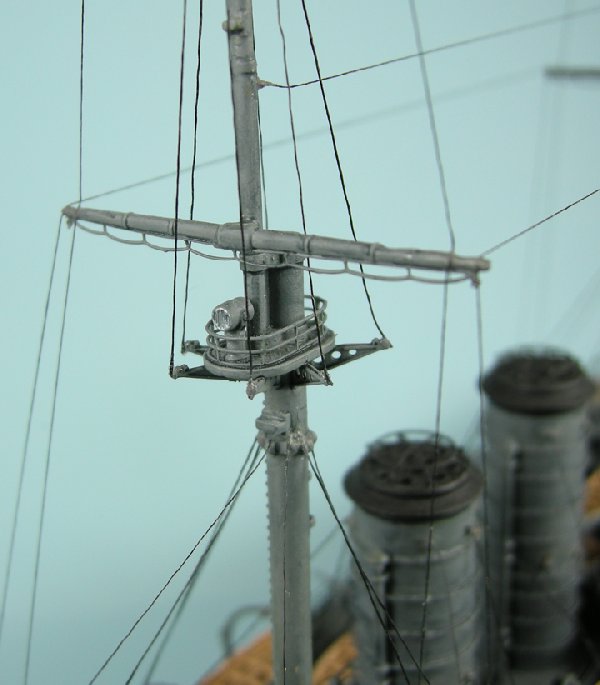
We're in the homestretch! A couple of paint touch-ups here, an Imperial Chrysanthemum mounting there, and we're almost ready for prime time. Now it's time for that process that scares most grown men and makes ladies of a delicate nature faint- the RIGGING! The kit doesn't help much either because there are many points where the rigging is supposed to go, but there are no base points. GMM comes with turnbuckles and tie downs, but that still doesn't help the fact that there are at least 20 anchorings that are nonexistent on the kit. I have nearly every source on the Mikasa known to man and even then, things are dicey. So, you just have to take a deep breath and create your own.
We're already close to a hundred hours here, what's a couple more? Thankfully, the kit DOES have plenty of other anchor points to work with so all is not lost. For my rigging, I use fly fishing tippet which is a type of resin coated thread that will hold its shape and is very strong (lures are made out of this stuff). Now comes the voodoo. For my support rigging (funnels and masts) I use 6/0, which is .005 mm. For standard rigging, I use 8/0 which is .003 mm. Did you catch that? The higher number tippet corresponds to the SMALLER diameter. The stuff I use is called UNI-Thread. It's available in many colors (I have black, brown, and tan) and sizes and comes in 200 yards, which is more than enough.
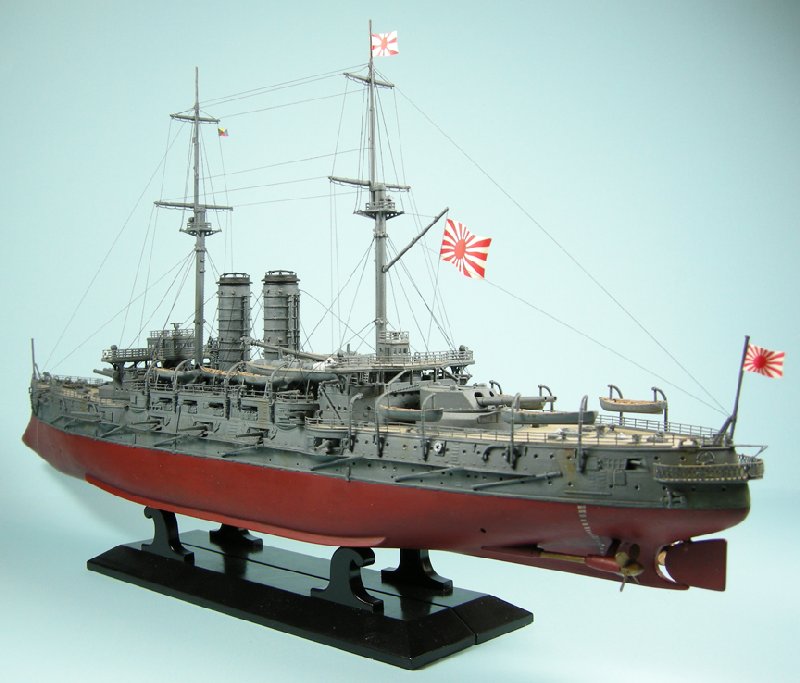
After a few more hours of rigging, with my fiancée tensely putting the cat in the bathroom to keep something disastrous from happening and repeatedly saying she'll be able to sleep again when this process is over, I give a sigh of relief. Pre-Dreadnoughts like the Mikasa had more in common with sailing ships than later ships like the Yamato, so there's a lot of rigging to be done. These ships carried sails "just in case" and were rigged accordingly. Pre-Dreadnoughts don't have as much rigging as earlier ships, but they have much more than later ships. That's part of their charm. A fully rigged Pre-Dread is a thing of beauty as something that points to the past while looking ahead to the future.
Flags:
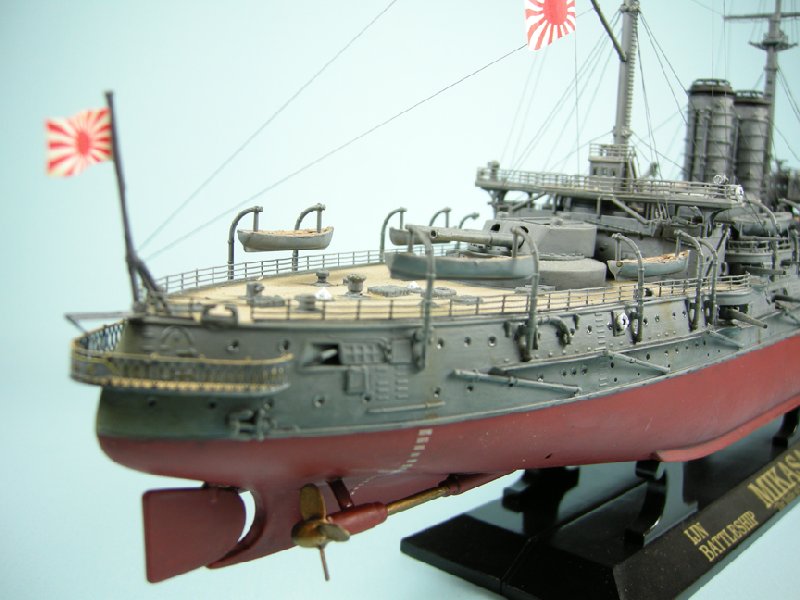
Hang the flags for that extra bit of pizzazz and you're all set! The kit comes with straight flags or waving flags. I picked the waving flags. They're printed on adhesive paper and you're supposed to just wrap them around the mast and flag pole. Of course, this is pretty unrealistic, so I folded the flags over, cut off the additional area that would have gone around the pole, bent them to a waving shape, and put on some dull coat. After the dull coat dried, I hung them up on the rigging.
The kit even includes Admiral Togo's famous "Z Flag". This was a flag that made the Nelson-like statement, "The fate of Imperial Japan hangs on this one battle; all hands will exert themselves and do their best." This same flag was flown on the Akagi just before the attack on Pearl Harbor...
Conclusions...
I have a real love-hate relationship with this kit. The kit parts all go together wonderfully and kudos to Hasegawa for bringing this subject out in 1/350 in plastic. But consider how much money and tedious work has to be done to bring it up to solid display quality (I spent over 100 hours on it) and the kit begins to lose its shine.
Bear in mind, we're not talking about some 20 year old model that only costs $20. This is a model that came out fairly recently from a company with the latest technology, and for a price approaching $100. Even with the extras, I expect better engineering for my buck. Especially when you take into account that Zvesda's model of the Mikasa's nemesis at Tsushima, the Knyaz Sovorov, is pretty nice kit and only costs $30...
Gold Medal Models comes to the rescue on some of the detail issues with its nice set of rails, funnel pieces, bridge, etc. Despite the weird issues with the boat cradles, rudders, and boat deck rails, this is a great detail set.
Photo Etch Details:
Kit: IJN Mikasa (#350-35)
Manufacturer: Gold Medal Models
Scale: 1/350
Media: Brass Photo Etch
Price: $42.00 USD (MSRP)
Pros: high quality brass material, beautiful funnel details, captain's walk, bridge interior details, torpedo net walkways
Cons: boat cradles not sized correctly to boats, cradles are too wide to coexist with GMM's own boat deck railings, PE rudder assemblies collide with aft casemate and can't be fitted.
In closing, despite some of the complaints, when I sit and look at my finished model of this feisty little battleship that led Japan to victory over Russia, I can't help but say, "Ah, it was worth it!"
For more information on the naval battles of the Russo-Japanese War, watch my animated documentary located at
historywithdade.com


Comments