Ships by Class/Type: Battleships
Topics from the Dreadnaught era to modern day.
Hosted by Steve Joyce
Zvezda Borodino - small fit of madness.
RedDuster
Visit this Community
England - South East, United Kingdom
Joined: March 01, 2010
KitMaker: 7,078 posts
Model Shipwrights: 6,649 posts
Posted: Friday, April 10, 2015 - 12:25 PM UTC
Yes Mr Warren Sir... Right away Sir.

I think this beast only has 56 guns in total so I should stop moaning.

Cheers Si
RedDuster
Visit this Community
England - South East, United Kingdom
Joined: March 01, 2010
KitMaker: 7,078 posts
Model Shipwrights: 6,649 posts
Posted: Saturday, April 11, 2015 - 01:27 AM UTC
Onwards and upwards.

The casemates sprayed white.


A coat of Citadel Mephitso red on the hull, to enrich the hull colour.


The 75mm casemate gun with the brass replacement next to it, the kit barrels are somewhat chunky.


Cracking on with the process, One trick I have learnt, use a pin to make an indent, and go slowly with the pin vice for the first few turns, then it doesn't skid around so much and generally I get hole pretty central.


Meantime the hull masked ready for spraying black.


And done.


The masking off, I do like this scheme, very striking.


20 75mm guns re-barrelled and sprayed, a few are a little off centre, but happy with them. (All done Mr warren Zur)


And the first two fitted,


Si
warreni
Visit this Community
South Australia, Australia
Joined: August 14, 2007
KitMaker: 5,926 posts
Model Shipwrights: 2,624 posts
Posted: Saturday, April 11, 2015 - 01:48 AM UTC
Good to see Captain Heathwood!

Another way to make that pilot hole for your drilling is just to use the tip of a No.11 Exacto blade. Or a small drill..

Looking very nice Sir.
RedDuster
Visit this Community
England - South East, United Kingdom
Joined: March 01, 2010
KitMaker: 7,078 posts
Model Shipwrights: 6,649 posts
Posted: Saturday, April 11, 2015 - 01:58 PM UTC
Cheers Warren,

Good ideas mate, especially I would think on harder plastics, the plastic on this old thing is rather soft.

Si
Littorio
Visit this Community
England - South East, United Kingdom
Joined: September 15, 2004
KitMaker: 4,728 posts
Model Shipwrights: 1,080 posts
Posted: Saturday, April 11, 2015 - 02:12 PM UTC
Looking good Si, like the paint scheme on this, makes me want to get the sister ship out and make a start.
Must resist...must resist... need to clear the ways first ready for the cruisers (Cruiser-Graf Spee and Guadalcanal-Portland campaigns) in August.
RedDuster
Visit this Community
England - South East, United Kingdom
Joined: March 01, 2010
KitMaker: 7,078 posts
Model Shipwrights: 6,649 posts
Posted: Saturday, April 11, 2015 - 10:43 PM UTC
Cheer Luciano,

It is a striking scheme, again a change from all the greys. Be warned though, this kit does need a lot of love. I am tempted to build the Suverov but without the time constraint and really throw the kitchen sink at it.

Will post today's update either later or tomorrow,

Si
RedDuster
Visit this Community
England - South East, United Kingdom
Joined: March 01, 2010
KitMaker: 7,078 posts
Model Shipwrights: 6,649 posts
Posted: Sunday, April 12, 2015 - 01:56 AM UTC
Today's update.

The casemates with gun fitted, they must be way to small.


All the casemate guns in place.


The maindeck is used as a sprue, which is mildly annoying as the small parts attached are not required until much later in the assembly.


The maindeck in place, took quite a bit of cleaning up, not too bad a fit for;d, but not good aft, and cracked the seem right at the stern, fortunately not too badly. Some filling needed in that area anyway.


The fo'c's'le deck test fitted, a few gaps but not too bad.


The superstructure sides have flash issues, one straight off the sprue and one cleaned up and the port holes drilled out.


The fo'c's'le deck and superstructure sided fitted.


And from above, a bit of filling to be done.


Si
TRM5150
Visit this Community
Massachusetts, United States
Joined: January 03, 2010
KitMaker: 2,159 posts
Model Shipwrights: 1,400 posts
Posted: Sunday, April 12, 2015 - 04:52 AM UTC
You're on fire with this one Si!! Nice work on the casemates!! Looking like you overcome the little sidesteps and its coming together now!!
RedDuster
Visit this Community
England - South East, United Kingdom
Joined: March 01, 2010
KitMaker: 7,078 posts
Model Shipwrights: 6,649 posts
Posted: Sunday, April 12, 2015 - 12:57 PM UTC
Thanks Todd,

as you know with these things, first part comes together quite quickly, then it gets to the detail and it really slows down.

Next job, filling and filing, adding the iron ladders to the superstructure sides, and then working out how to mask of up to the main deck level without breaking any gun barrels off to spray the upperworks before fitting the deck.

Si
RussellE
#306
Visit this Community
Victoria, Australia
Joined: June 27, 2010
KitMaker: 3,959 posts
Model Shipwrights: 2,777 posts
Posted: Sunday, April 12, 2015 - 04:21 PM UTC
5 months to complete? I reckon you'll do it in 3, mate.

Looking good so far-will be following along

Russ
rolltide31
#377
Visit this Community
Texas, United States
Joined: June 27, 2010
KitMaker: 1,481 posts
Model Shipwrights: 1,332 posts
Posted: Sunday, April 12, 2015 - 05:17 PM UTC
Si,

I will definitely be paying attention to watch your process for filling those gaps. It was one are of the Maya that gives me fits.

Love the contrasting color of red and black. Really makes her pop.

I concur with Russell, you will have her launched in 3 verse 5 months.

Dave
RedDuster
Visit this Community
England - South East, United Kingdom
Joined: March 01, 2010
KitMaker: 7,078 posts
Model Shipwrights: 6,649 posts
Posted: Sunday, April 12, 2015 - 06:09 PM UTC
Hi Russell,

That would be ambitious, nearly every joint needs filler, there will be some scratchbuilt added detail, so a very long way to go yet.

Hi Dave,

And yellow funnels as well, she should be quite striking when she is finished.

As I said above 3 months is pushing it. next weekend will be mostly filling and filing, and of course the four Iron ladders up the superstructure sides.

Si
JJ1973
#345
Visit this Community
Niedersachsen, Germany
Joined: August 22, 2011
KitMaker: 1,835 posts
Model Shipwrights: 1,832 posts
Posted: Monday, April 13, 2015 - 09:29 AM UTC
And another colorful and 'off the beaten track' build, wonderful Si and it's great fun following you and watching your progress!!

Great work!

Cheers,

Jan
RedDuster
Visit this Community
England - South East, United Kingdom
Joined: March 01, 2010
KitMaker: 7,078 posts
Model Shipwrights: 6,649 posts
Posted: Monday, April 13, 2015 - 12:47 PM UTC
Thanks Jan,

It is an interesting subject, but I do enjoy ships of this era, and it is fun making a silk purse out of a sows ear of a kit.

Glad to have you along.

Si
burbankbill
Visit this Community
Illinois, United States
Joined: February 25, 2014
KitMaker: 85 posts
Model Shipwrights: 80 posts
Posted: Tuesday, April 14, 2015 - 05:54 PM UTC
Hi Simon;
Couldnt you have put the casement guns in after you had masked and painted. I dont have the kit but it looks like that was possible but maybe im wrong.

Bill
RedDuster
Visit this Community
England - South East, United Kingdom
Joined: March 01, 2010
KitMaker: 7,078 posts
Model Shipwrights: 6,649 posts
Posted: Wednesday, April 15, 2015 - 12:11 AM UTC
Hi Bill,

I did look at inserting the casemate guns later in construction, but as the designed method fitting traps a locator between the hull and the casemate it gives a very strong join.

I did think of fitting the gun minus the barrel, spraying then fitting the barrel, but too much chance of a glue drop down the hull.

I have a plan for the masking, which will be easier to show than describe it, so keep watching.

Thanks for looking in.

Si
RedDuster
Visit this Community
England - South East, United Kingdom
Joined: March 01, 2010
KitMaker: 7,078 posts
Model Shipwrights: 6,649 posts
Posted: Saturday, April 18, 2015 - 03:48 AM UTC
Now the boring bit.

The filling.

The this join, on both sides is poor, the superstructure section stand proud of the hull and is a tight conrer to get a file in.


carved and sanded back.


The surrounding area ,asked and green stuff used to fill the gap.


A trickier join because of the curve, however using the wood deck saves worrying about the moulded planking.


The post bow coming on, any damaged paintwork will be left unmasked for the next spray job.


The starboard bow done, smaller gaps have been filled with thick superglue.


Clean up started aft as well.


Getting there, quite a bit more to do on this.

Si
Naseby
Visit this Community
Slovakia
Joined: October 15, 2010
KitMaker: 825 posts
Model Shipwrights: 97 posts
Posted: Monday, April 20, 2015 - 12:44 AM UTC
This kit seems to be quite challenging, but You have mastered it very well Simon. Looking forward to the finished thing.
RedDuster
Visit this Community
England - South East, United Kingdom
Joined: March 01, 2010
KitMaker: 7,078 posts
Model Shipwrights: 6,649 posts
Posted: Monday, April 20, 2015 - 02:47 AM UTC
Cheers Naseby,

It is a challenging beast, but that is the fun. I wouldn't say that I have mastered it yet, quite a few challenges to come.

Glad to have you along.

Si
RedDuster
Visit this Community
England - South East, United Kingdom
Joined: March 01, 2010
KitMaker: 7,078 posts
Model Shipwrights: 6,649 posts
Posted: Wednesday, April 22, 2015 - 01:33 AM UTC
More of the boring stuff.

The clean up goes on. The port bow done.


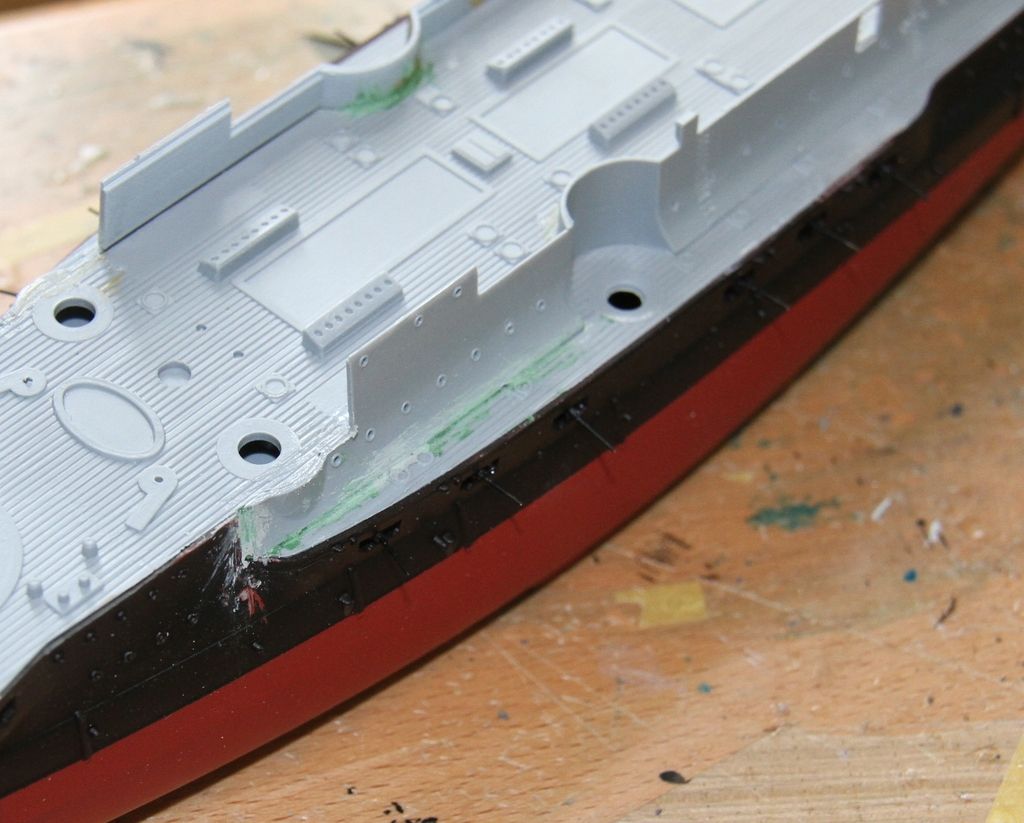
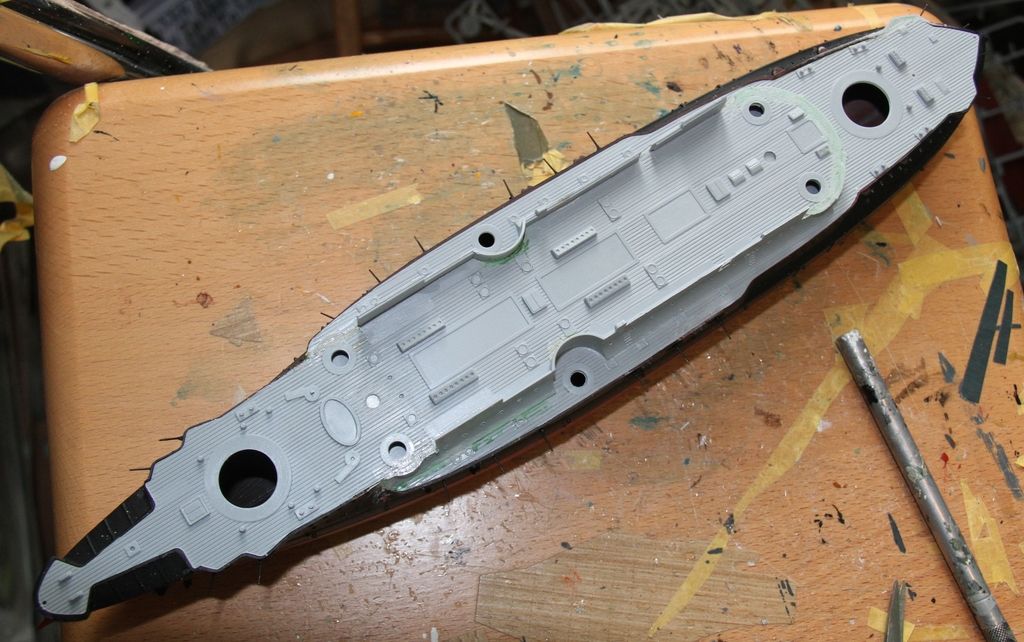
Clean up pretty much done.


The Iron ladders, there are two on each side of the superstructure. I have taken some spare lengths vertical ladder, and cut individual steps off.


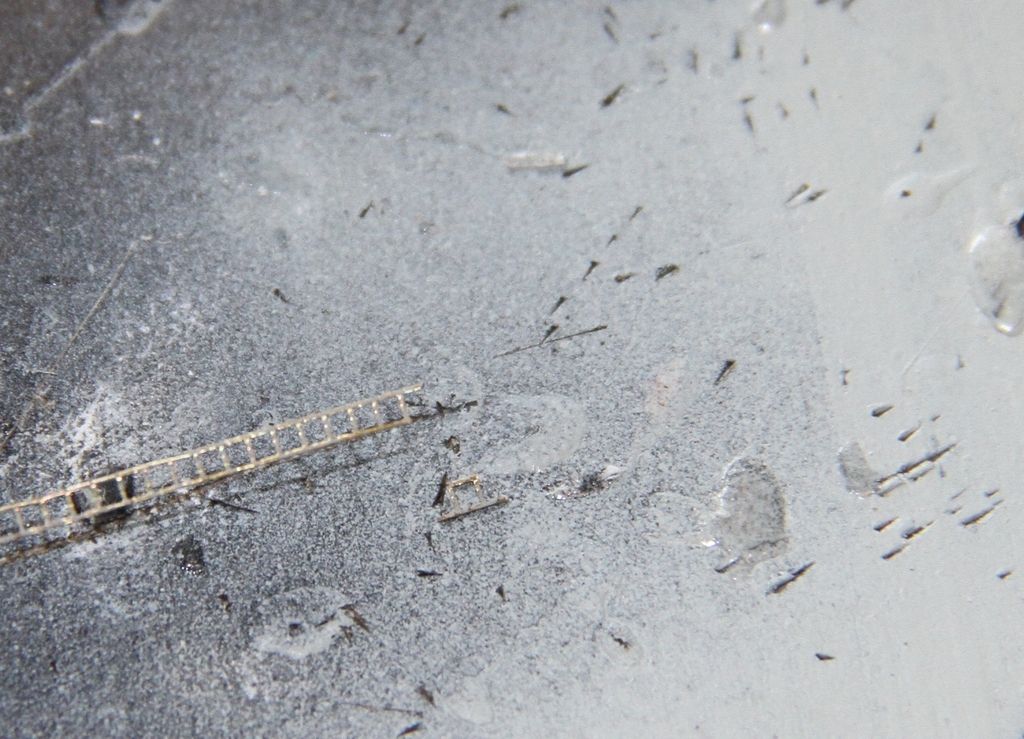
The step is bend to shape with flat nosed tweezers.


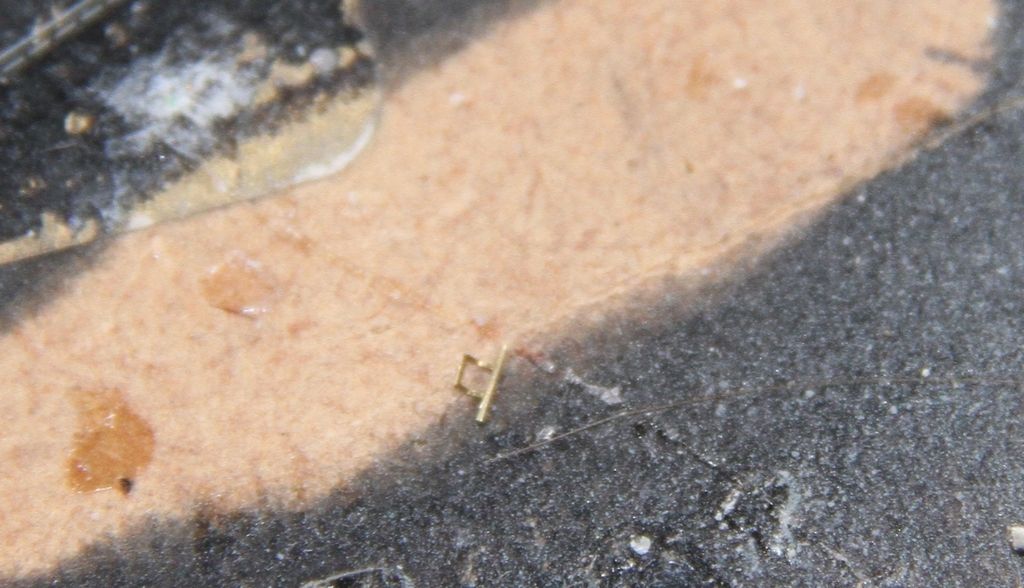
The steps going on, some of these will need re-doing but it is a start.


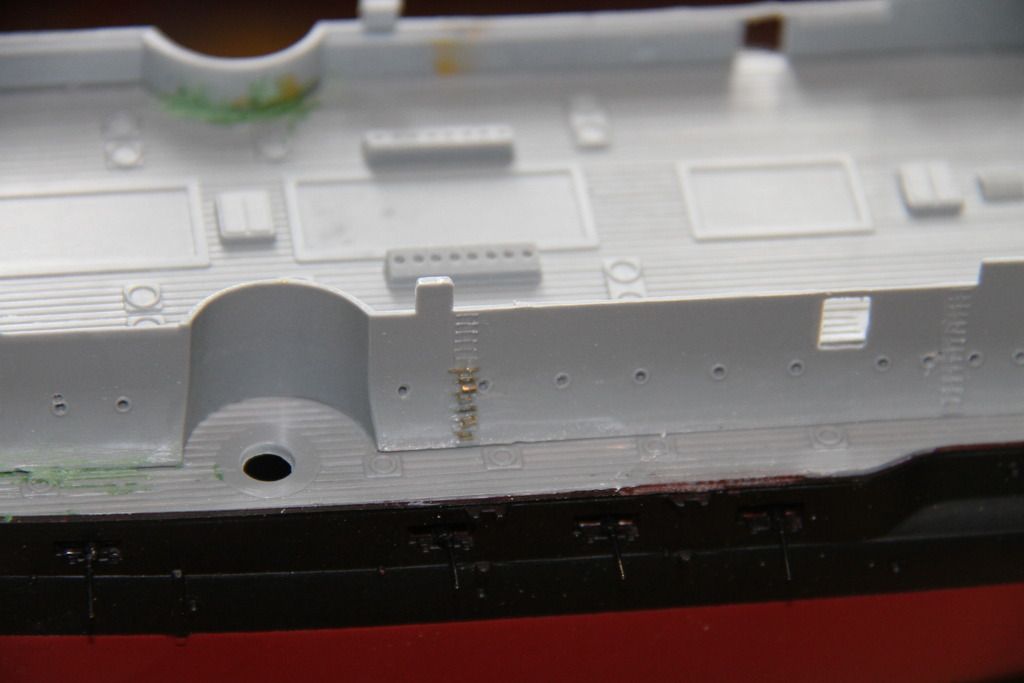
Also I an assuming, and I could be wrong, the large round raised circles represent coaling hatches, so I am fitting left over hatches from old frets.


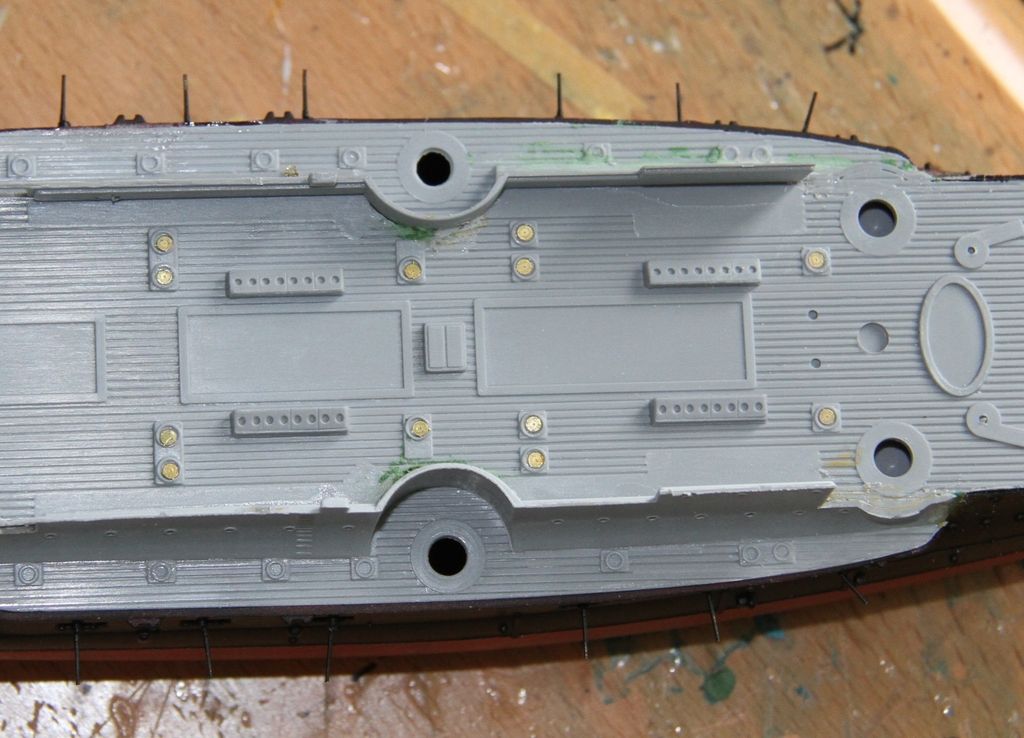
More dull stuff, Iron ladders and coaling hatches.

But then more interesting stuff, like wood deck fitting, bridges, gun turrets and masts.

Si

RedDuster
Visit this Community
England - South East, United Kingdom
Joined: March 01, 2010
KitMaker: 7,078 posts
Model Shipwrights: 6,649 posts
Posted: Sunday, April 26, 2015 - 10:58 PM UTC
On with the boring stuff... To stat with.

Iron ladders done.


and coaling hatched too.


Bit of major progress now.

The hull masked off ready for spraying the area damaged by filing and filling, and the upperworks.


In order to protect the casemates tape was gently secured across the gun barrels.

And sprayed.


Masking off, the masking of the casemates worked.


next job is the deck.

Si
RedDuster
Visit this Community
England - South East, United Kingdom
Joined: March 01, 2010
KitMaker: 7,078 posts
Model Shipwrights: 6,649 posts
Posted: Monday, April 27, 2015 - 11:58 PM UTC
The deck out of it's packet.


and being prepped for fitting.


The maindeck section fitted.


And finally all the decking down, contrasts nicely with the black.


Si.
TimReynaga
Staff MemberAssociate Editor
MODEL SHIPWRIGHTS
Visit this Community
California, United States
Joined: May 03, 2006
KitMaker: 2,500 posts
Model Shipwrights: 1,830 posts
Posted: Tuesday, April 28, 2015 - 12:05 AM UTC
Si,

That wood deck is stunning! And the fit appears to be perfect.

JJ1973
#345
Visit this Community
Niedersachsen, Germany
Joined: August 22, 2011
KitMaker: 1,835 posts
Model Shipwrights: 1,832 posts
Posted: Tuesday, April 28, 2015 - 09:37 AM UTC
Si,

what is there to say??? I second Tim with the deck, and as with the Ching Yuen, great work and fun to watch!!

- and I envy you for your bench time these weeks, for me it's more or less the opposite...

Cheers,


Jan
RedDuster
Visit this Community
England - South East, United Kingdom
Joined: March 01, 2010
KitMaker: 7,078 posts
Model Shipwrights: 6,649 posts
Posted: Tuesday, April 28, 2015 - 11:57 AM UTC
Thanks Tim,

The deck was a very good fit, as usual with the Artworx decks that I have used.

Cheers Jan,

Appreciate your support, I am really enjoying the challenge of building something that is not state of the art.

Si