Starling Models Algerine Class Minesweeper.
England - South East, United Kingdom
Joined: March 01, 2010
KitMaker: 7,078 posts
Model Shipwrights: 6,649 posts
Posted: Tuesday, November 14, 2017 - 03:12 AM UTC
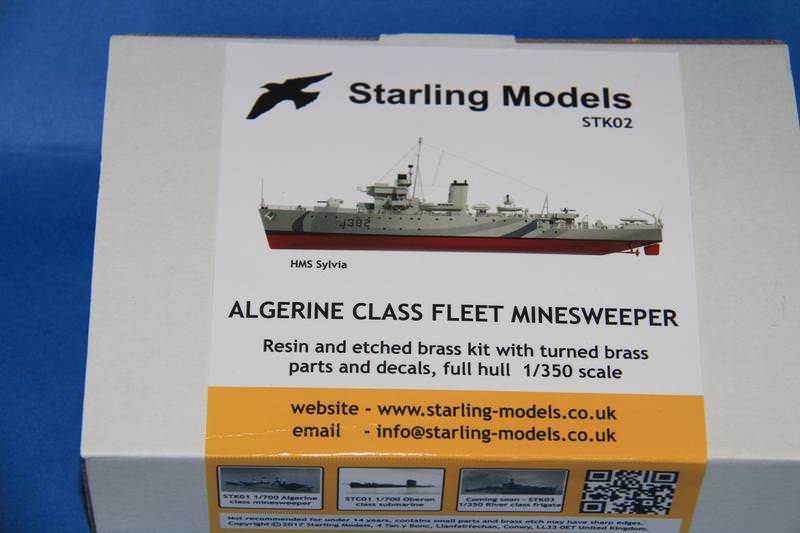
One of my Telford purchases, looked so good I had to start it straight away. Here is the box and it's contents.
The Box
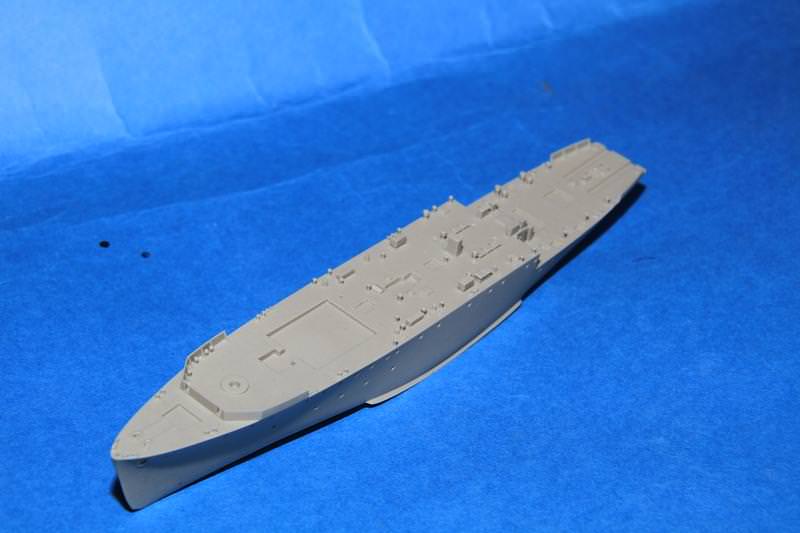
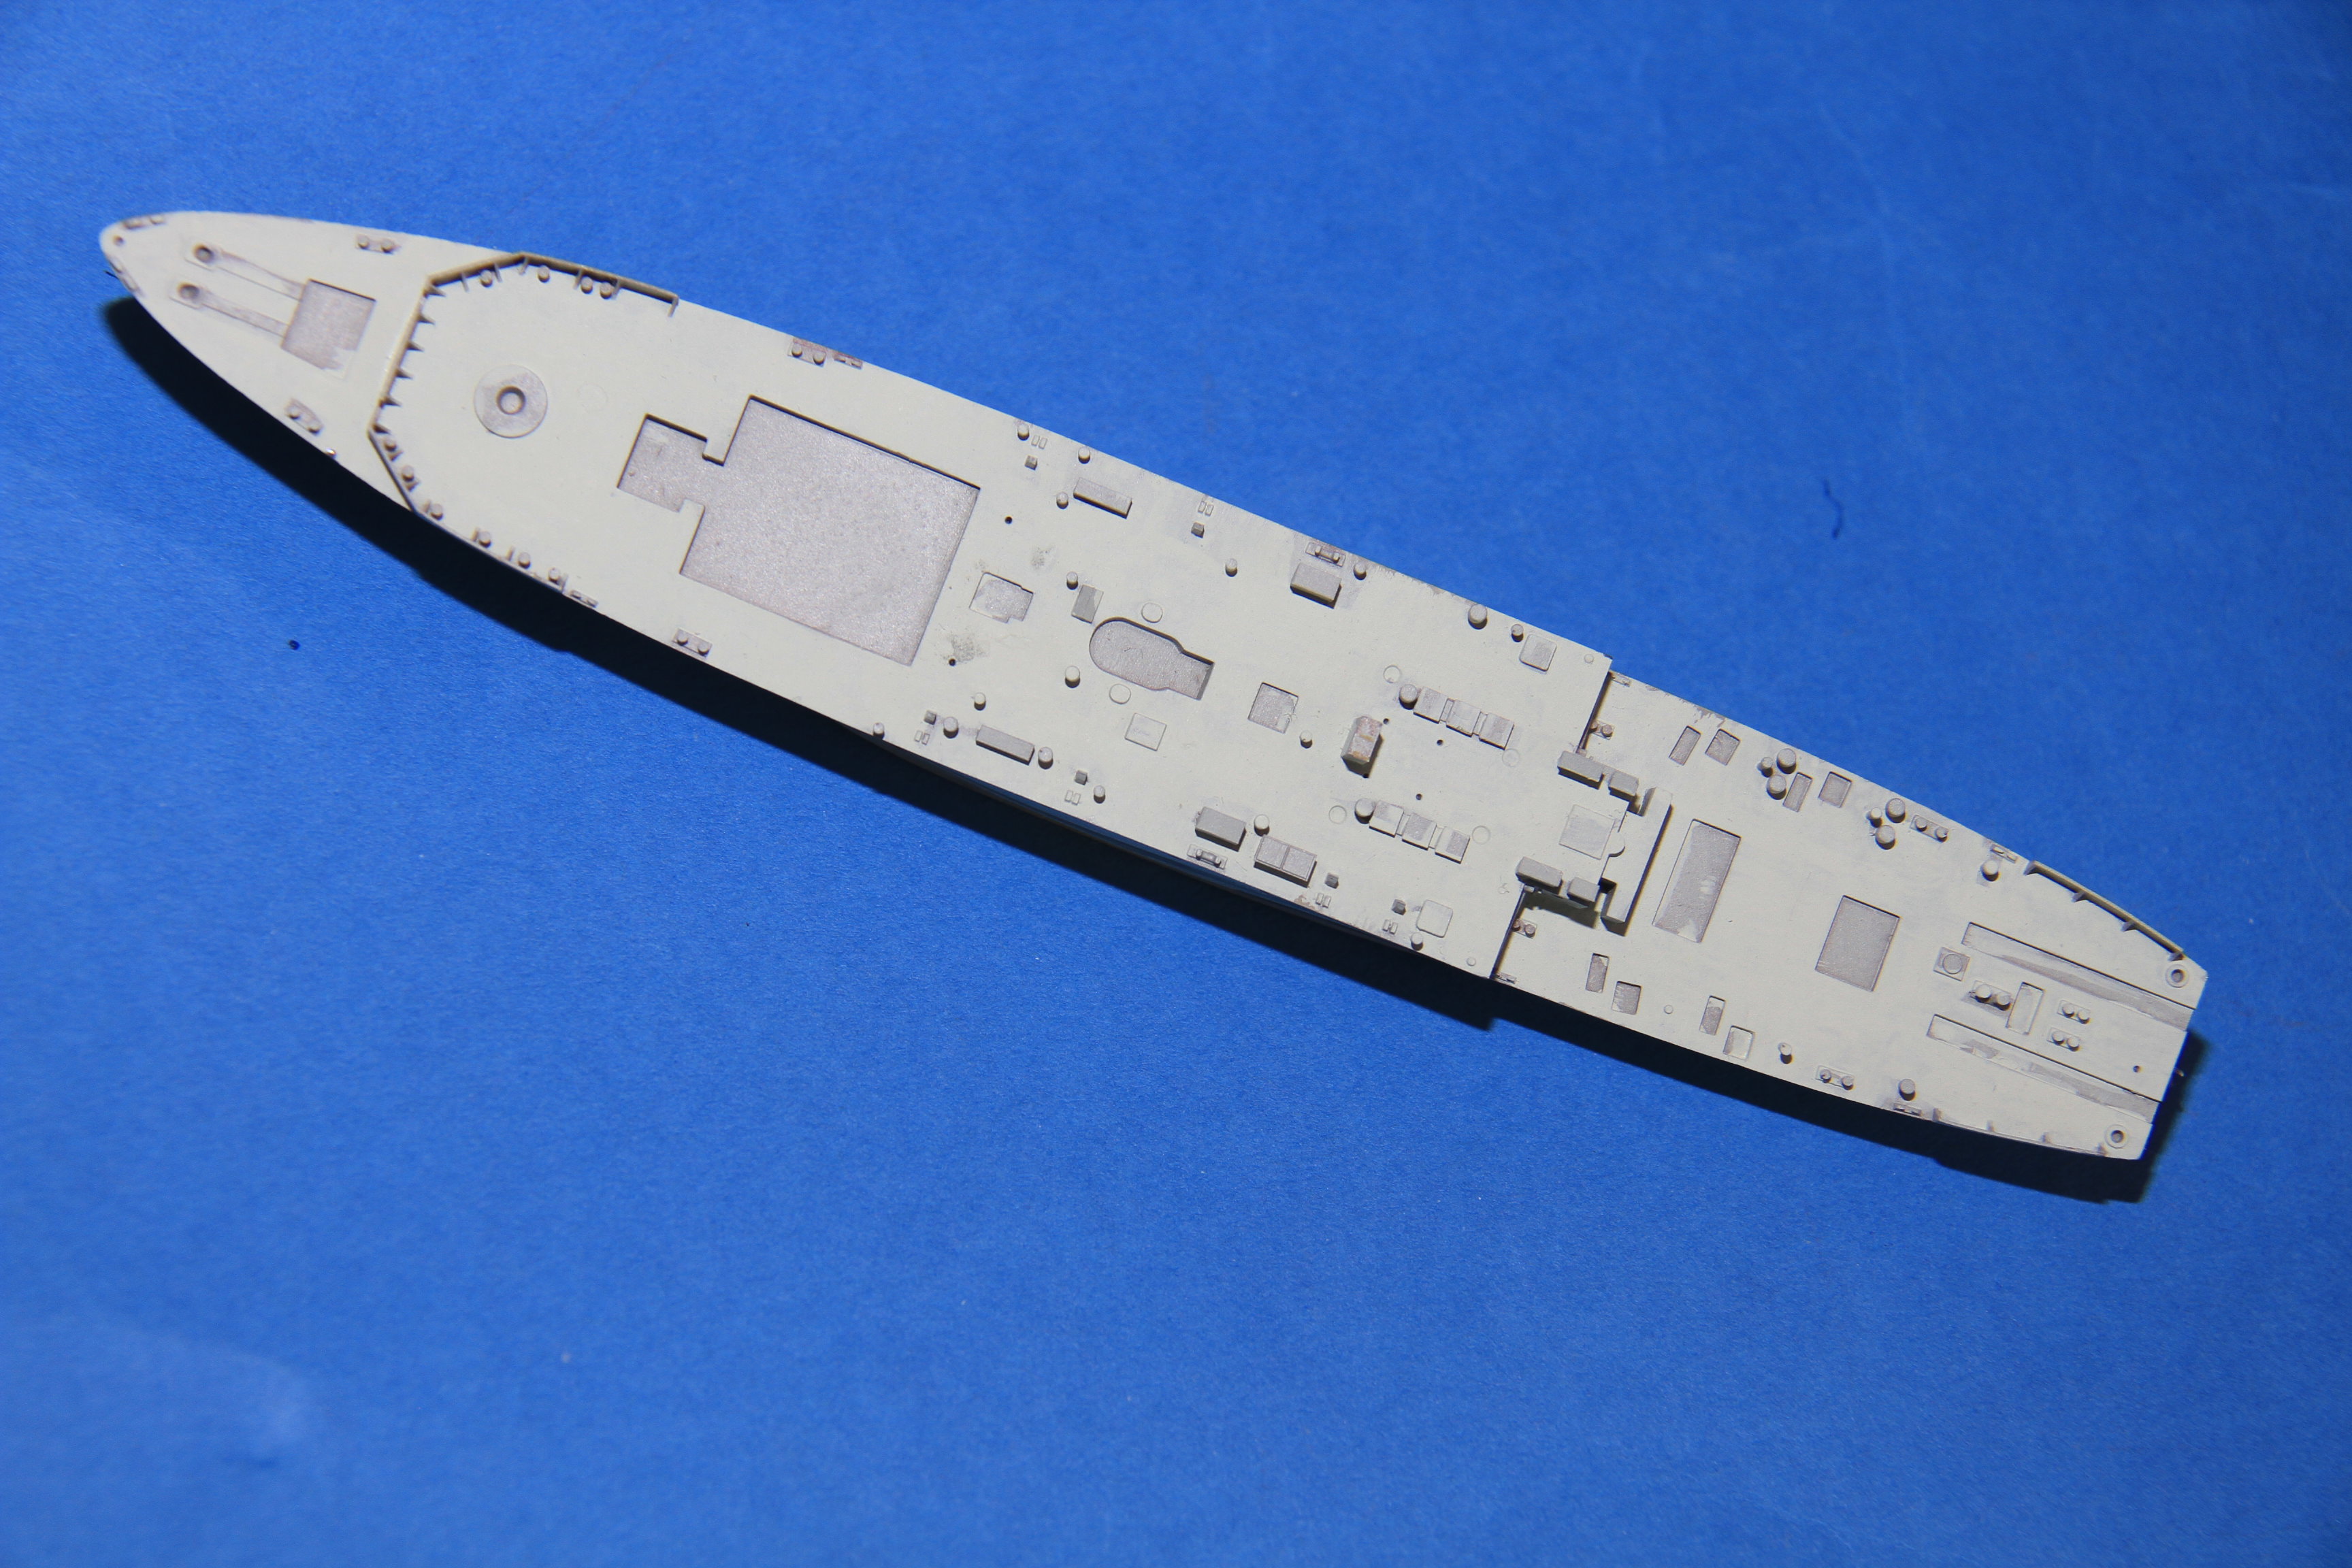
The Hull
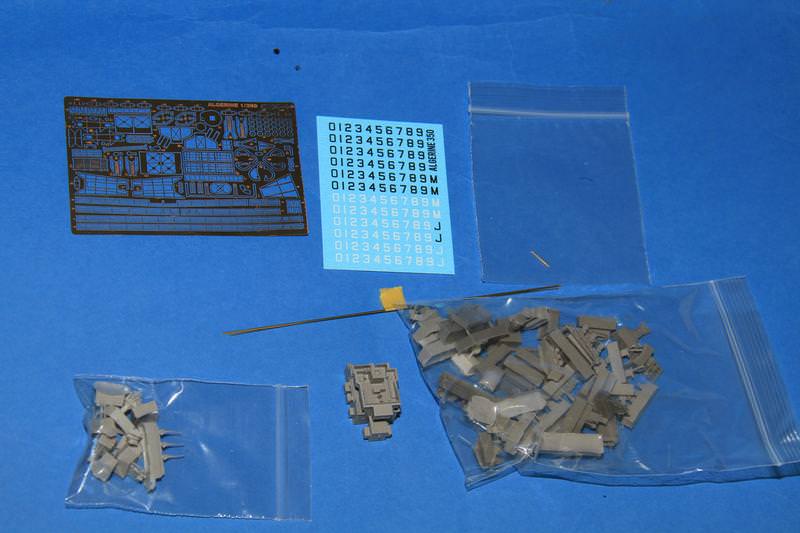
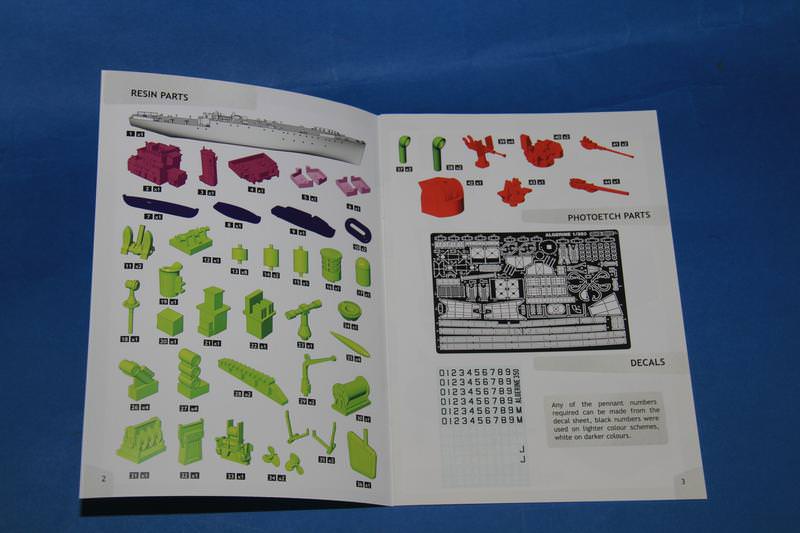
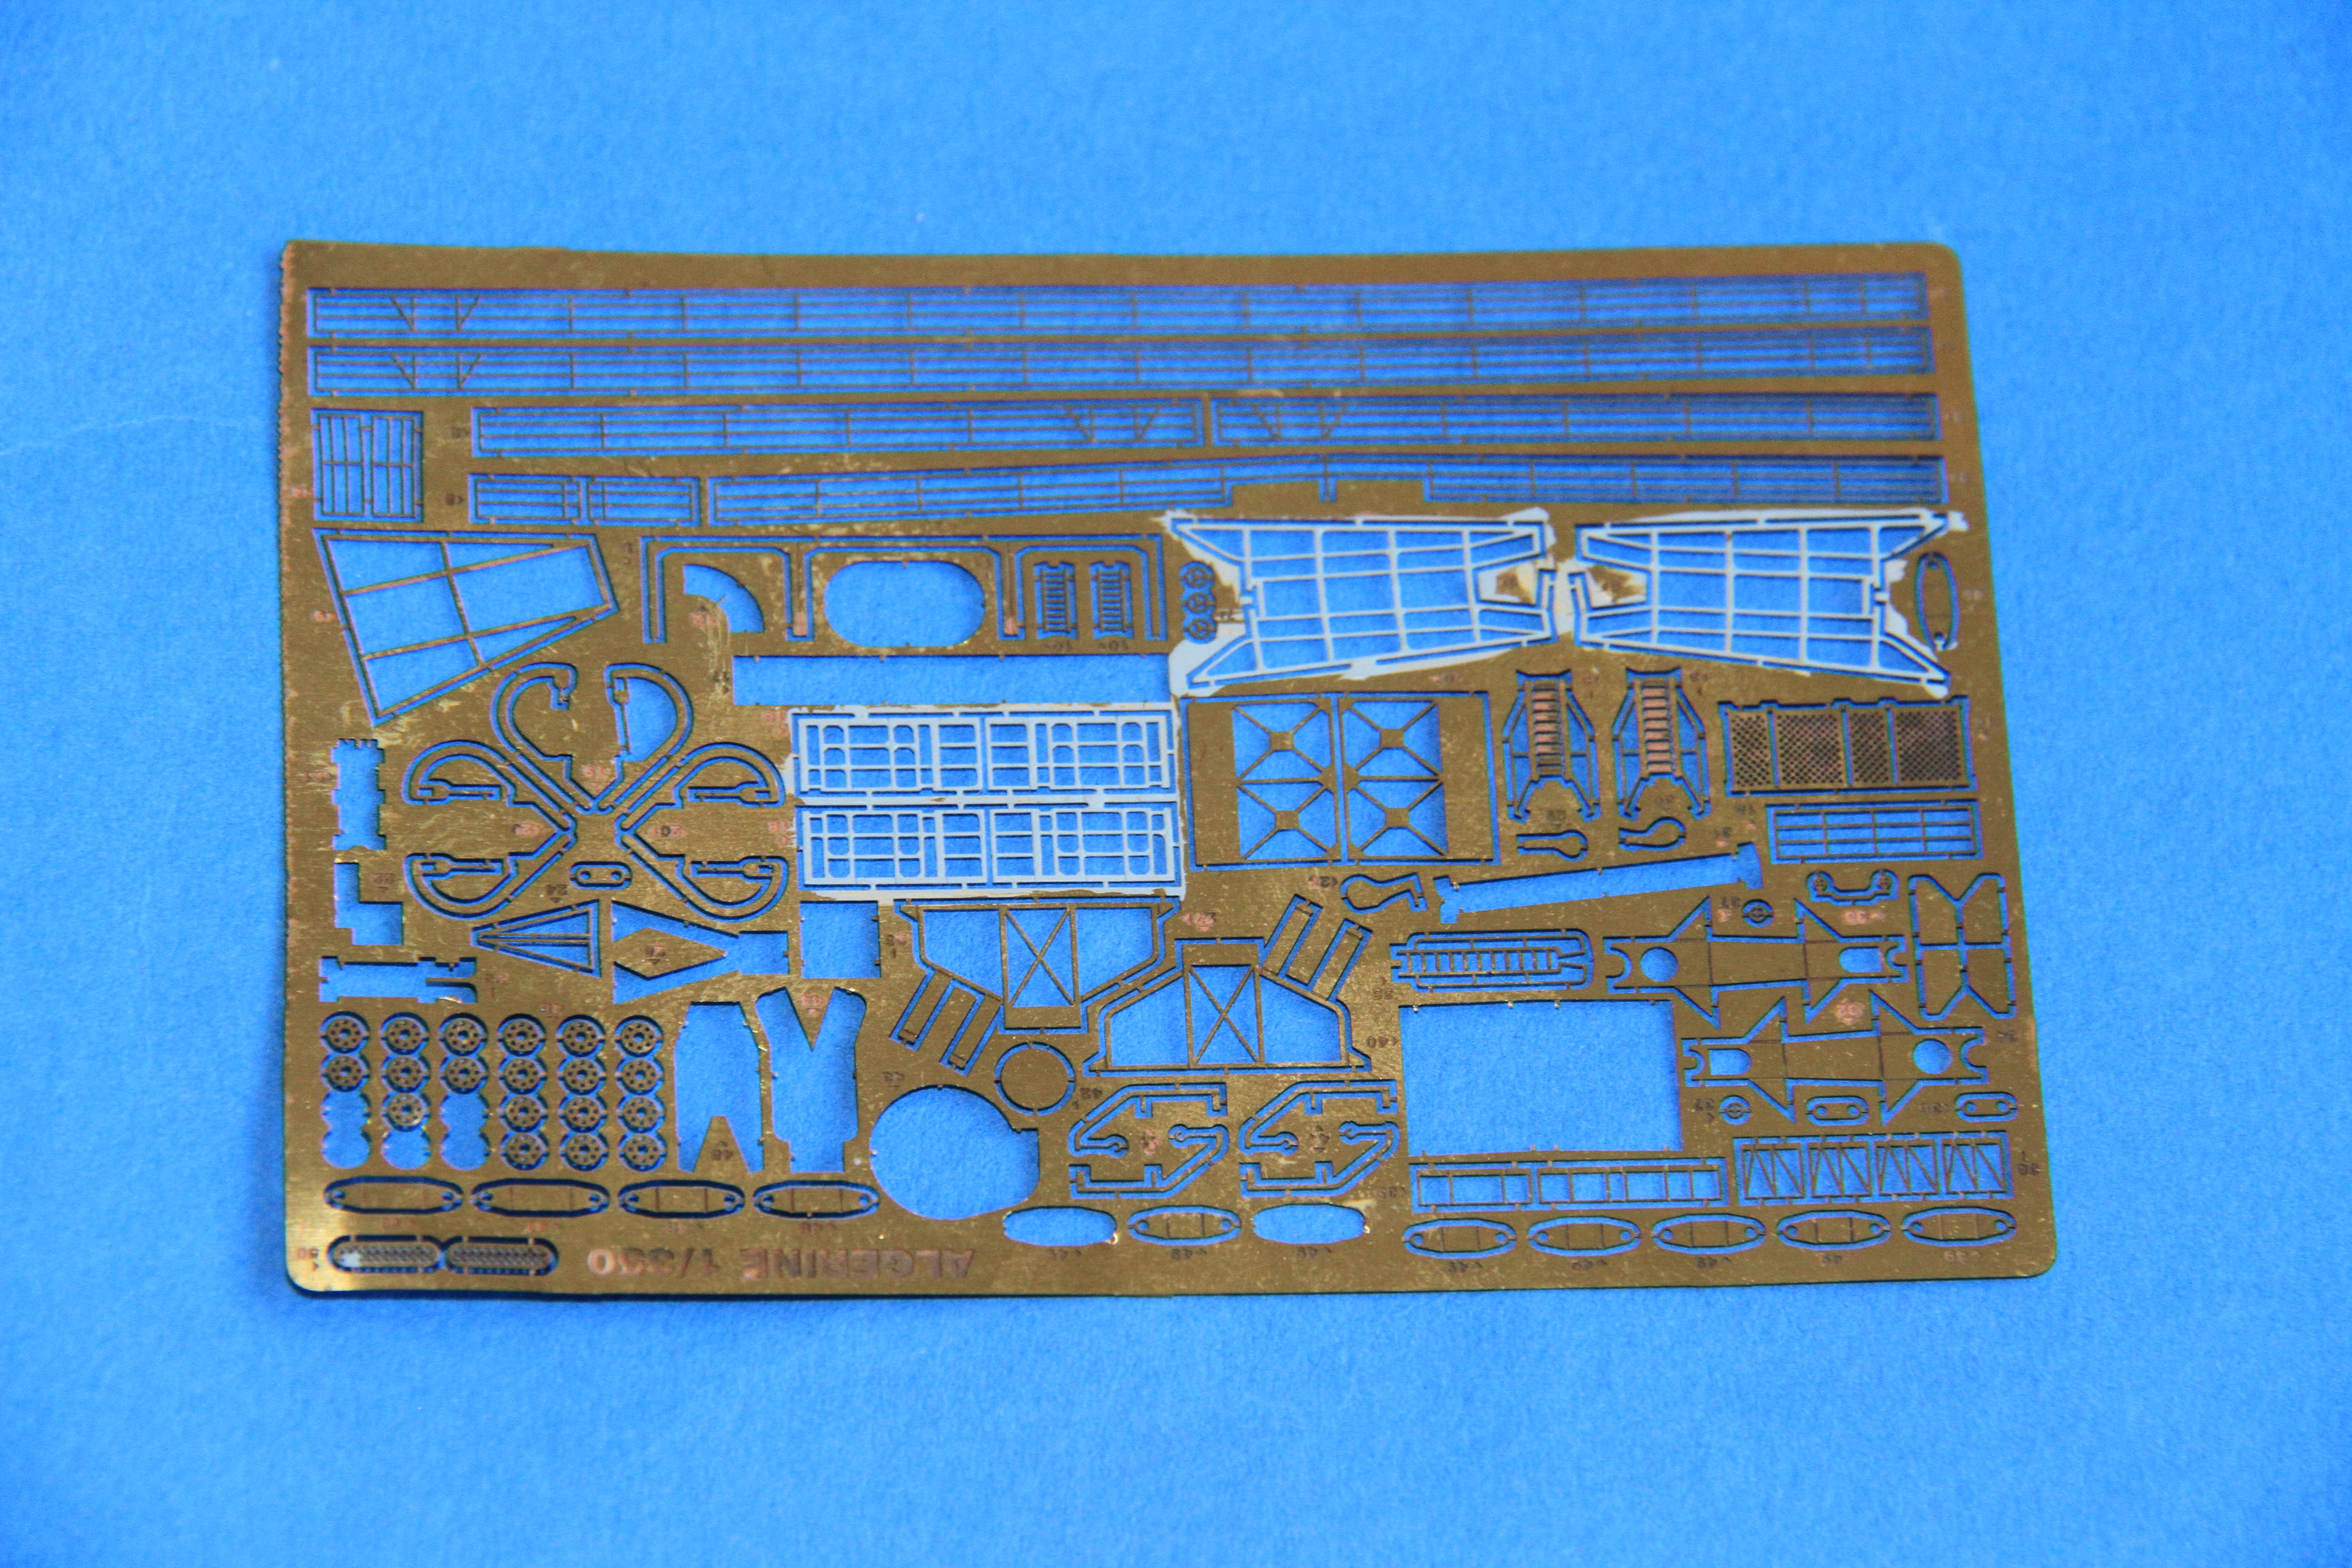
The rest of the bits, includes very nice etch enough hull numbers for any ship and a brass barrel for the 4".
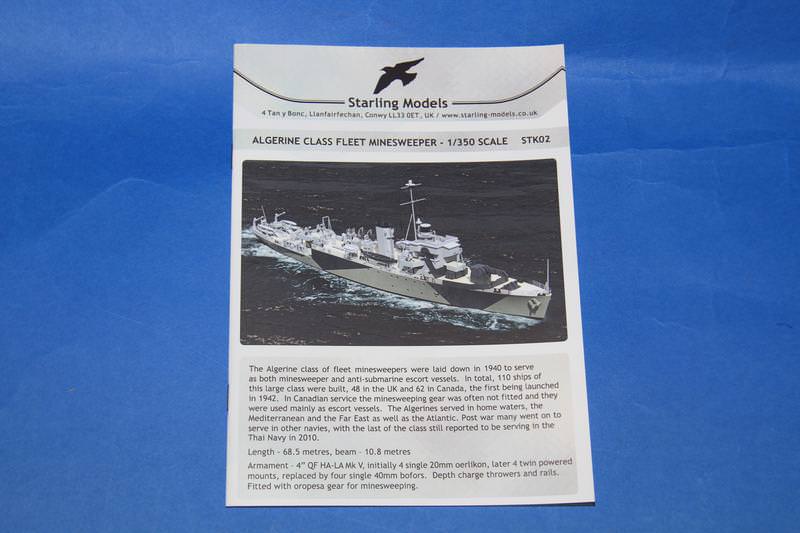
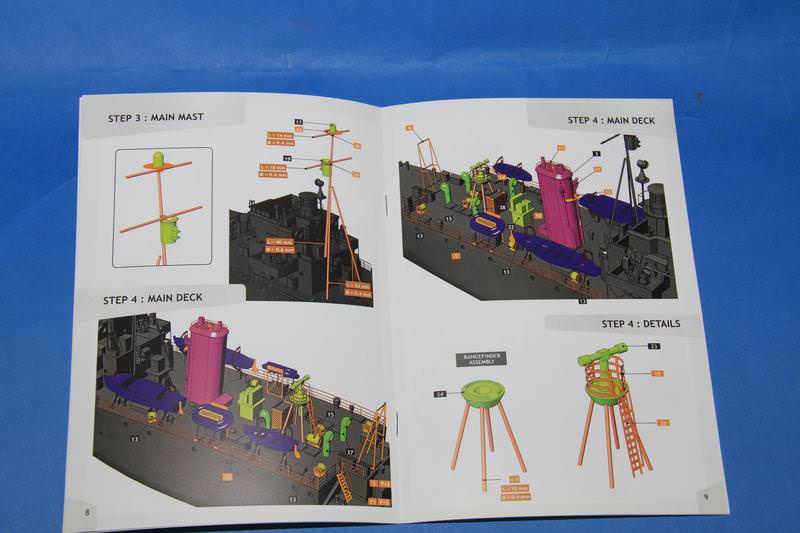
The instruction booklet. (Yes! booklet)
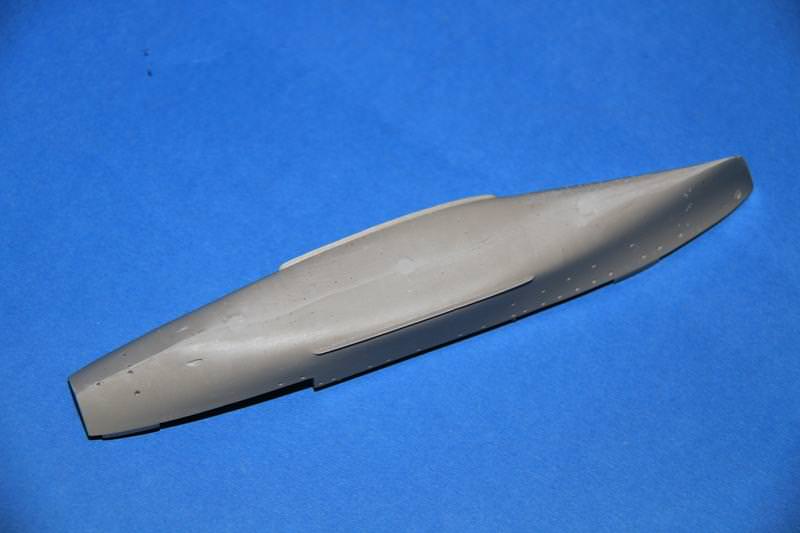
The keel has been laid.
First job, a small amount of cleaning up, there were three small pour points and a bit of seam, here it is done.
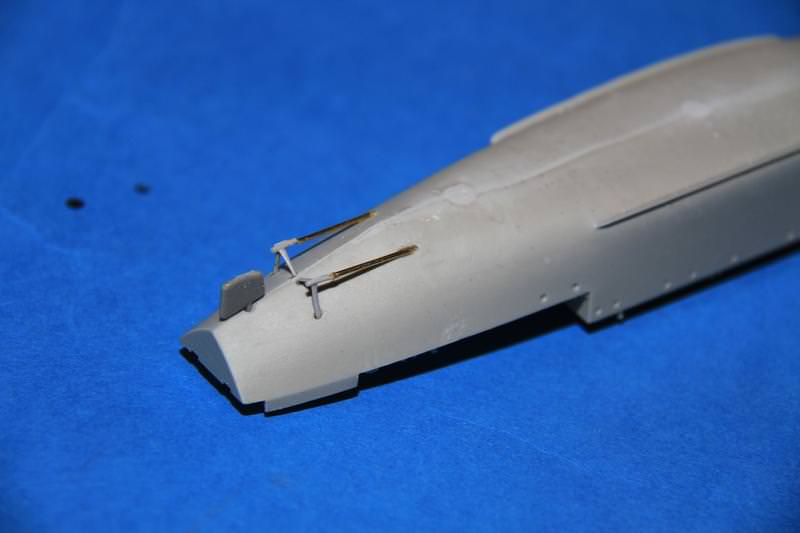
The shaft brackets, very nicely cast.
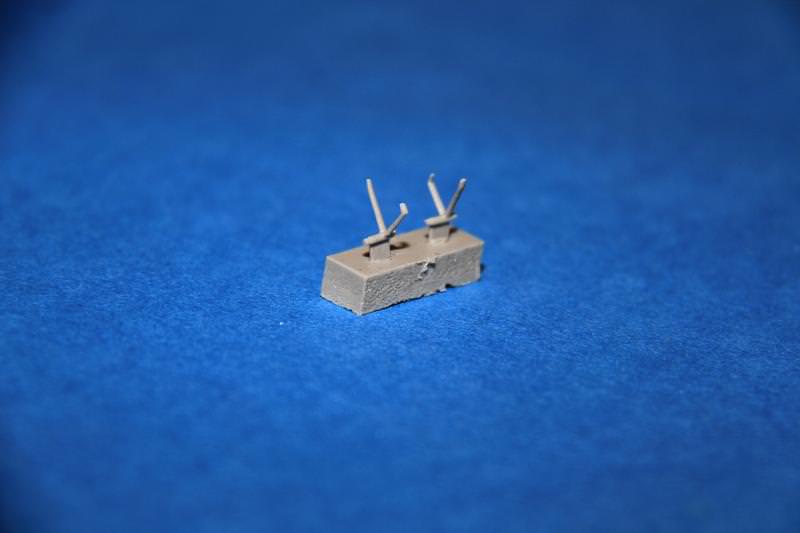
fitted with brass rod shafts (also provided in the kit)
More soon.
Cheers
Si

#335
Auckland, New Zealand
Joined: September 03, 2013
KitMaker: 1,808 posts
Model Shipwrights: 871 posts
Posted: Tuesday, November 14, 2017 - 04:47 AM UTC
I like the look of this kit. The detail seems very impressive so I will watch and see how it builds how.
cheers
Michael
Campaign:
Strip, Track and Trail - Porsche 917/20 - On the bench
Phantoms at 60 - F-4J Marines
Below 1000 tons - M50 minesweeper - Sailed for duty
#453
Texas, United States
Joined: August 28, 2016
KitMaker: 1,925 posts
Model Shipwrights: 1,298 posts
Posted: Tuesday, November 14, 2017 - 06:00 AM UTC
Interesting subject, never thought of trying a minesweeper.
I haven't seen a resin ship kit assembled so you will have my full attention. Looks like its detailed nicely.
TimReynaga
 Associate Editor
California, United States
Joined: May 03, 2006
KitMaker: 2,500 posts
Model Shipwrights: 1,830 posts
Posted: Tuesday, November 14, 2017 - 06:22 AM UTC
Hmmm... Starling models... I'm not familiar with them, but from your pics the little minesweeper looks very nice indeed. I'll be following your build for sure!
England - South East, United Kingdom
Joined: March 01, 2010
KitMaker: 7,078 posts
Model Shipwrights: 6,649 posts
Posted: Tuesday, November 14, 2017 - 02:12 PM UTC
Quoted Text
I like the look of this kit. The detail seems very impressive so I will watch and see how it builds how.
cheers
Michael
Hi Michael,
It is very crisp, one of the best I have seen, the whole package is very complete indeed.
just had to crack on with this one.
Cheers
Si
England - South East, United Kingdom
Joined: March 01, 2010
KitMaker: 7,078 posts
Model Shipwrights: 6,649 posts
Posted: Tuesday, November 14, 2017 - 02:20 PM UTC
Quoted Text
Interesting subject, never thought of trying a minesweeper.
I haven't seen a resin ship kit assembled so you will have my full attention. Looks like its detailed nicely.
Hi Mark,
Welcome aboard, Certainly in the RN many ships like this had busy wars as convoy escorts on top of minesweeping duties, some of this class and more famously the Halcyon class were permanently based in Murmansk to keep port swept and act as extra escorts and pilot vessels on the last leg of the journey.
As resin kits go, at first look I would think this would make a good first kit, very complete, and detailed instructions.
Cheers
Si
England - South East, United Kingdom
Joined: March 01, 2010
KitMaker: 7,078 posts
Model Shipwrights: 6,649 posts
Posted: Tuesday, November 14, 2017 - 02:32 PM UTC
Quoted Text
Interesting subject, never thought of trying a minesweeper.
I haven't seen a resin ship kit assembled so you will have my full attention. Looks like its detailed nicely.
Welcome aboard Dave,
Had worked little ships, minesweepers, certainly during WW2 RN minesweepers did a lot more than just sweeping mines, ships like this acted as convoy escorts, at least two of the slightly larger Halycon class were permanently based in northern Russia, sweeping channels for the convoys, strengthening the escort for the final run in, and acting as pilot vessels through the swept channel.
This kit, at first look, would make a great resin kit, very comlete, great instructions and superbly cast.
Cheers
Si
England - South East, United Kingdom
Joined: March 01, 2010
KitMaker: 7,078 posts
Model Shipwrights: 6,649 posts
Posted: Tuesday, November 14, 2017 - 02:41 PM UTC
Hi Tim
I believe this is their first venture into 1/350, small UK based firm. They also have, very close to release a 1/700the 1970's HMS Ark Royal. Good on line store for getting aftermarket as well.
I believe L'Arsenal had a lot to do with the production of this kit, certainly the instructions bear a striking resemblance to theirs.
Mike's next venture into 1/350 will be a River class Frigate, that I am also looking forward to.
Cheers
Si
Massachusetts, United States
Joined: January 03, 2010
KitMaker: 2,159 posts
Model Shipwrights: 1,400 posts
Posted: Wednesday, November 15, 2017 - 06:08 AM UTC
You're back with a vengeance! LOL Mike does make some great looking stuff! Looking forward to seeing you slap this one around!
England - South East, United Kingdom
Joined: March 01, 2010
KitMaker: 7,078 posts
Model Shipwrights: 6,649 posts
Posted: Friday, November 17, 2017 - 01:22 AM UTC
Quoted Text
You're back with a vengeance! LOL Mike does make some great looking stuff! Looking forward to seeing you slap this one around!
Don't think this going to need much slapping Todd, gentle handling, and it looks like it will slide together, might add a little more detail to the bridge though.
Cheers
Si
England - South East, United Kingdom
Joined: March 01, 2010
KitMaker: 7,078 posts
Model Shipwrights: 6,649 posts
Posted: Friday, November 17, 2017 - 03:24 AM UTC
Very quick update,
The hull sprayed and should have cured by now,
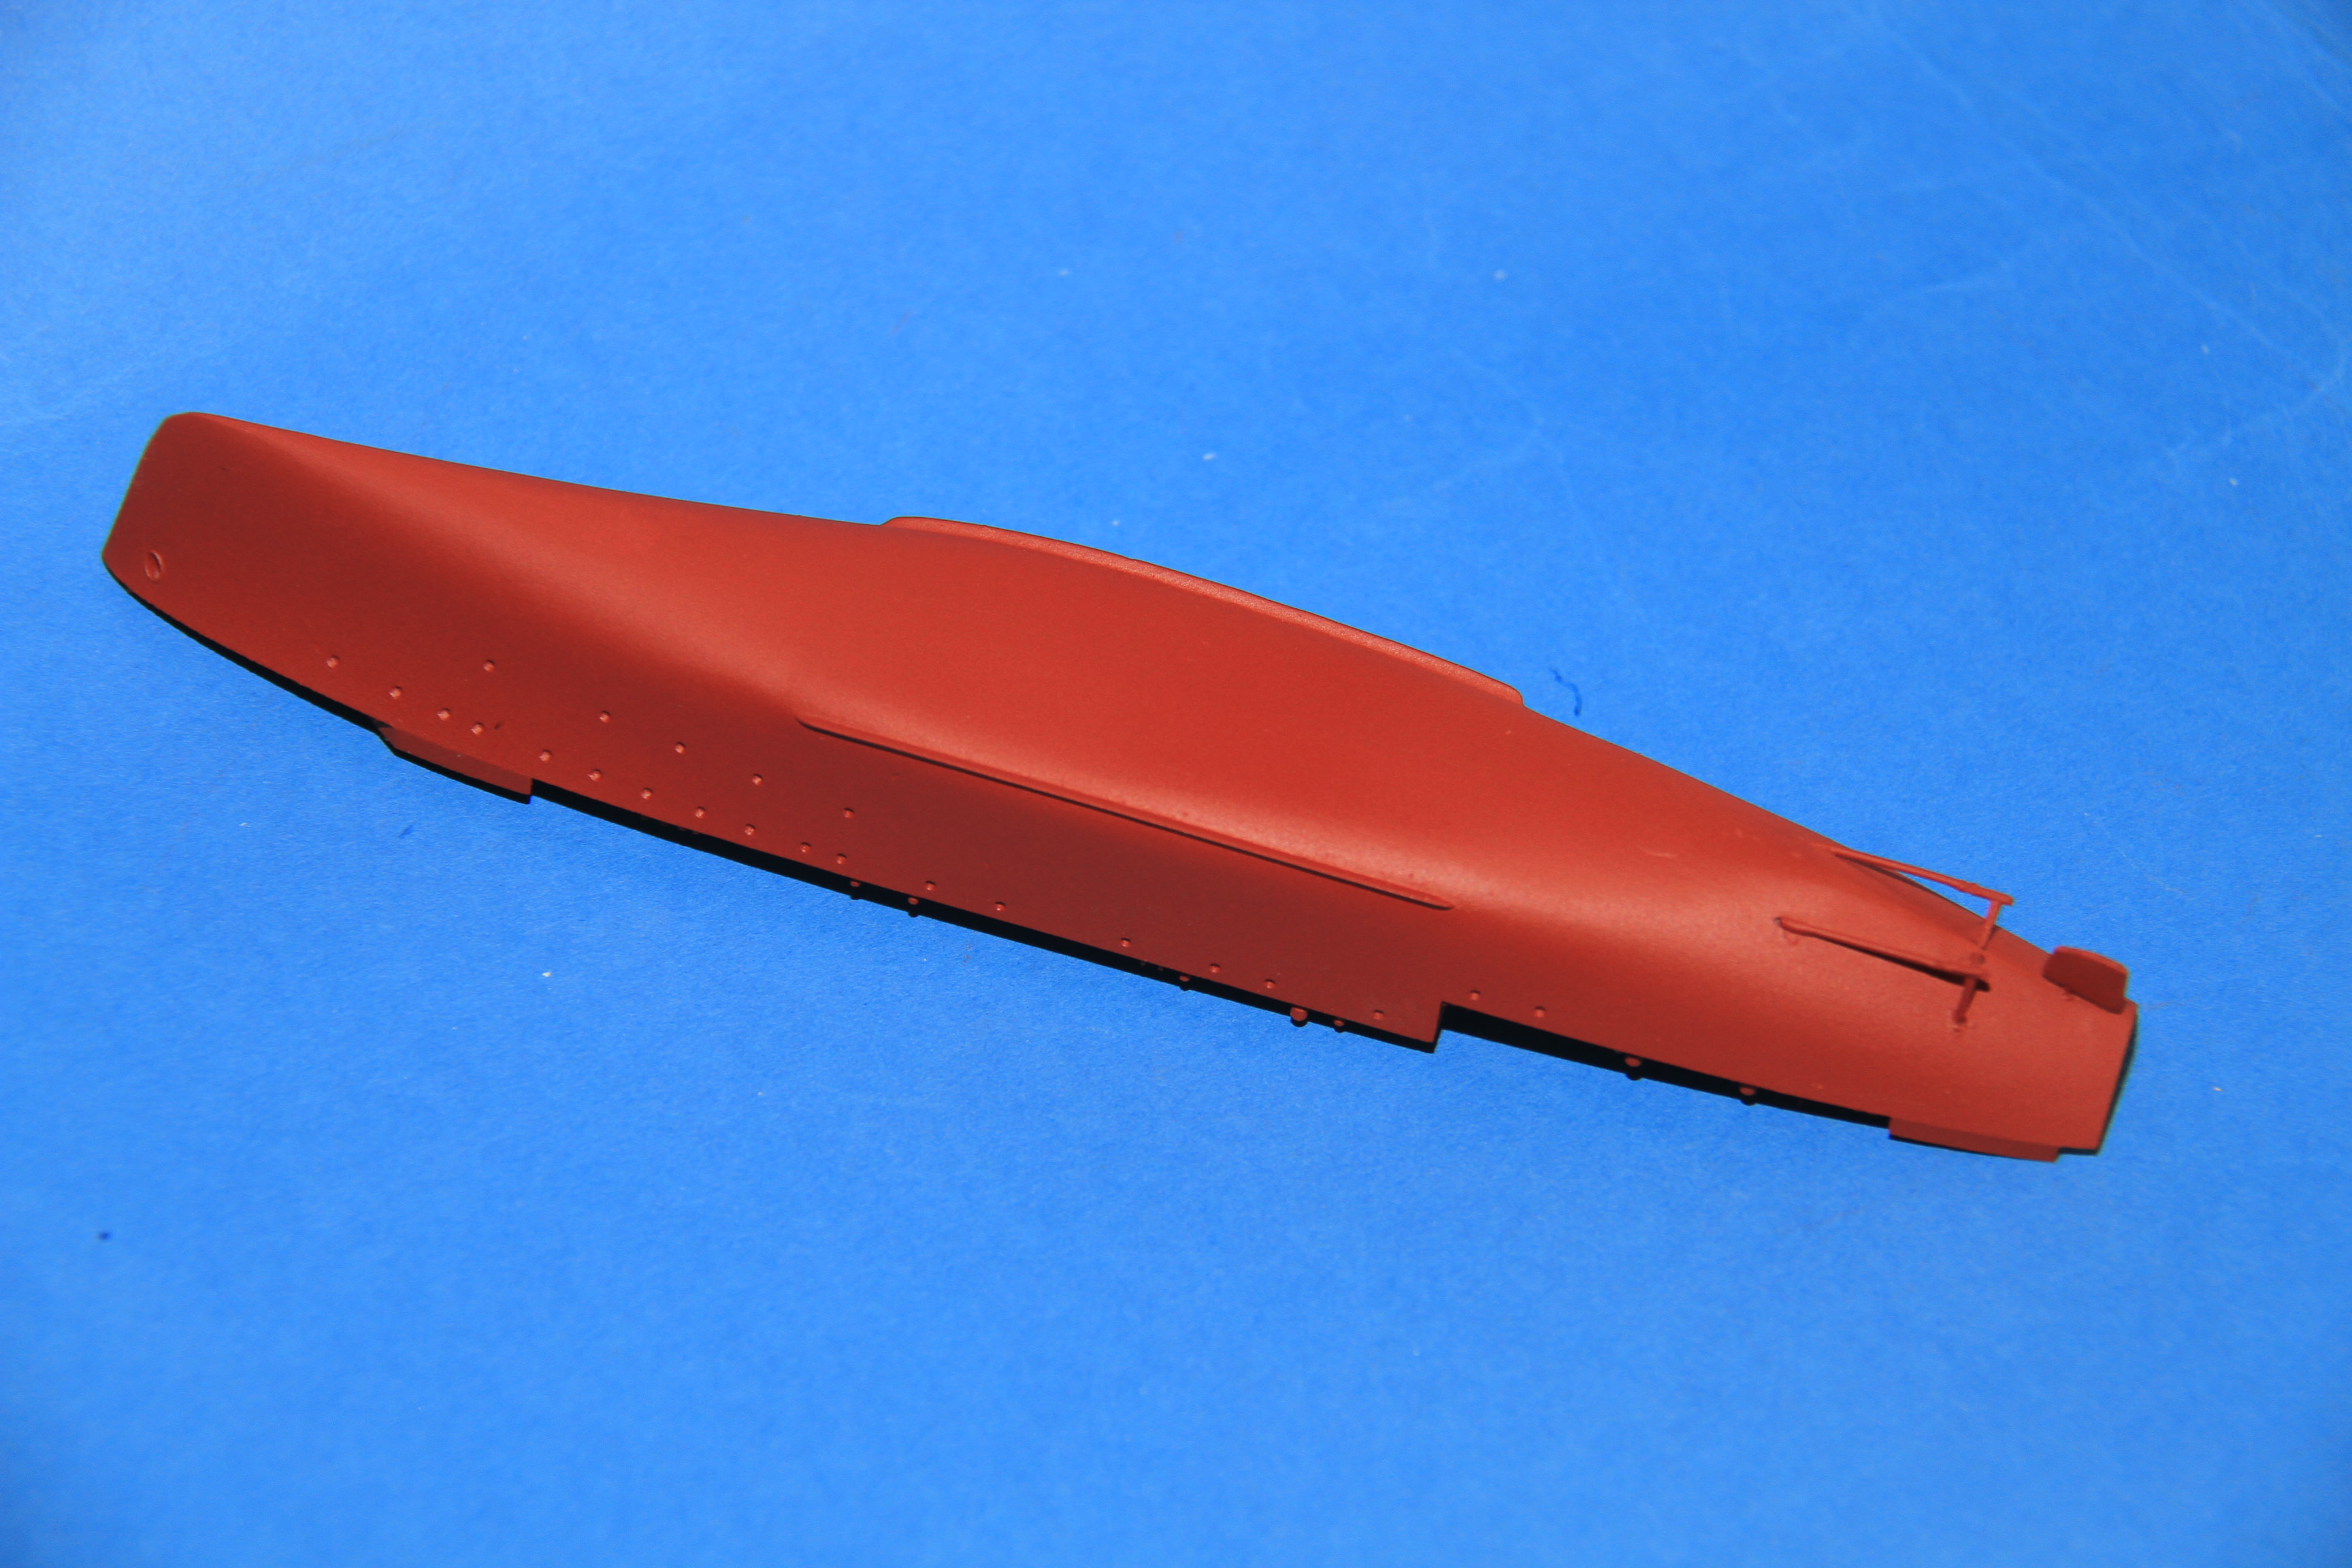
should be ready for the start of the camouflage going on.
Cheers
Si
England - South East, United Kingdom
Joined: March 01, 2010
KitMaker: 7,078 posts
Model Shipwrights: 6,649 posts
Posted: Tuesday, November 21, 2017 - 02:33 AM UTC
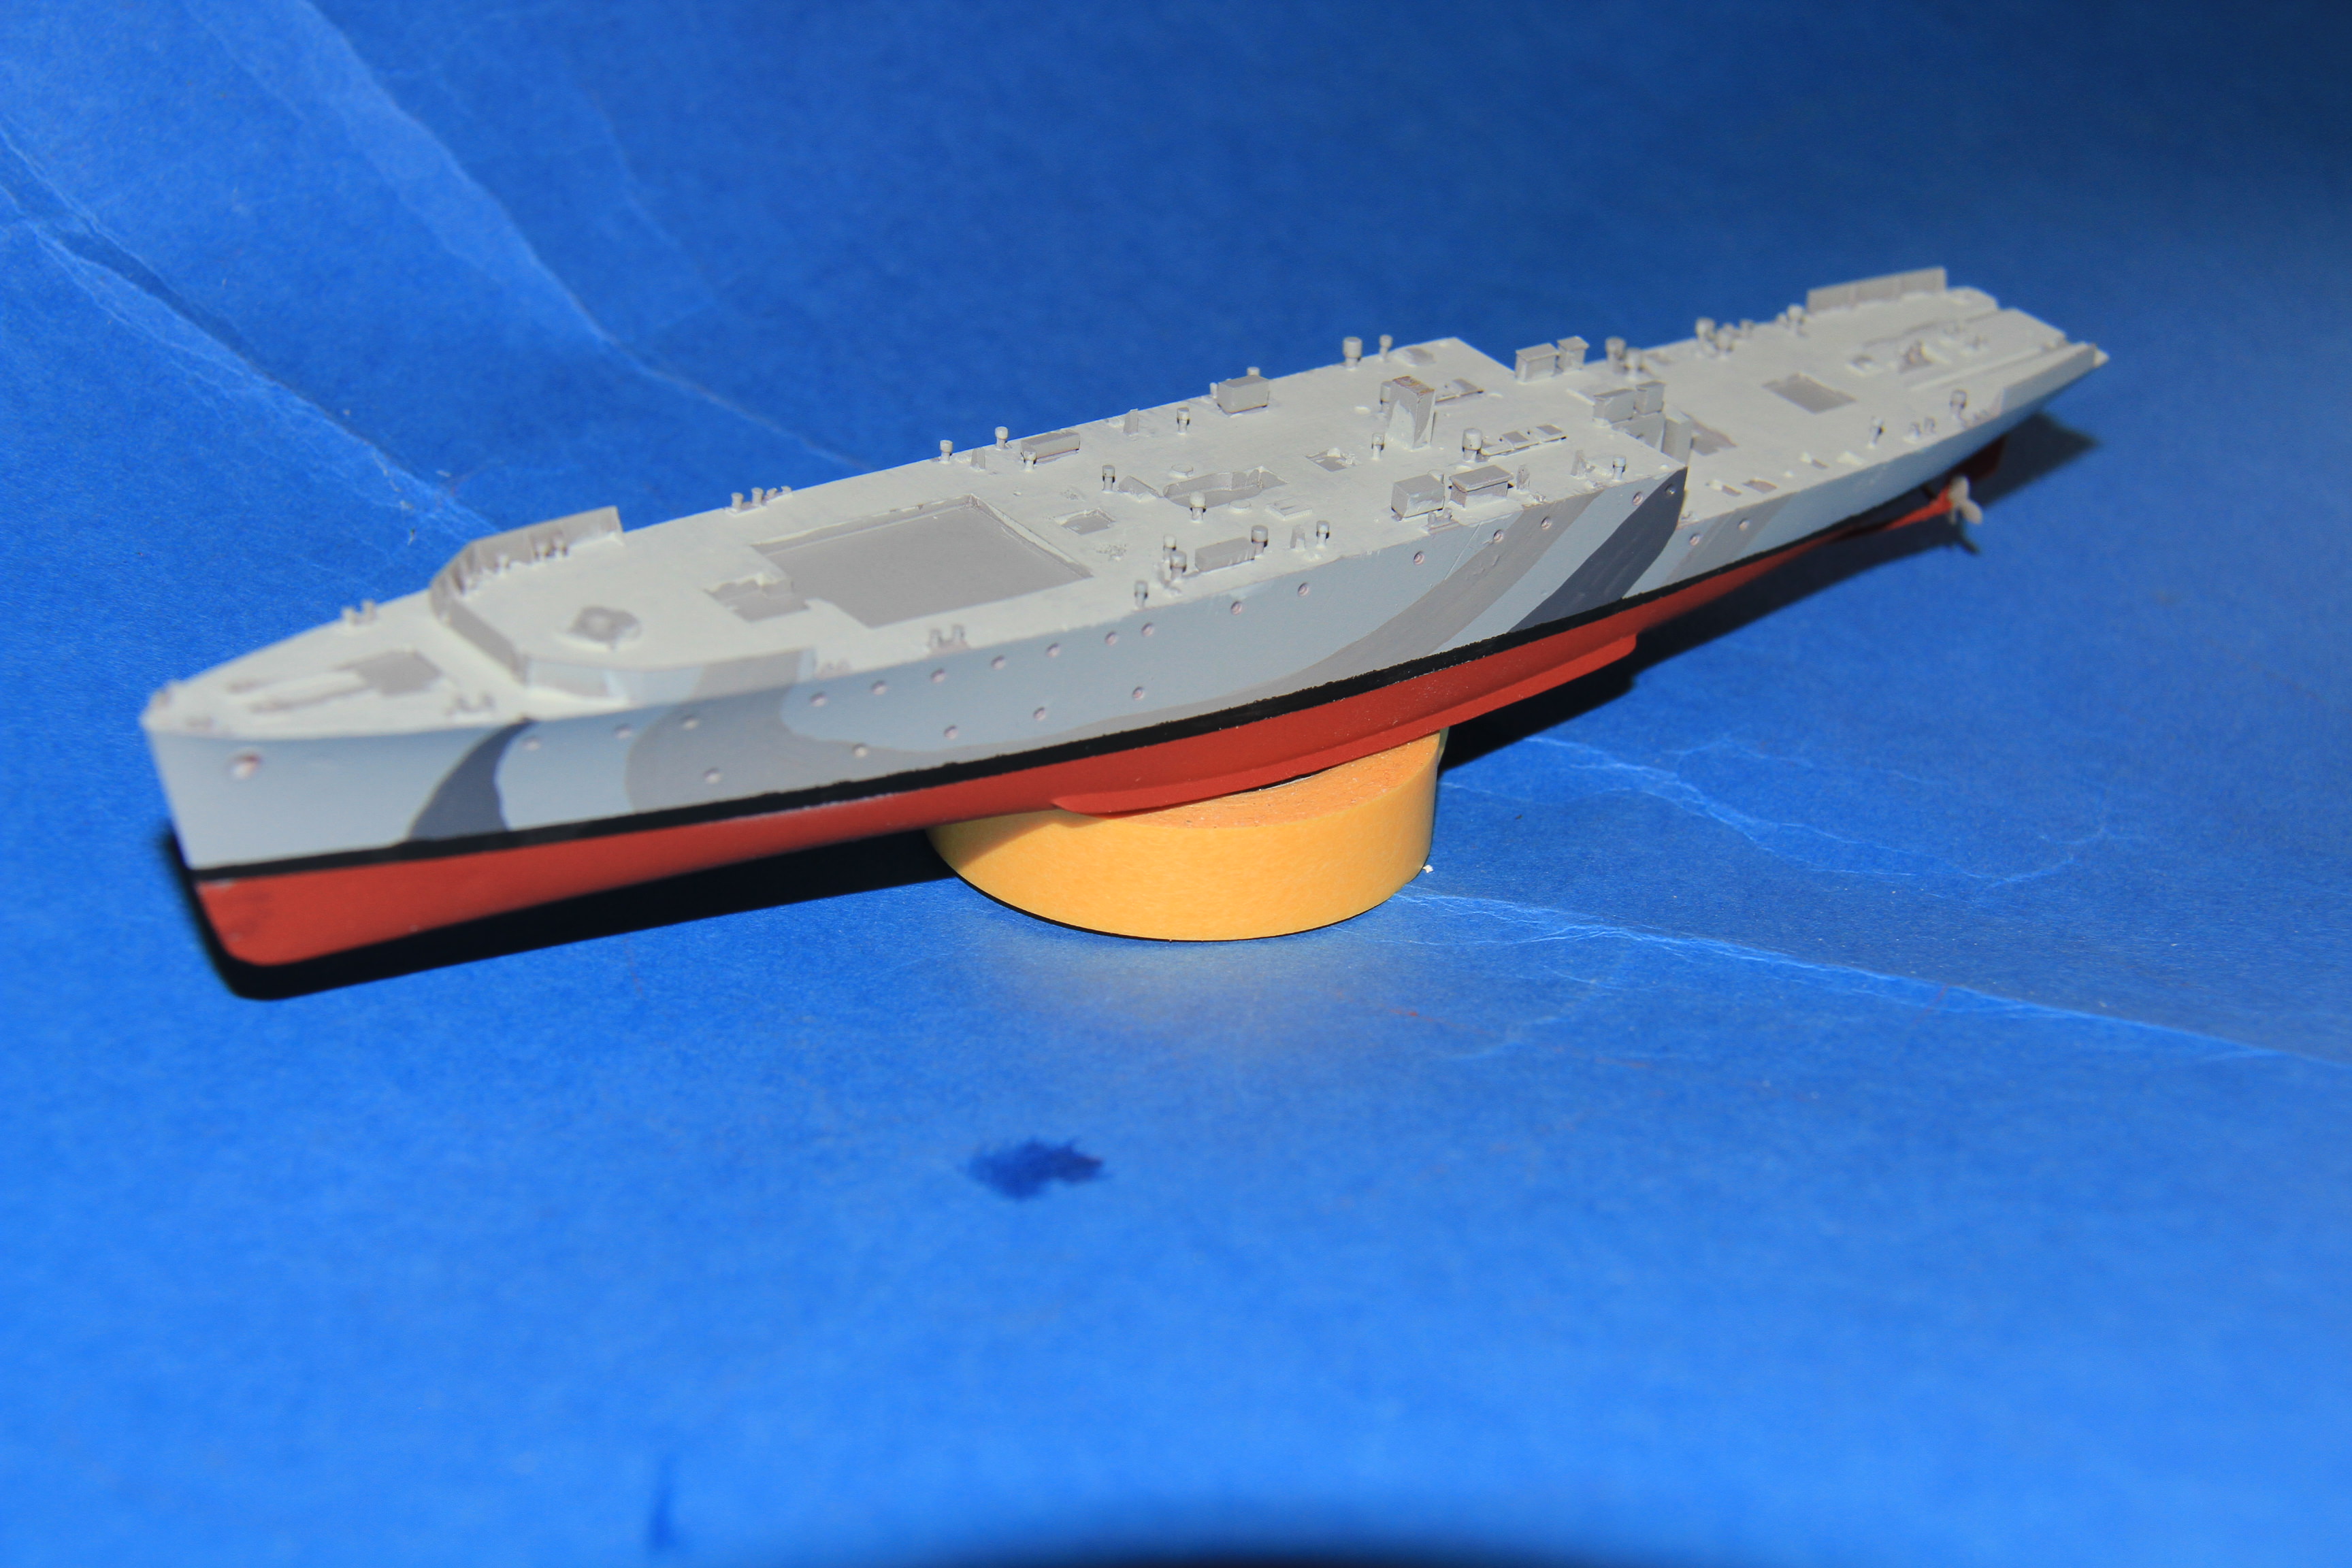
On with the camo.
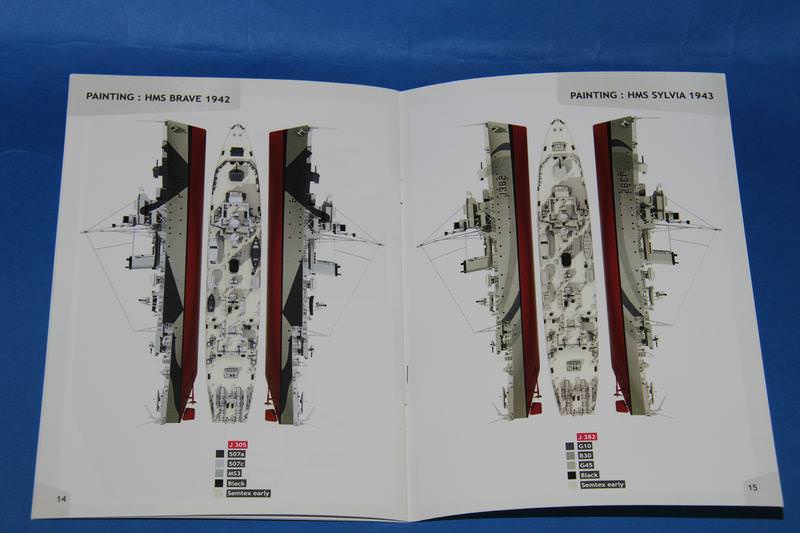
I have gone for HMS Sylvia from the schemes suggested in the kit instructions.
Base colour on Tamita TS81 looked about right.
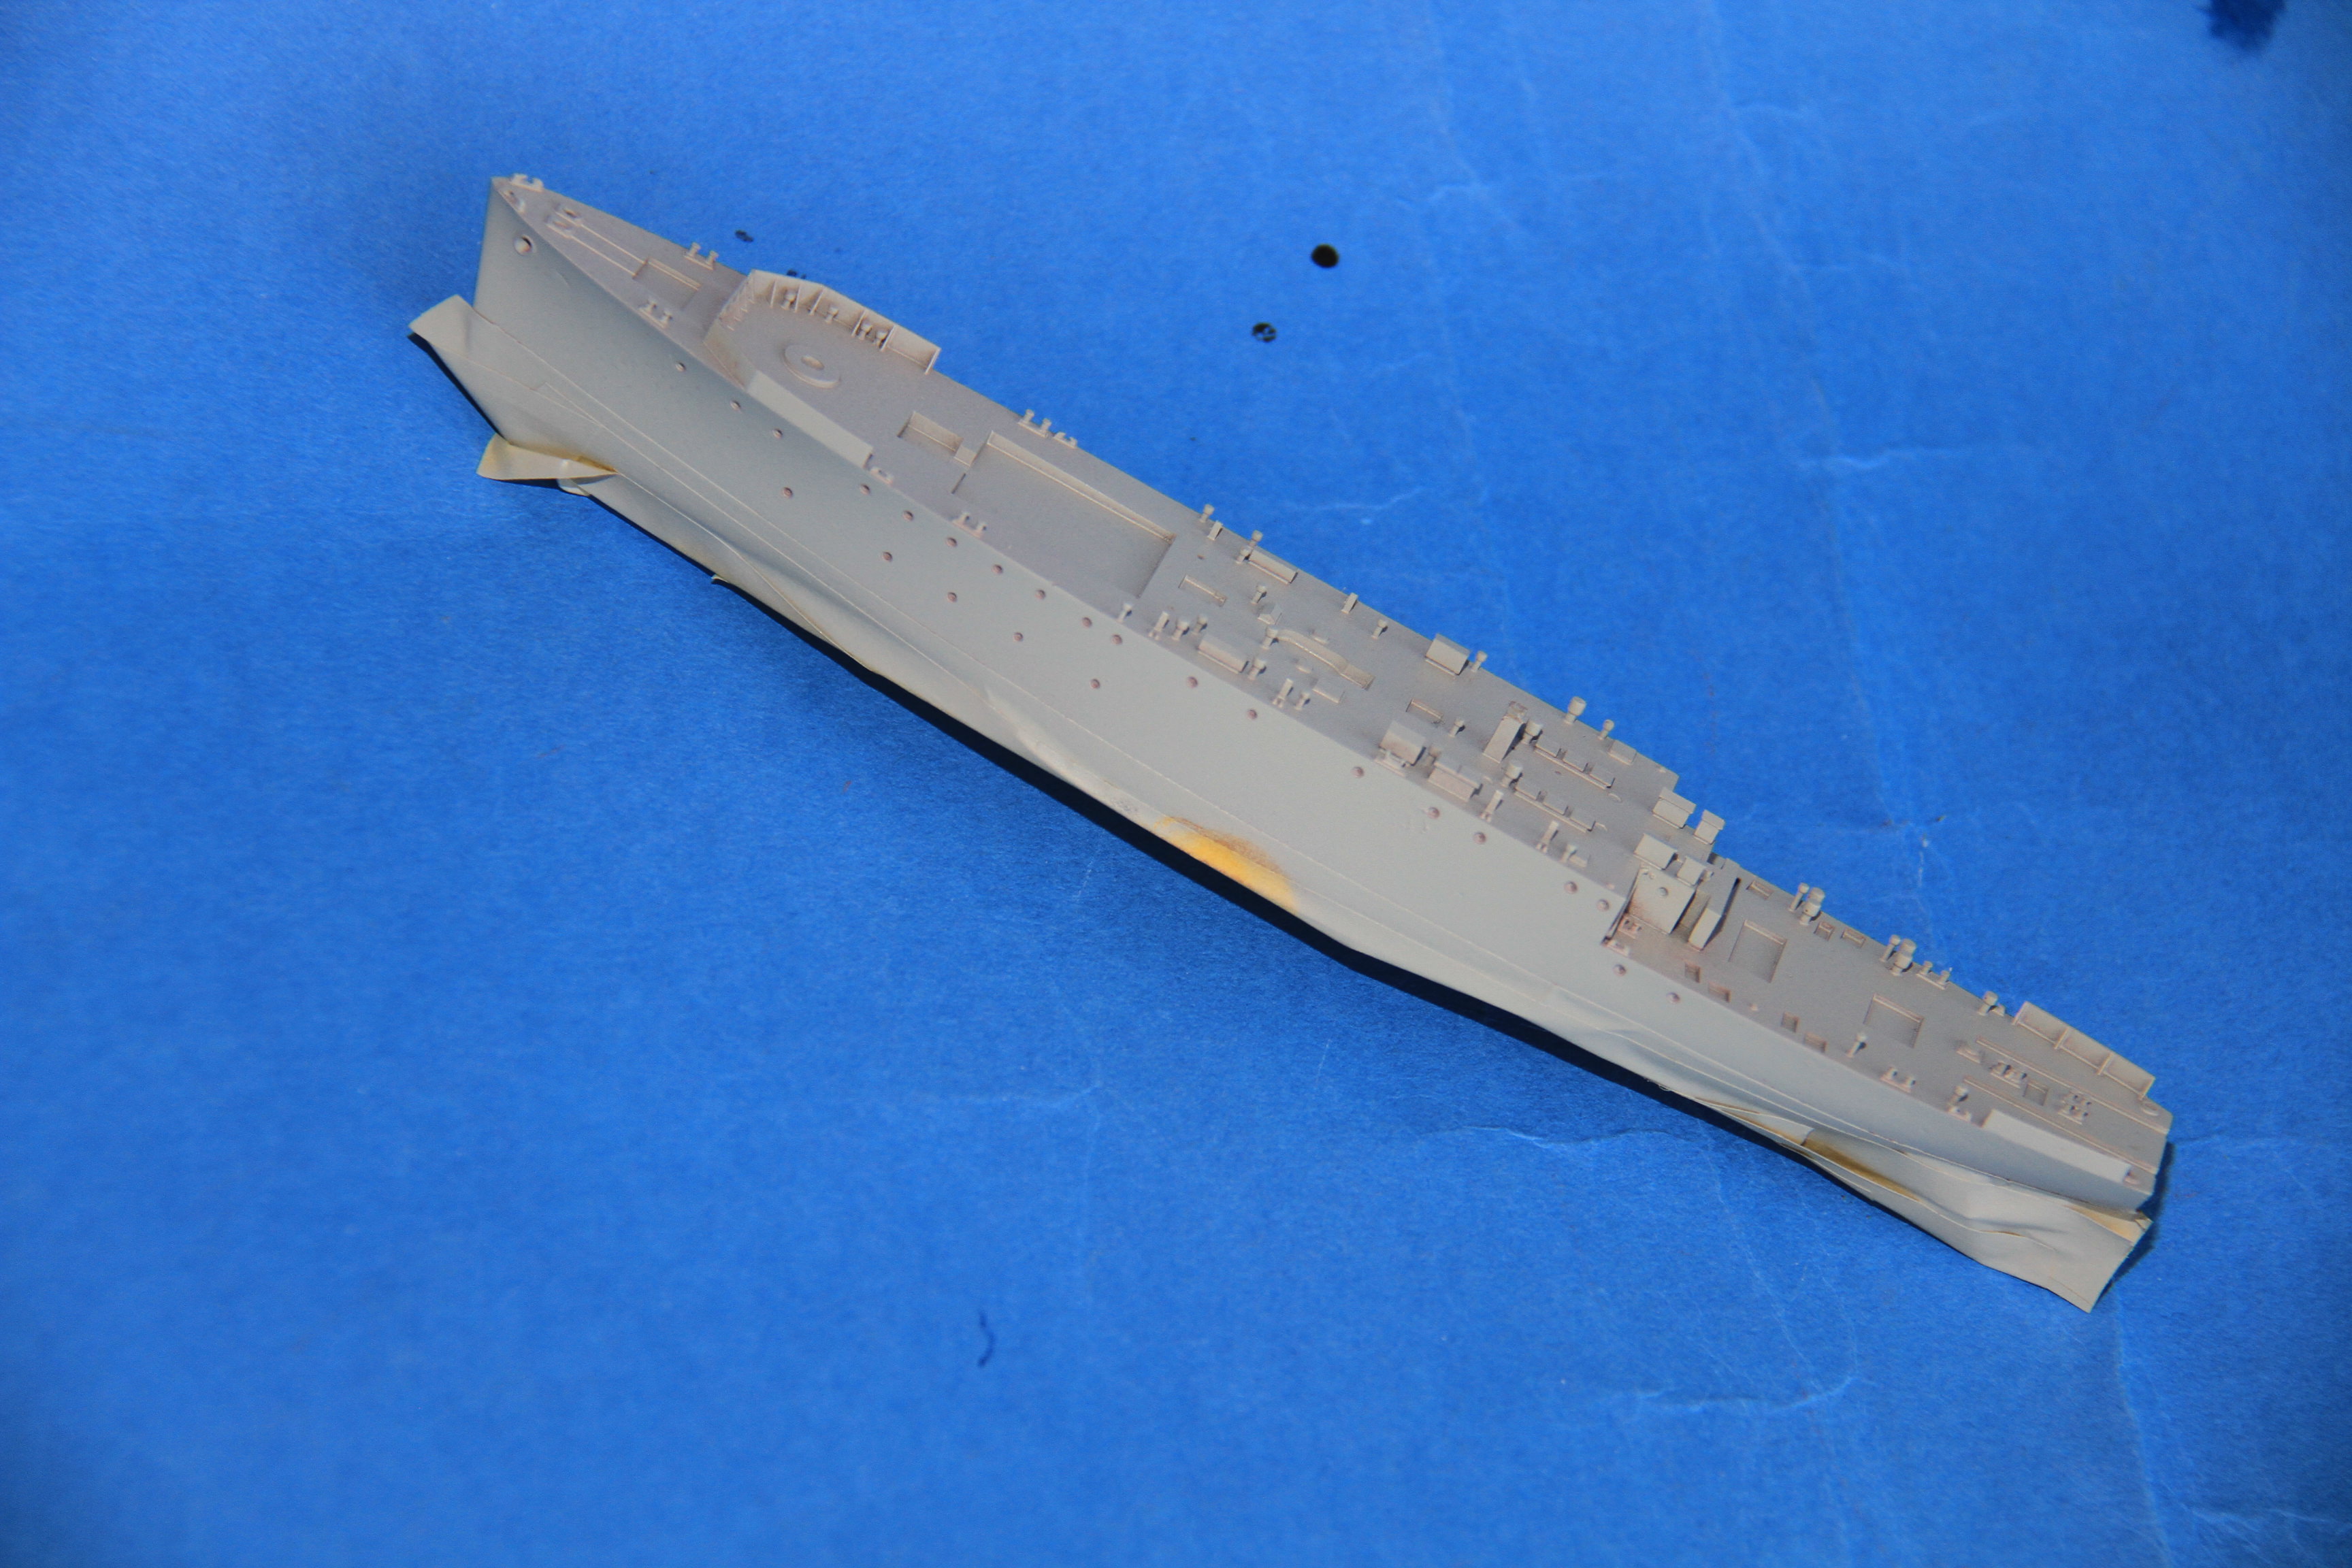
The deck painted pale grey to replicate the early semtex colour.
and the camo painted.

Boot topping still needs to be added, then on with building.
Cheers
si
TimReynaga
Associate Editor California, United States
Joined: May 03, 2006
KitMaker: 2,500 posts
Model Shipwrights: 1,830 posts
Posted: Tuesday, November 21, 2017 - 06:14 AM UTC
The paintwork is looking good, Si. What paints do you use? I am slowly switching over to acrylics moe and more myself.
England - South East, United Kingdom
Joined: March 01, 2010
KitMaker: 7,078 posts
Model Shipwrights: 6,649 posts
Posted: Wednesday, November 22, 2017 - 12:16 AM UTC
Quoted Text
The paintwork is looking good, Si. What paints do you use? I am slowly switching over to acrylics moe and more myself.
Hi Tim,
The paints are a bit of mix, the base colour on the camouflage and deck is Tamiya RN light grey TS81 straight out of the rattle can, the camouflage colours are Tamiya medium grey & field blue brushed on, and the deck is a Lifecolour US Pale grey, three light coats again brushed on.
I used all acrylics these days, mostly Tamiya and lifecolour, with the odd Citadel and xtracolour addition thrown in.
Cheers
Si
England - South East, United Kingdom
Joined: March 01, 2010
KitMaker: 7,078 posts
Model Shipwrights: 6,649 posts
Posted: Wednesday, November 22, 2017 - 12:27 AM UTC
Quoted Text
The paintwork is looking good, Si. What paints do you use? I am slowly switching over to acrylics moe and more myself.
Hi Tim,
I use mostly Tamiya paints, out if the jar, both with airbrush and brush, also their rattlecans are very good, also lifecolour, mostly airbrushed, with Citadel for metallic and primary clours.
On this one the base colour is Tamiya TS81 straight out of the rattlecan, the camouflage colours are also Tamiya, brushed on. The deck is lifecolour, needs a bit care to brush on, three light coats to build up an even colour.
I use almost exclusively acrylic paints, As I tend to have one or two sessions a week at bench, the drying speed of acrylic paint allows to achieve that bit more.
Hope you have success with acrylics.
cheers
Si
#335
Auckland, New Zealand
Joined: September 03, 2013
KitMaker: 1,808 posts
Model Shipwrights: 871 posts
Posted: Wednesday, November 22, 2017 - 01:58 PM UTC
Already with the hull colour and camo it's looking very good!
cheers
Michael
Campaign:
Strip, Track and Trail - Porsche 917/20 - On the bench
Phantoms at 60 - F-4J Marines
Below 1000 tons - M50 minesweeper - Sailed for duty
TimReynaga
Associate Editor California, United States
Joined: May 03, 2006
KitMaker: 2,500 posts
Model Shipwrights: 1,830 posts
Posted: Wednesday, November 22, 2017 - 08:13 PM UTC
Quoted Text
... the drying speed of acrylic paint allows to achieve that bit more...
Thanks Si. The quick drying time and relative ease of use are what draw me to acrylics too; certainly there's no arguing with your results. Model on!
England - South East, United Kingdom
Joined: March 01, 2010
KitMaker: 7,078 posts
Model Shipwrights: 6,649 posts
Posted: Wednesday, November 22, 2017 - 11:44 PM UTC
Quoted Text
Already with the hull colour and camo it's looking very good!
cheers
Michael
Thanks Michael,
I thought this was the most interesting of the three schemes provided for in the kit.
Cheers
Si
England - South East, United Kingdom
Joined: March 01, 2010
KitMaker: 7,078 posts
Model Shipwrights: 6,649 posts
Posted: Wednesday, November 22, 2017 - 11:47 PM UTC
Quoted Text
Quoted Text
... the drying speed of acrylic paint allows to achieve that bit more...
Thanks Si. The quick drying time and relative ease of use are what draw me to acrylics too; certainly there's no arguing with your results. Model on!
Thanks Tim,
Give acrylics a go, no smelly solvents for brush cleaning, with the ones I use water does work, although I do use their proprietary thinners for airbrushing.
Cheers
Si
England - South East, United Kingdom
Joined: March 01, 2010
KitMaker: 7,078 posts
Model Shipwrights: 6,649 posts
Posted: Monday, November 27, 2017 - 02:49 AM UTC
A bit more progress.
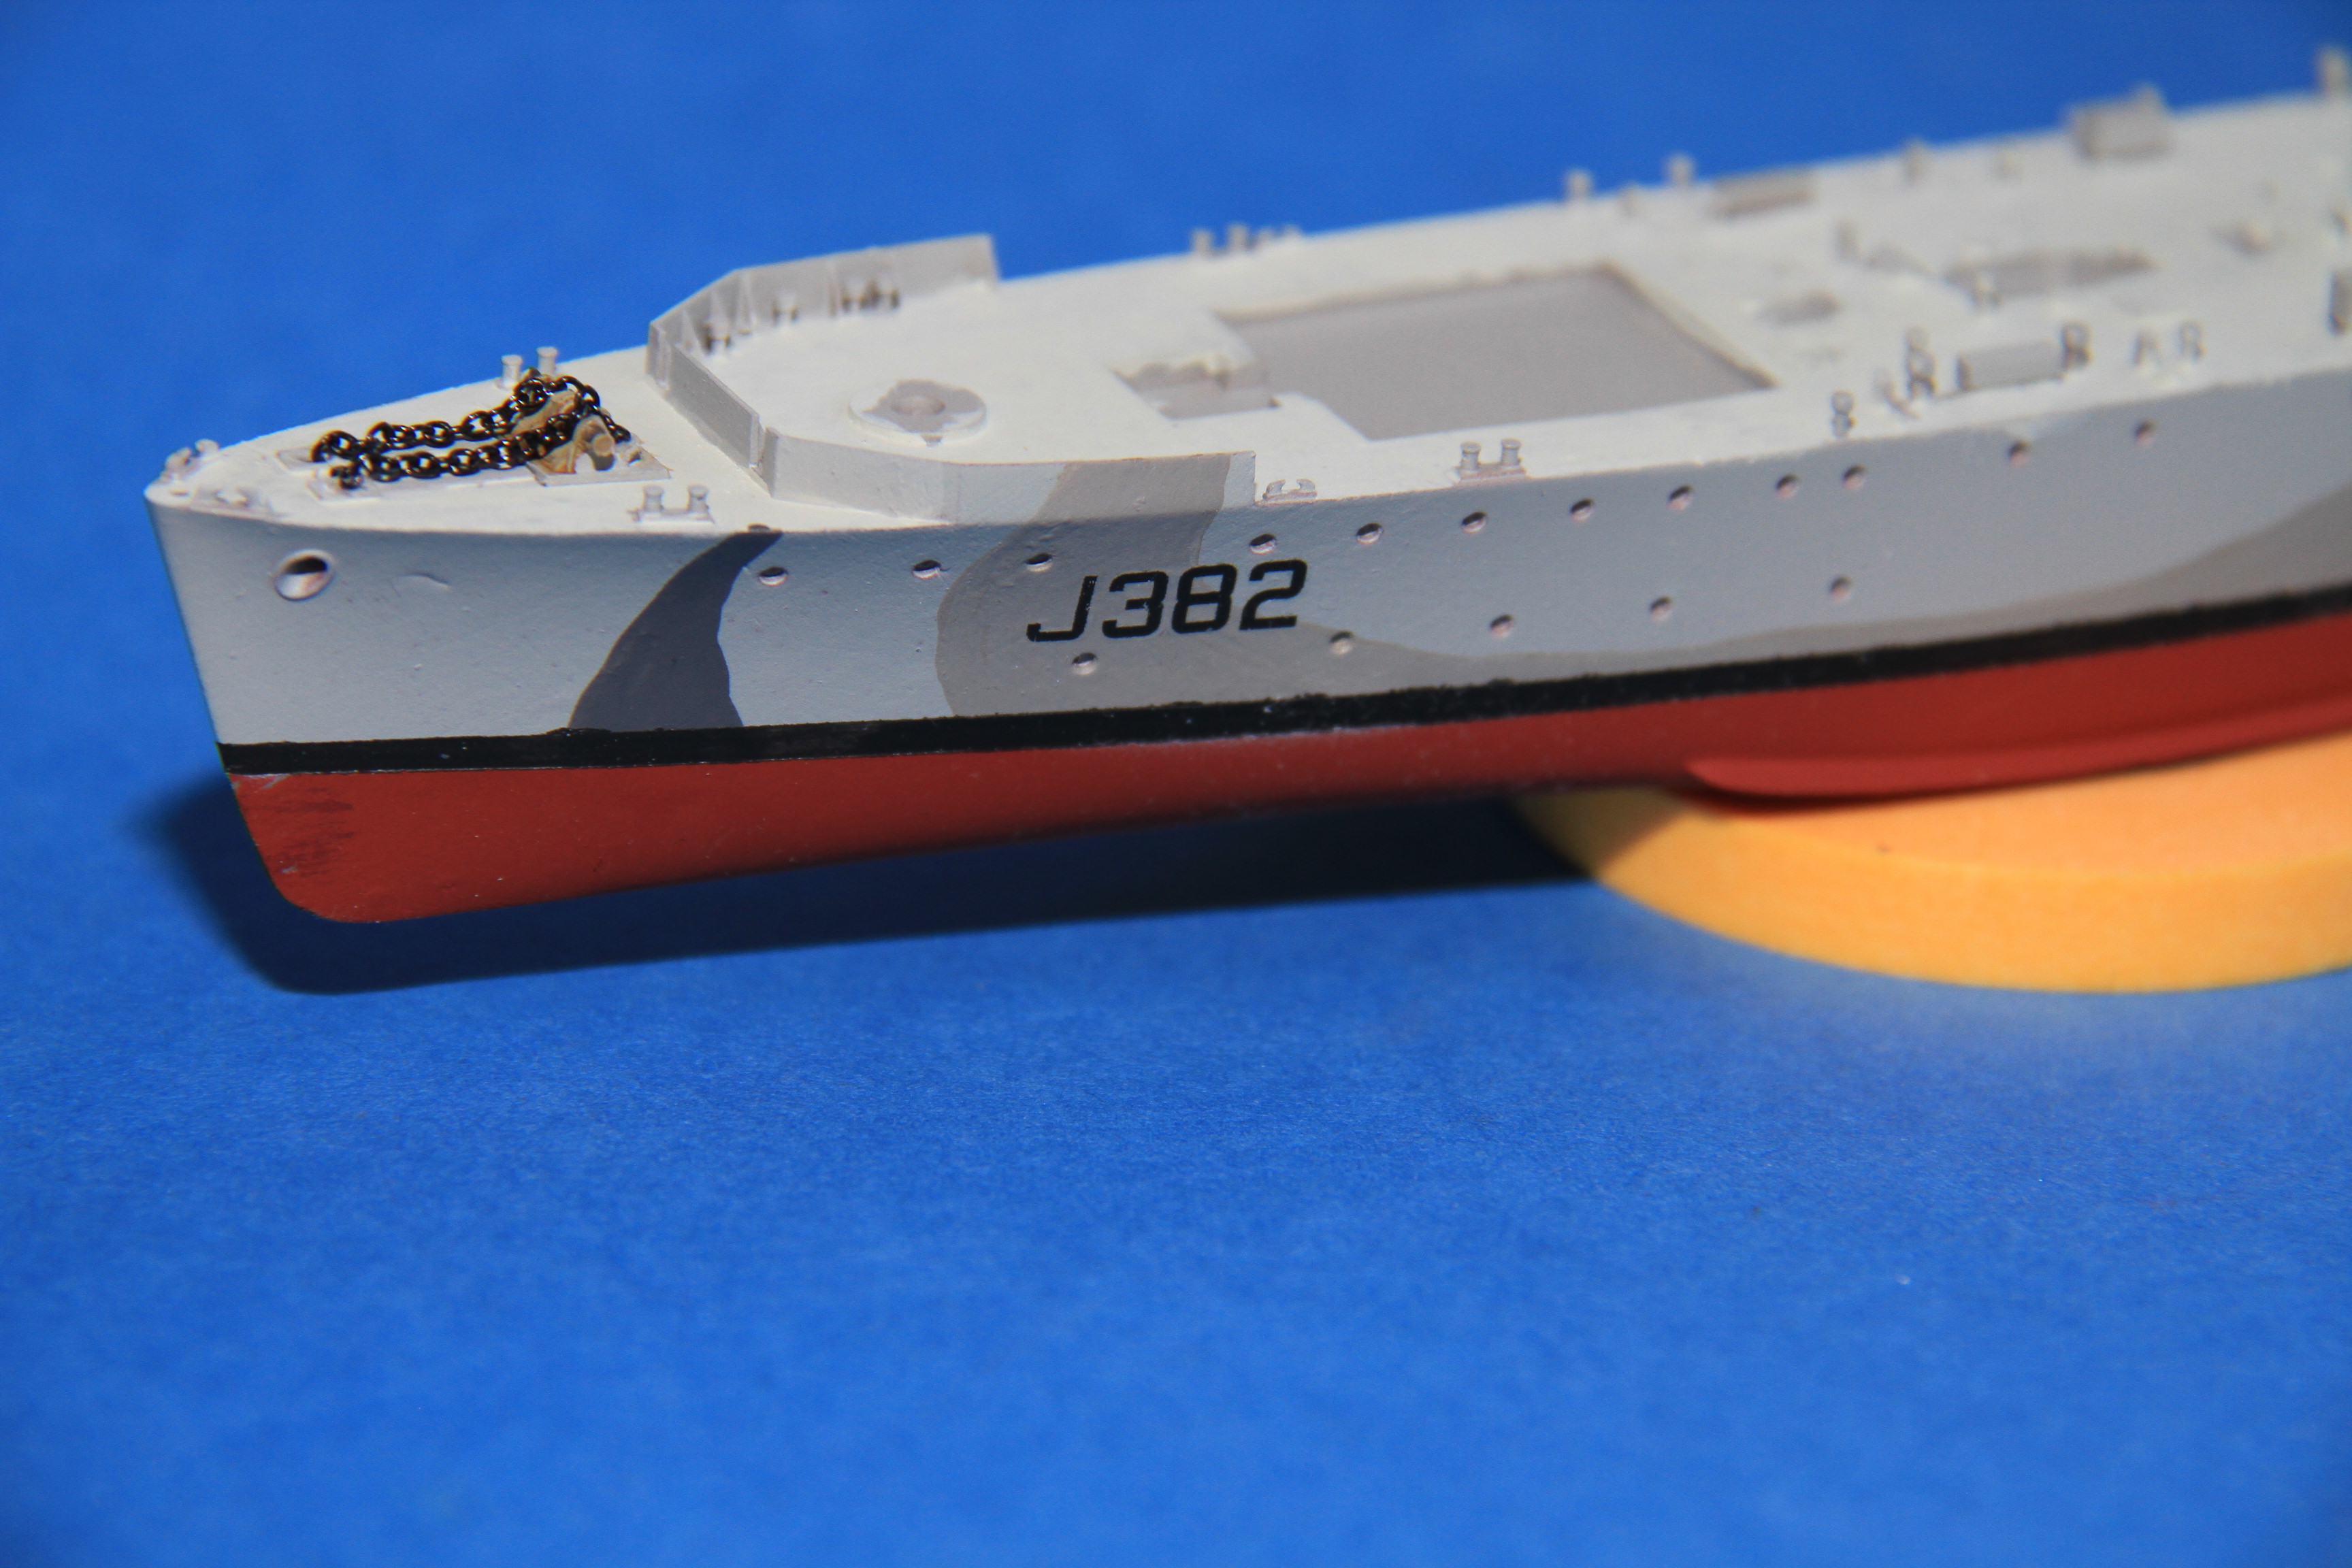
The boot topping painted and the masking off.
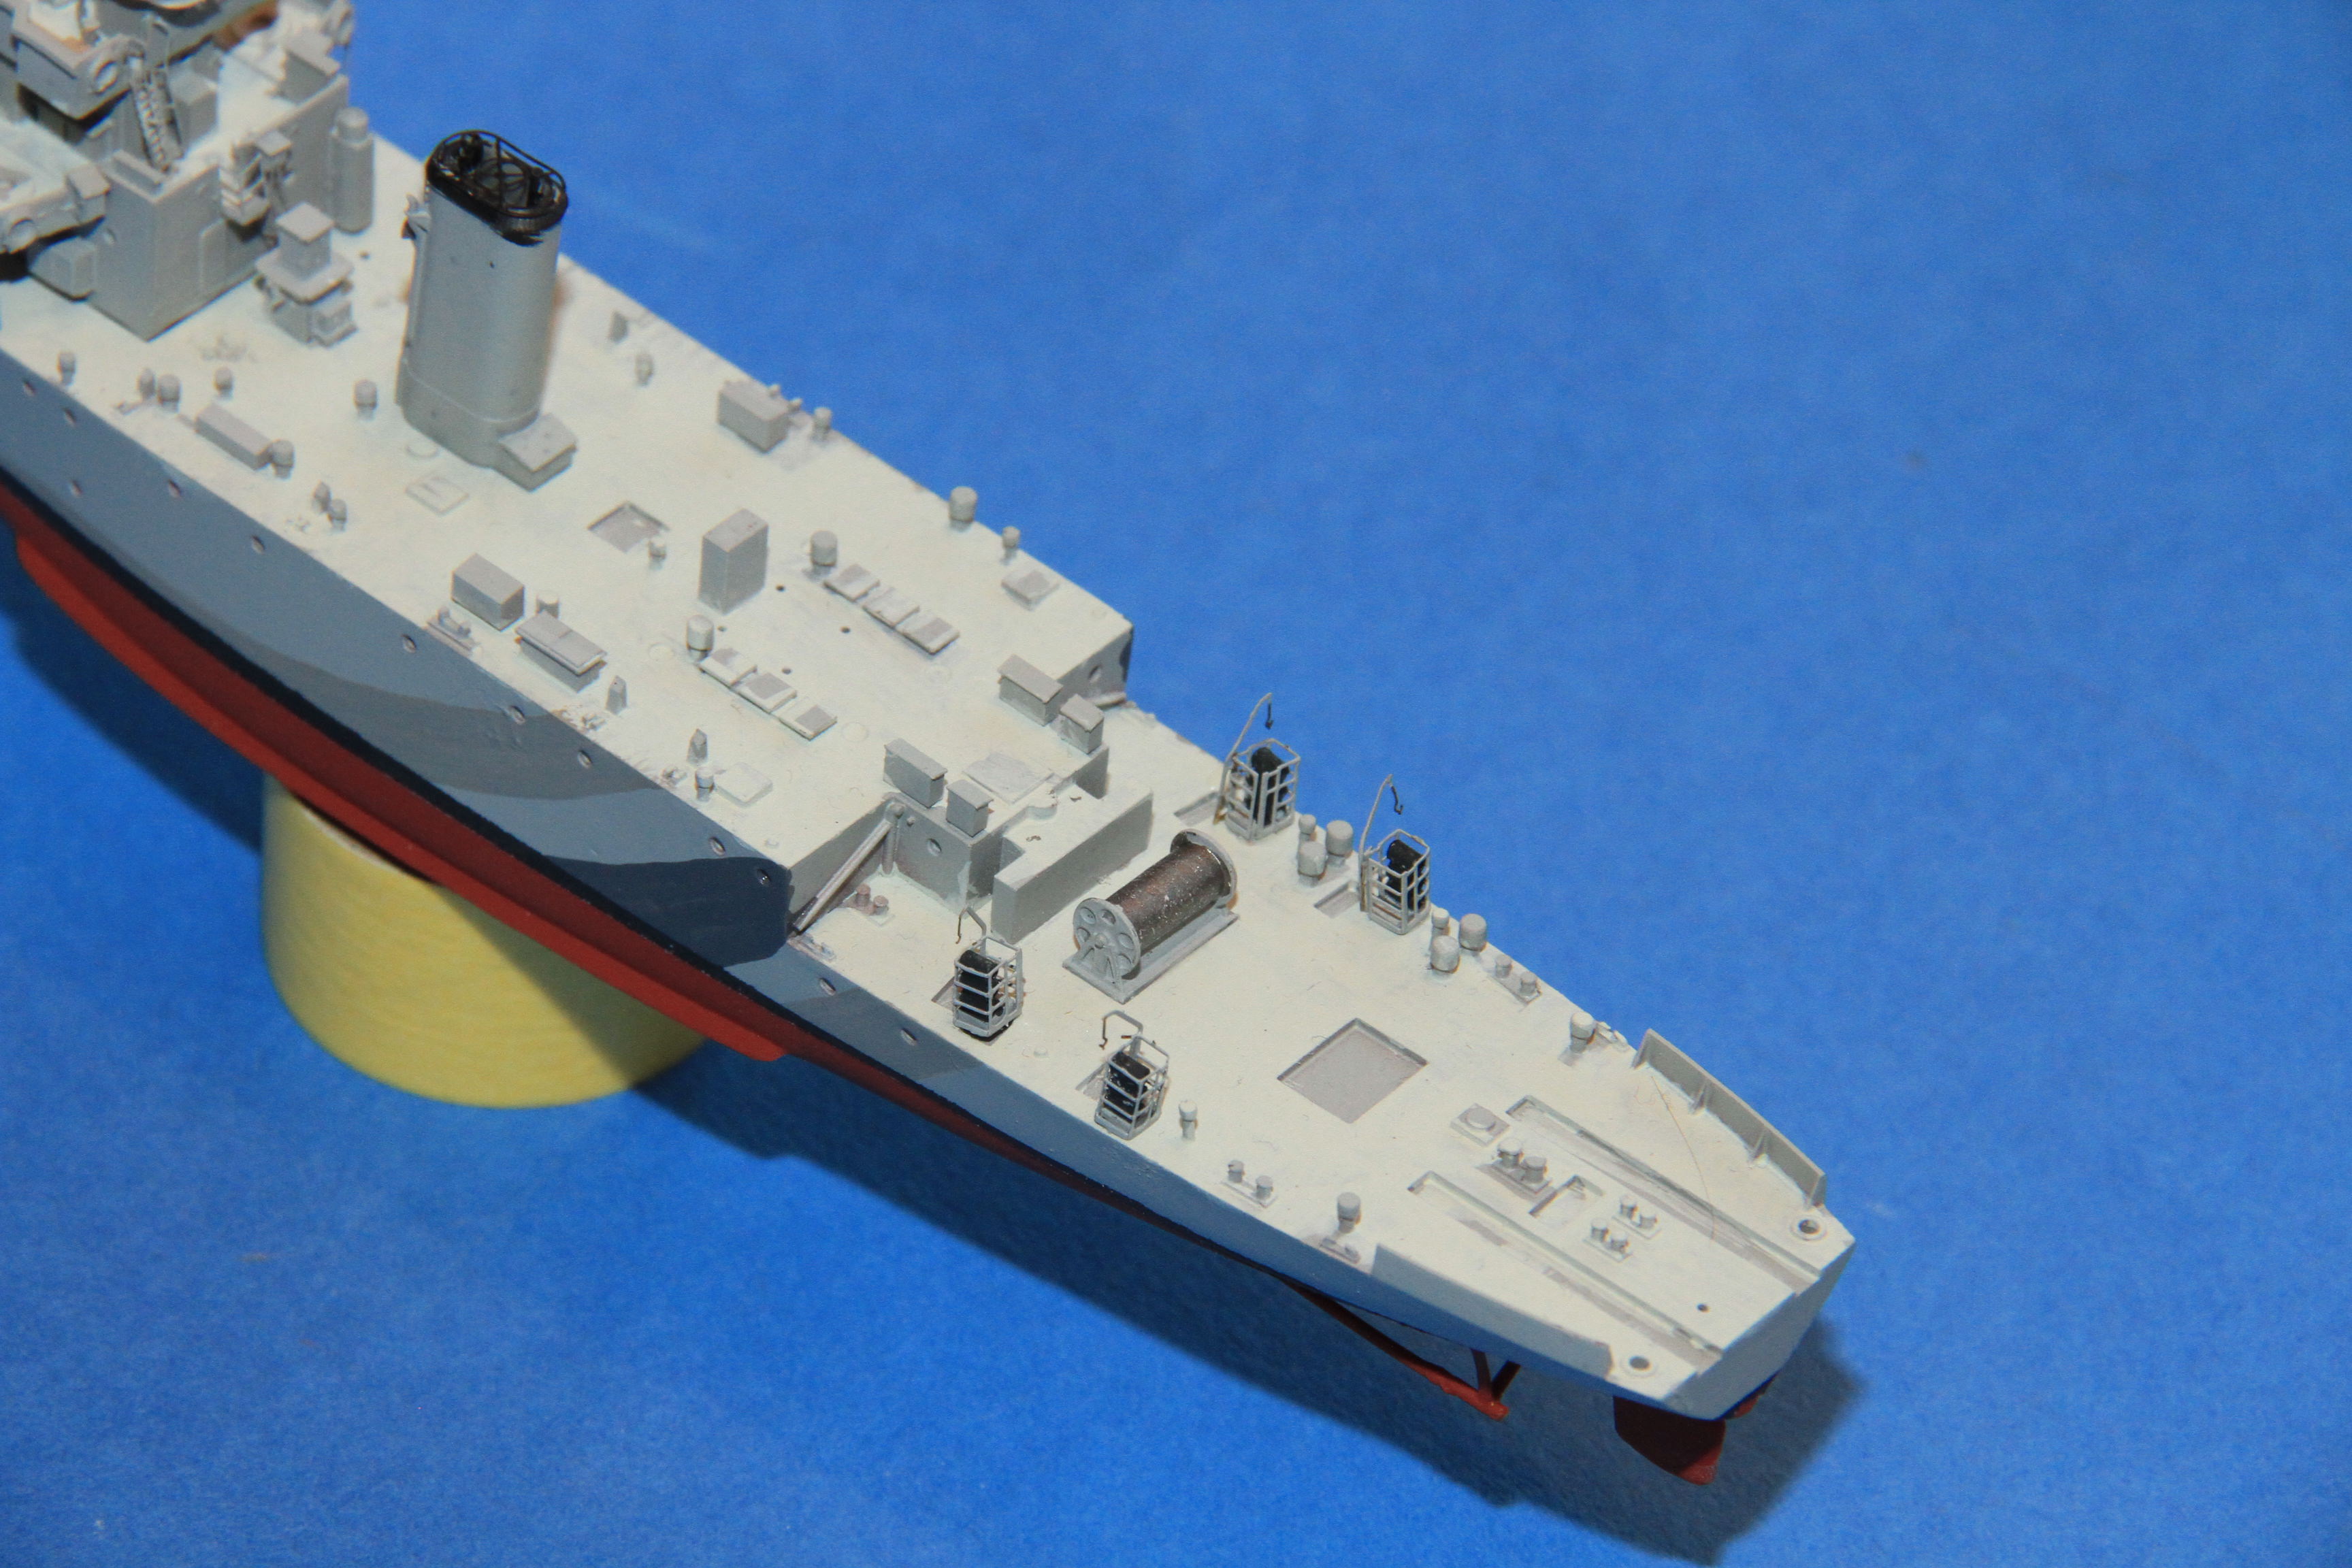
Windlass and anchor cable in place, the cable was left over from the Kagero, it would be my only very small criticism of the lovely kit, there is no anchor cable supplied, (Not a big deal, as often I don't use the kit supplied cable anyway.
The pennant number added from the kit decals, they do need to be trimmed as the sheet is one bit sheet of carrier film, but they adhere well, and no silvering.
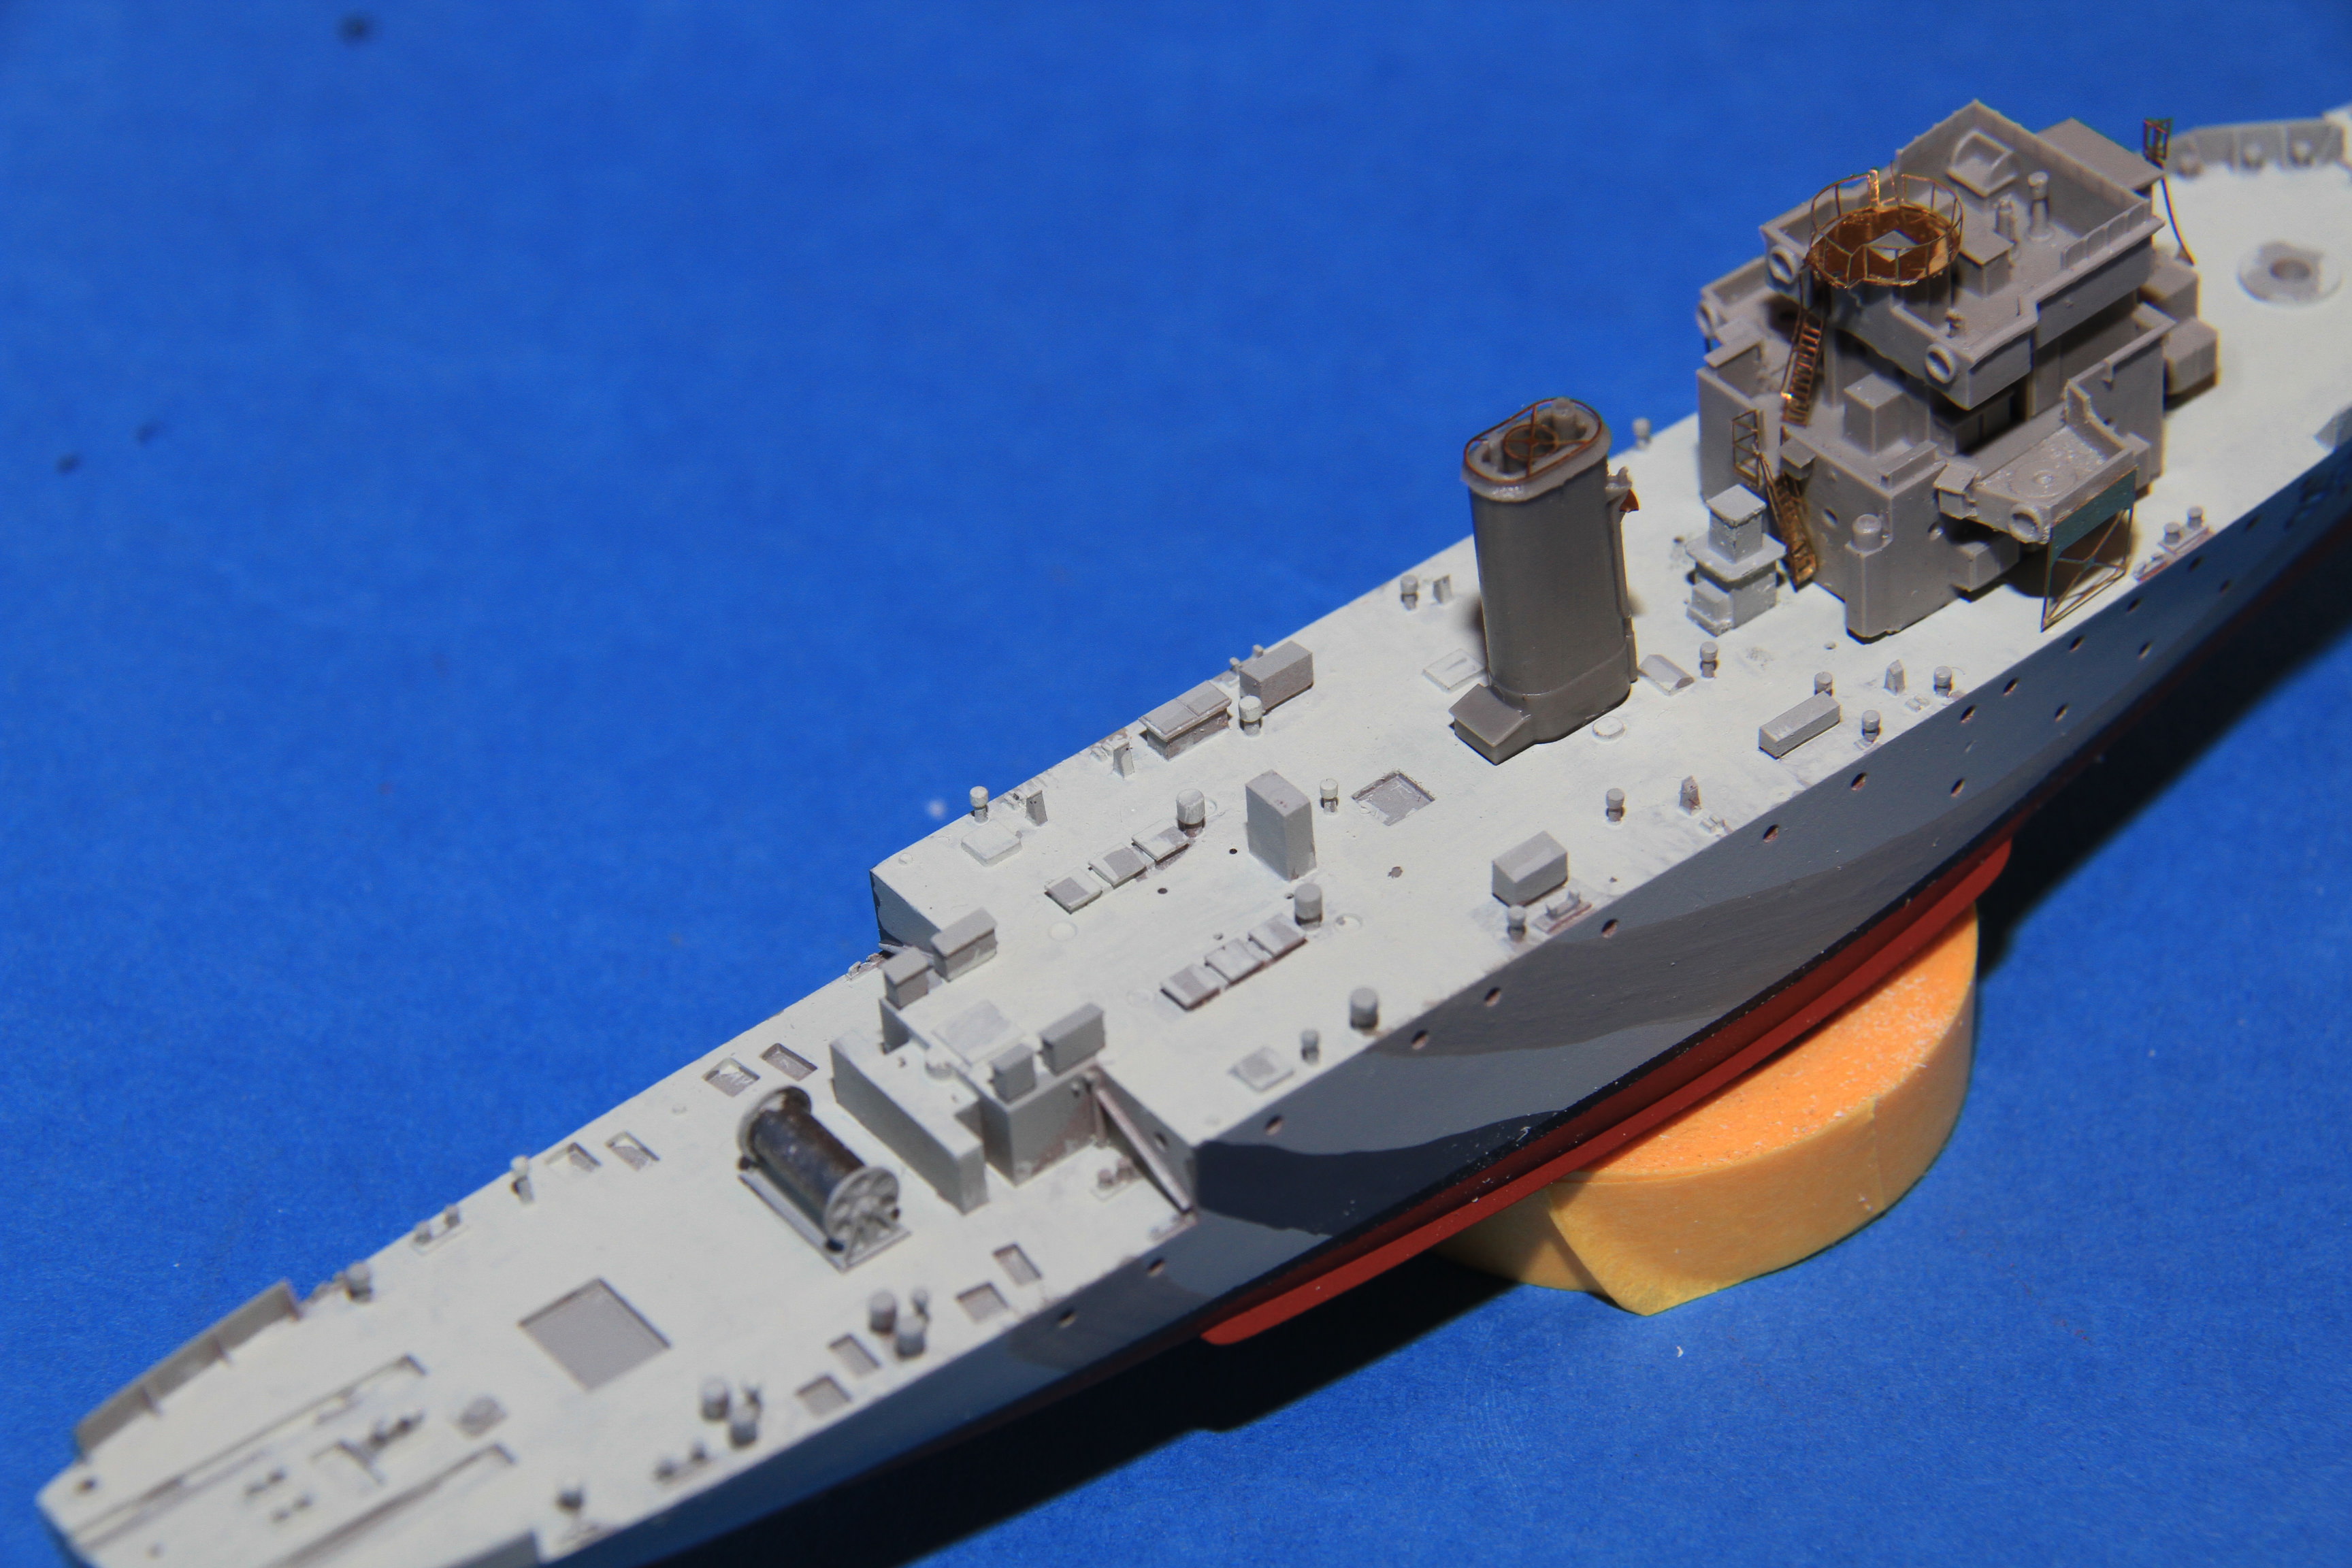
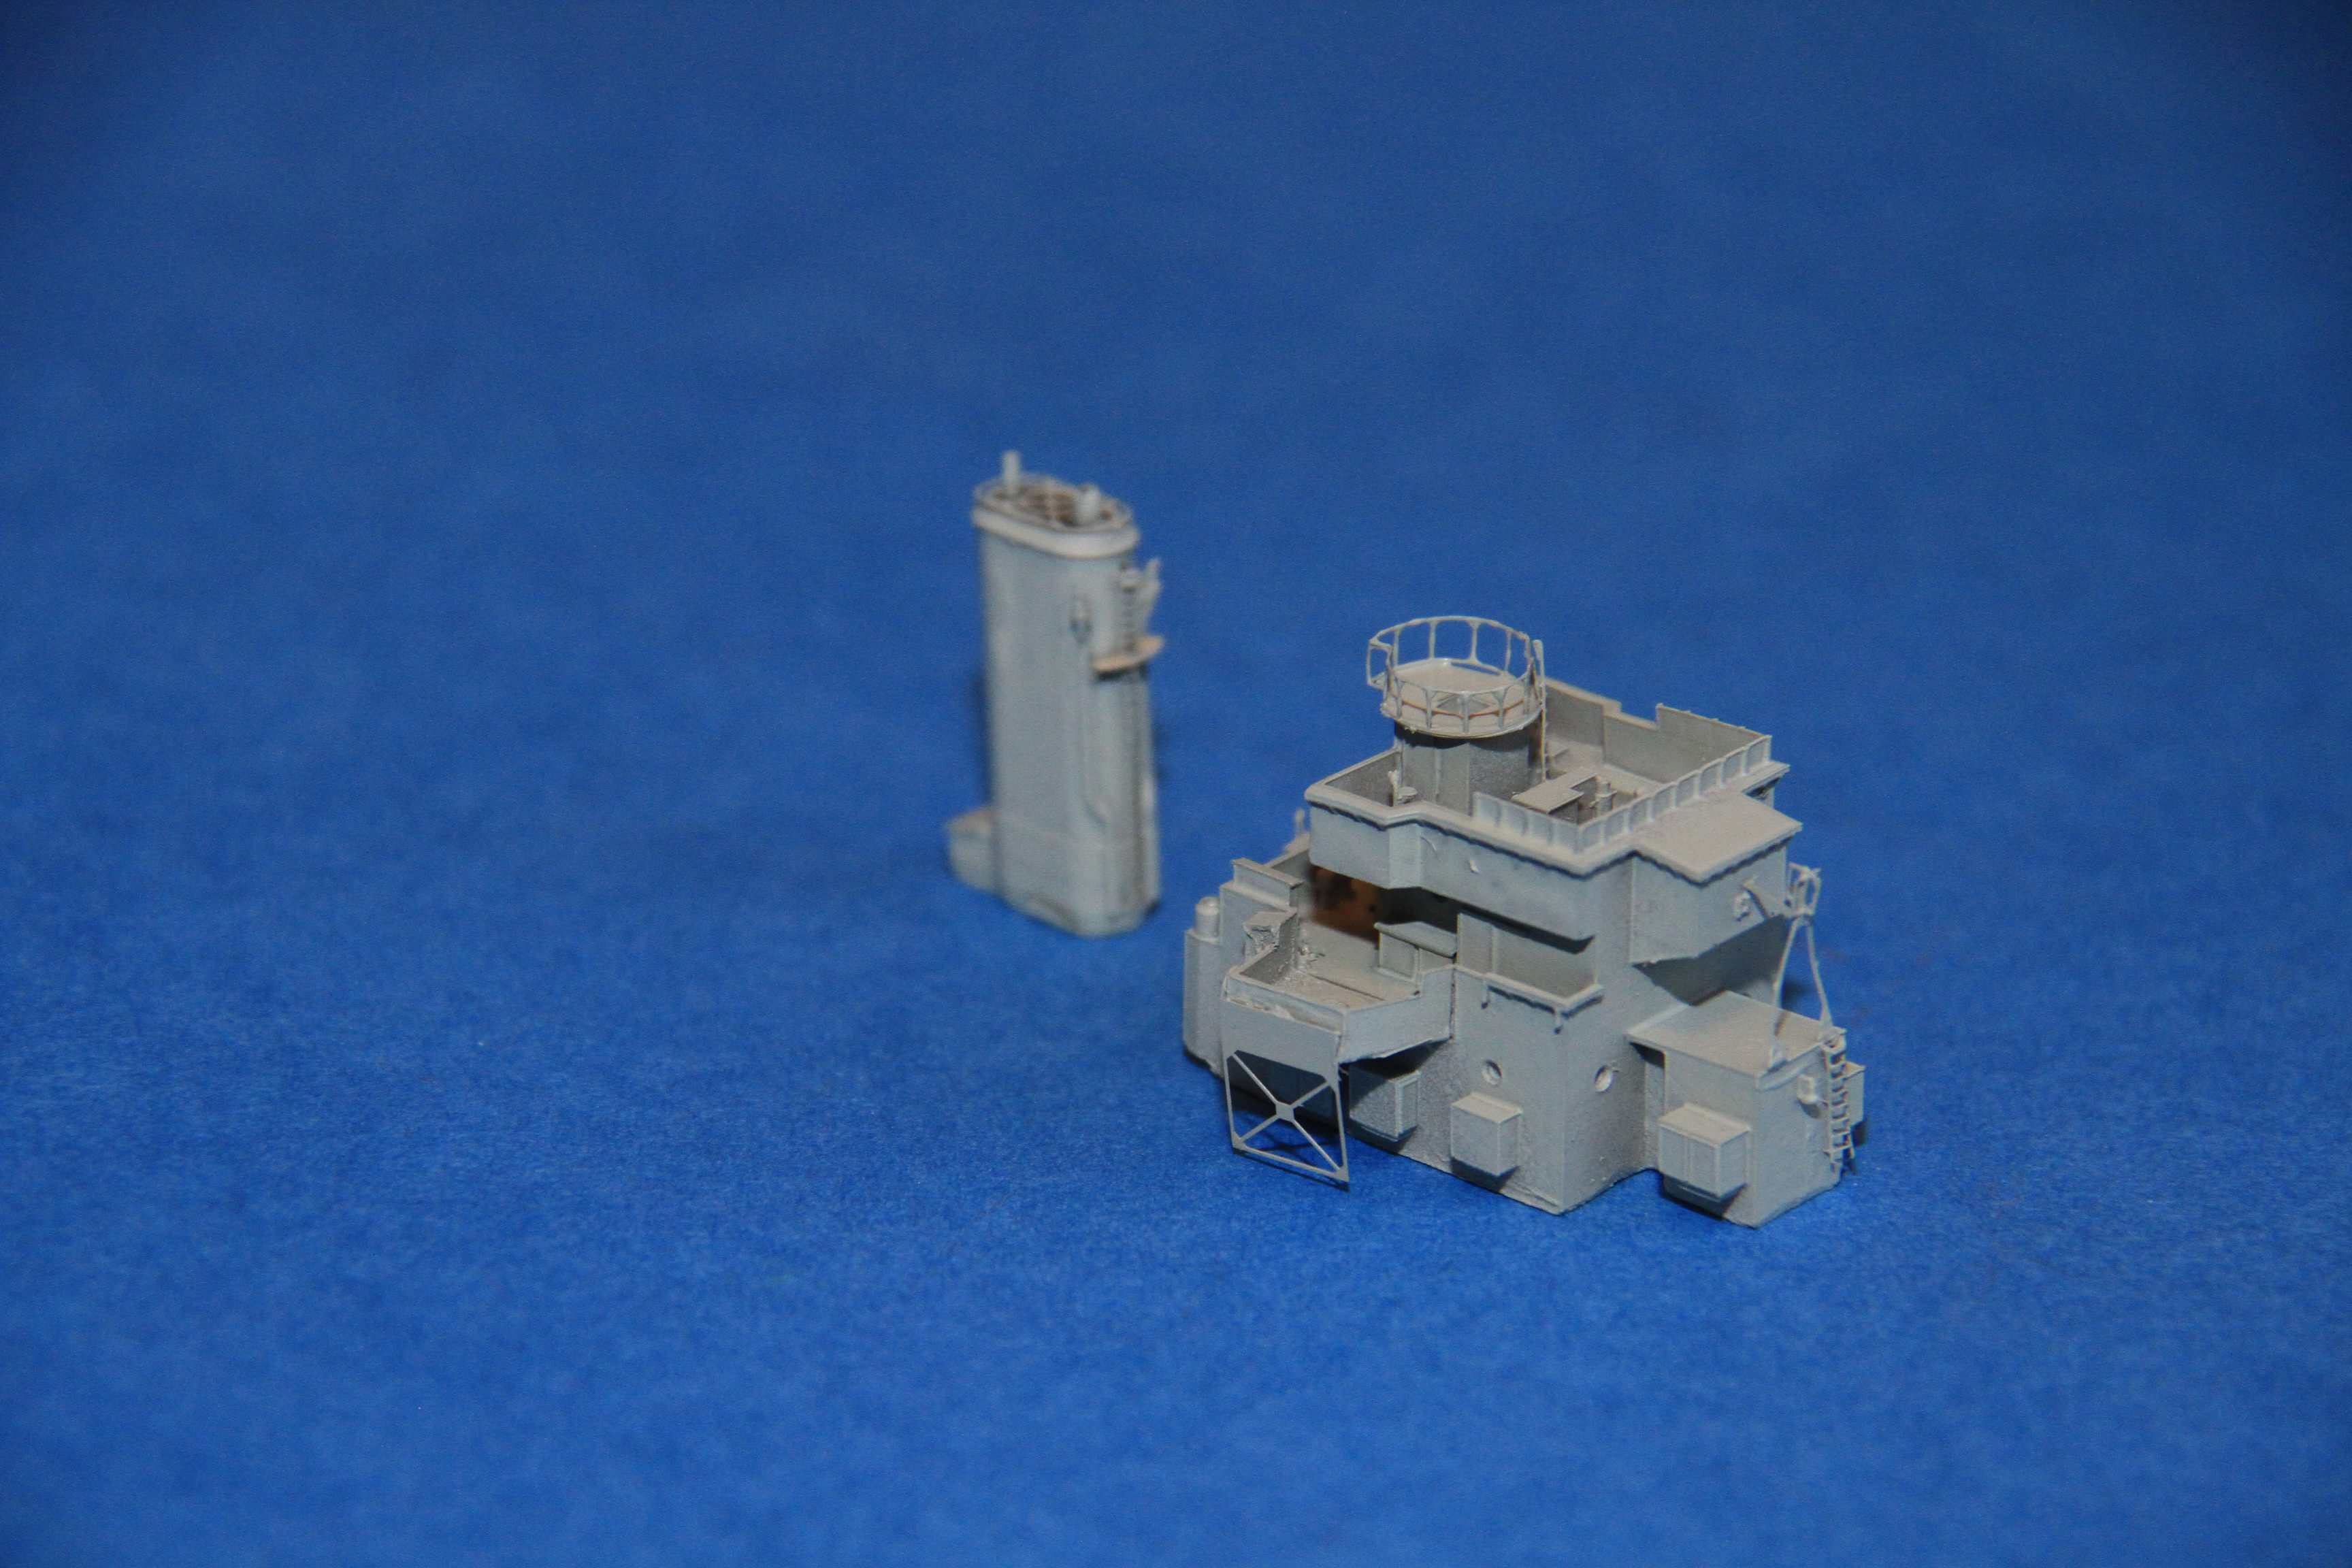
The one piece bridge casting, outstanding!
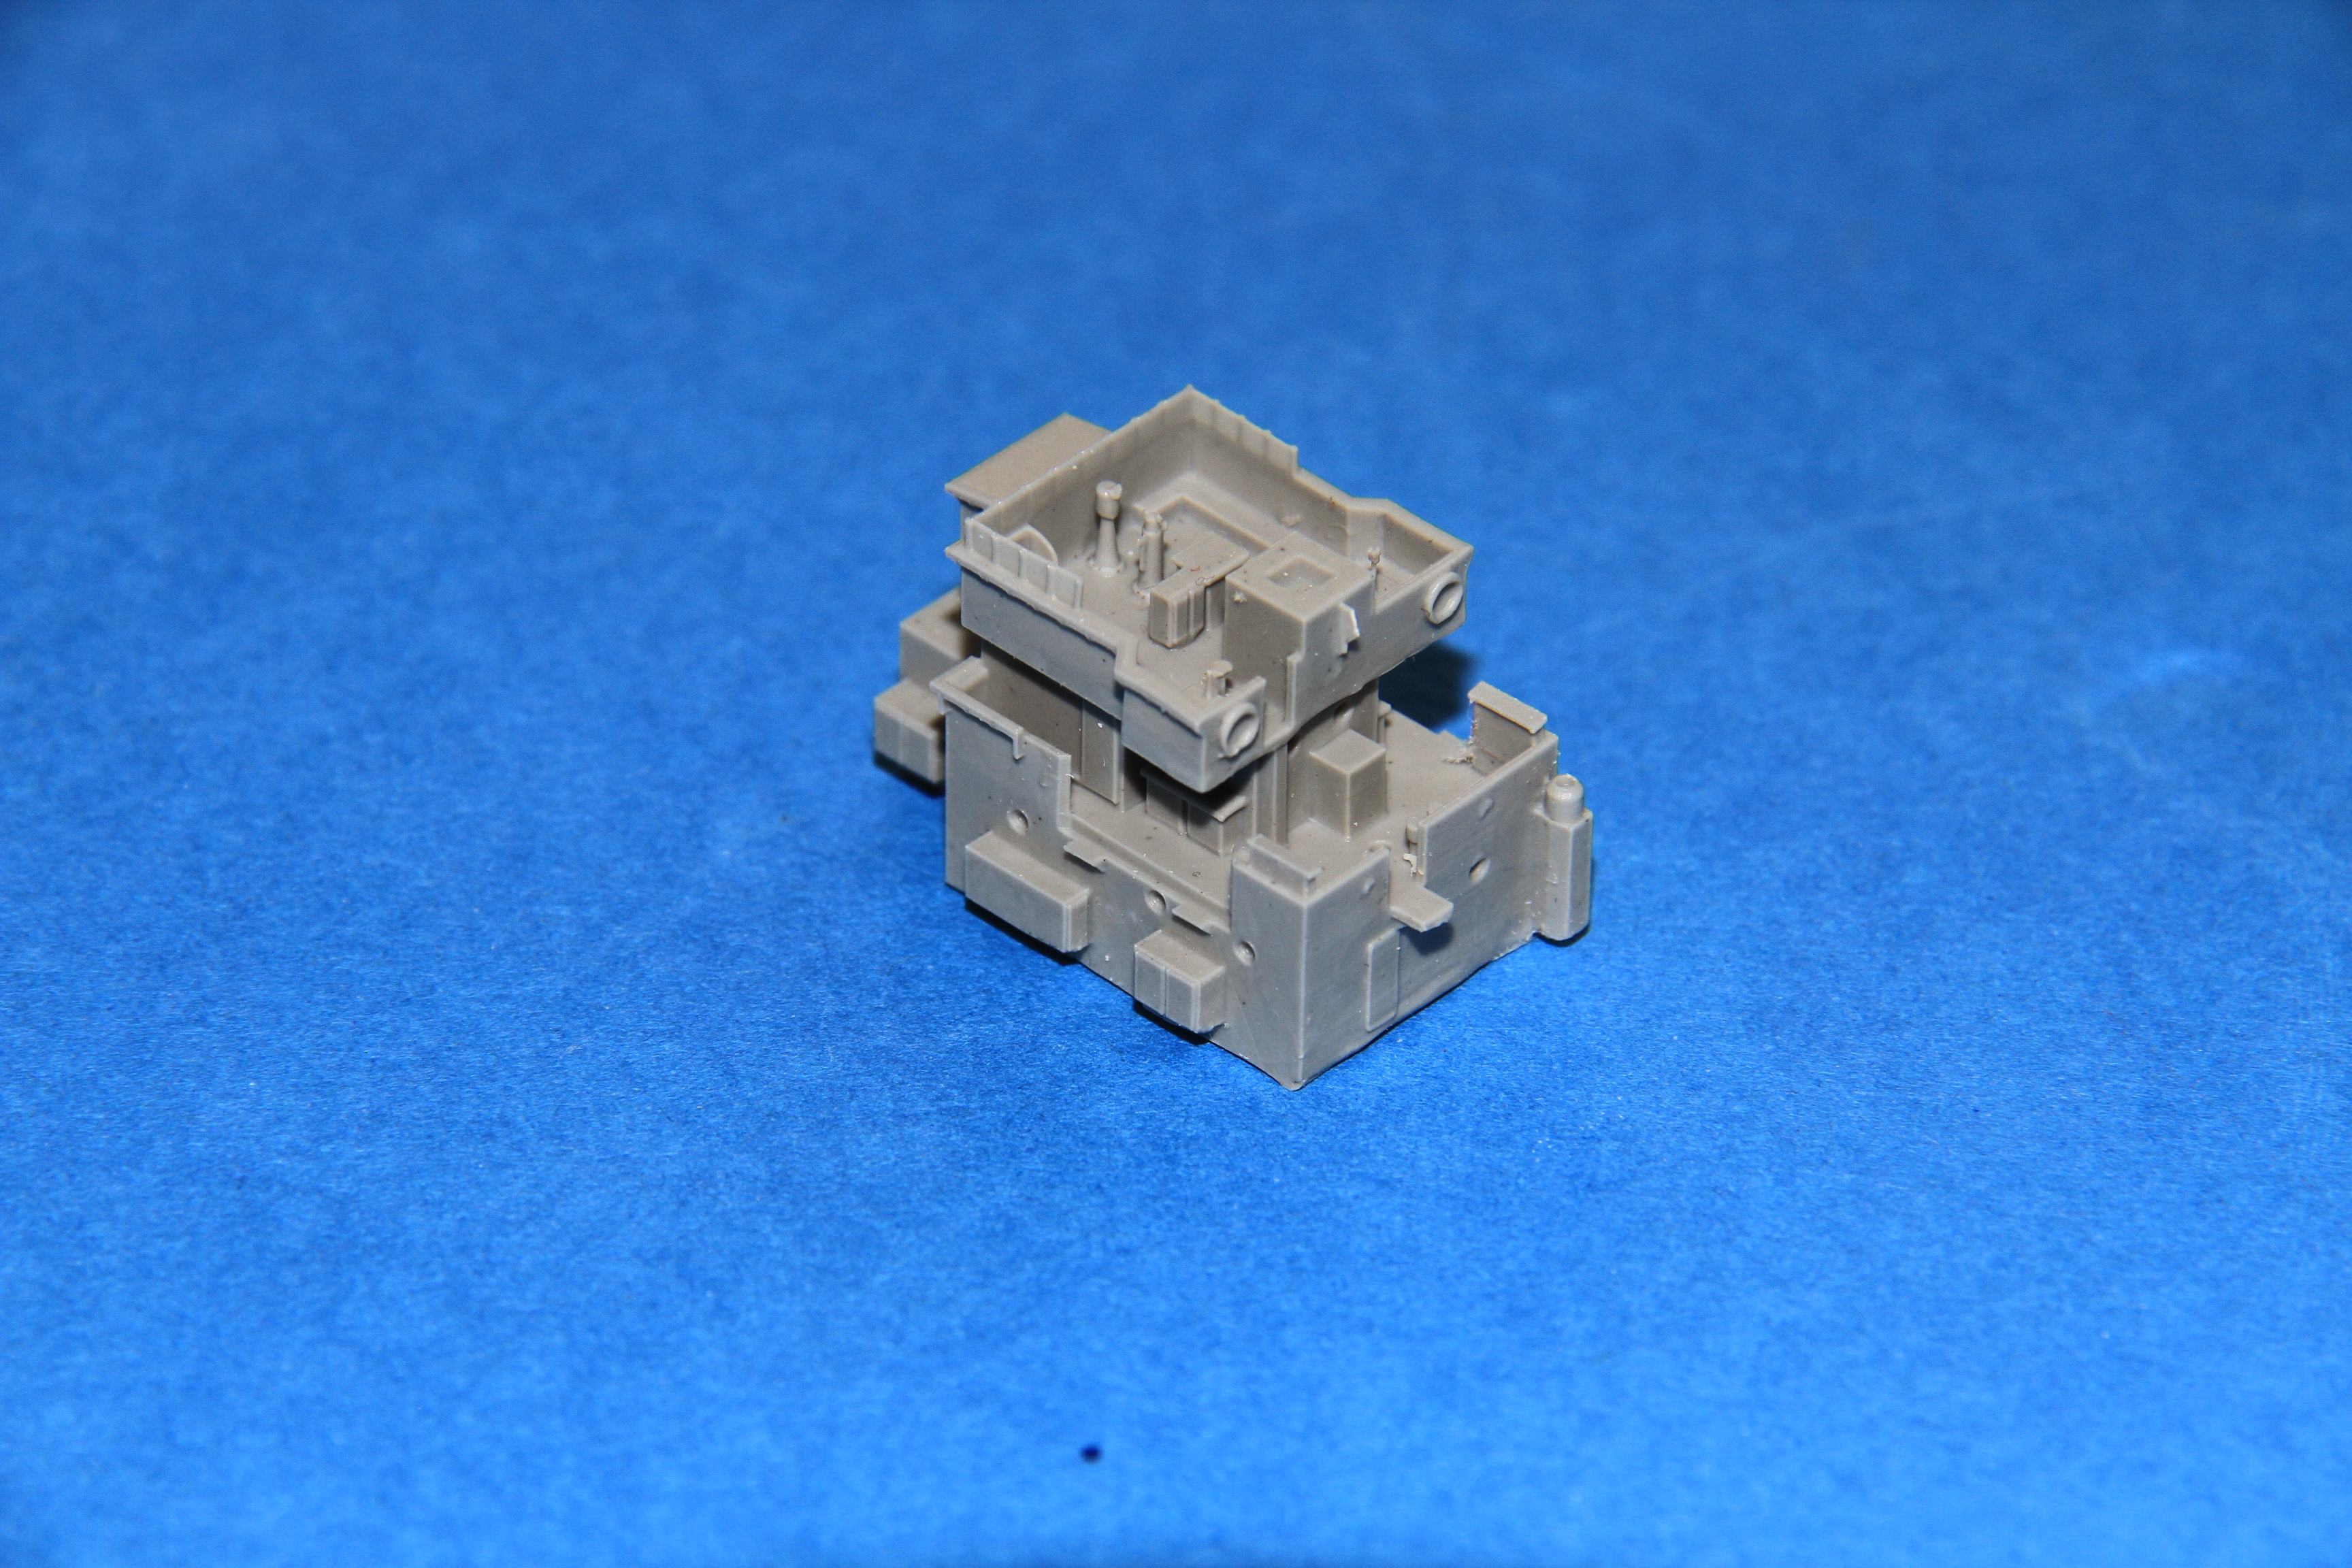
Details going on the forward end of the bridge, the lower bridge wings are to take the single 20mm. Best to fit the supports with bridge test fitted in place.
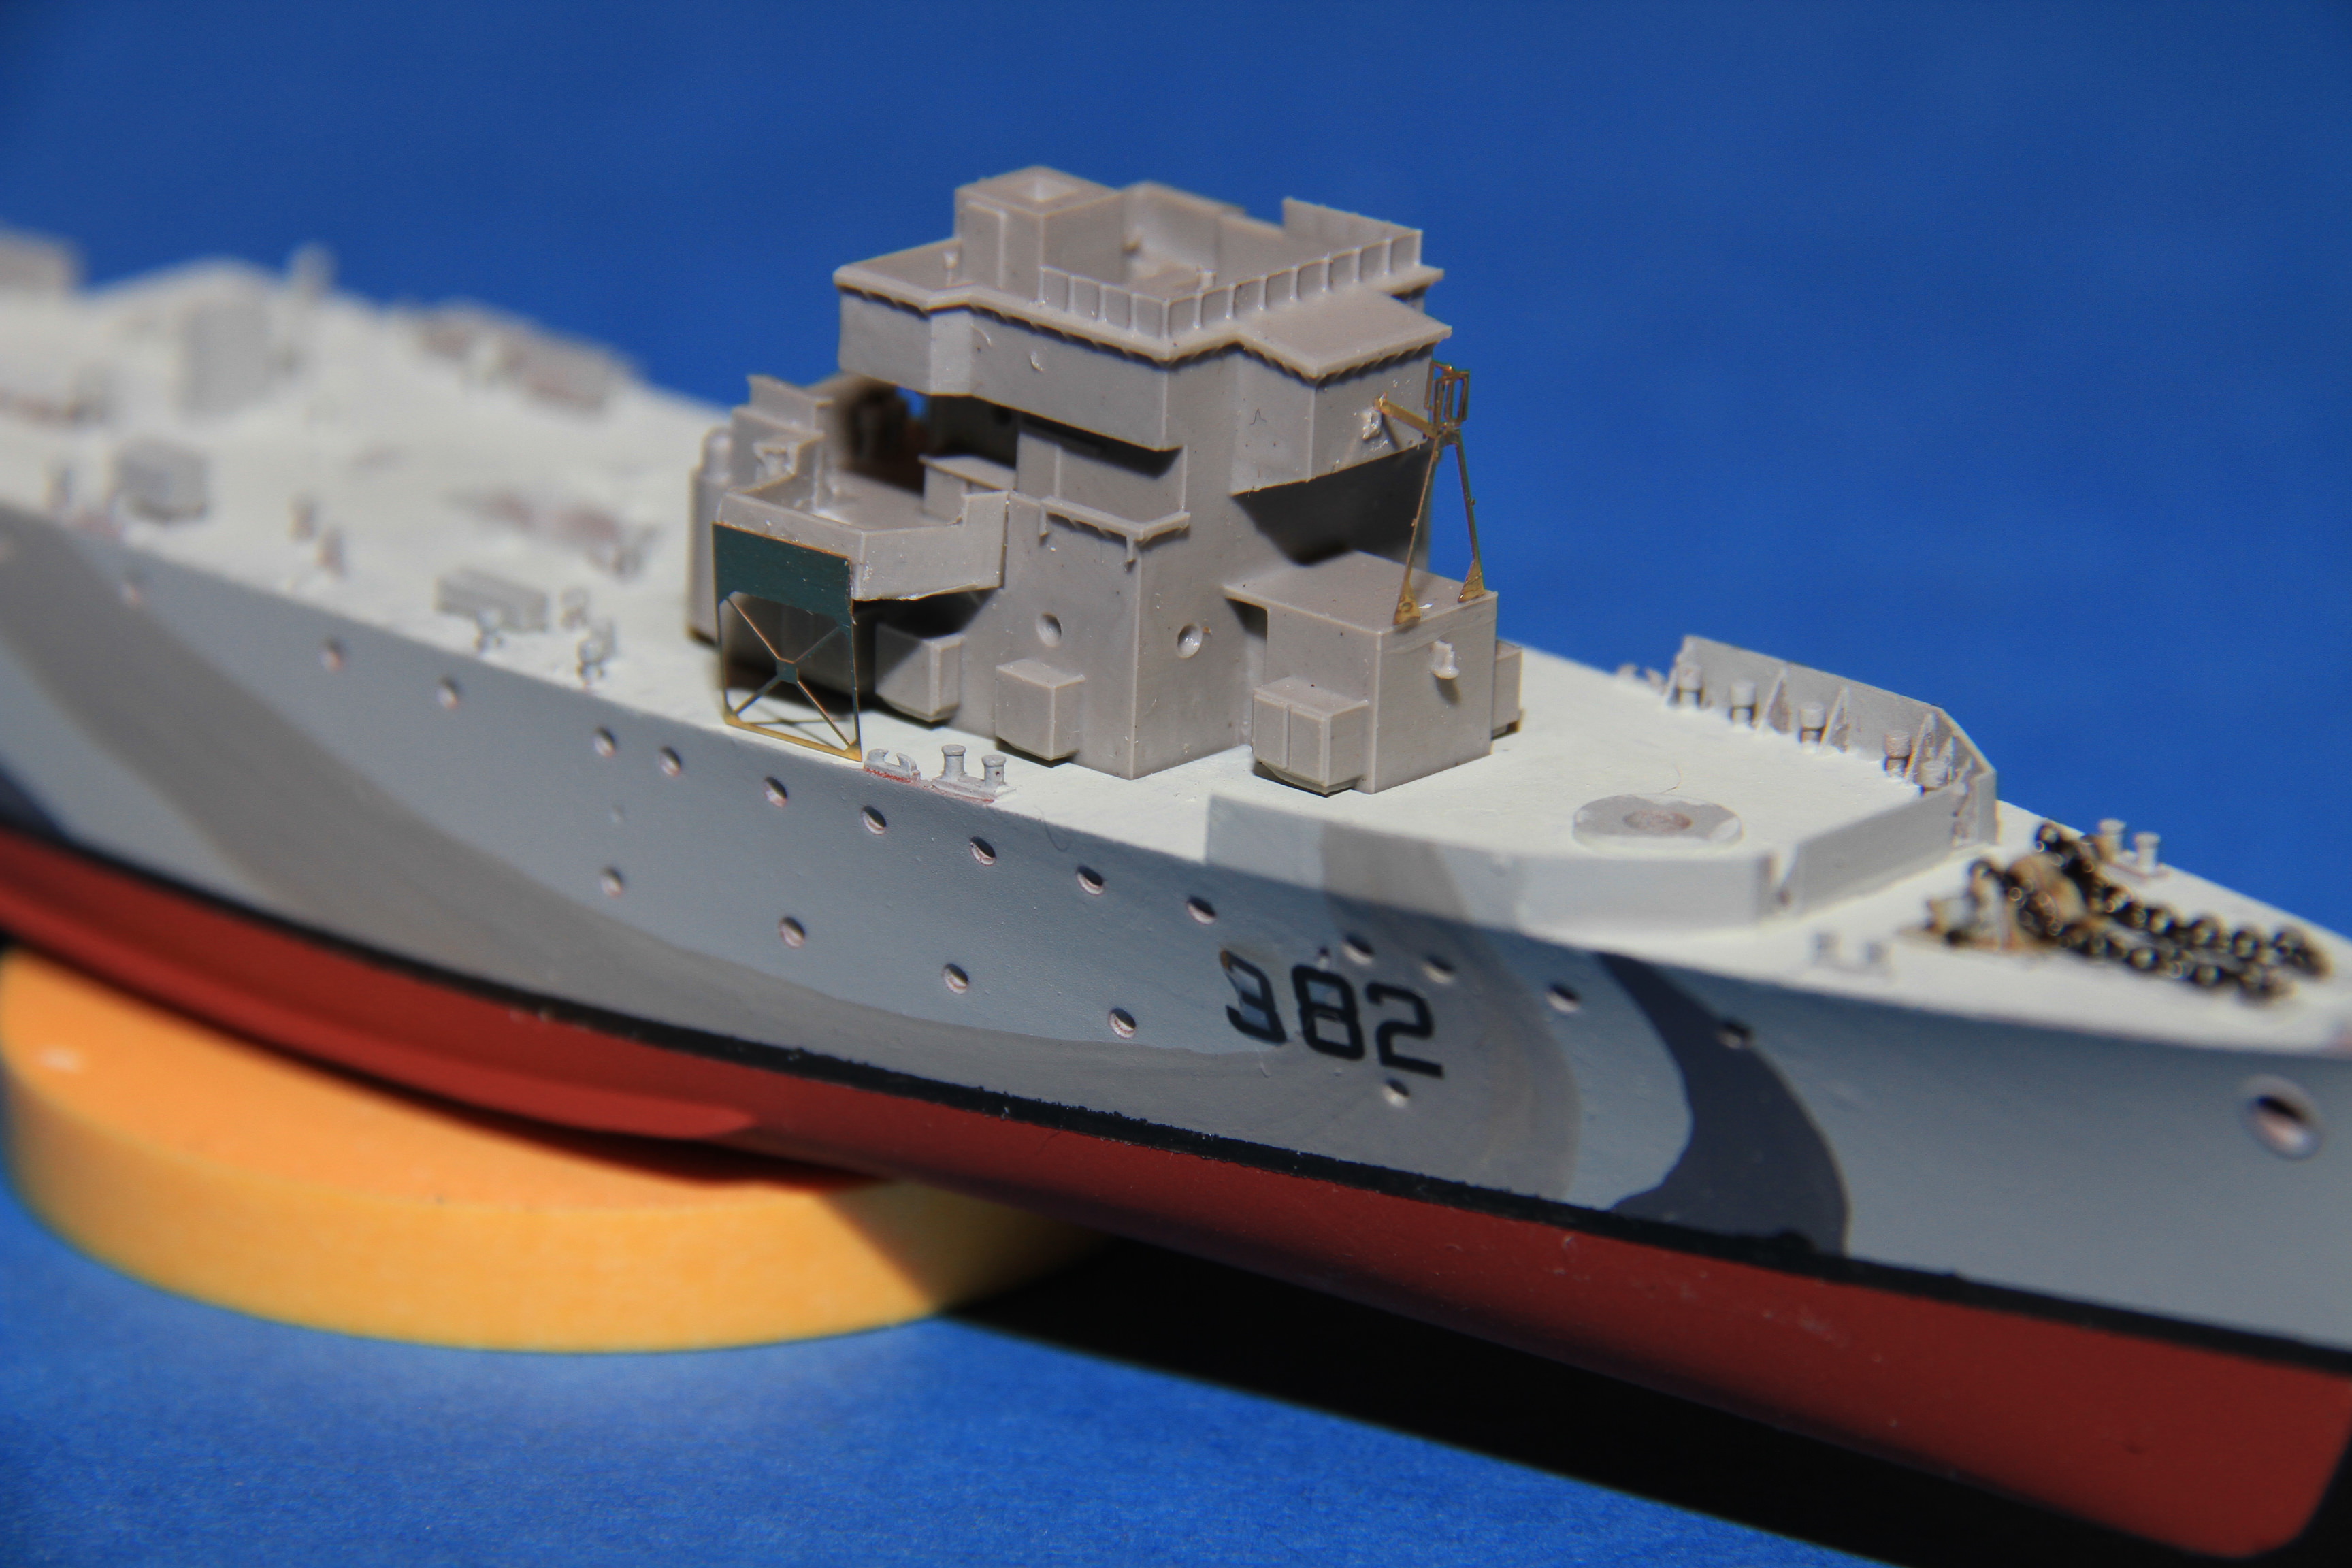
And on the after end.
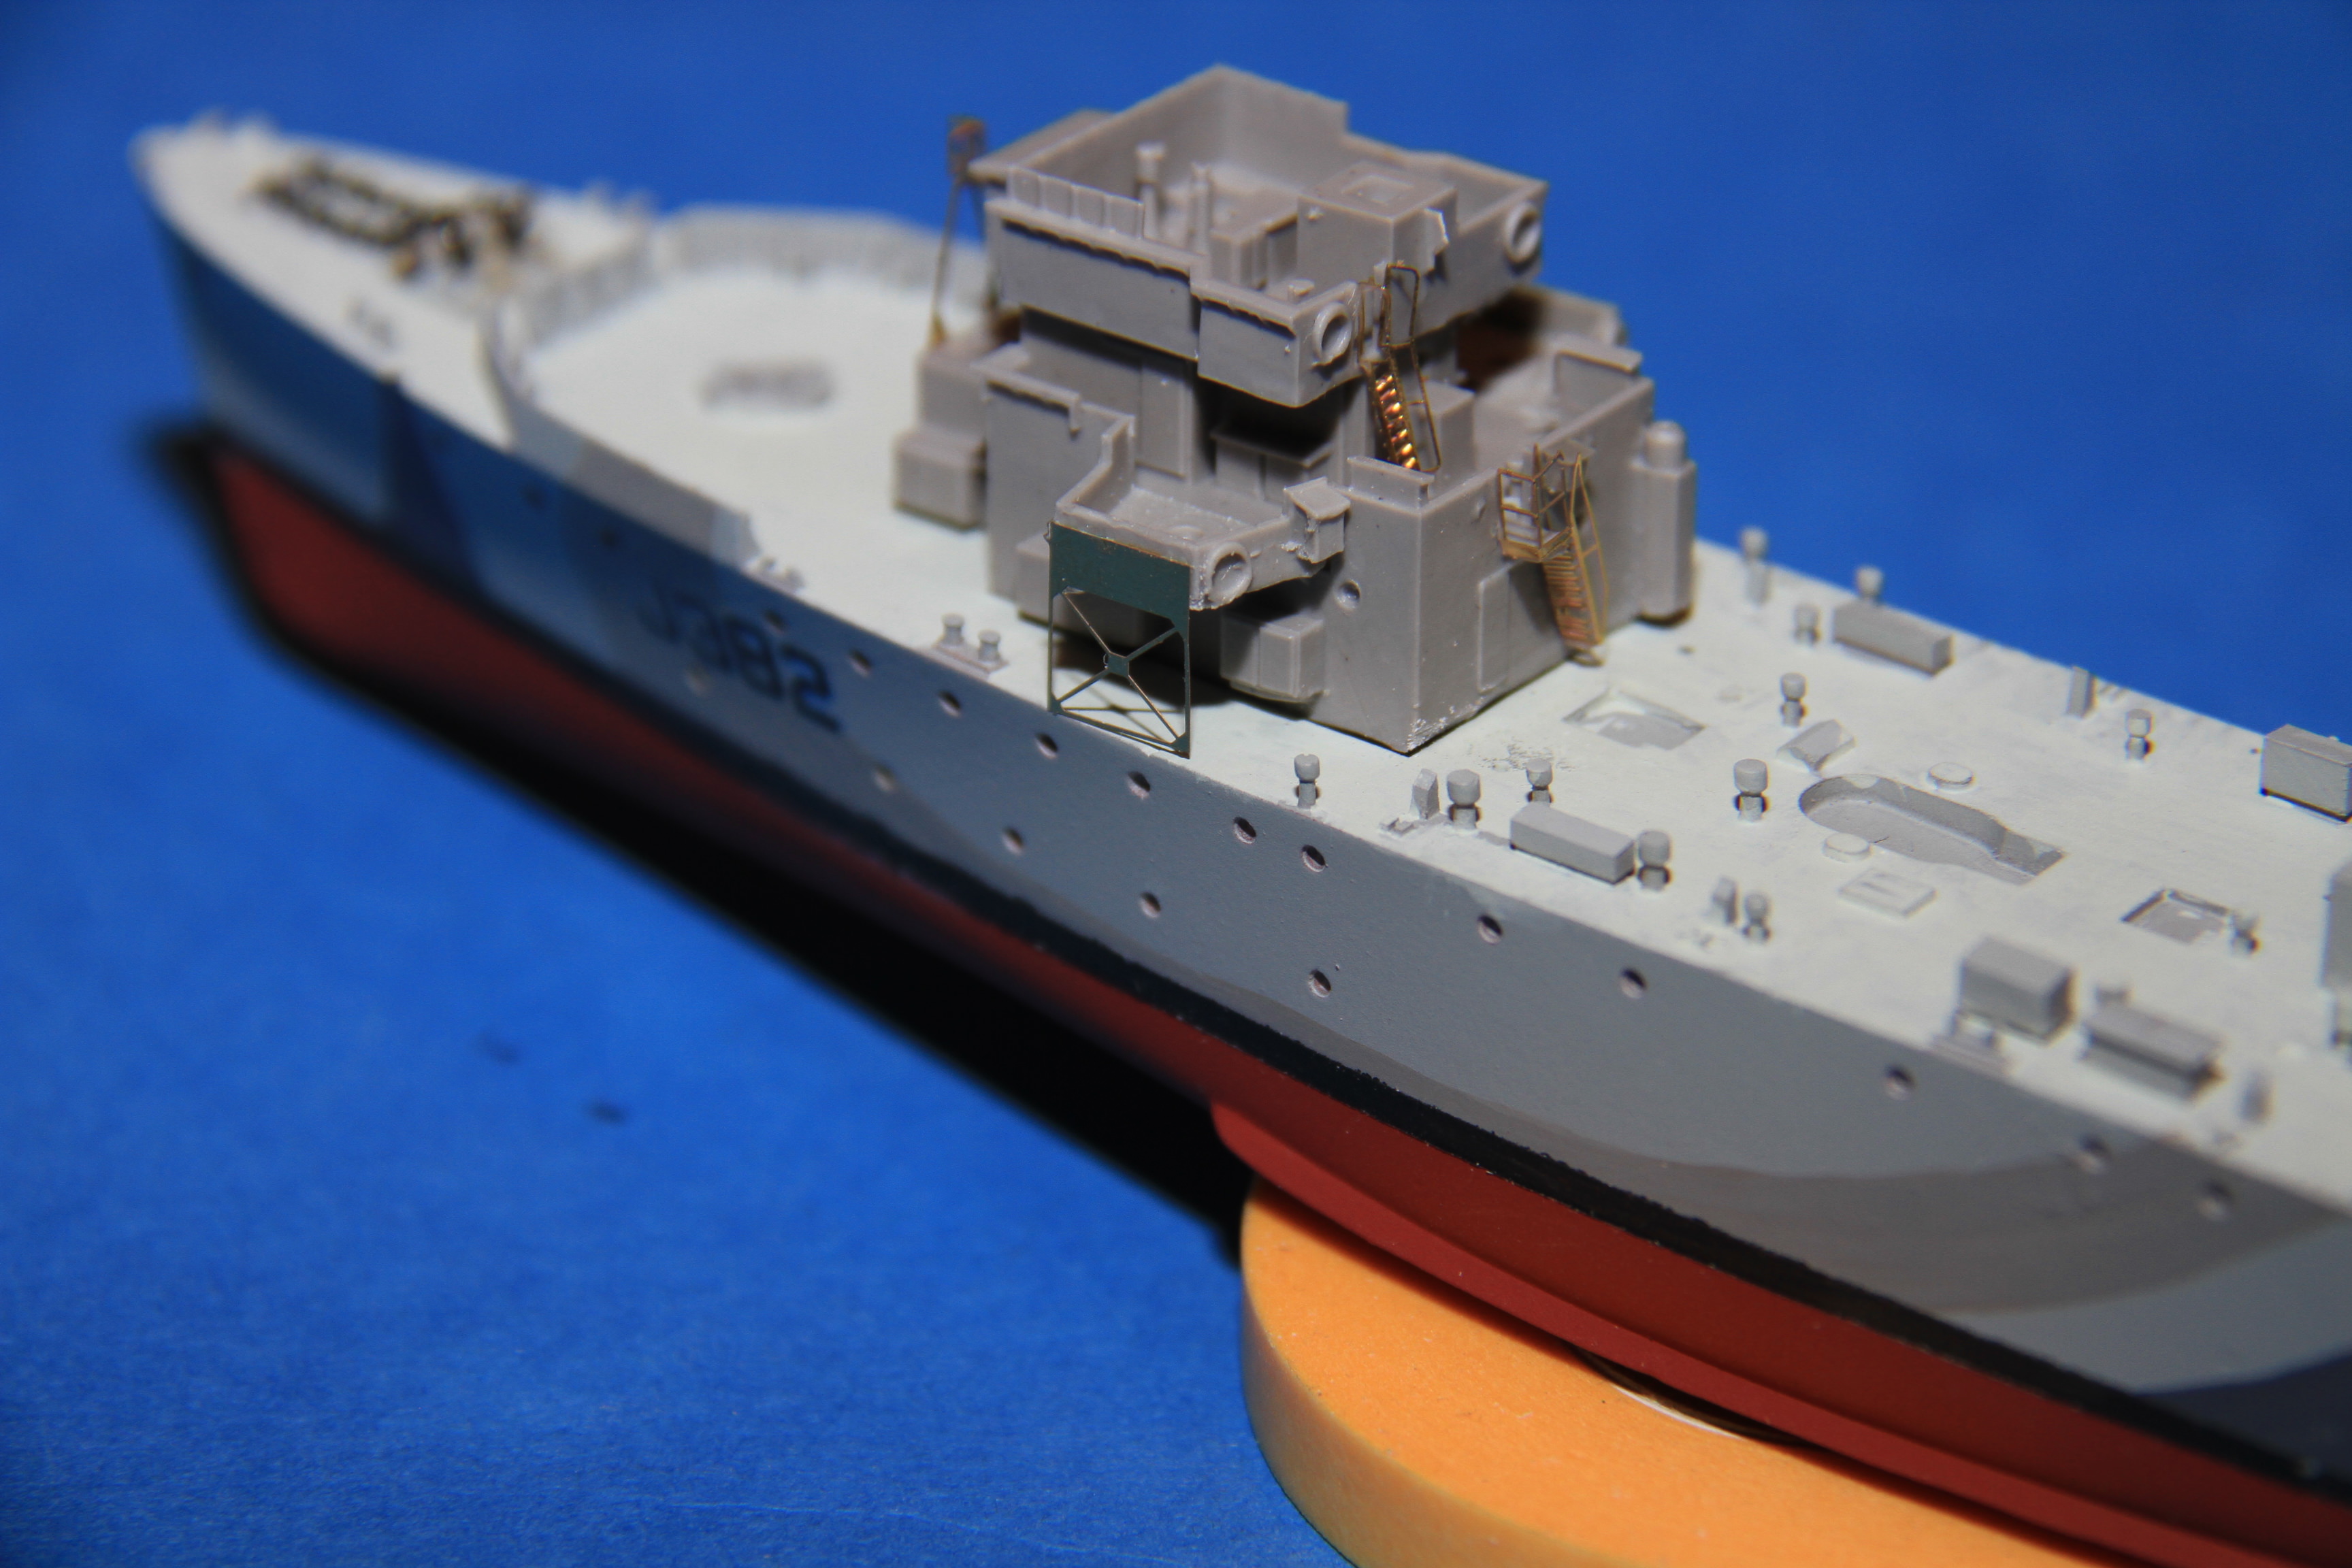
A bit more to go and that will be ready for spraying.
Cheers
Si
England - South East, United Kingdom
Joined: March 01, 2010
KitMaker: 7,078 posts
Model Shipwrights: 6,649 posts
Posted: Monday, December 04, 2017 - 02:26 AM UTC
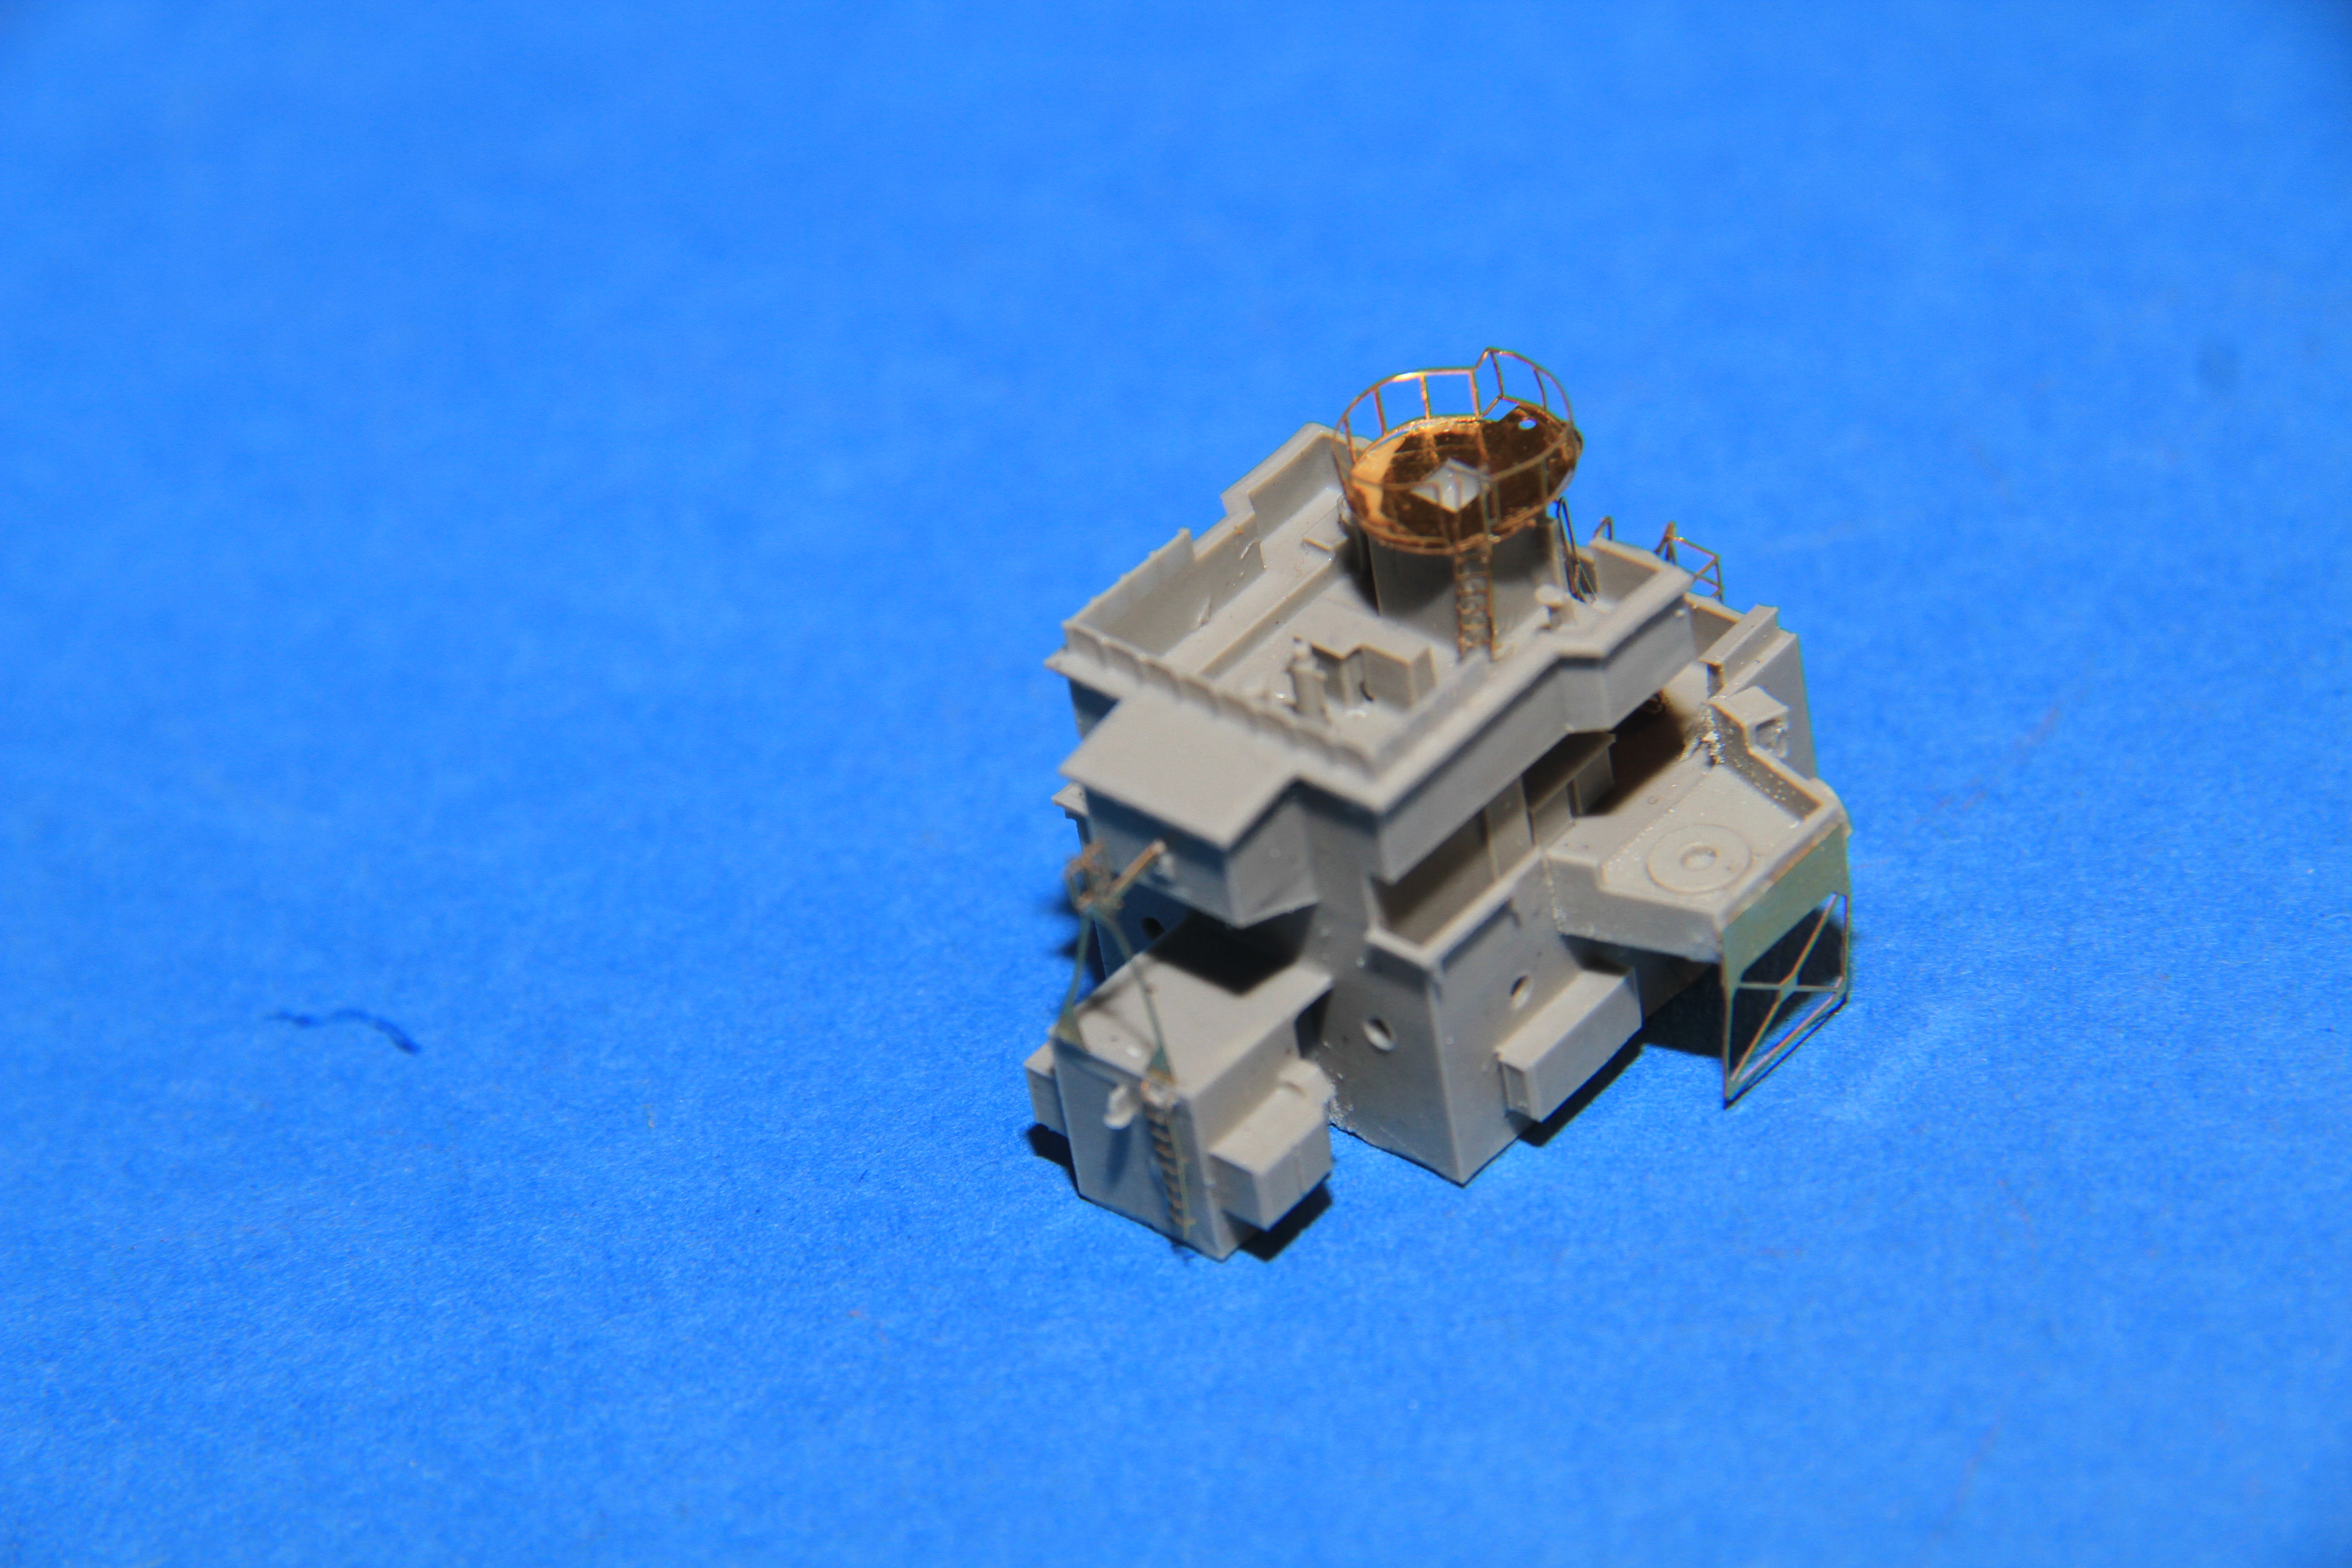
More work on the bridge, the radar platform on, and it's railing ready to be fitted, this one was too fragile to cut up.
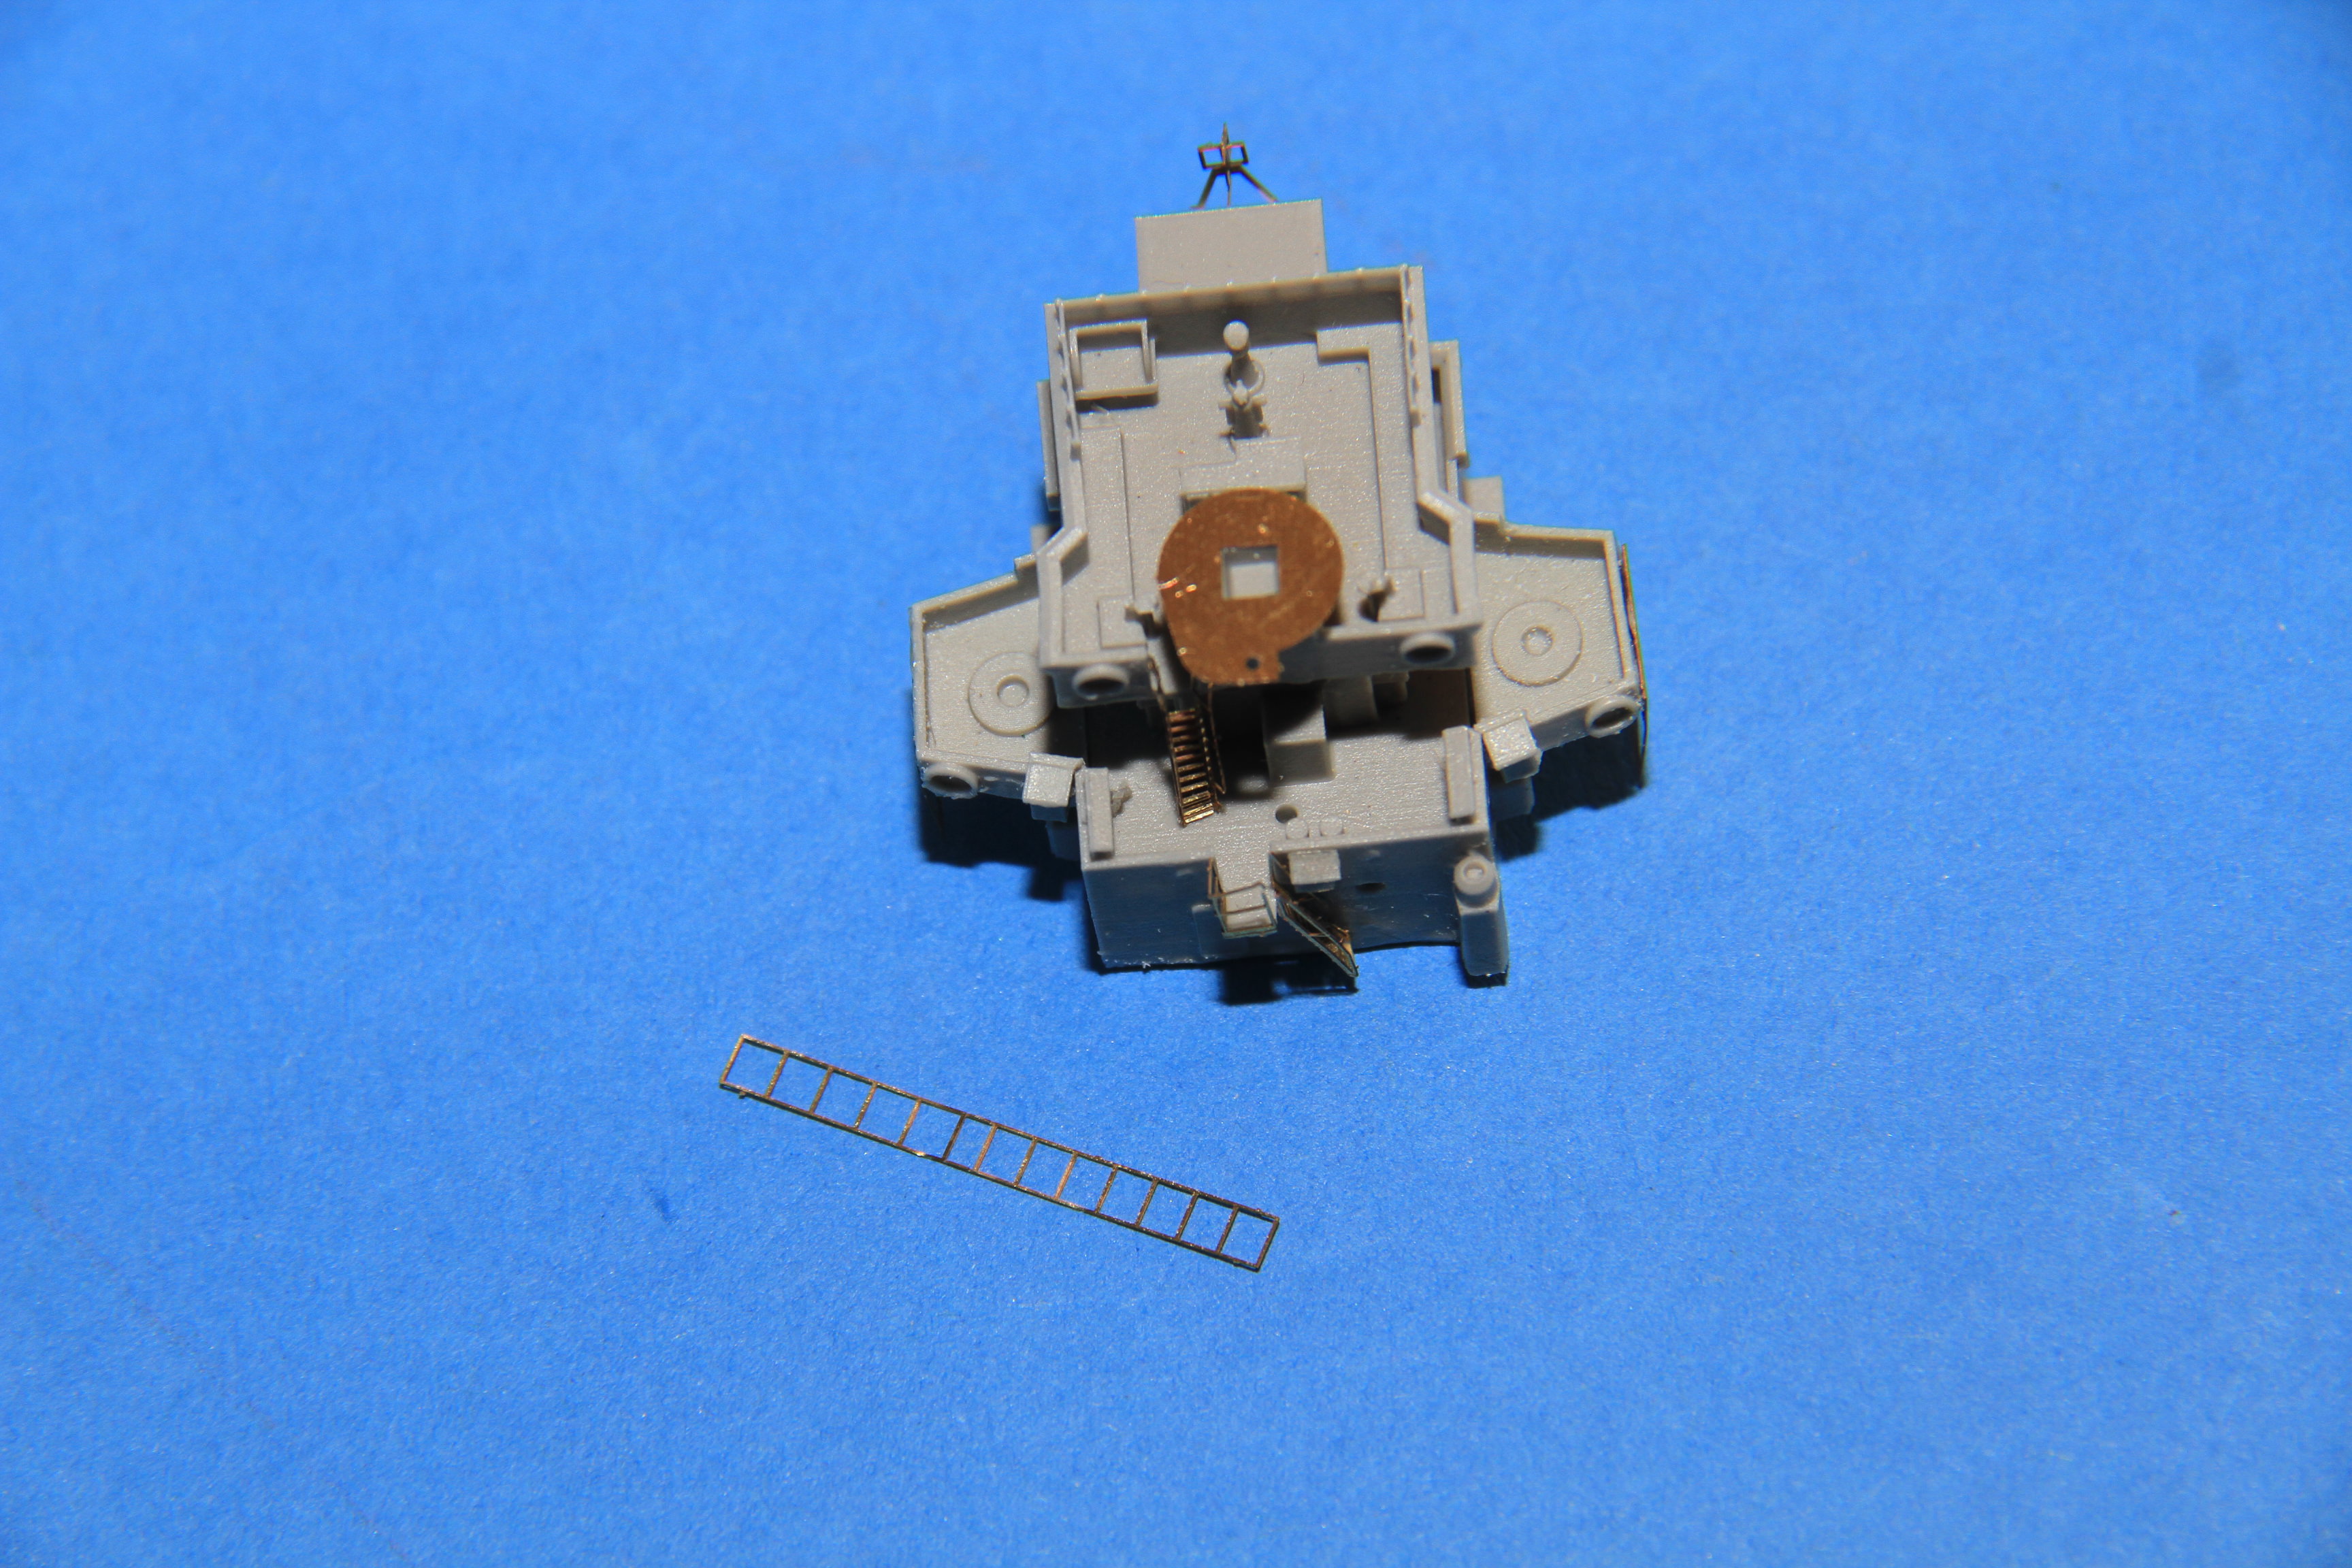
Folded and fitted, not perfect, but close enough.
The funnel with its etch in place.

The bridge and funnel test fiited, and the large reel that will be under the after light AA platform painted & glued down.
More soon
Si
England - South East, United Kingdom
Joined: March 01, 2010
KitMaker: 7,078 posts
Model Shipwrights: 6,649 posts
Posted: Wednesday, December 27, 2017 - 03:02 AM UTC
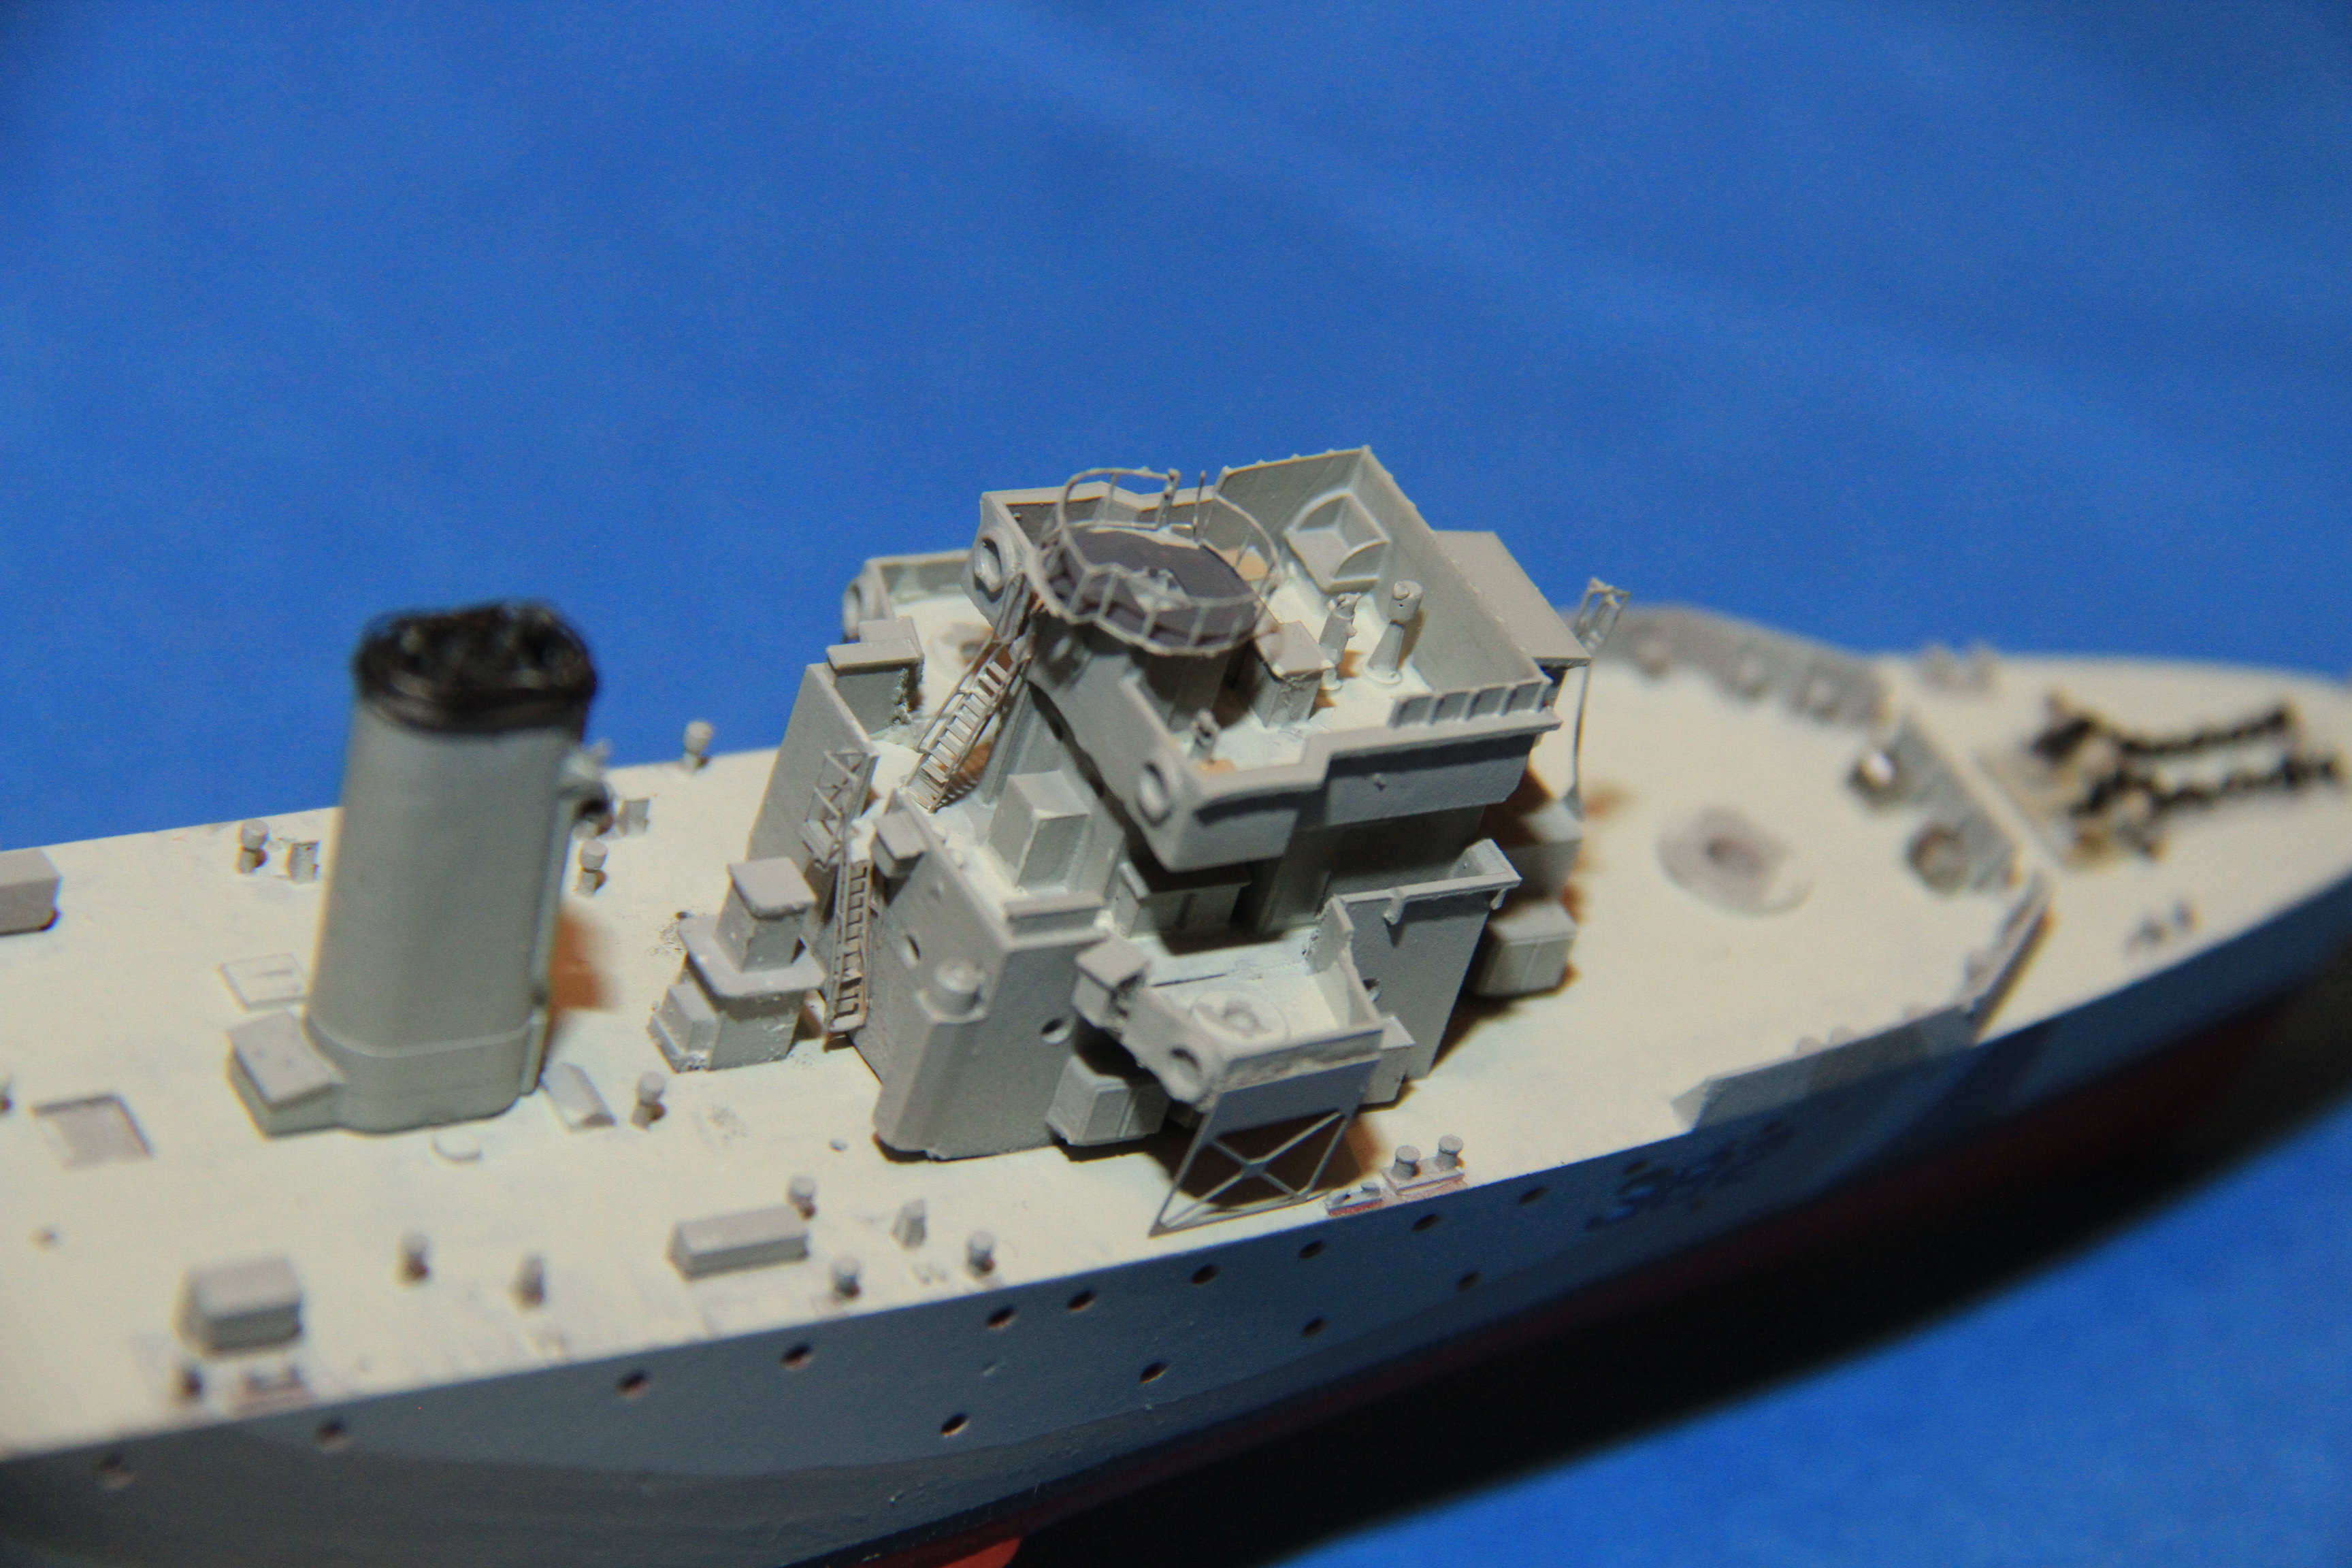
Quick update, managed to get a bit of spraying done.
The Bridge and funnel,
Bit of detail painting done and fitted in place.
More soon,
happy new Year to all
Cheers
Si
Bayern, Germany
Joined: December 11, 2009
KitMaker: 823 posts
Model Shipwrights: 551 posts
Posted: Wednesday, December 27, 2017 - 01:58 PM UTC
Hello Simon,
me are getting dizzy about the speed you are building this kit

. It looks very nice so far. Is the anchor chain the correct size for this ship? I do feel it is a bit too big?!
Keep watching your blog with interest!
Cheers
Thomas
England - South East, United Kingdom
Joined: March 01, 2010
KitMaker: 7,078 posts
Model Shipwrights: 6,649 posts
Posted: Thursday, December 28, 2017 - 12:28 AM UTC
Quoted Text
Hello Simon,
me are getting dizzy about the speed you are building this kit . It looks very nice so far. Is the anchor chain the correct size for this ship? I do feel it is a bit too big?!
Keep watching your blog with interest!
Cheers
Thomas
Thanks Thomas,
Don't be fooled, the bridge superstructure is one casting, except got the 20mm gun positions, quite a bit of detail to go on that let alone the rest of it.
You are most probably right about the anchor cable, it was some left over from the Tamiya Kagero, it was the smallest decent cable I had, but to me it looked better than etched.
Cheers
Si
England - South East, United Kingdom
Joined: March 01, 2010
KitMaker: 7,078 posts
Model Shipwrights: 6,649 posts
Posted: Monday, January 08, 2018 - 02:05 AM UTC
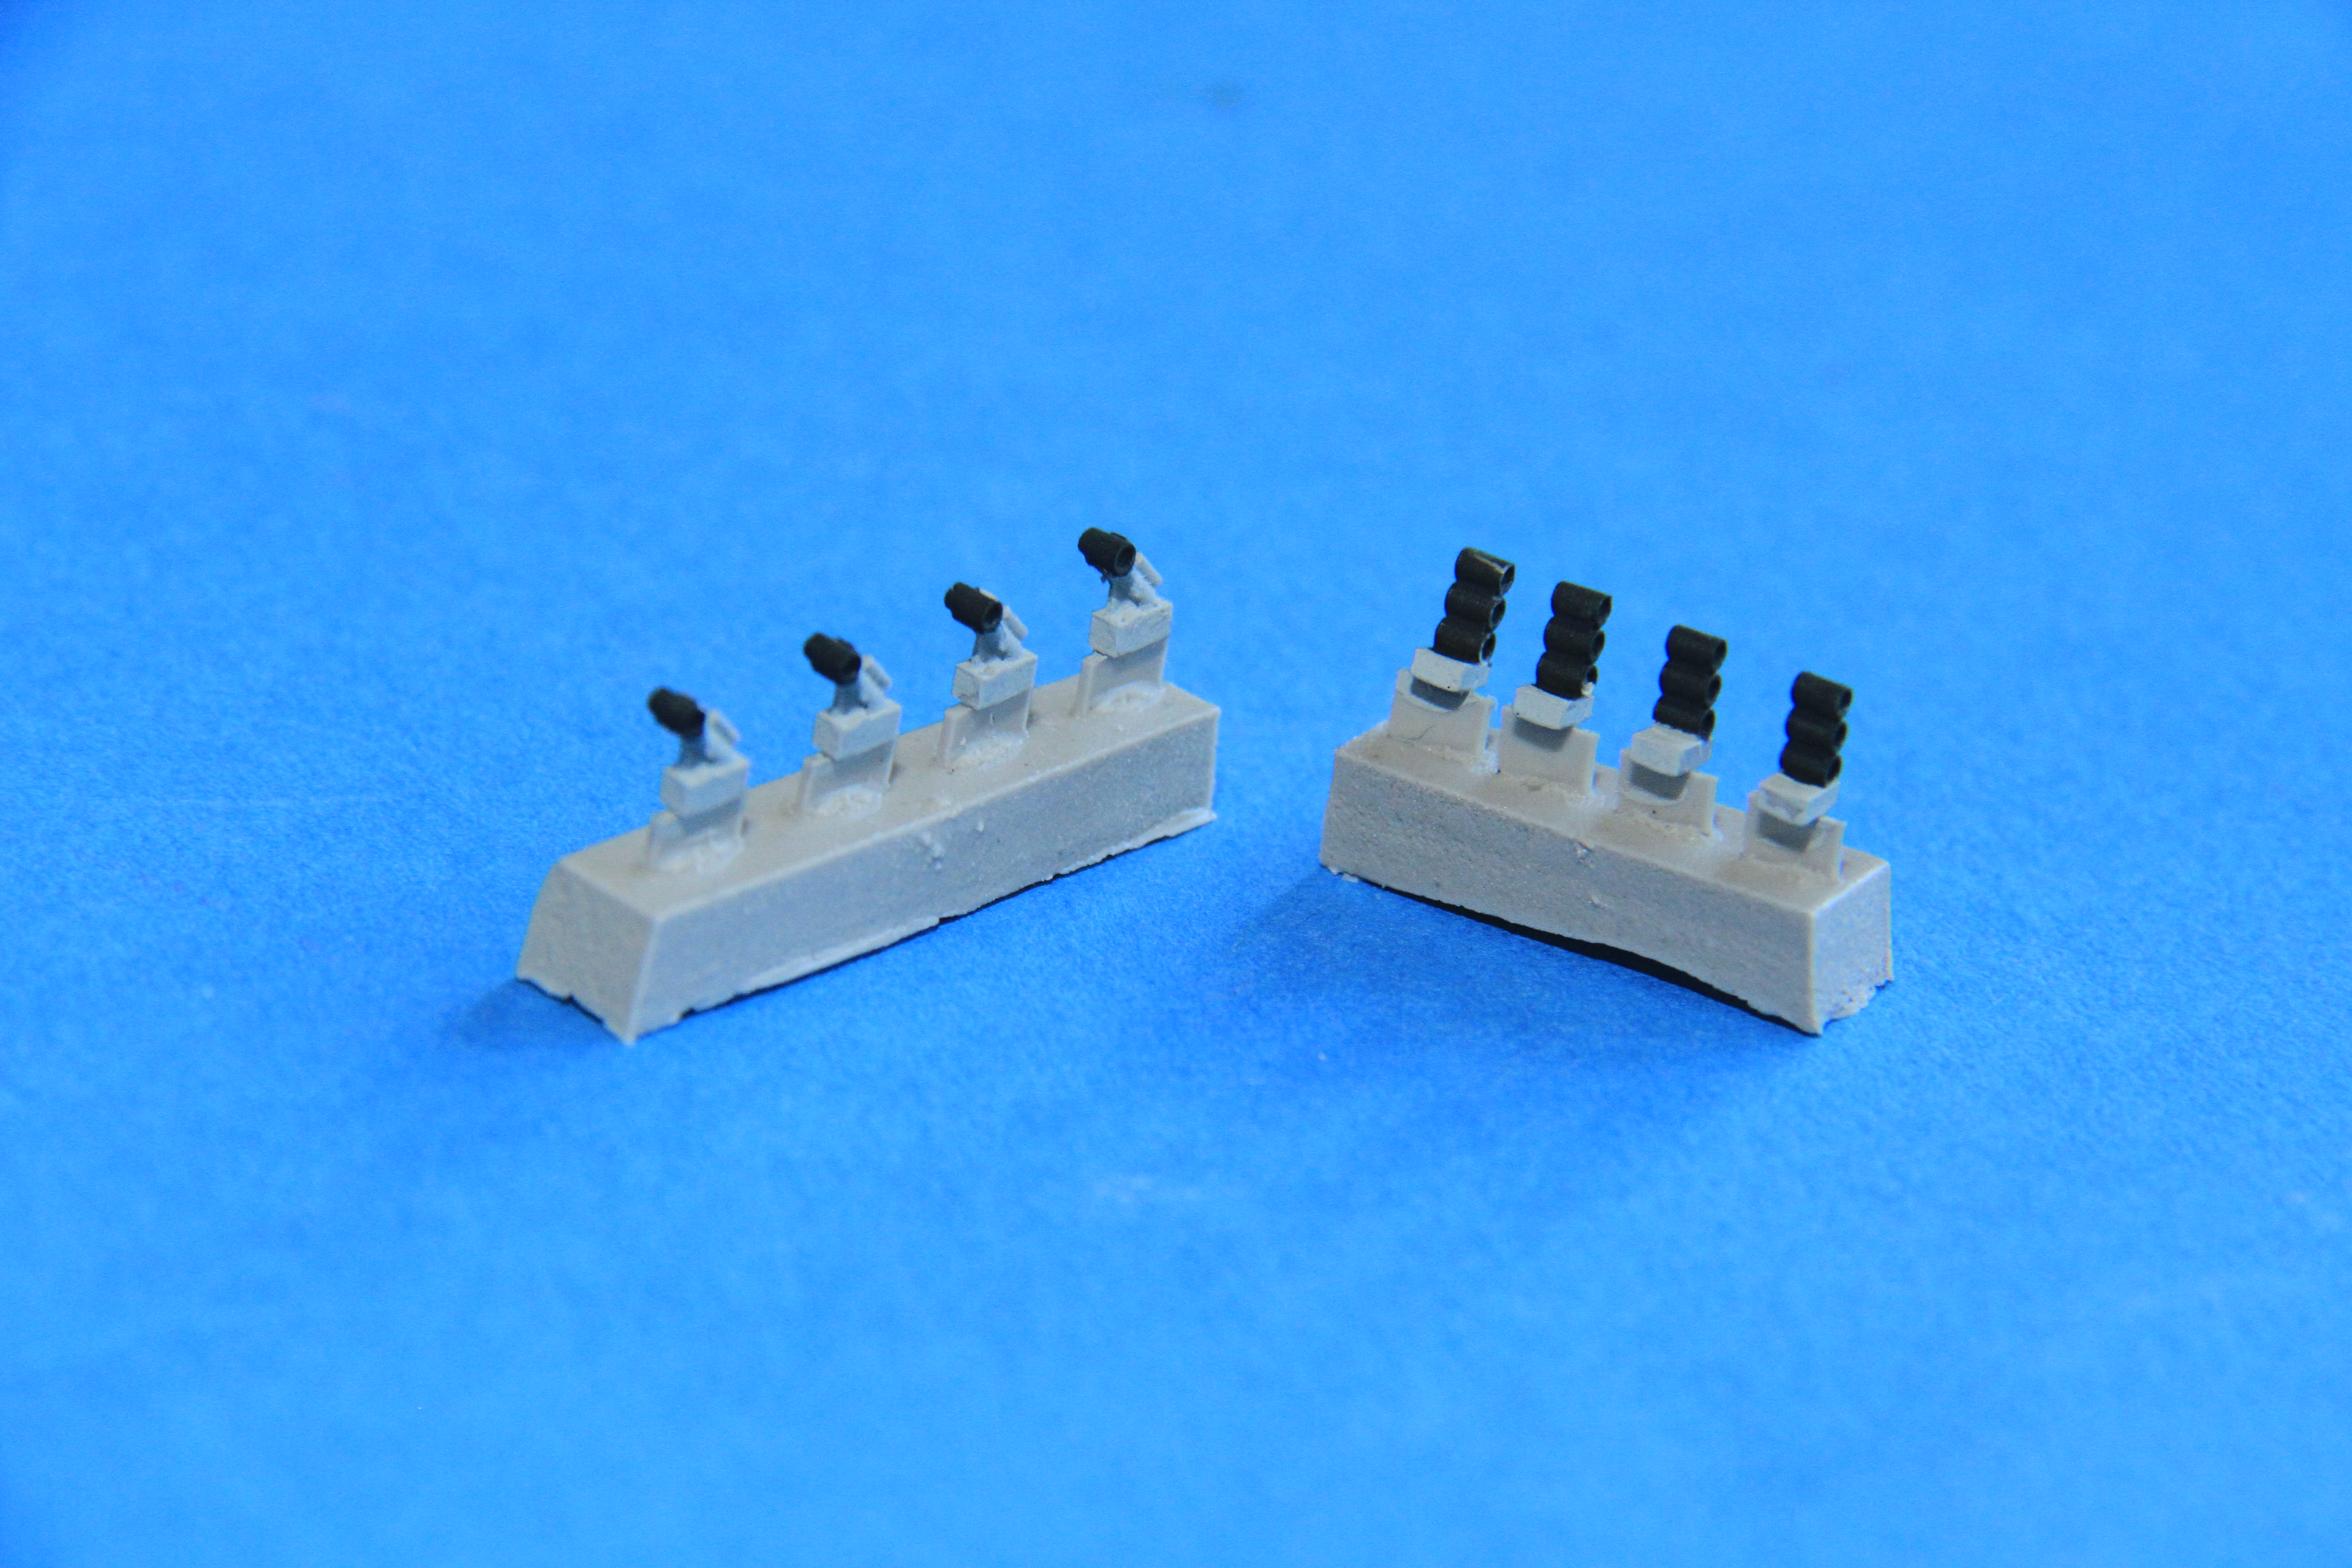
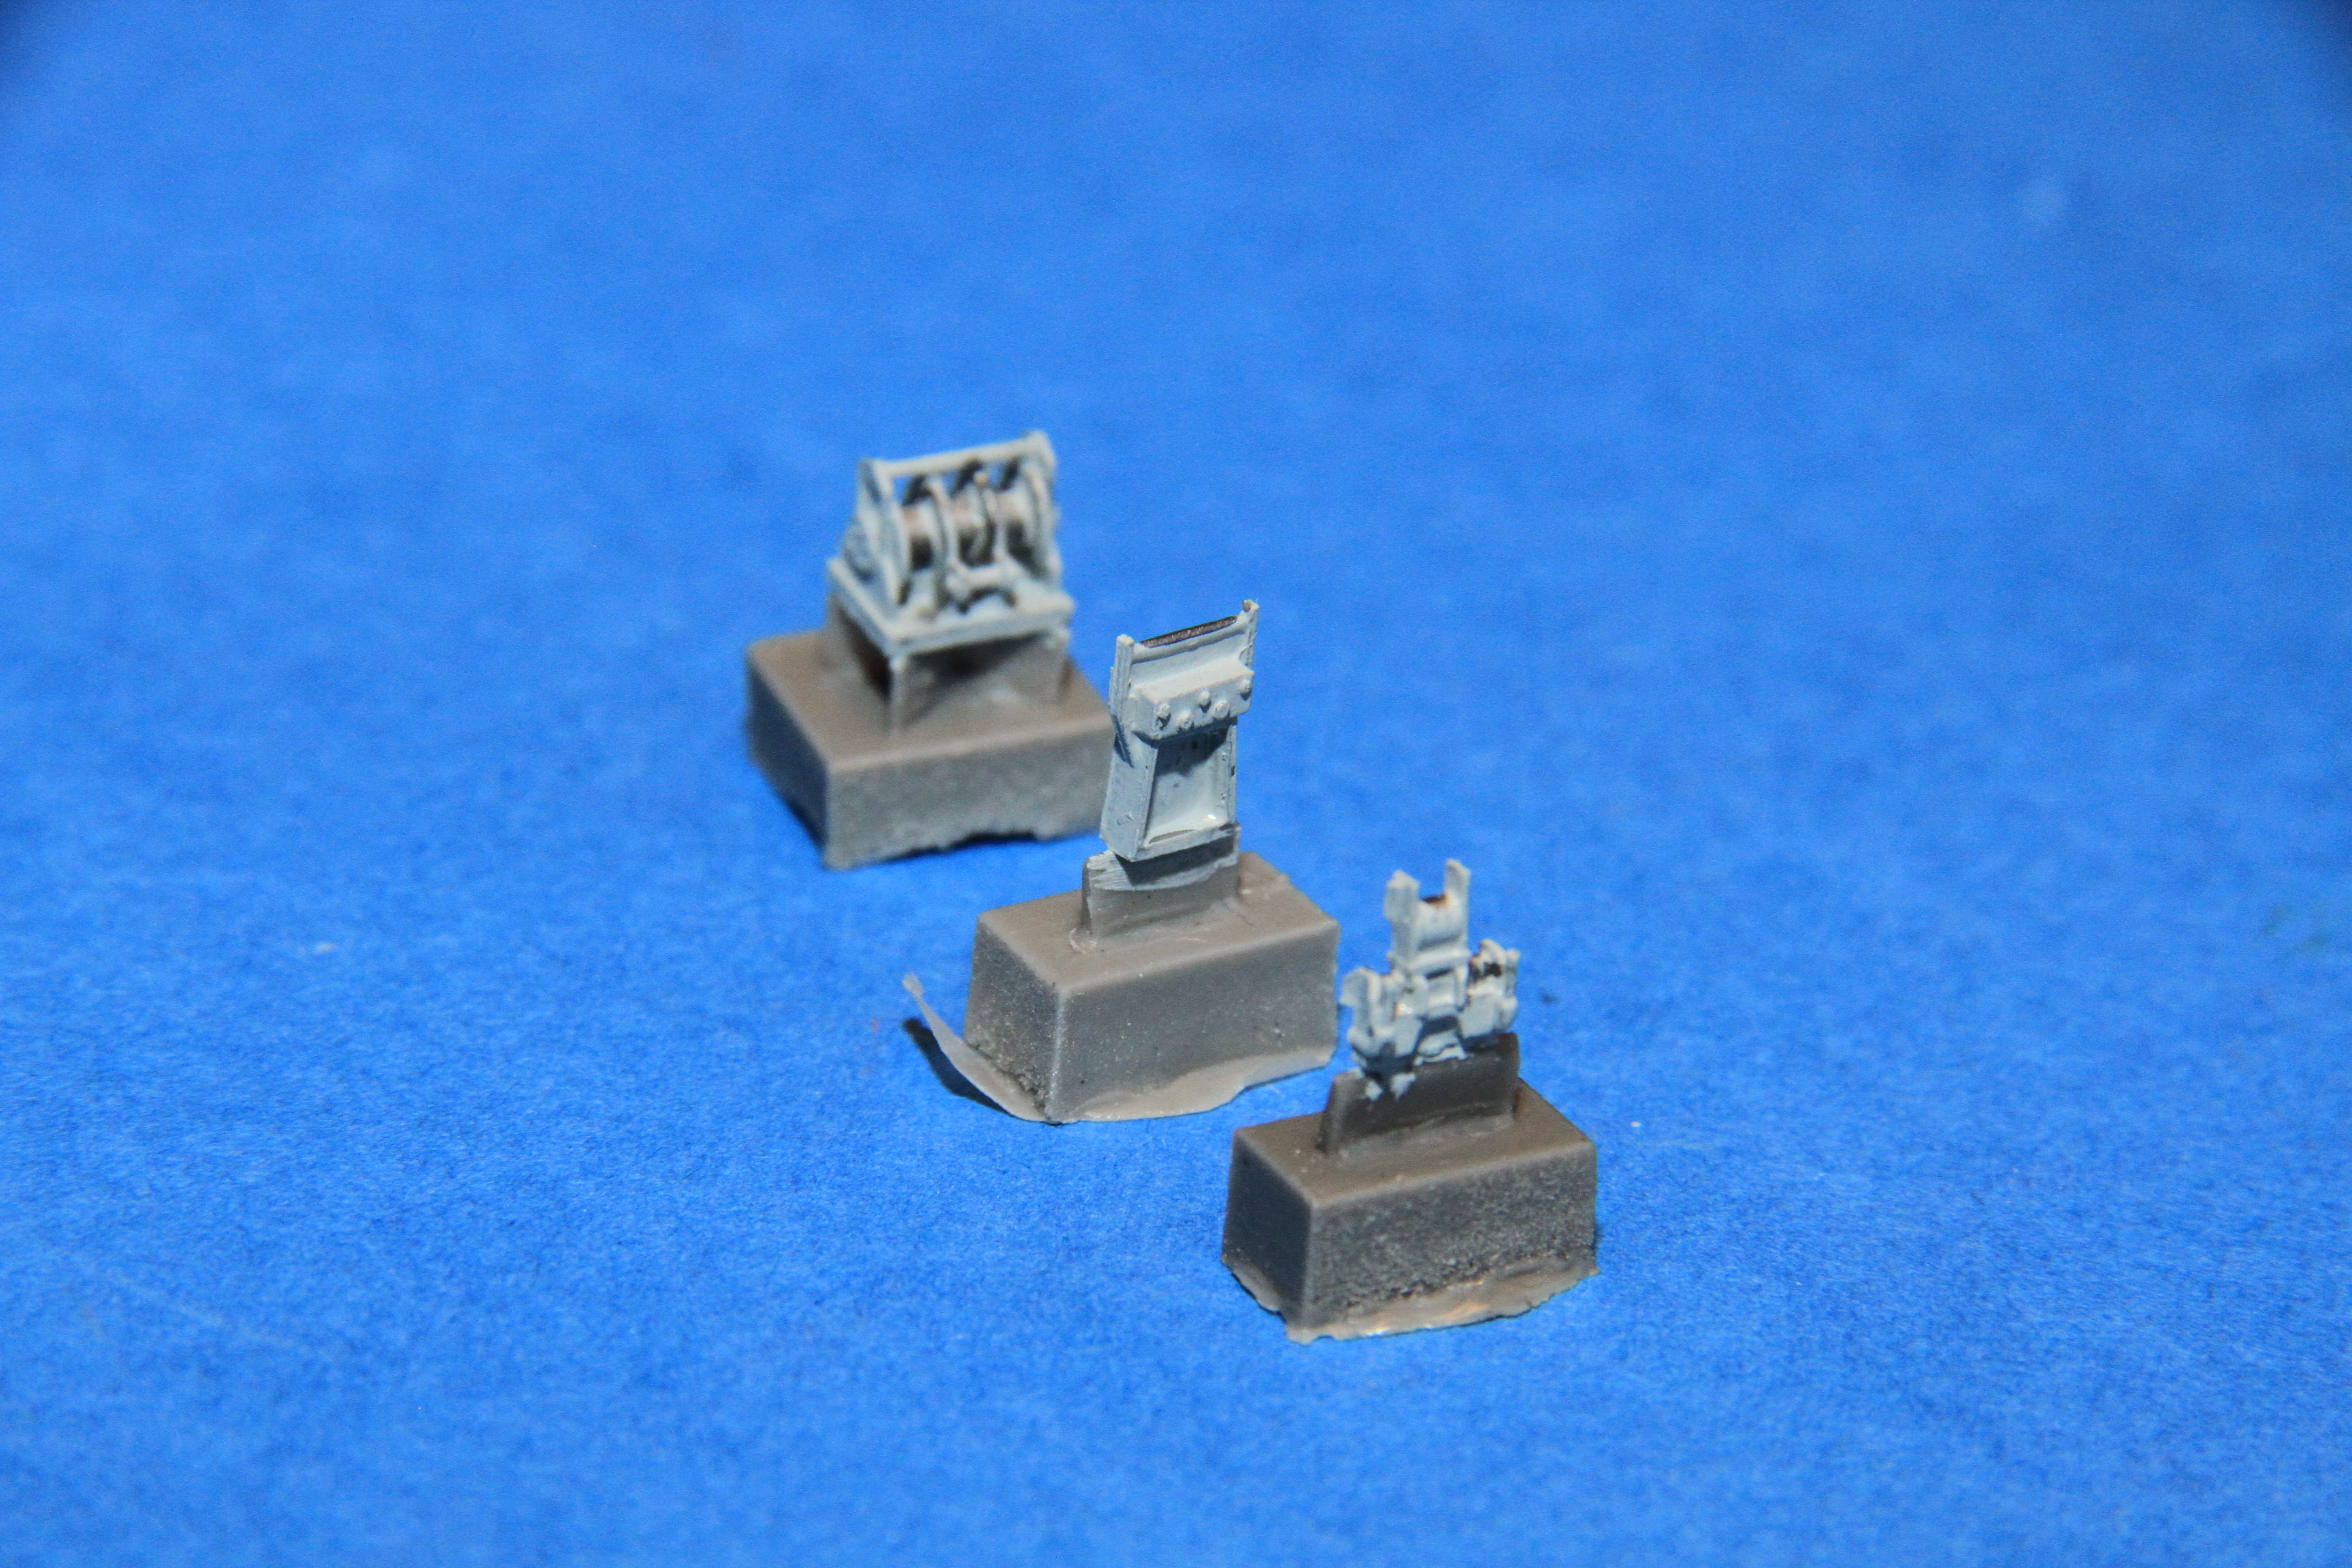
This weekend's progress.
The depth charge fit, The throwers and ready use reloads painted, all very ice clean castings.
The etch for the ready use and the after rails painted on the fret.
Resin castings for the rails, base painting done, needs tidying yet.
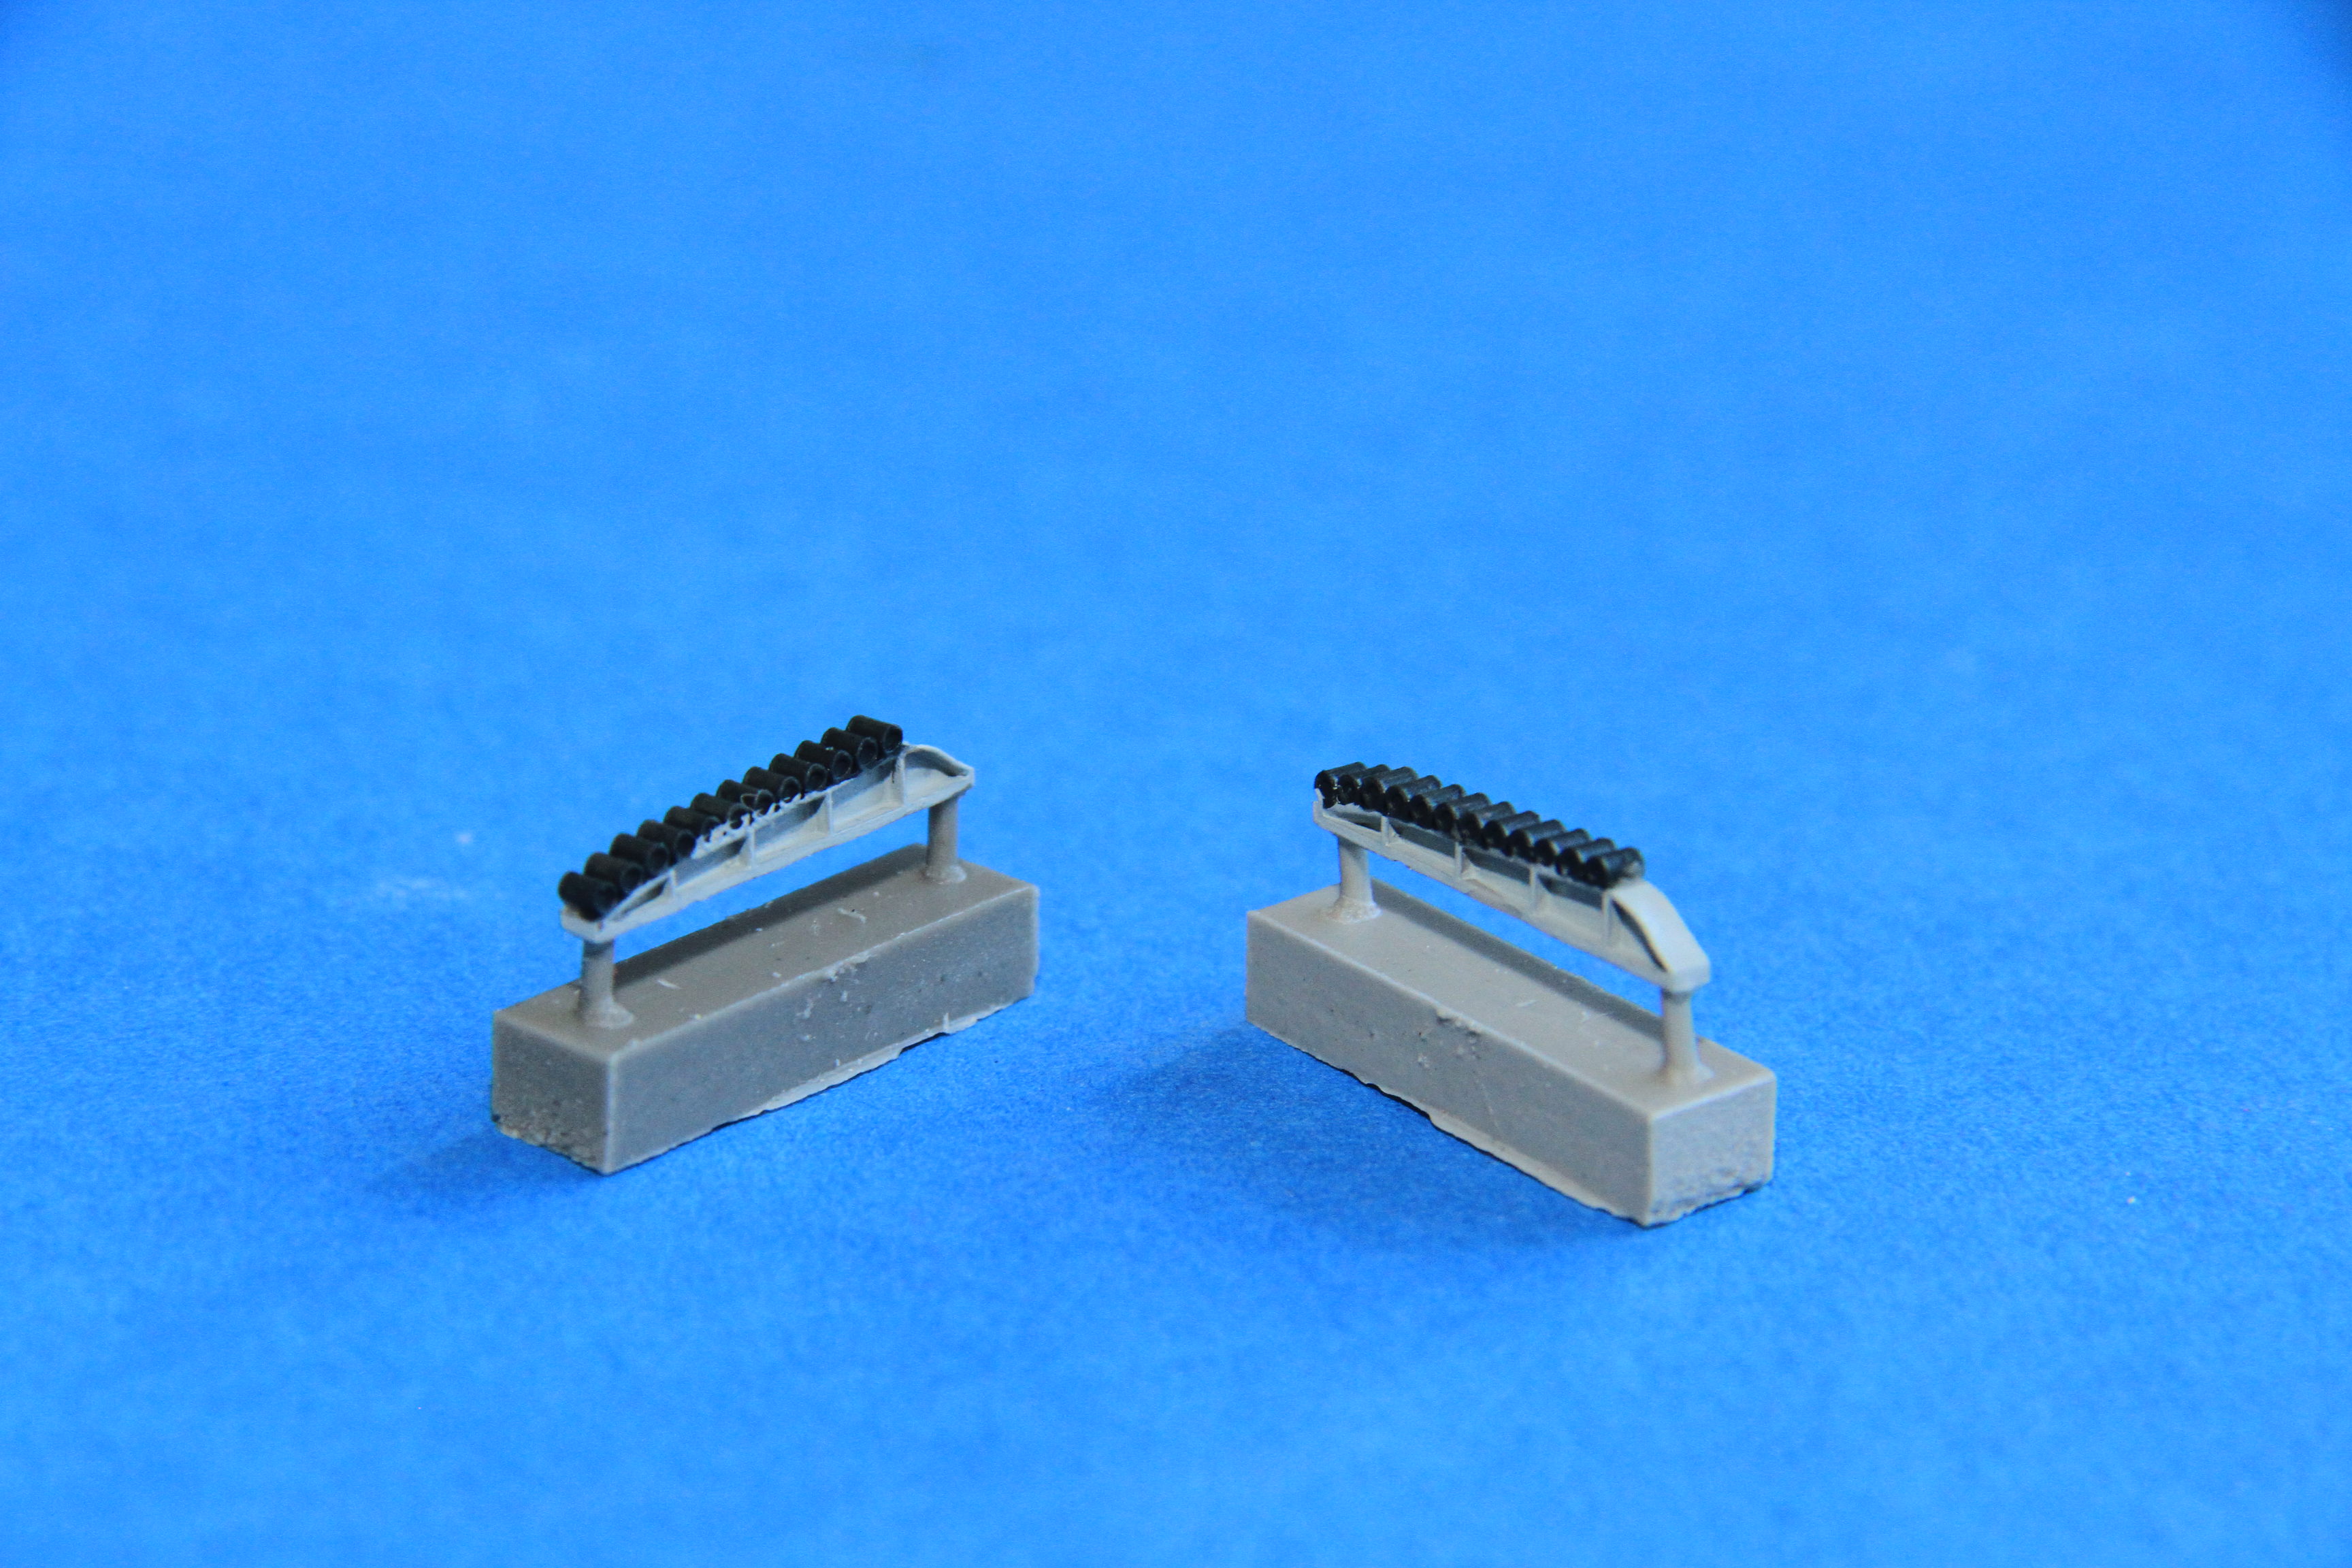
Reloads for the throwers fitted, along with their etch, including the loading davits.
And the throwers fitted.
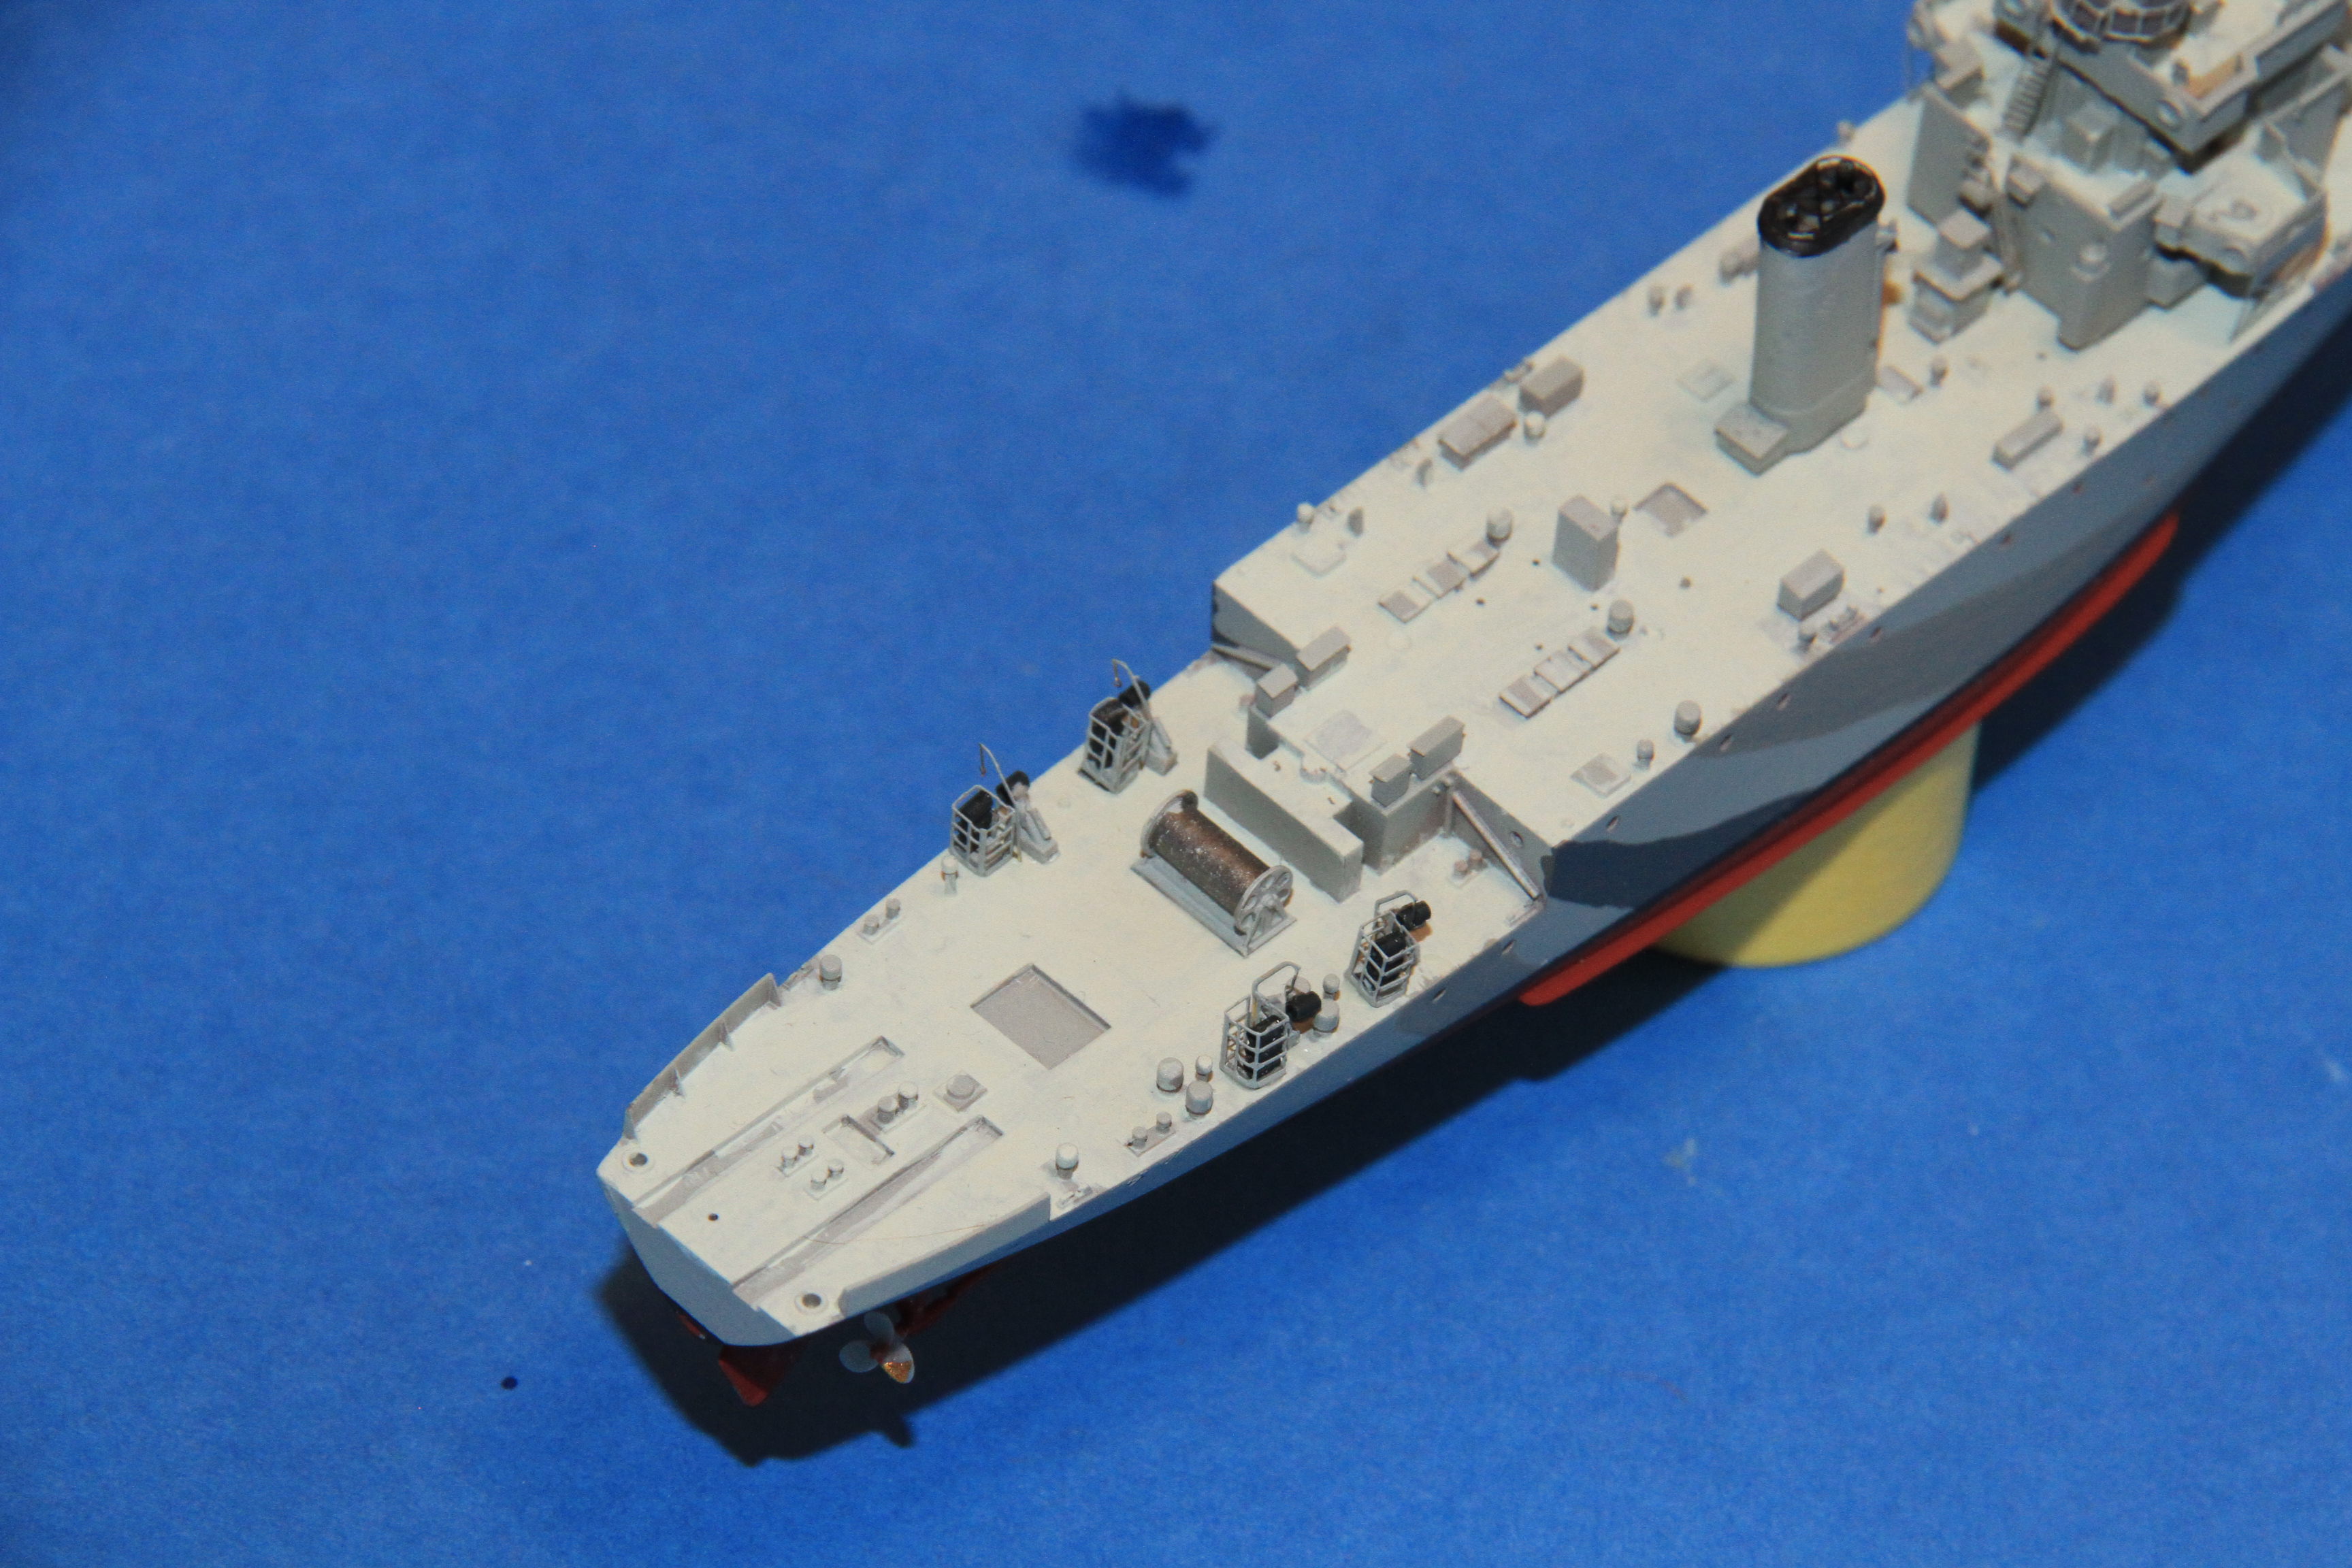
Before fitting the rails, reckon it will be easier to fit the guides for the paravane wires first, these and the winch have been bases coated, need a couple washes before putting in place.
more soon,
Cheers
Si


