

Go to modelshipwrights.com for the current dynamic site!


Daves Tugboat Diorama
4
Comments
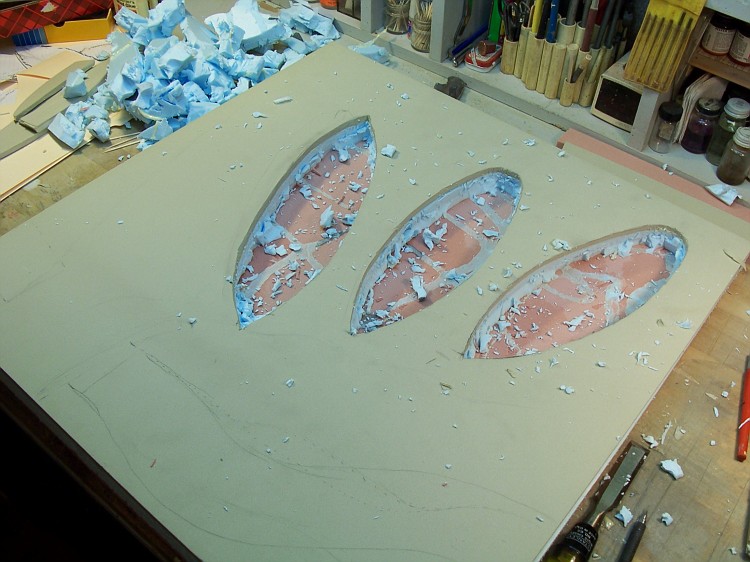
The blue foam was dug out to the bottom of the base so the hauls of the tugs would be below the water. With the tugs in position I sketched out the basic lay of the land. I used a file folder to make a pattern so I could get a pretty good feel of how it was going to look. I rough cut the foam and glued and spiked it to the base.
I use a power chisel, a belt sander and a Dremel tool to shape the foam. Once its in a rough shape a heavy coat of plaster smoothes it all out. Plaster sticks to the foam polyurethane foam really well, so no priming is necessary, A little bit of sanding on the plaster with course sandpaper to knock off the high spots and its ready for a couple coats of Gesso to smooth it over and create a surface for the paint to stick to.


About the Author


Comments


Dave, an absolutly brilliant job. Love the way you quietly turn it into a horror scene in some of the last photos. Thanks for great build process, really enjoyed it.
OCT 10, 2007 - 04:50 PM
What an excellent, well thought out, atmospheric diorama! The step by step narration and photos were also great! Thanks for sharing that with us!
OCT 13, 2007 - 12:42 AM

Copyright ©2021 by Dave Roehrle. _OPINIONS Model Shipwrights, KitMaker Network, or Silver Star Enterrpises. Images also by copyright holder unless otherwise noted. Opinions expressed are those of the author(s) and not necessarily those of Model Shipwrights. All rights reserved. Originally published on: 2007-10-04 00:00:00. Unique Reads: 6400

WEB HOSTING BY


Copyright ©2021 Model Shipwrights and Kitmaker Network, a subsidiary of Silver Star Enterprises
All Rights Reserved. Please read our Conditions of Use and Privacy Policy.
All Rights Reserved. Please read our Conditions of Use and Privacy Policy.